How to Create Christmas French Tip Nail Designs at Home Now!
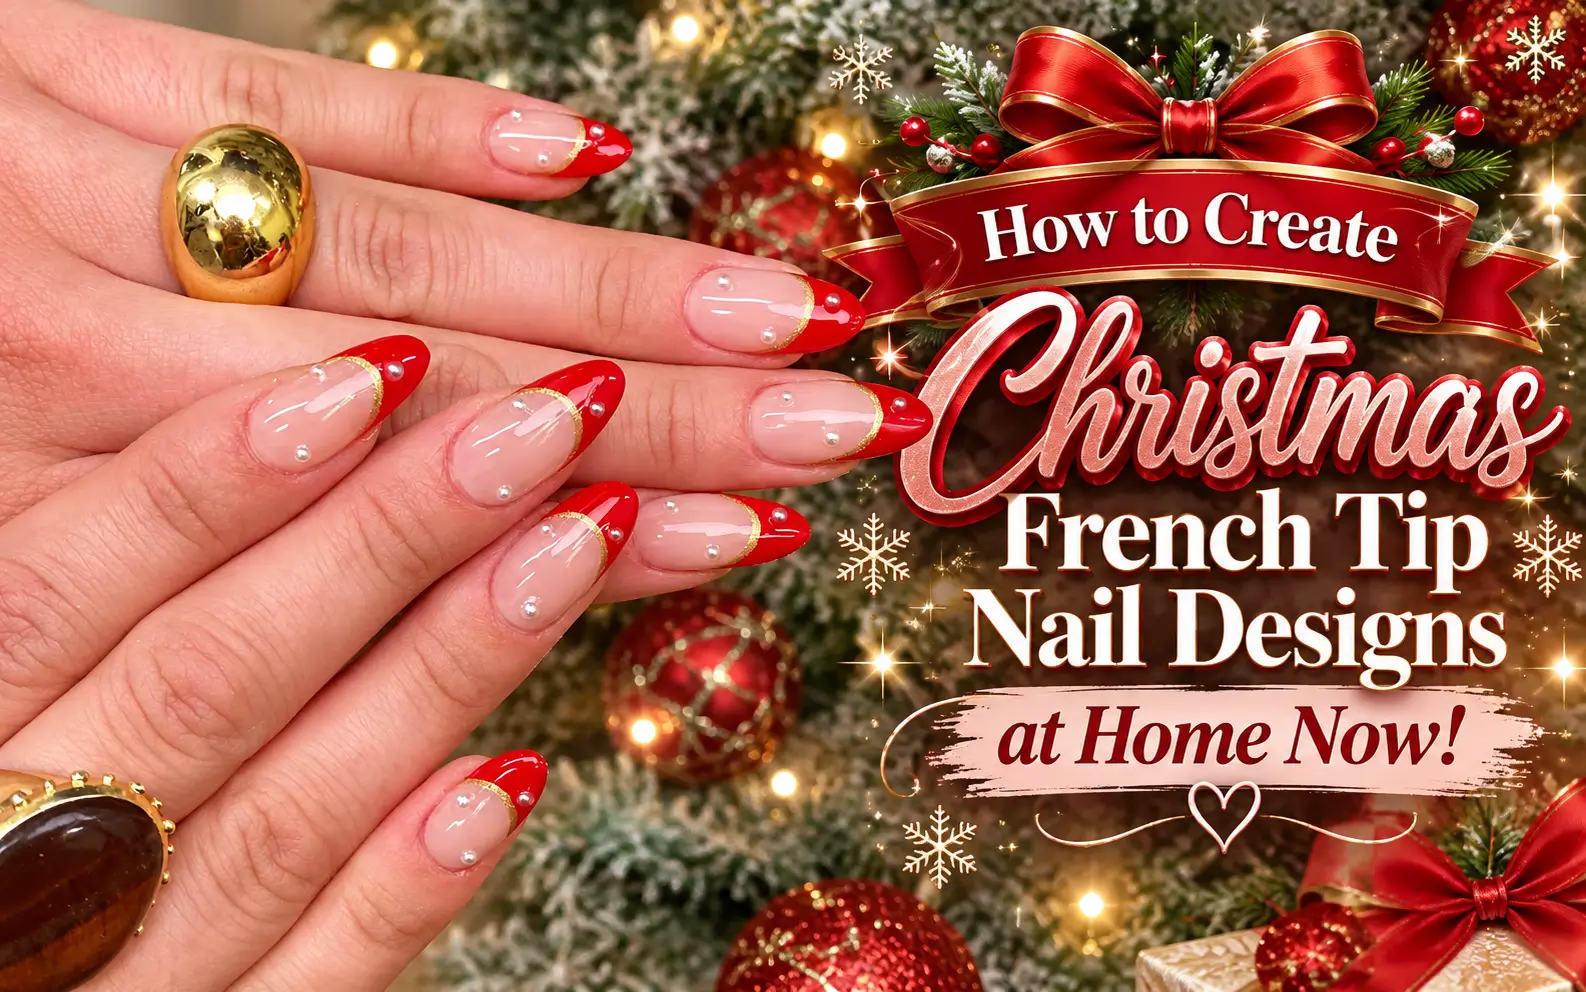
Christmas nails do not have to be complicated to feel special. A soft pink base, a clean French tip, and a few thoughtful details can create a beautiful holiday manicure you can enjoy at home. This collection of How to Create Christmas French Tip Nail Designs at Home Now ideas brings together a mix of rich reds, crisp whites, deep greens, glitter, delicate holly branches, tiny berries, pearls, gems, and subtle festive accents.
You will find designs for different nail shapes and styles, from neat square tips to elegant almond nails. Some ideas are simple enough for a beginner, while others use fine hand painted details for a more decorated finish. There are also softer options for anyone who prefers understated Christmas nails instead of bold artwork.
As you browse the designs, focus on the details that suit your skill level and personal style. Pick your favorite colors, gather a fine brush or dotting tool, and recreate the look one layer at a time.
15 Christmas French Tip Nail Designs 2026
1. Blush Pink and Burgundy Christmas French Tips
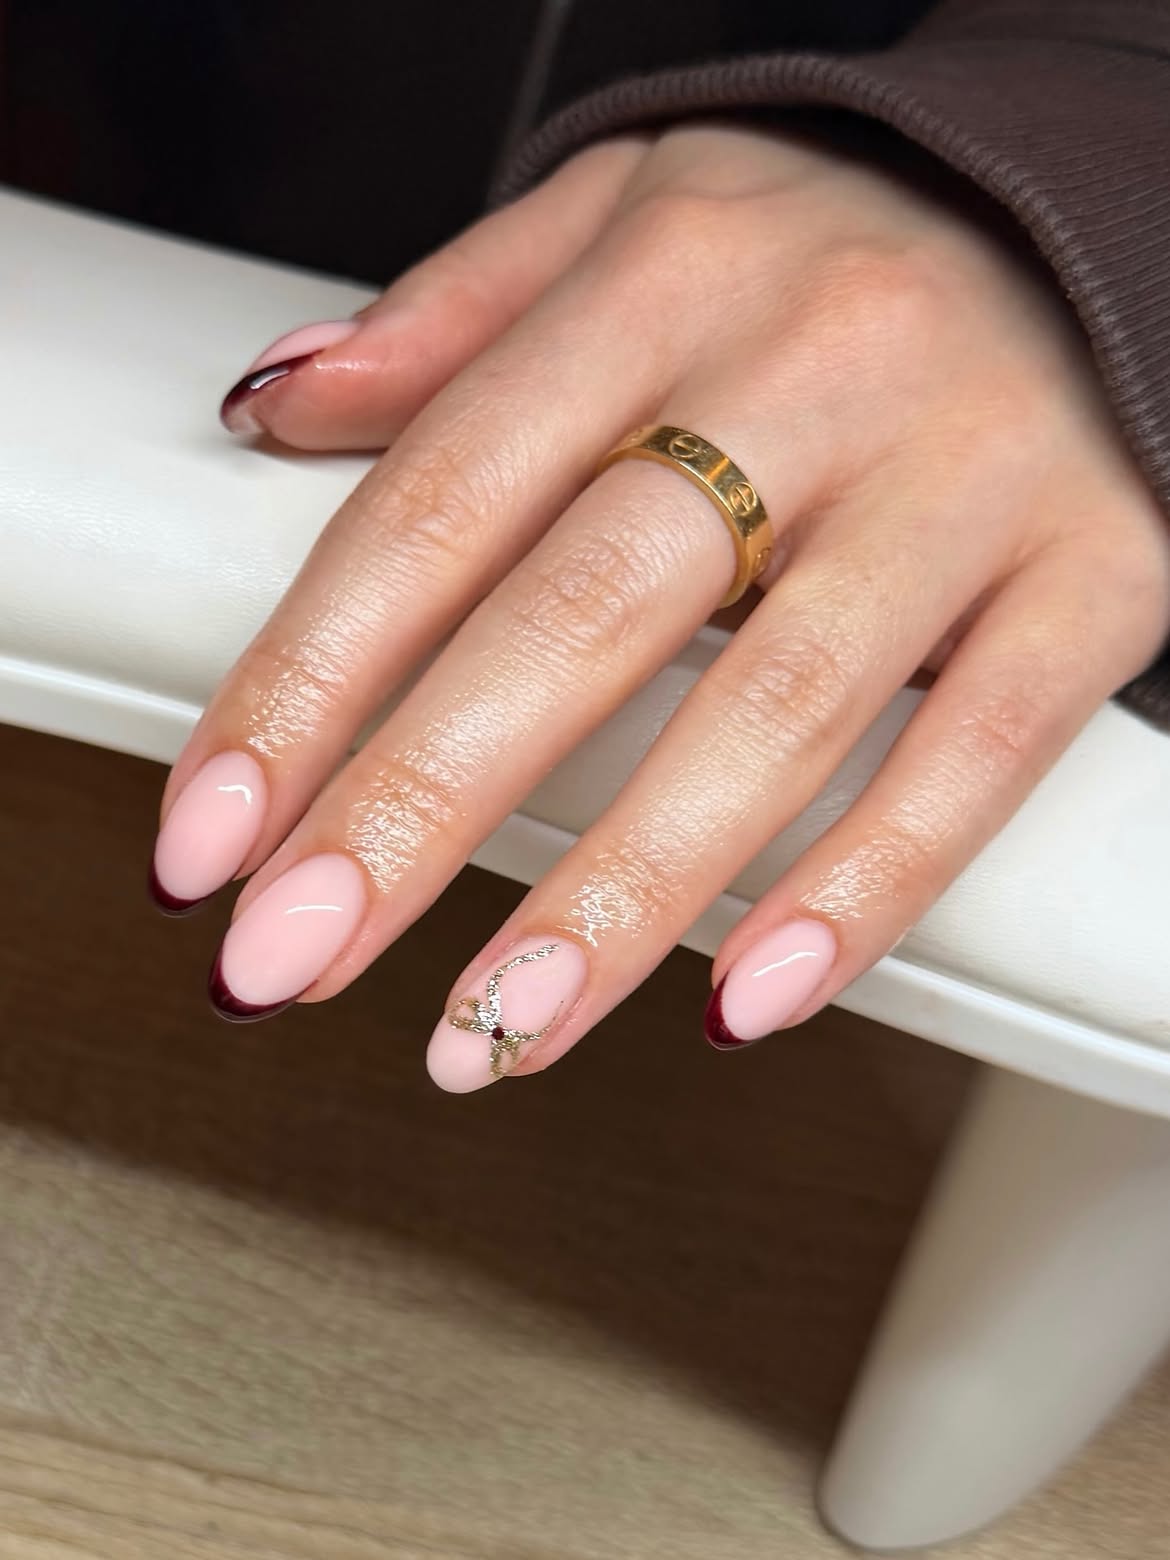
A soft blush base gives this almond shape a clean, polished look, while the deep burgundy tips bring in a rich Christmas feel. The French tip is slim and follows the curved almond edge, so the design stays delicate rather than heavy. One accent nail adds a fine metallic detail near the tip, giving the set a little sparkle without covering the whole nail.
For a similar look at home, start with a sheer pink or milky blush base and let it dry fully. Then paint a thin burgundy curve along each tip. Use a fine nail art brush for better control, especially around the side edges. Keep one nail simple and add a small silver or gold detail for contrast.
The key is restraint. The deep tip does most of the decorating, while the soft base keeps everything balanced.
2. Red Glitter and Holly Details for Christmas French Tip Nails
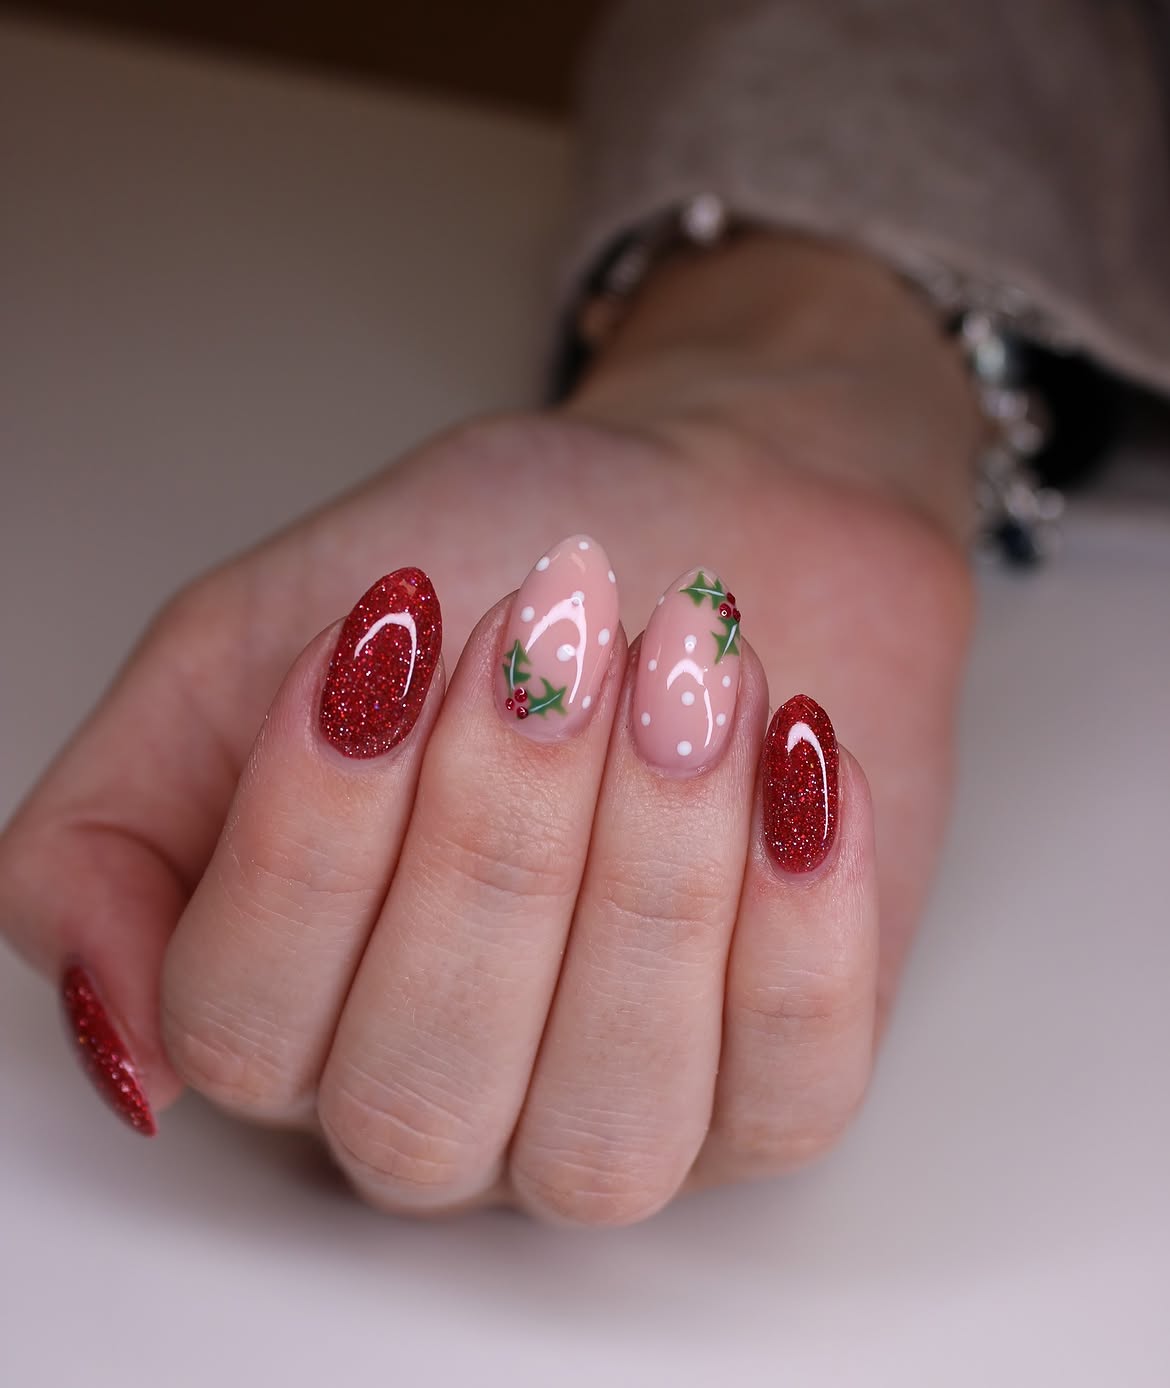
This set mixes sparkling red nails with soft pink accent nails covered in small Christmas details. The red glitter is bold and festive, while the pink nails keep the overall look light. White dots, tiny green holly leaves, and small red berry details add the holiday theme without making every nail equally busy.
The design shows full red glitter nails rather than classic French tips, but the color combination can easily be adapted for a French tip design at home. Use the red glitter only along the tips and keep the soft pink base underneath. Save the holly artwork for one or two accent nails.
A fine detail brush will help with the tiny leaves. For the berries, small dots made with a dotting tool are enough. Keep the white accents slightly irregular for a more hand painted look.
Paint the nails with a soft pink base and let it dry before adding the festive details.
Create thin red glitter French tips on the simple nails, keeping the curve neat around the almond edge.
Finish one or two accent nails with tiny green holly leaves, red berry dots, and scattered white details.
3. Green French Tips with Tiny Christmas Ornament Details
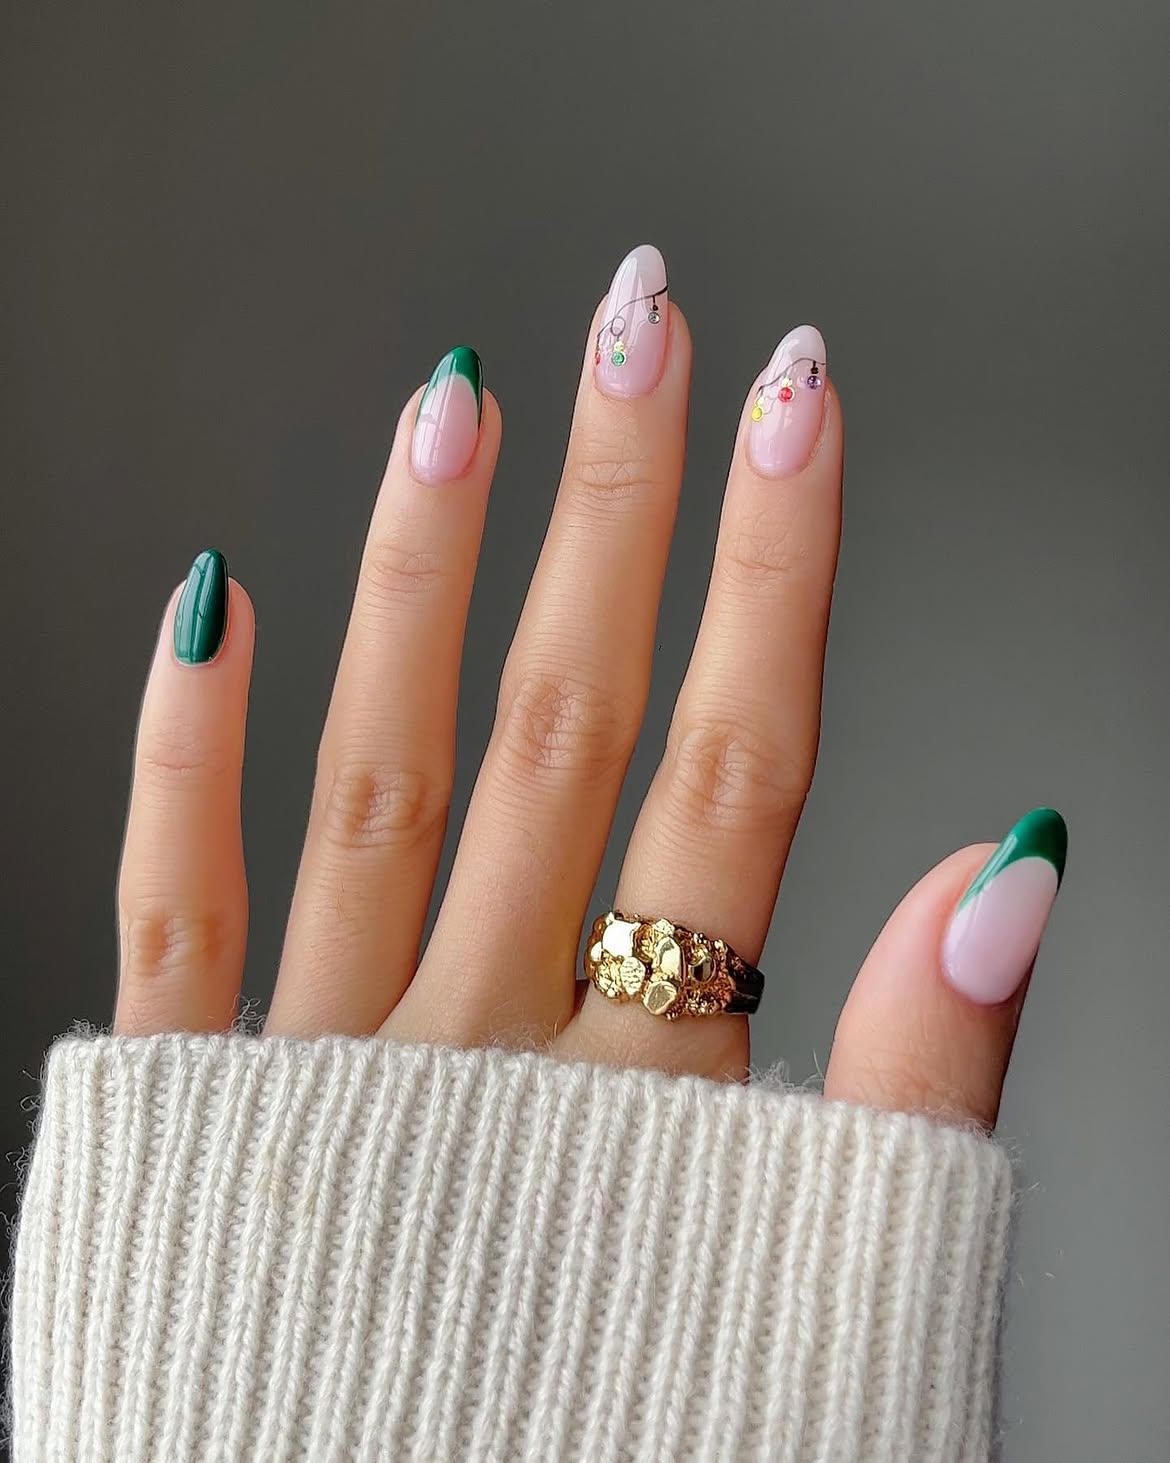
The deep green French tips give this manicure its main holiday color, while the sheer pink base keeps the overall design soft. A few nails feature delicate hanging ornament details in tiny red, yellow, green, and silver tones. The thin curved lines make the decorations look like little Christmas lights or ornaments resting near the tip.
The design works especially well on almond shaped nails because the green follows the natural curve and leaves plenty of space for the small artwork. At home, focus on getting the French tip shape even first. Once the base is dry, use a very fine brush to draw the thin decorative lines, then place tiny dots for the colorful ornament details.
Keep the decorations small and spaced apart. That gives the manicure a neat holiday look instead of making the accent nails feel crowded.
💡 Quick Tip
For cleaner green French tips, draw the smile line slowly with a fine brush and build the color in thin layers. Add the tiny ornament dots only after the green tip is fully set.
You can also find more inspiration in these 17 Pink and White Christmas Nails, featuring cute ideas that pair beautifully with classic French tips.
4. Soft Pink French Tips with Holly Berry Branches
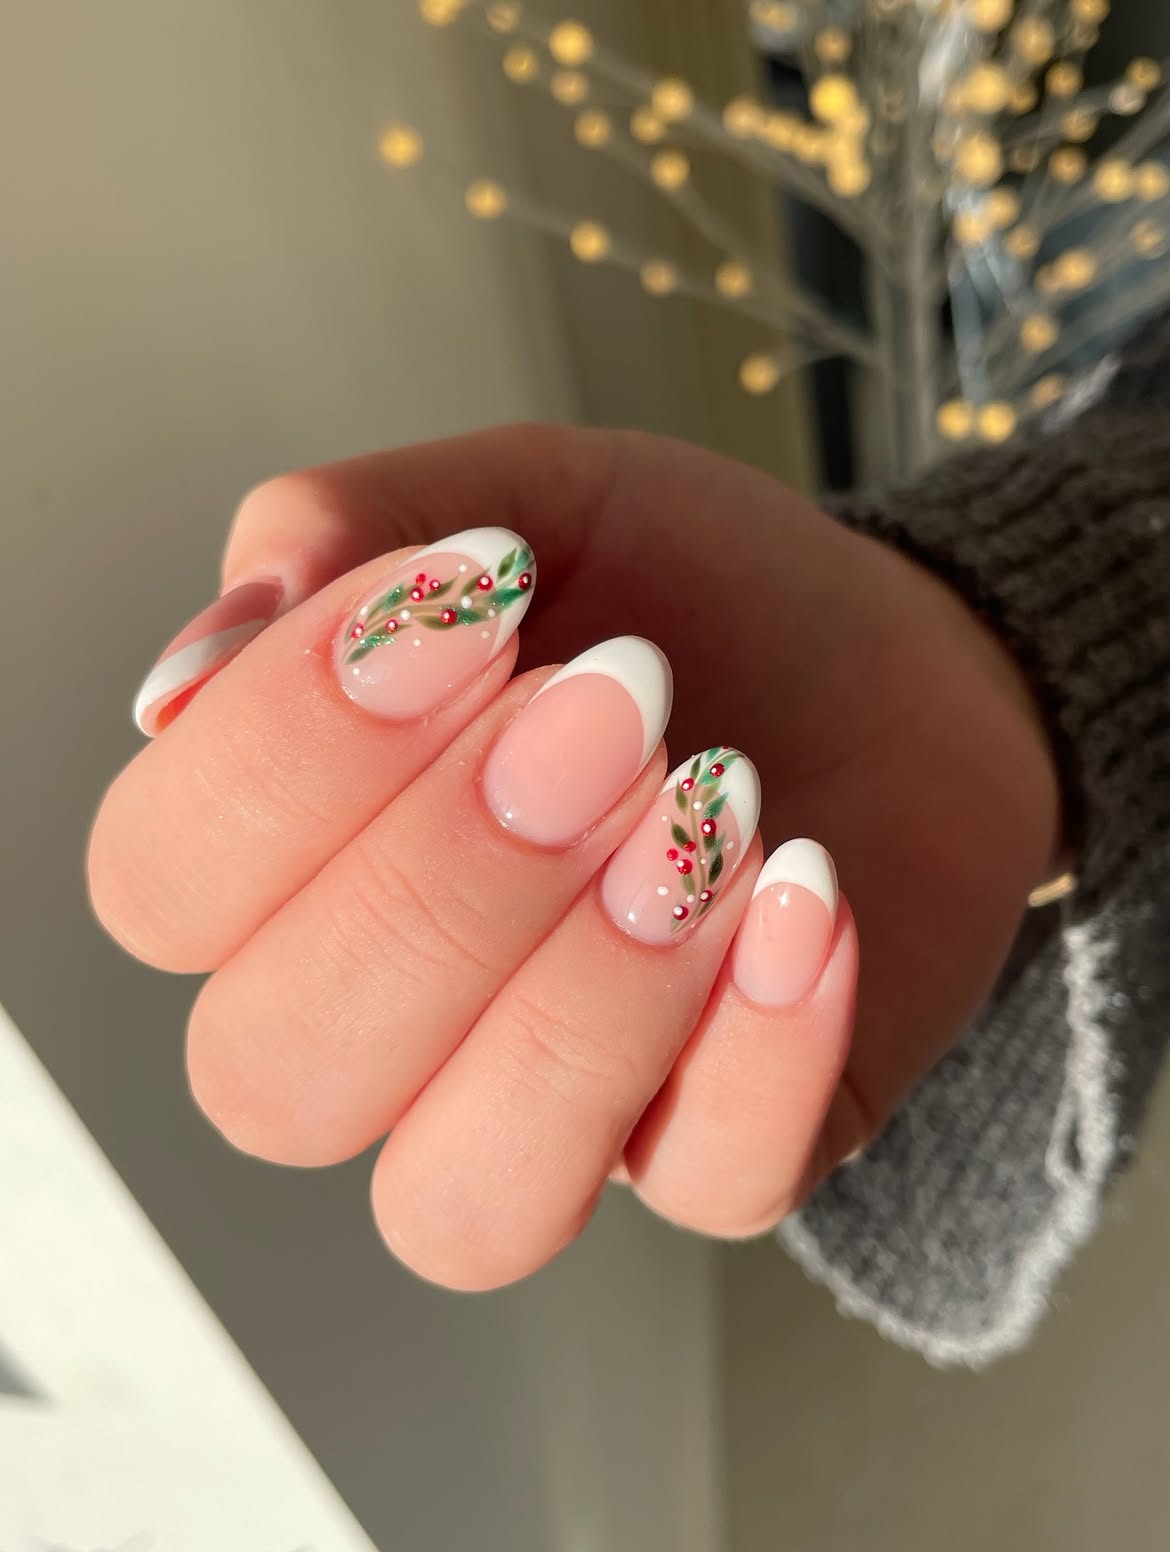
Soft pink and crisp white make the base of this manicure feel fresh and delicate. The white French tips follow the curved nail shape, while two accent nails carry hand painted greenery with tiny red berries. A few small white dots are tucked around the branches, giving the artwork a festive detail without covering the whole nail.
The branch design is the standout here. Keep the base sheer and glossy, then add a thin green stem that curves across the accent nail. Small pointed leaves can be painted along the stem, followed by tiny red dots for the berries. The remaining nails can stay simple with classic white French tips.
For an at home version, a fine detail brush makes the curved branch much easier to control. Let each layer dry before adding the next detail so the small decorations stay crisp.
Recreate this look
5. White French Tips Framed with Festive Holly
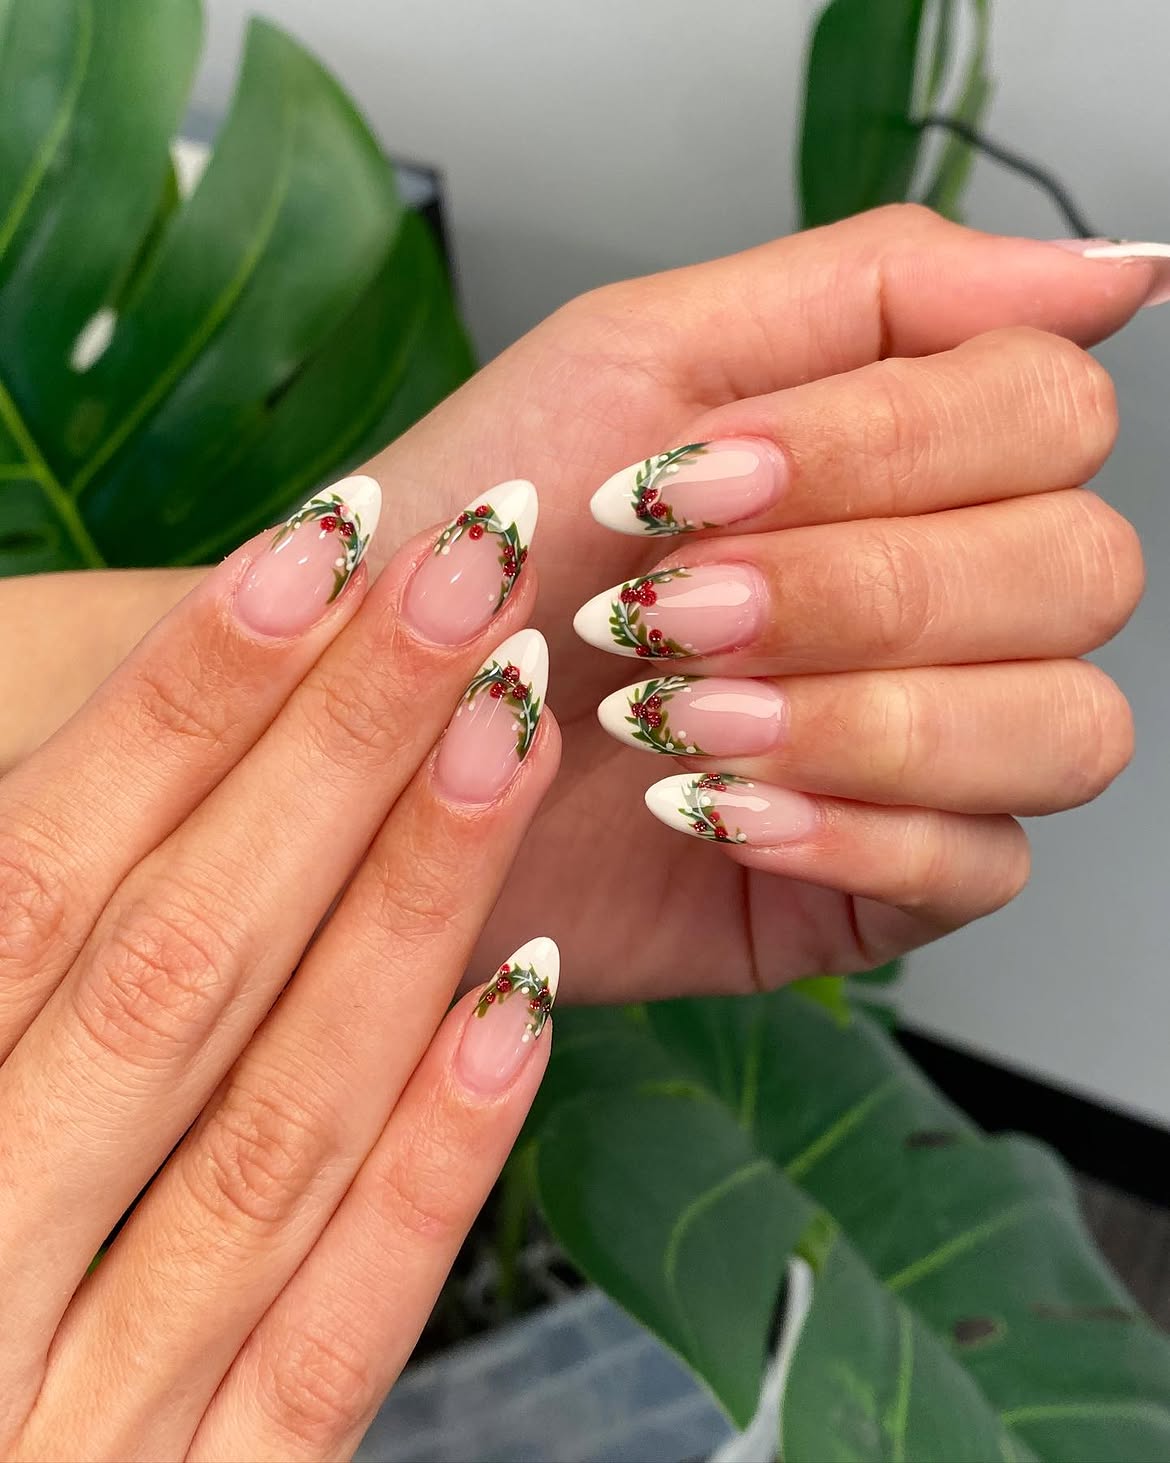
The white tips in this set are kept crisp and simple, while delicate holly branches curve around the sides of several nails. The sheer pink base lets the nail art stand out, and the tiny red berries create a clear Christmas detail without covering the full nail.
The most interesting part is how the greenery follows the shape of the nail. Instead of placing one large holiday image in the center, the leaves and berries are tucked along the French tip and sidewall area. That makes the manicure feel detailed while still leaving plenty of open space.
For a home version, paint the soft pink base first, then add the white French tips. Once dry, use a very fine brush for the green leaves and thin stems. Finish with tiny red berry dots and a few small white accents. Keeping the branches thin will help the design stay neat on almond shaped nails.
6. Red Glitter French Tips on Soft Pink Almond Nails
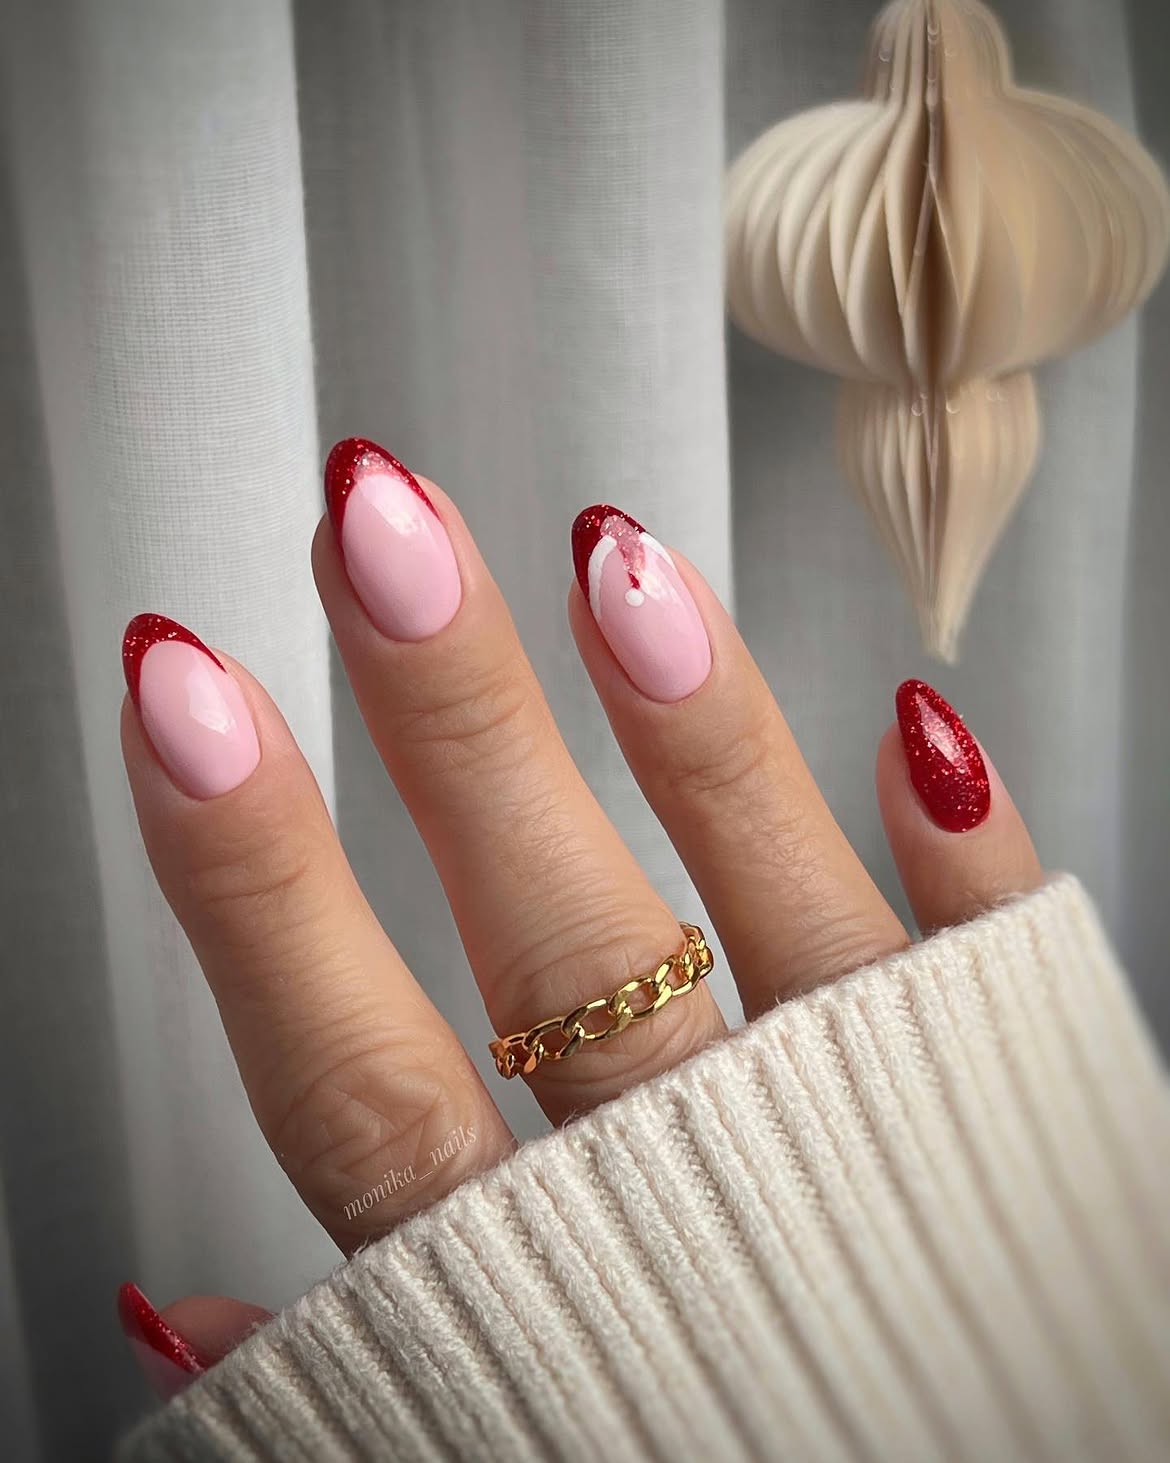
The soft pink base keeps this manicure delicate, while the deep red glitter tips bring in a clear Christmas feel. The almond shape makes the curved tips look longer and more refined. One nail stands out with a fuller red glitter finish, while another adds a small white looping detail over the red tip for extra interest.
For an at home version, the clean base is the place to start. Paint the nails with a sheer pink shade, then carefully trace the almond curve with red glitter polish. Keep the glitter concentrated at the tips rather than spreading it across the whole nail. For the accent nail, add a simple white curved detail once the red layer is dry.
A few details that make this design work:
• Soft pink keeps the manicure light and wearable.
• Deep red glitter gives the French tips a festive finish.
• Almond shaped nails make the curved tips look elegant.
• One fuller glitter nail adds contrast.
• A small white accent keeps the design interesting without making it busy.
The soft pink base balances the rich red glitter, while the curved tip keeps the Christmas detail polished and easy to wear.
7. Deep Red French Tips with Delicate White Christmas Scallops
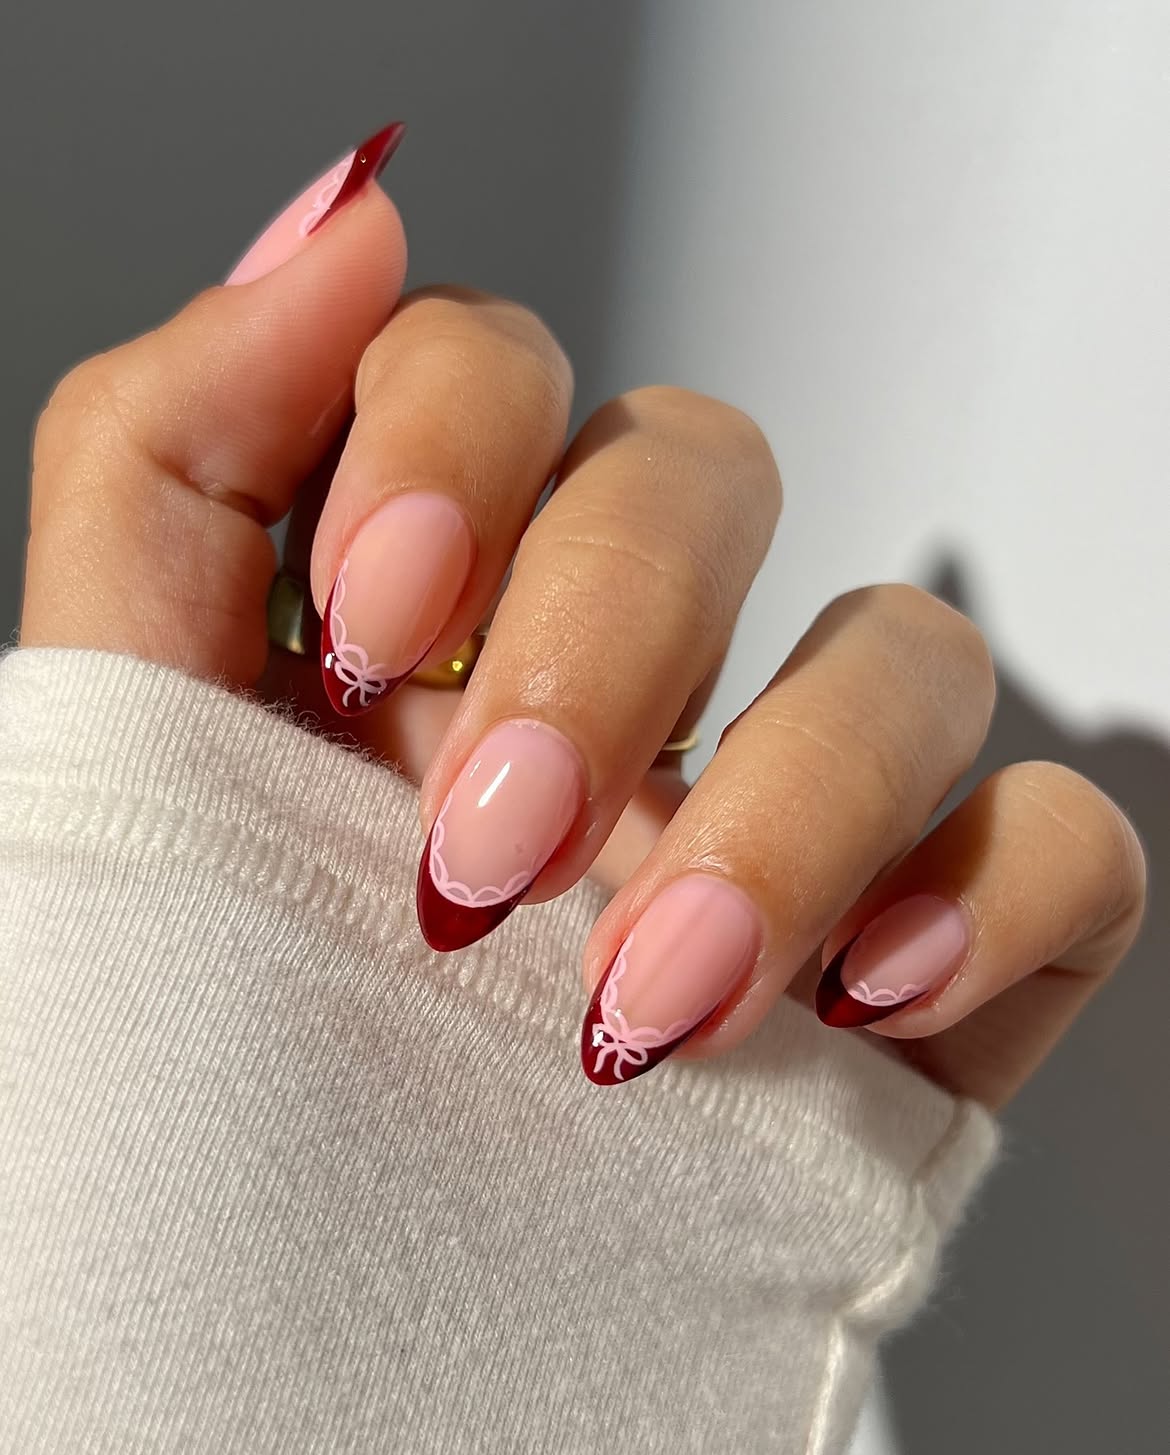
Deep red tips give these almond nails a rich holiday look, while the pale pink base keeps them soft and polished. The standout detail is the thin white artwork placed along the edge of several red tips. It creates a delicate scalloped border, with a small bow style detail on some nails for a playful Christmas finish.
The design is simple enough to recreate at home because the decoration stays close to the tip. Start with a glossy pale pink base, then carefully paint the deep red French tips. Once the red polish is dry, use a very fine brush to trace tiny white loops along the border. A small bow detail can be added near the side of the tip on an accent nail.
Details to copy
• Base: glossy pale pink
• Tip: deep red with a curved almond shape
• Border: thin white scalloped lines
• Accent: small white bow style detail
• Finish: glossy and neat with the artwork kept near the tips
Christmas French Tip Details
- ▸ Start with a glossy pale pink base.
- ▸ Paint a deep red French tip that follows the almond edge.
- ▸ Add tiny white scallops along the border of the tip.
- ▸ Finish an accent nail with a small white bow detail.
8. Pink Glitter Christmas French Tips with Holly Accents
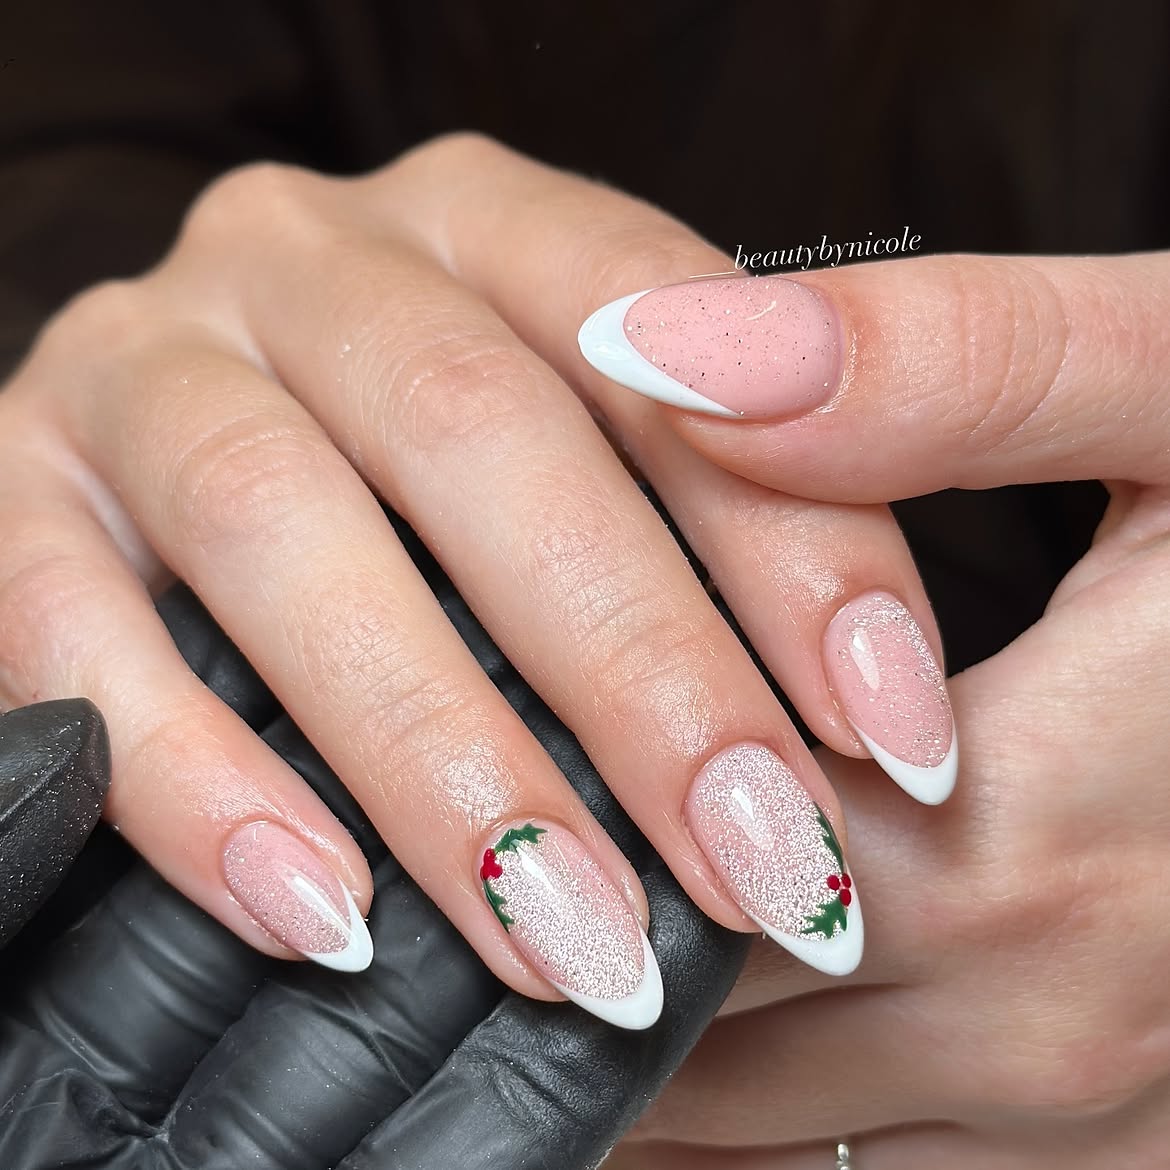
A sheer pink base gives these nails a soft, glossy look, while fine glitter adds a subtle sparkle across the nail. The crisp white French tips frame the almond shape beautifully. On the accent nails, small green leaves and bright red berry details curve around the edges, creating a festive holly inspired finish.
The glitter is what gives this set extra depth. Instead of making the tips colorful, the design keeps the French edge white and lets the sparkle show through the pink base. That makes the holiday artwork stand out without taking over the manicure.
Details worth copying:
• Sheer pink base with fine silver sparkle
• Clean white French tips
• Almond shaped nails with a soft curved edge
• Small green holly leaves on selected nails
• Tiny red berries placed beside the greenery
• Glossy finish to bring out the glitter
For a home manicure, add the glitter while the pink layer is still being built, then wait until it is dry before painting the white tips and tiny holly details.
Keep the pink base sheer so the fine sparkle remains visible.
Place the holly details on only a few nails for a balanced finish.
Use a very fine brush for the tiny leaves and berry details.
Let each layer set before adding the next detail to keep the artwork clean.
9. Berry Red French Tips with Tiny Golden Star Accents
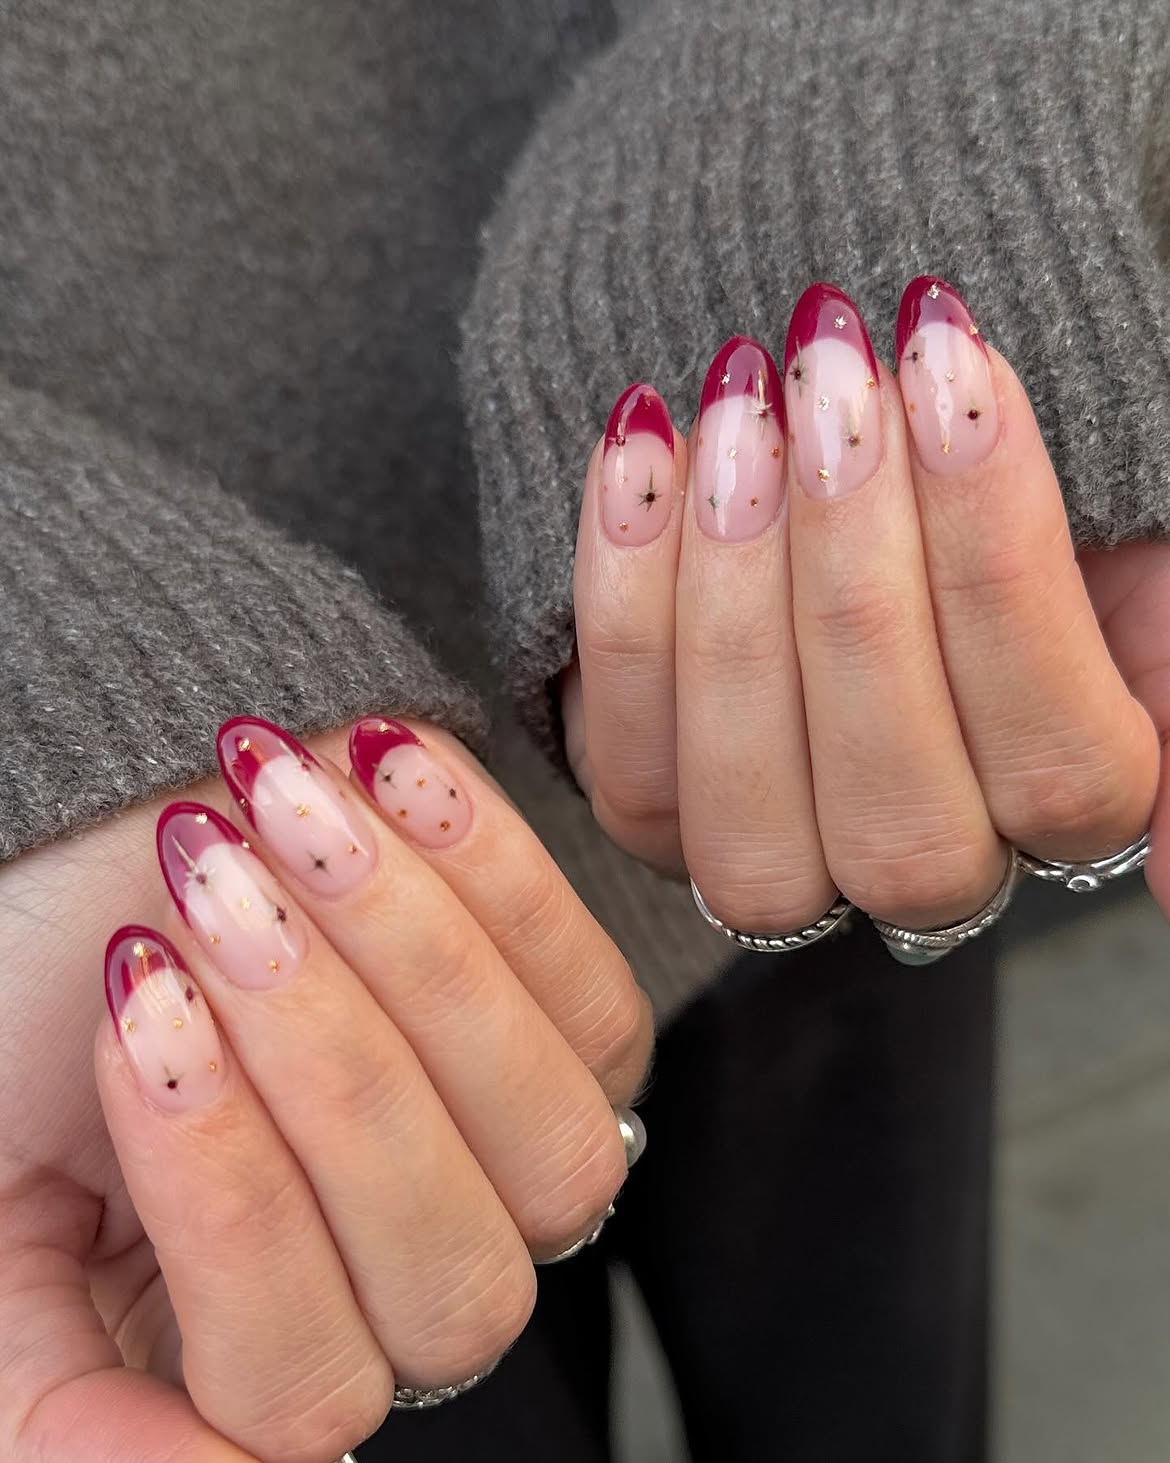
The deep berry red tips bring a rich Christmas color to these almond nails, while the sheer pink base keeps the manicure light. Tiny gold and dark star like details are scattered across the nail beds, with a few fine metallic marks adding just enough sparkle. The result feels festive without relying on large holiday artwork.
The placement of the details is what makes this design stand out. Most of the decoration stays on the pink section, so the curved red tips remain the main feature. That balance also makes the manicure easier to recreate at home. Start with the sheer pink base, then carefully paint the berry French tips. Once dry, add a few tiny star shapes and small metallic dots with a fine detail brush or dotting tool.
Keep the accents widely spaced rather than covering every open area. That gives the design the same delicate finish seen in the design.
| Main detail | How to use it |
|---|---|
| Sheer pink base | Keep it glossy and softly translucent so the details remain visible. |
| Berry red French tips | Follow the natural almond curve with an even, rounded edge. |
| Tiny star accents | Place a few small shapes across the pink area instead of filling the nail. |
| Metallic dots and lines | Use them sparingly to create small points of Christmas sparkle. |
For more festive inspiration, check out these 17 Red and Green Christmas Nails featuring bold seasonal details and fun Christmas designs.
10. Soft Blush Pink French Tips with Pastel Christmas Details
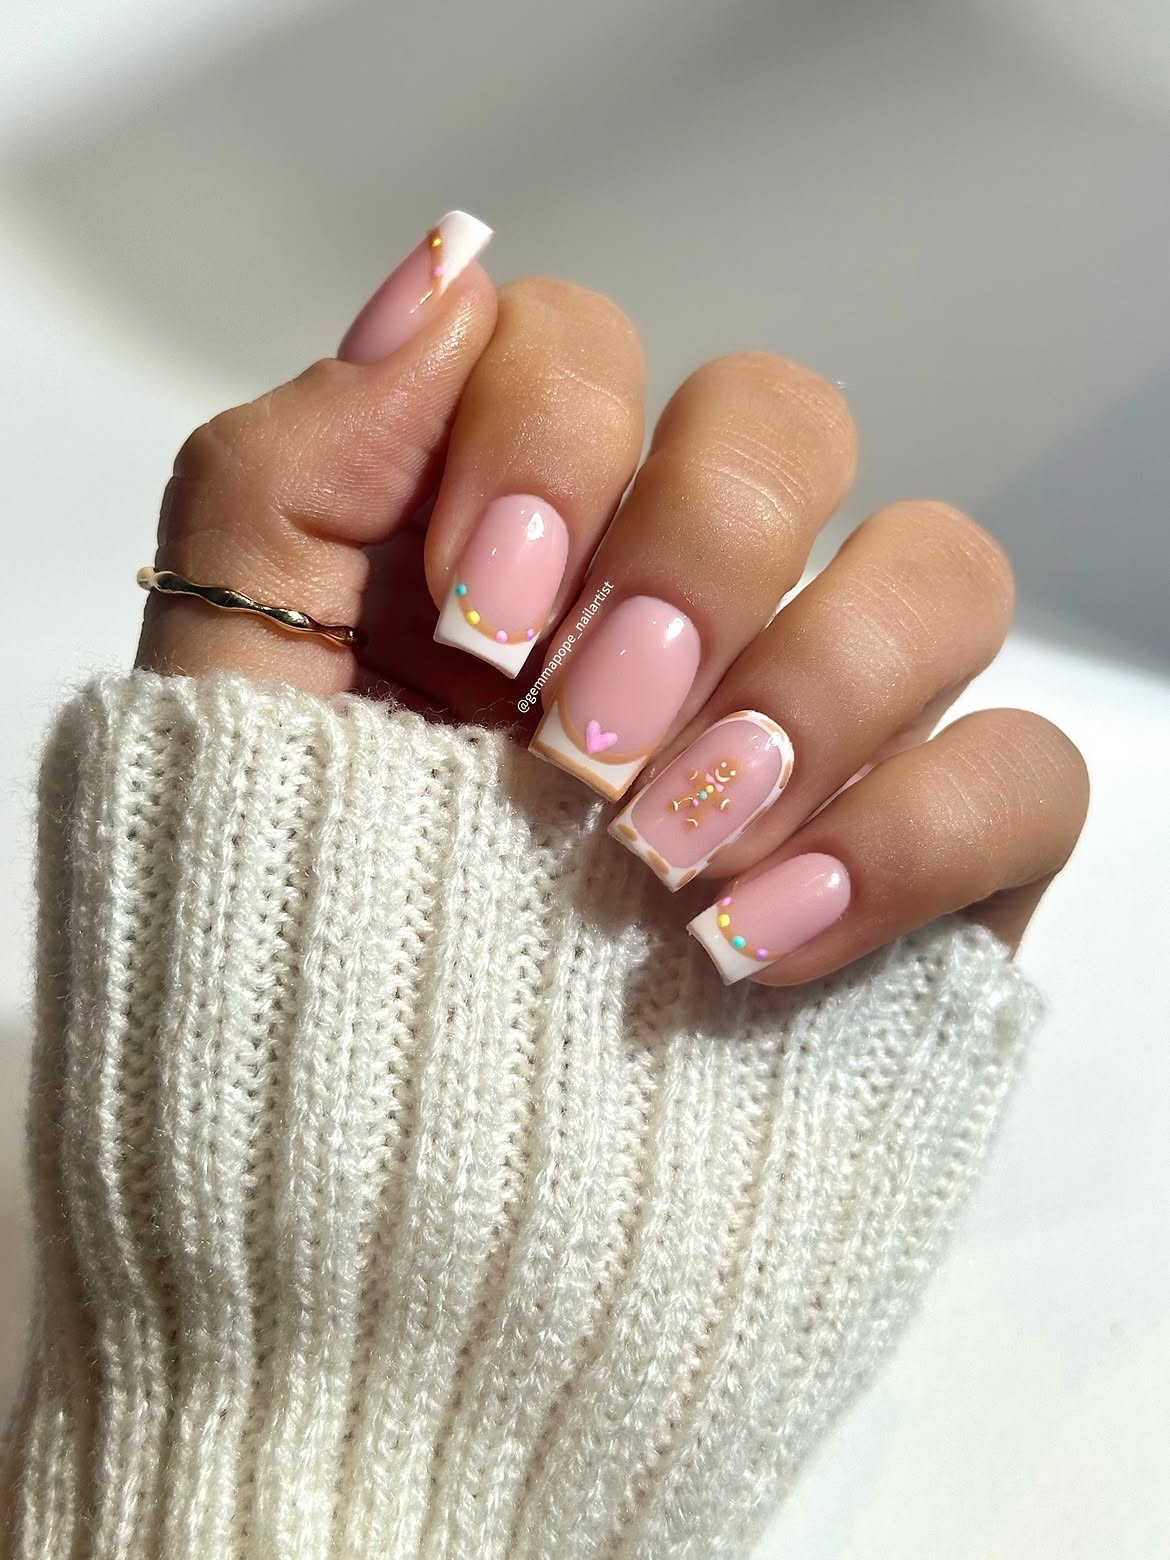
Soft blush pink gives this manicure a sweet base, while the crisp white tips add a clean finish. Small pastel dots are placed around several tips, creating a playful holiday detail without making the nails look crowded. One accent nail has a tiny gingerbread style design with small decorative marks, while another includes a little pink heart.
The square shape gives the French tips a slightly straighter look than the almond designs earlier in the post. That makes this idea especially useful for anyone who likes a shorter, neat nail shape but still wants seasonal artwork.
The trick is to keep the decorations tiny. Paint the pink base first, add the white tips, then use a dotting tool for the pastel accents. For the small gingerbread style detail, a fine nail art brush will give you better control.
11. Glossy Red French Tips with Gold Lines and Pearls
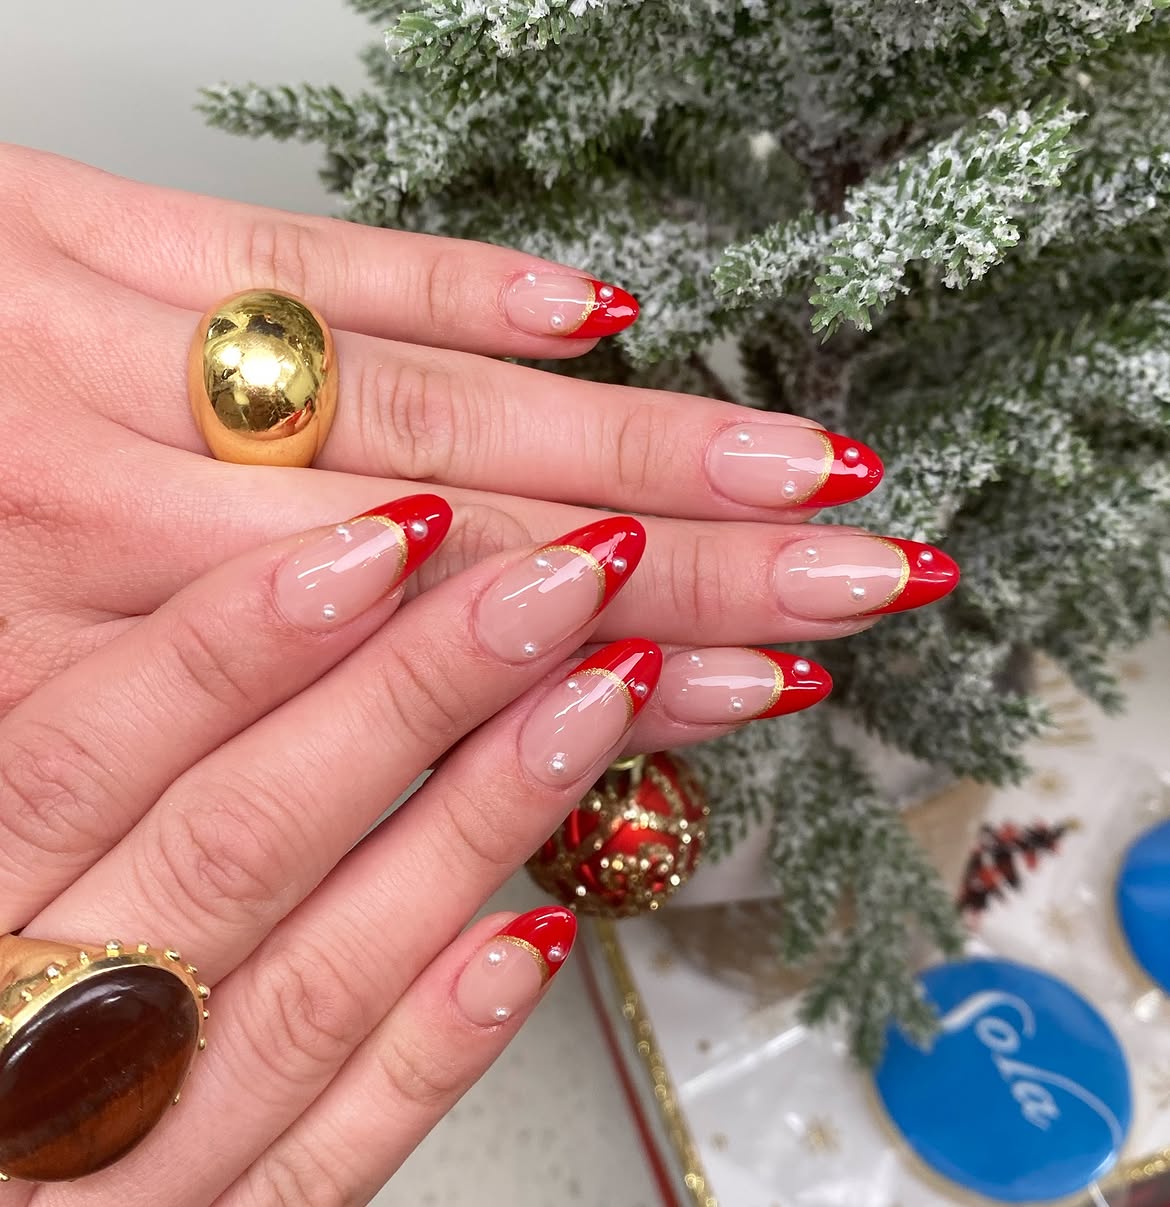
Bright red French tips make this manicure instantly festive, while the sheer pink base keeps it balanced. A thin gold line separates the red tip from the pink nail, giving the design a refined finish. Small pearl like accents are placed across several nails, adding a delicate detail that catches the light without covering the base.
The almond shape also helps the red tips look long and clean. For an at home version, begin with the sheer pink base and let it dry completely. Paint the red tip next, following the natural curve of the nail. Once the tip is set, use a very fine brush to add the thin gold border. Finish with a few small pearl accents, keeping their placement slightly different from nail to nail.
The combination of red, gold, and soft pink gives these Christmas French tip nails a polished holiday look.
Begin with a smooth sheer pink base. Keep the surface glossy and even before adding any decoration.
Add the red French tips, trace a thin gold line along their base, then place a few tiny pearl accents for the final Christmas detail.
12. Glittery Christmas French Tips with Pine Branch Accents
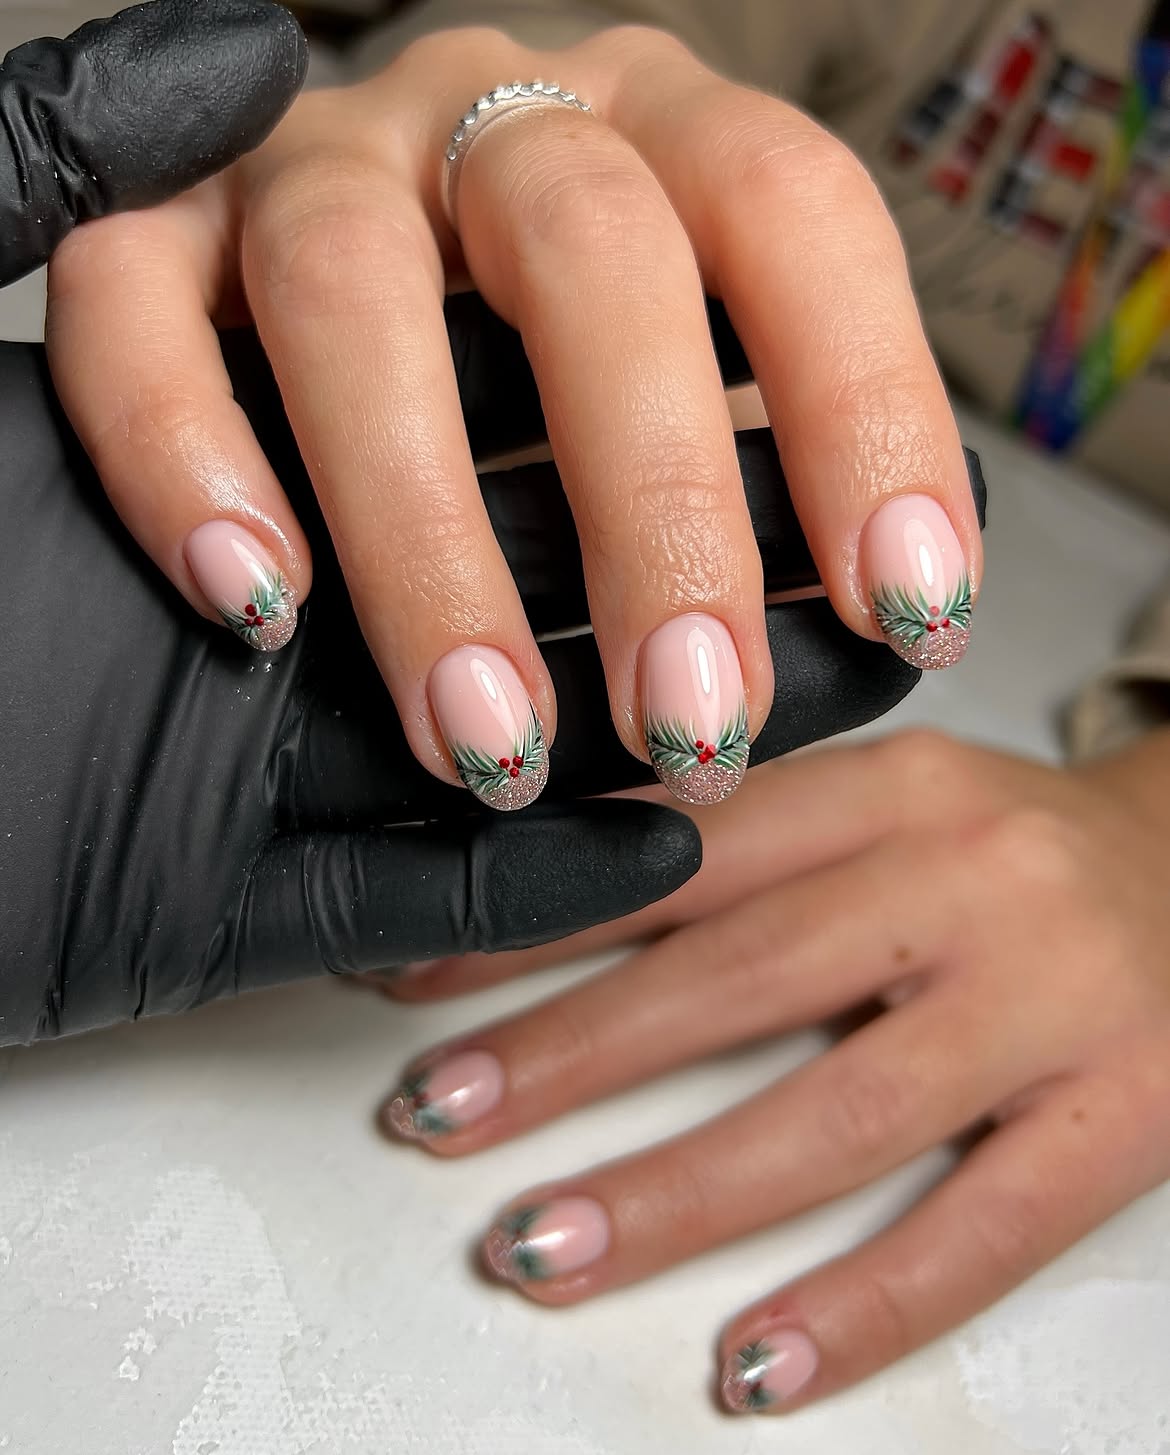
A soft nude pink base gives this manicure a clean starting point, while the tips are finished with fine silver glitter for a snowy effect. Small green pine style branches curve across the lower edge of the tips, and tiny red berry details add a classic Christmas touch.
The design is especially pretty because the glitter and greenery sit close together at the tip instead of spreading across the whole nail. That leaves plenty of open pink space and keeps the manicure looking neat.
To recreate it at home, begin with a glossy nude pink base. Paint a French tip using silver glitter polish, then add thin green branches while the glitter layer is dry. Tiny red dots can be placed between the leaves to create the berry detail. A very fine brush will make the greenery easier to control.
The finished look feels festive, sparkly, and still soft enough for an everyday holiday manicure.
Use a glossy nude pink shade to create the clean background for the holiday details.
Follow the natural nail curve with a fine silver glitter French tip.
Add thin green branches and tiny red berry dots near the glitter border for the final Christmas finish.
13. Soft Pink Square French Tips with Tiny Christmas Charms
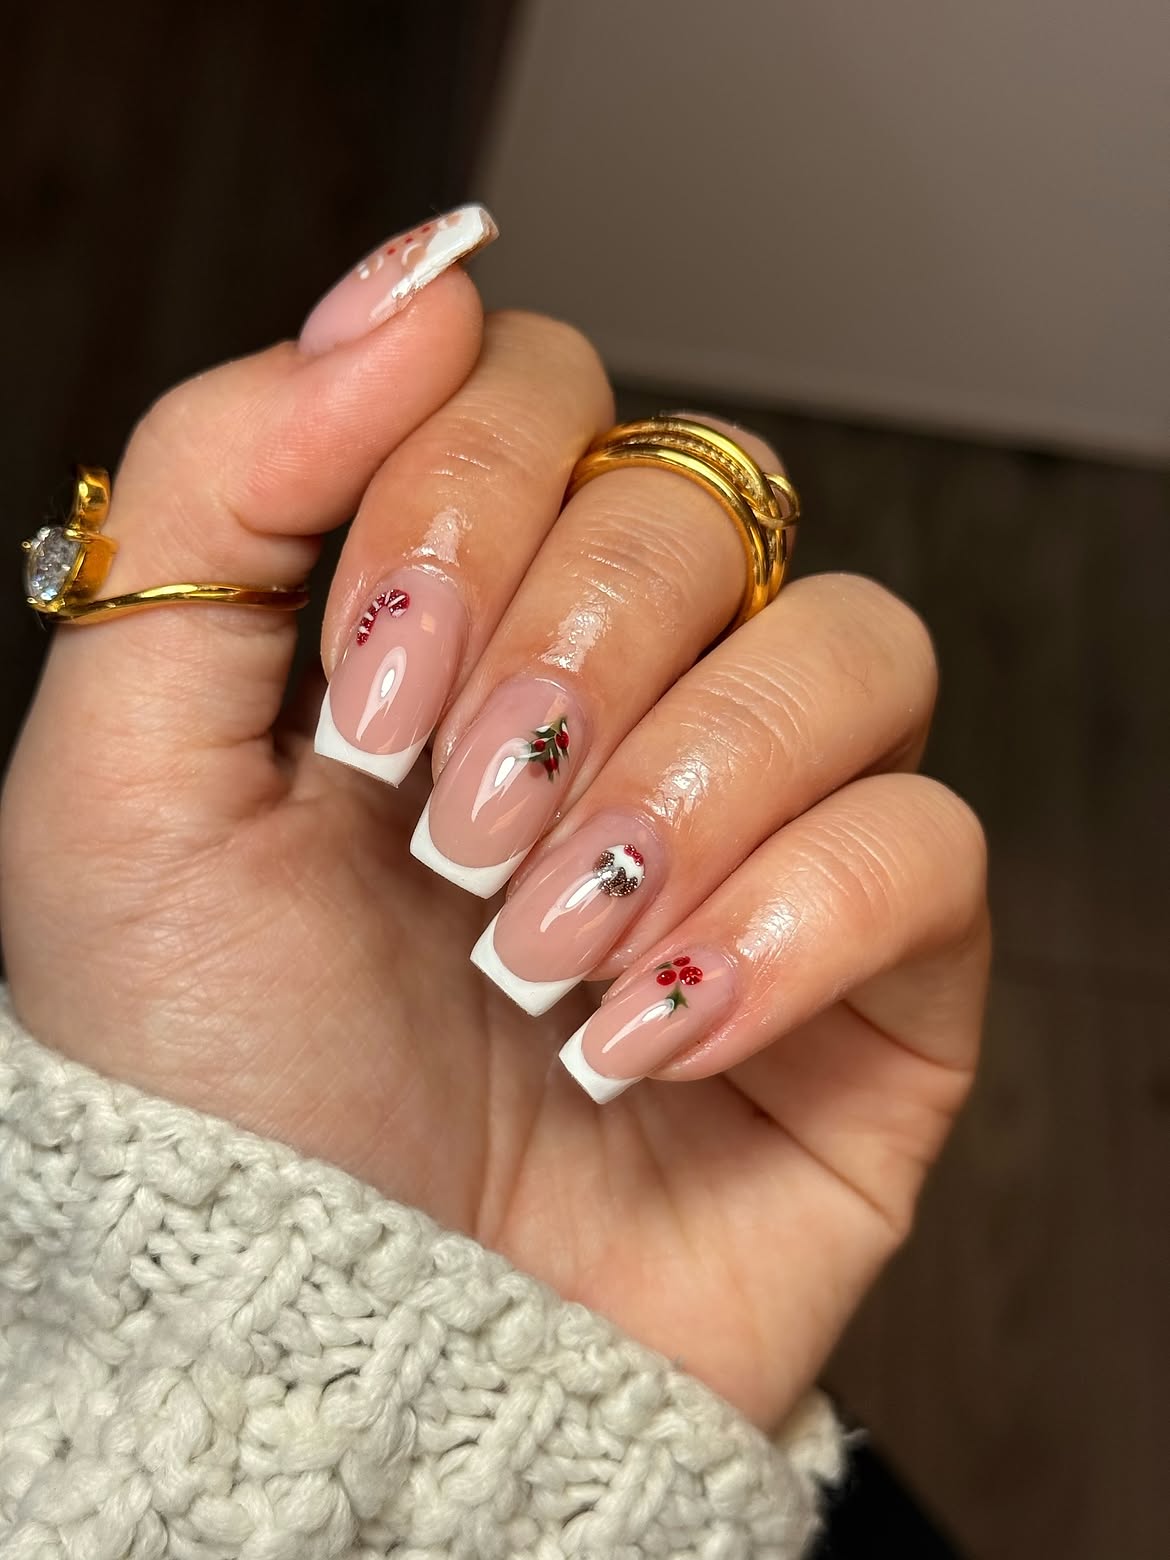
This manicure pairs a sheer blush pink base with clean white French tips on a neat square shape. Each nail gets a small festive detail, including a tiny candy cane, holly leaves with red berries, and other delicate holiday accents. Because the artwork is kept small, the manicure still feels polished rather than overly decorated.
The square tips give the set a crisp look, while the glossy pink base keeps it soft. The best part is the mix of tiny designs. Instead of repeating one Christmas motif on every nail, the accents change from nail to nail while the pink and white foundation stays consistent.
For a home version, paint the pink base and square French tips first. After they dry, use a very fine brush to add the small holiday elements. Work slowly and leave plenty of pink space around each detail. A glossy top coat will help everything look smooth and finished.
Sheer blush pink across the full nail.
Crisp white tips following the square shape.
Add one tiny seasonal design to selected nails.
Seal the small artwork with a glossy top coat.
14. Ruby Red Christmas French Tips with Colorful Gem Accents
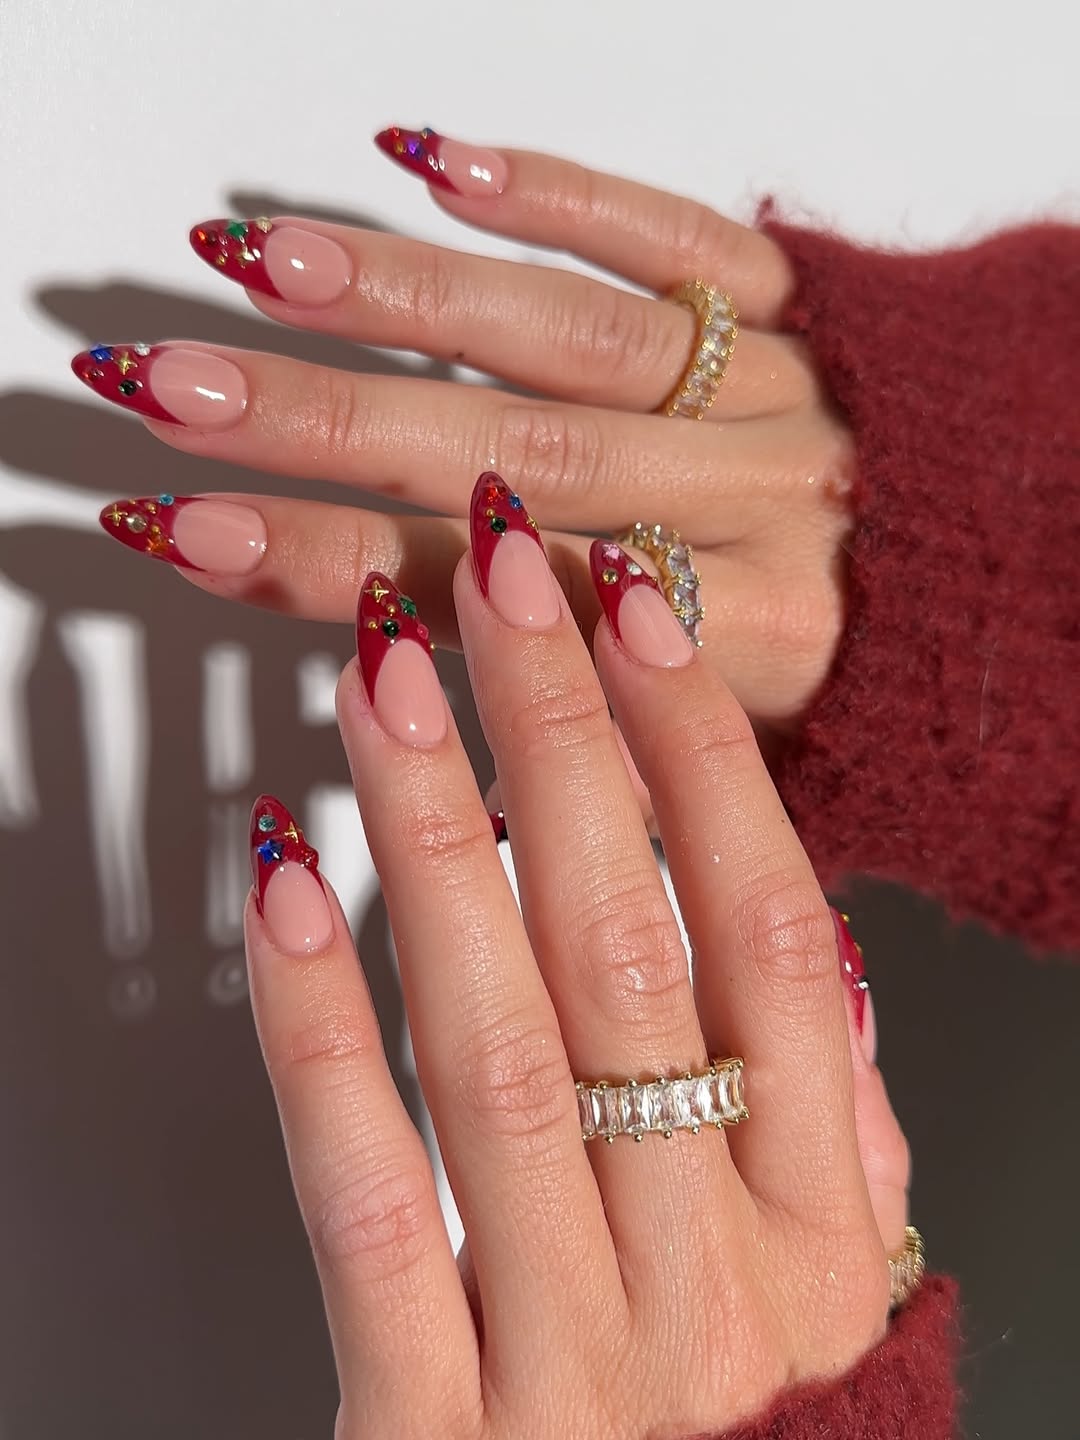
These long almond nails use a sheer nude pink base with rich ruby red French tips. The red is concentrated at the pointed ends, leaving the center of each nail clean and glossy. Tiny multicolor gems and metallic details decorate the red sections, creating a festive look that feels more like sparkling holiday ornaments than traditional nail art.
The pointed almond shape gives the red tips plenty of room for the small embellishments. Start with the nude pink base, then carefully outline the French tip before filling it with red polish. Once the tip has set, place a few tiny colored gems near the upper edge. Mixing small shapes and colors keeps each nail slightly different while the matching red tips tie the whole set together.
For a cleaner home manicure, work with very small decorations and leave some open red space around them. That helps the sparkle stand out.
| Detail | Best approach |
|---|---|
| Pink base | Use a sheer nude pink and keep the finish glossy. |
| Red French tip | Follow the pointed almond edge for a sharp, even shape. |
| Gem accents | Add tiny colorful gems near the red tip instead of covering it. |
| Final finish | Seal the design carefully while keeping the raised decorations secure. |
15. Pearly Red French Tip Christmas Nails
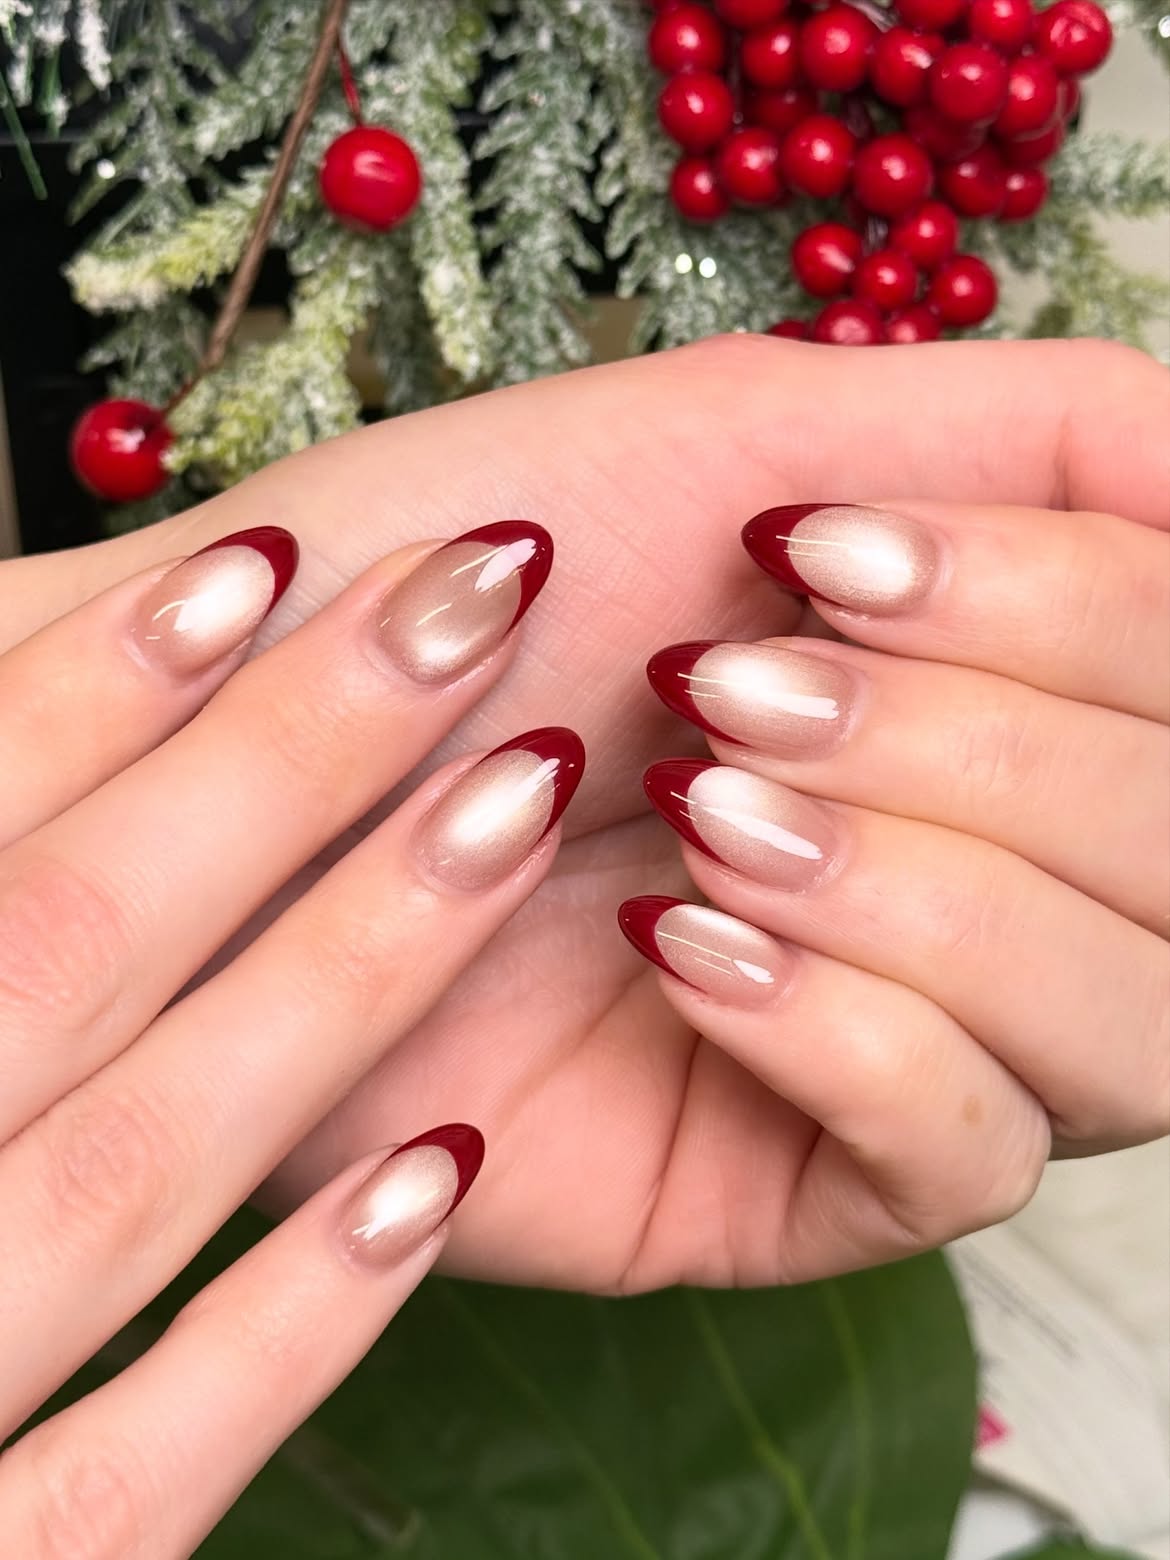
A soft pearly pink base gives these almond nails a smooth, luminous finish, while the deep red French tips add a rich holiday contrast. The red follows the pointed edge of each nail, creating a clean shape without covering the glowing base. The subtle shimmer underneath makes the manicure look especially bright when the light catches the surface.
This design keeps the decoration very simple. There are no large holiday drawings or busy accents, so the color combination does all the work. For an at home version, start with a sheer pink polish that has a fine pearly finish. Once it dries, paint the deep red tips with a thin brush, following the natural curve of each nail.
A glossy top coat helps preserve the reflective finish and makes the red tips look even richer. This is a lovely choice for Christmas French tip nail designs when you want something festive but understated.
Keep the pink base soft and luminous so the red tips remain the main focus.
Follow the natural almond shape when painting the red French edge.
Skip heavy artwork that could hide the pearly finish of the base.
Avoid making the red tip too thick, especially on the narrower nails.