17 Red and Green Nails With Festive Details to Save
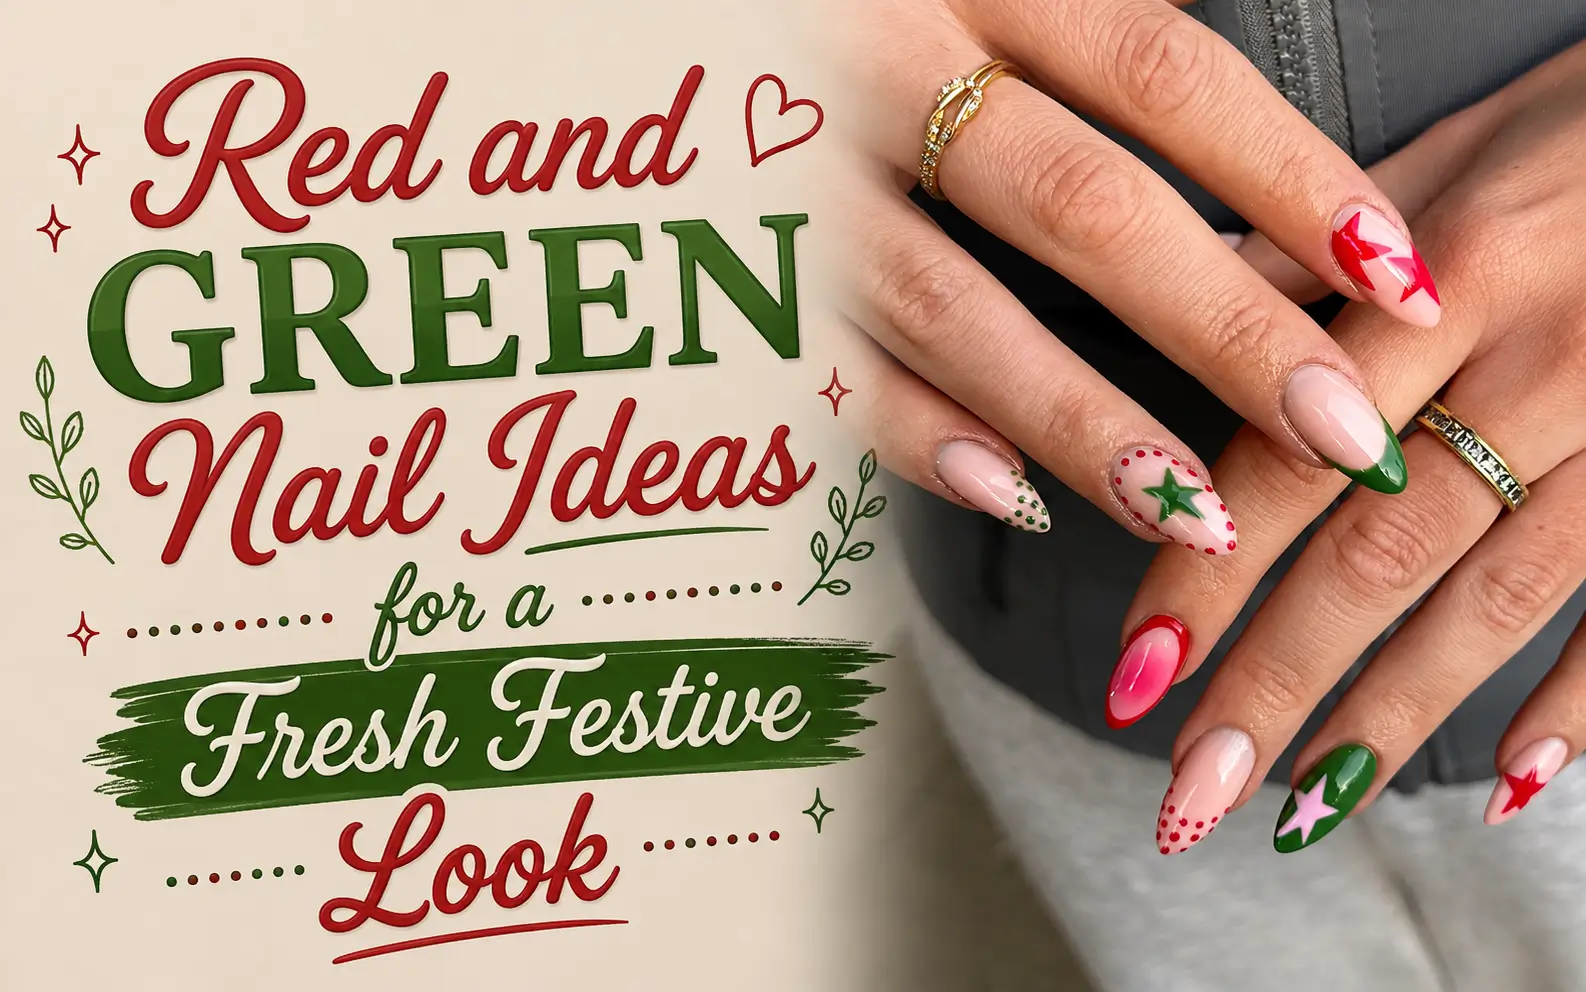
Red and green can look classic, playful, soft, or bold depending on how much of each color you use. The 17 Red and Green Nails in this collection show how flexible the pairing can be, with ideas for short square shapes, rounded nails, and longer almond tips. Some designs keep things simple with glossy French tips, solid glitter polish, or one abstract accent. Others bring in stars, bows, wreaths, snowflakes, plaid, dots, peppermint swirls, and tiny gold details.
The strongest looks do not place every pattern on every finger. They use nude or pale pink bases to create breathing room, repeat one small motif across both hands, or let solid red and green nails calm the busier artwork. The roundup also includes soft sage and mint shades, deep emerald tones, bright cherry red, sheer watercolor layers, and sparkling finishes. Use these ideas to find a color balance and level of detail that fit your style, then borrow the shapes, spacing, or accents that catch your eye.
17 Chic Red and Green Nails Designs 2026
1. Use Tiny Dots to Connect a Mixed Red and Green Nail Set
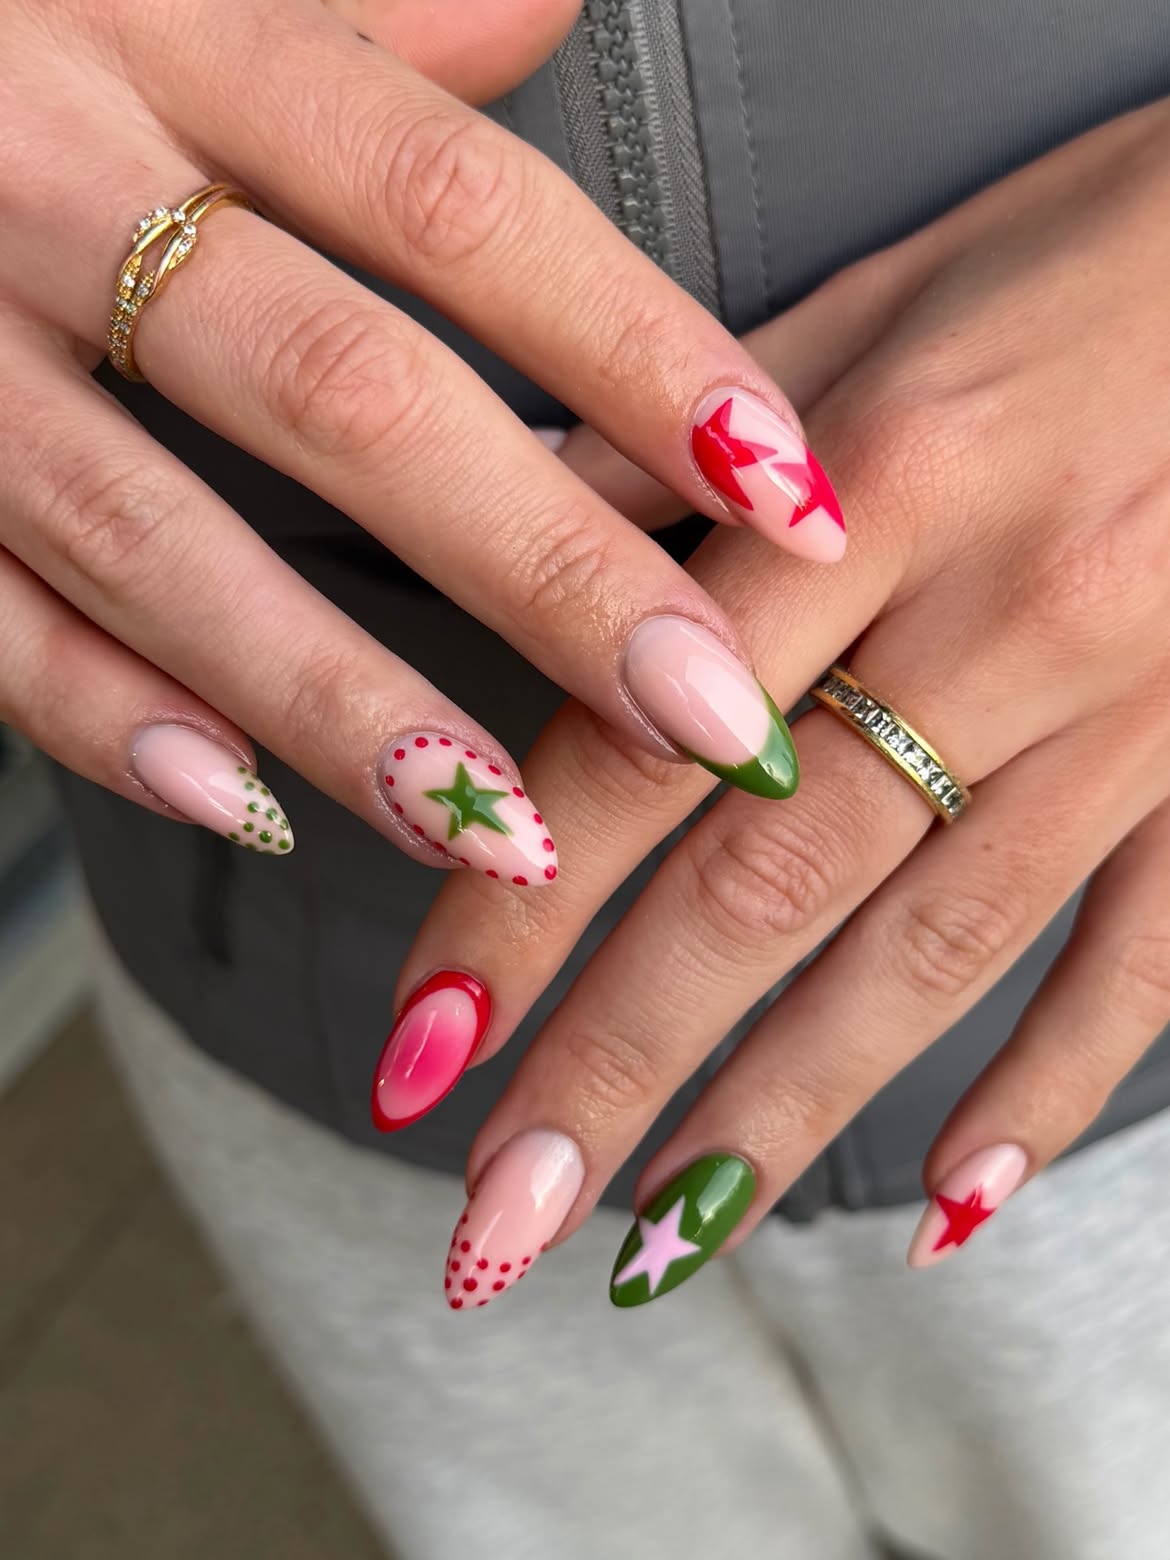
Small dotted borders are the quiet detail that holds this bold set together.
The large stars and solid tips pull attention first, but the neat red and green dots create a rhythm across the softer pink nails. Because the dots are spaced evenly and kept close to the edges, they frame each nail without covering the translucent base.
The useful lesson: When several nails use different patterns, repeat one tiny detail to make the set feel connected.
Use one dot size, leave equal gaps, and stop before the border becomes crowded. The result is playful, but the clean spacing keeps every star, curve, and color tip easy to read.
Keep the dots close to the outer edge.
Use one dot size and leave even spaces.
Do not crowd the star with extra marks.
Avoid changing the dot size on every nail.
2. Alternate Red and Green French Tips for a Clean Color Mix
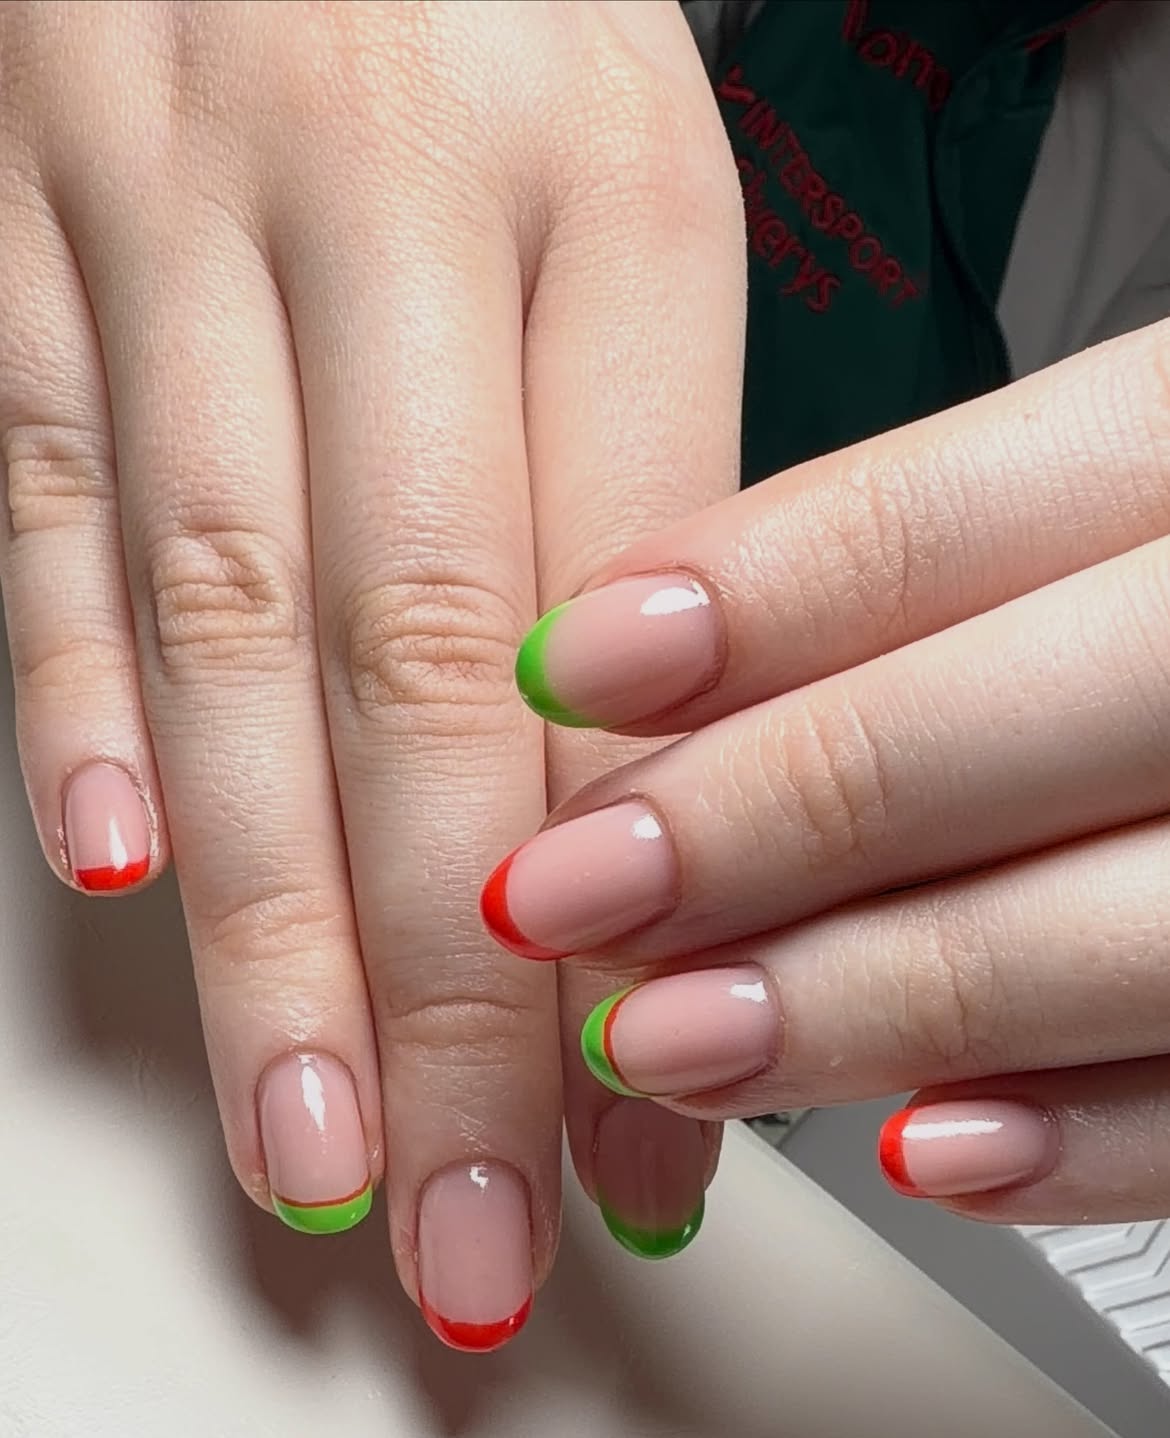
Clean red and green tips make the color pairing feel crisp rather than busy.
A sheer pink base covers every short oval nail, while the tip colors alternate from finger to finger. Most nails use a single curved band. A few green tips carry a slim red outline just above the edge, adding a small surprise without changing the simple direction.
Why the look stays balanced: The bright color appears only at the free edge, so plenty of natural pink remains visible. Keeping the tip depth similar across all nails also helps the two shades feel like part of one planned set.
This approach works well for anyone who likes seasonal color but wants the shape and spacing to do most of the work.
Apply a glossy sheer pink base across every nail.
Alternate curved red and green tips from finger to finger.
Add a slim contrasting outline to one or two tips for extra detail.
3. Pair Bold Red and Green Nails With Fine Holiday Line Art
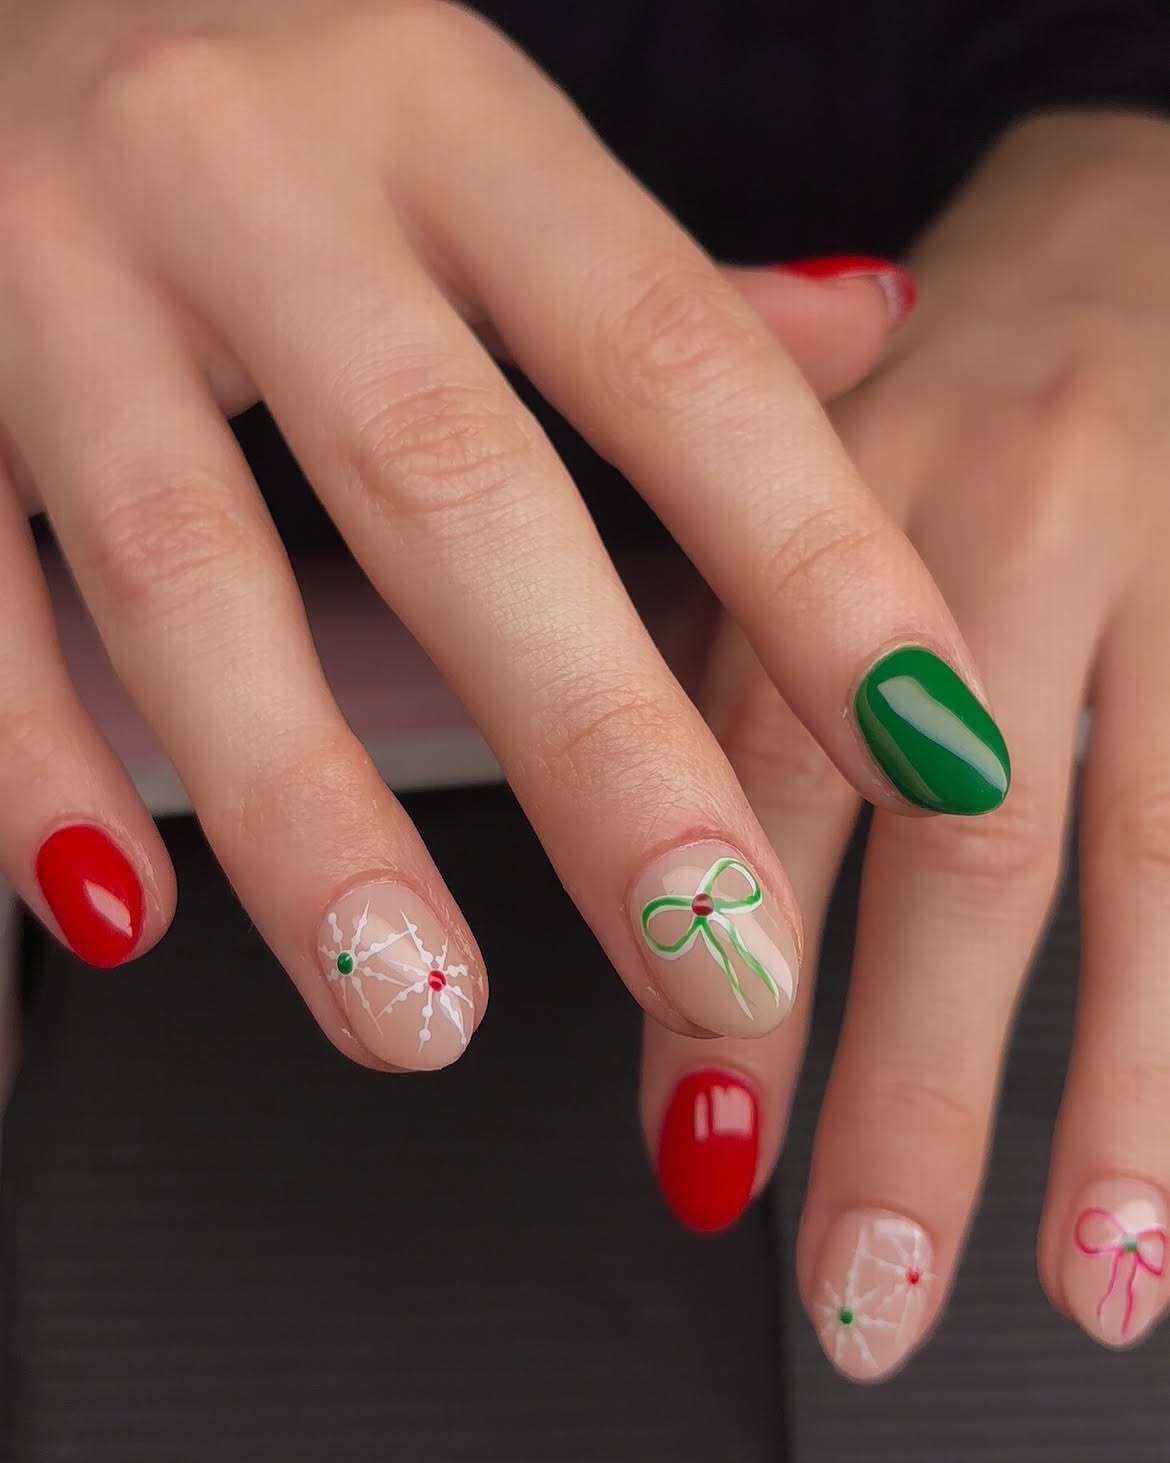
Solid color and delicate detail share the work in this manicure.
Glossy red and green nails create strong color blocks, while sheer nude accents carry fine white snowflakes and slim ribbon bows. Tiny red and green dots appear inside the line art, linking the quieter nails back to the bolder ones.
The short oval shape gives the artwork a soft, neat frame. It also leaves enough room for the bows to stretch vertically without looking squeezed.
Styling note: Keep the detailed art on separate fingers and use smooth solid polish between them. That pause makes the small lines easier to notice and stops the holiday motifs from competing with one another.
| Solid Color Nails | Line Art Accents |
|---|---|
| Anchor the red and green palette | Carry the bows and snowflakes |
| Use glossy full coverage | Keep the base sheer and quiet |
| Create bold pauses between designs | Add fine details with open spacing |
If you prefer a cleaner everyday manicure, you can also check out these 20 Short Green Nails for simple green designs that still feel stylish.
4. Use Wide Red and Green Tips on Short Rounded Nails
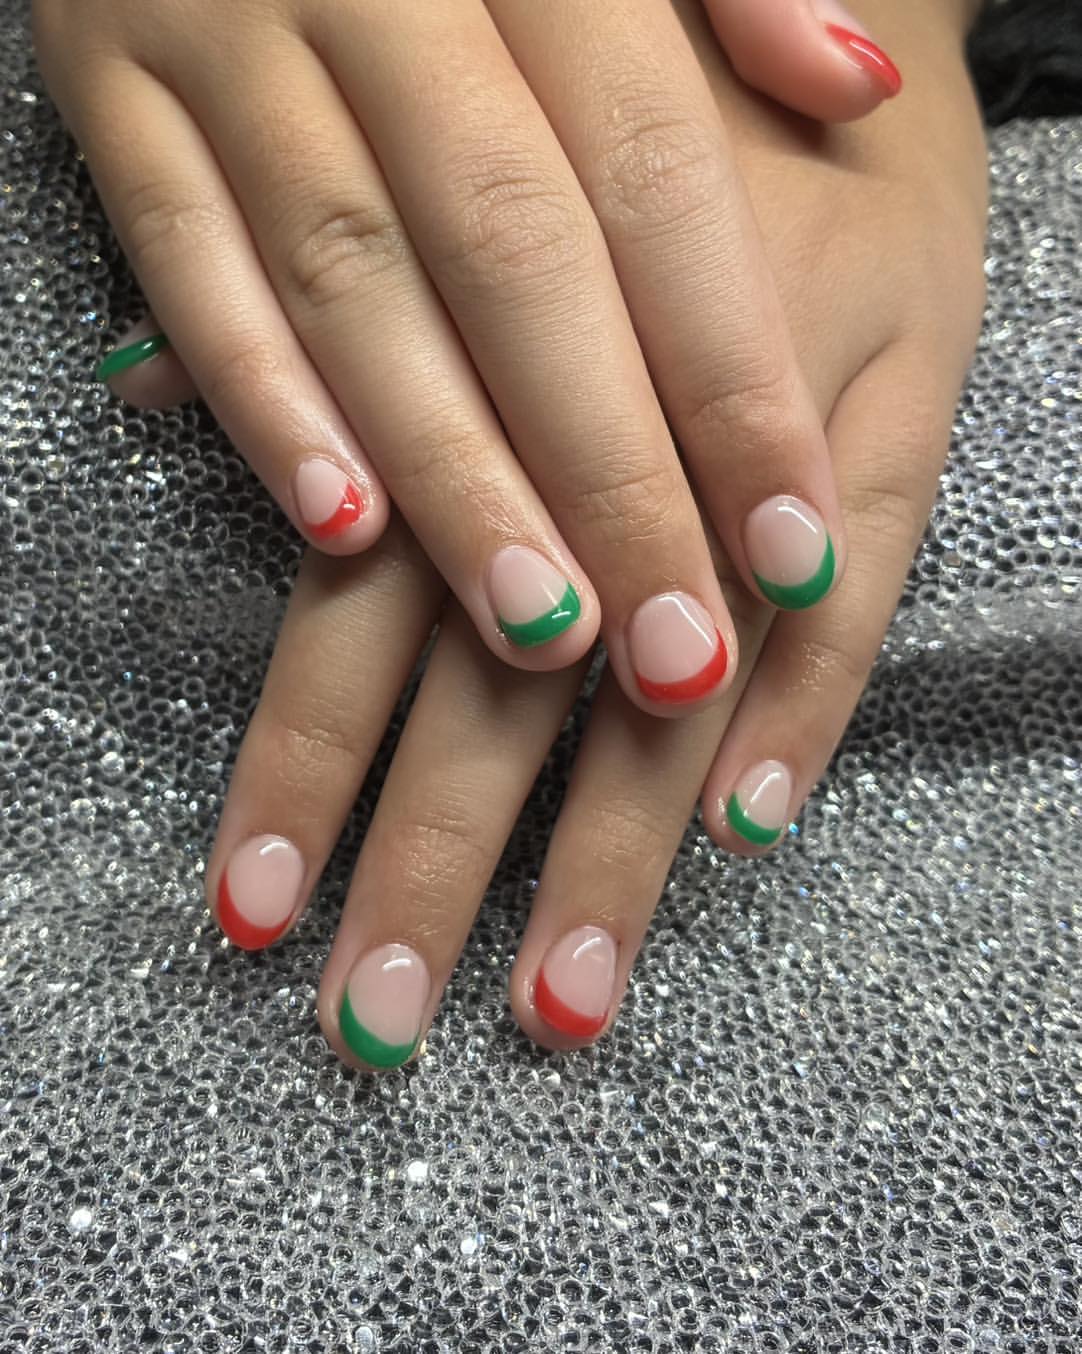
Wide curved tips bring more color to short nails without covering the soft pink base.
Color coverage: The red and green bands sit deeper than a thin French line, which makes both shades easy to see on a compact nail shape. Alternating the colors across both hands creates a steady rhythm, while the plain nude base keeps the manicure from looking heavy.
Shape effect: The smile lines are softly curved rather than sharply drawn. That rounded edge follows the natural nail shape and gives the color a relaxed finish.
Best detail to copy: Match the width of every tip before choosing the color order. Consistent proportions will connect the set even when red and green appear in an irregular sequence.
Recreate this look
5. Frame White Snowflakes With Diagonal Red and Green Panels
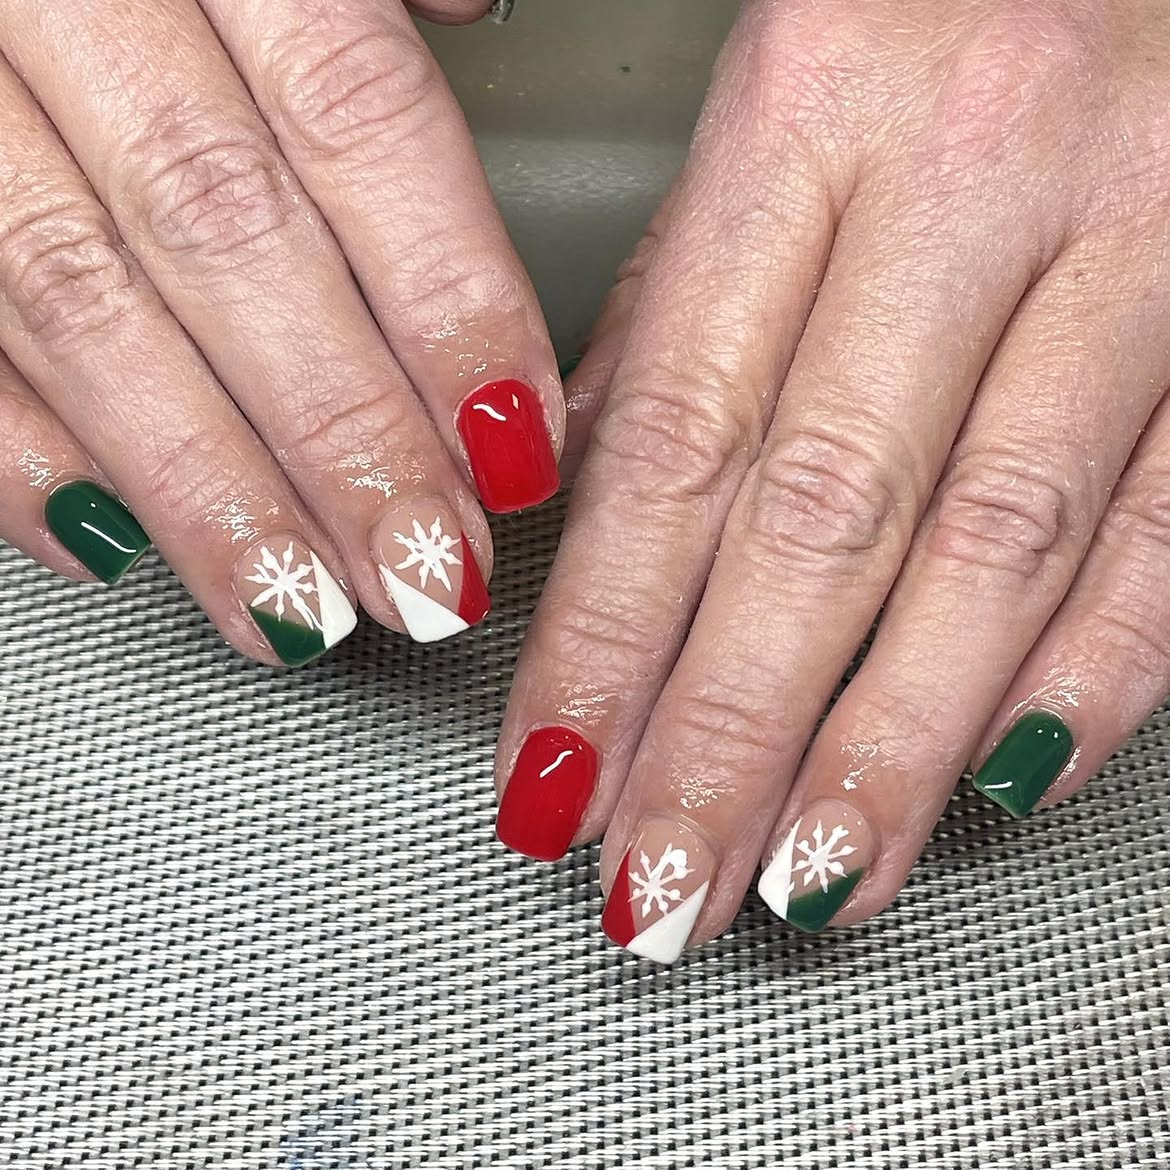
White snowflakes become the clear focal point when they sit between strong diagonal blocks of color.
The accent nails use a nude center with red, green, and white sections sweeping in from opposite corners. That angular layout feels crisp against the short square shape. Solid red and deep green nails around them give the eye a place to rest.
The design formula is simple:
- Use full color on the surrounding nails.
- Reserve the center fingers for the geometric pattern.
- Paint the snowflakes in white so they remain visible over every section.
Keeping the snowflakes slightly different on each accent nail adds a handmade quality, while the repeated diagonal direction holds the full set together.
6. Mirror Red and Green Motifs Across Opposite Hands
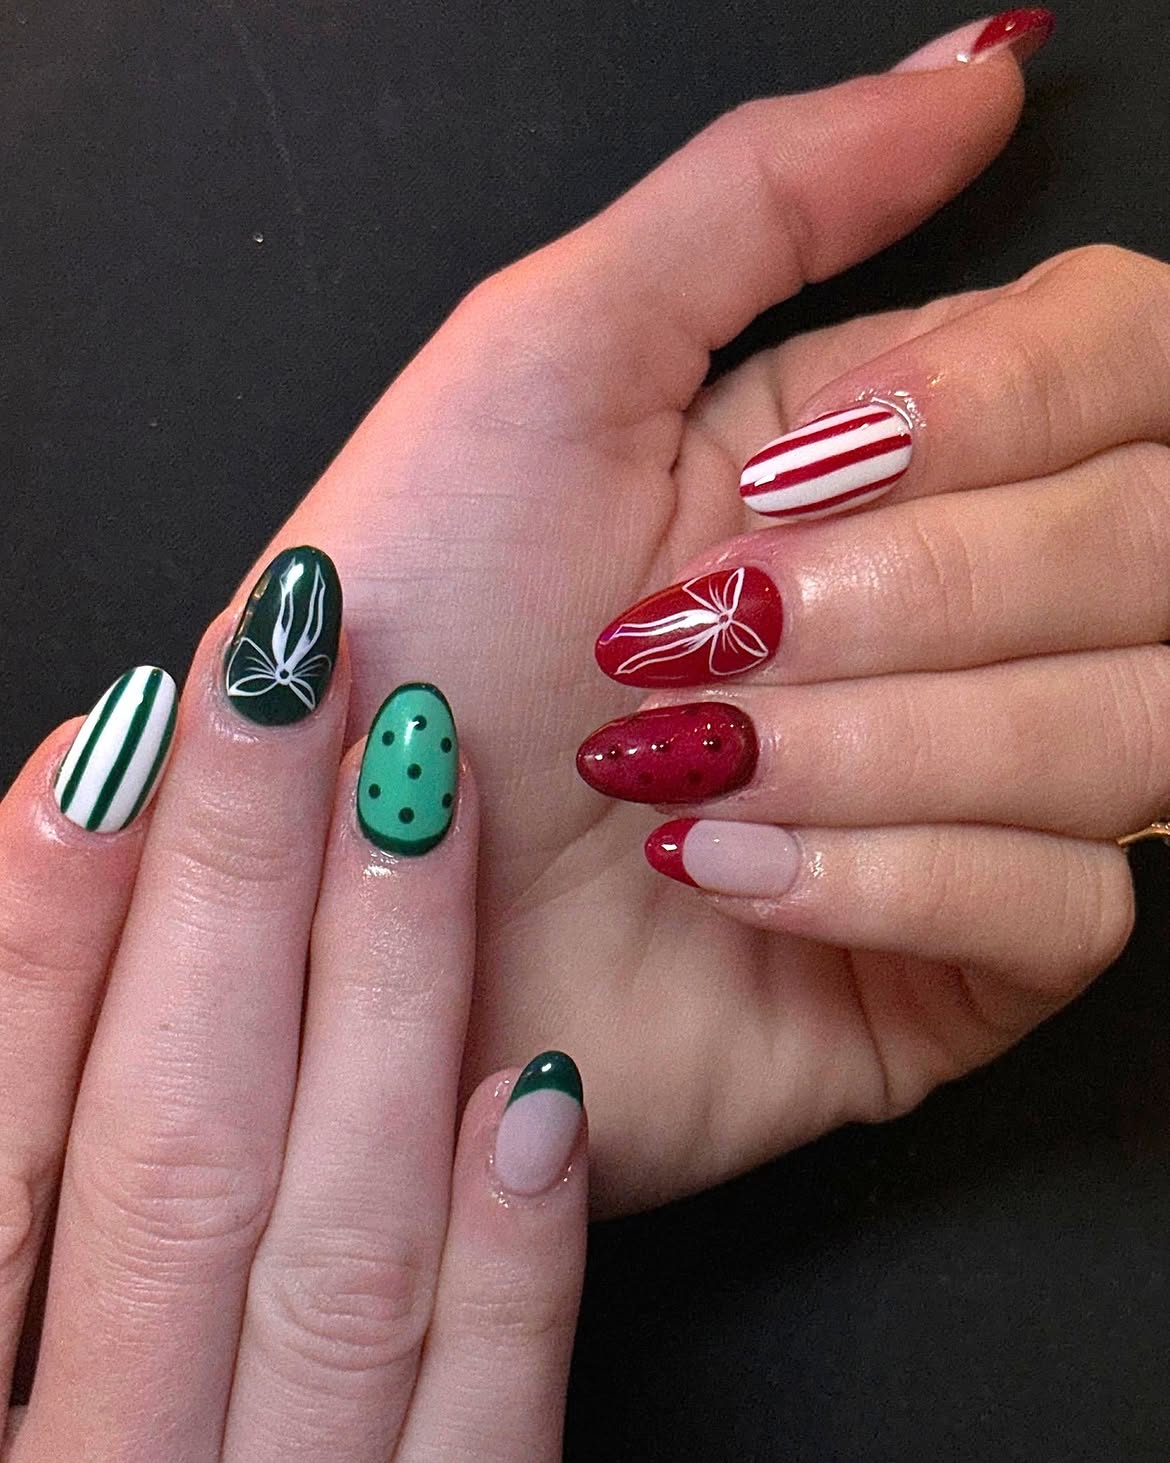
Instead of mixing both colors on every nail, this manicure gives green its own hand and red the other.
Green side: Deep green, mint, and white appear through slim stripes, dark dots, a curved tip, and a fine bow outline.
Red side: Bright red takes the lead with matching stripes, another white bow, a curved tip, and one sparkling accent nail.
What connects the hands is their repeated visual language. Both sides use striped nails, delicate bow drawings, glossy finishes, and sections of exposed nude polish. The spotted mint nail and red glitter nail add separate points of interest without breaking the mirrored layout.
Giving each hand one main color creates plenty of variety, while the shared patterns make the full manicure feel planned.
Assign one main color to each hand, then repeat two or three motifs in both palettes so the designs feel connected.
7. Mix Plaid, Dots, Stripes, and Bows in One Color Story
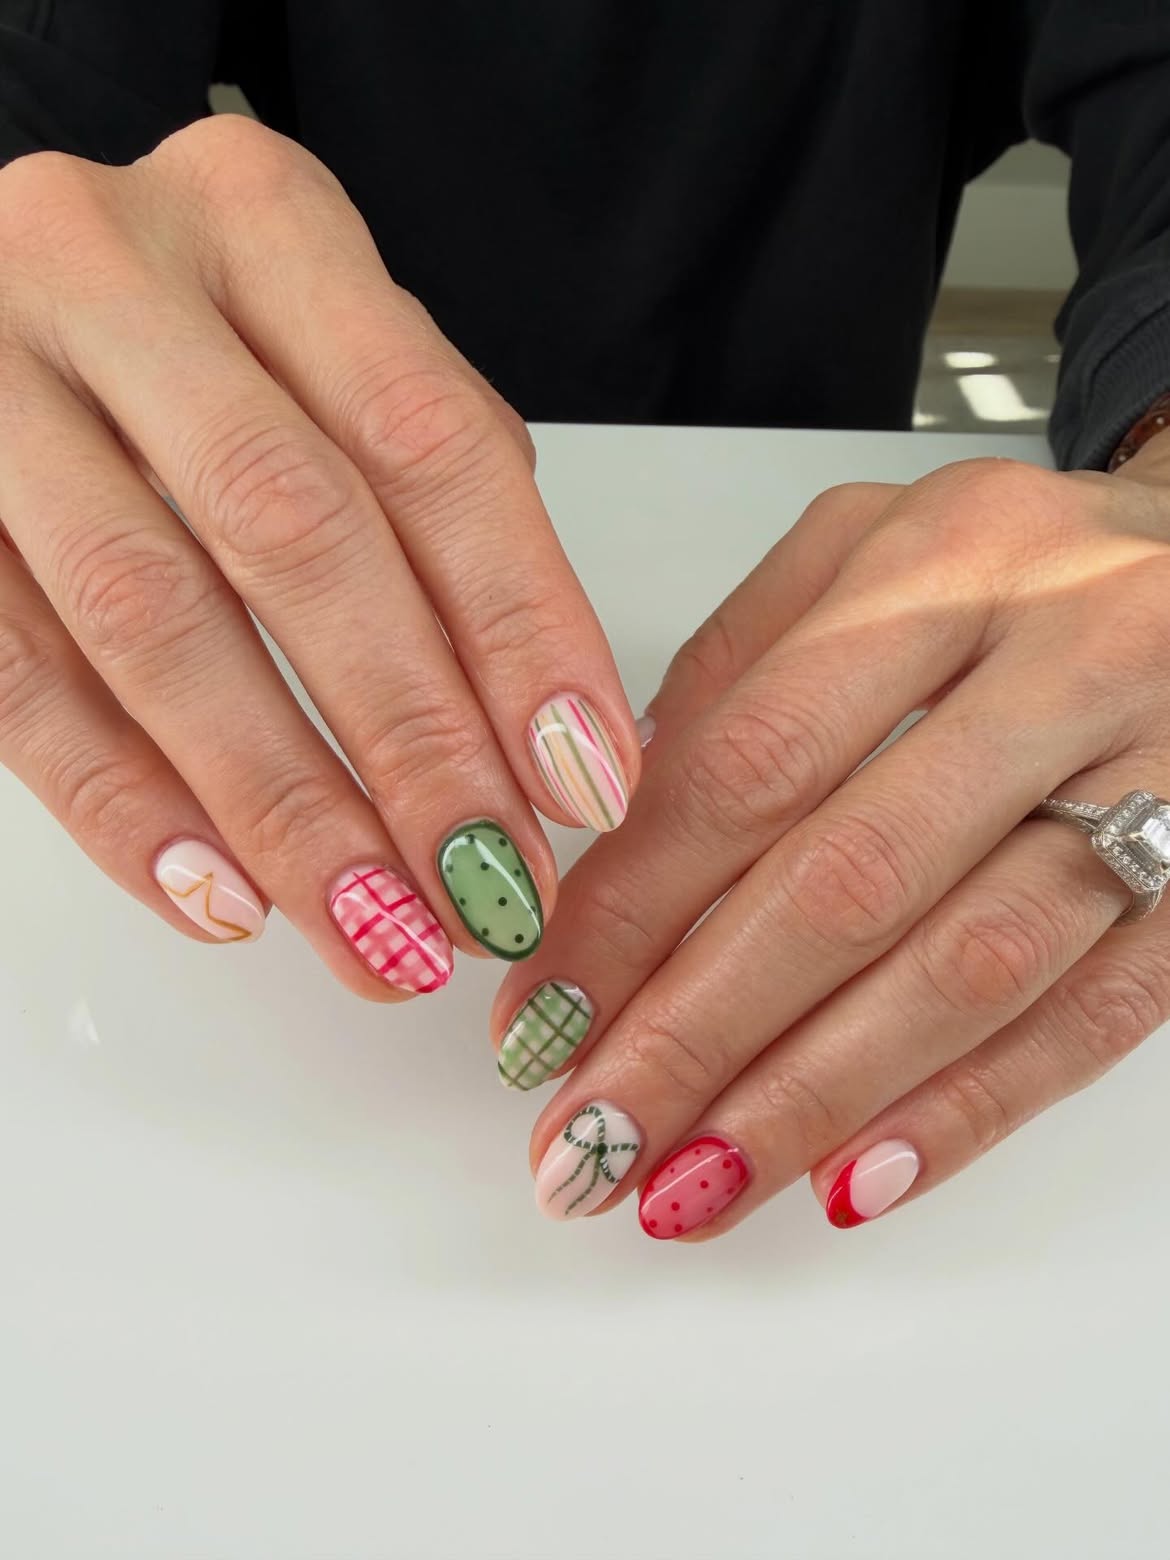
This manicure treats every nail like a different piece of holiday wrapping paper.
Plaid appears in red and green, slim stripes run lengthwise, tiny dots sit inside outlined borders, and a delicate bow becomes the softest accent. Red French tips and pale pink bases give the eye a few quiet places between the busier patterns.
Pattern map
Plaid: Brings the strongest structure.
Dots: Add a smaller repeated rhythm.
Stripes: Make the short oval nails look longer.
Bow: Breaks up the straight lines with a curved detail.
The set stays connected because the shades remain soft and each design uses fine lines. Keeping a similar line weight allows several patterns to sit together without one nail looking unrelated.
💡 Pattern Mixing Tip
Choose two main colors and one pale base, then repeat the same fine line weight across every plaid, stripe, dot, and bow.
8. Soften Red and Green Nails Art With Sheer Watercolor Layers
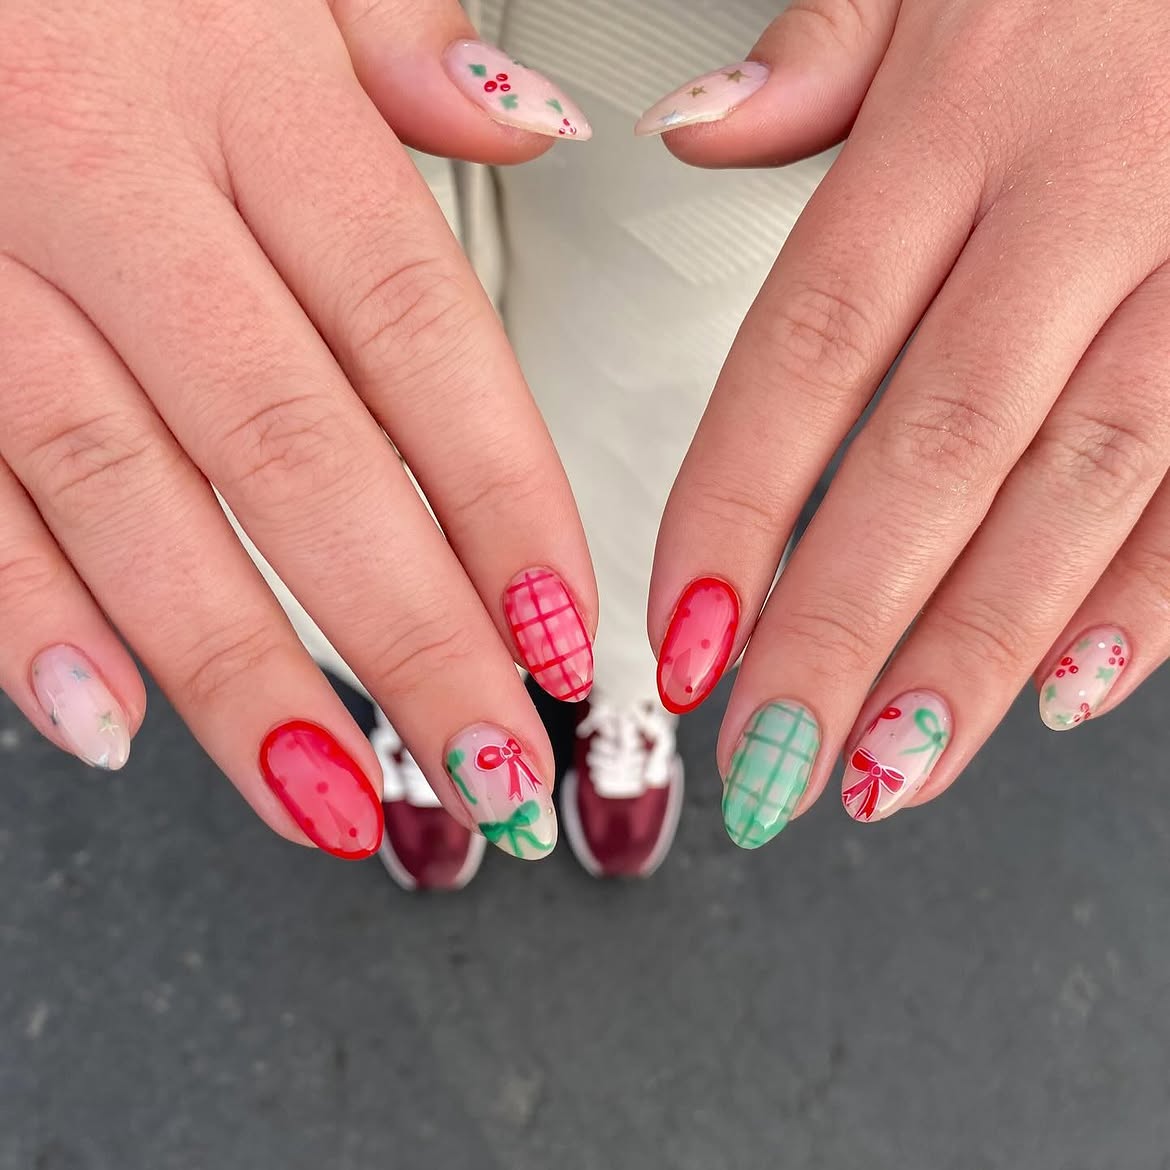
Sheer color gives this festive manicure a soft, painted look.
Some nails are framed with translucent red borders that fade into a pink center. Others use washed mint or raspberry plaid, while small bows, berries, and tiny star shapes sit over the pale base. The almond shape gives the loose patterns enough room to stretch without looking cramped.
Notice how no single detail is fully opaque except a few outline accents. That light coverage lets different motifs share the same set while keeping the overall finish gentle.
Why it works: Red and green appear at several strengths, from faint washes to sharper lines. That change in intensity creates depth without introducing extra colors.
Solid color blocks create stronger contrast and a heavier finish.
Soft color washes leave the pink base visible and give plaid, bows, and borders a lighter look.
9. Build a Red and Green Nail Set Around Five Holiday Motifs
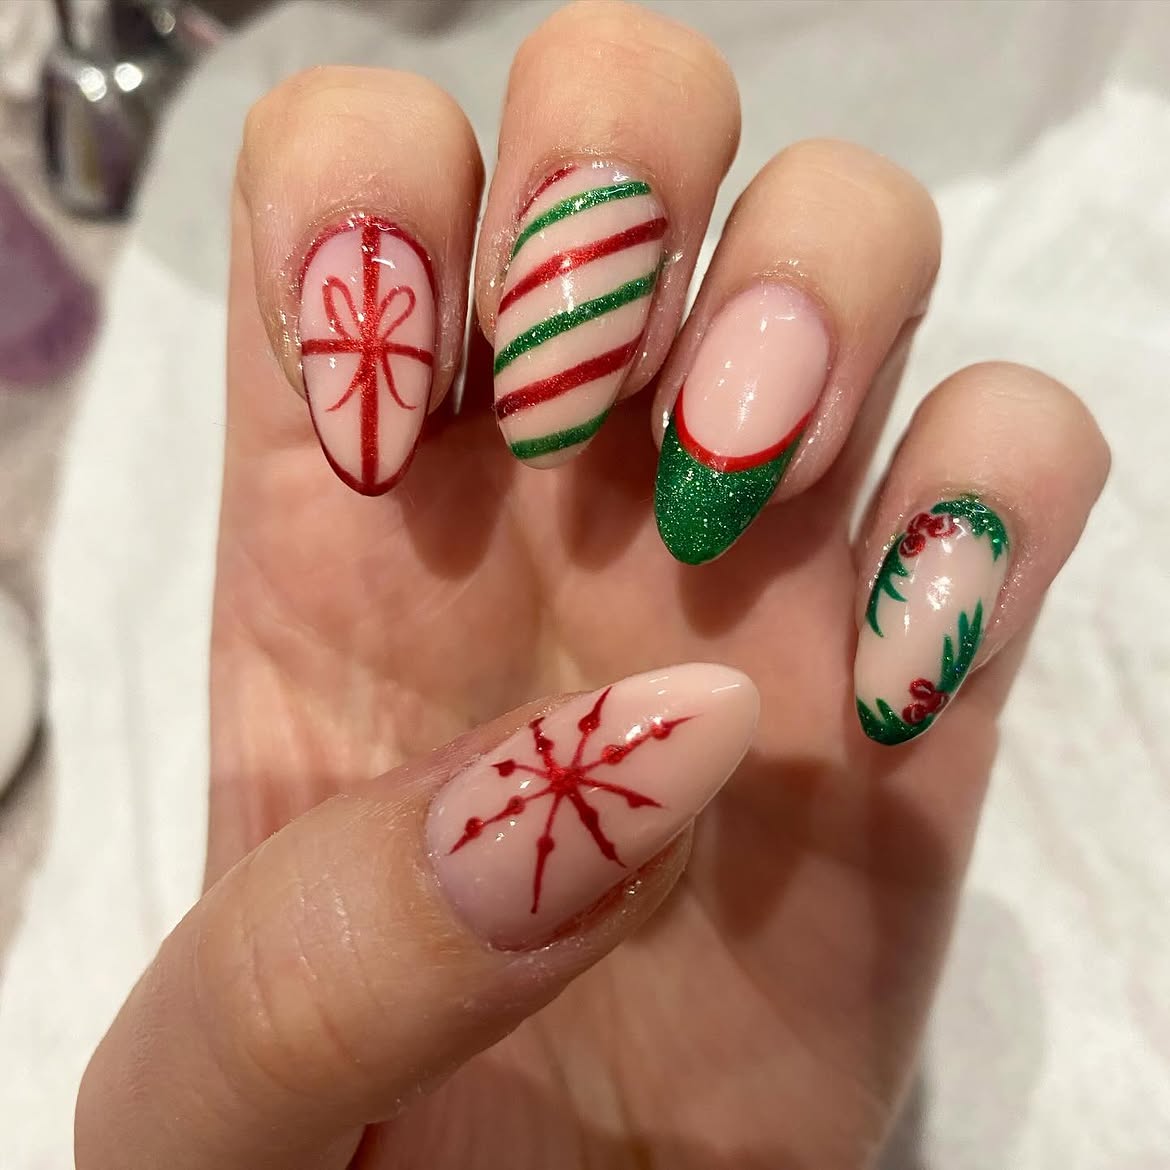
Each nail has its own holiday symbol, but the pale pink base keeps the collection from becoming chaotic.
A red gift ribbon fills one almond nail, diagonal red and green stripes cover another, and a glittering green tip carries a slim red border. Delicate greenery and berries frame the smallest nail, while the thumb holds a red starburst that reads like a simple snowflake.
The strongest choice is the spacing. Large motifs sit on open nude backgrounds, and the fully striped nail is separated from the detailed greenery. That gives every design a clear area to occupy.
Use one shared finish, such as fine shimmer or a glossy top coat, to connect artwork that changes from finger to finger.
Motif Placement Guide
- ▸ Use an outlined gift ribbon on an open nude base.
- ▸ Give one nail full diagonal stripes for strong pattern.
- ▸ Add a glittering green tip as the color anchor.
- ▸ Keep small greenery and berries close to the nail edge.
- ▸ Save one larger snowflake shape for the thumb.
For a darker nail look with plenty of style, take a look at these 16 Black and Green Nails for chic designs that feel fresh and striking.
10. Use Sage Green to Soften Bold Red Star Nails
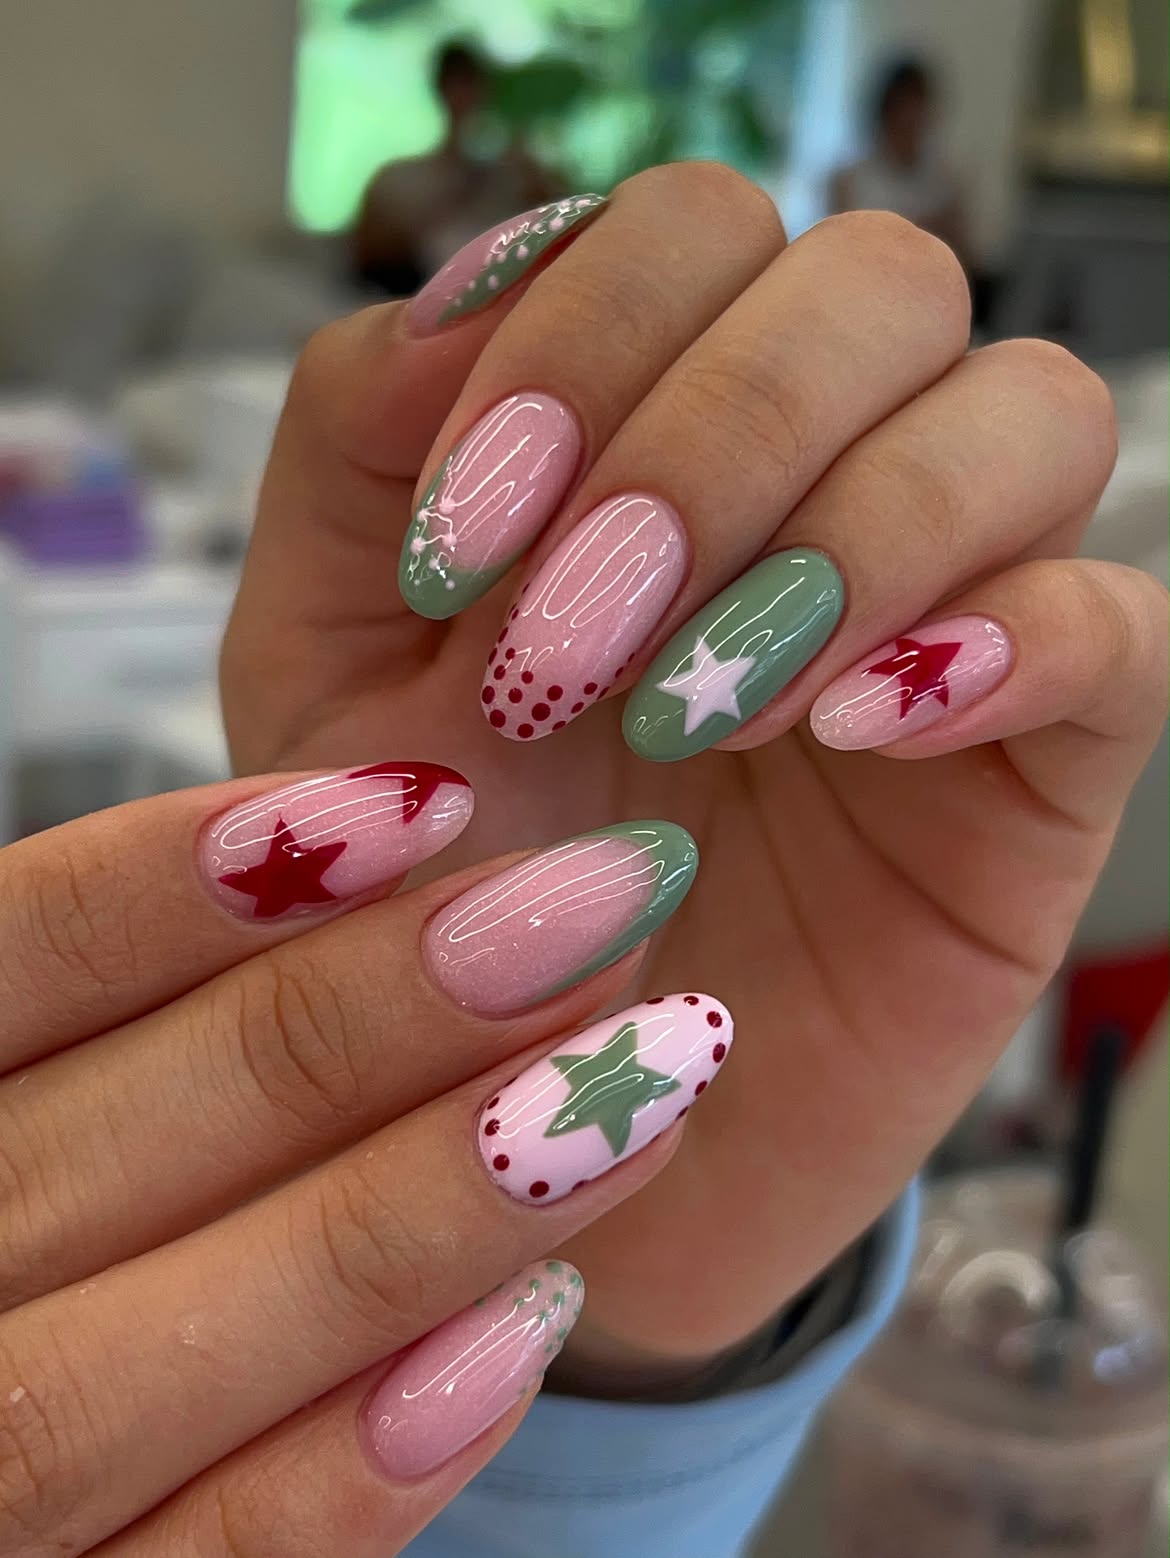
Sage green changes the mood of red and green nail art by making the contrast calmer and less traditional.
- The glossy pink base carries scattered red dots, large stars, soft green sections, and a few delicate white details.
- Some nails are mostly open, while others use a full sage panel or an angled sweep of color.
- That shift in coverage keeps the long almond set moving from light to bold.
A useful trick here is to vary the size of the stars. Large shapes become focal points, while tiny dots fill narrow spaces near the tips without competing.
The subtle shimmer in the pink base catches light across every nail and acts like a quiet finish that ties the different placements together.
11. Repeat One Peppermint Swirl in Red and Green Colorways
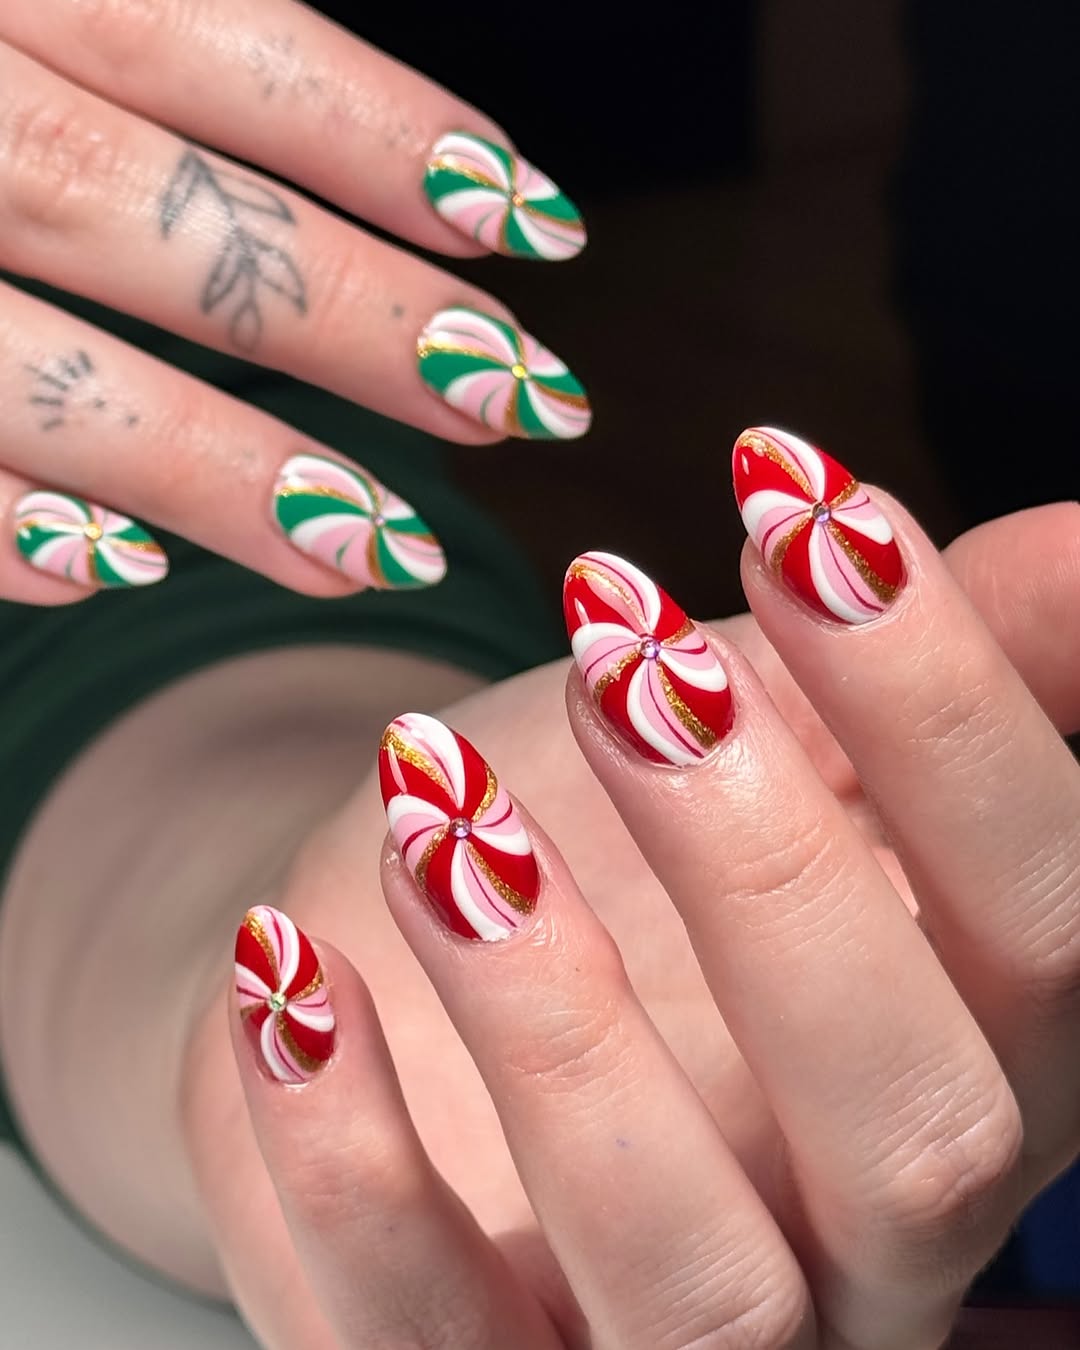
Pinwheel swirls make red and green feel playful without relying on stripes, dots, or small holiday icons.
The foreground set uses red, white, and pale pink curves, while the second hand repeats the same design in green. Every swirl turns around a small gem at the center. Fine gold glitter traces selected sections, adding warmth and helping the curved shapes stand apart.
Repeating the same layout in two colors is the clever part. It creates a matched look across both hands while allowing each palette to stay clear.
For clean movement, keep the curved bands wider near the outside edge and narrow them as they reach the center. The shape should look like it is turning, not like straight wedges meeting in the middle.
Curve every band toward one small center point.
Keep the pink and white spaces visible.
Trace only a few sections with gold glitter.
Avoid drawing straight wedges from the center.
Do not outline every curve with glitter.
Keep the center gem small so it does not hide the swirl.
12. Balance Plaid and Mini Wreaths on Short Red and Green Nails
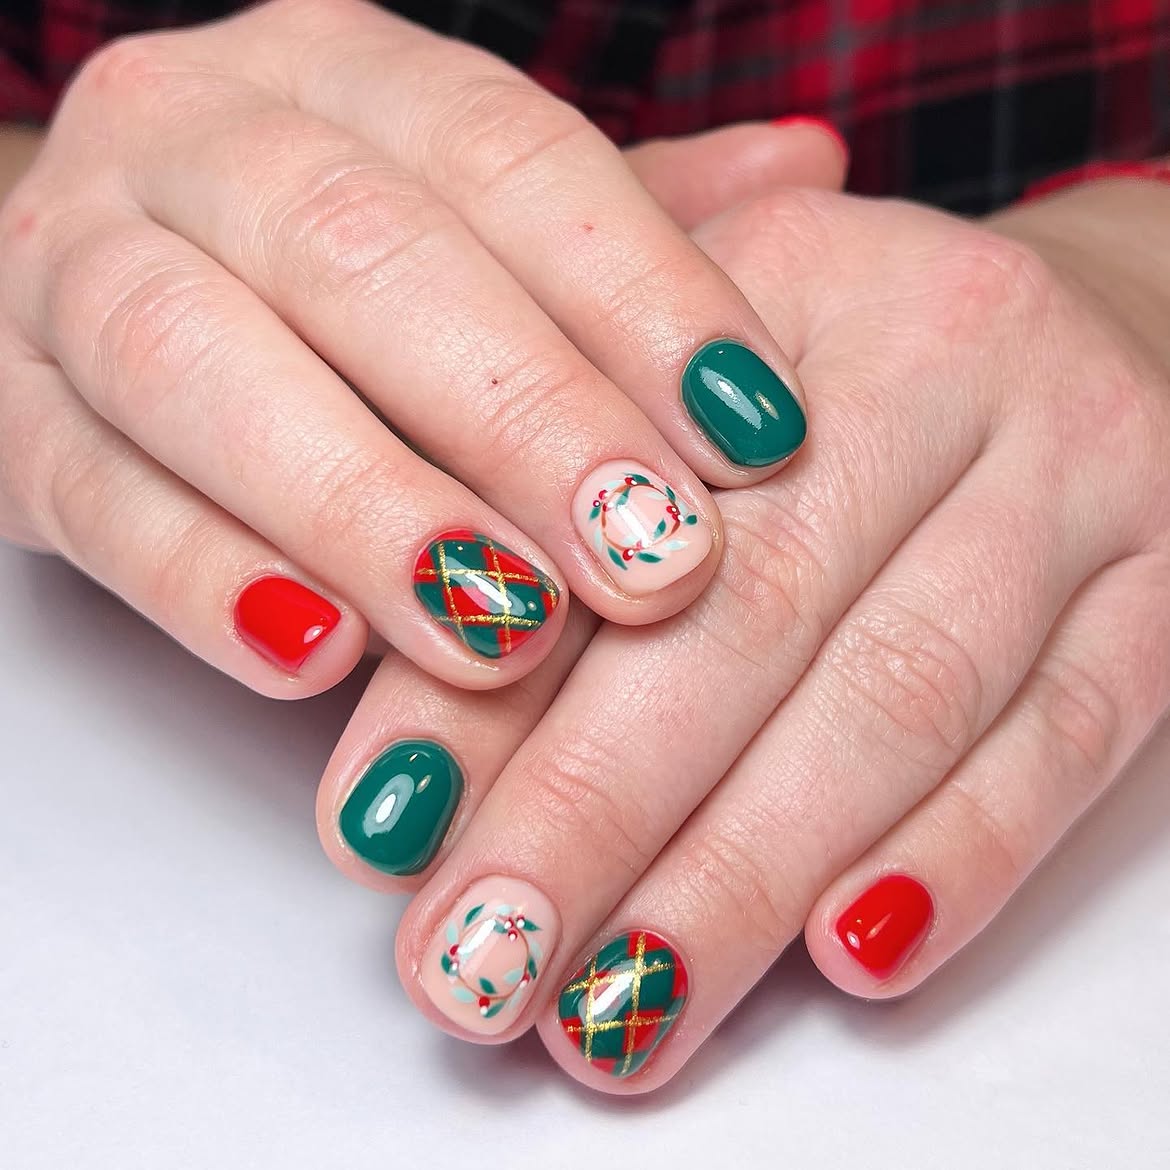
Short nails can carry detailed holiday art when the design is divided into clear roles.
Glossy red and deep teal nails provide simple blocks of color. The plaid accents combine red and green bands with fine gold lines, while the pale pink nails hold small wreaths made from curved green leaves and red berries.
The wreaths stay readable because they sit in the center of an open base. Plaid is busier, so it appears on separate fingers with no extra motif layered over it.
This is a useful layout for compact nails: two solids, one structured pattern, and one small illustration. Repeating those roles across both hands adds detail without forcing every idea onto every nail.
Use glossy red and green nails as simple color anchors.
Reserve one accent nail for red, green, and gold plaid.
Center a small leafy wreath on a pale pink base.
Repeat the same roles across both hands for balance.
13. Mix Plaid, Bows, and Gems Like Bright Holiday Gift Wrap
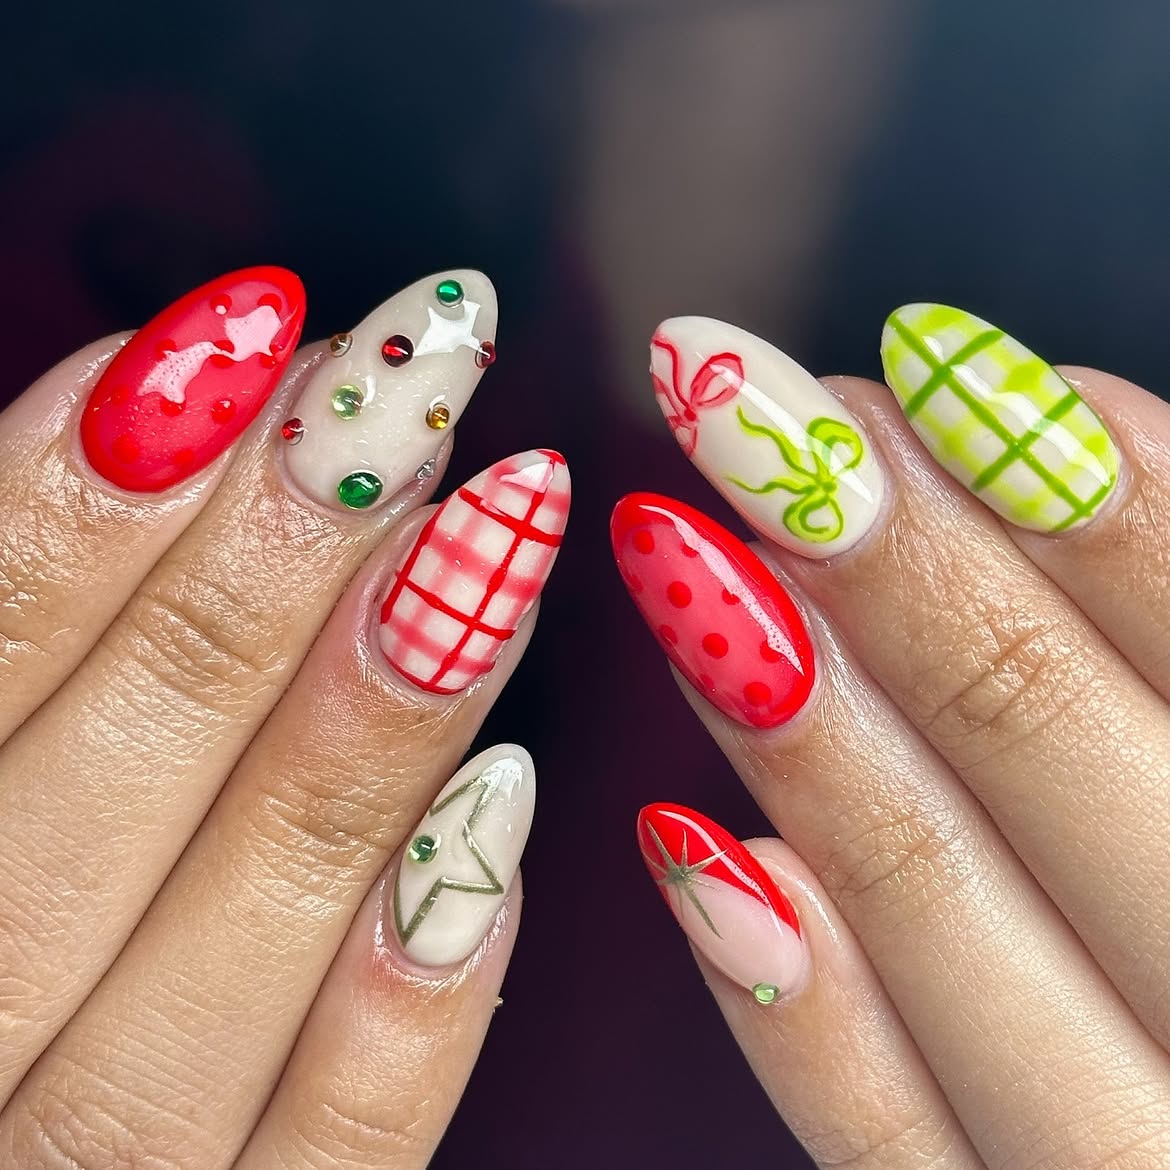
This set borrows the color and pattern energy of stacked holiday presents.
Creamy bases keep the almond nails light, while vivid red and lime green create the stronger sections. Plaid, ribbon curves, tiny stars, dots, and reflective gems make every finger feel like a separate wrapped package.
Details that build the look:
- Red jelly nails bring soft dots and flowing white ribbon shapes.
- Red and lime plaid create the strongest structured patterns.
- Fine bow outlines add movement without covering the pale base.
- Small stars introduce another gift inspired detail.
- Scattered gems provide bright points of red, green, gold, and silver.
The manicure stays readable because each nail carries one main job. Plaid handles pattern, bows provide line art, and jewels supply sparkle. A glossy finish connects the different surfaces.
Give each nail one clear role: one bold pattern, one fine drawing, or one group of gems. Separating those details keeps the full set playful without making it crowded.
14. Tie Red Plaid and Green Bows Together With Gold Details
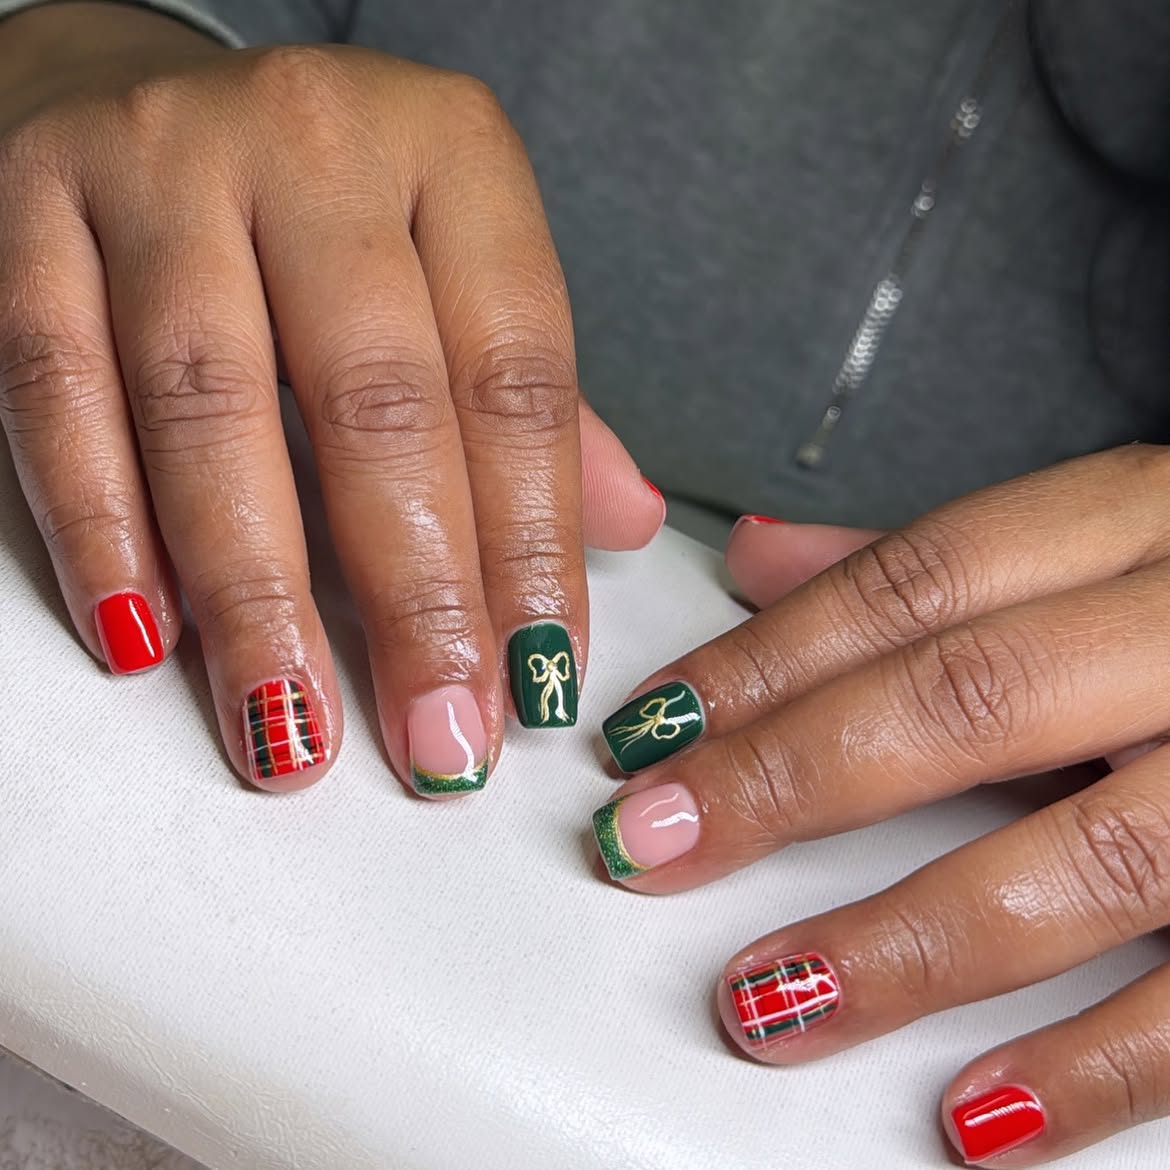
Gold is the small detail that makes this classic red and green manicure feel coordinated.
Glossy red nails create bright anchors, while deep forest green nails carry fine ribbon bows. Red plaid accents introduce green, white, and gold crossing lines. Nude nails with sparkling green tips provide open space between the full color designs.
Look closer at the placement: Gold appears as narrow plaid lines, bow outlines, and a slim border above the glittered tips. Repeating it in small amounts links three different patterns without taking attention away from the main colors.
The short square shape keeps every motif compact and readable. This layout combines plaid, line art, glitter, and solid polish while giving each detail enough room to stand on its own.
15. Split Red and Green Glitter Across Both Hands
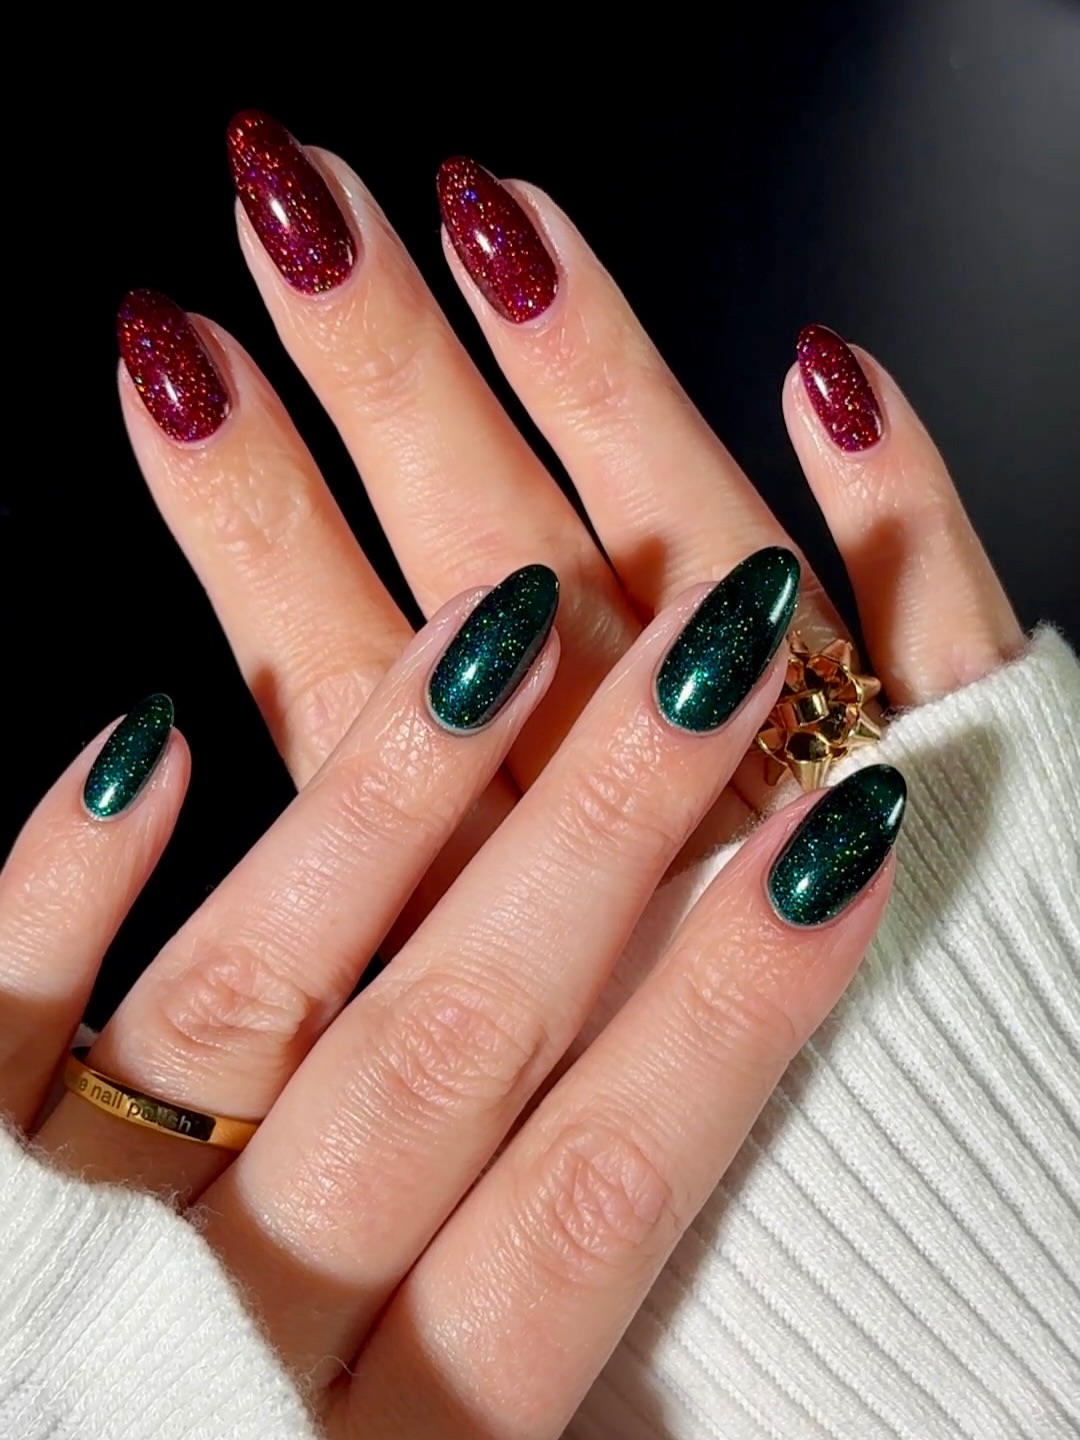
Sometimes the cleanest red and green manicure skips every motif and lets the polish finish carry the idea.
One hand is covered in deep ruby red shimmer, while the other uses dark emerald green. Fine reflective particles scatter through both shades, so the two colors feel connected even though they never appear on the same nail.
Why the split looks polished: Every nail shares the same almond shape, full color coverage, glossy surface, and fine sparkle. Repeating those elements makes the separate color choices feel deliberate.
The darker tones give the manicure a rich seasonal mood, while the tiny flashes of light keep the solid polish from looking flat. It is a simple approach with a strong visual payoff.
Deep red creates the warmer side of the manicure, with fine reflective sparkle adding movement.
Dark green provides a cooler contrast while repeating the same shimmer, shape, and glossy coverage.
16. Add One Abstract Emerald Accent to Solid Red, Green, and White Nails
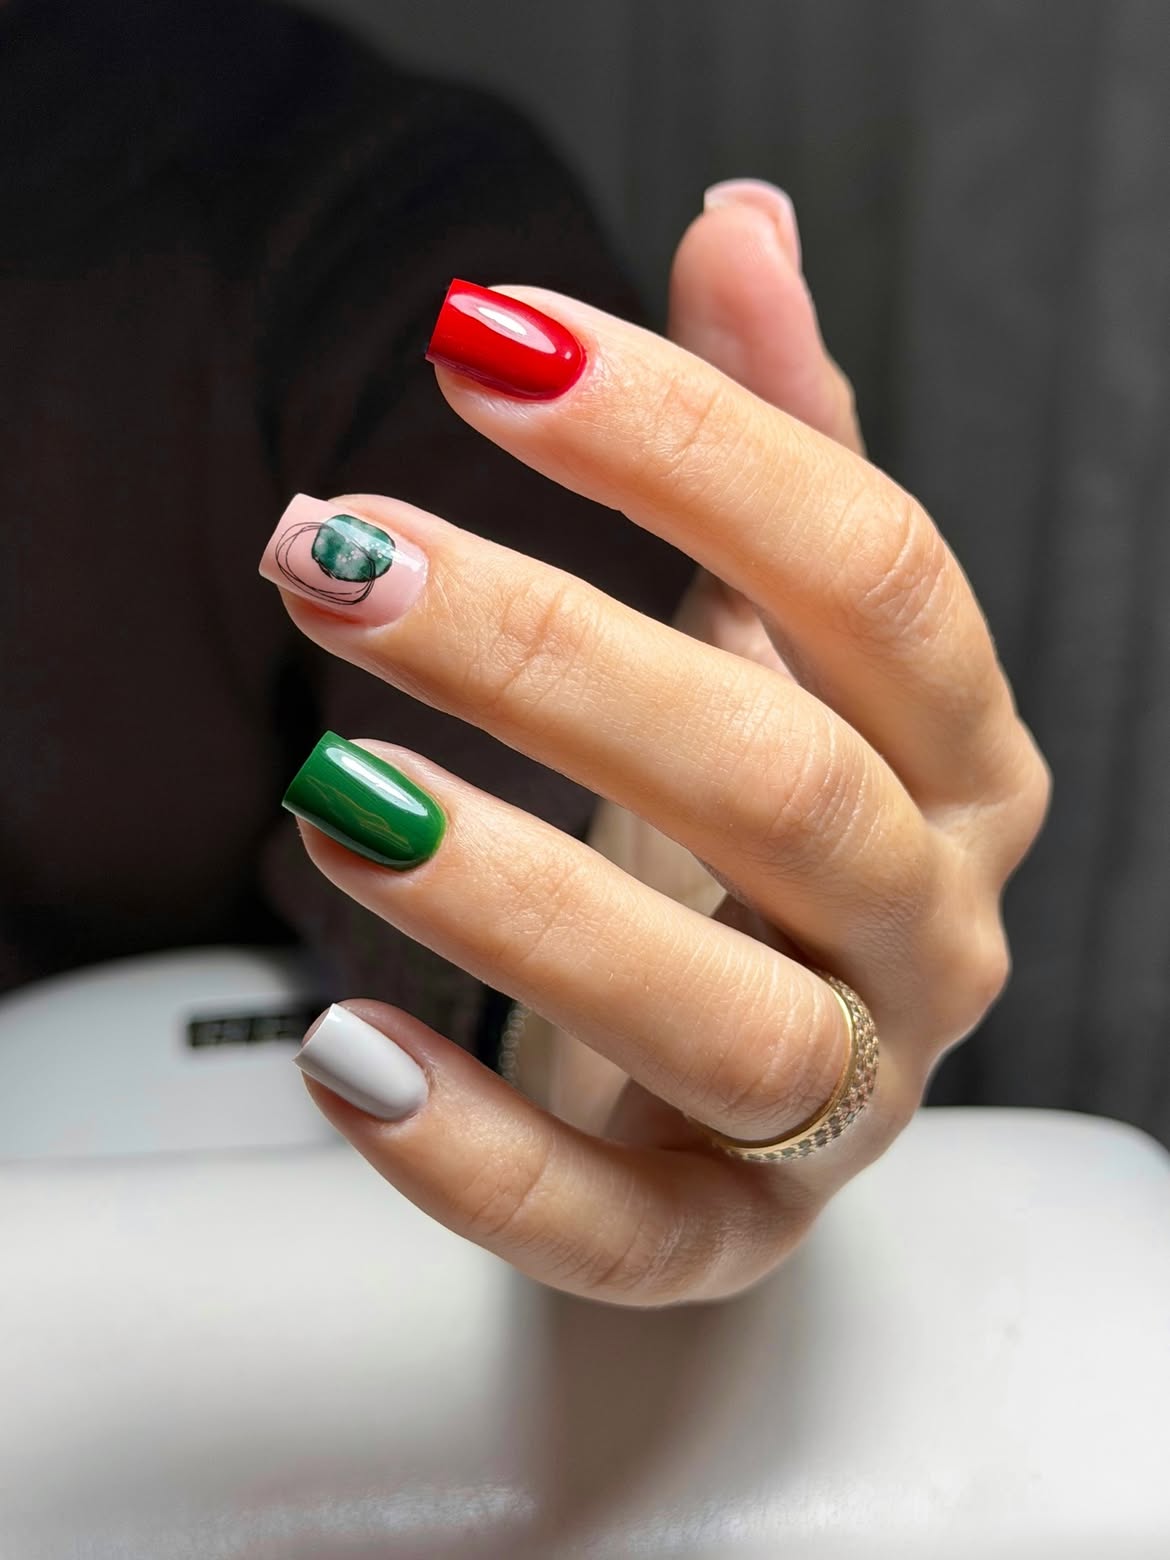
A single abstract accent is enough to give this simple red and green manicure a distinct point of view.
- Bright red, deep green, and clean white cover three short square nails with smooth, glossy color.
- The remaining nail keeps a nude base and holds an emerald watercolor shape surrounded by loose black circles.
- That small piece of line art feels almost like a polished stone or ornament, but the image stays abstract.
The balance is easy to copy: Use solid polish on most nails, then place all the fine detail on one accent finger. Matching the green inside the artwork to the solid green nail connects the design, while the white nail gives the darker shades a visual pause.
📌 Design Note
Place the most detailed artwork on one pale accent nail, then repeat one of its colors as a solid shade elsewhere in the manicure.
17. Use Gold Bows and Tiny Studs to Dress Up Red and Green Nails
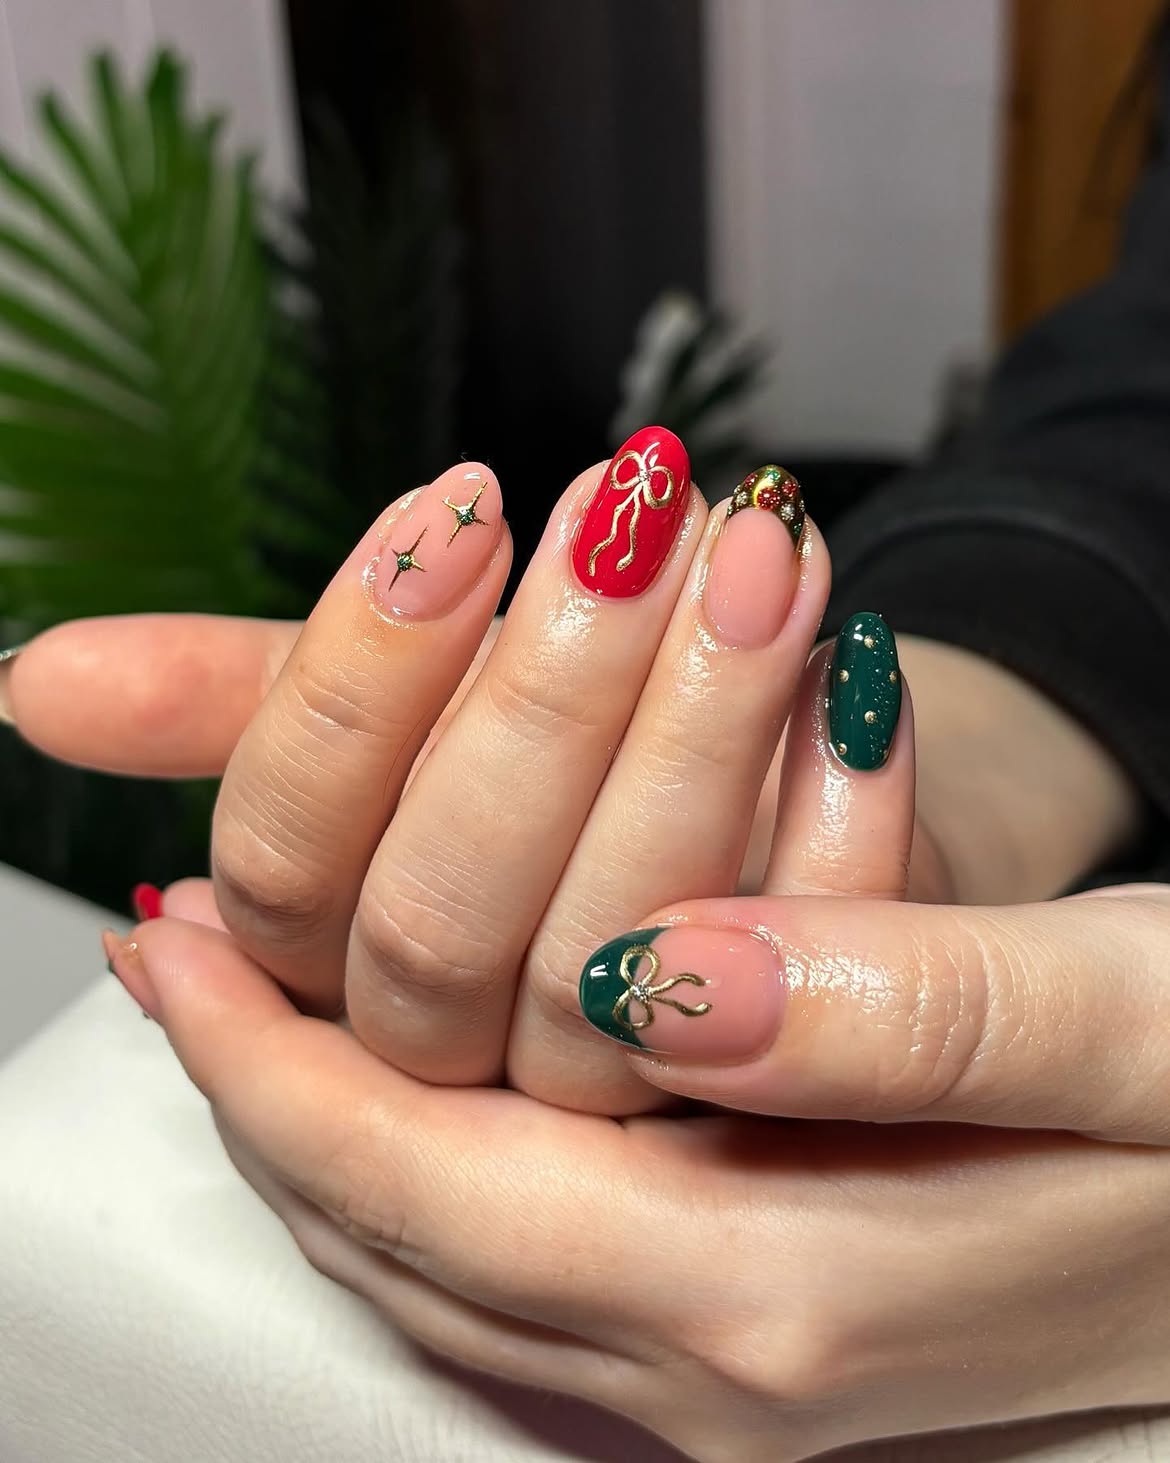
Metallic gold gives this red and green manicure a polished finish without covering the clean color story.
The red nail carries a thin gift bow, while the thumb repeats a smaller bow over a curved green tip. A solid green nail is dotted with tiny gold accents. The pale nails add breathing room through delicate starbursts and a clustered red, green, and gold tip.
What keeps it refined: The metallic details are spaced apart and surrounded by plenty of smooth polish. Larger bows become focal points, while small dots and stars fill the quieter areas.
The result blends solid color, negative space, line art, and raised details without making the short oval nails feel crowded.
| Color Anchors | Gold Accents |
|---|---|
| Glossy red and forest green polish | Fine ribbon bows and tiny dots |
| Full coverage creates bold sections | Open spacing keeps the details clear |
| Nude polish provides visual pauses | Small metallic points connect every nail |