17 Orange and Green Nails That Make Color Feel Fresh
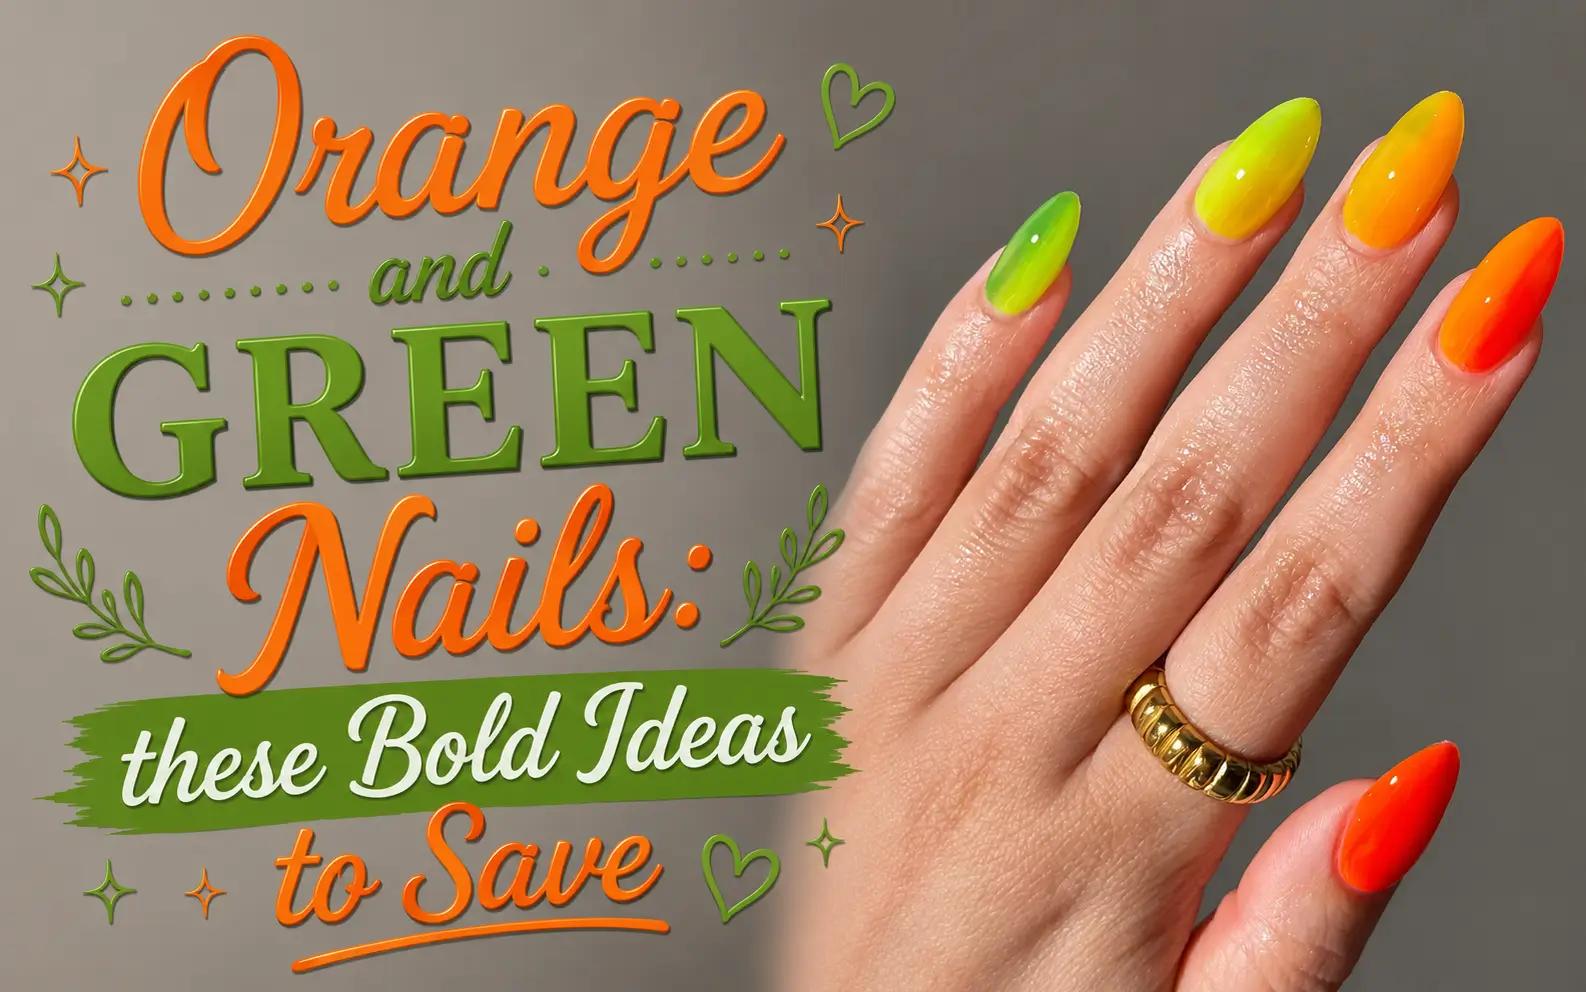
Orange and green can look bold, playful, earthy, or surprisingly polished, depending on the shades and details you choose. Bright lime and tangerine bring strong energy, while olive, teal, coral, and soft mint create calmer combinations that still catch the eye.
These 17 Orange and Green Nails ideas show how flexible this color pairing can be. The collection includes glossy gradients, split color manicures, abstract swirls, reverse French tips, tiny flowers, citrus artwork, marble patterns, glitter stripes, metallic details, and simple solid shades. Some designs use sheer pink or nude bases to give the brighter colors more breathing room. Others cover the full nail with saturated color for a stronger result.
You can copy an entire manicure or borrow one small detail, such as a curved outline, dotted accent, flower center, or contrasting tip. Keep your preferred nail length and shape in mind as you browse, then save the combinations that suit your own style and routine.
17 Viral Orange and Green Nails Designs 2026
1. Neon Orange to Lime Ombre Almond Nails
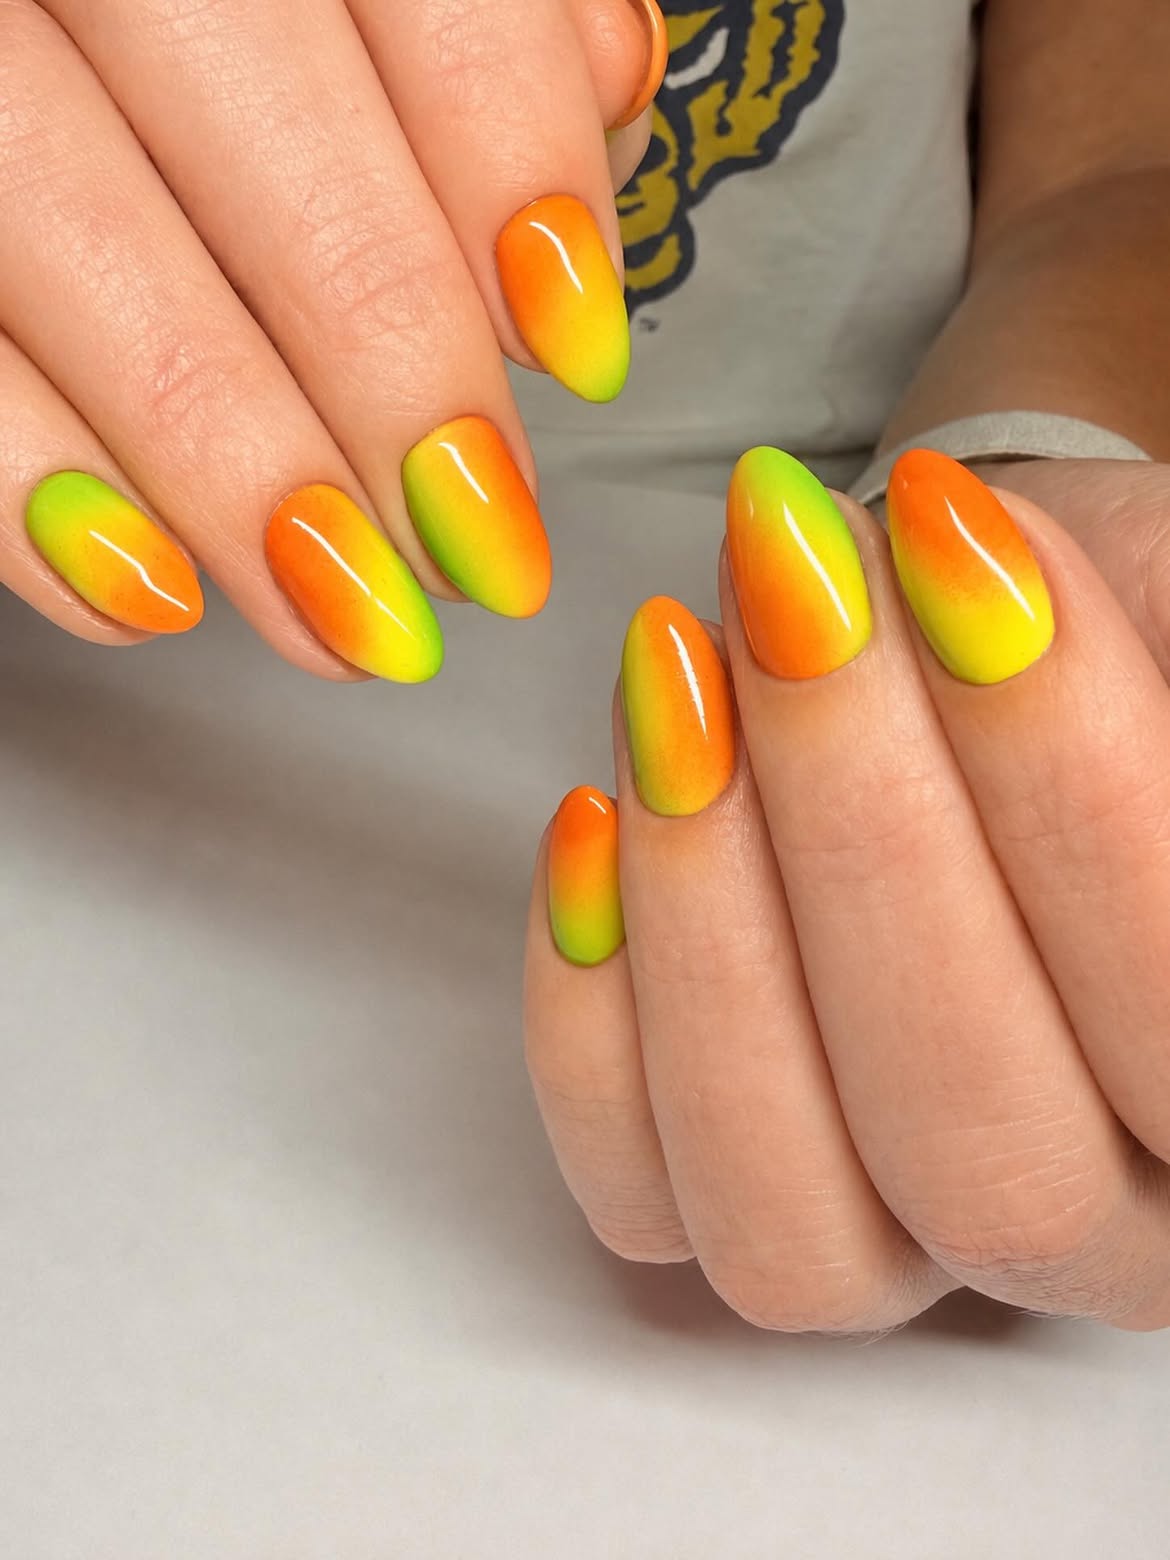
Hot orange melts into sunny yellow and then sharp lime green across these glossy almond nails. The soft sprayed blend keeps the bright colors connected, while the changing direction on each nail gives the set movement without using patterns, gems, or extra decoration.
What makes this design work:
- A yellow center creates a smooth bridge between orange and green.
- The medium almond shape gives the gradient enough space to remain visible.
- Reversing the color placement on selected nails stops the set from looking too uniform.
- A glassy topcoat makes the neon shades appear brighter and cleaner.
For a similar result, build the colors in thin layers and blend while each layer is still workable. Keep the transition soft rather than creating a hard line between shades.
2. Split Orange and Green Swirl Nails
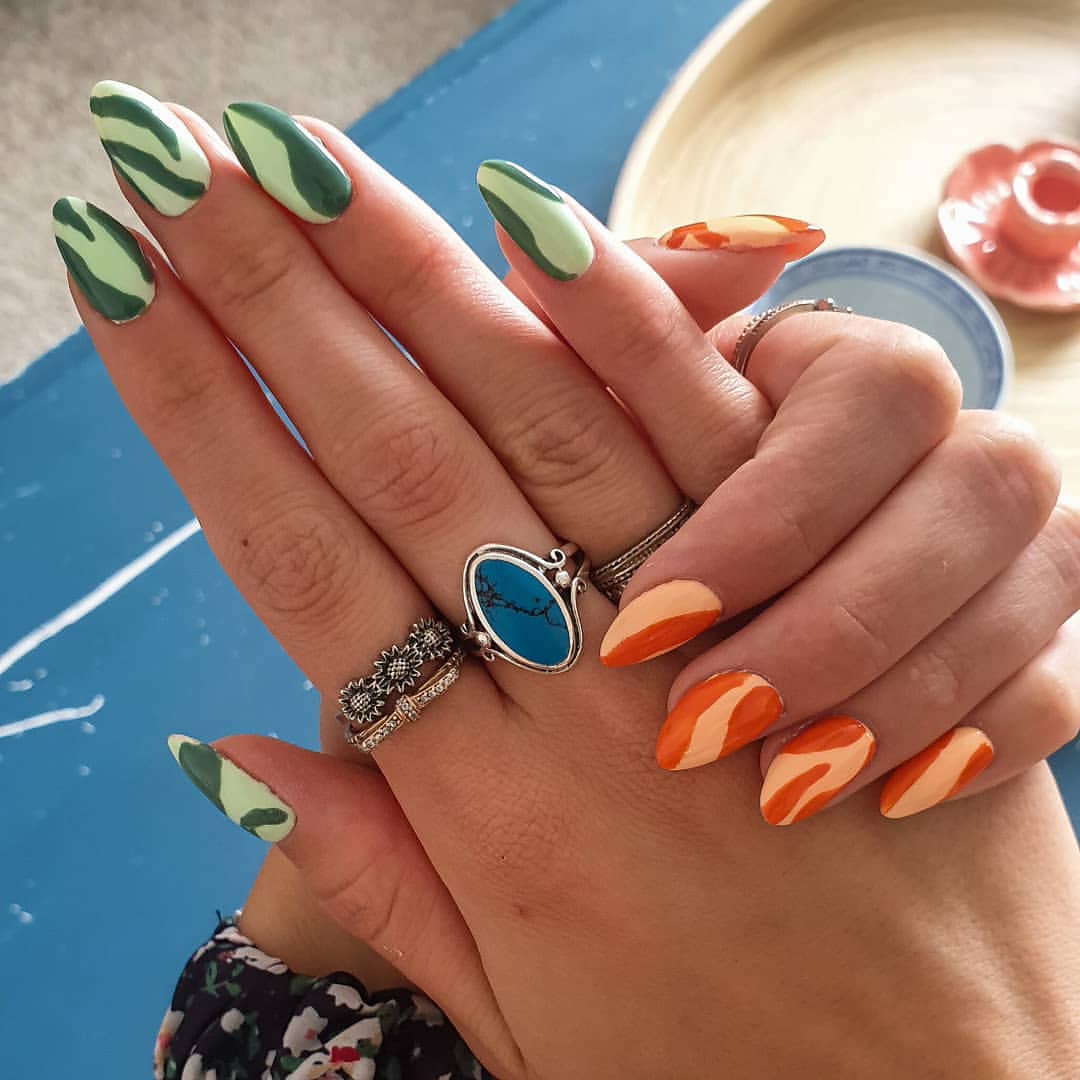
Matching the pattern instead of the polish color gives this two hand manicure its clever balance. One hand pairs a pale mint base with deep green waves, while the other uses a soft peach base with burnt orange curves.
The unifying detail: Both sides repeat the same loose, flowing pattern. The lines change direction and width from nail to nail, which makes the design feel hand painted rather than overly controlled.
Start with two thin coats of the lighter base shade. Once dry, use a fine brush to paint irregular curves along the sides and across selected tips. Leave wide areas of the base visible so the darker colors do not take over. A glossy topcoat smooths the painted edges and connects both color stories.
| 🌿 Green hand | 🍊 Orange hand |
|---|---|
| Base: pale mint green | Base: soft peach |
| Pattern: deep green waves | Pattern: burnt orange curves |
| Keep: varied line widths | Repeat: the same freeform movement |
3. Retro Orange Waves With Olive Daisy Accents
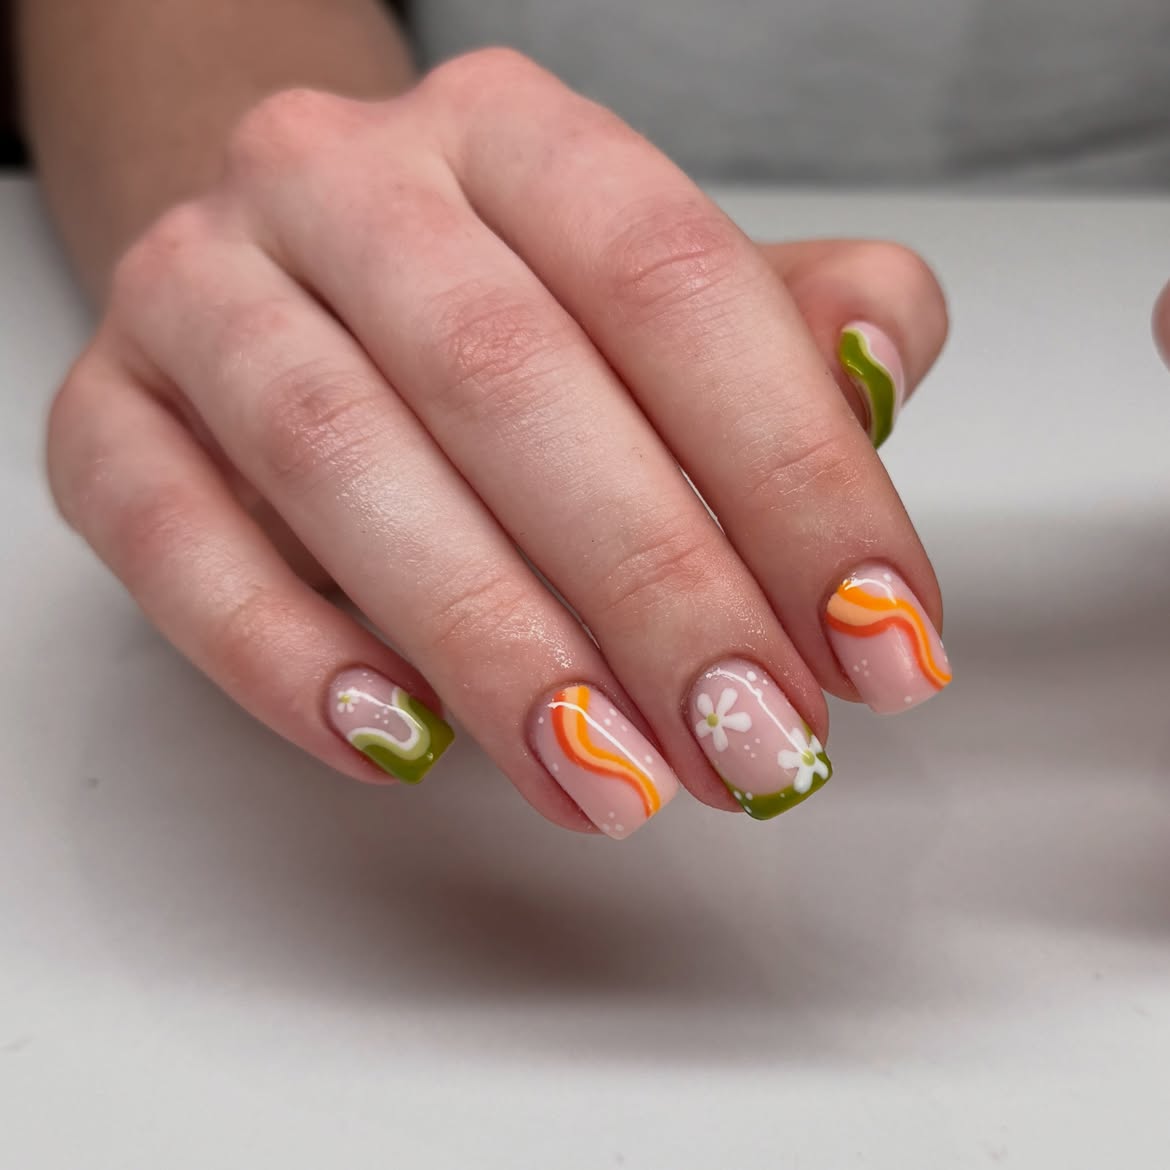
Retro curves and tiny daisies share the same sheer pink base, giving this mixed design a clear visual link. Bright orange and yellow waves bring warmth, while olive green tips make the palette feel grounded.
Pattern mix: Some nails carry flowing stripes, while others use green corner tips, white curves, or small flowers. Changing the artwork keeps every nail interesting.
Color balance: Orange appears on selected nails instead of across the full set. Green returns in the tips and flower centers, helping the two sides of the palette feel connected.
Shape choice: The short square shape gives the curves and daisies a neat frame. Leave open space around each design so the small details remain easy to see.
Build this mixed nail set
If you love softer green shades, these ideas also pair beautifully with our 16 Matcha Green Nails article for a calmer, creamy green manicure look.
4. Neon Orange and Green Nails With Hot Pink Corners
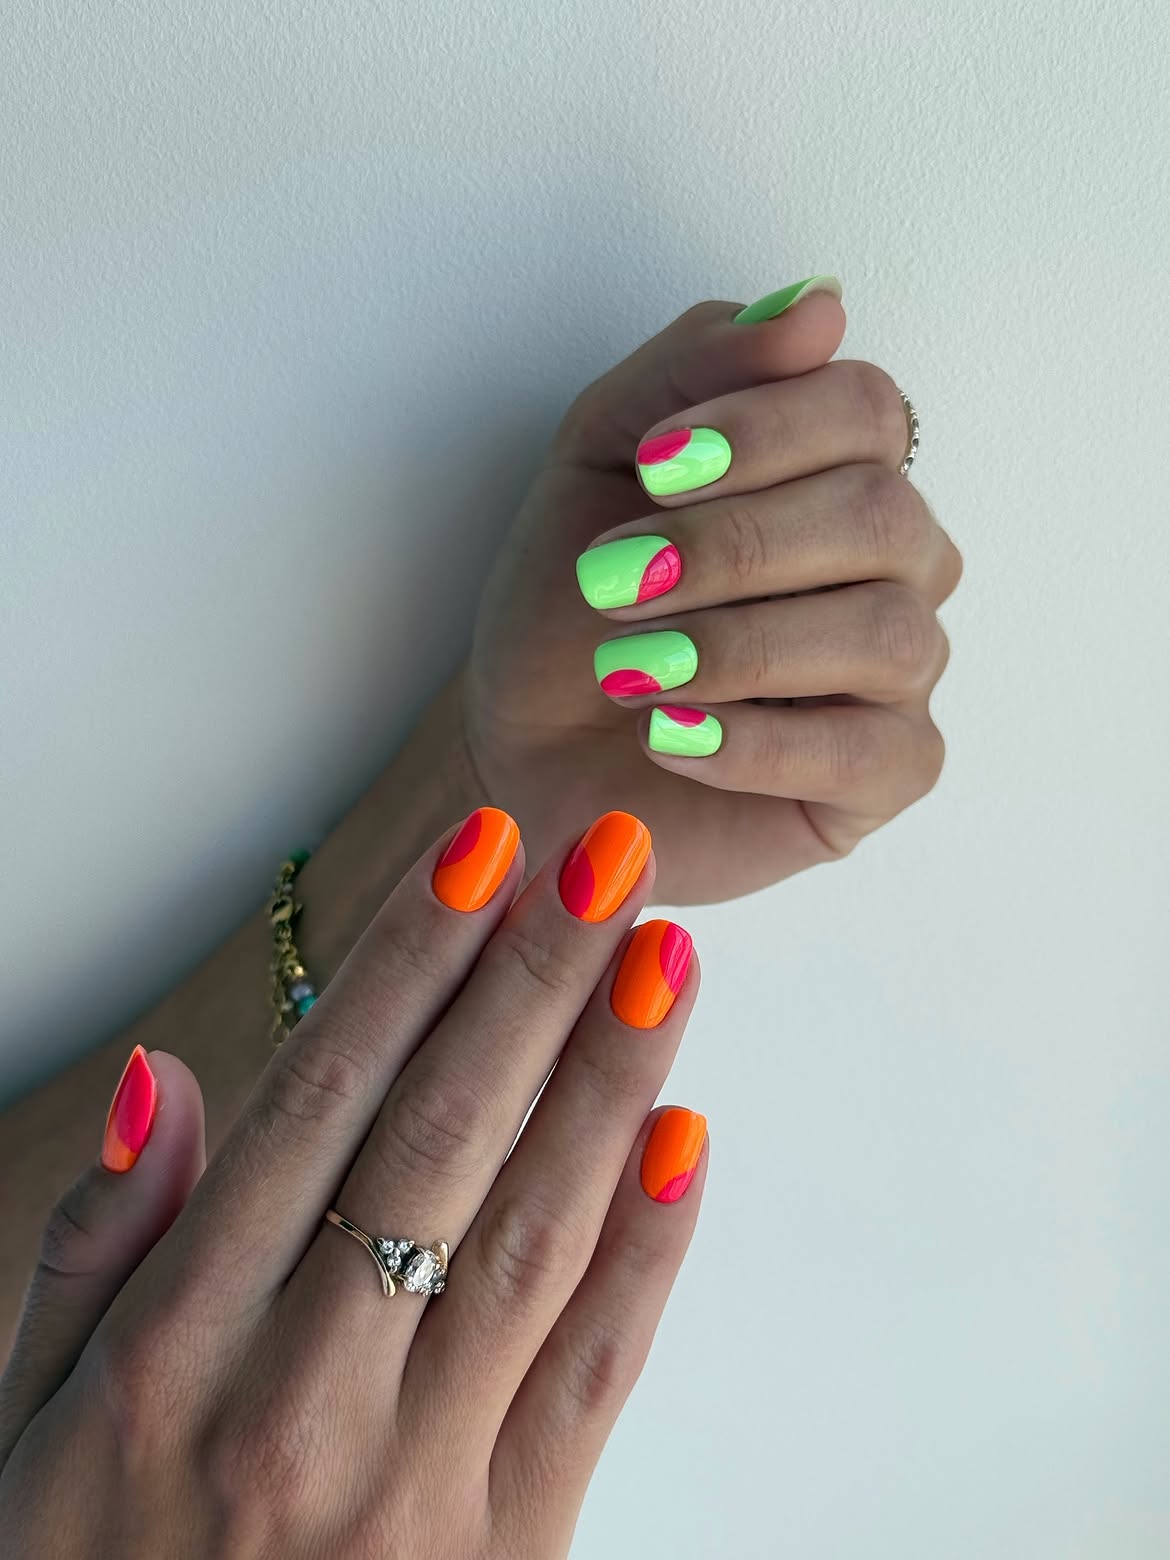
A repeated hot pink accent turns two different neon manicures into one coordinated set. One hand uses a vivid lime green base, while the other is coated in bright orange. The pink curves appear in changing positions, creating a playful connection between both hands.
To recreate the rhythm:
- Apply one bold base color to each hand.
- Paint rounded pink sections near the sides, tips, or cuticle area.
- Change the placement on every nail while keeping the curved shape consistent.
- Seal the design with a glossy topcoat to sharpen the neon contrast.
Short rounded square nails suit this idea because the wide surface gives each curved accent enough room without making the design feel crowded.
A third color can connect separate orange and green hands. Repeat the same accent shape, then move it around each nail to keep the set lively.
5. Orange and Green Marble Nails With Sheer Accent Tips
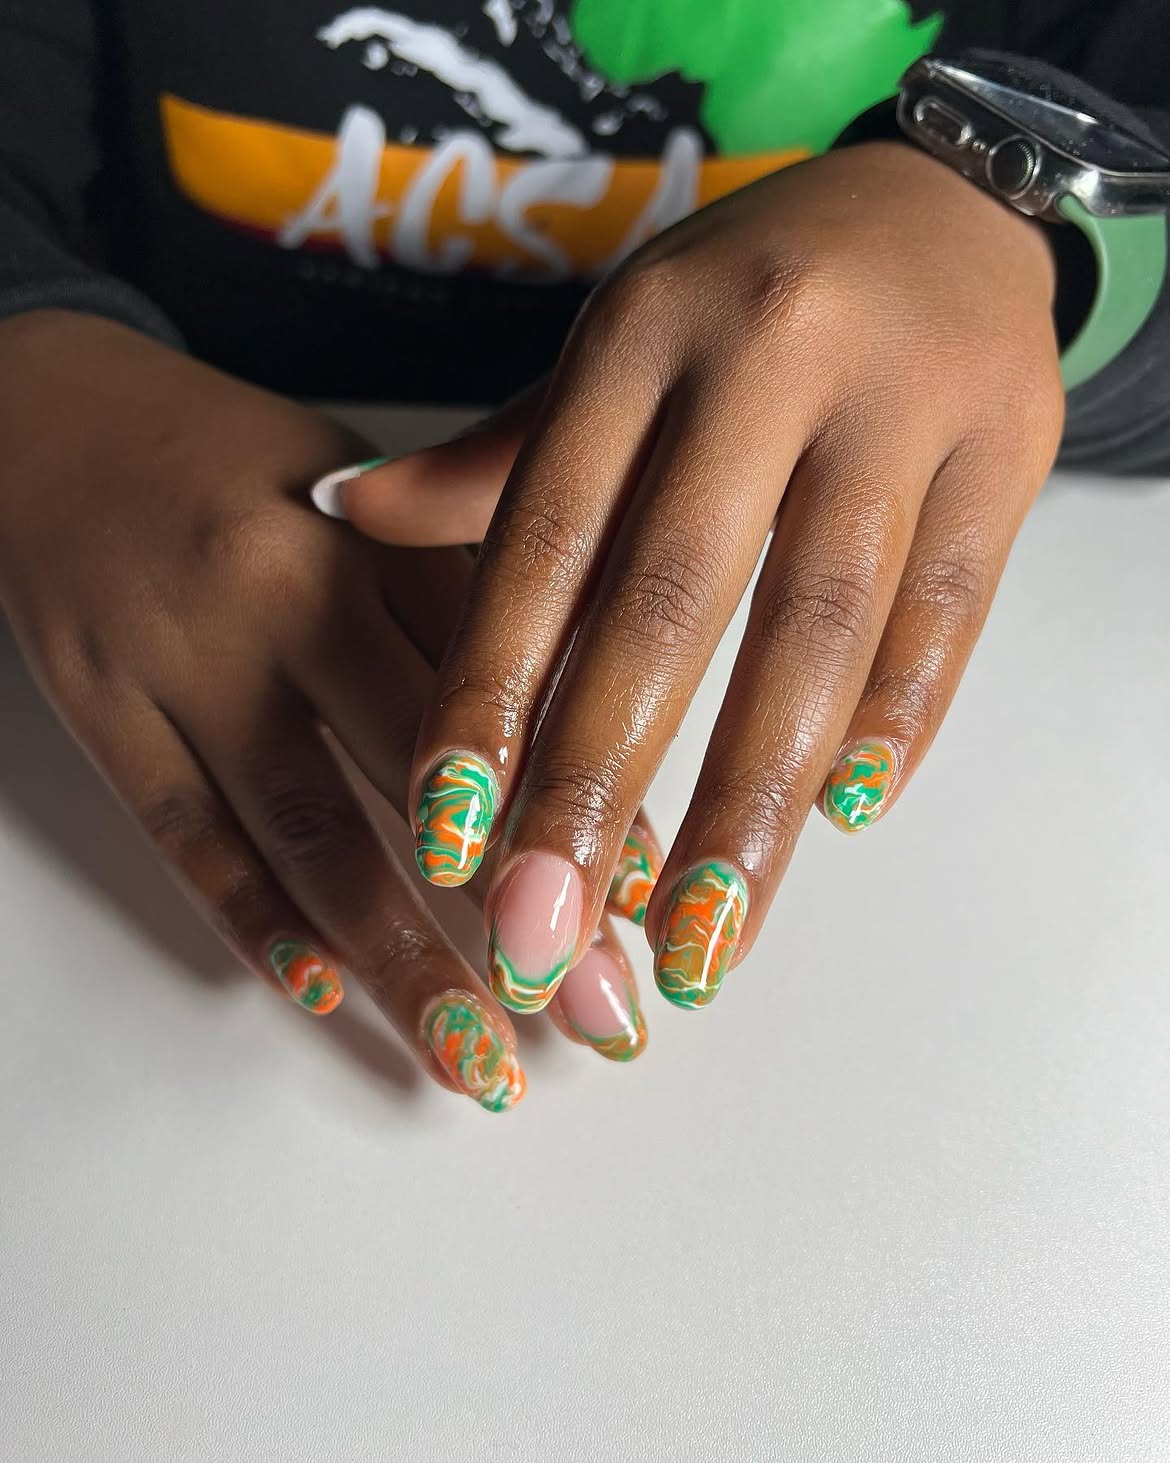
Dense color gets breathing room in this orange and green marble manicure. Most nails are covered with flowing ribbons of orange, green, white, and small touches of yellow. The accent nails keep a sheer pink base and carry the same colors around the tip.
Full marble nails: Closely layered curves create a lively, fluid pattern. Every nail changes slightly, so the artwork feels natural instead of copied.
Sheer accent nails: Open space softens the busy pattern. Thin colored lines around the edge connect these quieter nails to the rest of the set.
Repeat every shade on both nail styles, then apply a glossy topcoat to deepen the colors and smooth the fine painted lines.
Use full marble on selected nails.
Repeat the same colors in thinner lines on the sheer accents.
Do not fill every open area with another curve.
Keep some sheer base visible around the accent tips.
6. Deep Teal Green and Burnt Orange Graphic Nails
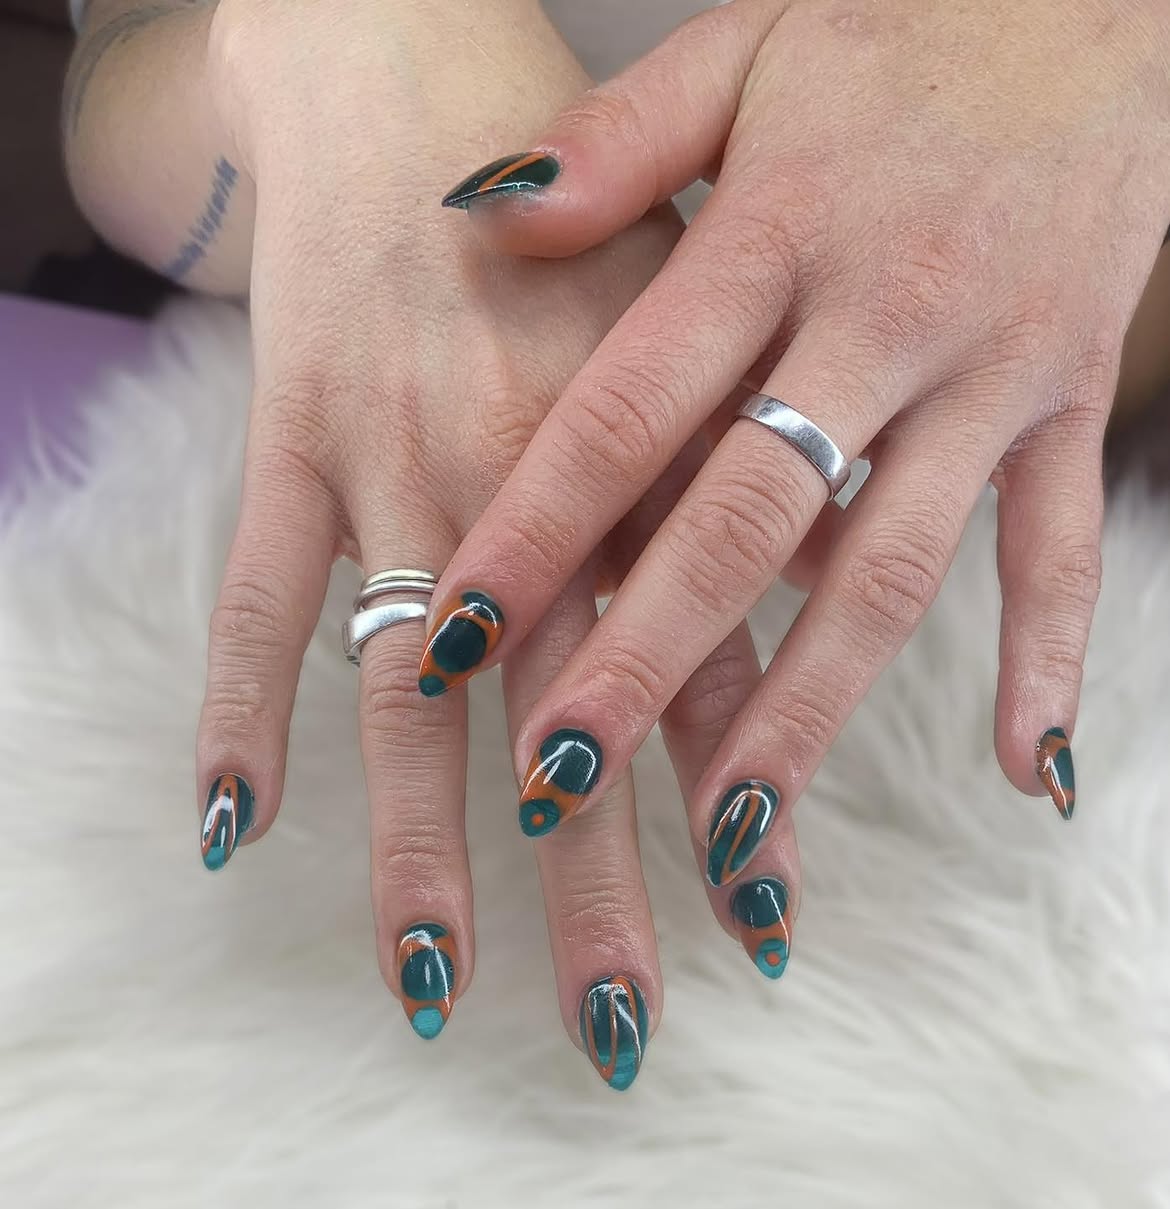
Deep teal green takes the lead in this bold almond manicure. Burnt orange curves, turquoise tip details, and fine pale outlines create a graphic pattern that changes across every nail.
- Shape: The tapered almond tips make the long curved sections look sharper.
- Placement: Orange appears along the sides, across selected tips, and inside rounded shapes.
- Repetition: Small circles, narrow outlines, and teal pointed tips connect the varied designs.
- Finish: High shine brings depth to the darker green base and keeps the detailed lines clear.
Map the larger orange sections first, then add the smaller curves and outlines. Leave a little distance between neighboring shapes so each color remains easy to identify.
7. Pistachio Green and Orange Stripe Nails With Daisies
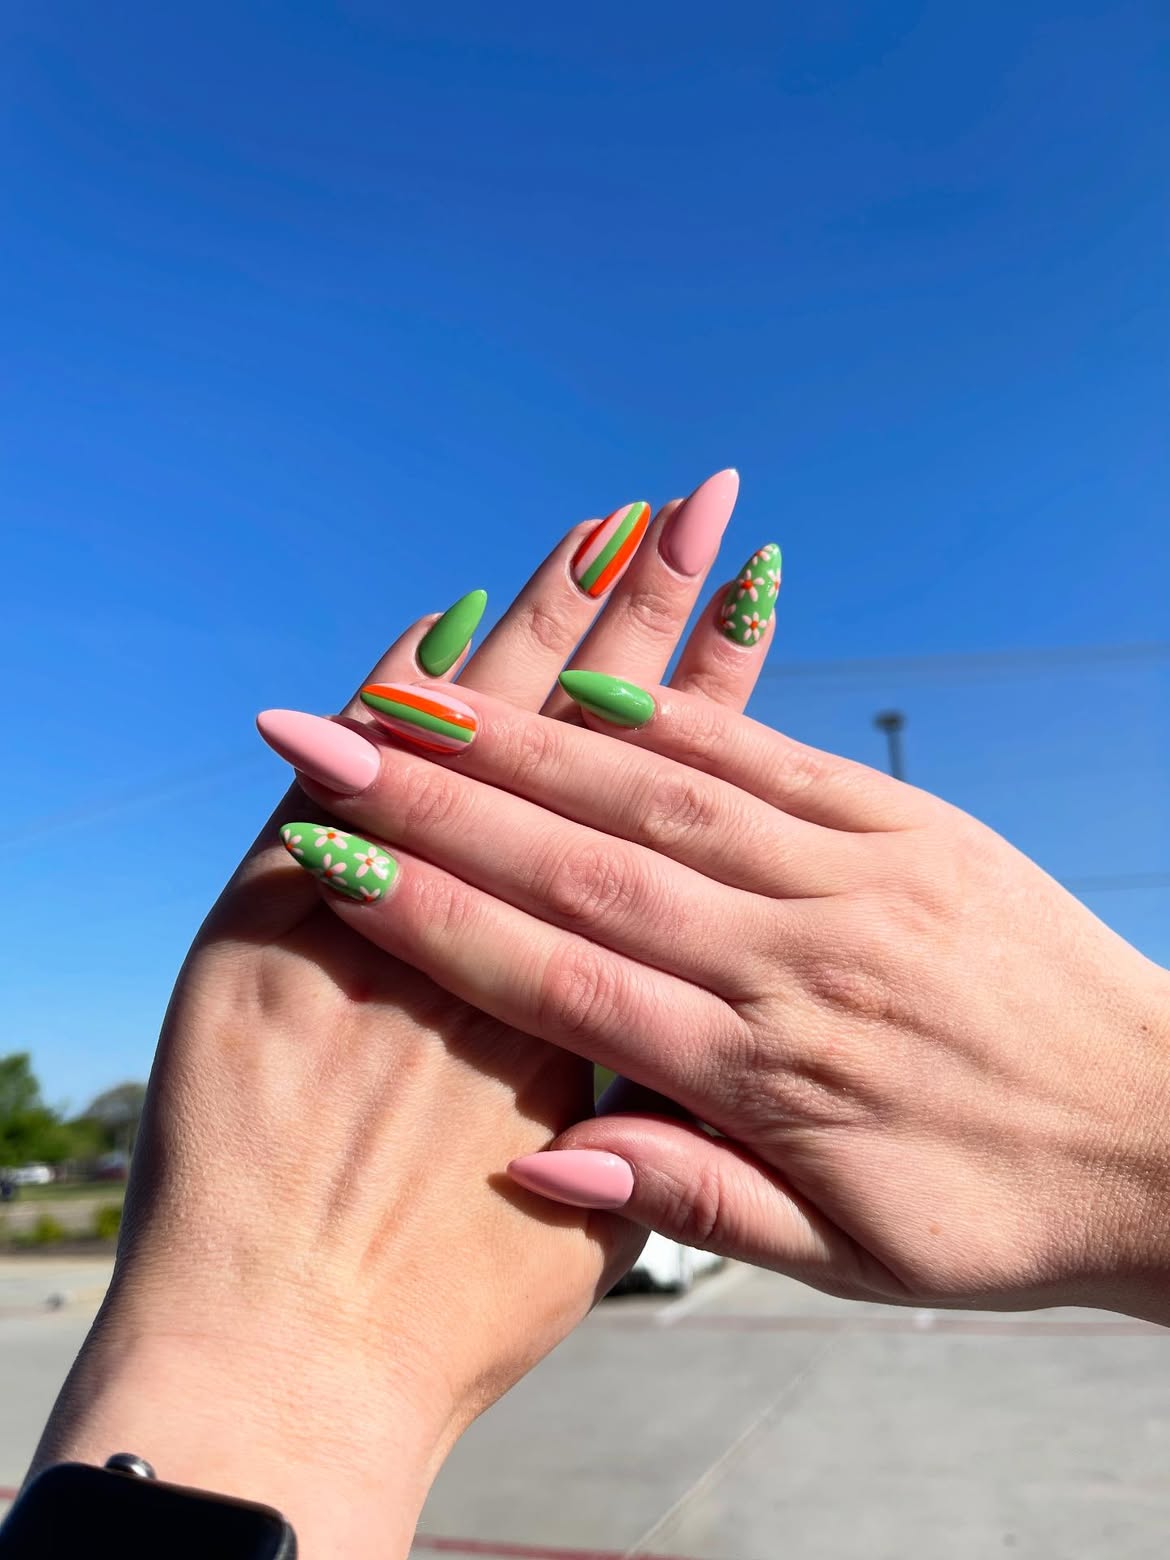
Soft pink gives this cheerful orange and green manicure a calm base. The long almond nails alternate between solid pink, solid pistachio green, striped accents, and small white daisies painted over green.
Orange is used sparingly inside the stripes and at the center of the flowers. This keeps the warmer shade noticeable without pulling attention away from the green. Repeating the same green across the solid nails, stripes, and floral backgrounds makes the varied artwork feel connected.
Keep the daisies small and leave space between them. A glossy finish brightens the colors while preserving the clean shape of each stripe and flower.
Choose the anchors. Use soft pink and pistachio green as the main solid colors.
Add narrow stripes. Bring orange and green together on a few selected nails.
Finish with flowers. Paint small white daisies with orange centers over the green base.
8. Coral Orange and Teal Green Glitter Nails With Hearts
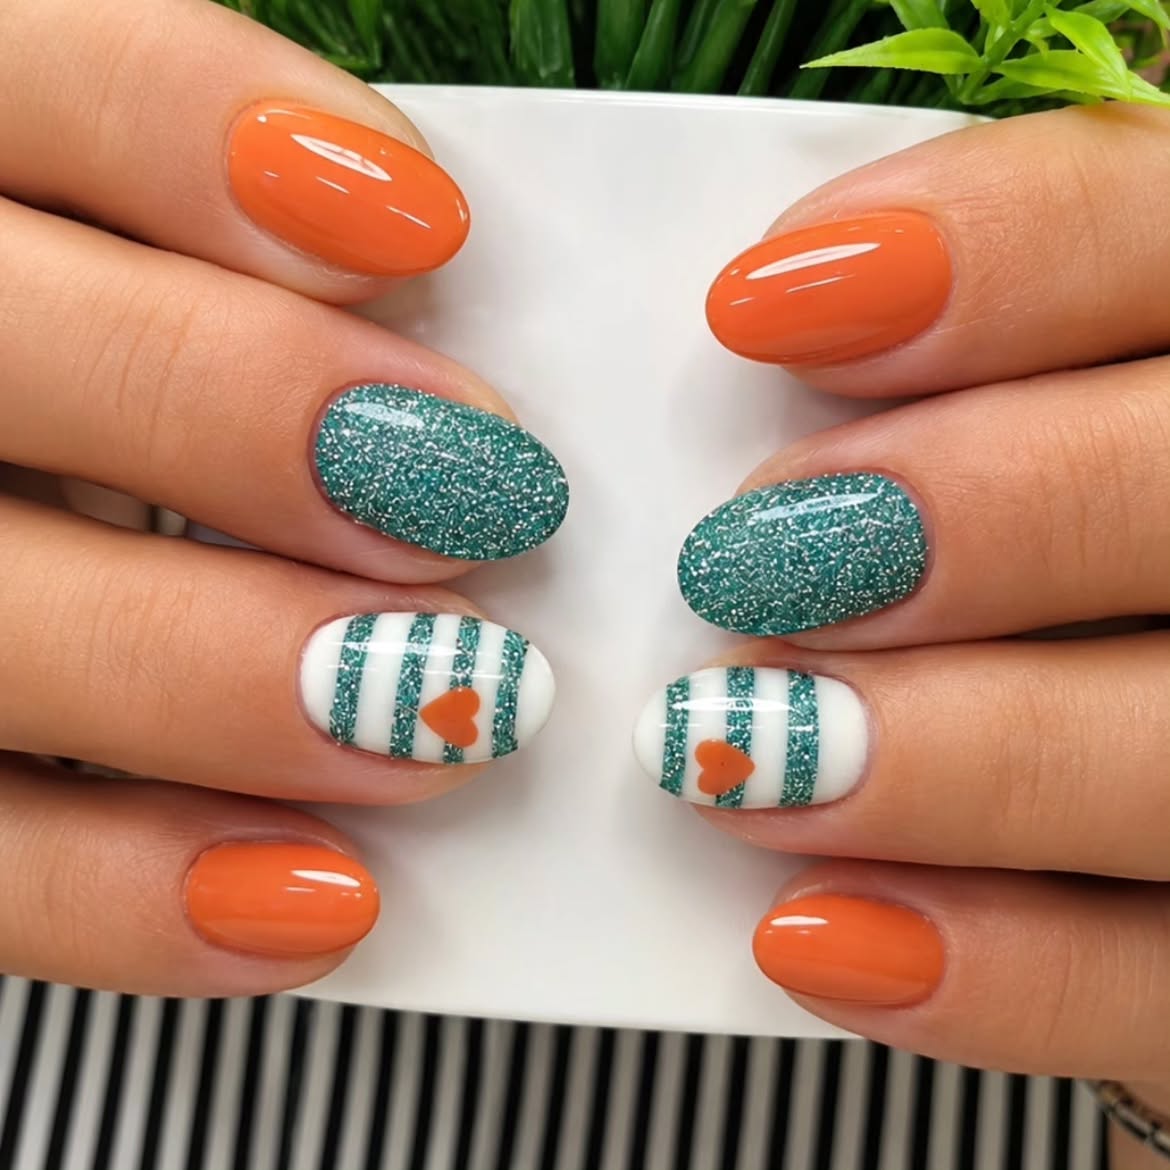
This manicure turns a simple alternating color plan into something more playful. Glossy coral orange, sparkling teal green, and crisp white accents each have a separate role.
The nail plan:
- Solid orange nails provide warm blocks of color.
- Teal green nails carry dense silver sparkle.
- White accent nails use narrow vertical glitter stripes.
- Small orange hearts connect the striped nails to the solid orange polish.
The short rounded shape keeps the striped pattern compact and easy to read. Make the spaces between the green lines roughly even, then place each heart near the lower center of the nail. A smooth topcoat over the accent nails helps the stripes and heart edges look clean.
📌 Good to know
Let the white base dry before adding the green glitter lines. Paint the orange heart last so its outline stays clear against the striped background.
9. A Green to Orange Gradient Across the Whole Hand
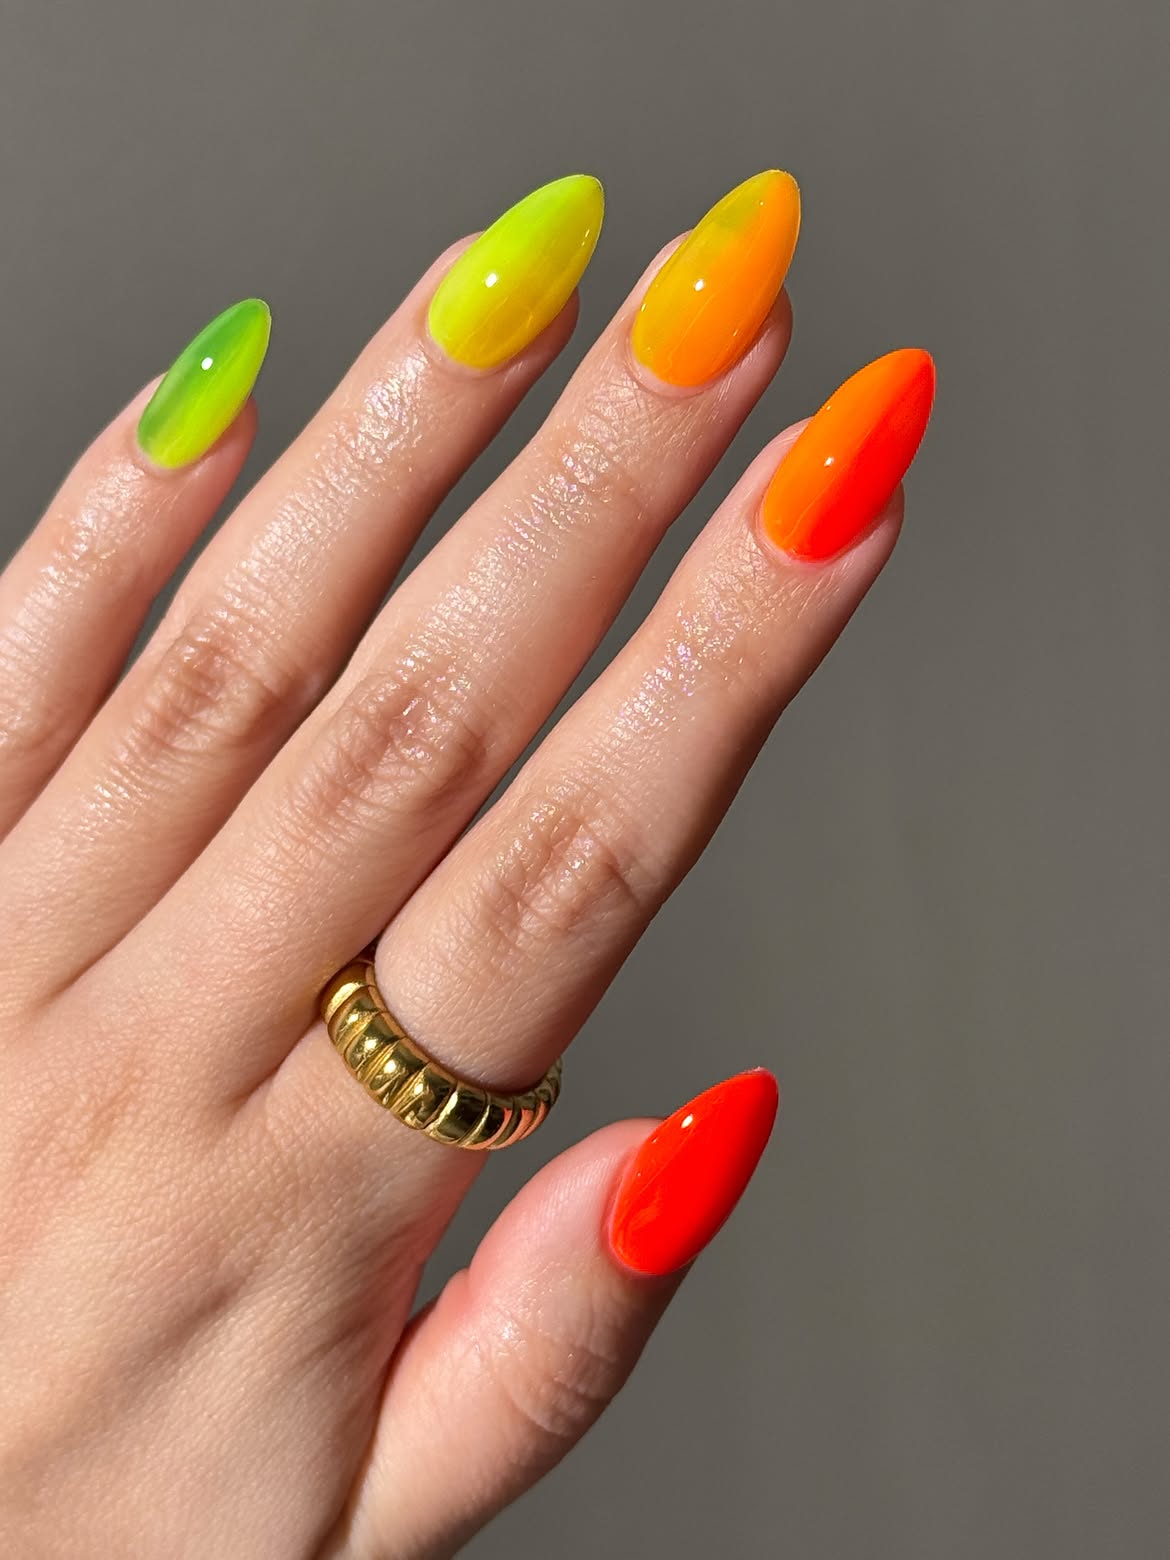
Instead of blending every color on every nail, this manicure creates one continuous transition across the full hand. Green begins on the smallest nail, moves through lime and yellow, then shifts into orange and vivid red.
Each nail also carries a soft change between two nearby shades. This prevents the color sequence from looking like five unrelated solid polishes. The long almond shape gives each blend enough room to develop, while the glossy finish makes the neon colors appear smooth and saturated.
Arrange the shades in order before painting. Keep neighboring colors close enough that every nail links naturally to the next one.
Follow the color flow
Blend neighboring shades inside each nail so the transition continues without a sudden color break.
If bold nail art feels like too much, you can also explore 18 Simple Green Nails for softer ideas that keep the color pretty and wearable.
10. Mint Green Nails With Orange Stripes and Pink Flowers
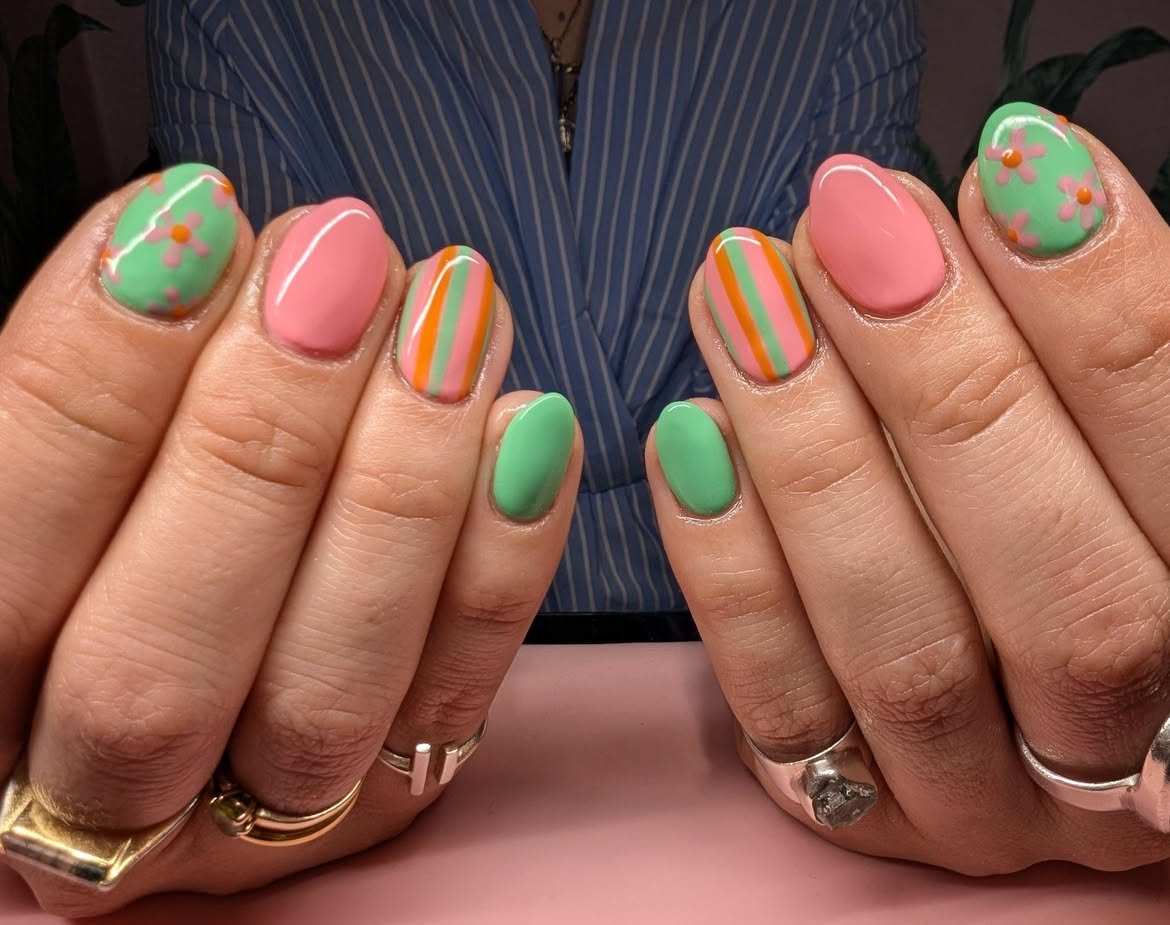
Mint green and soft pink form the main palette, while narrow orange details bring warmth to the striped and floral nails. The short rounded shape keeps the colorful mix neat and approachable.
What changes: Solid nails alternate with vertical stripes and small flowers, so the manicure never settles into one repeated pattern.
What repeats: The same mint green and pink return in every design. Orange appears inside the stripes and at the center of each flower, connecting the two artwork styles.
Keep the striped lines narrow and place the flowers with open space around them. This allows the solid nails to act as quiet breaks between the busier accents.
A balanced design mix
11. Pastel Green and Orange Short Nails With Raised Dots
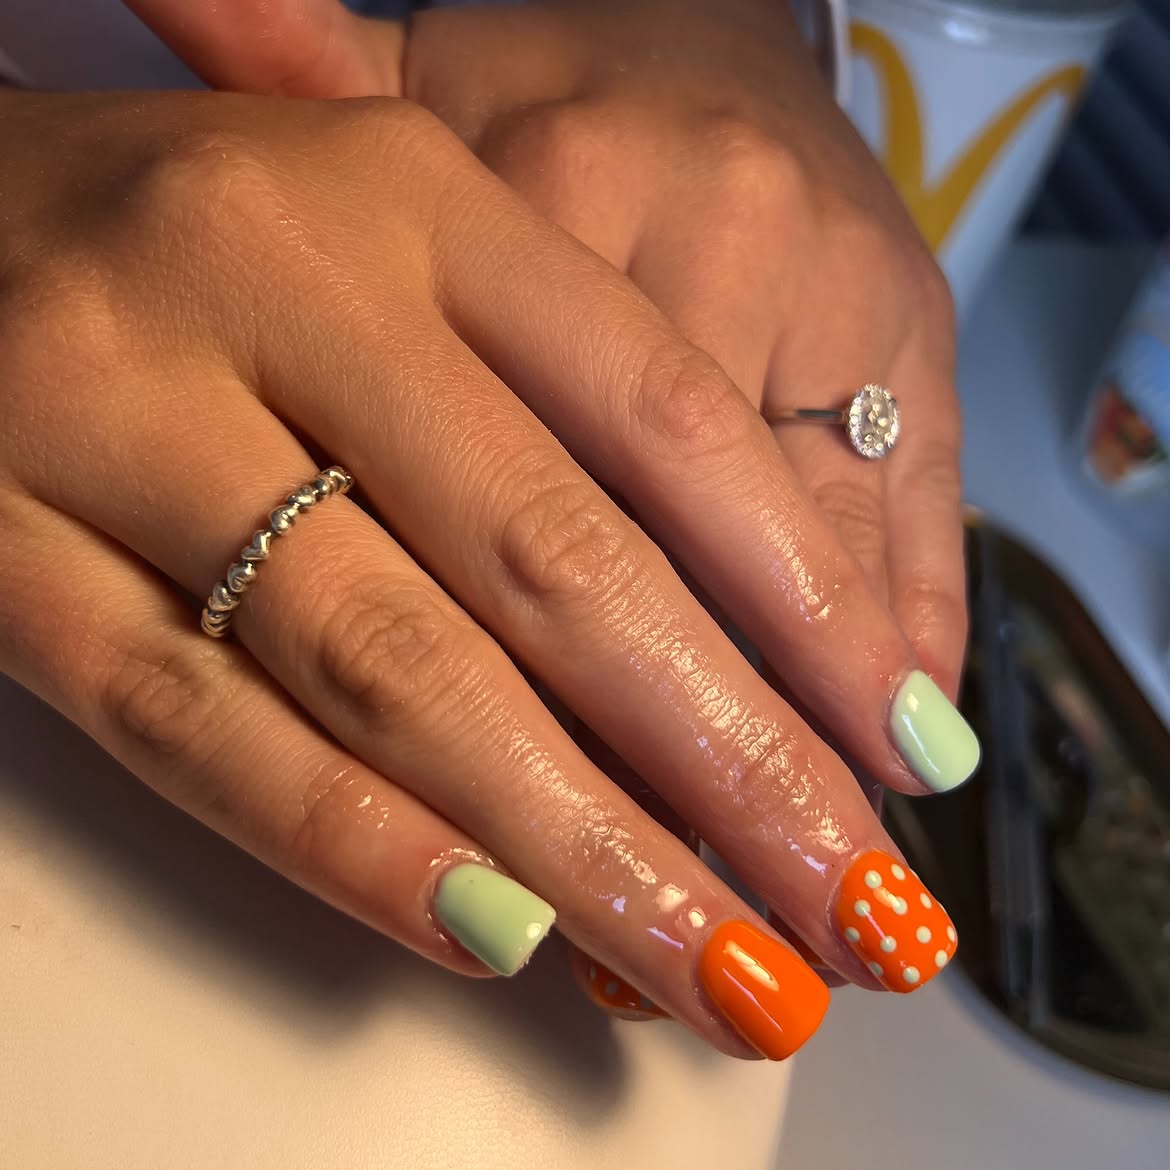
Clean blocks of pastel green and vivid orange make this short manicure bold without relying on complex artwork. Most nails remain solid, allowing the dotted orange accent to stand out clearly.
The pale green dots repeat the color of the solid nails and create a slightly raised texture. Their scattered placement feels playful, yet the limited two color palette keeps the full set tidy. Short square tips also give the dots a broad surface without requiring extra length.
Alternate the solid shades across the hand, then choose one orange nail for the dotted design. Keep a little space between each dot and finish the remaining nails with a smooth, glossy surface.
12. Minimal Mint Green and Coral Orange Wave Nails
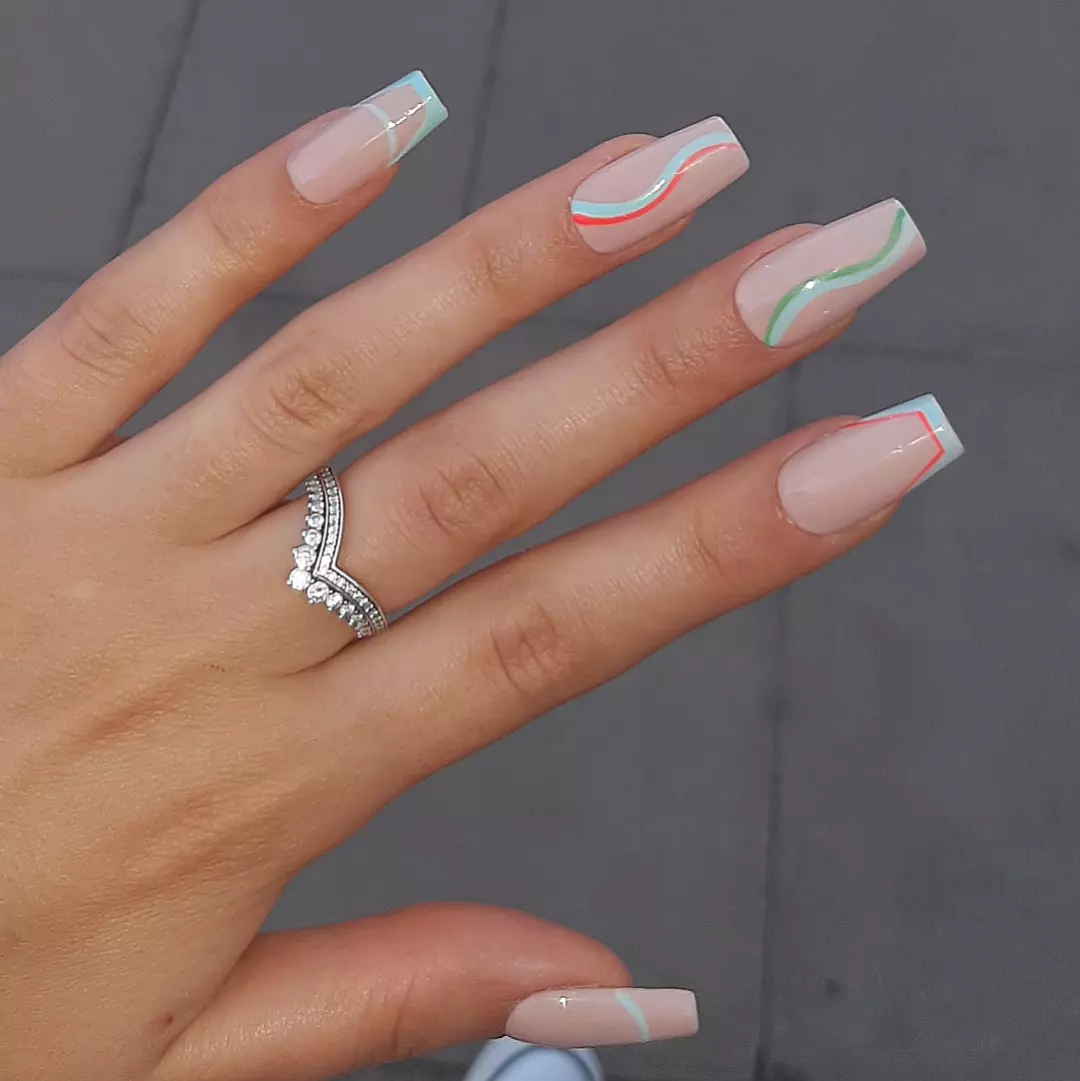
The restraint is what makes this long coffin manicure stand out. A sheer blush base covers every nail, while fine mint green and coral orange lines curve across the tips and sides.
- Some nails use a pale mint tip with a clean angled edge.
- Others carry one flowing line or a pair of narrow curves.
- The open base keeps the long shape looking light, even with several different line placements.
Apply the sheer base first and let it settle before painting the colored details. Keep the curves slim and smooth, then repeat mint near several tips so the changing designs still feel connected. A glossy coat gives the fine lines a clean finish.
- ▸ Use only one or two colored curves on each nail.
- ▸ Repeat pale mint near selected tips to connect the set.
- ▸ Place coral orange beside mint on a few accent nails.
- ▸ Preserve plenty of the sheer blush base around every line.
13. One Orange Hand and One Lime Green Hand
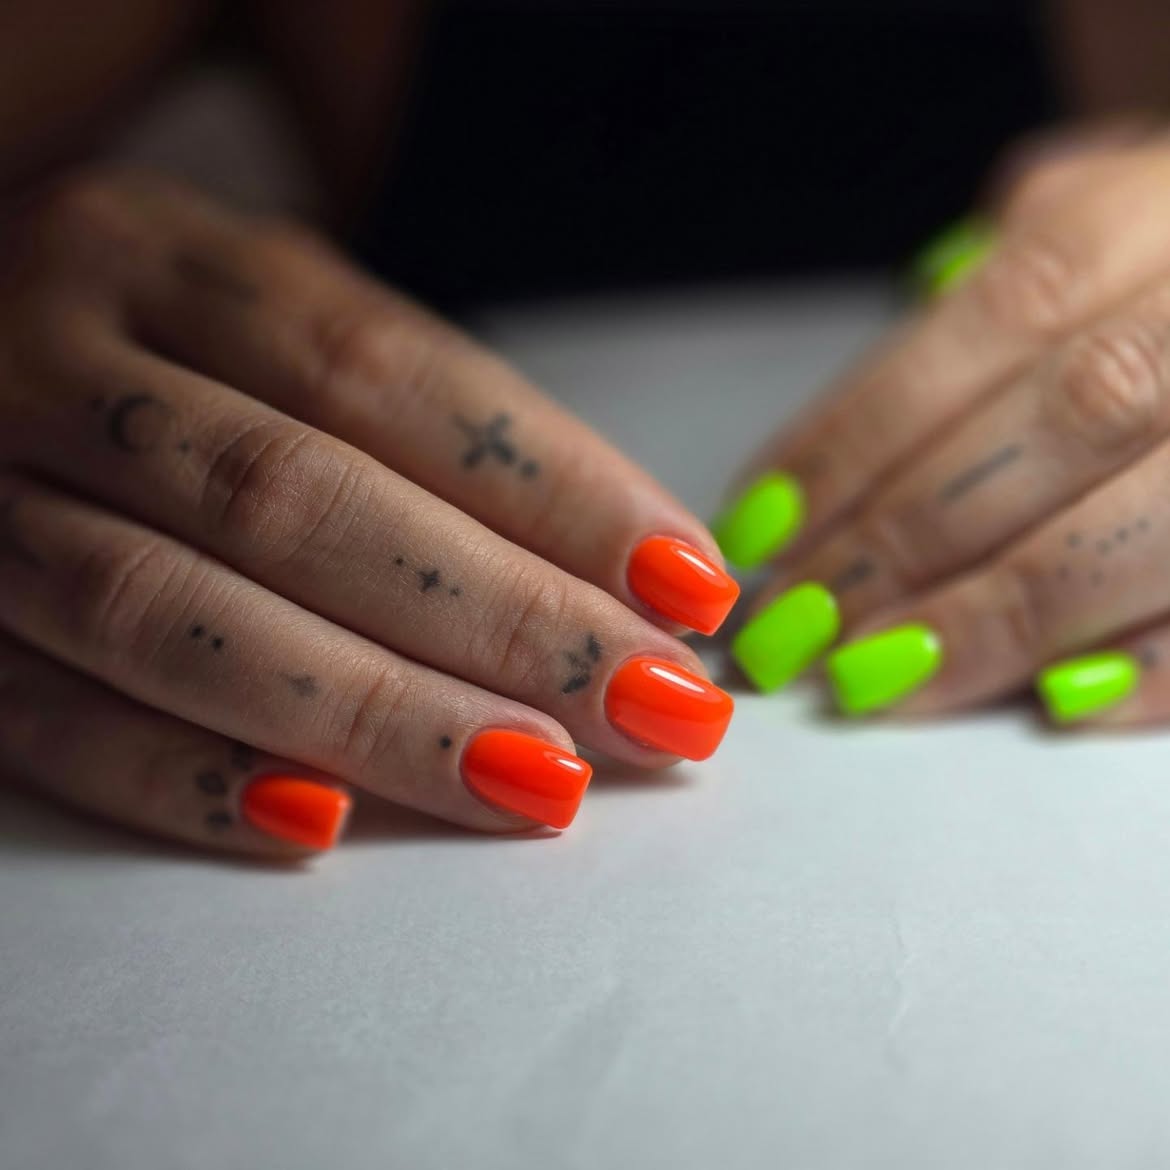
Nothing competes with the color in this bright split manicure. One hand is coated in vivid orange, while the other uses electric lime green.
The orange side feels warm, bold, and saturated.
The green side adds a sharper neon contrast that makes the orange look even brighter.
Matching the short square shape and glossy finish keeps both hands connected. This approach works well when you want orange and green nails without detailed patterns. Choose shades with similar brightness, keep the nail length consistent, and use the same finish on both hands so the color split feels intentional.
14. Orange Citrus and Green Starburst Nails With Gold Details
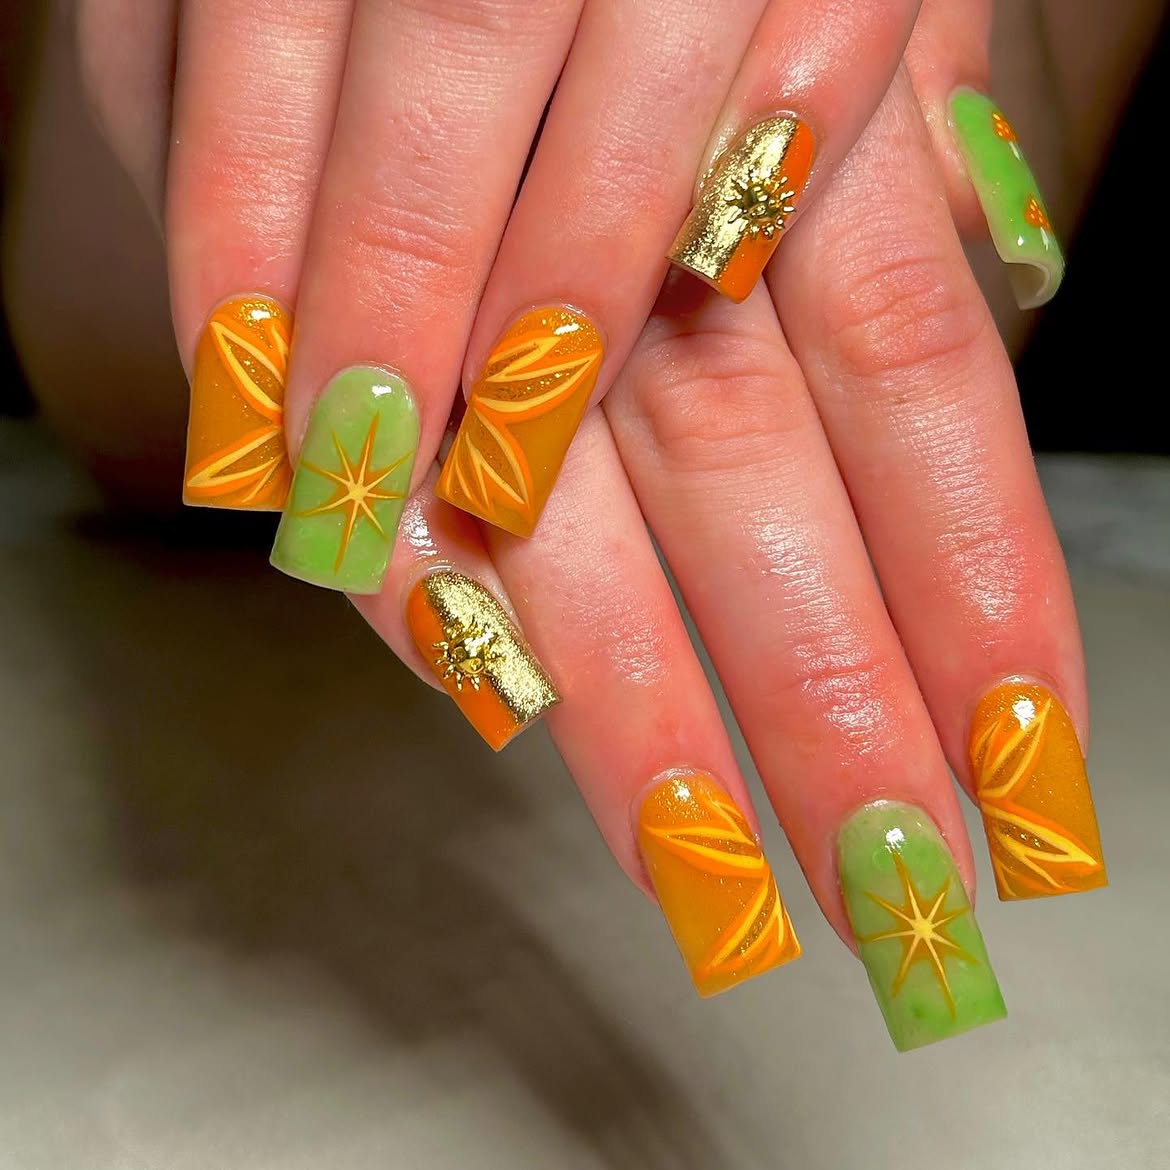
Citrus curves and starburst details give this orange and green manicure an unexpected celestial look. The long square nails provide plenty of room for each motif.
- Orange nails: Lighter curved outlines resemble sliced citrus sections.
- Green nails: Fine gold starbursts stretch across the translucent lime base.
- Gold accents: Reflective panels and small raised sun details add shine and texture.
The repeated warm gold links the orange and green designs without covering their main colors. Keep the line artwork thin so the translucent bases remain visible. Use the raised details on only a few nails, allowing the citrus and starburst patterns to carry most of the set.
The design recipe
15. Neon Orange and Green Brushstroke Nails With Silver Foil
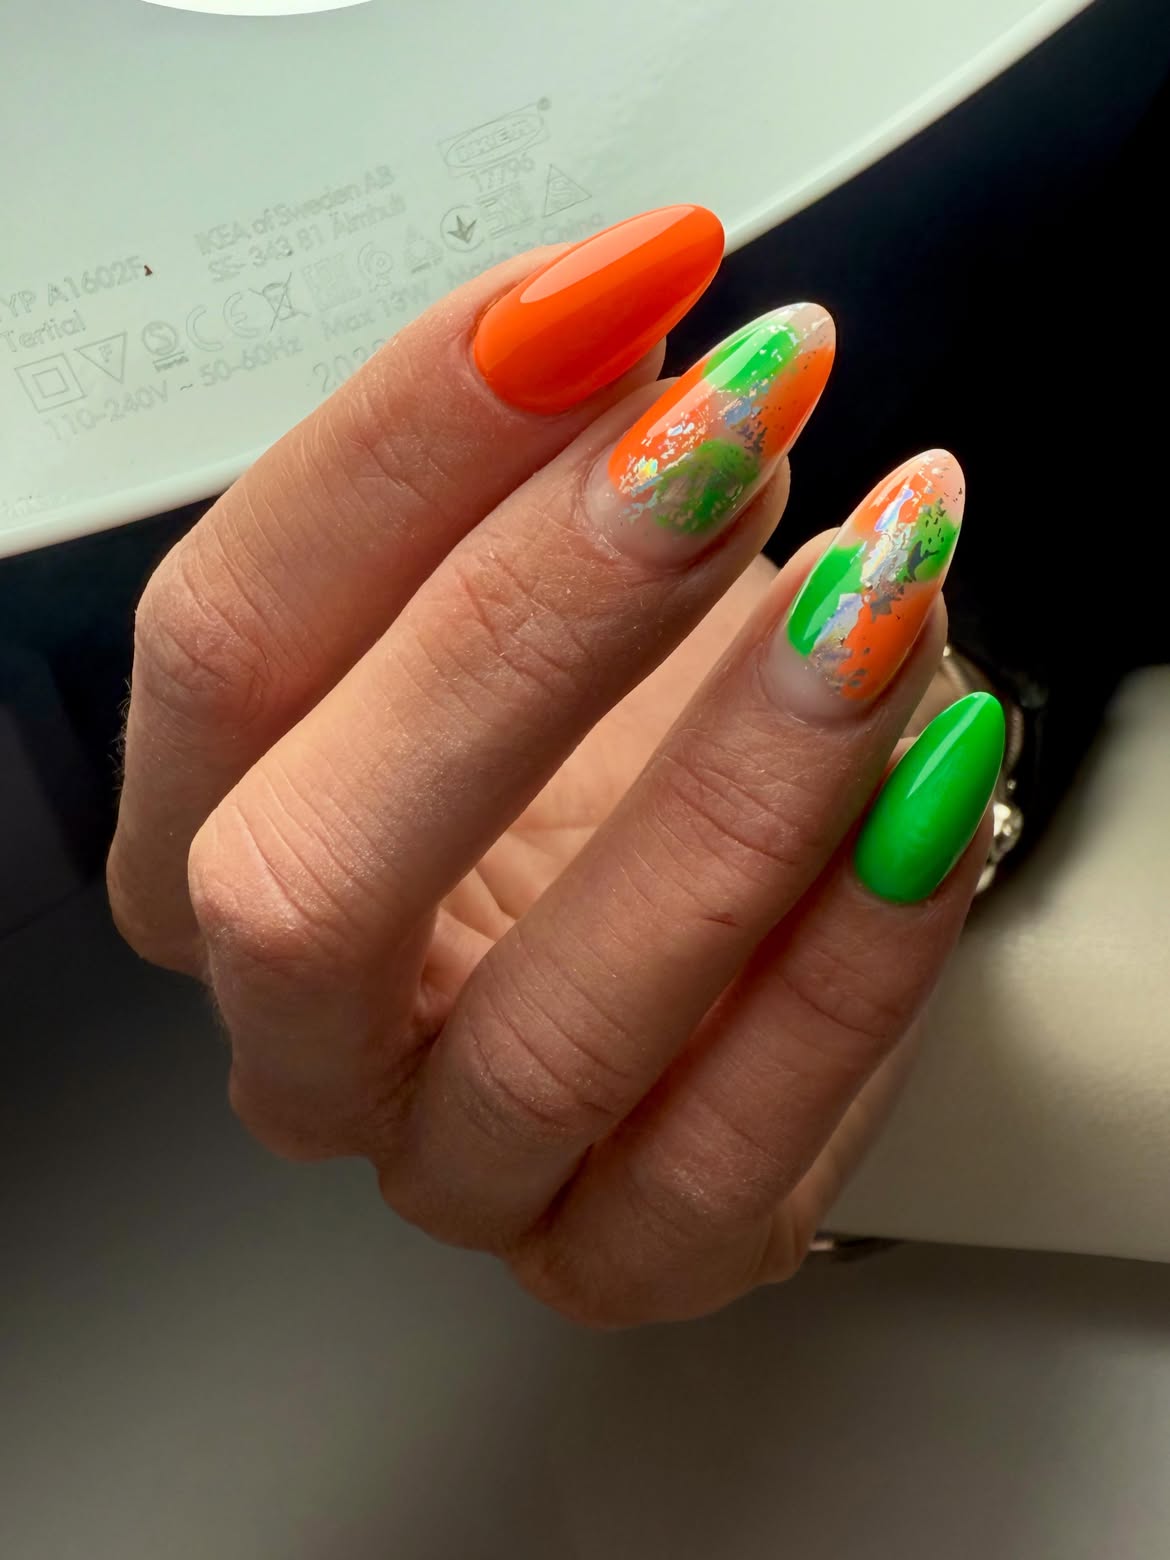
Solid color anchors keep the abstract accent nails from feeling random. A glossy orange nail sits at one end of the manicure, while vivid green appears at the other. Between them, the sheer accent nails combine broad strokes of both colors.
Reflective silver fragments and small dark flecks add texture without hiding the translucent base. The open areas are important because they separate the brushstrokes and let the metallic details catch the light.
Use bold strokes instead of carefully filled shapes. Place the silver pieces where the orange and green sections meet, then add only a few dark marks. Finish with a smooth glossy coat to seal the layered artwork.
16. Reverse Orange and Lime Green French Tip Nails
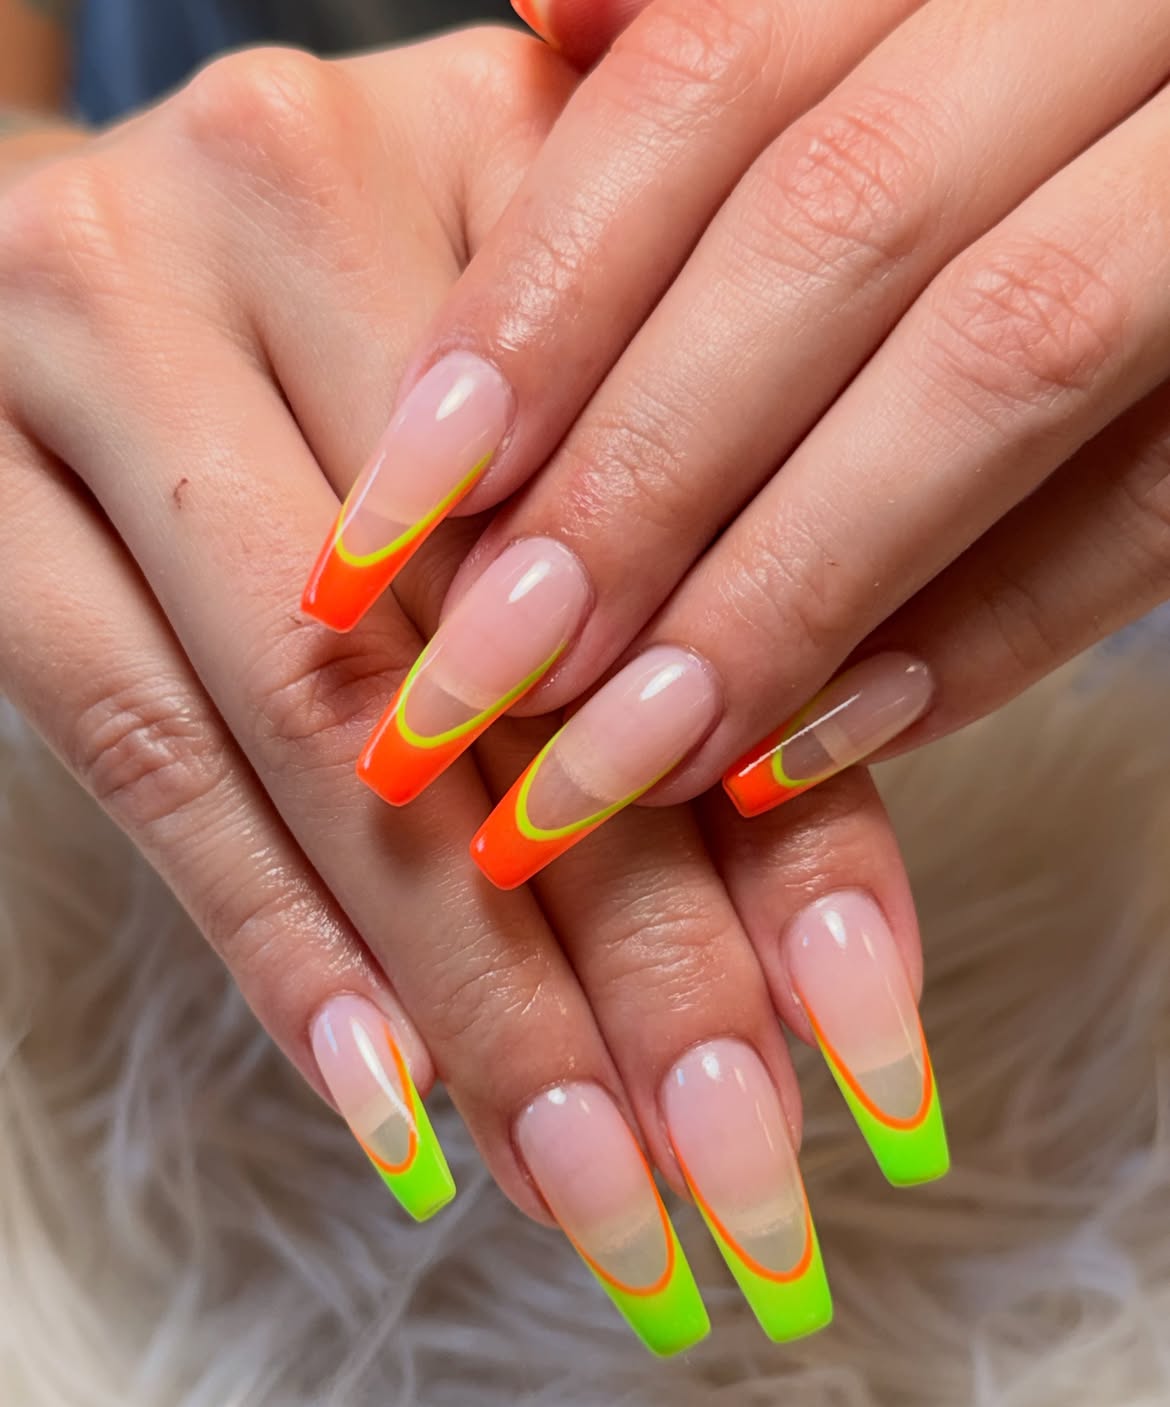
Swapping the same two colors between hands gives this French manicure a strong mirrored effect. The long coffin shape provides a wide, straight edge for the bright tips.
First hand: Vivid orange fills the tips, with a slim lime green curve tracing the inner edge.
Second hand: Neon green takes over the tips, while orange forms the narrow outline.
Shared detail: A sheer pink base and matching curved placement keep the reversed colors connected.
Paint the wider tip section first, then add the contrasting inner line. Keep that line thin and follow the same rounded curve on every nail. The clear space between the cuticle and tip prevents the neon colors from overwhelming the long shape.
| Design detail | Orange tip hand | Green tip hand |
|---|---|---|
| Base | Sheer pink | Sheer pink |
| Wide tip | Vivid orange | Neon green |
| Inner curve | Lime green | Orange |
| Connection | Matching curve, length, and glossy finish | |
17. Orange and Forest Green Jelly Nails
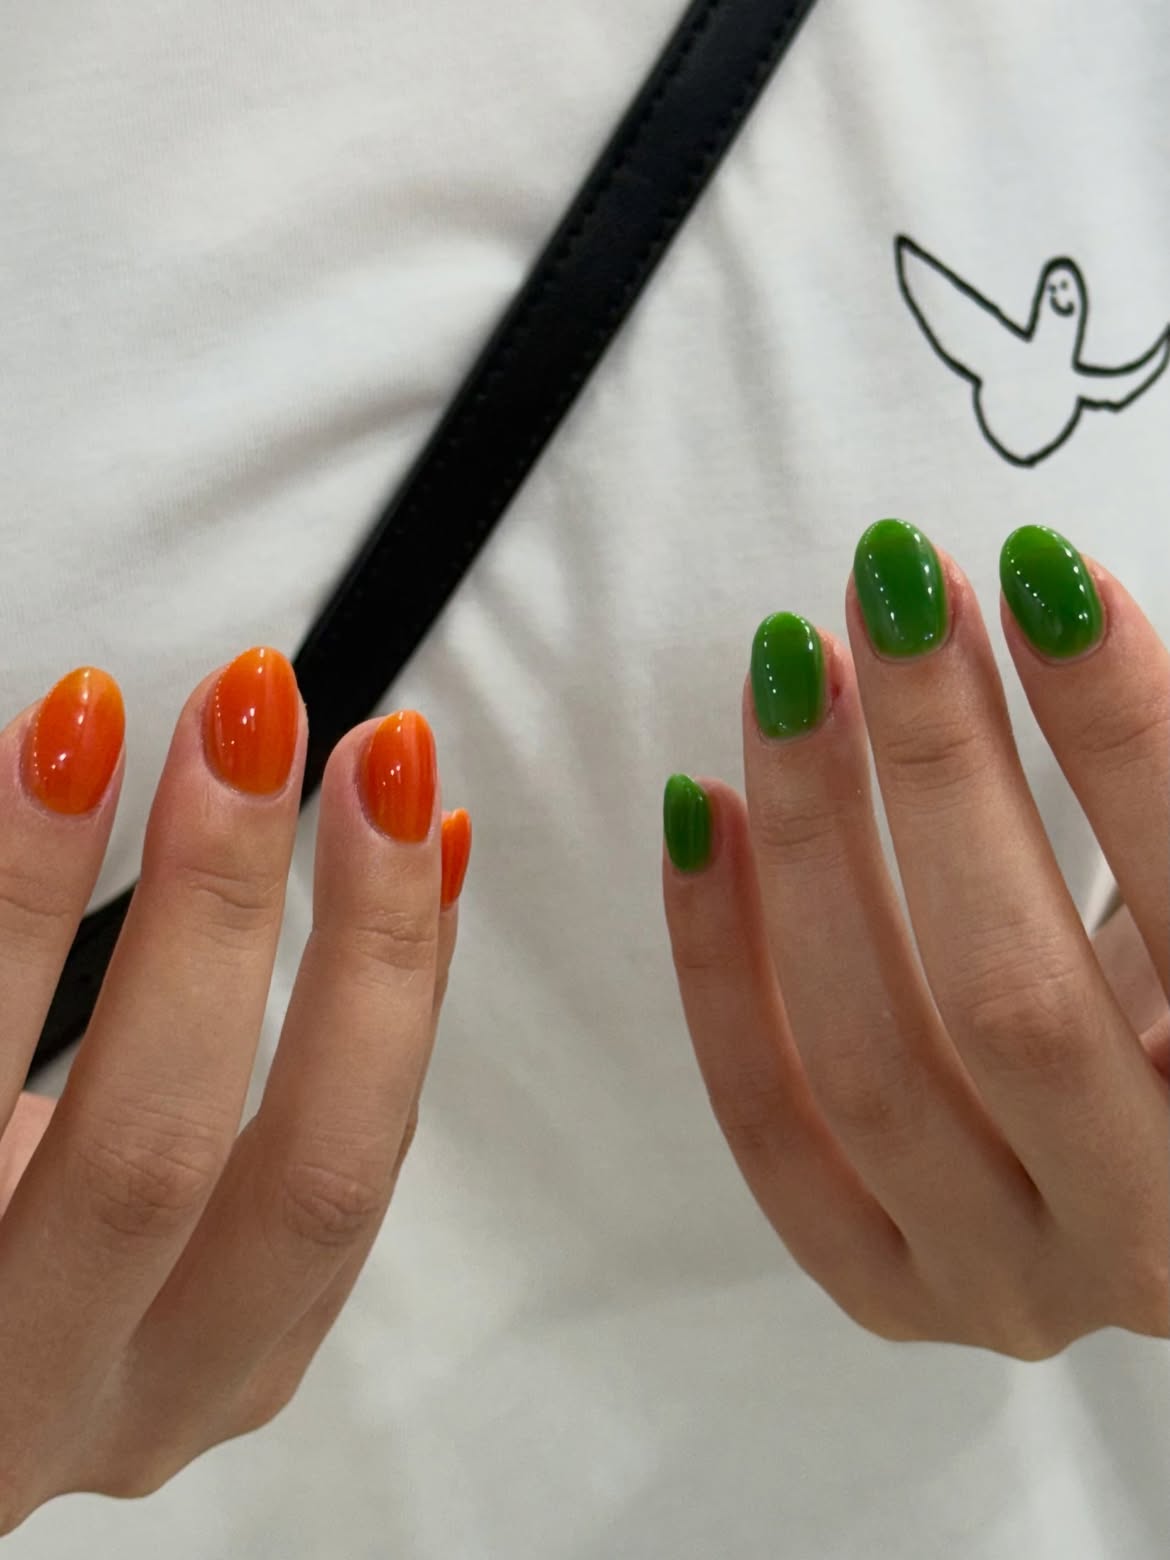
This split manicure relies on finish as much as color. One hand uses warm tangerine orange, while the other carries a deep leafy green. Both shades have a slightly translucent appearance that gives the simple solid colors extra depth.
The short oval shape keeps the look clean and wearable. With no patterns or accent nails, the contrast between warm orange and cool green becomes the main feature. Their matching shine makes the two hands feel like parts of the same manicure.
Build the color with thin layers and stop before it becomes fully opaque. Finish both hands with the same glossy coat to preserve the glassy effect.
The jelly finish formula