17 Easy Late Summer Early Fall Nails at Home: Best Ideas to Try
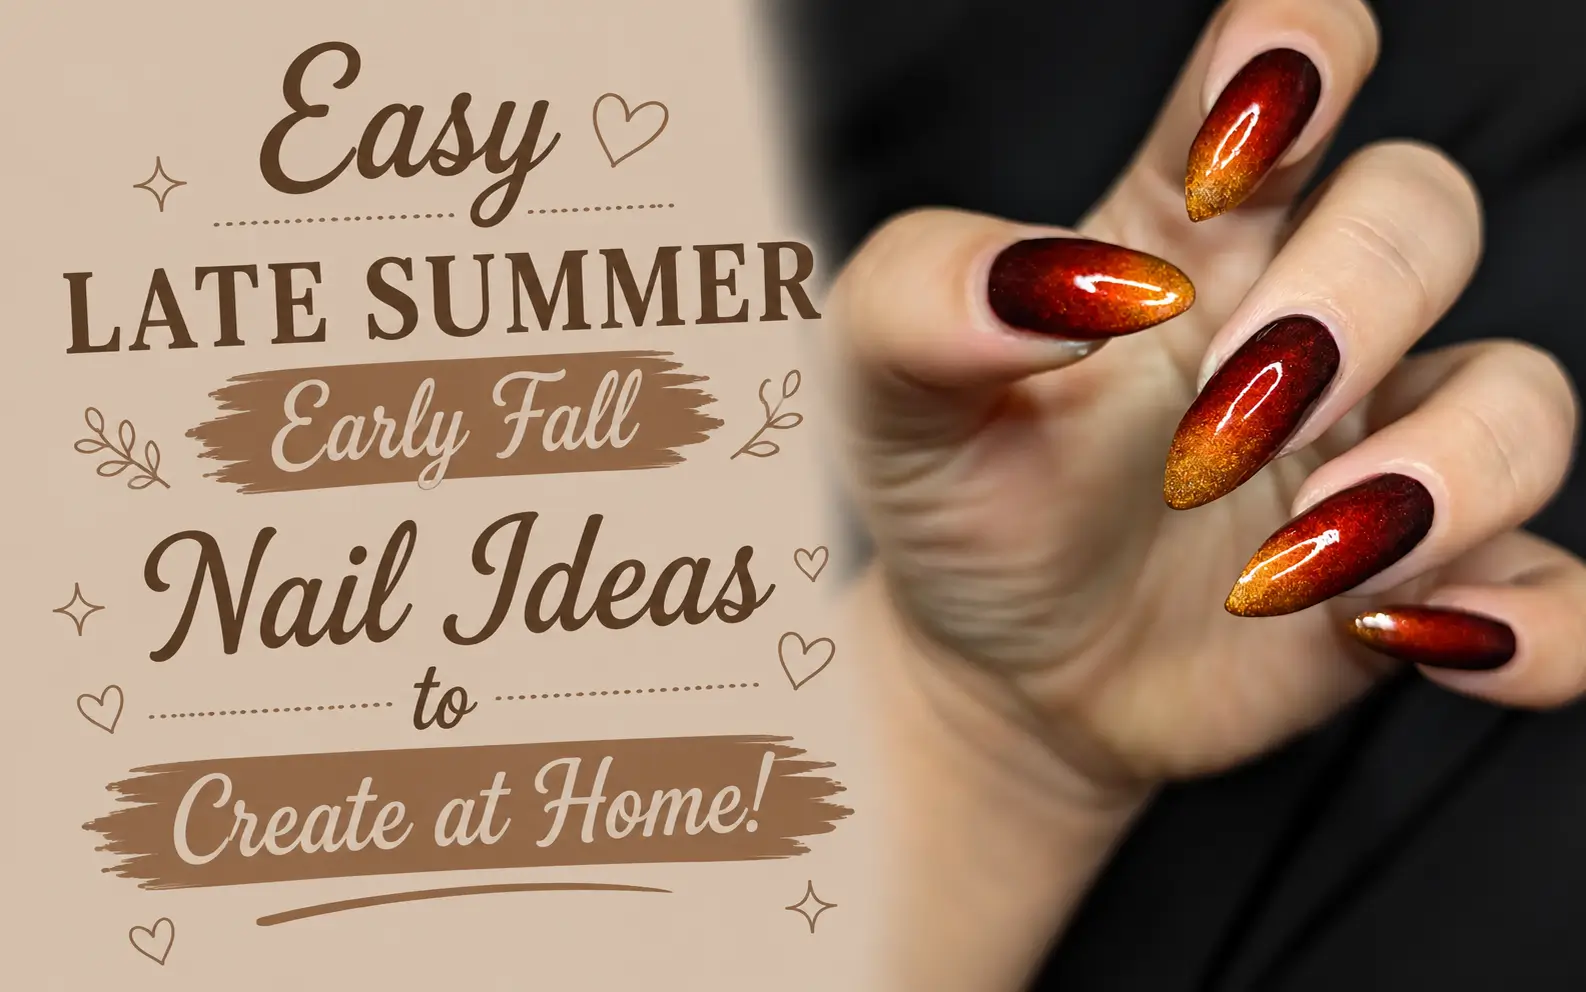
The weeks between summer and fall can make choosing a nail color surprisingly tricky. Bright shades still look right in the sunshine, but berry, copper, chocolate, olive, and plum start calling as cooler days get closer. These Easy Late Summer Early Fall Nails at Home bring both moods together without requiring advanced nail art skills.
Some designs need little more than polish and a glossy top coat. Copper glitter, muted plum, and soft blush dots are simple places to begin. Other ideas use clouds, French tips, leaf branches, tortoiseshell patches, gold foil, flowers, or abstract color blocks to add more detail.
You can also simplify the intricate designs with flower decals, striping tape, dotting tools, magnetic polish, and ready made glitter toppers. Keep the original colors or adjust them to match the polish you already own. With seventeen different ideas ahead, there is plenty of room to choose a manicure that fits your skill level, nail length, and seasonal mood.
17 Easy Late Summer Early Fall Nails at Home Designs 2026
1. Glossy Berry Polka Dots Bridge Two Seasons
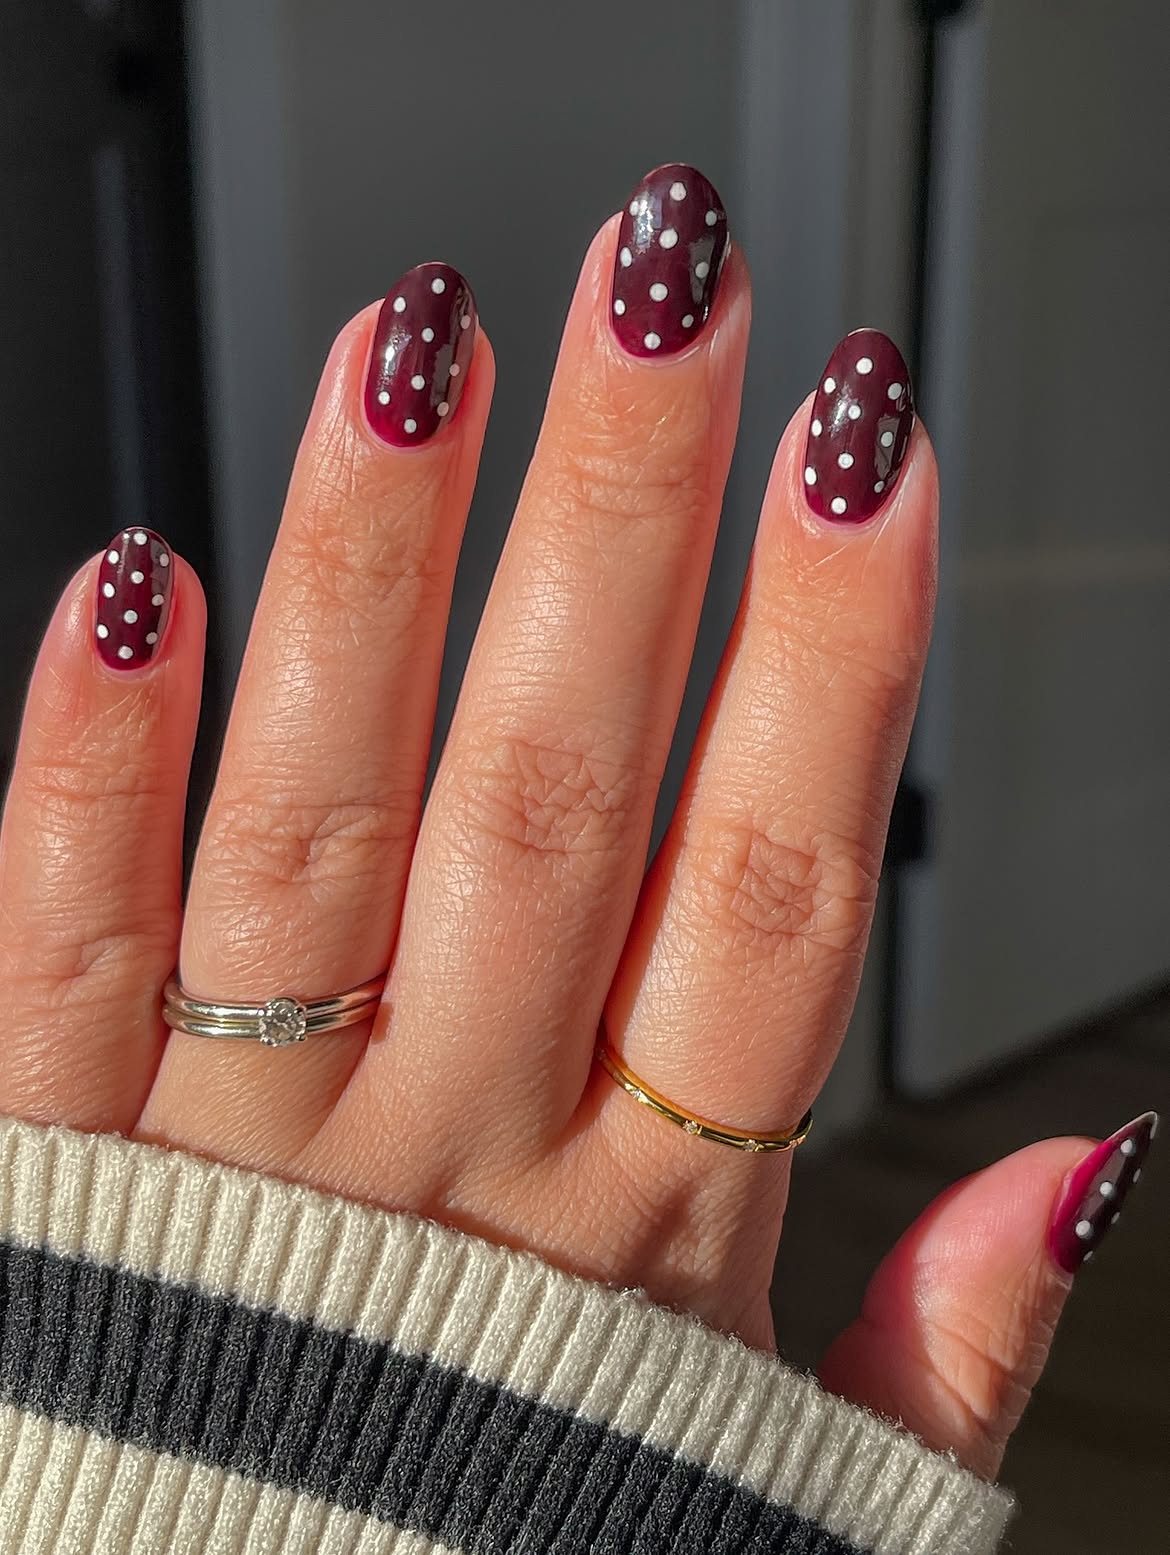
Rich berry polish brings the depth of early fall, while crisp white dots keep the manicure playful enough for late summer. The short, softly rounded nails also make this look practical for everyday wear.
The dot placement is the detail that keeps it charming. Each nail has a loose scatter instead of rigid rows, so small differences made by hand will look intentional.
Color choice: Pick a deep berry, wine, or plum polish with a glossy finish.
Dotting trick: Use a small dotting tool, toothpick, or the rounded end of a hairpin. Let the base color dry before adding the white dots so they stay clean.
Finish only after the dots have set, or the top coat may pull the white color across the nail.
Shape the nails into a short, softly rounded finish.
Apply two thin coats of deep berry polish.
Scatter small white dots across each dry nail.
Seal the design with a clear glossy top coat.
2. Colorful Flower Corners on a Sheer Nude Base
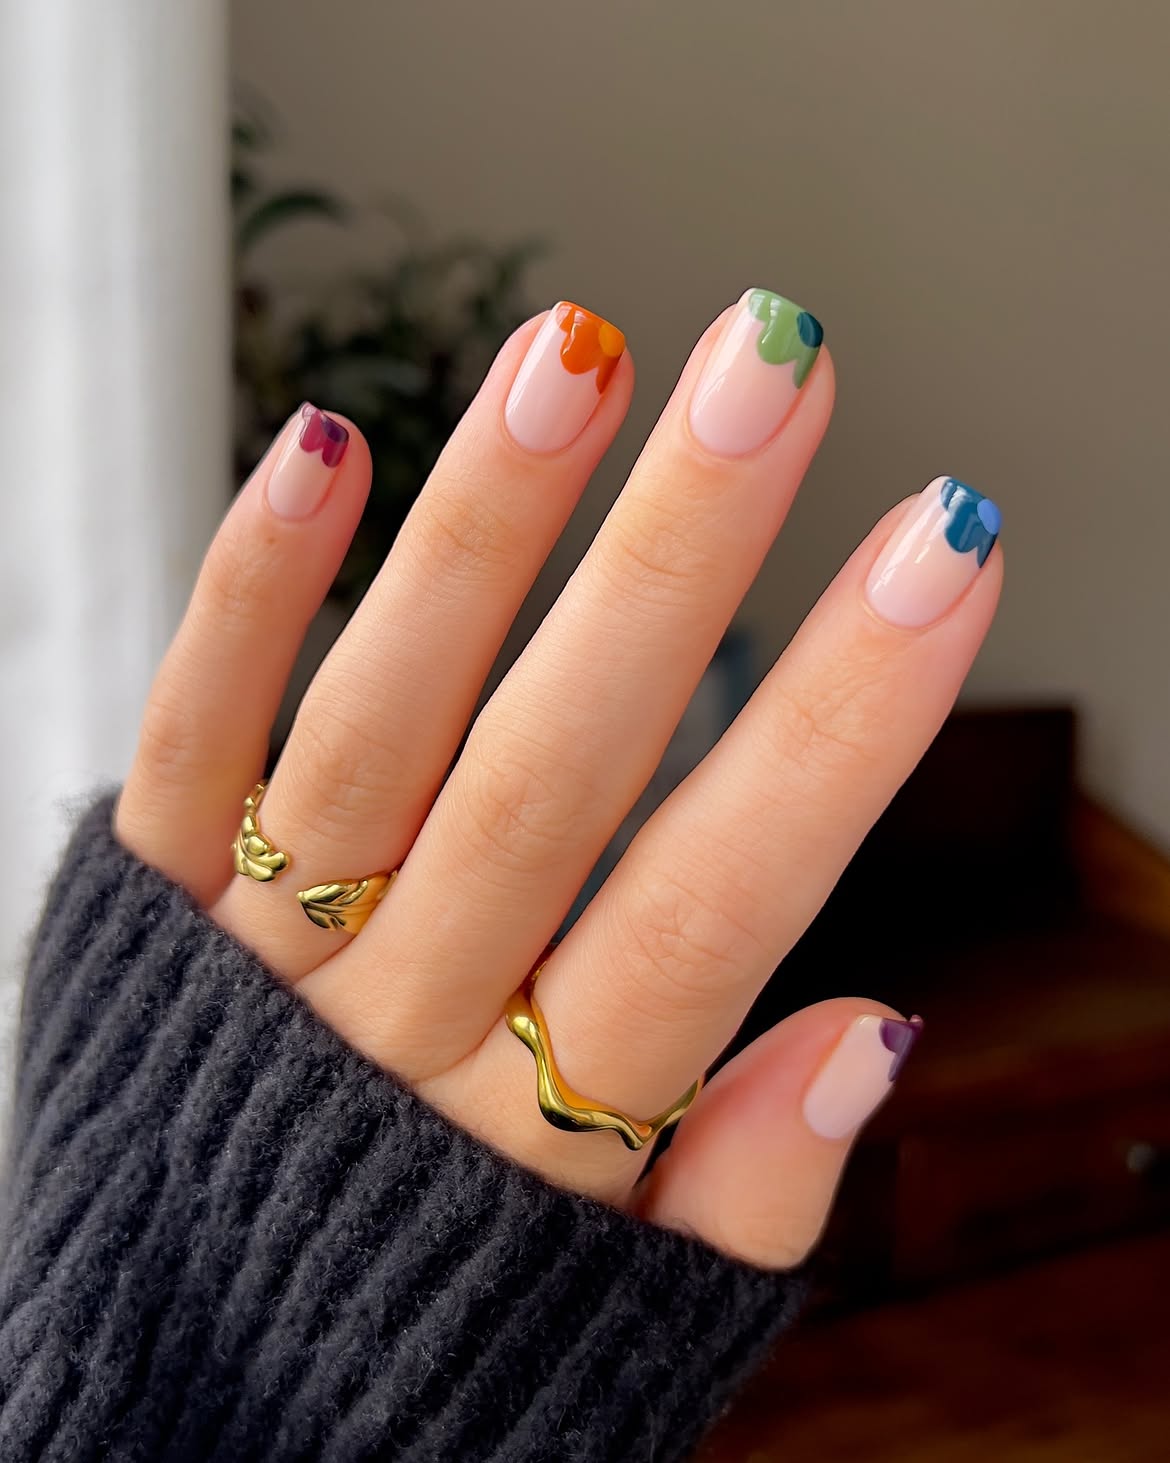
Barely there pink polish keeps these nails clean and airy, while bold flower shapes curl around one corner of each tip. Orange, green, blue, and purple give the manicure a late summer garden feel. The deeper shades also help it settle naturally into early fall.
Most of each nail remains uncovered, which stops the mixed colors from looking busy. The softly squared shape gives the curved petals a neat frame.
To recreate the flowers, place three or four rounded color strokes near one upper corner. A dotting tool or the rounded end of a hairpin can make the petal shapes. Add a darker dot near the outer edge to suggest the flower center, then seal everything with a glossy clear coat.
Keep each flower close to one corner of the nail.
Change the flower color while keeping the nude base consistent.
Avoid covering too much of the sheer base with petals.
Do not brush on the top coat until every color has dried.
3. Mix Berry Stars, Stripes, and Dots
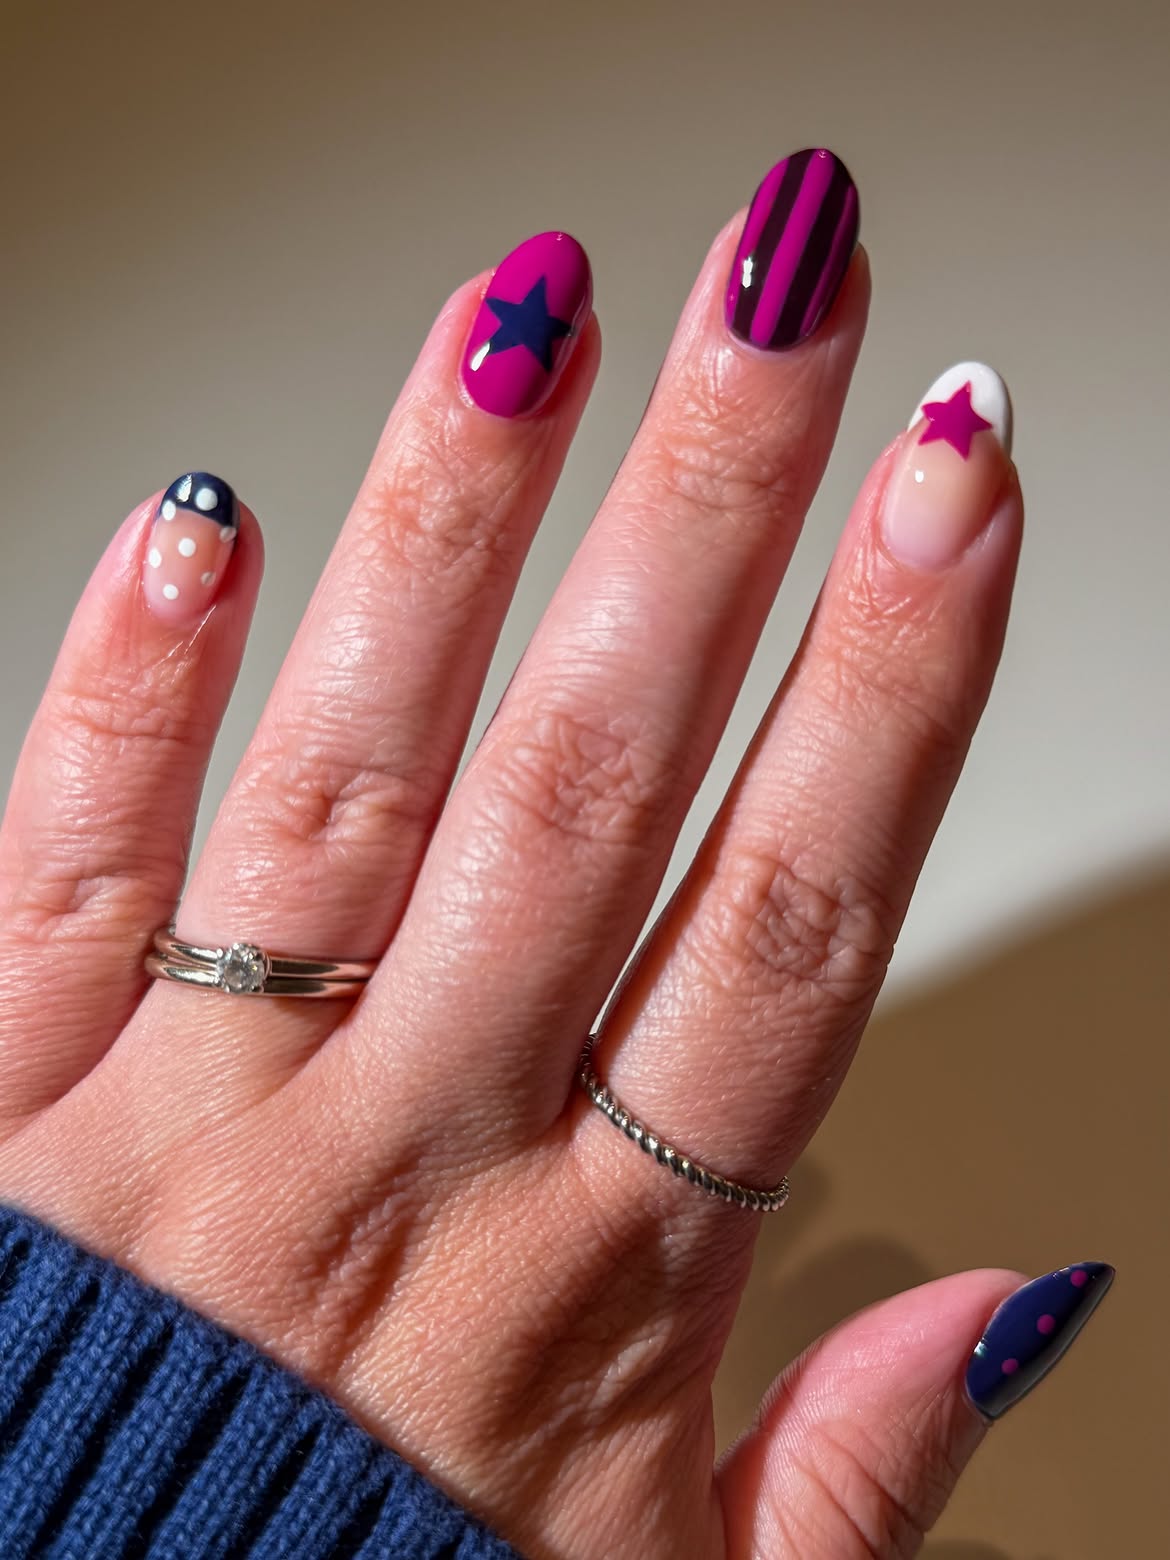
Why pick one pattern when a tight color palette can hold several together? This manicure combines berry pink, deep navy, white, and sheer nude, then gives nearly every nail its own design.
The solid berry nail carries a navy star, while another nail uses bold vertical stripes. A white curved tip and pink star brighten the sheer base. Small dots appear on the navy sections, linking the remaining nails without copying the same layout.
Use nail stickers or a fine brush for the stars. Thin striping tape can help create cleaner lines. Remove the tape while the polish is still slightly wet, then allow every pattern to dry before applying a clear top coat.
For softer designs you can recreate yourself, check out 16 Bold Late Summer Early Fall Nails before choosing your next seasonal manicure.
4. Tiny Vacation Details for Late Summer Nails
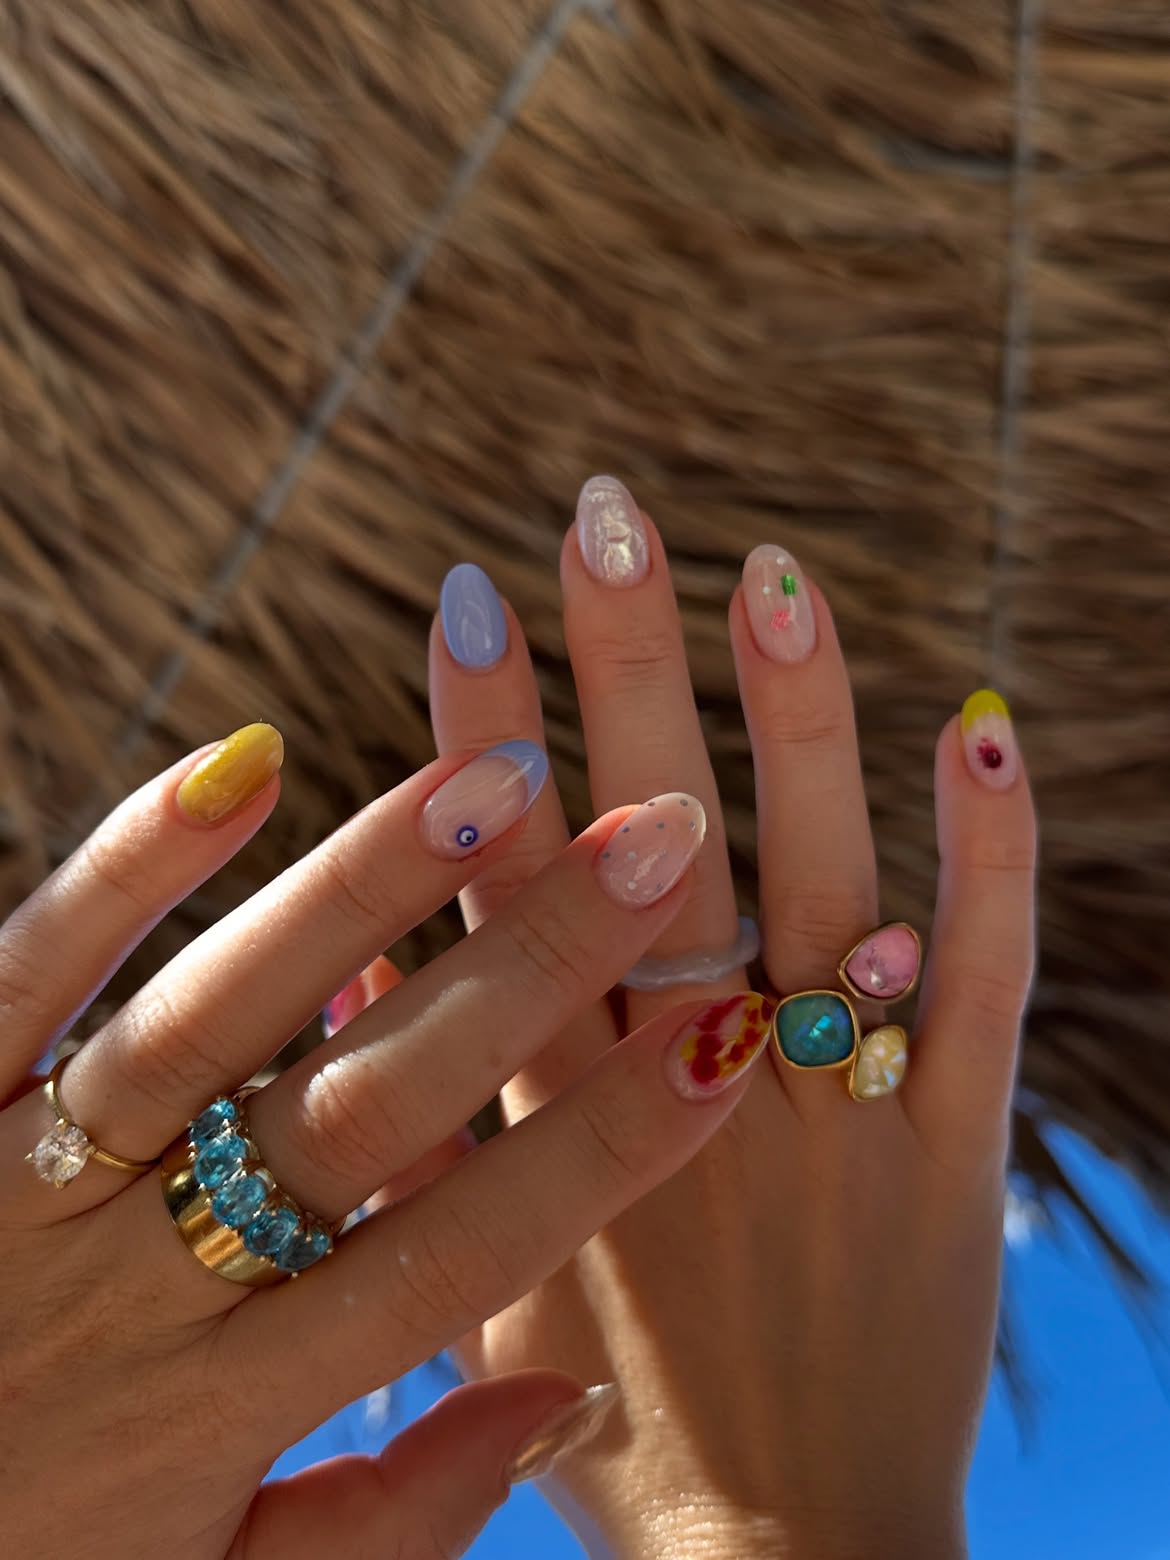
Small painted marks, pearly shine, soft lilac, sunny yellow, blue, red, and green make this manicure feel like a collection of vacation souvenirs. Each nail looks different, but the repeated colors keep both hands connected.
- Use sheer nude polish as the common base on several nails.
- Keep one or two nails solid in lilac or yellow to give the eye a quiet resting point.
- Add tiny details such as colored squares, a circular blue accent, soft speckles, and curved tips.
- Press iridescent flakes into slightly tacky polish for the pearly nail.
- Create the red and yellow accent with loose brush strokes instead of trying to make both sides match.
The mix suits the last warm days of summer, while lilac and deeper jewel colors help carry it into early fall.
Sheer bases and repeated touches of lilac, yellow, blue, and red connect the many small designs without making the manicure feel crowded.
5. Copper Glitter Nails Catch the First Fall Light
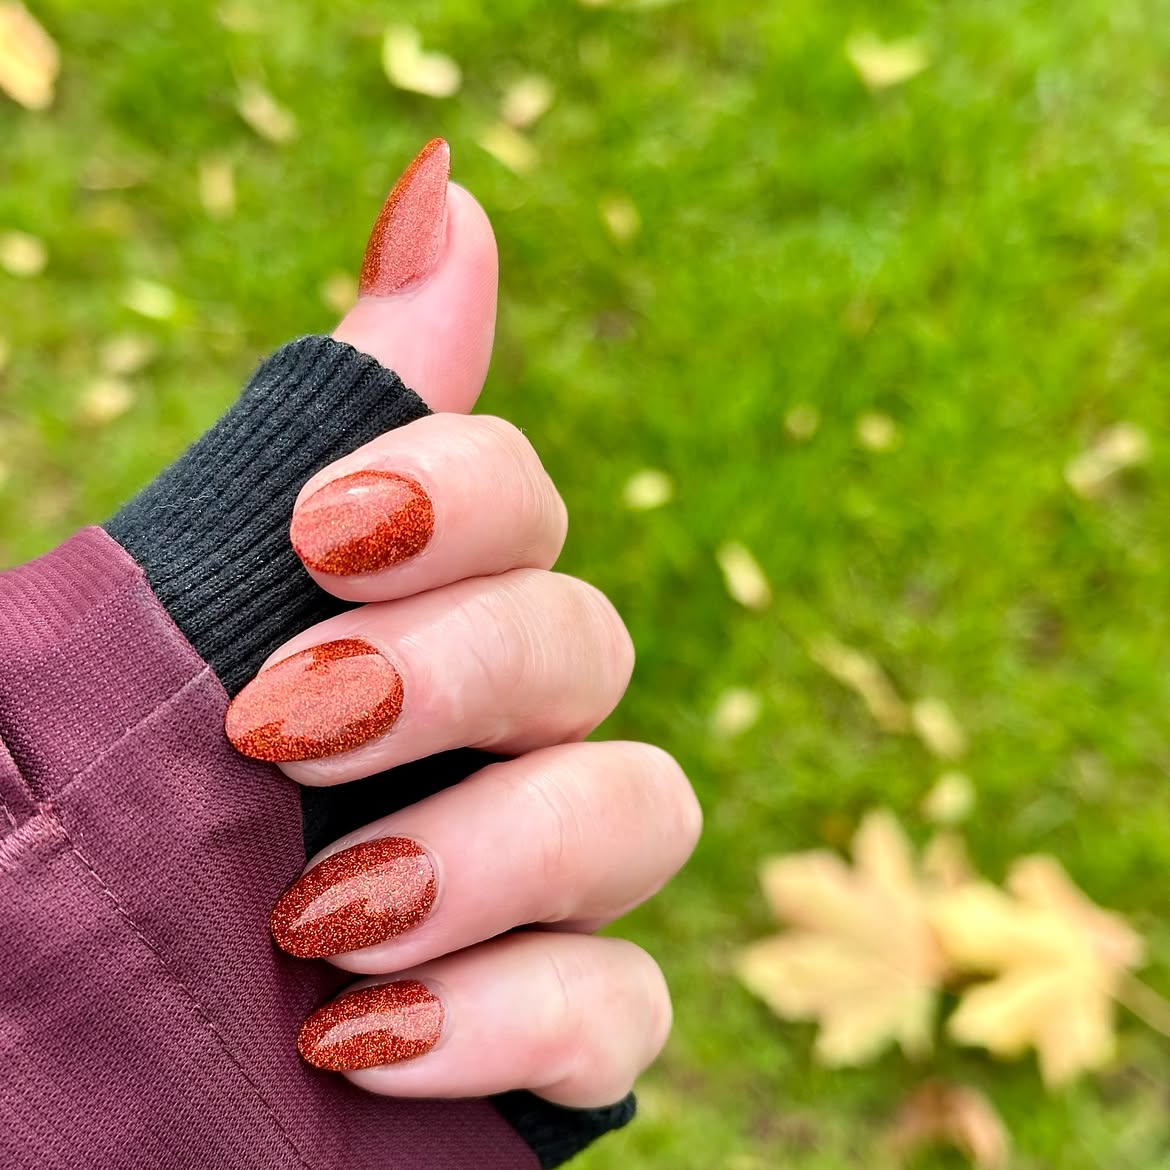
Copper glitter does nearly all the work in this simple manicure. The warm rust tone looks bright in late summer sunlight, while its deeper metallic color feels ready for early fall.
The short, rounded shape keeps the sparkling finish neat and wearable. Since every nail uses the same color, there is no detailed artwork to copy or match.
- File each nail into a soft rounded shape.
- Apply a clear base coat to create a smoother surface.
- Build the copper glitter with thin, even coats.
- Allow each layer to dry before adding more color.
- Finish with a glossy top coat to smooth the glitter and strengthen the shine.
This is a useful choice when you want seasonal color without spending time on tiny patterns.
6. Soft Blush Polka Dots with Dark Fall Contrast
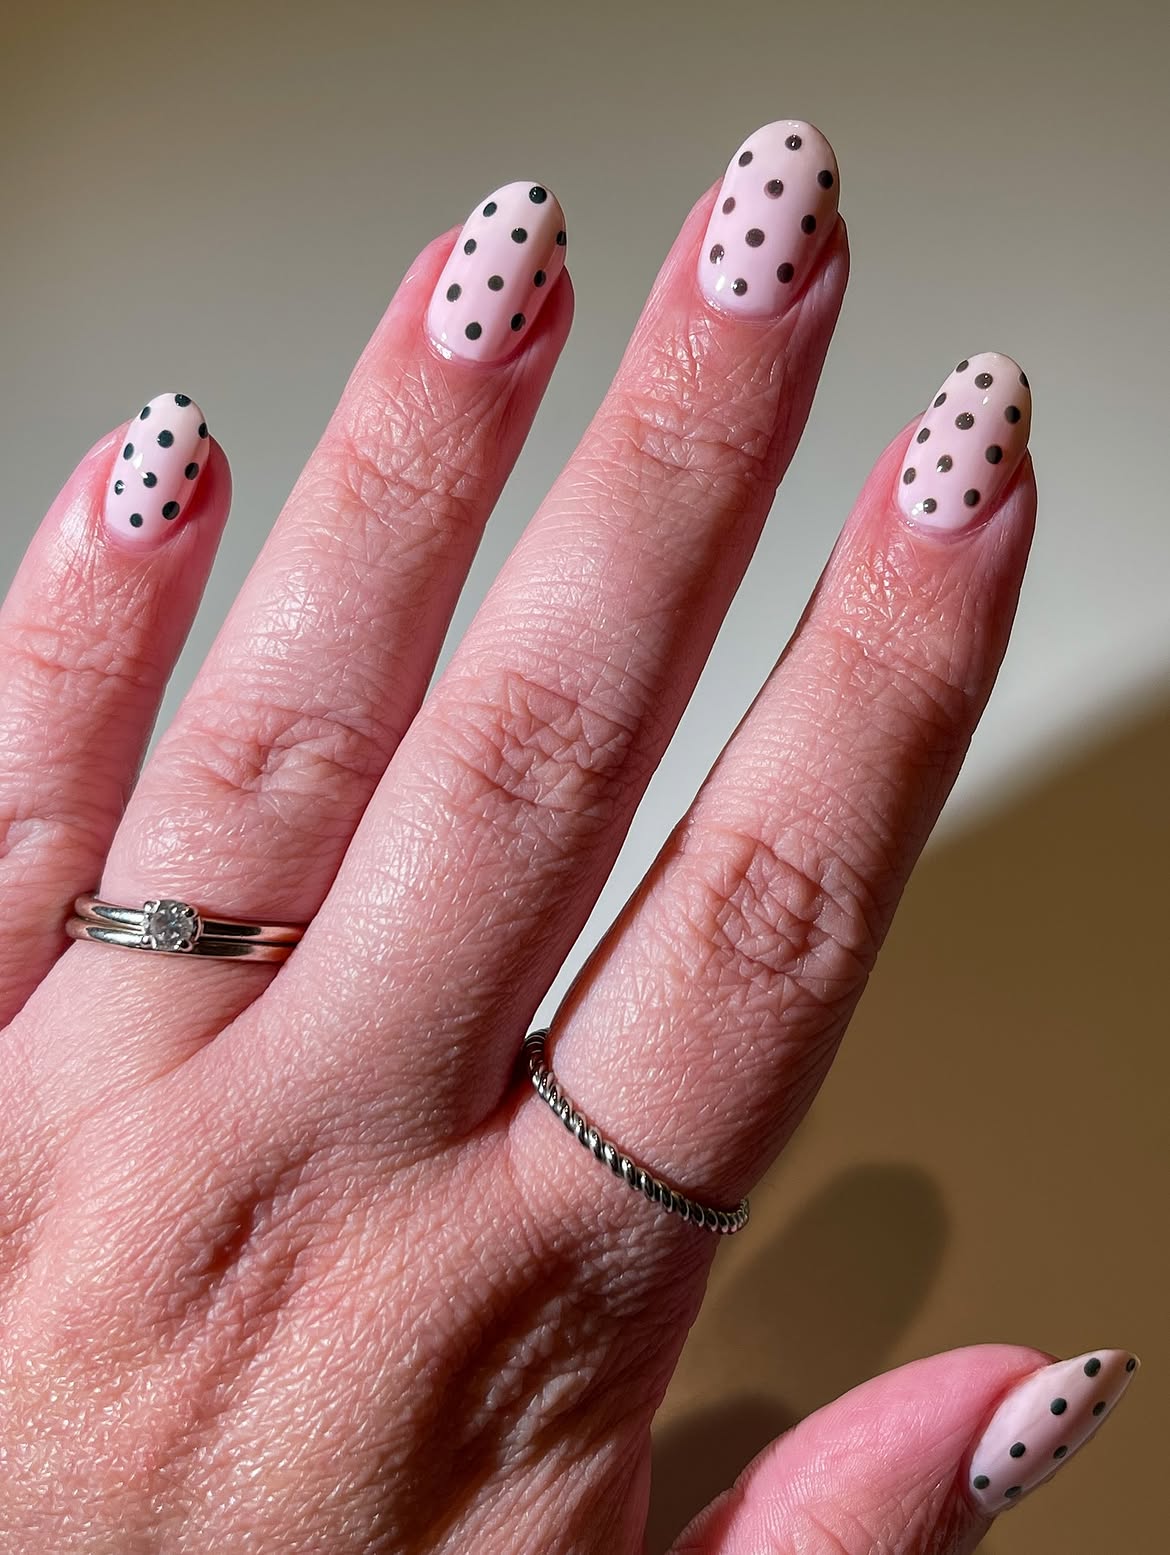
This manicure reverses the deeper base and light dot combination. A pale blush color covers every nail, while small near black dots provide crisp contrast. The glossy finish and softly rounded shape keep the repeated pattern polished.
- Choose an opaque blush pink or creamy nude base.
- Allow the base color to dry before creating the dots.
- Arrange the dark dots in loose rows with visible space between them.
- Use the same dotting tool across every nail to keep the circles close in size.
- Clean any uneven dots with a small brush dipped in polish remover.
- Add a clear top coat only after the dots have dried.
The soft pink still feels light enough for late summer, while the dark details introduce a subtle early fall mood.
| Glossy finish | Matte finish |
|---|---|
| Matches the bright shine shown in the image. | Creates a softer and more graphic result. |
| Makes the blush base look smooth and fresh. | Makes the dark dots stand out more clearly. |
7. Chocolate French Tips with Golden Cat Eye Accents
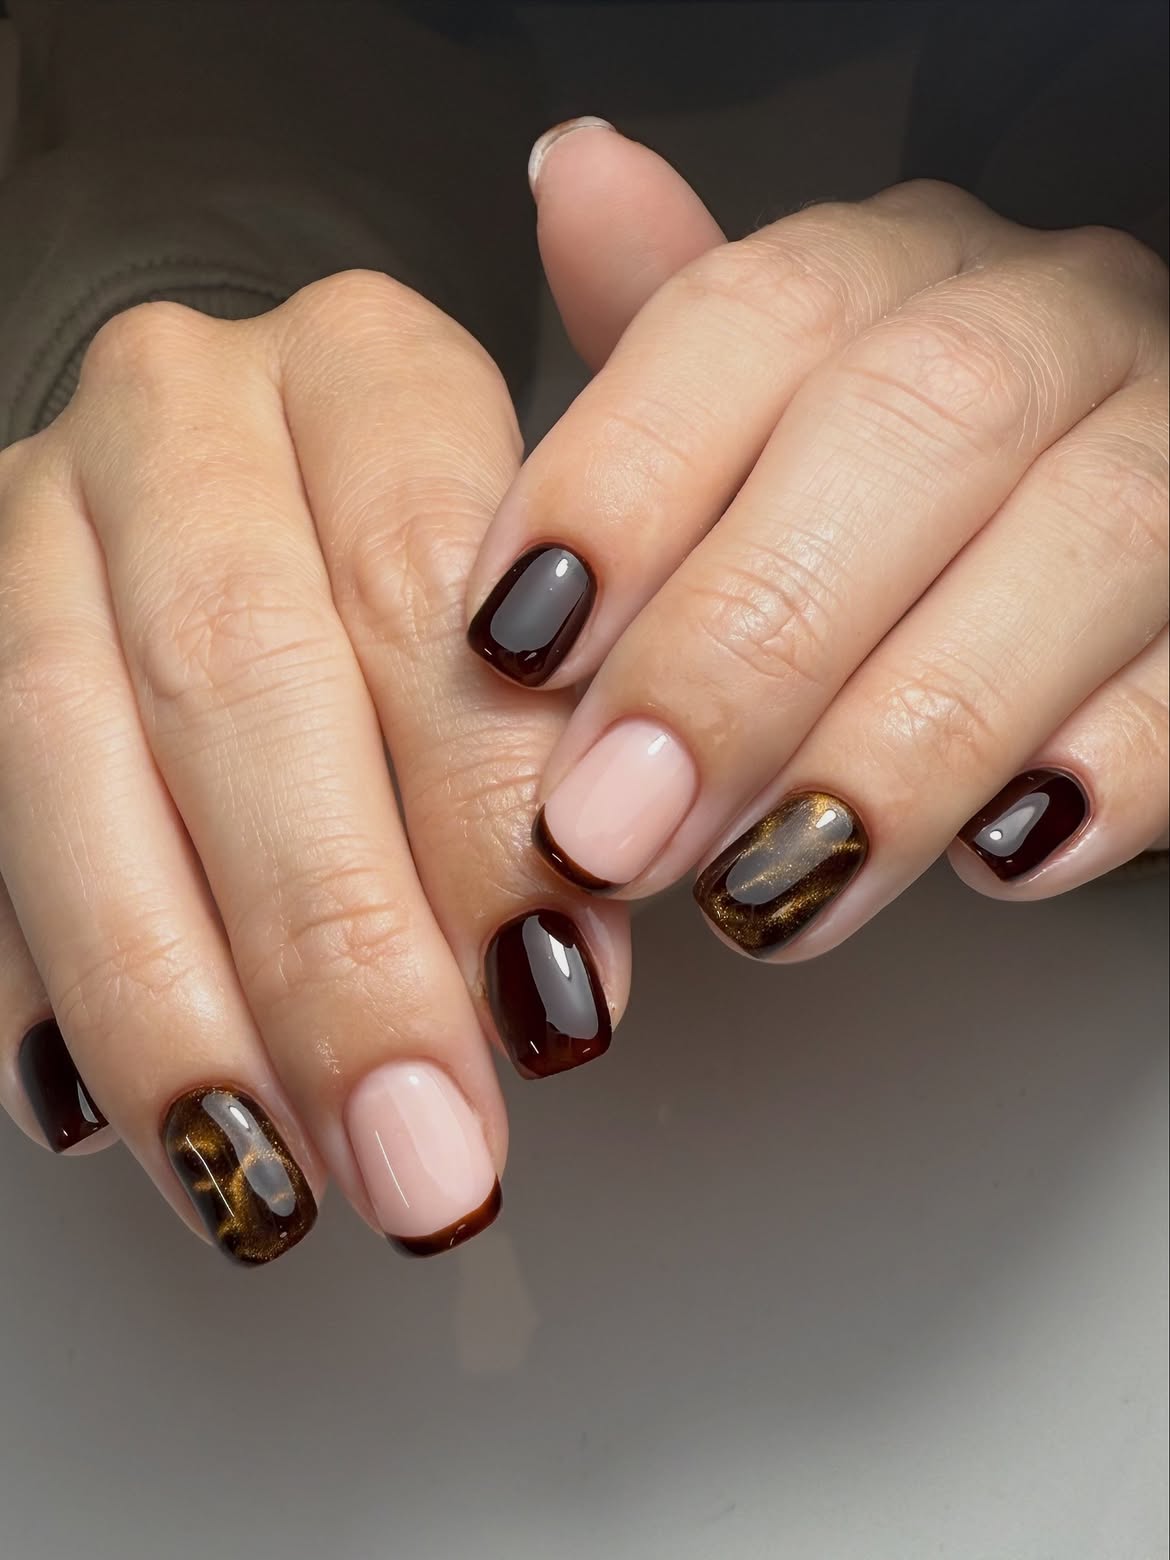
Chocolate brown shifts this manicure toward early fall, but the sheer blush nails stop the set from feeling too dark. Thin brown French tips repeat the color of the solid nails, while golden magnetic shimmer adds depth and movement.
- Paint selected nails with a rich espresso or dark chocolate shade.
- Use a sheer blush base beneath the narrow brown tips.
- Reserve one or two nails for golden cat eye polish.
- Hold the magnet near the wet magnetic polish according to its instructions.
- Keep the square shape short so the dark tips remain neat.
- Seal every nail with a high shine top coat.
The mix of solid color, fine tips, and glowing shimmer creates variety without introducing an unrelated shade.
💡 Cleaner French Tips
Use the side of the polish brush to sweep a narrow brown line across the free edge. Clean the curve with a small flat brush and polish remover before adding the top coat.
8. Burgundy to Gold Ombre Nails Glow Like Sunset
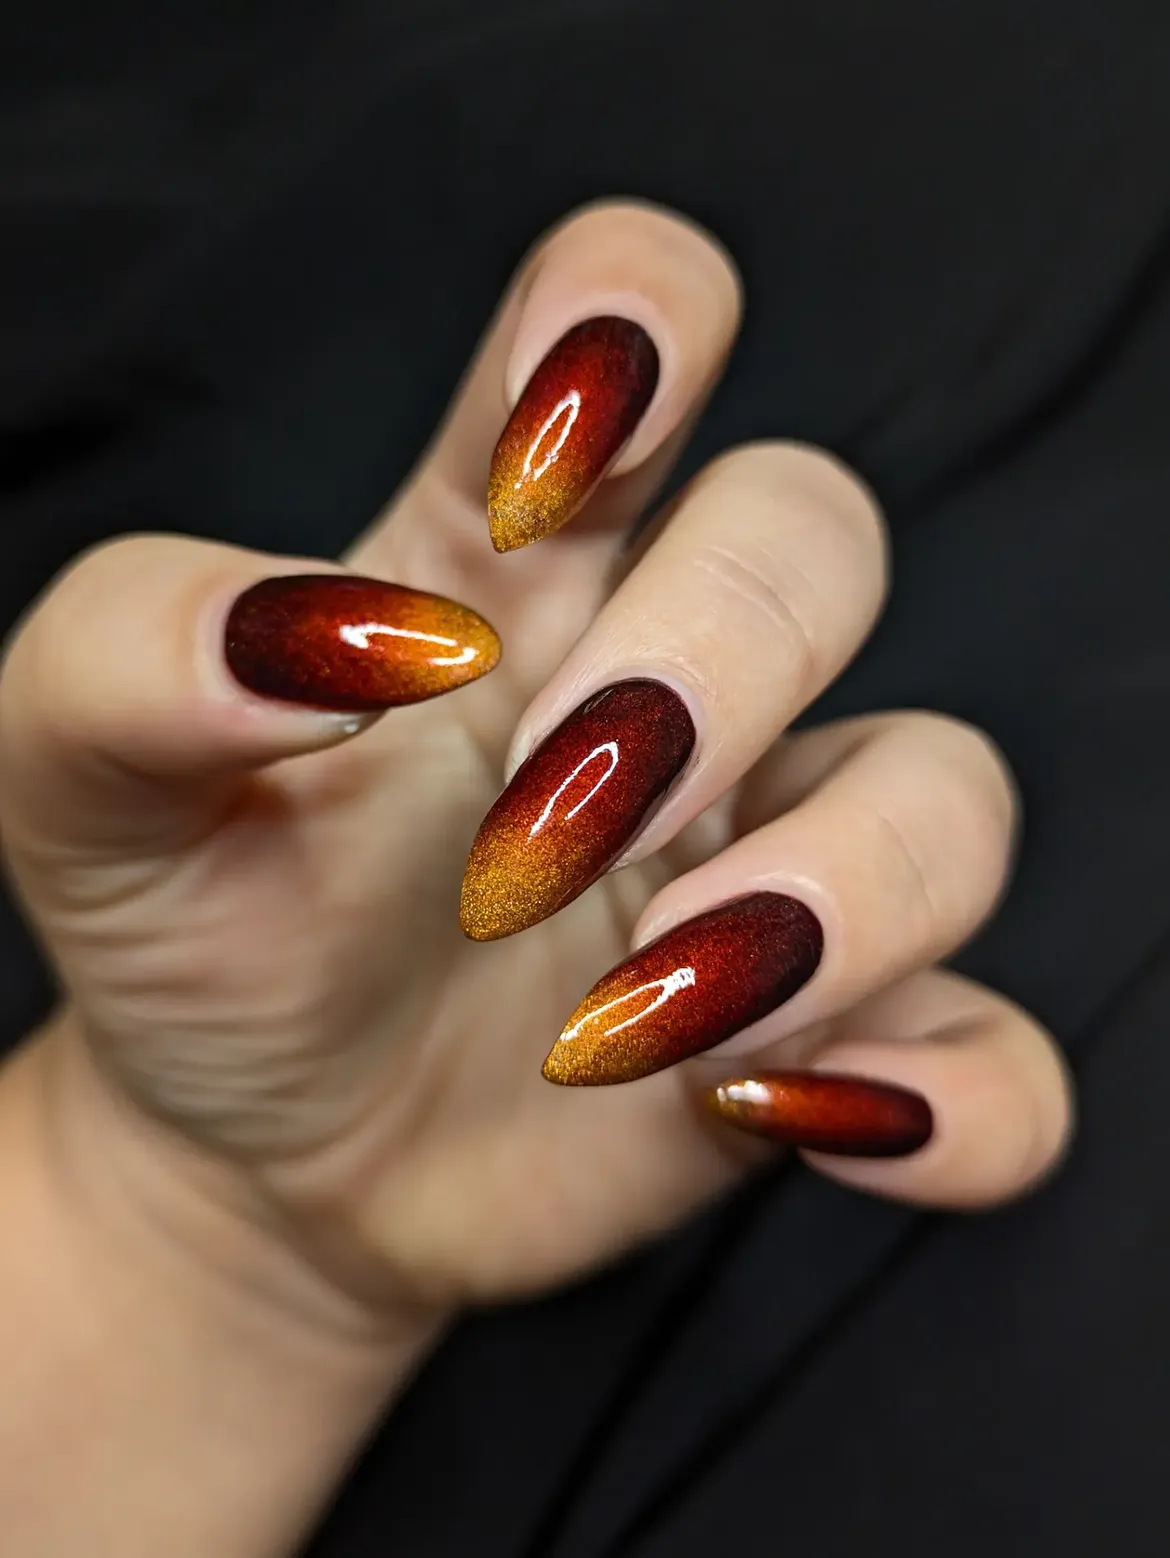
Deep burgundy begins near the cuticles, melts through warm red, and ends in amber gold at the pointed tips. Fine shimmer catches the light across the entire blend, giving the long almond shape a glowing finish.
How to Recreate the Color Fade
- Begin with a deep burgundy base and let it dry.
- Place burgundy, copper red, and golden polish beside each other on a makeup sponge.
- Press the sponge lightly over each nail instead of dragging it.
- Repeat with thin layers until the color borders look soft.
- Keep the golden shade concentrated near the pointed tips.
- Add a fine shimmer layer to echo the glowing finish in the image.
- Smooth the finished blend with a glossy clear coat.
Clean around the cuticles before sealing the design because dark burgundy marks are easy to notice against the skin.
Color Placement Guide
9. Emerald Green and Tortoiseshell Nails Bring Earthy Contrast
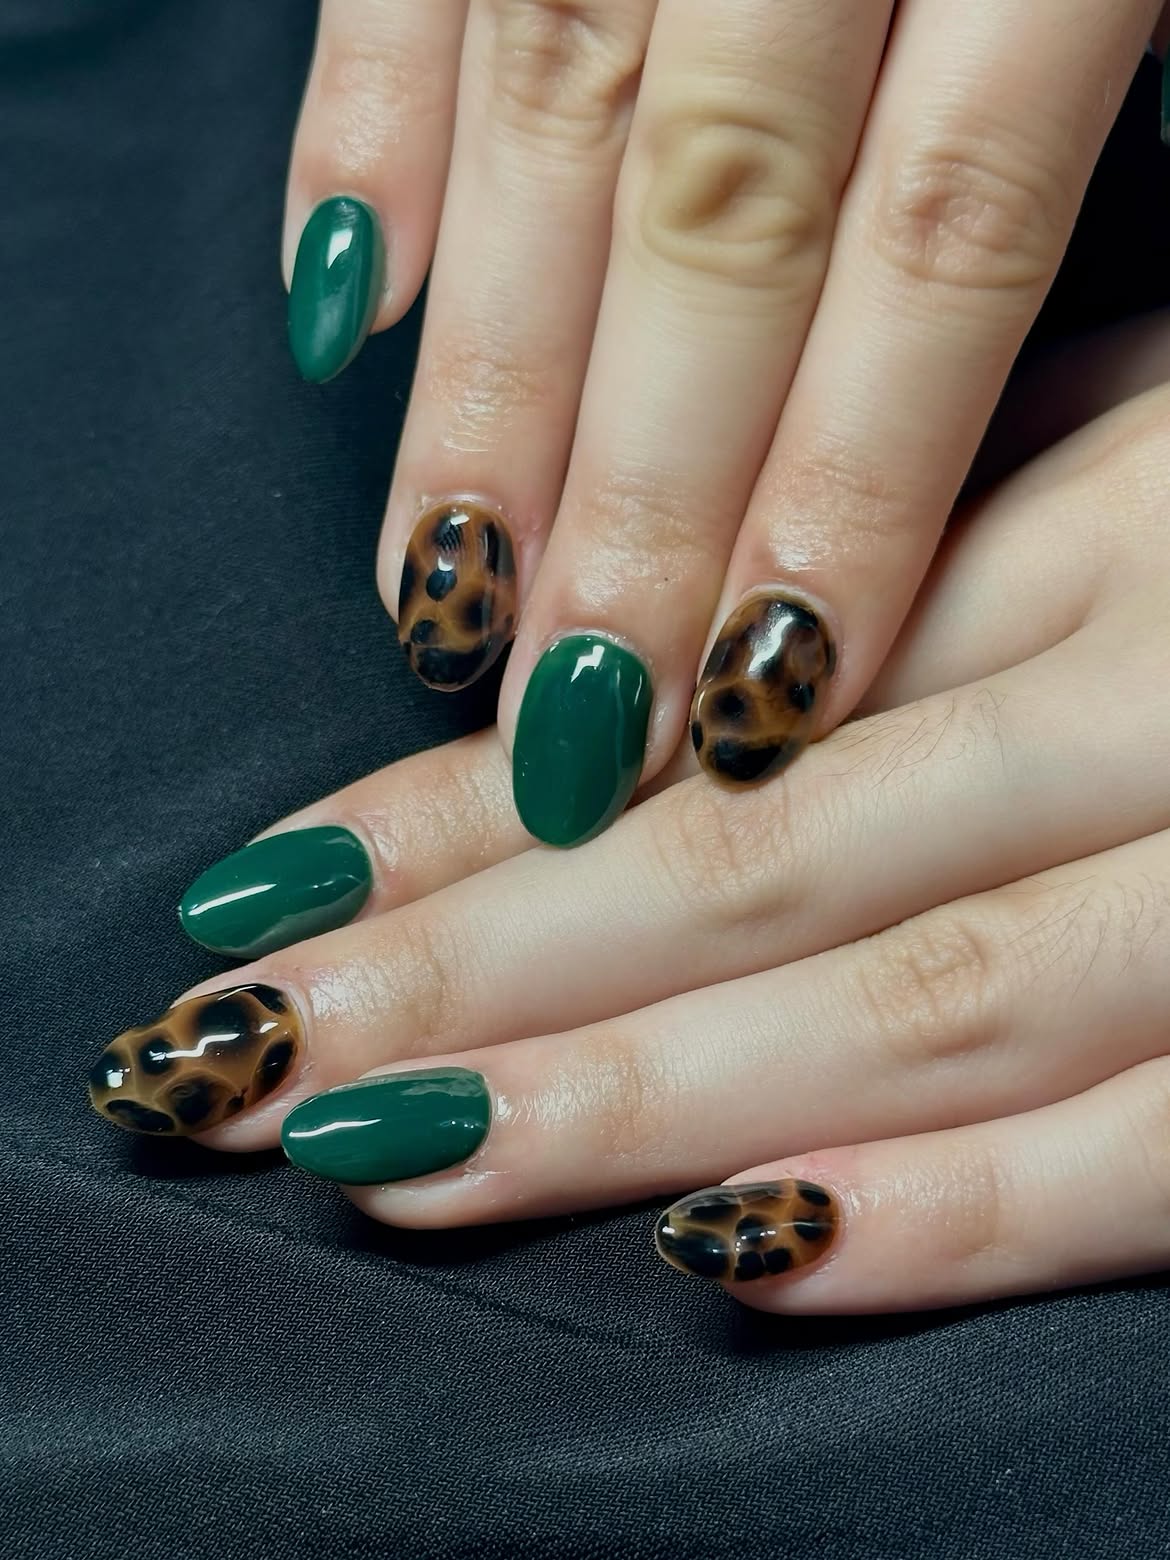
Glossy emerald nails give this manicure a rich, leafy base. The tortoiseshell accents add amber warmth and irregular dark markings, creating a blend that feels natural during the shift into early fall.
The solid green nails provide calm spaces between the detailed accents. This prevents the tortoiseshell pattern from becoming too heavy across both hands.
At Home Pattern Formula
- Alternate solid emerald nails with tortoiseshell accent nails.
- Begin each patterned nail with a sheer amber or warm brown base.
- Add irregular dark brown and near black patches.
- Leave some amber areas visible between the darker marks.
- Cover the pattern with another thin translucent brown layer to soften the edges.
- Keep the spots uneven in size and placement.
- Finish every nail with a glossy top coat.
Work with thin translucent layers.
Leave irregular amber gaps around the dark patches.
Do not cover the base with fully opaque brown.
Avoid placing identical spots on every accent nail.
For more seasonal manicure inspiration, explore these 19 Late Summer Color Early Fall Nails that mix bright summer shades with cozy fall tones.
10. Chocolate Floral Nails with Fine Gold Botanical Details
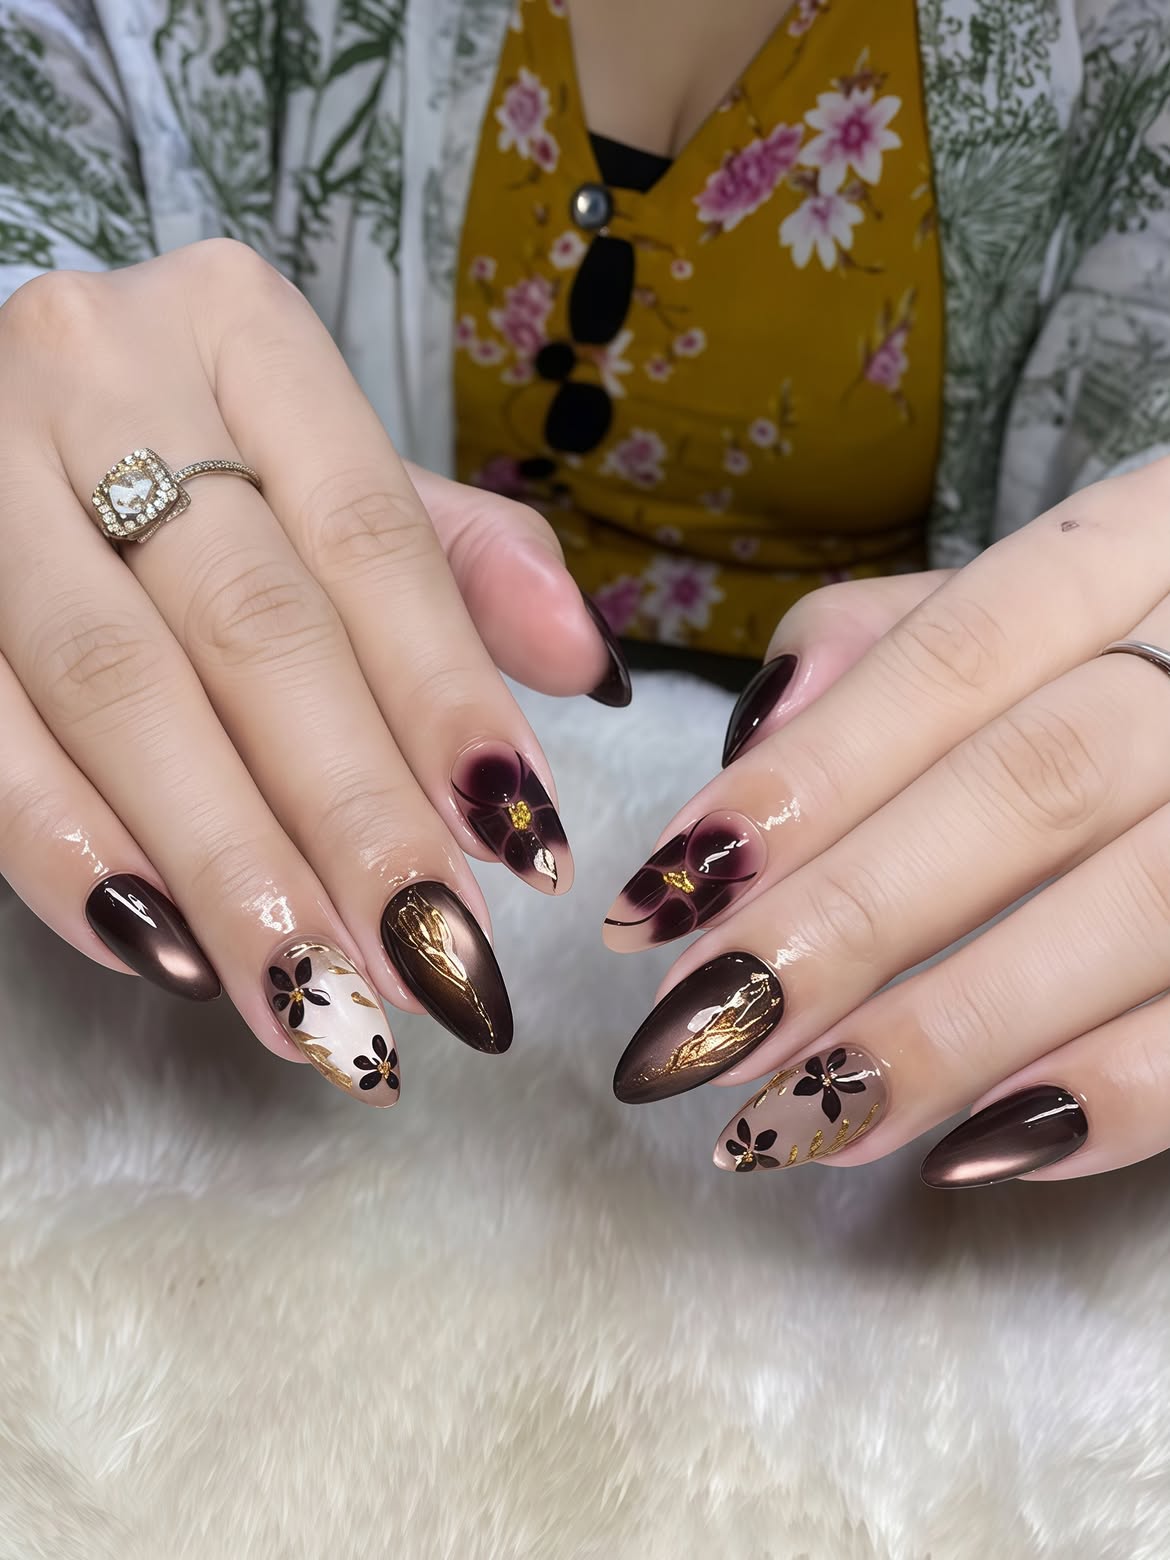
Dark chocolate polish gives this manicure a rich early fall base. Some nails have a smooth glossy finish, while others show a glowing bronze effect. Sheer nude accents carry large burgundy flowers, and fine gold stems bring the whole set together.
The original artwork is detailed, so an easier home version can use decals, foil, or stickers instead of painting every line by hand.
Easier At Home Method
- Shape the nails into a soft almond point.
- Paint several nails with deep chocolate polish.
- Use bronze magnetic polish on selected accent nails.
- Apply a sheer nude shade beneath the floral designs.
- Create each flower with four rounded burgundy petals.
- Place small gold foil pieces near the flower centers.
- Use thin botanical nail stickers for the gold stems and leaves.
- Cover the finished artwork with a strong glossy top coat.
Paint individual petals, narrow stems, leaves, and gold lines with fine nail brushes.
Use floral decals, thin botanical stickers, and small gold foil pieces to copy the layered look with less freehand painting.
11. Rose Gold Glitter Tips Fade into a Bare Pink Base
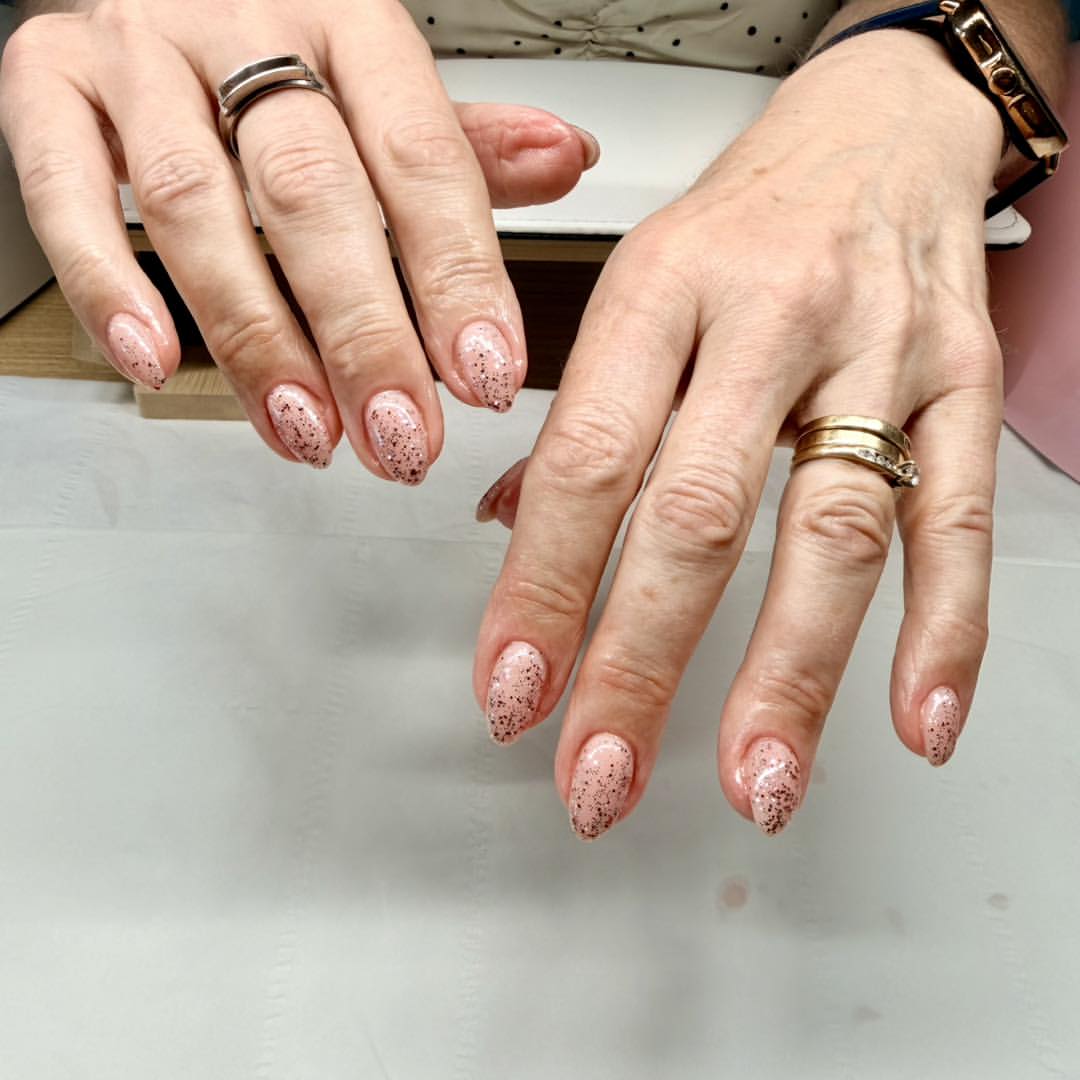
A sheer pink base keeps this manicure soft, while tiny rose gold flecks gather near the tips and fade toward the middle. The scattered sparkle creates a lighter alternative to a solid metallic manicure.
The short oval shape also makes this design practical for daily wear.
Create the Glitter Fade
- Apply a sheer blush polish across every nail.
- Let the base dry before adding the glitter.
- Place most of the rose gold glitter along the free edge.
- Remove excess polish from the brush before tapping glitter toward the middle.
- Leave the area near the cuticle almost clear.
- Add another light layer only at the tips if more sparkle is needed.
- Seal the surface with a smooth glossy top coat.
The warm glitter fits late summer sunlight and brings in the copper tones associated with early fall.
12. Muted Plum Nails with a Single Berry Leaf Accent
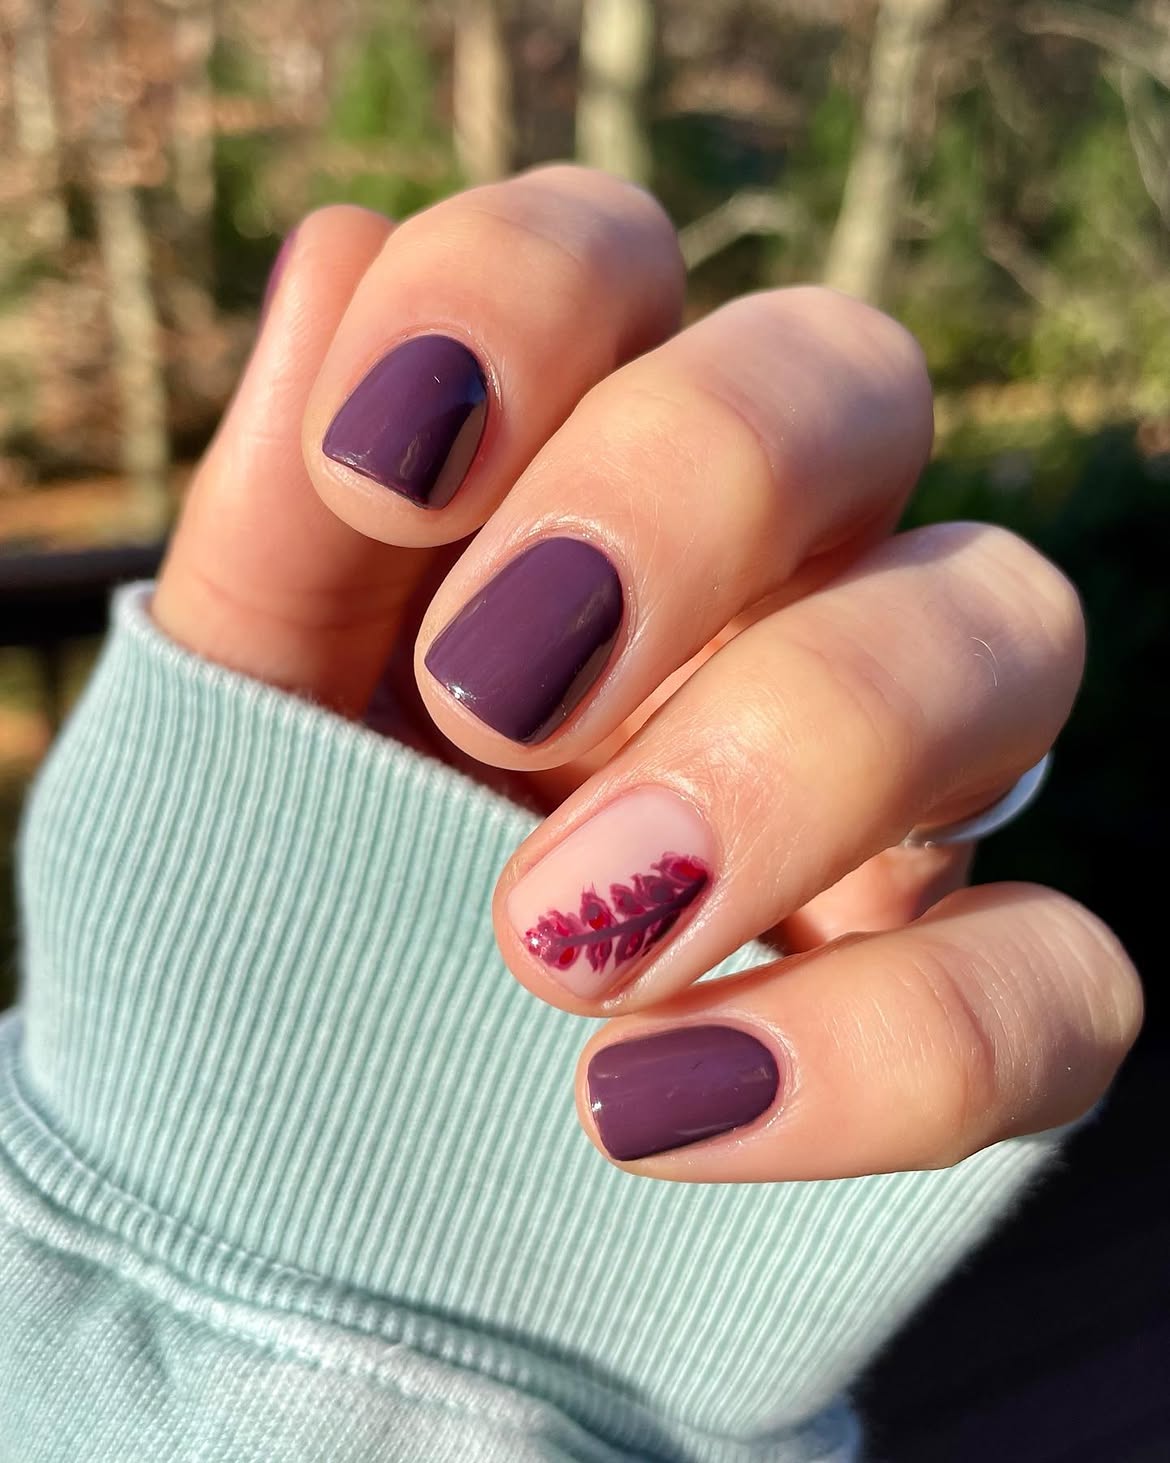
A muted plum shade carries most of this manicure, while one sheer blush nail holds a slim berry colored leaf branch. The limited artwork makes the set easy to recreate and keeps the short square shape looking tidy.
The leaf design adds an early fall detail without relying on orange, brown, or gold.
Paint the Accent Nail
- Apply plum polish to every nail except the ring finger.
- Cover the accent nail with a sheer blush shade.
- Draw one curved stem using a thin nail brush.
- Add small pointed leaves on alternating sides of the stem.
- Use berry red and deep plum for slight color variation.
- Keep the branch near one side so some bare pink remains visible.
- Add a glossy top coat after the leaf design dries.
Repeat the main plum color inside the leaf artwork. This small connection helps the accent nail belong with the rest of the manicure.
13. Burnt Orange Nails with Black Speckles and Gold Foil
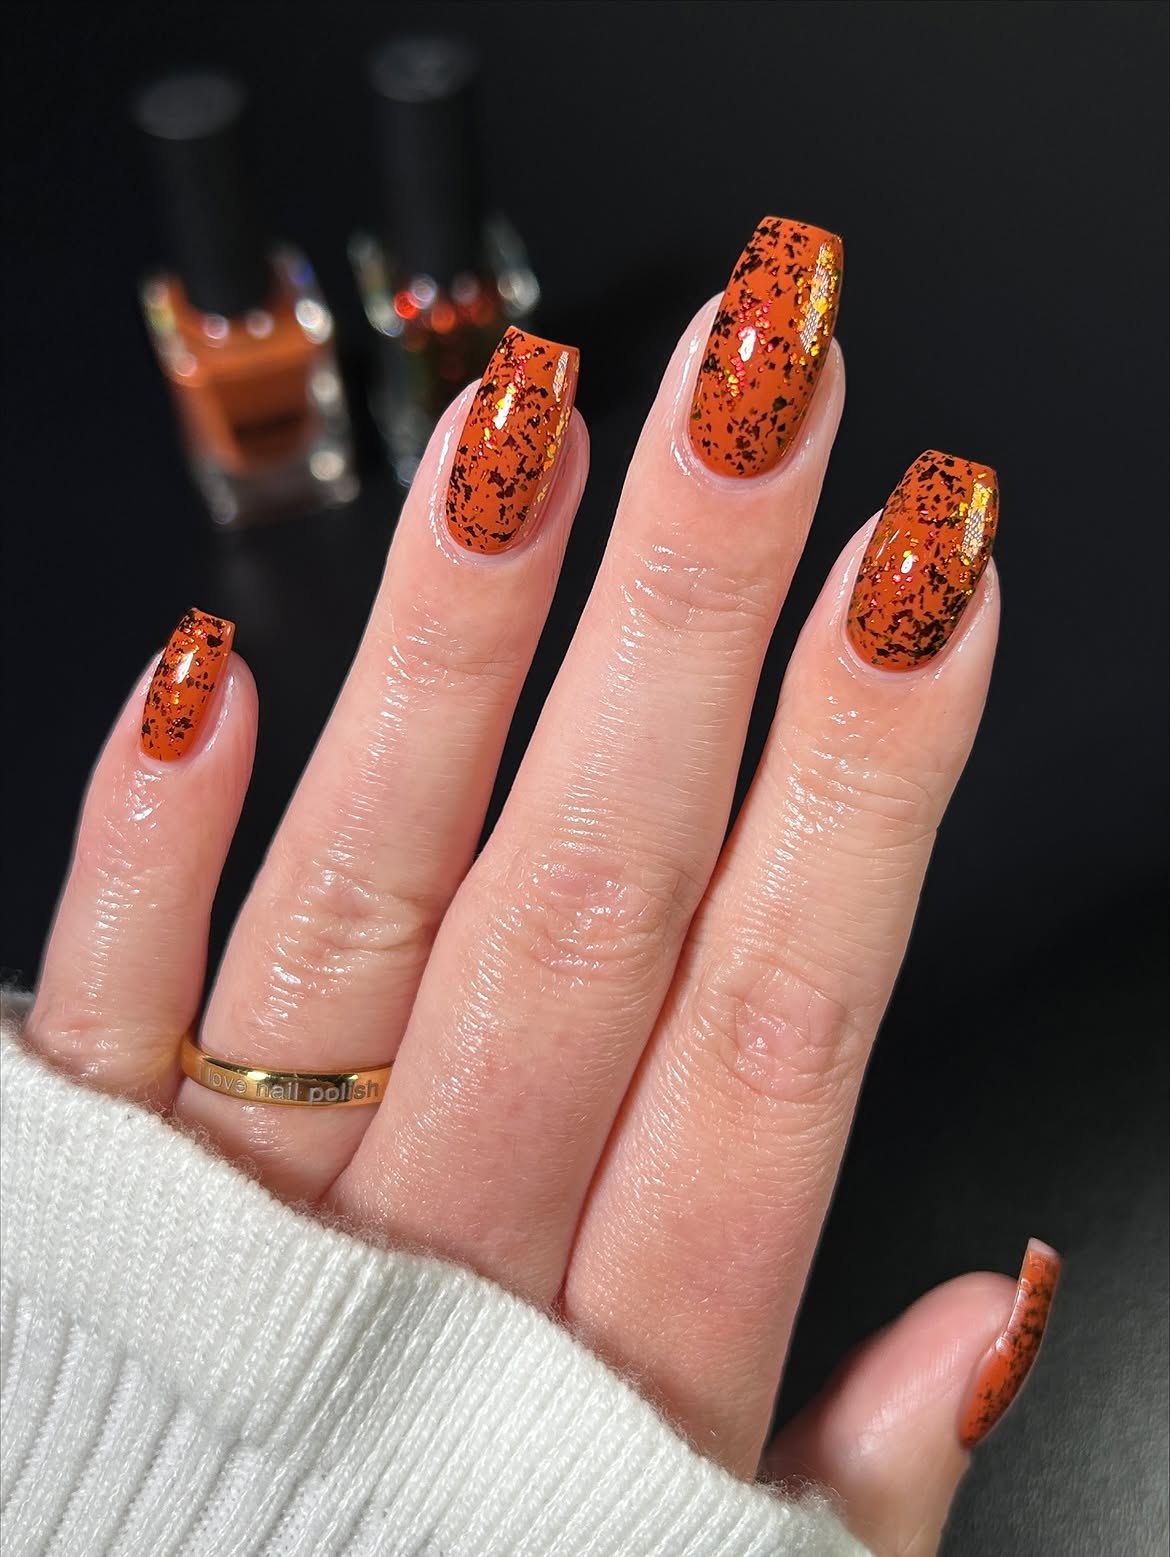
Burnt orange brings a clear autumn note to this manicure. Irregular black flecks create rough contrast, while scattered gold pieces catch the light and keep the color from looking flat.
The repeated texture works well across the long square nails because each flake lands differently. There is no detailed pattern to match from finger to finger.
Build the Layered Finish
- Apply a rich burnt orange base to every nail.
- Let the color dry until it is slightly tacky.
- Tap small black flakes over the surface in uneven groups.
- Add a few gold foil pieces between the dark speckles.
- Leave visible orange spaces around both textures.
- Press raised foil gently so it sits flat.
- Cover the design with a thick glossy top coat.
A ready made speckled topper can make this version much easier to complete at home.
| Black Flecks | Gold Pieces |
|---|---|
| Create strong contrast against the orange. | Add warm reflected shine. |
| Scatter several small pieces across each nail. | Use fewer pieces so the metallic detail stays visible. |
| Keep the placement irregular. | Press every piece flat before sealing. |
14. White Heart French Tips on a Sheer Pink Base
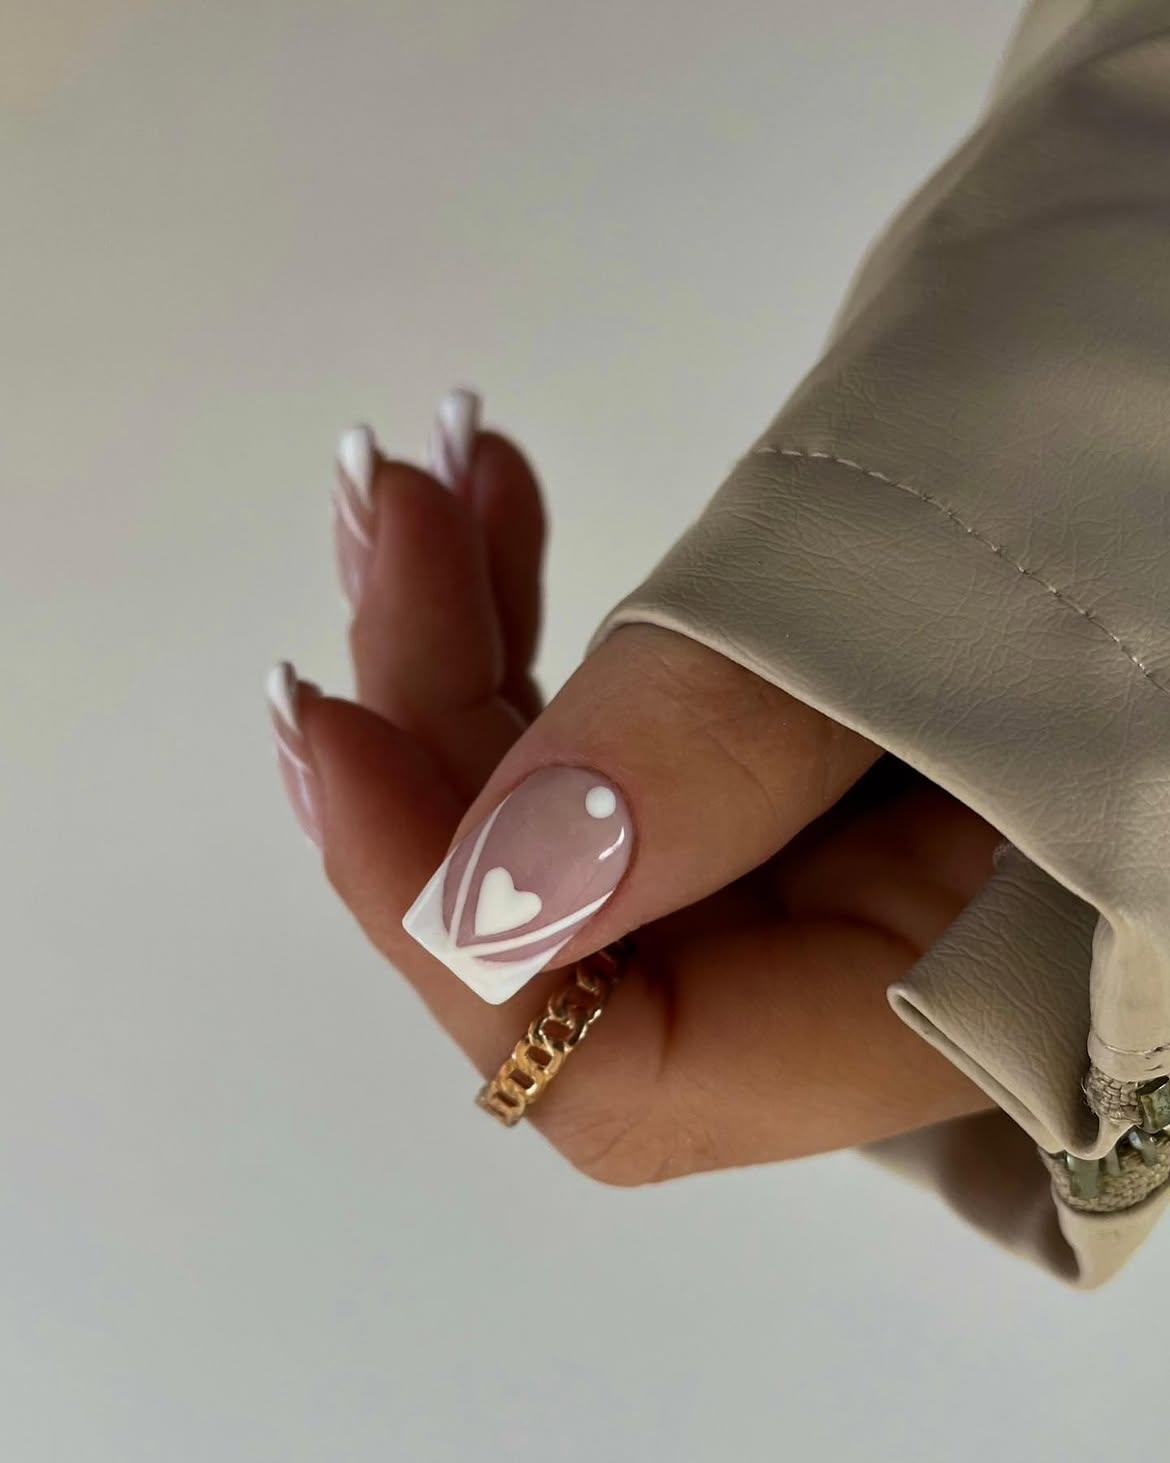
The featured nail uses a sheer rosy base with a crisp white square tip. A small white heart sits above two narrow curved lines, while one dot near the cuticle balances the design.
This manicure keeps the light feeling of late summer and works easily with cream, beige, brown, and other early fall clothing colors.
Paint the Heart Detail
- Shape the nail into a straight square tip.
- Apply a sheer pink polish across the whole nail.
- Paint the free edge with opaque white polish.
- Create the heart using two small white dots pulled into one point.
- Draw two slim curved lines beneath the heart.
- Place one round white dot near the cuticle.
- Let the artwork dry before applying a glossy top coat.
Use the accent design on one or two nails if painting every finger feels too detailed.
Simple Tool Kit
15. Blush Floral Nails with Gold Edges and White Petals
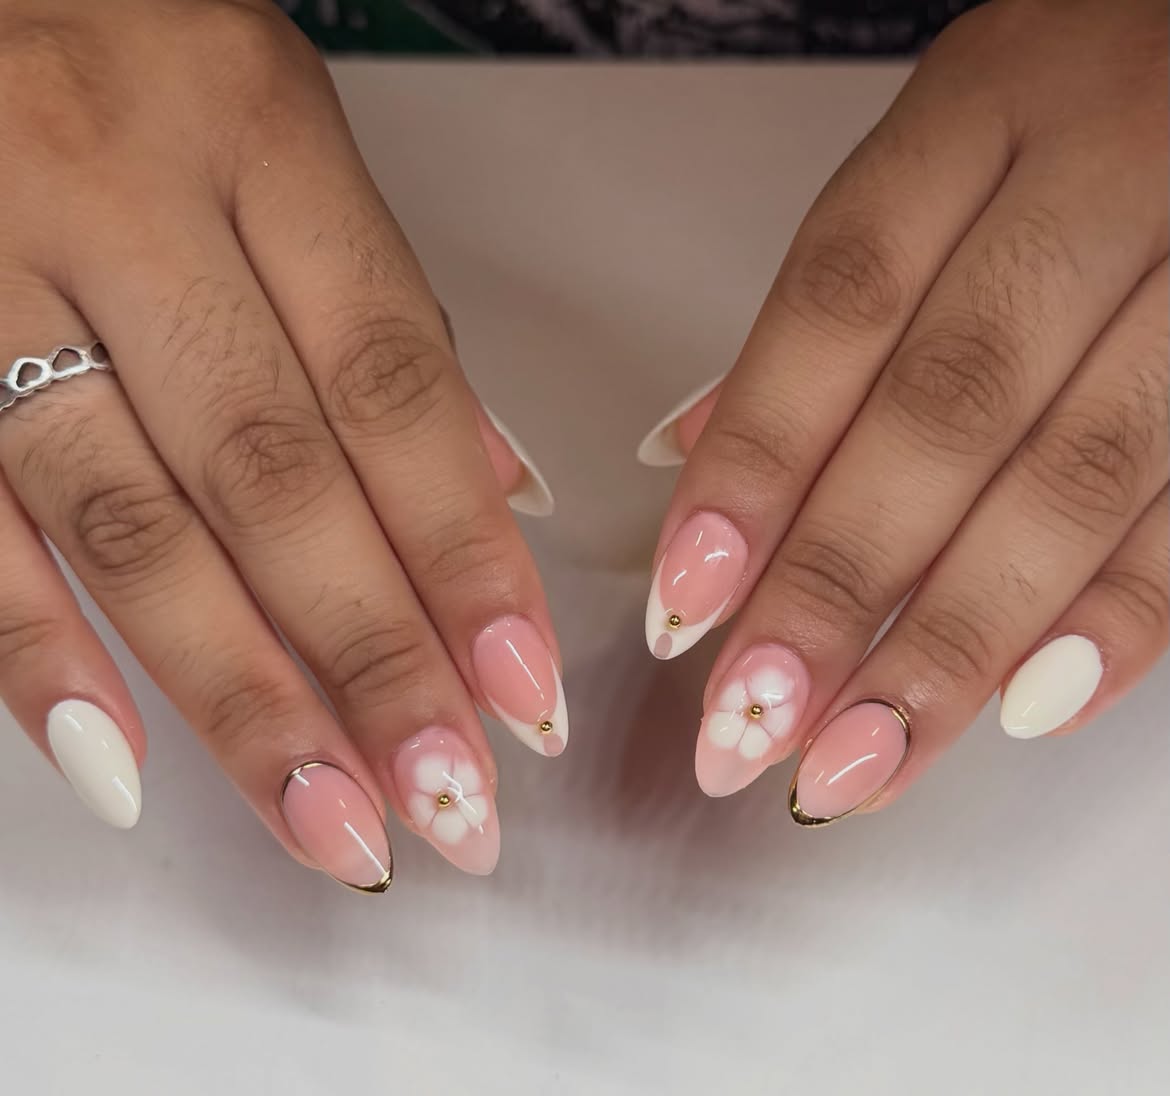
Soft pink, ivory, and thin gold lines give this manicure a clean seasonal transition. Some nails are fully white, others carry narrow French tips, and the blush nails are finished with raised white flowers or slim metallic borders.
Tiny gold centers connect the flowers to the outlined nails. The result stays light enough for late summer while introducing the warmer shine of early fall.
Create an Easier Home Version
- Apply sheer blush polish to most nails.
- Paint selected nails with creamy white polish.
- Use a French tip guide for the narrow white tips.
- Add thin gold striping tape around the edges of chosen nails.
- Attach white flower decals to one nail on each hand.
- Place a small gold stud in the center of every flower.
- Secure raised decorations with nail glue.
- Apply the top coat around the flowers instead of covering the petals heavily.
📌 Order Matters
Complete the blush base, white tips, and gold borders first. Attach the raised flowers and gold centers only after the flat polish details have dried.
16. Bubblegum Pink Cloud Nails with Tiny White Stars
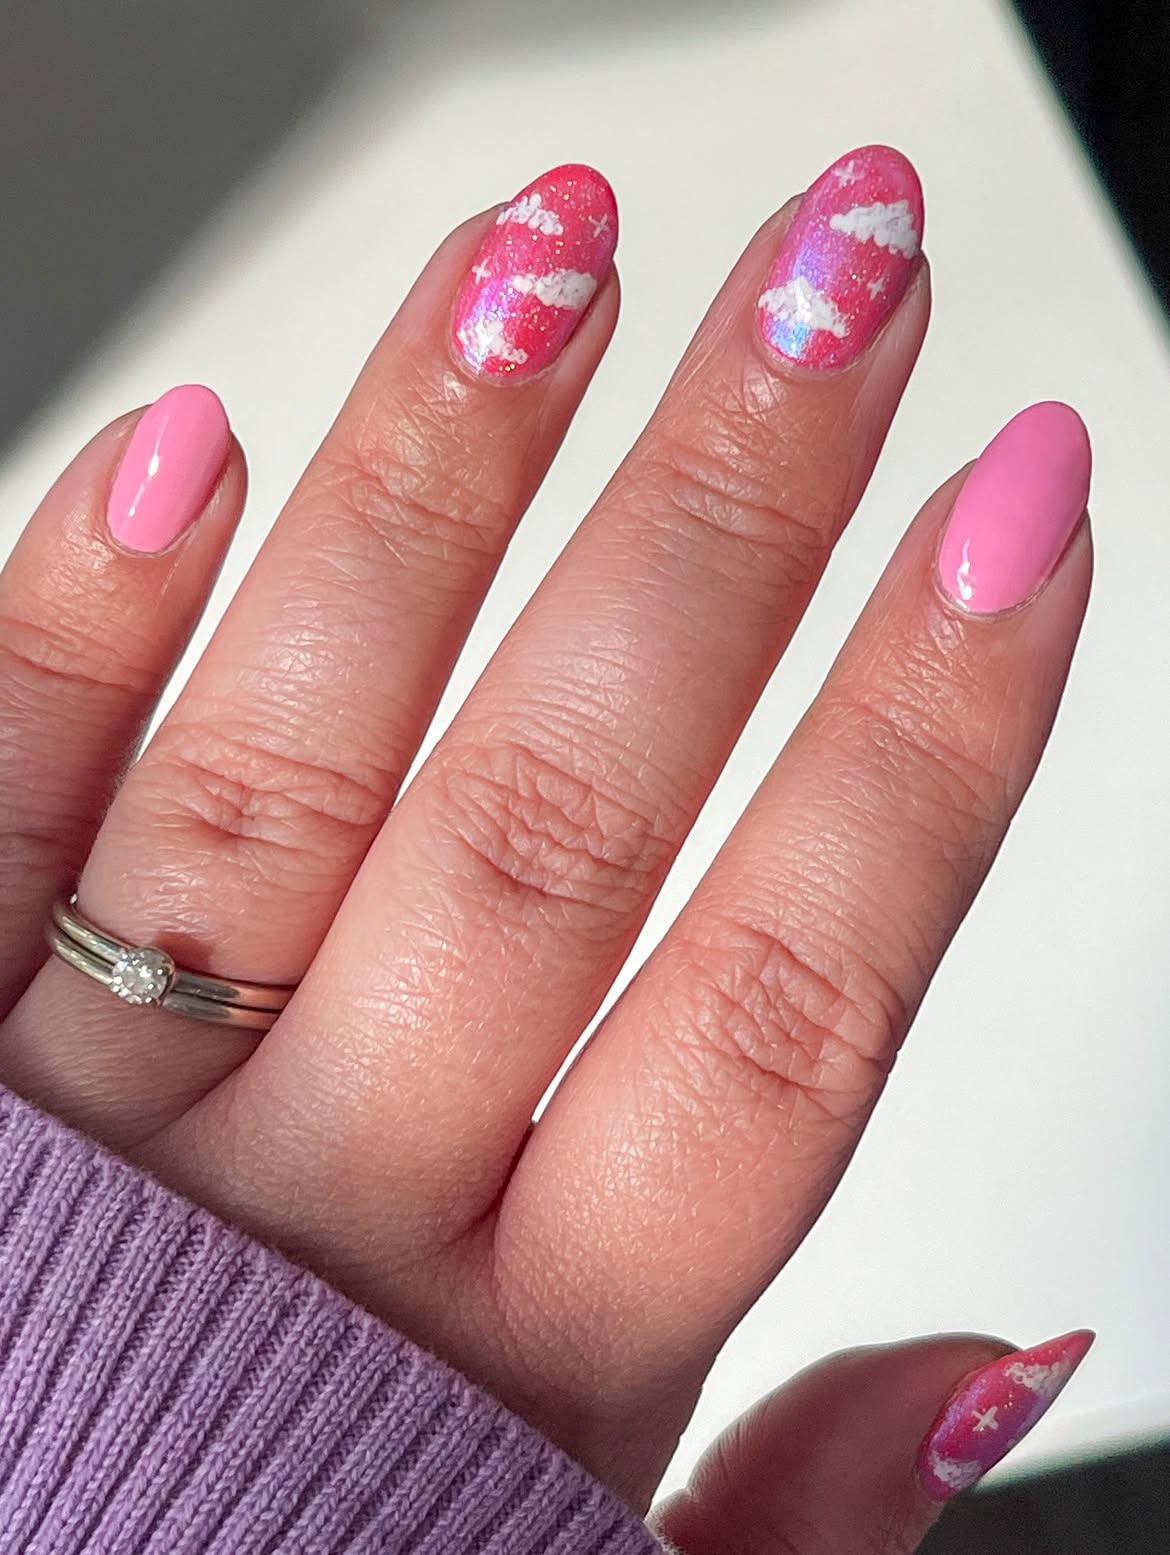
Bubblegum pink keeps this set bright, while the accent nails add iridescent shimmer, small white clouds, and tiny cross shaped stars. The clouds are soft and slightly uneven, so the design does not require exact freehand lines.
Solid pink nails give the eye a break between the busier sky details.
Paint the Cloud Accents
- Apply glossy pink polish to the solid nails.
- Cover the accent nails with pink shimmer or an iridescent topper.
- Make each cloud with three or four overlapping white dots.
- Pull the lower edges together with a small brush.
- Add tiny white crosses and dots in the open spaces.
- Keep the artwork light so the glitter remains visible.
- Finish with a glossy clear coat after the clouds dry.
The cheerful pink holds onto late summer color while the cloudy artwork gives it a softer seasonal feel.
17. Retro Abstract Tips in Olive, Mustard, Rust, and Brown
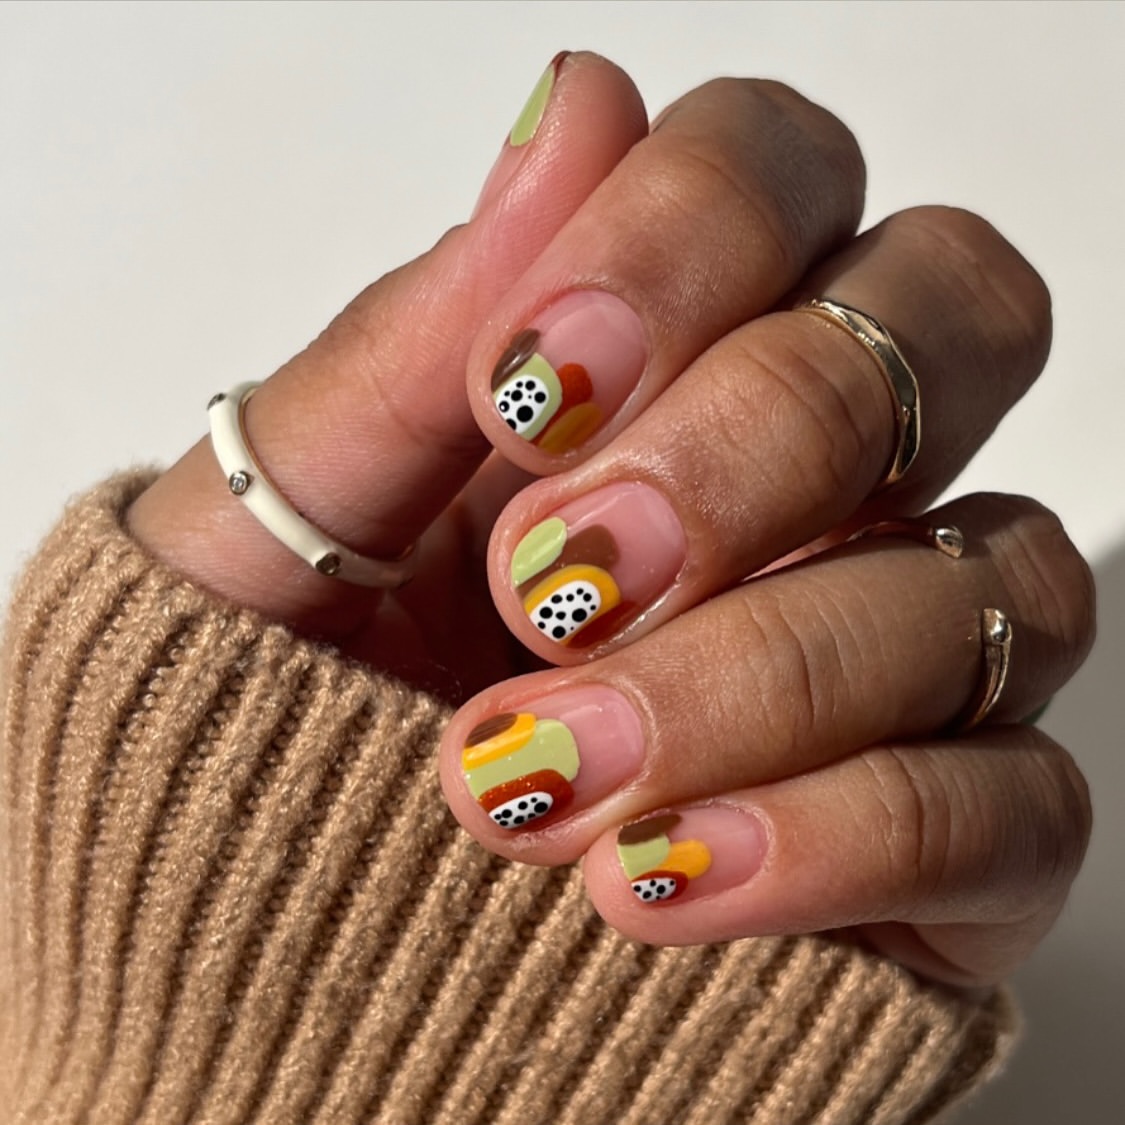
Most of the sheer pink base remains visible, so the mixed colors do not overwhelm the short rounded nails. Olive keeps the palette fresh for late summer, while rust and brown introduce early fall warmth.
Build the Abstract Tip Design
- Apply a sheer pink base to every nail.
- Keep the artwork close to one corner or along the tip.
- Paint the widest olive and mustard shapes first.
- Layer smaller rust and brown curves over them.
- Add a small white rounded section near the edge.
- Place tiny black dots inside the white area.
- Change the arrangement slightly on every nail.
- Seal the layered artwork with a glossy top coat.
Cluster the colors near the nail tips.
Repeat the white dotted detail across several nails.
Do not cover the entire sheer pink base.
Avoid copying the exact same shape arrangement on every nail.