How to Pick Winter Nail Colors for a Minimalist Manicure Now

Choosing a winter manicure sounds simple until every shade starts to feel too dark, too festive, or too plain. Seasonal nails do not need snowflakes, heavy glitter, or detailed art to feel right for colder weather. A thoughtful color palette, clean shape, and controlled finish can do most of the work.
These 19 Winter Nail Colors for a Minimalist Manicure cover familiar favorites and less expected choices. Rich burgundy, navy, deep teal, and mushroom taupe bring warmth and depth. Milky white, icy blue, sheer blush, and fine pearl shimmer offer a softer look. Brighter shades such as orchid, berry, pistachio, and mint also earn a place when balanced with neutral bases or limited to one accent.
Each idea includes practical ways to simplify the design shown in the photo. You will find guidance for choosing color pairs, using negative space, limiting patterns, and adding small metallic details without making the manicure feel crowded. Use these examples to find a winter palette that suits your style, nail length, and comfort level.
18+ Winter Nail Colors for a Minimalist Manicure
1. Deep Plum Gives a Minimalist Winter Manicure More Depth
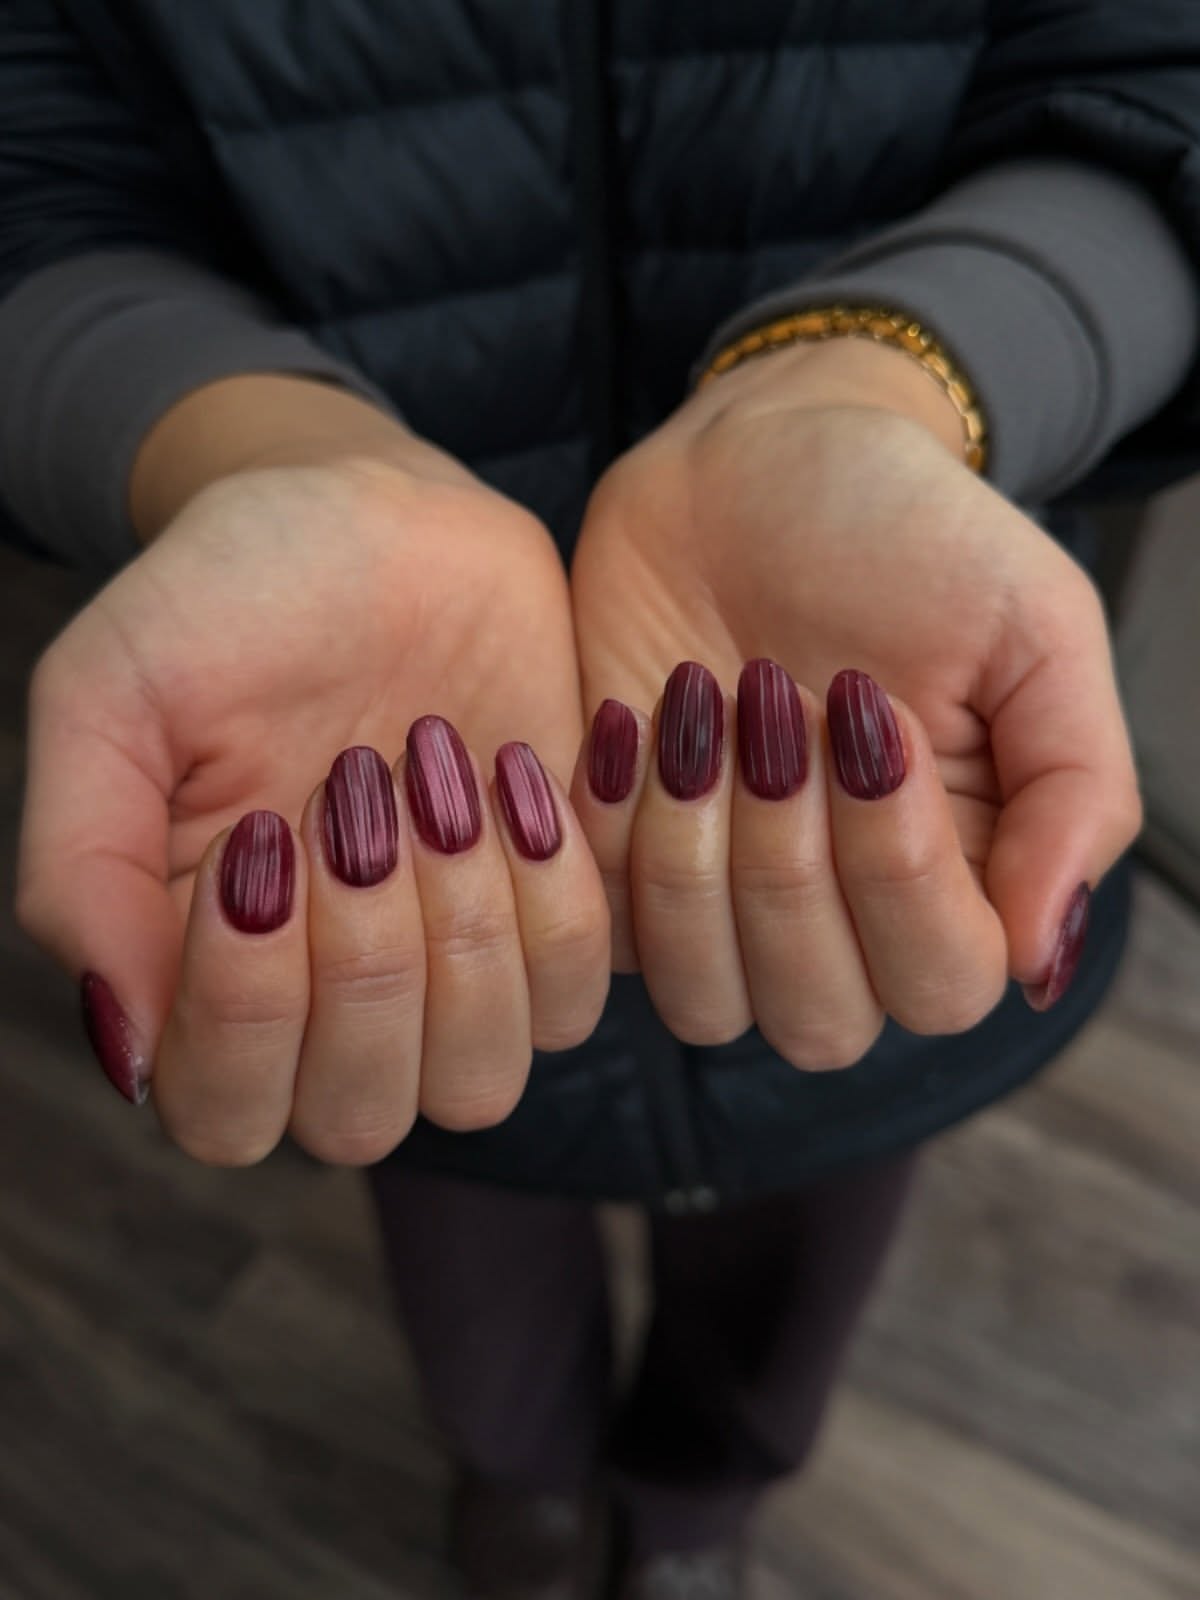
Deep plum brings winter richness without needing extra nail art. On these short, softly rounded nails, the dark berry color looks neat and refined rather than heavy.
The shade sits between red and purple, so it feels warmer than black while still carrying a moody seasonal character. Fine lines of reflected light give the glossy surface subtle movement.
To recreate the look, keep one color across every nail and maintain a consistent shape and length. Let the rich color and reflective finish provide all the detail. Pay close attention to the cuticle line, since uneven edges are easier to notice with dark polish.
Shape first: File each nail into a short, softly rounded form.
Build the color: Use thin coats so the deep plum stays smooth and even.
Keep it glossy: Finish with clear shine and skip extra decoration.
2. Blackened Emerald Adds Quiet Sparkle to Square Nails

Almost black in the shade and emerald under direct light, this color has the depth winter nails need. The fine green shimmer keeps it from looking flat, while the bright diagonal reflection creates a focused cat eye effect.
What works here: The long square shape gives the dark shade a clean, structured edge. Using the same polish on every nail keeps the manicure simple, even with the shifting sparkle.
Choose this look when you want a darker color with more interest than plain black. Apply the shimmer consistently so the reflective bands face a similar direction. This small detail makes the finished set look balanced and carefully planned.
Use one emerald shade across the full set.
Direct each reflective band at a similar angle.
Avoid adding gems to every nail.
Do not mix several glitter finishes in one set.
3. Turn Berry and Chartreuse Nail Art Into a Minimalist Winter Palette

Berry red and yellow green form an unexpected color pairing with plenty of personality. The image uses glossy short nails, floral shapes, scattered spots, and loose brush details to connect the two shades.
For a minimalist version, borrow the palette instead of copying every pattern. Paint most nails in deep berry, then reserve the yellow green for one accent nail. A single petal shape or tiny dot near the cuticle will link the colors without making the manicure feel busy.
The deeper red gives the set its winter mood. The brighter green brings contrast and keeps the result from feeling too traditional. Use a glossy finish across the full set so both colors look connected.
| Image detail | Minimalist edit |
|---|---|
| Several floral patterns | One small flower on an accent nail |
| Both colors on most nails | Berry base with one green accent |
| Mixed spots and brush details | A few dots placed near the cuticle |
If you prefer a classic tip design, these 18 Simple Winter French Tips for Short Nails offer fresh ways to make short nails look elegant in colder months.
4. Pistachio Green and Tortoiseshell Make a Softer Winter Pairing

Pistachio green gives this almond manicure a fresh base, while the translucent brown tortoiseshell details add warmth and winter depth. The pale pink nail creates breathing room between the stronger colors.
Small green dots connect the patterned nails to the solid green ones. This repeated color keeps the mixed design looking coordinated instead of random.
To create a more minimalist version:
- Use pistachio green on two or three nails
- Keep tortoiseshell on one full accent nail
- Add a slim brown tip to one pale pink nail
- Repeat the green through a few tiny dots
- Use the same glossy finish across every nail
The almond shape softens the contrast and gives the darker brown accents a clean, graceful outline.
Warm brown gives the manicure seasonal depth, while pistachio green keeps it light. Repeating the green in tiny details makes both finishes feel connected.
5. Pair Icy Mint with Cocoa Dots for a Minimalist Winter Manicure

Cool mint does not have to feel summery. Paired with warm cocoa brown, it becomes softer, richer, and better suited to the colder season. The rounded dots add personality without relying on detailed artwork.
Why this design stays visually clean:
- One mint shade covers every nail
- The brown circles use a consistent size
- Wide spaces stop the pattern from feeling crowded
- Some dots meet the nail edges for a natural scattered look
- A glossy finish connects both colors
For a quieter version, decorate only two accent nails and leave the others solid mint. Keep the dots large and limited in number. Tiny dots placed everywhere would make the design look busier.
💡 Placement Tip
Let a few brown circles extend beyond the side or tip of the nail. This makes the pattern look naturally scattered while the open mint spaces keep it restrained.
6. Layer Milky White Swirls for an Icy Minimalist Manicure

Start with a cloudy white base instead of a flat, solid coat. The soft layers in this manicure create a frosted effect, while faint pearly shimmer gives the nails gentle movement under the light.
Build this snowy look with:
- A sheer or milky white foundation
- Soft white curves placed in different directions
- Light pressure so the lines remain wispy
- A small amount of shimmer for a frozen glow
- A glossy top layer to smooth the design
The pointed almond shape adds length, but the pale single color keeps the result calm. Avoid making every swirl identical. Slight variation helps the pattern resemble drifting frost rather than painted stripes.
7. Scatter Berry Dots Over a Sheer Blush Base
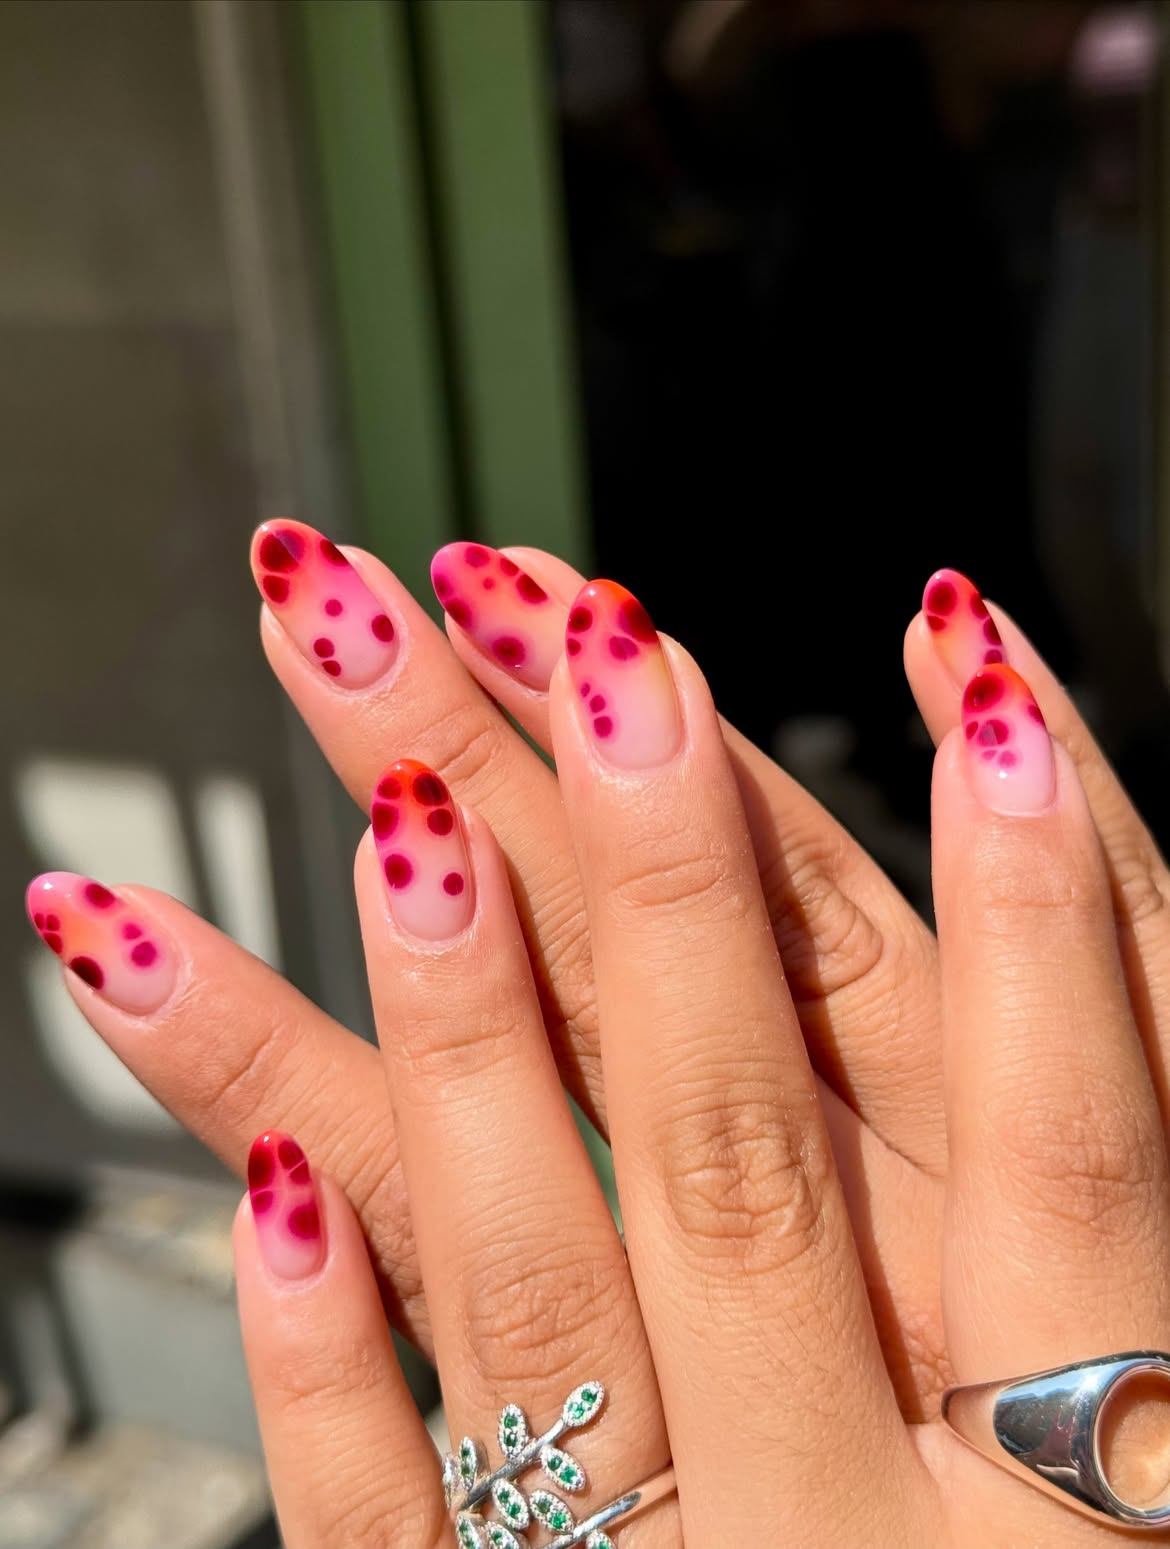
Negative space does most of the work in this manicure. A translucent blush base keeps the nails light, while soft edged dots in bright pink, red, and deep berry create a playful winter pattern.
The circles gather around the tips and sides instead of covering the full nail. This placement lets the natural base remain visible and stops the bold colors from becoming overwhelming.
Keep the spotted design balanced:
- Choose two or three shades from one color family
- Mix larger circles with a few smaller dots
- Leave open space around the center of each nail
- Place deeper berry tones near the tips
- Keep the almond shape smooth and consistent
The blurred edges give the dots a soft watercolor quality that suits the sheer background.
Dots cover the whole nail with little space between the colors.
Dots stay near the tips and edges, leaving the sheer blush base visible.
8. Blend Mint Into Espresso for a Moody Winter Contrast

The strongest color lesson in this set is the meeting of pale mint and deep espresso. One feels cool and airy, while the other adds weight and warmth. Gold beads bring a small flash of light between them.
Some nails show striped mint tips over a sheer nude base. Others use a smoky fade with mint at the center and dark color around the edges. For a minimalist manicure, choose only one of these treatments.
Edit the look down with these choices:
- Keep the sheer nude base visible
- Select mint tips or the smoky fade
- Use espresso lines on one accent nail
- Add only one or two tiny gold details
- Repeat the same almond shape throughout
Limiting the decorative elements allows the unusual winter color pairing to remain the main focus.
9. Choose Cool Orchid When Dark Winter Shades Feel Too Heavy

Winter color does not have to be dark. This vivid orchid brings energy to a simple manicure while keeping the same clean feeling as a classic solid shade.
Its cool pink and purple balance gives it more depth than bubblegum pink. The smooth oval shape and glossy surface allow the bright color to stand on its own.
Why the one color approach works:
- Every nail uses the same orchid shade
- The short length keeps the bold color practical
- Rounded edges soften the vivid tone
- No patterns compete with the clean finish
- High shine makes the manicure look fresh
Keep the cuticle line tidy and the nail lengths even. With such a noticeable color, small differences in shape will be easier to see.
Refine the shape: Keep the oval outline smooth and consistent across every nail.
Build thin layers: Apply the orchid color gradually for an even, smooth surface.
Seal the shine: Add a clear glossy layer and avoid extra decoration.
For longer nail inspiration, explore 17 Winter Acrylic Nails for Long Coffin Nails with elegant colors, glossy finishes, and statement seasonal designs.
10. Pull Cobalt and Icy Blue from a Rainbow French Set

A full rainbow can still offer useful direction for a minimalist winter manicure. The sheer nude base keeps this colorful set light, while pointed tips and small stars create a playful finish.
To make the idea feel calmer and more seasonal, select only the coolest shades from the palette. Cobalt, icy blue, and soft lilac work well together without losing the cheerful character of the original design.
Simplify the look with these edits:
- Limit the tips to two cool colors
- Keep the nude base clear and glossy
- Add one small star on each hand
- Use a tiny silver detail at the center
- Maintain the same slim almond shape
The open nude area is important. It gives bright colors room to stand out without filling the whole nail.
| Colorful version | Winter edit |
|---|---|
| A different color on each tip | Cobalt and icy blue tips only |
| Stars placed across many nails | One small star on each hand |
| Several bright color families | One cool color family with silver details |
11. Try Tonal Stripes Instead of Detailed Winter Art

Thin stripes can carry a whole manicure without extra symbols or decoration. The image shows two playful versions, one with raspberry pink and pale lines, and another with bright orange red and soft blush lines.
Using a lighter stripe from the same color family creates contrast while keeping the palette controlled. The short rounded shape also makes the repeated pattern feel neat and wearable.
For clean and consistent stripes:
- Choose a solid base with strong coverage
- Pair it with one lighter stripe color
- Keep every line narrow
- Use similar spacing across each nail
- Angle the stripes in the same direction
- Finish with a smooth glossy layer
Berry and blush offer the moodier winter choice, while orange red brings more warmth.
Choose this pairing for a cooler, richer look that feels lively without losing its winter depth.
Choose this pairing for warmer color with a cheerful candy inspired finish.
12. Soften Apricot with Icy Blue and White Linework
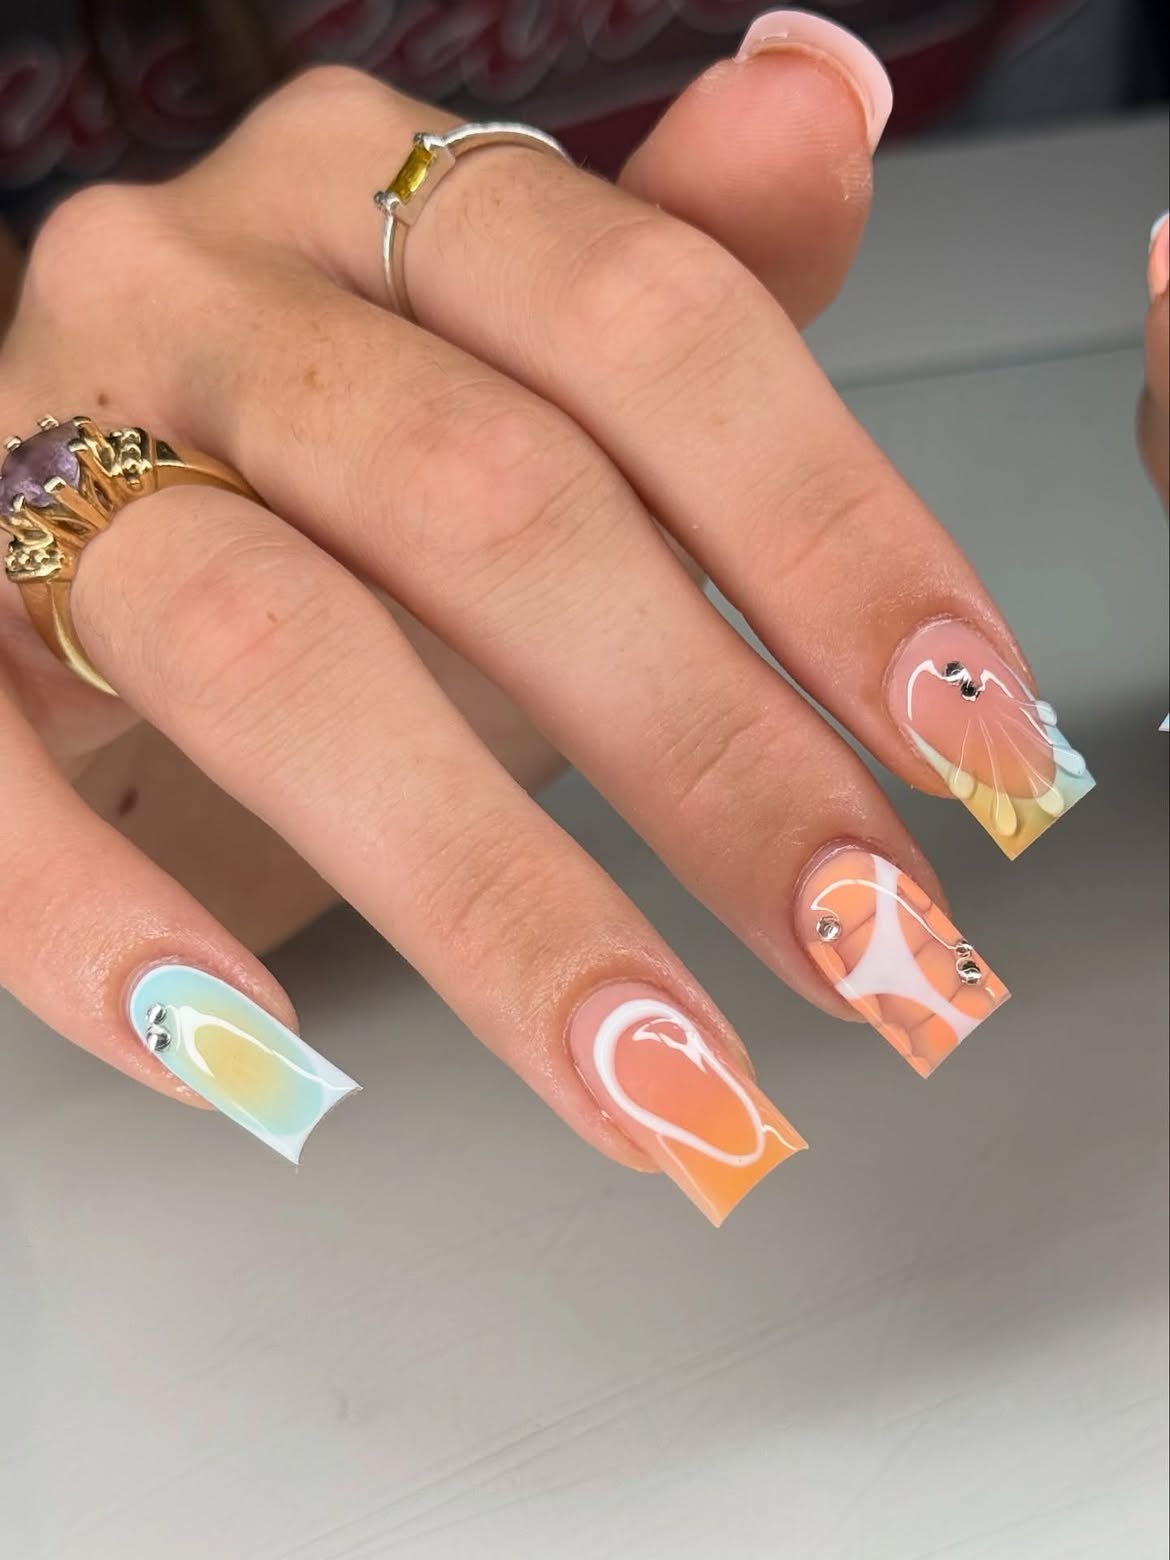
Clear space plays an important role in this pastel manicure. Sheer apricot, pale blue, and soft yellow overlap without becoming fully opaque. White curves and small silver details bring the different nails together.
The artwork shown is detailed, but its color formula can be reduced for a minimalist winter set. Keep apricot as the main shade, then add icy blue to one accent nail.
Create a quieter version with:
- A sheer nude or clear foundation
- Soft apricot on most of the tips
- One pale blue accent nail
- A single white curve on selected nails
- One or two small silver studs
- The same glossy finish across the set
The cooler blue balances the warm apricot, while the white linework gives the manicure a crisp frosted touch.
Let apricot provide warmth, use icy blue as a small contrast, and repeat white only where the design needs a clean connection.
13. Ground Neon Green with Black for a Bolder Winter Look

Treat this design as a color board rather than a direct minimalist plan. It combines neon green, hot pink, blue, pale yellow, black dots, animal stripes, flowers, and small gems.
The useful winter idea is the contrast between bright green and strong black. Black gives the neon shade more weight, while a cream or sheer base keeps the set from feeling too dark.
Reduce the full design with these choices:
- Use neon green on one or two nails
- Keep the remaining nails black or sheer
- Choose dots or stripes, not both
- Limit the pattern to one accent nail
- Skip the gems or use one tiny silver stud
- Repeat the same glossy finish throughout
This edit keeps the fearless color story while removing the competing details.
⚠️ Watch the Pattern Count
One printed nail and one bright solid shade create enough contrast. Adding dots, stripes, flowers, and gems together will move the manicure away from a minimalist finish.
14. Rework Aqua and Blush Into a Frosted Winter Palette
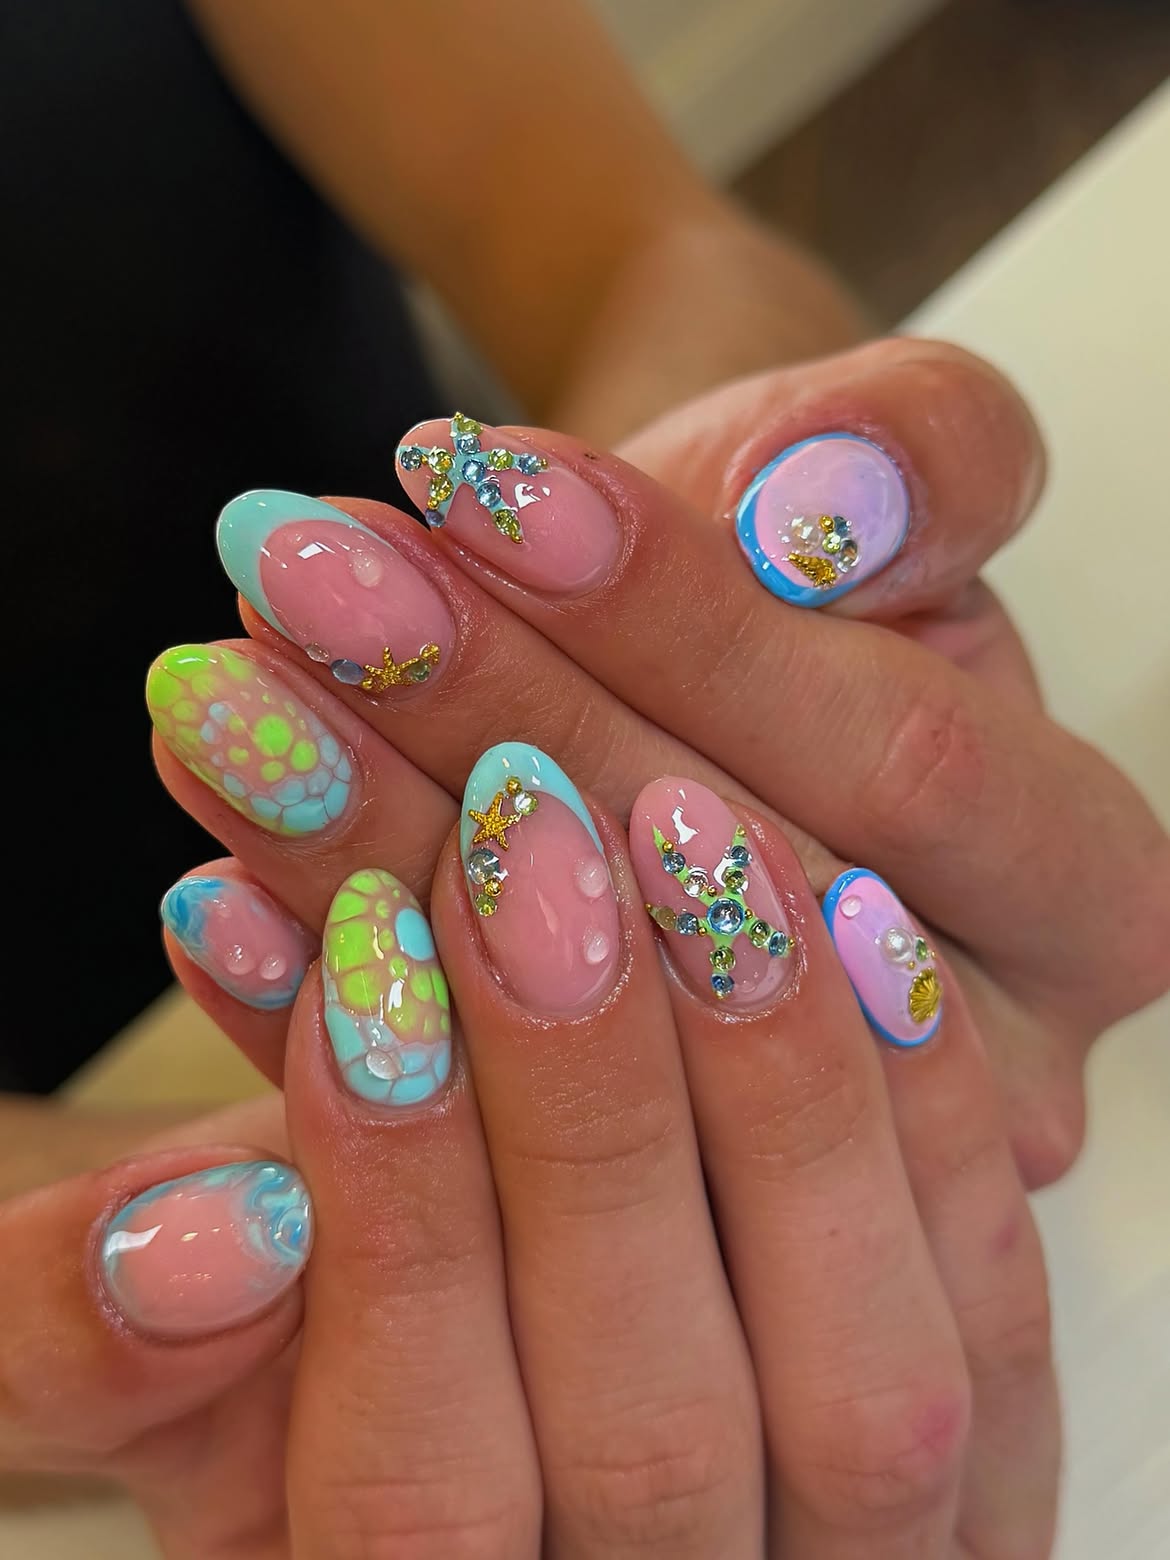
Aqua, blush, and lime give this manicure a clear sea inspired character. The image includes watery swirls, bubble details, bright scale patterns, gold shells, star shapes, and scattered gems.
For a winter interpretation, focus on the palest aqua and sheer pink parts of the design. These colors can resemble ice when the brighter green and most of the decorations are removed.
Create the cooler minimalist edit with:
- A sheer blush base across every nail
- Thin icy aqua tips on selected nails
- One soft blue swirl as an accent
- A single gold star or shell detail
- Clear shine instead of raised water drops
- No more than one decorated nail per hand
The soft base keeps the manicure delicate, while aqua adds a crisp color edge.
15. Fade Sheer Pink Into White for a Minimalist Winter Manicure

Snowy white becomes softer when it fades into a sheer pink base. The gradual color change keeps the manicure natural near the cuticles and brighter at the tips.
A layer of fine shimmer catches the light without covering the clean gradient. Short soft square nails make the pale design practical and polished.
Ask for these details:
- A translucent pink base near the cuticles
- White color blended gradually toward the tips
- Soft transitions with no visible dividing line
- Fine silver or pearl shimmer
- Short nails with gently rounded corners
- A smooth glossy finish
Keep the shimmer light so the white fade remains easy to see. Dense glitter would hide the delicate color transition.
16. Choose Mushroom Taupe for a Quiet Everyday Winter Manicure

Mushroom taupe sits between grey and beige, giving it a calm depth that suits colder months. The image uses one glossy shade across short, softly squared nails with no patterns or added decoration.
This color feels warmer than standard grey but cooler than a nude beige. That balance makes it easy to pair with winter knits, dark coats, and neutral outfits.
What to look for in a taupe polish:
- A balanced mix of grey and beige
- Medium depth that remains visible on the nail
- Smooth coverage with no streaks
- A short square shape with rounded corners
- Clean cuticle edges
- A glossy finish for gentle reflection
Check the polish in daylight before deciding, since indoor lighting can make taupe appear warmer or cooler.
Creates a cooler, sharper result that works well with silver jewelry and charcoal clothing.
Creates a warmer, softer result that works well with gold jewelry and cream knitwear.
17. Use Navy as a Single Accent Against Winter White
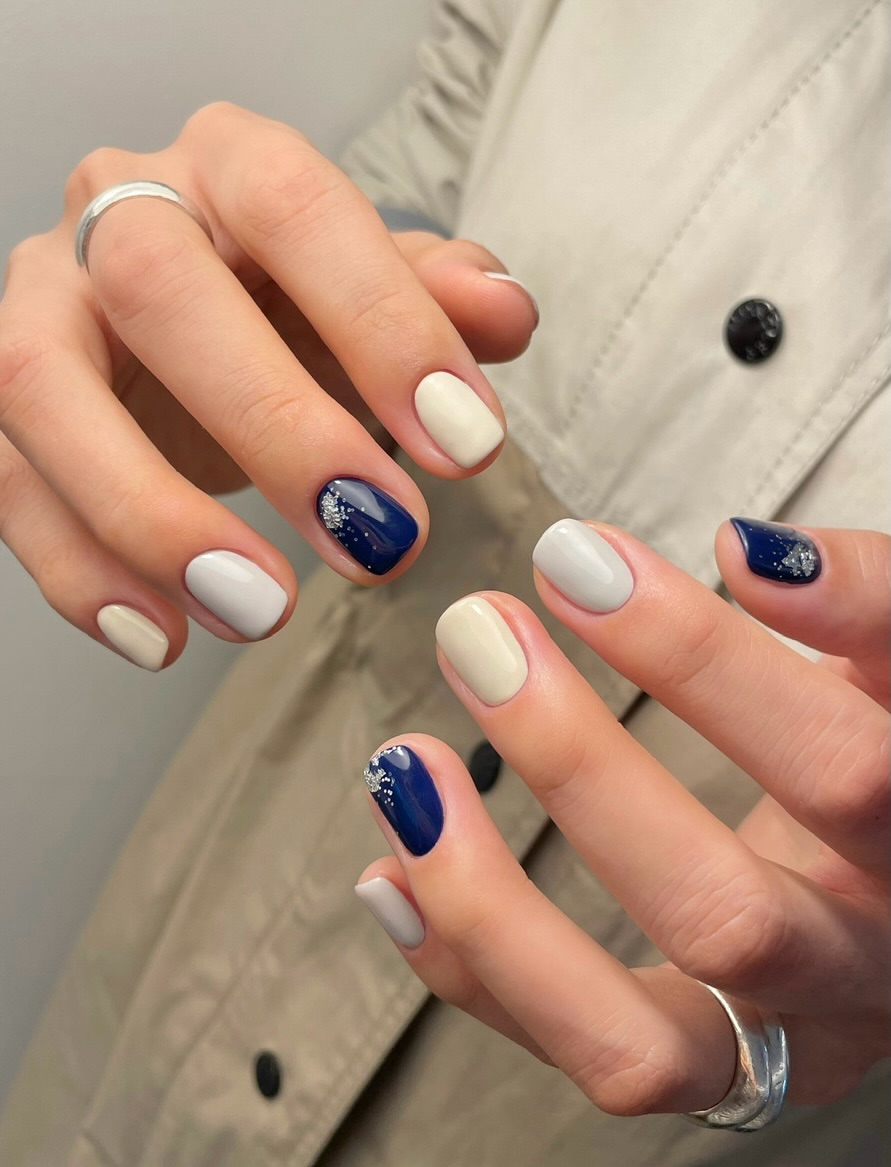
Navy needs only one supporting shade to make a strong winter statement. Here, creamy white covers most of the short nails, while deep blue appears on a small number of accents.
Fine silver dots and sparkling motifs decorate the navy without taking over the full set. The result feels seasonal because the contrast recalls a dark night sky against fresh snow.
Copy the balance with these details:
- Paint most nails creamy white
- Use navy on one accent nail per hand
- Place silver sparkle near one corner
- Leave the white nails free from decoration
- Keep the short rounded square shape
- Use one glossy finish across both colors
Avoid pure black if you want a softer result. Navy still offers deep contrast, but its blue tone feels richer beside warm white.
Cream keeps the manicure soft, navy provides winter depth, and a small amount of silver adds light without crowding the clean color pairing.
18. Balance Burgundy Solids With Blush Line Art
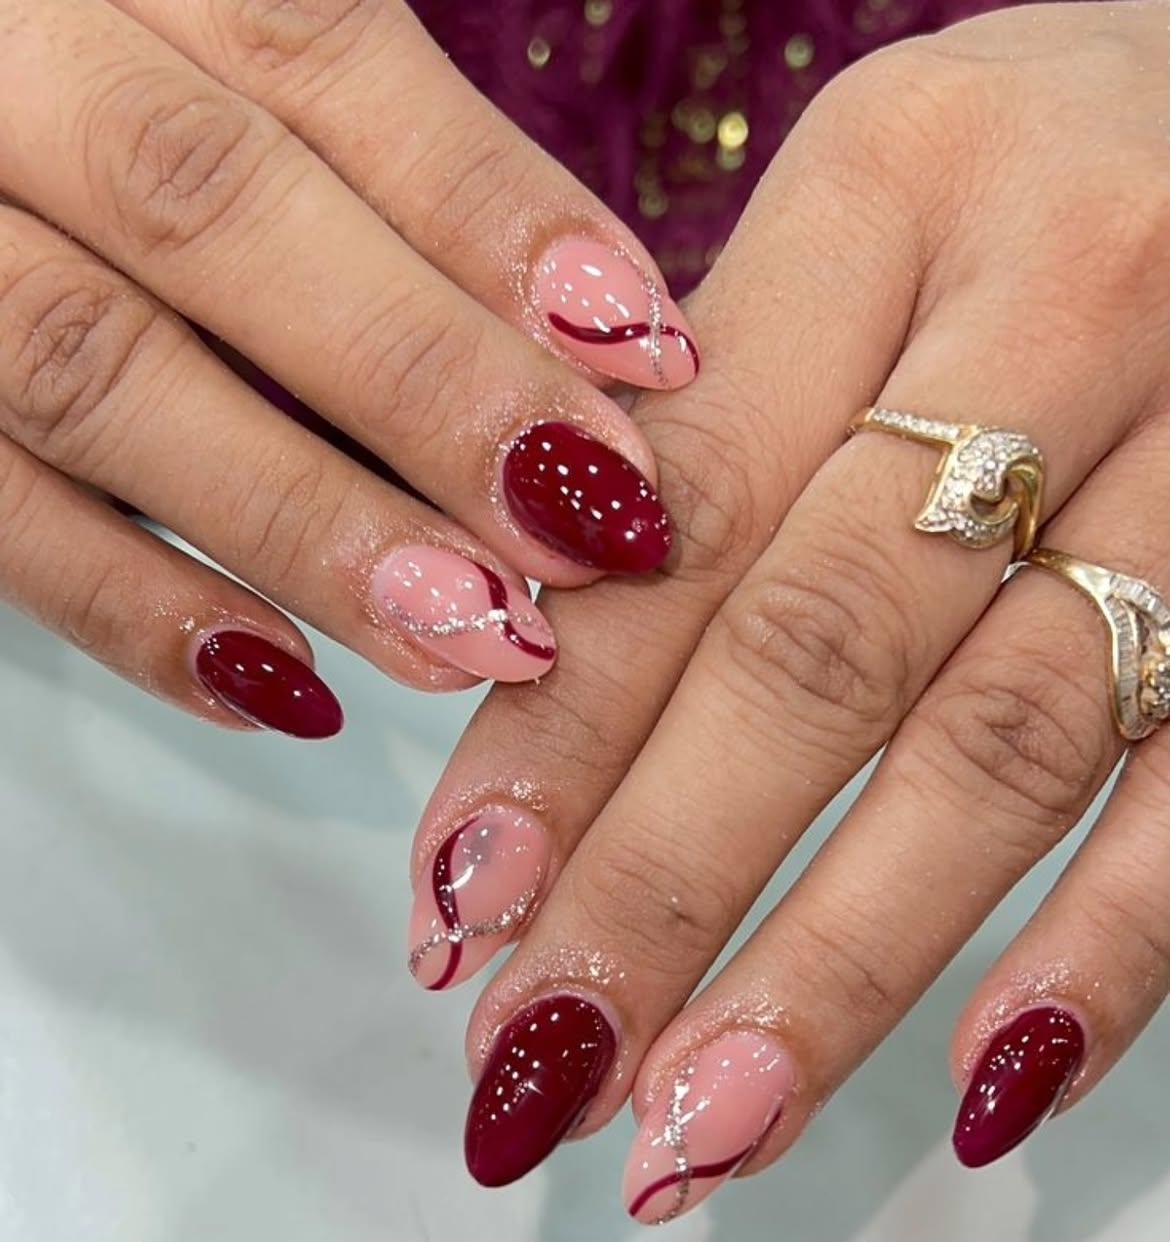
Deep burgundy becomes lighter and more modern when it is paired with sheer blush nails. The solid wine color gives this manicure winter depth, while the pale accent nails prevent the full set from looking too heavy.
Curved burgundy lines repeat the main shade across the blush base. A thin trail of silver glitter adds brightness without competing with the rich color.
Use these details to keep the design refined:
- Paint several nails solid burgundy
- Leave the accent nails sheer blush
- Add one or two curved wine colored lines
- Trace only part of each curve with silver
- Keep the lines slim and widely spaced
- Repeat the same rounded almond shape
The key is leaving enough bare blush visible around the linework.
Burgundy covers every nail, creating a richer but visually denser result.
Blush accent nails break up the dark color while thin wine and silver curves connect the set.
19. Pair Deep Teal With Tortoiseshell for Warm Winter Contrast
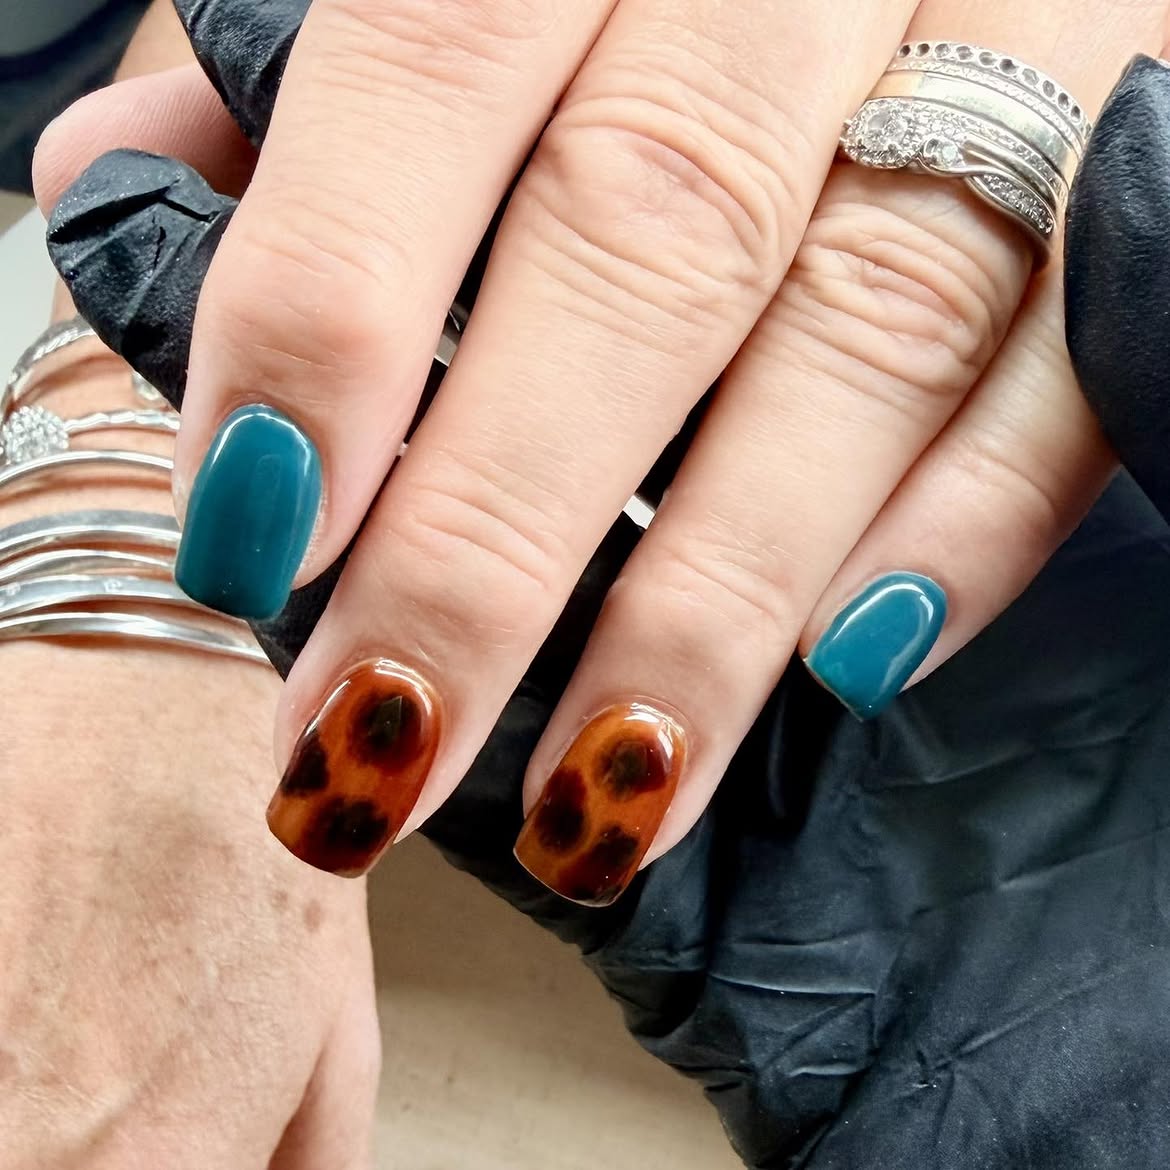
Two strong finishes share this set without competing because each stays on its own nails. Solid teal brings a cool jewel tone, while the amber and dark brown pattern adds warmth.
The short square shape gives both colors a clean frame. A glossy surface makes the teal look deeper and brings out the layered appearance of the tortoiseshell accents.
Keep this pairing controlled with:
- Solid teal on most nails
- Tortoiseshell on one or two accents
- Warm amber as the pattern base
- Irregular dark brown patches
- Similar nail length throughout
- The same high shine finish on every nail
Avoid adding gems or painted symbols. The contrast between the cool solid color and warm organic pattern already provides enough detail.
Lay down amber: Begin the accent nail with a warm translucent brown base.
Add loose patches: Place uneven dark brown shapes with space around them.
Finish with shine: Seal the pattern under a smooth glossy layer to reveal its depth.