17 Red Christmas Nail Designs That Shine This Holiday Season
Red Christmas nails can be bold, delicate, or somewhere in between. A coat of glossy scarlet makes a statement on its own, while a tiny snowflake, ribbon, or candy cane gives the same color a playful holiday feel. You can keep the design simple or add as much detail as you like.
In this collection of 17 red Christmas nail designs, you will see several shades and finishes. There are bright red glitter tips over sheer pink bases, deep burgundy nails with fine gold details, and candy stripes paired with small festive drawings. Some manicures repeat one detail across every nail. Others mix a solid color with one or two accent nails. The design also show how these ideas work on short nails, square tips, and longer almond shapes.
If you like a simpler look, start with the glossy red nails or classic French tips. If you want more detail, look at the bows, holly, wrapped gifts, and snowflakes. Choose a shade and shape you like, then use the photos to decide which details belong on your Christmas nails.
17 Red Christmas Nail Designs 2026
1. Glossy Red Christmas Nails With Curved Tips
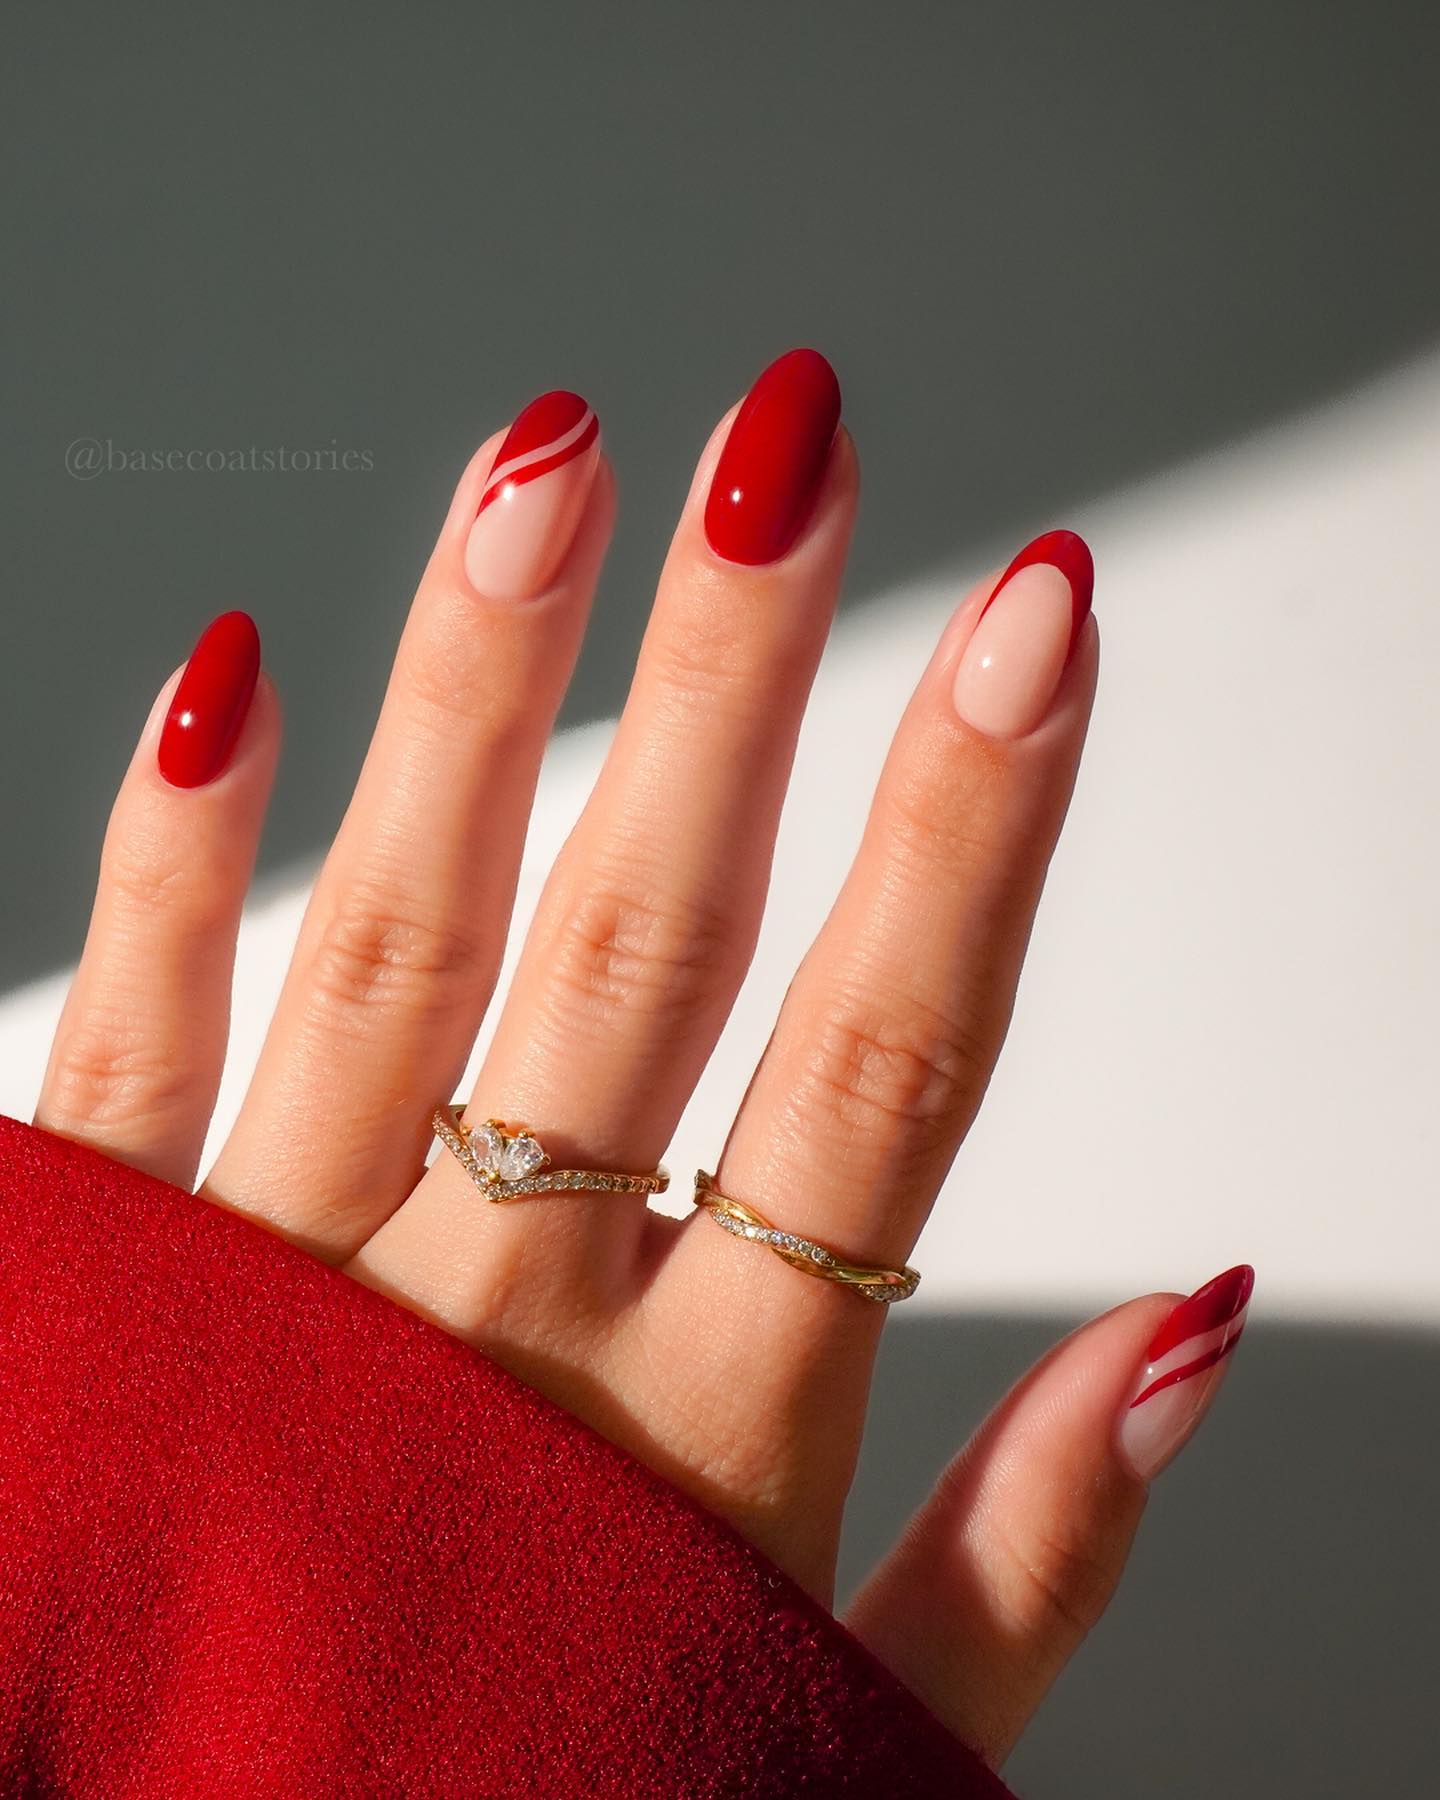
A bright red manicure can feel festive without adding snowflakes or glitter. Here, two almond shaped nails are painted solid red. The others have a sheer pink base with red tips and sweeping curved lines. The open space keeps the design light, while the repeated red ties every nail together.
What makes it work: The lines curve in the same direction as the nail tips, so the detailed nails look clean beside the solid ones. For a similar result, ask for a sheer base and one consistent red shade across the whole set. A glossy finish brings out the contrast.
2. Red Glitter Christmas Nails With a Candy Cane Heart
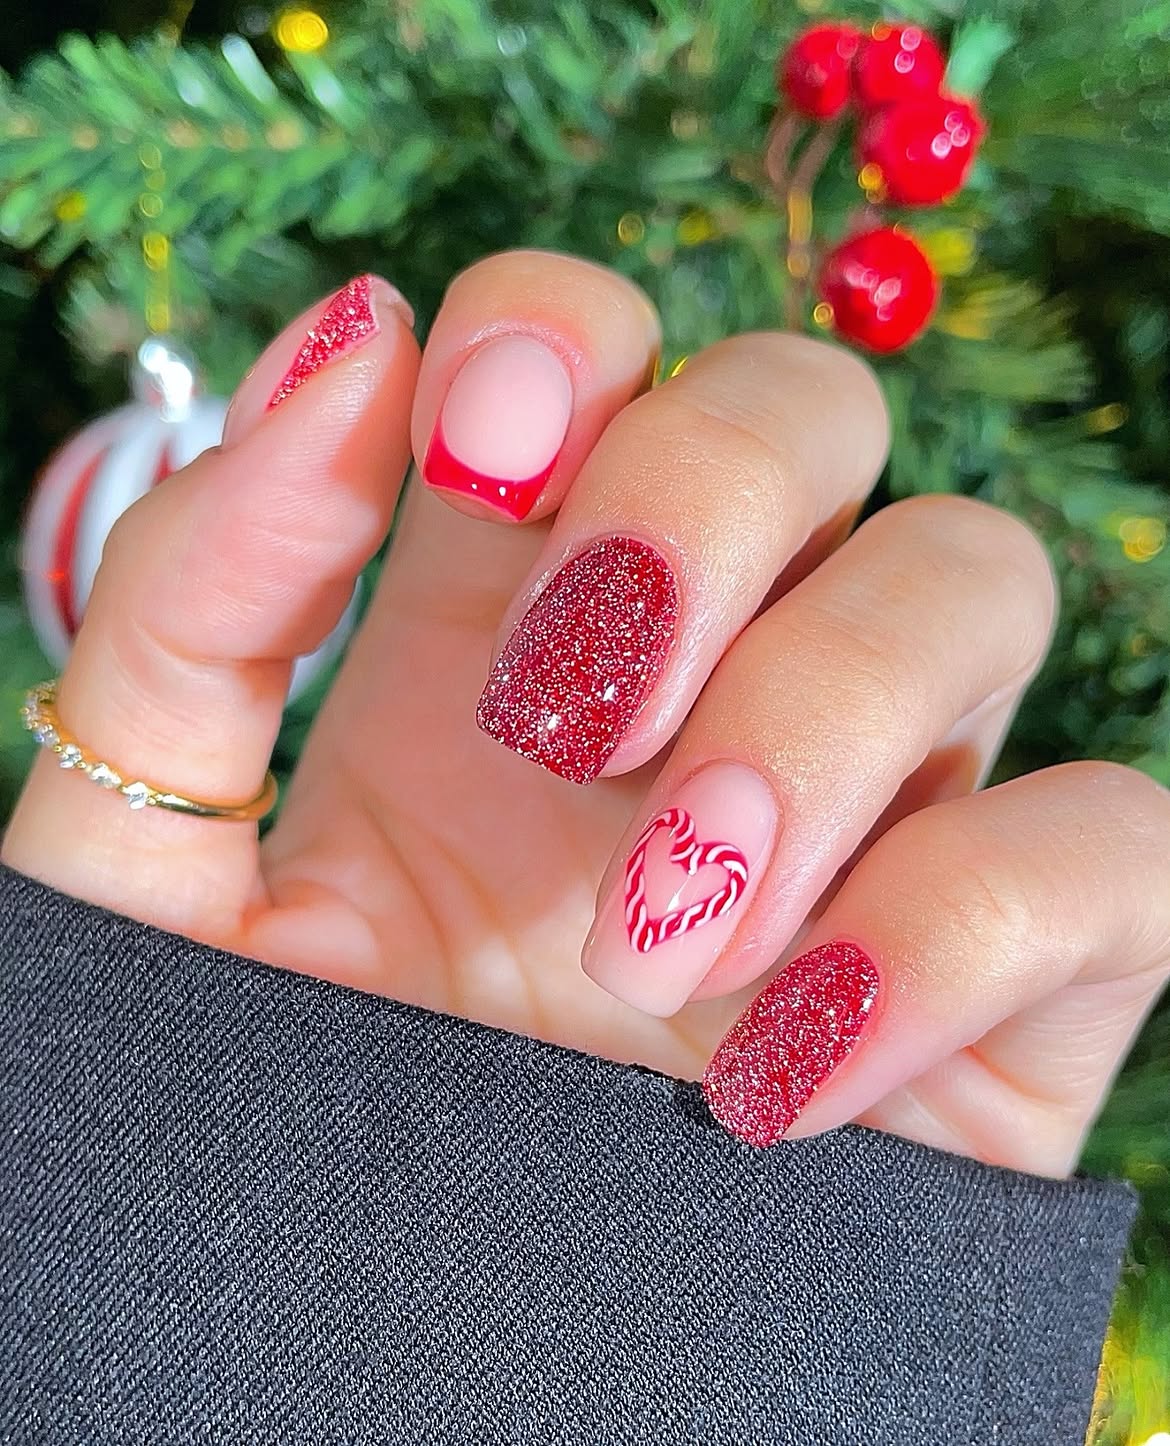
The little heart is the detail that makes this set memorable. Red and white curved stripes form a candy cane heart on a pale pink nail. Around it, two nails are covered in fine red glitter, one has a bright red tip, and the thumb carries a smaller glitter accent.
The short, softly squared shape gives each detail enough room without making the set feel crowded. If you want the heart to stand out, keep its background sheer and place the glitter on the surrounding nails. The mix catches the light, but the heart remains the first thing you notice.
Ask for this look
Choose two nails for full red glitter and leave one pale pink for the heart.
Draw the heart in red, then add thin white curves that follow its shape.
Add a simple red tip to balance the detailed nails, then finish with a clear top coat.
3. Red Christmas Nails With a Gift Bow and Holly Details
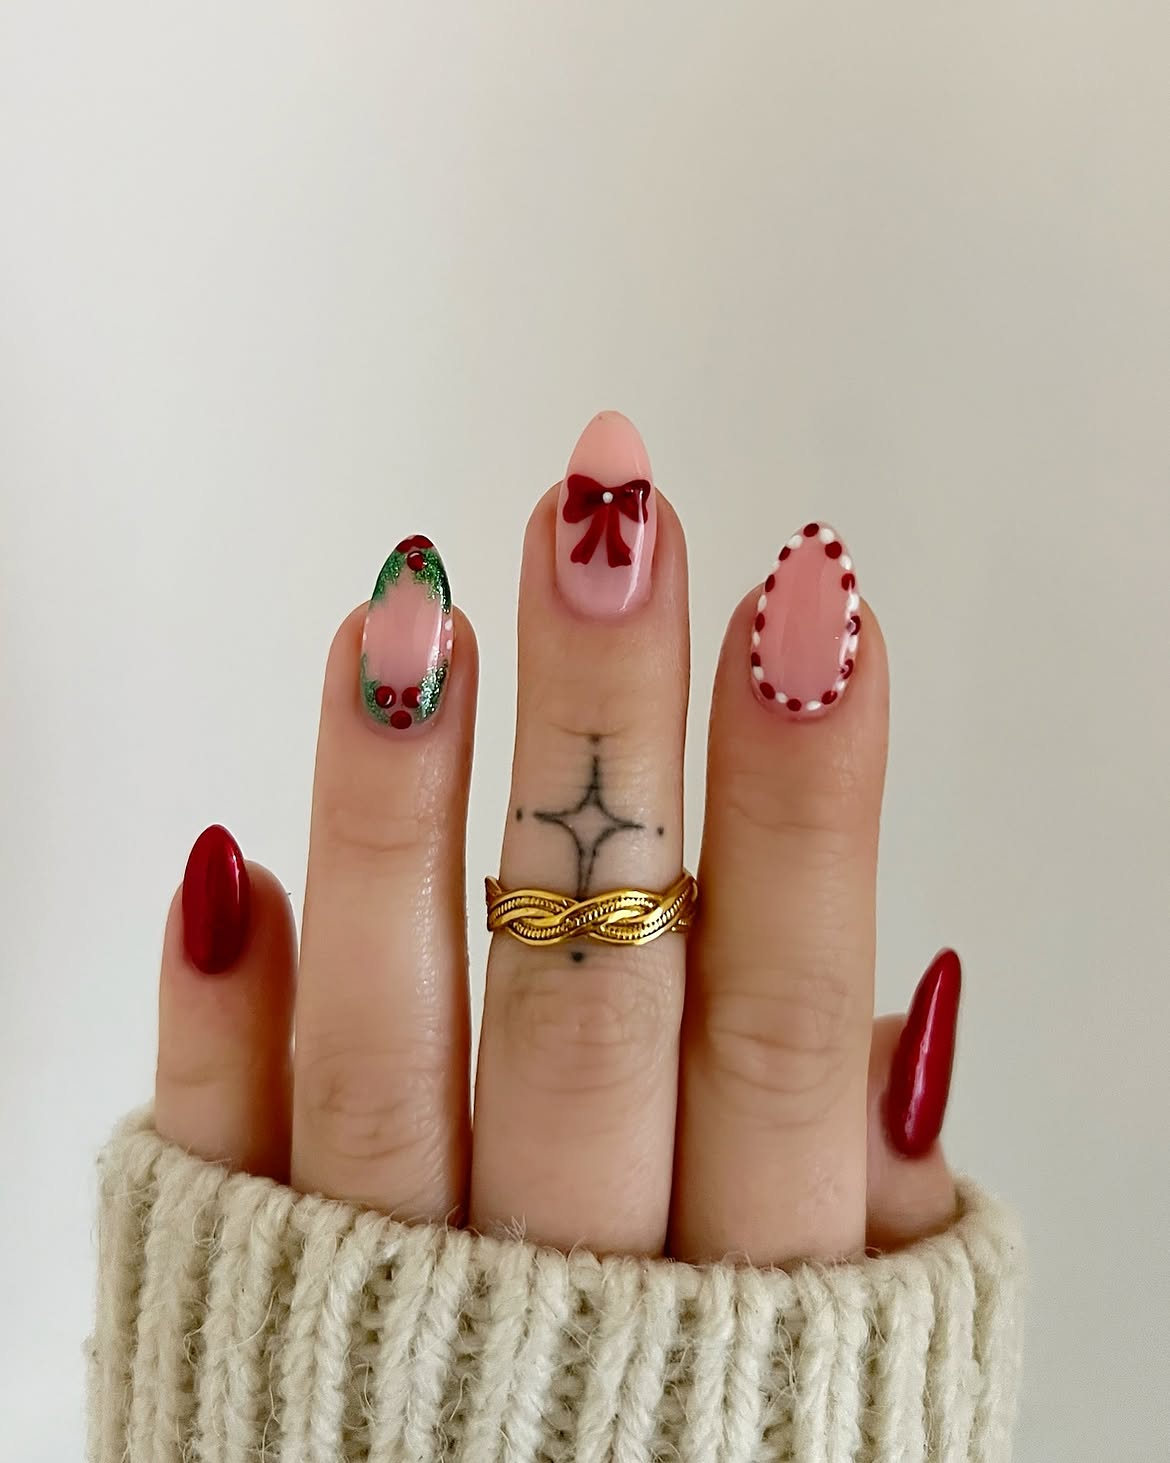
This set looks like a tiny collection of Christmas decorations. Each nail has its own detail, but the deep red polish on the outer nails holds the look together.
- A dark red bow sits across the middle nail, with a small white dot at its center.
- Green glitter and red dots near the edges of another nail suggest holly and berries.
- Red and white dots trace the edge of a sheer pink nail.
The almond shape leaves space around each design, so the bow and dotted border remain easy to see. Keep the pink base sheer if you recreate it. That clear space helps the small details show up.
| Keep the full look | Make it simpler |
|---|---|
| Paint a bow across one nail. | Paint a smaller bow near the tip. |
| Add green glitter and red berry dots. | Use one small green accent in a corner. |
| Frame a nail with red and white dots. | Place a few dots along just the tip. |
For a more beginner friendly look, check out 16 Christmas Nails You Can Do Without a Nail Salon before choosing your next red Christmas manicure.
4. Red Glitter French Tips With a Tiny Santa Hat
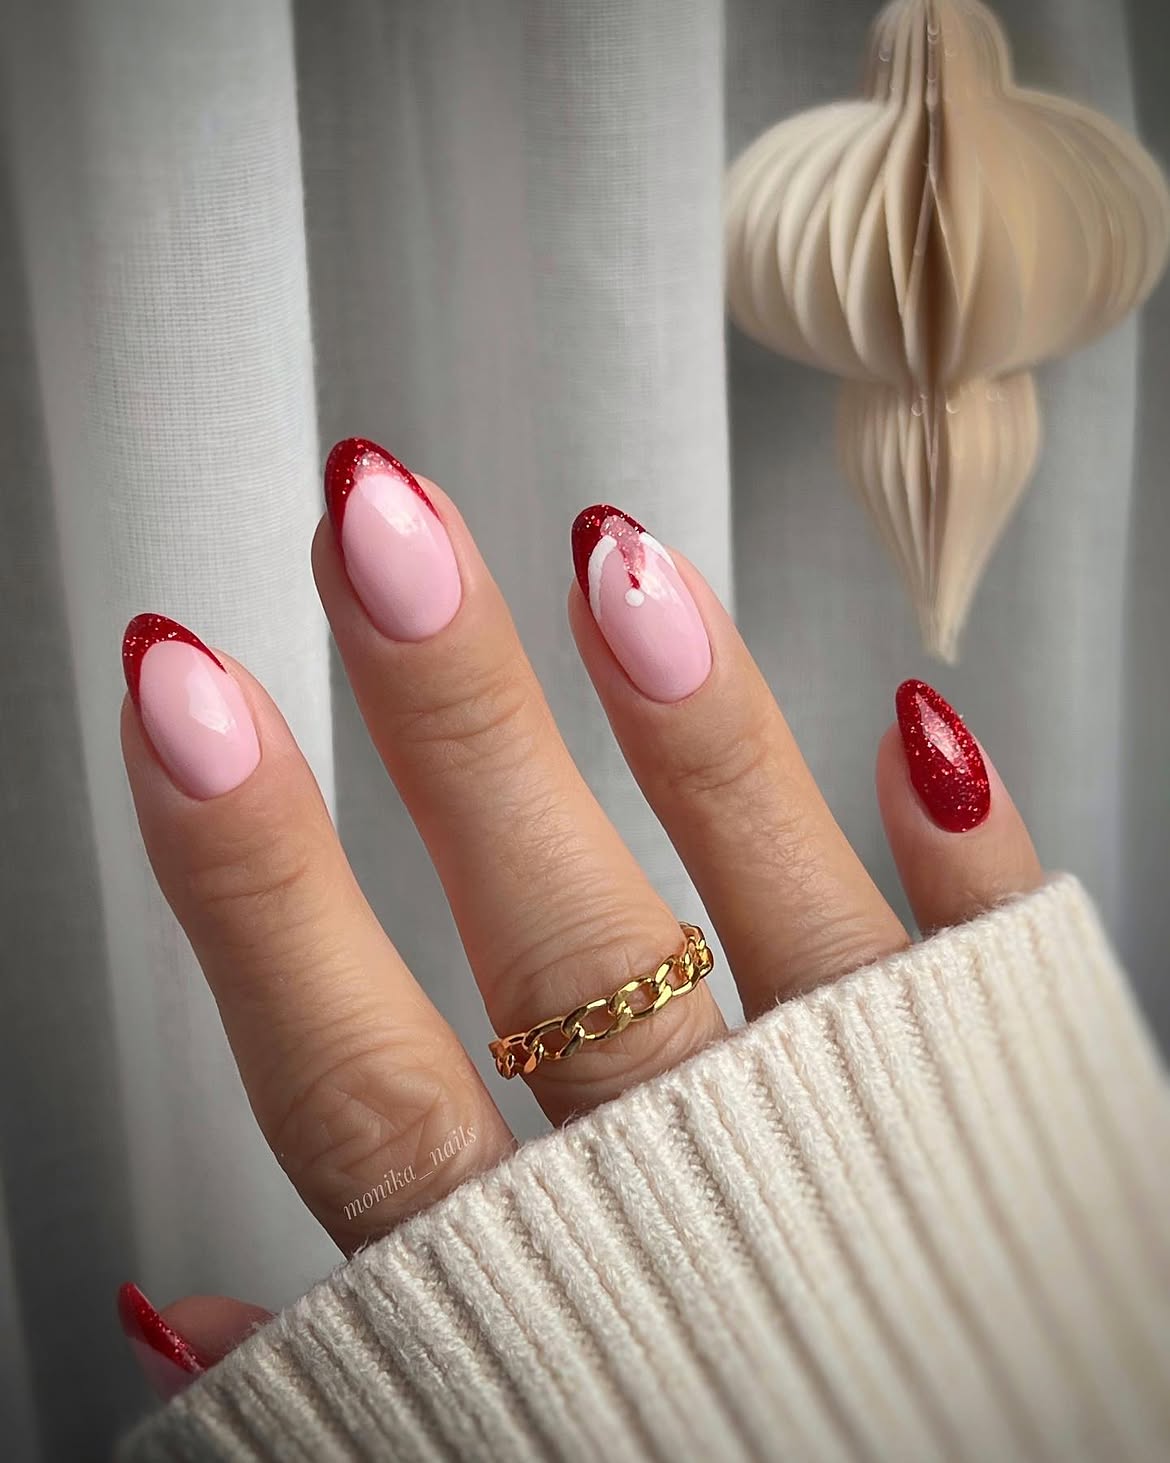
One small Santa hat gives this manicure its Christmas detail. The almond shaped nails have a soft pink base and sparkling red tips. One nail is fully covered in red glitter, while another has a curved white line and dot beneath its red tip to suggest the hat’s brim and pompom.
Keep the accent small if you recreate this set. The plain glitter tips leave room for the hat to catch your eye, and the fully red nail adds a little more sparkle without another drawing. It is a useful choice if you want holiday nails that still look simple from a distance.
💡 Quick tip
Ask for a smooth clear top coat over the glitter. If it still feels rough after drying, another thin coat can give the nails a more even finish.
5. Red Christmas Nails With Candy Stripes and Tiny Trees
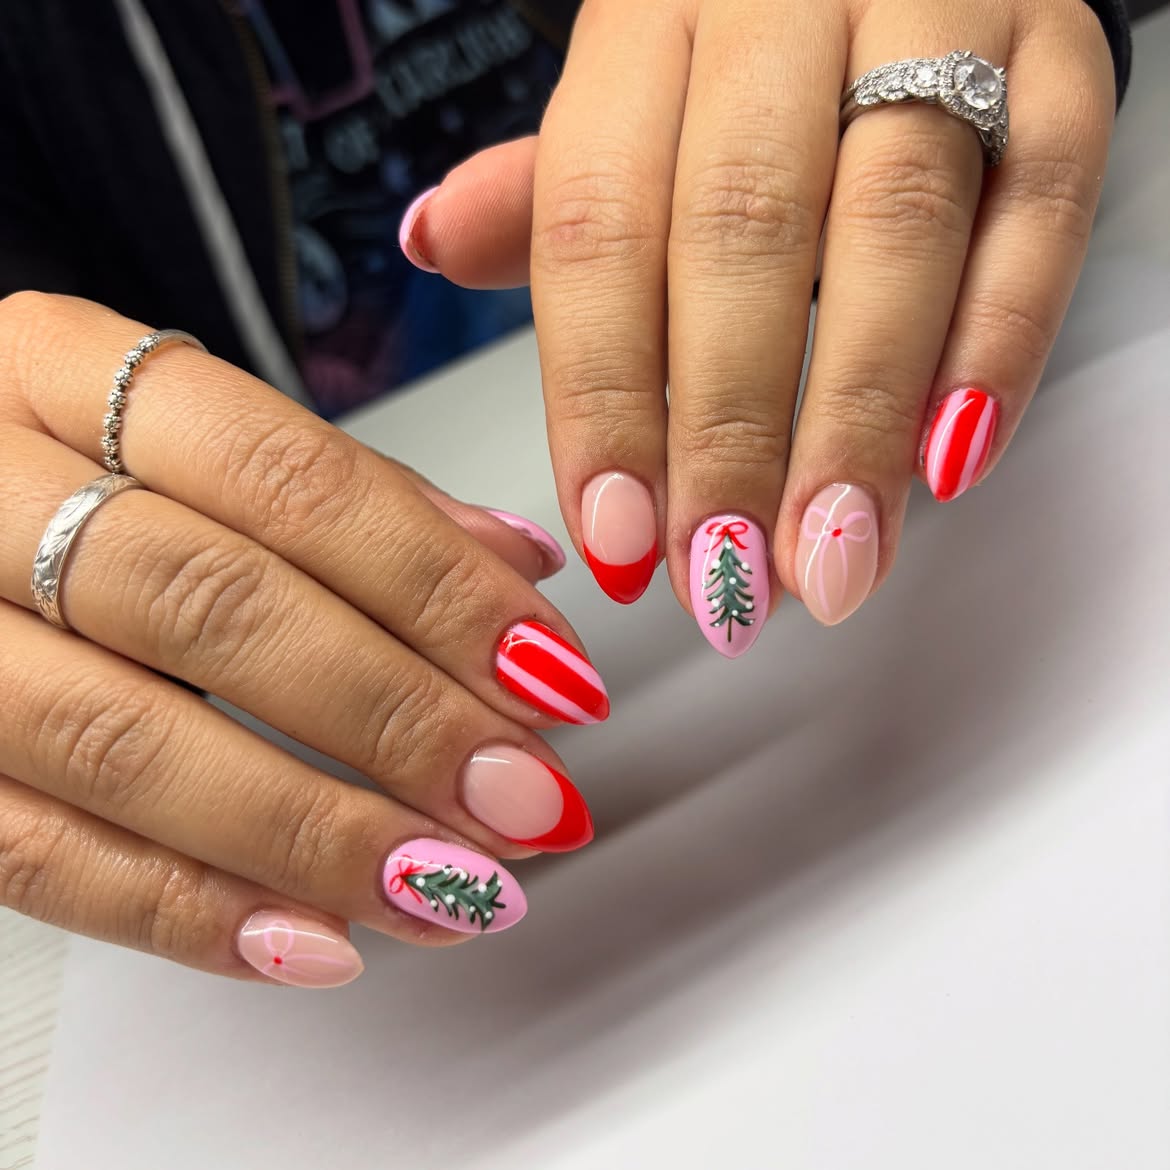
The candy stripes draw your eye first. Red and pale pink bands run across one nail on each hand, while curved red French tips carry the same color through the rest of the set.
Look closer at the softer nails: small green trees sit on pink backgrounds, each topped with a red bow. Fine white lines form a ribbon shape on another nail, with a tiny red dot at its center. The mix feels playful because the bold patterns have space between them. If you recreate it, place the striped nails away from the tree nails and let the red tips connect the different designs.
Place stripes and tree art on separate nails.
Repeat red on the French tips to connect the set.
Give the little trees a plain pink background.
Keep the ribbon lines thin so they do not compete with the stripes.
6. Deep Red Christmas Nails With Ribbon Stripes
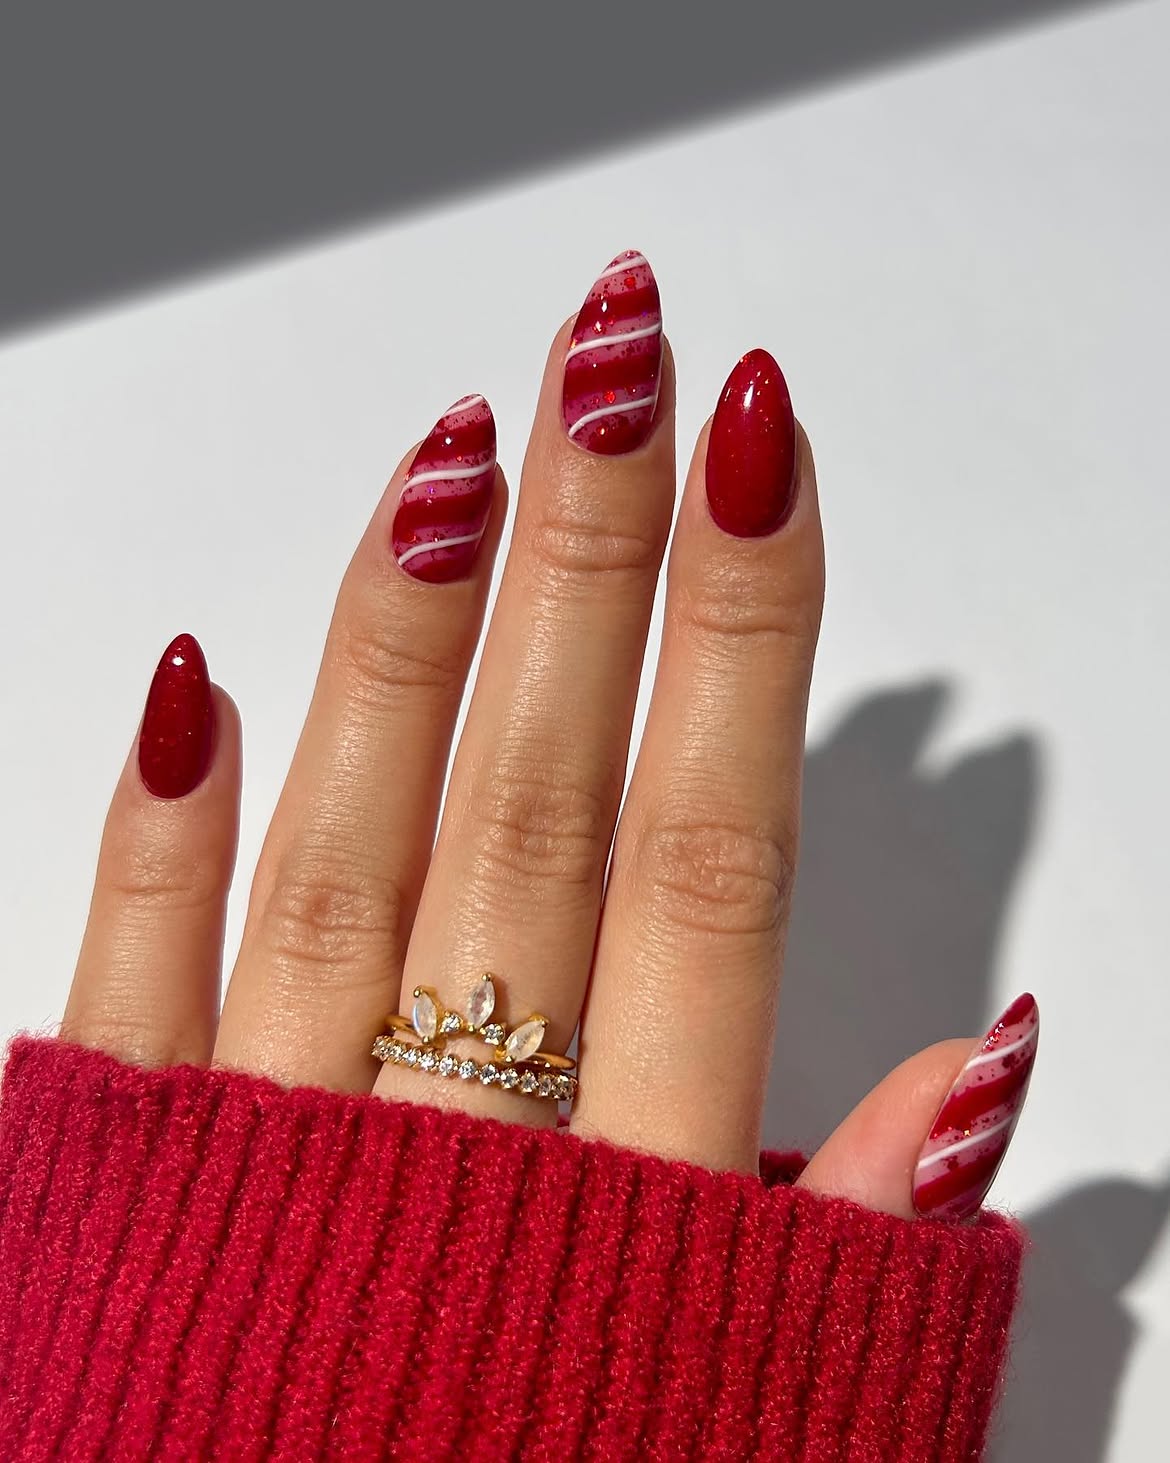
Deep berry red gives these stripes a rich holiday look. Three almond shaped nails have lighter pink bands crossing the red at an angle. Thin white curves mark the edges, while small glitter flecks catch the light. The other nails stay solid red.
The direction of the lines matters here. Each striped nail follows a similar diagonal path, though the bands start in slightly different places. That makes the pattern flow across the hand. If you recreate it, leave enough dark red showing between the lighter bands so the white lines remain clear.
For cleaner ribbon lines
7. Red Christmas Nails With Tiny Wrapped Gifts
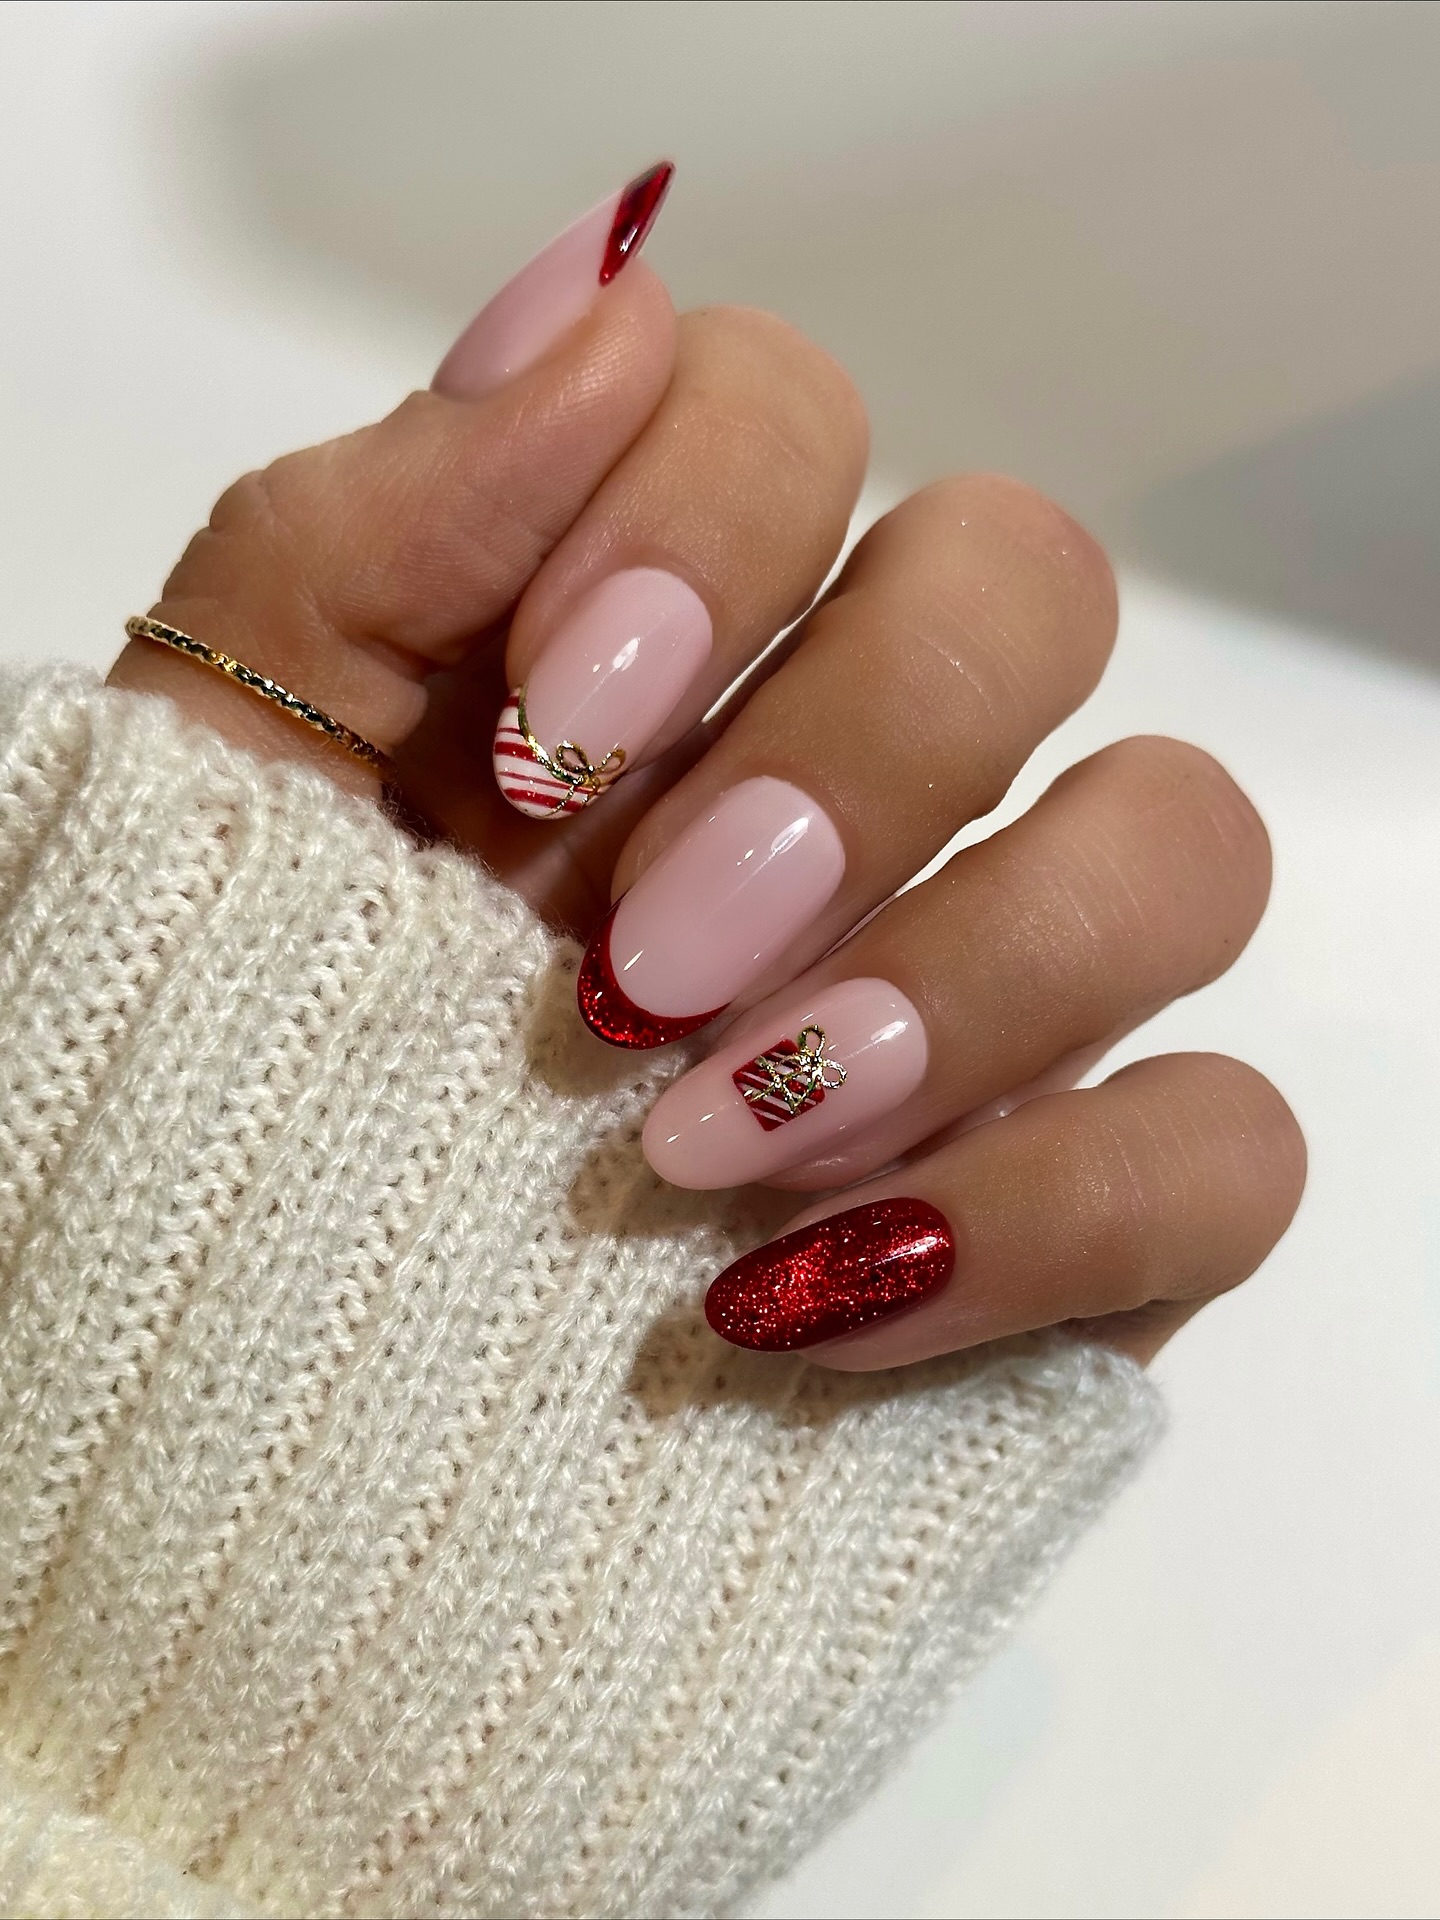
These nails turn gift wrap into miniature nail art. One pale pink nail has a small red and white striped parcel topped with a gold bow. Another has a striped tip with a matching bow. A red glitter French tip and one fully glittered nail add sparkle around those little gifts.
The gold loops appear slightly raised in the design, giving the parcels a delicate, jewelry like detail. Keep the gift designs small if you recreate the look. Leaving plenty of pale pink around them makes the bows and stripes easier to see.
The gold bows appear raised. If you prefer a smoother nail surface, ask for small gold bows painted flat instead.
8. Red Christmas French Tips With Fine Gold Accents
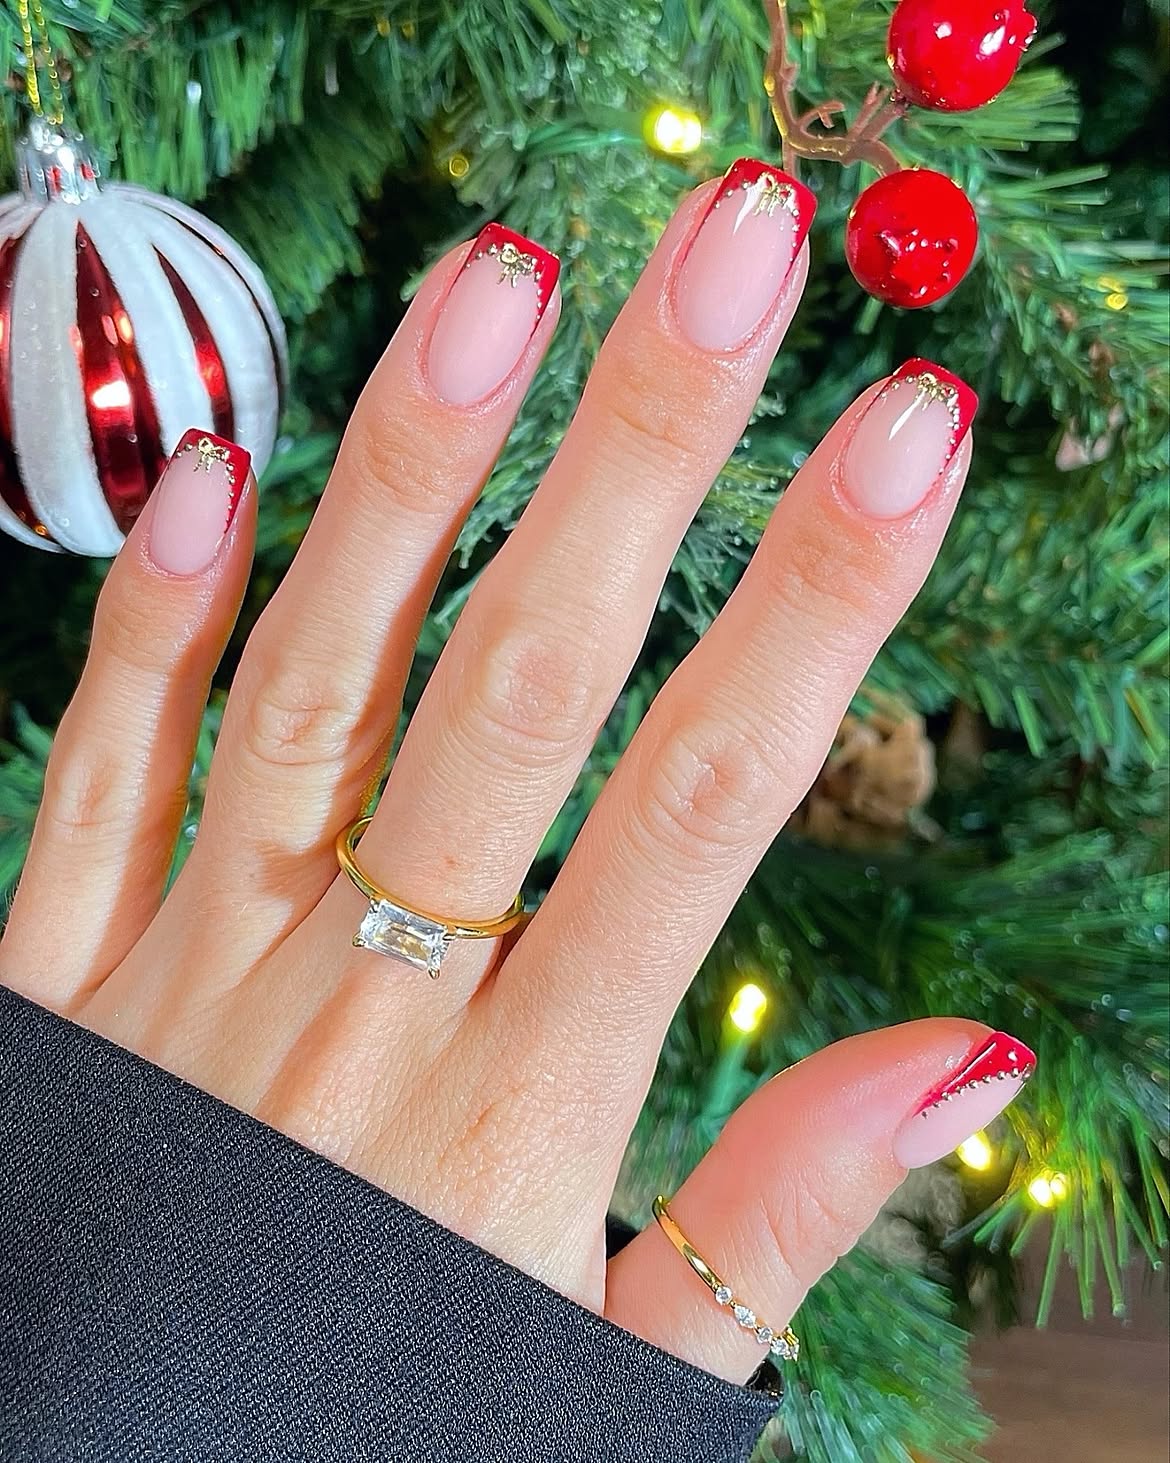
The same red tip appears on every nail, giving this set a tidy, matching look.
- A soft pink base leaves most of each nail clear.
- Bright red frames the softly squared tips.
- Tiny gold details sit close to the red edge, with a few dots tracing down the side of some nails.
The gold adds a festive touch without covering the pink base. For a similar manicure, ask for the red tips first, then place the small gold accents near the edges. Keeping the centers open lets the fine details stand out.
A soft pink base and matching red tips across the whole set.
Place small gold accents near the tips and leave the middle of each nail clear.
9. Red Plaid Christmas Nails With a Ribbon Bow
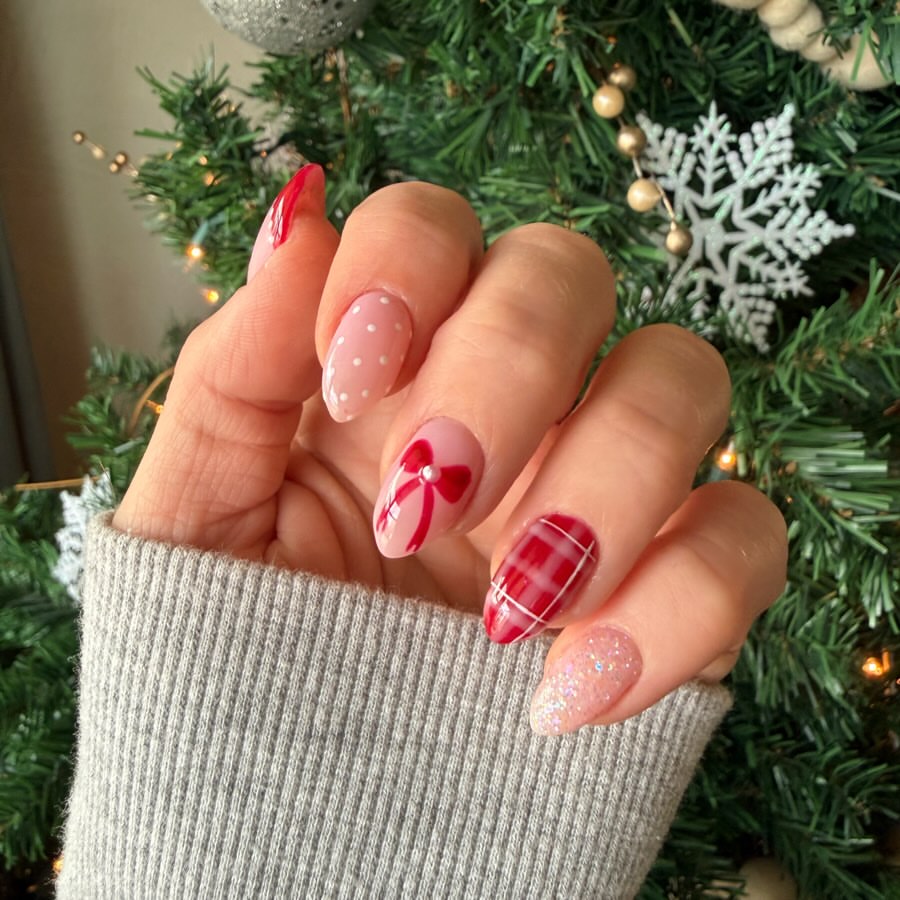
Plaid is the standout detail on this hand. One almond shaped nail has layered red bands crossed by fine white lines. Beside it, a bright red bow sits on a pale pink nail, with a small light catching detail at the center and ribbon ends trailing down.
The other nails give those patterns room to breathe. White dots are spaced across one pink nail, the pinky has soft iridescent sparkle, and the thumb shows a red accent near its tip. The mix feels cheerful and cozy beside a winter sweater. If you recreate it, keep the plaid on one nail so its fine lines remain easy to see.
- Also Check this: 15 Easy Christmas Nails for Busy Moms
10. Short Red Christmas Nails With a Snowflake and Gift Ribbon
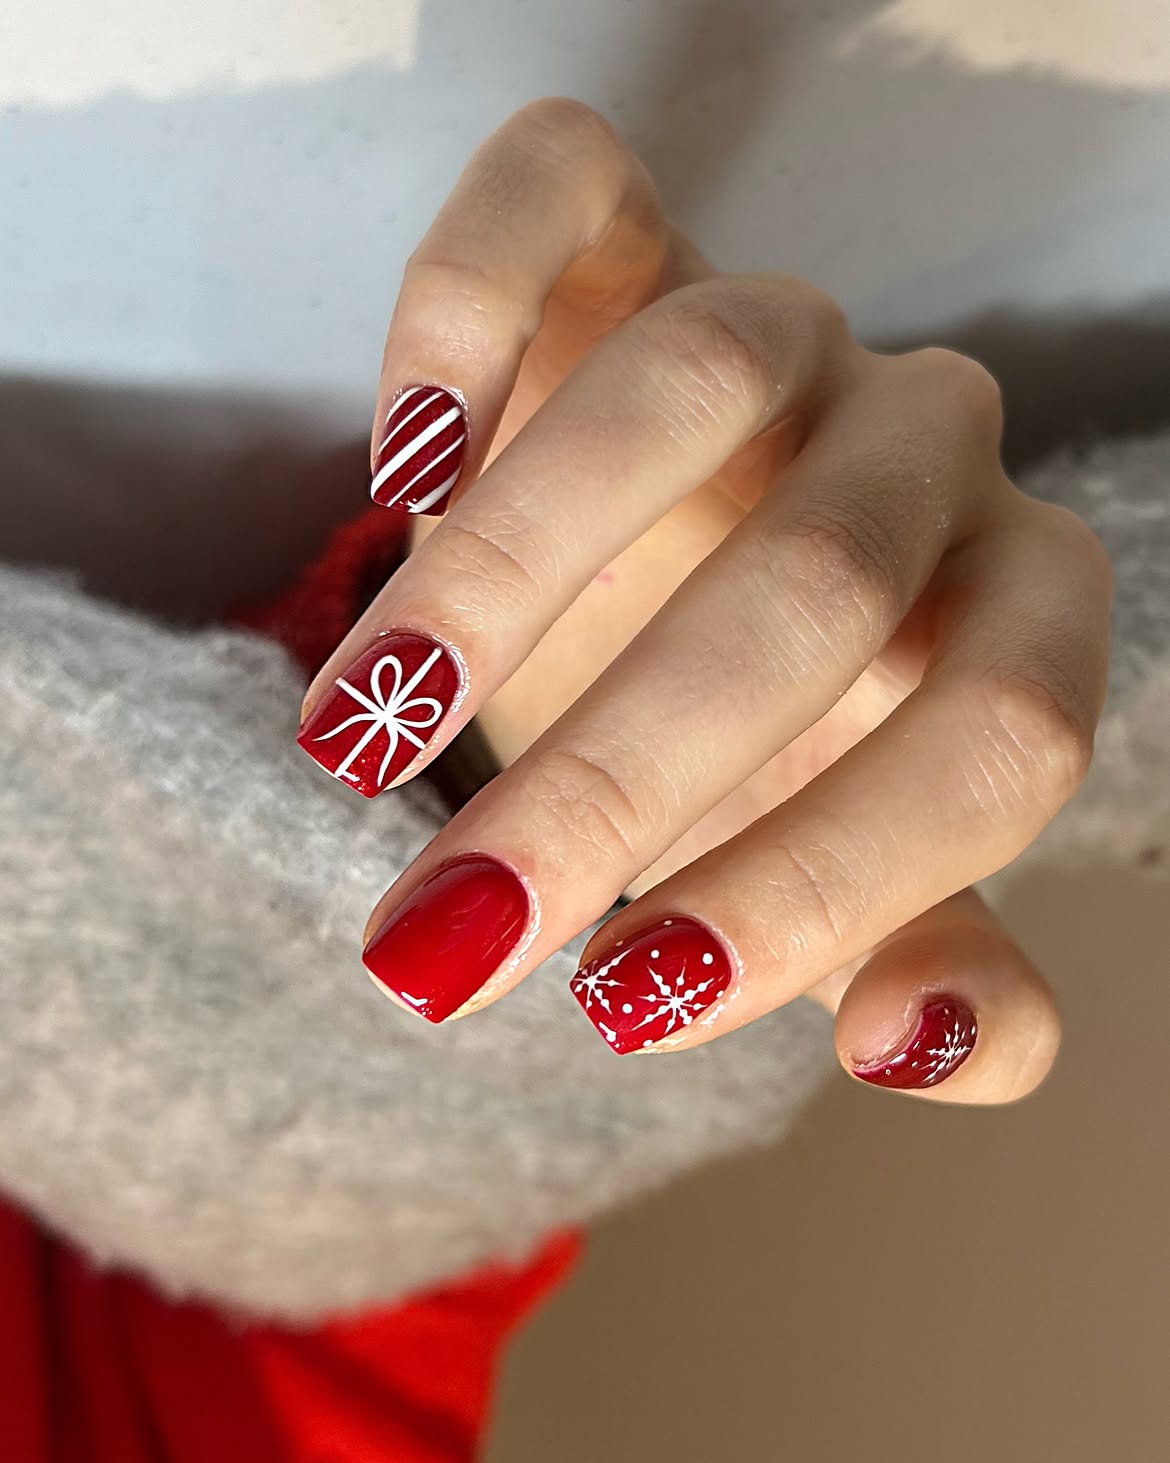
Glossy red covers nearly every nail from base to tip. The white details give each one a different role: diagonal candy stripes, a tied gift ribbon, and a fine snowflake with a few scattered dots. One nail stays solid red, while the pinky has smaller white marks near its edge.
The short, softly squared shape makes the drawings easy to see. The plain red nail is useful, too. It gives your eye a pause between the ribbon and snowflake. To recreate this set, use thin white lines and leave some red space around each drawing.
| White detail | How to keep it clear |
|---|---|
| Candy stripes | Keep the lines at a similar angle with red space between them. |
| Gift ribbon | Draw the crossing ribbon lines before adding the loops. |
| Snowflake | Start at the center and leave room for the small branches. |
11. Burgundy Red Christmas Nails With Hanging Ornaments
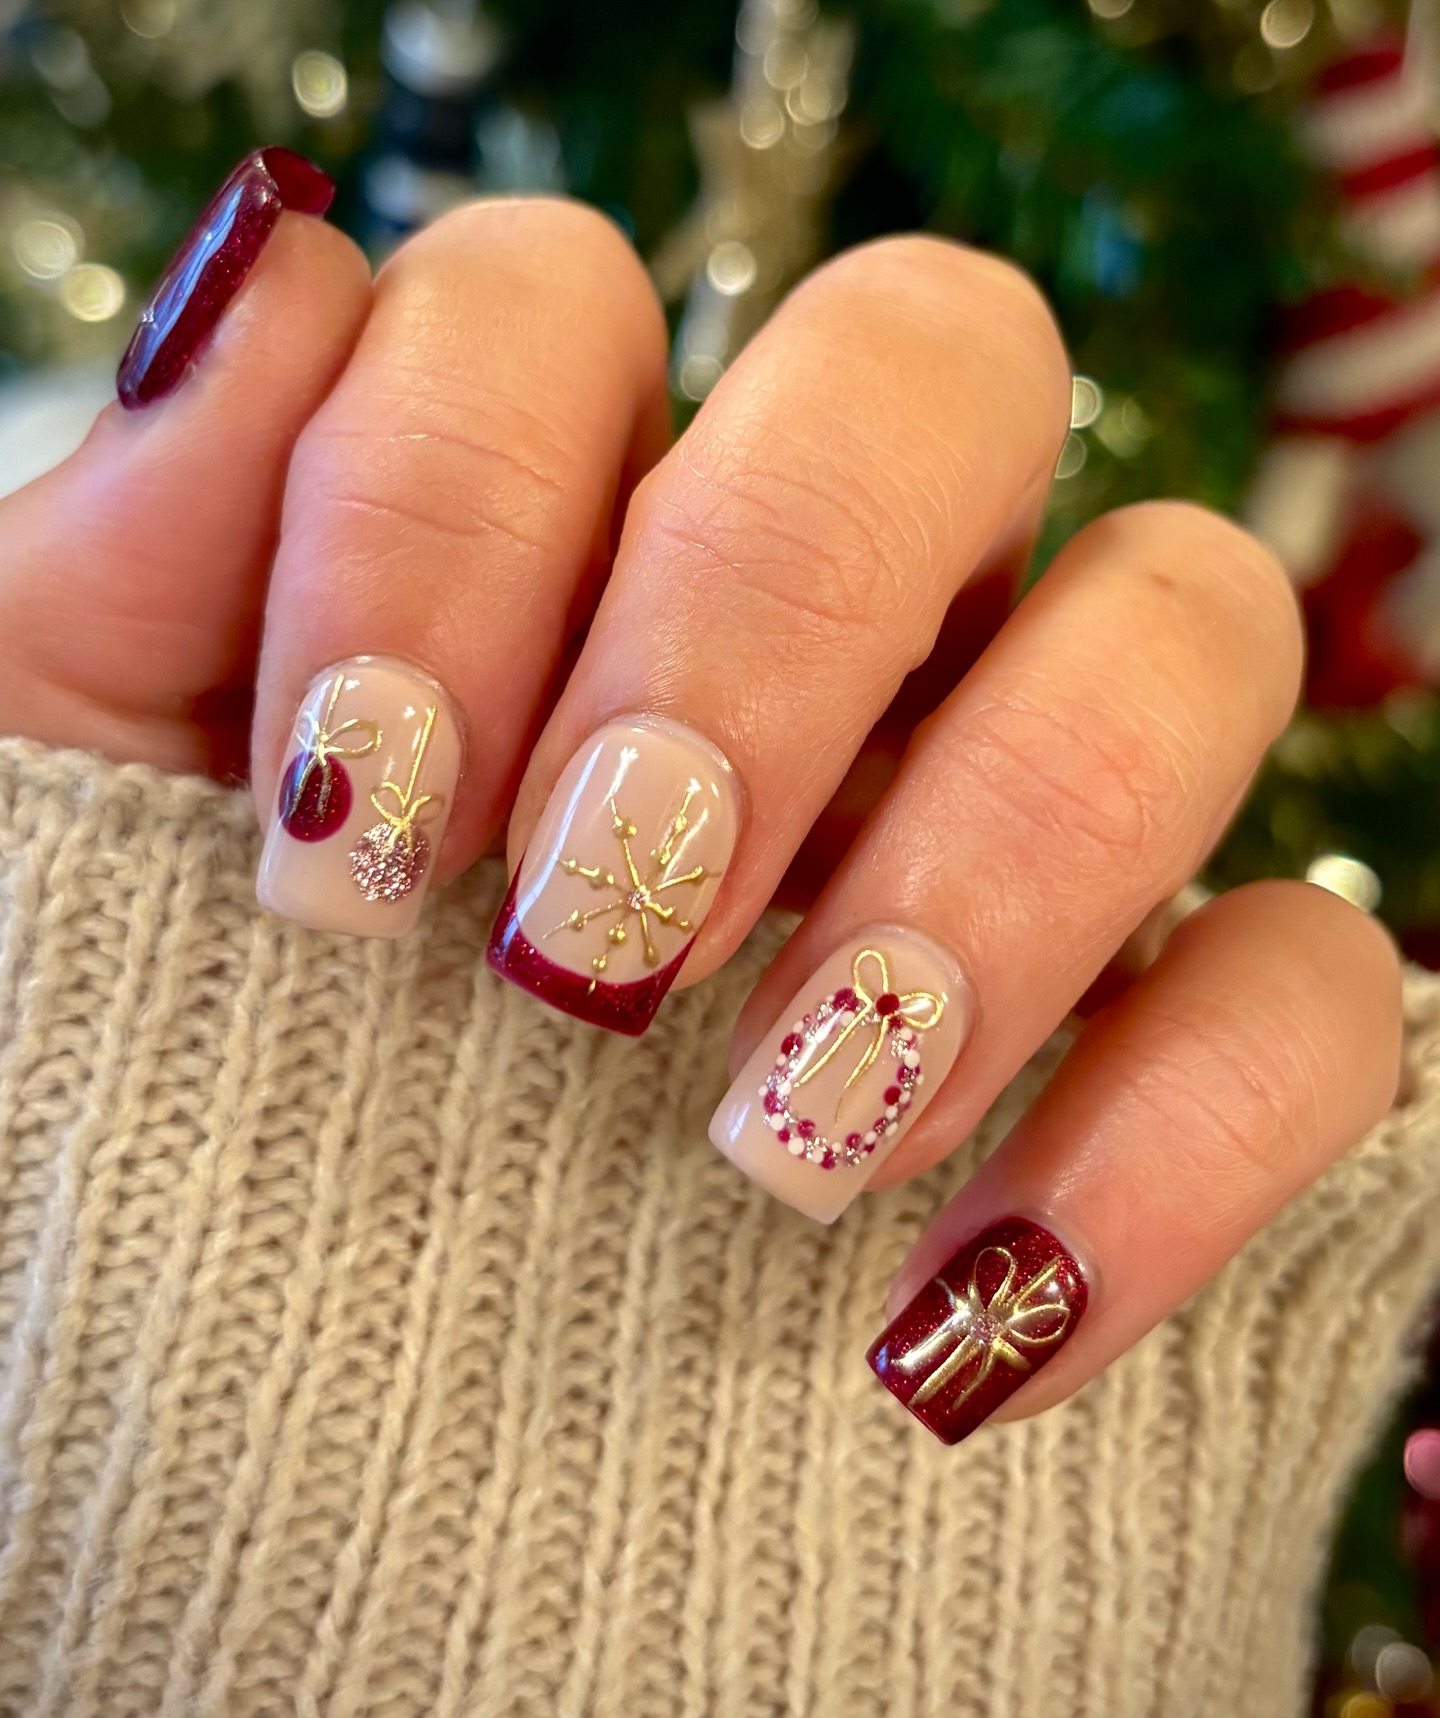
The tiny hanging ornaments give this set its own Christmas story.
- Two baubles hang from fine gold lines on a pale pink nail. One is deep red and the other sparkles.
- A gold snowflake sits above a burgundy French tip.
- Red and light dots form a small wreath beneath a gold bow.
- The fully burgundy nail is wrapped in gold ribbon lines.
There is plenty of detail, but the repeated gold keeps the nails connected. The squared tips leave room for each drawing. For a similar set, use the same deep red throughout and give each ornament its own pale background.
Choose one deep red for the tips, bauble, and gift nail. Keep the gold lines fine so the smaller shapes stay clear.
Give the baubles, snowflake, and wreath separate nails. Leave a little pale space around each one.
12. Red Christmas Nails With Holly Berry Sprigs
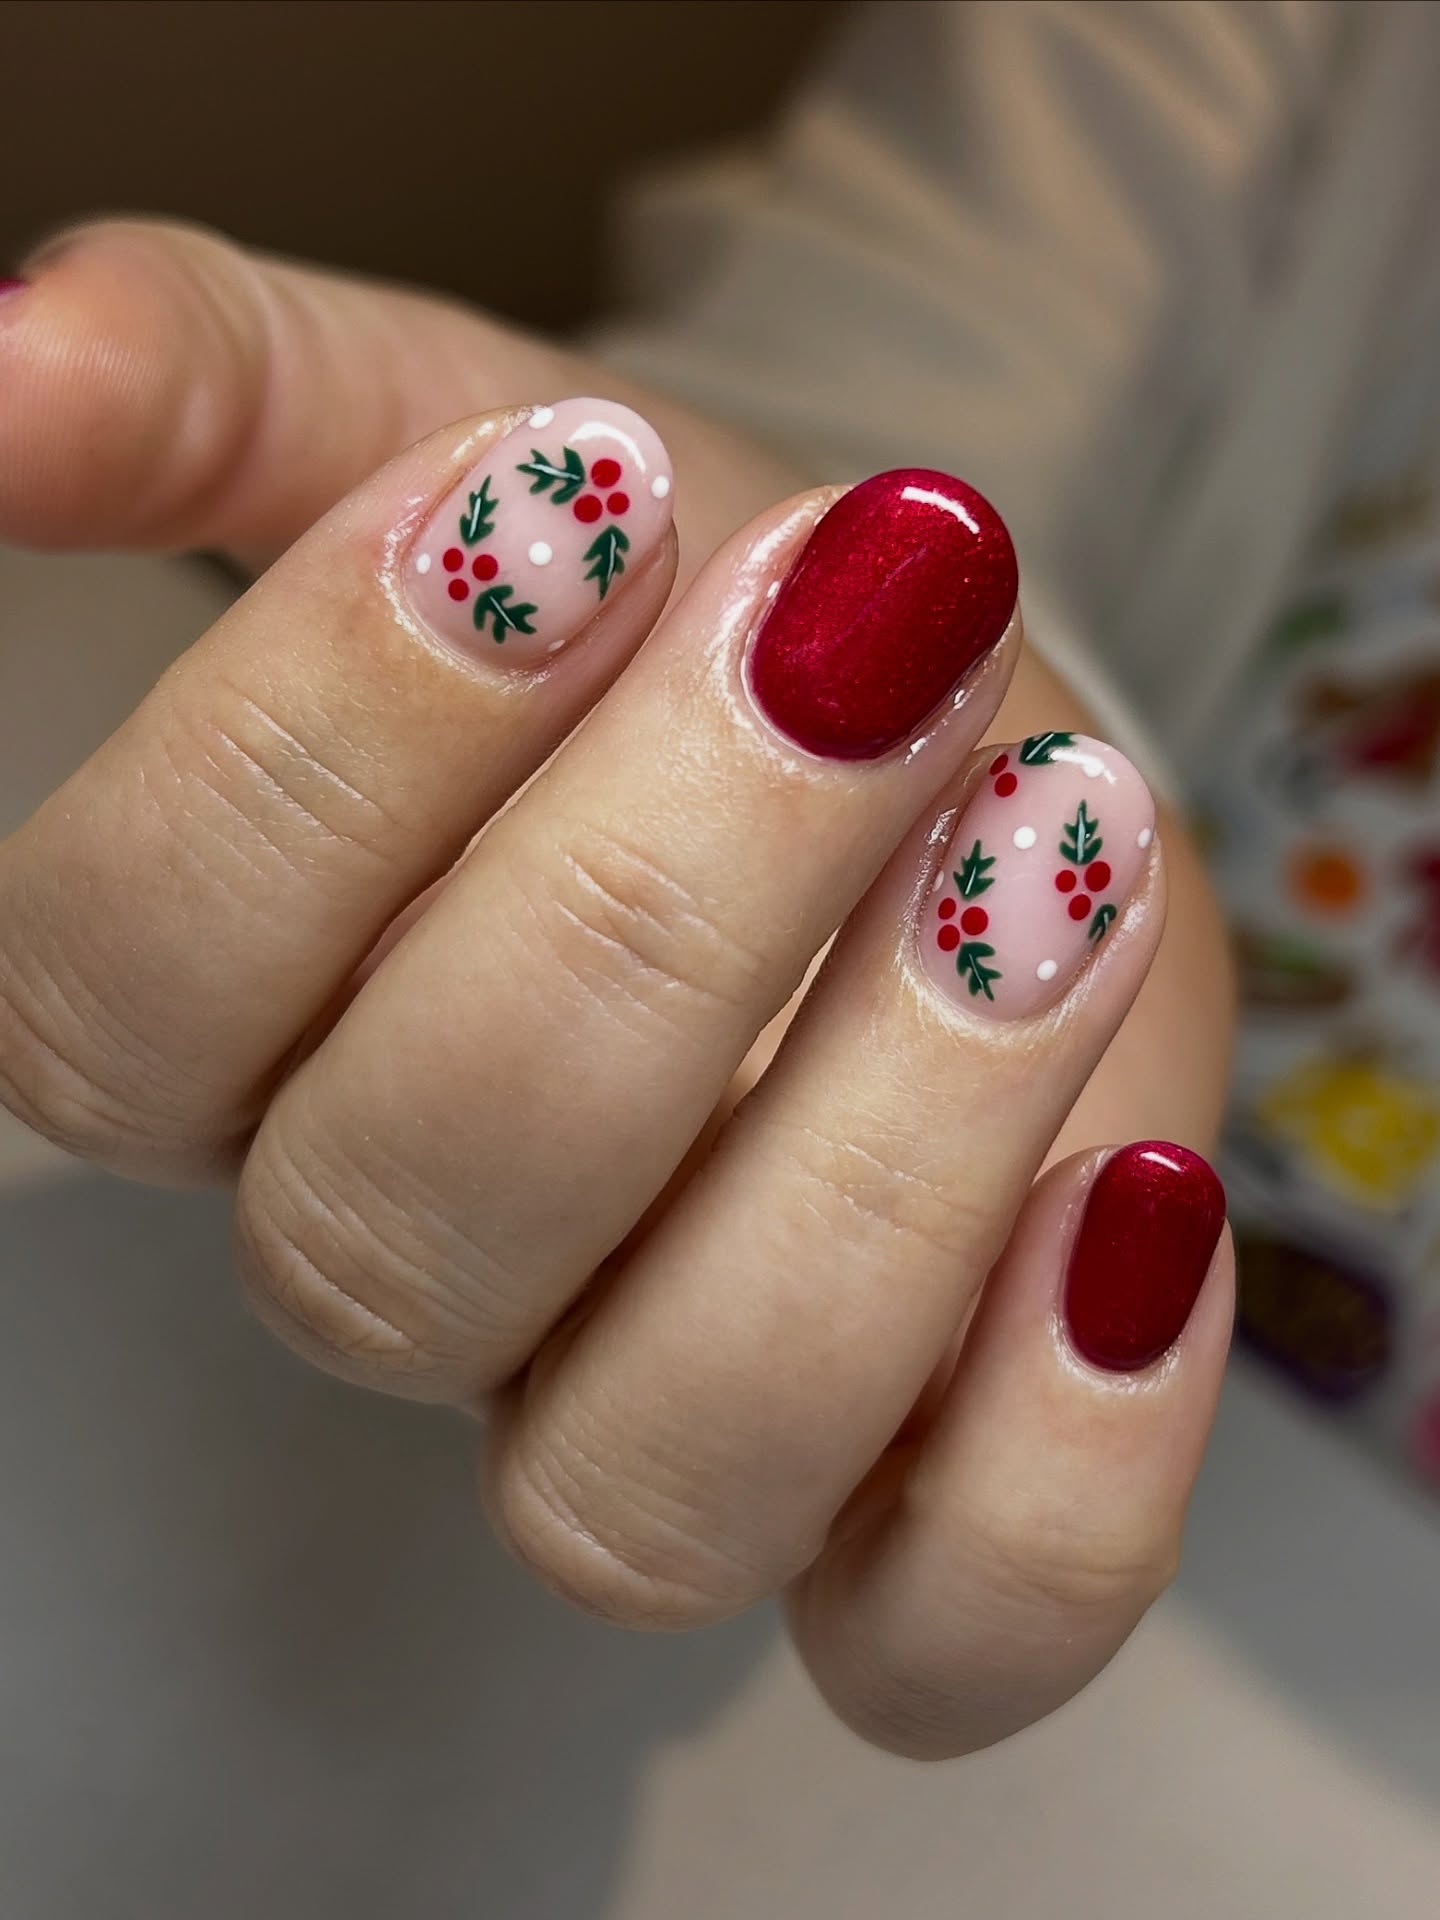
Little red berry clusters and dark green sprigs are scattered across two pale pink nails. Small white dots fill the open spaces like falling snow. The other visible nails are coated in deep red shimmer, bringing a stronger block of color to the set.
The short, rounded shape gives each sprig just enough space. The clusters sit in different positions on the pink nails, so the pattern feels natural rather than copied exactly. If you recreate it, keep the berries small and let some of the pink base show between them.
Build the berry pattern
Use pale pink for the patterned nails and deep red for the solid nails.
Group small red dots, then add short green sprigs beside them.
Place a few white dots in the gaps, leaving plenty of pink visible.
13. Red Glitter Christmas Nails With White Snowflakes
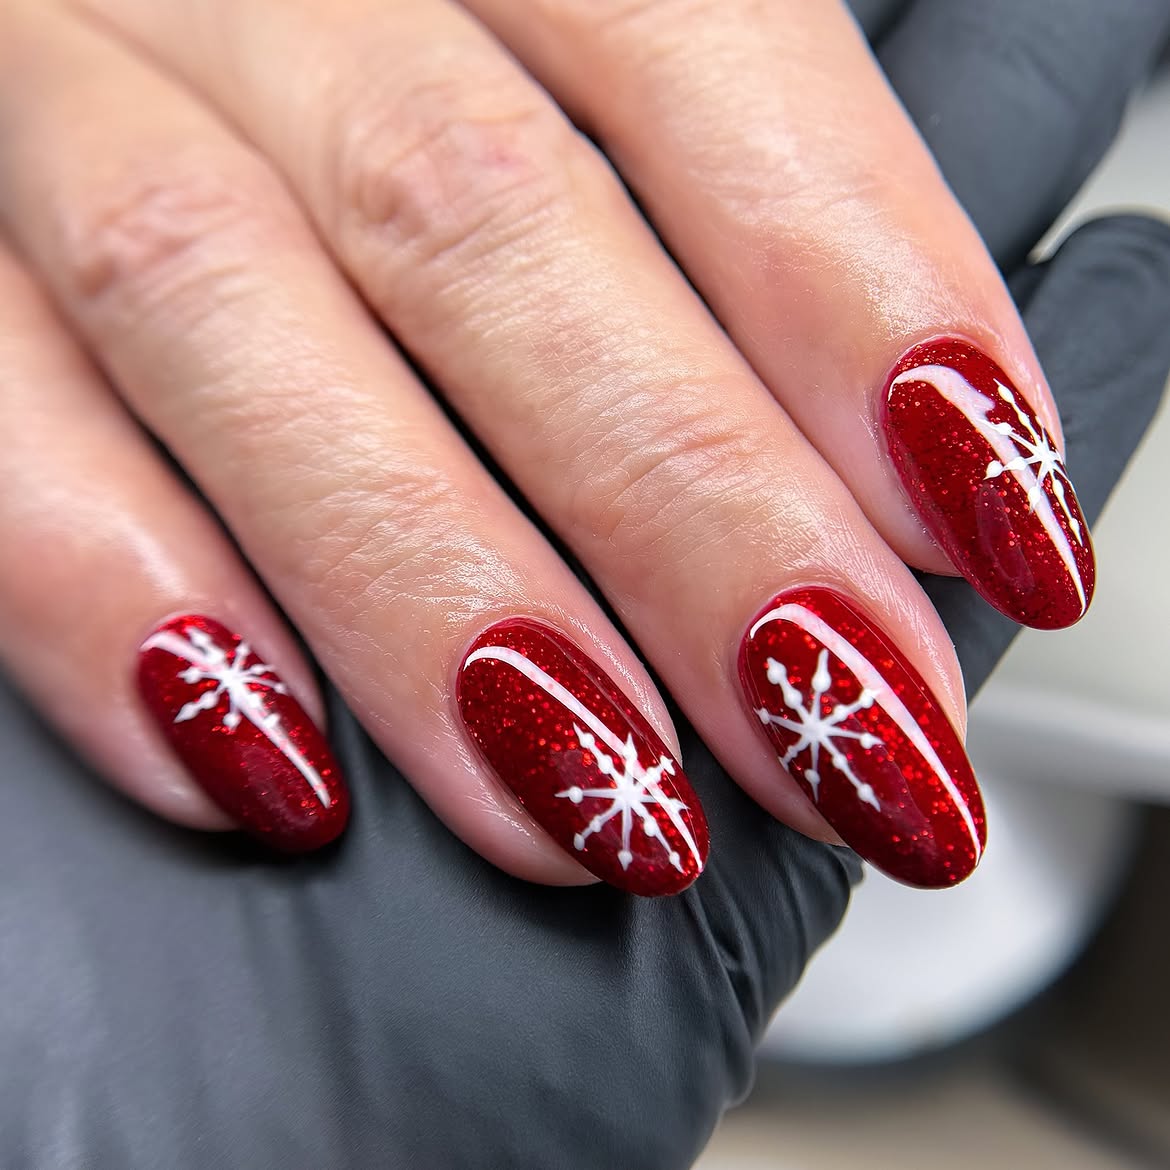
Snowflakes cover every visible nail in this sparkling red set.
- Deep red glitter forms a full color base.
- Each almond shaped nail has a white snowflake with fine branches.
- A long white curve sweeps past each flake, giving the repeated design a sense of movement.
The snowflakes sit at slightly different points on the nails, but the white curves follow a similar path. That keeps the set matched without making every finger look identical. The strong red and white contrast also lets the small branches show clearly, even against the glitter.
14. Glossy Scarlet Red Christmas Nails on Long Almond Tips
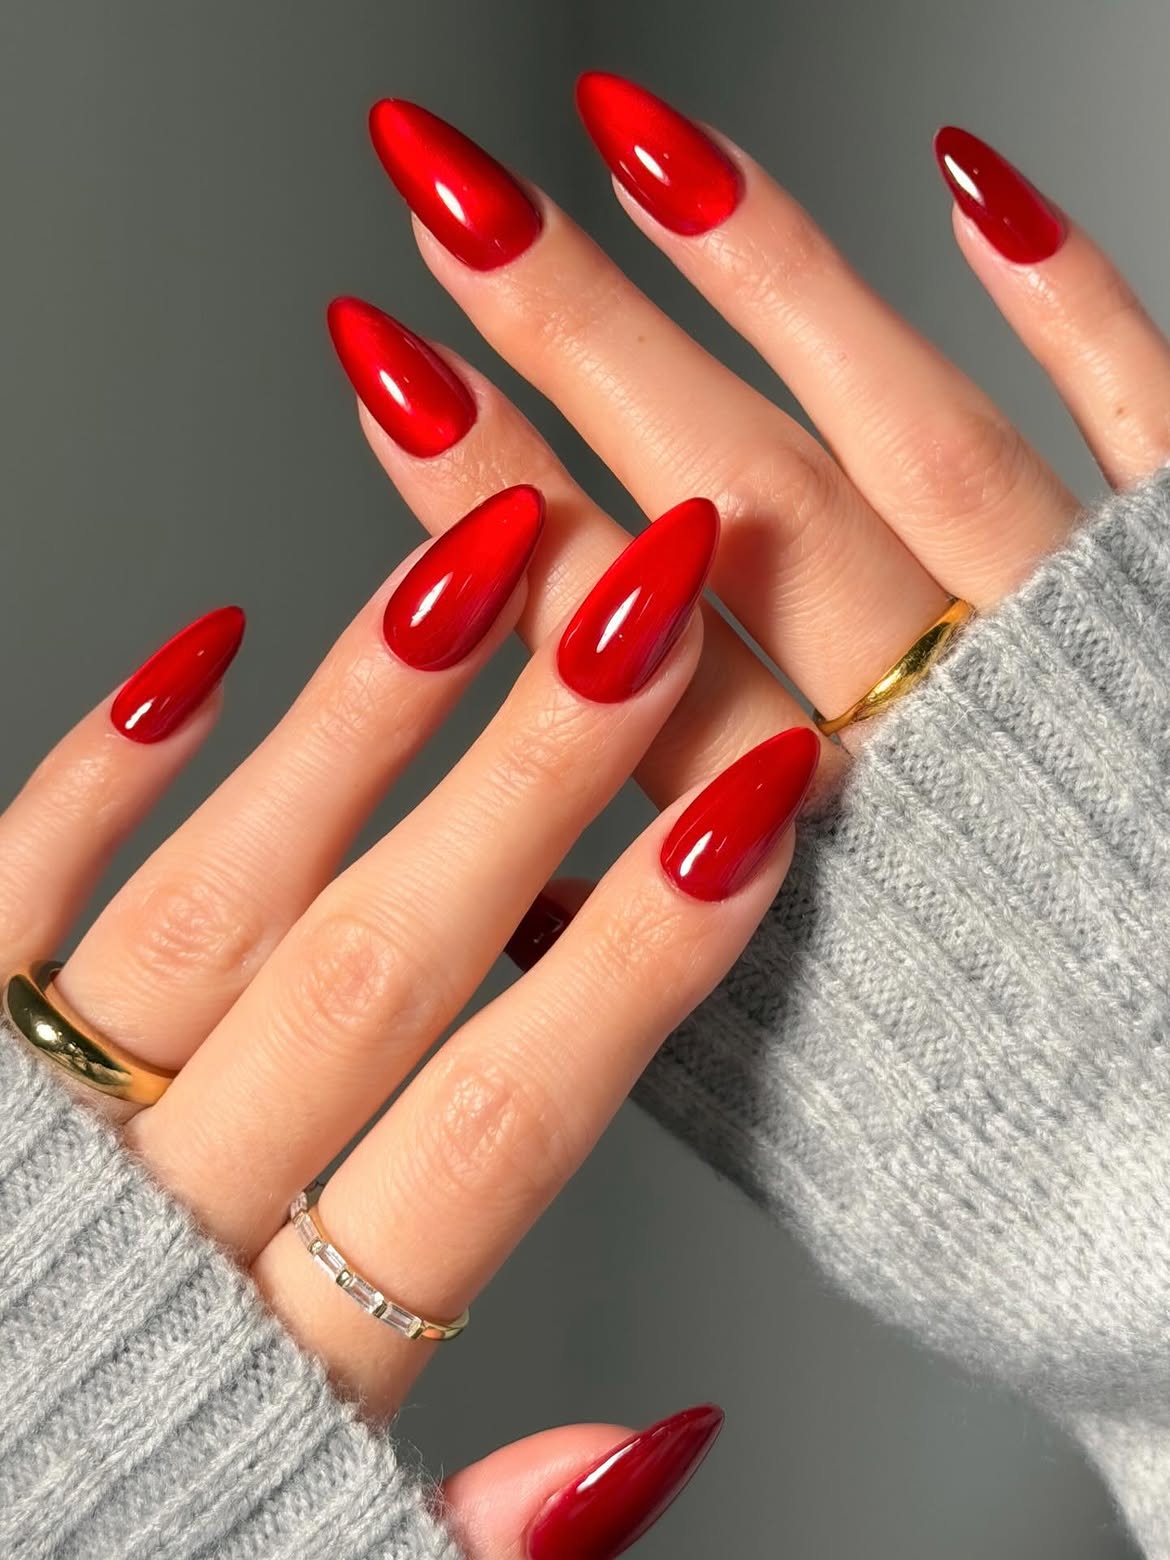
Bright red carries this entire manicure. Both hands show long, tapered almond nails painted in one vivid shade with a smooth, glossy finish. The grey knit and simple rings in the photo make the color stand out even more.
For a similar look, pay attention to the shape as much as the polish. Ask for an even taper and neatly filed tips across the set. With no small drawings to distract the eye, the clean outline and glossy surface become the main details. A single strong red can feel festive on its own.
📌 Color note
Check your red polish swatch in daylight before applying it. Indoor light can make a bright scarlet look closer to a deeper berry shade.
15. Red Glitter Almond Nails With Snowflakes and Candy Stripes
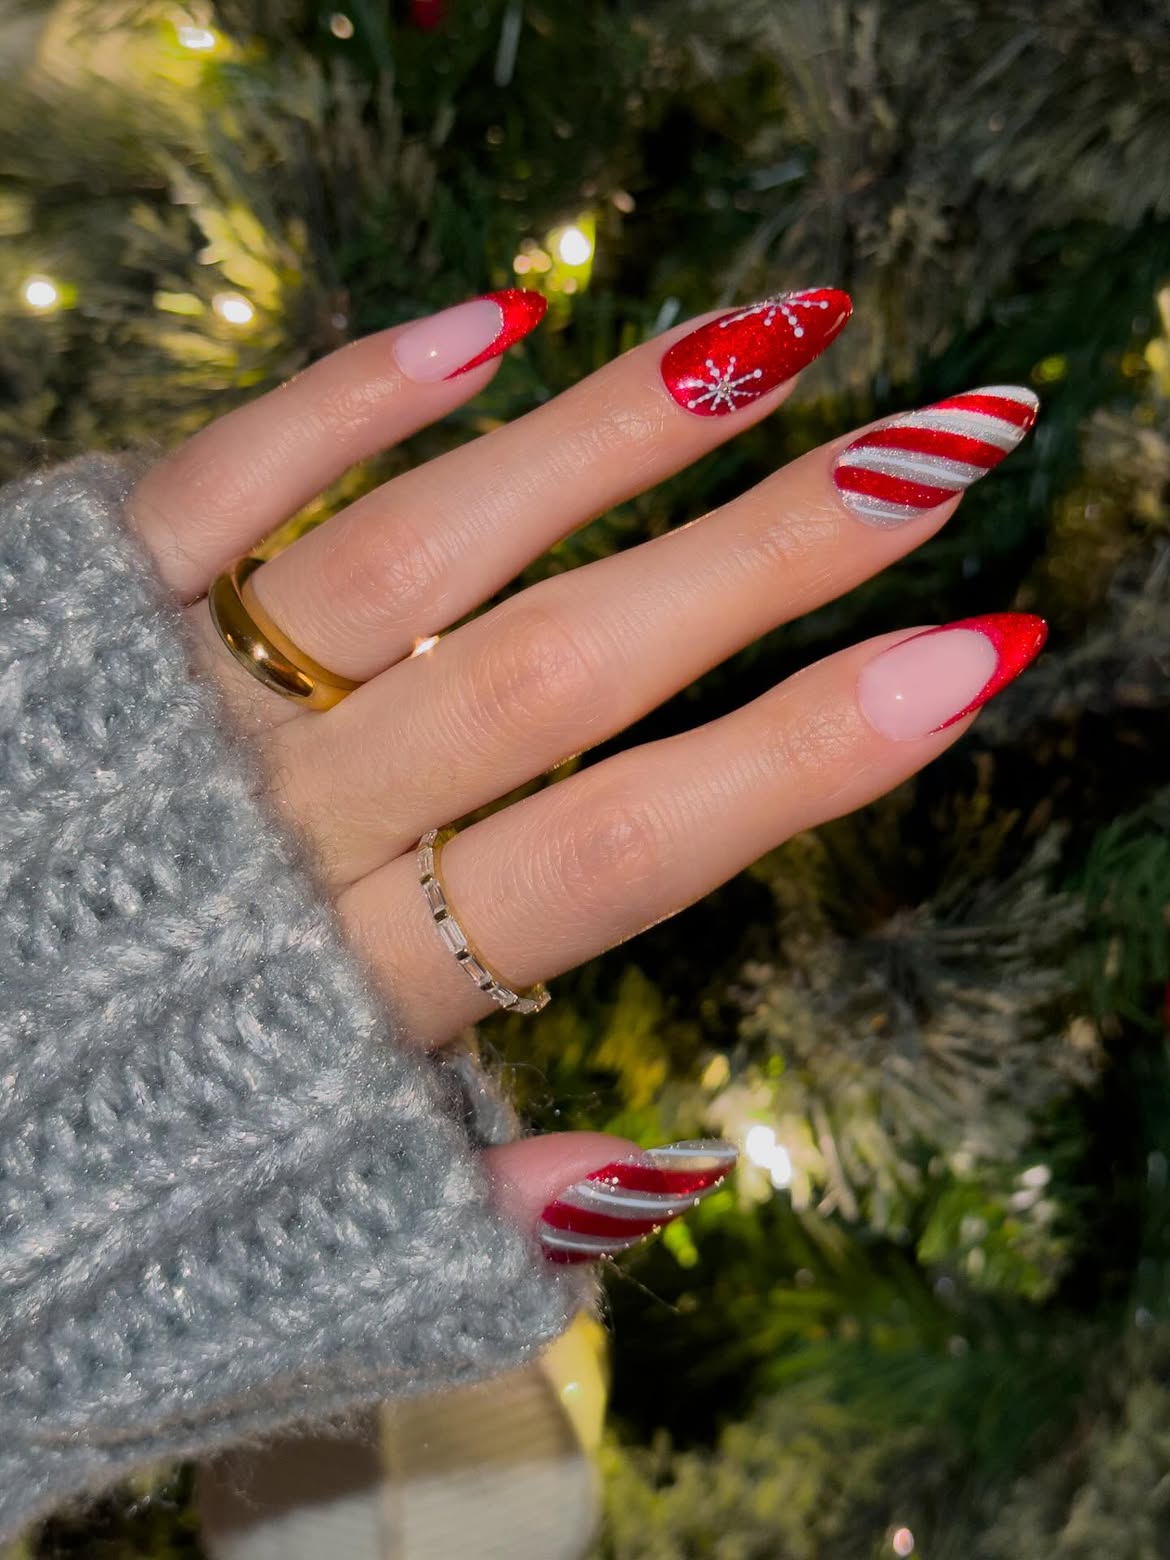
This set gives each almond nail a different part of the Christmas look. Two nails have sheer pink bases with curved red glitter tips, leaving plenty of open space. The center nail is covered in sparkling red and decorated with a delicate white snowflake and small dots. On the remaining nails, silver white stripes wind across the red like candy canes.
The repeated red glitter ties the designs together, while the pale bases keep the detailed nails from feeling crowded. If you want to recreate the mix, use the snowflake on just one nail so its fine lines stand out beside the bolder stripes.
16. Burgundy Glitter Christmas Nails With Tiny Candy Canes
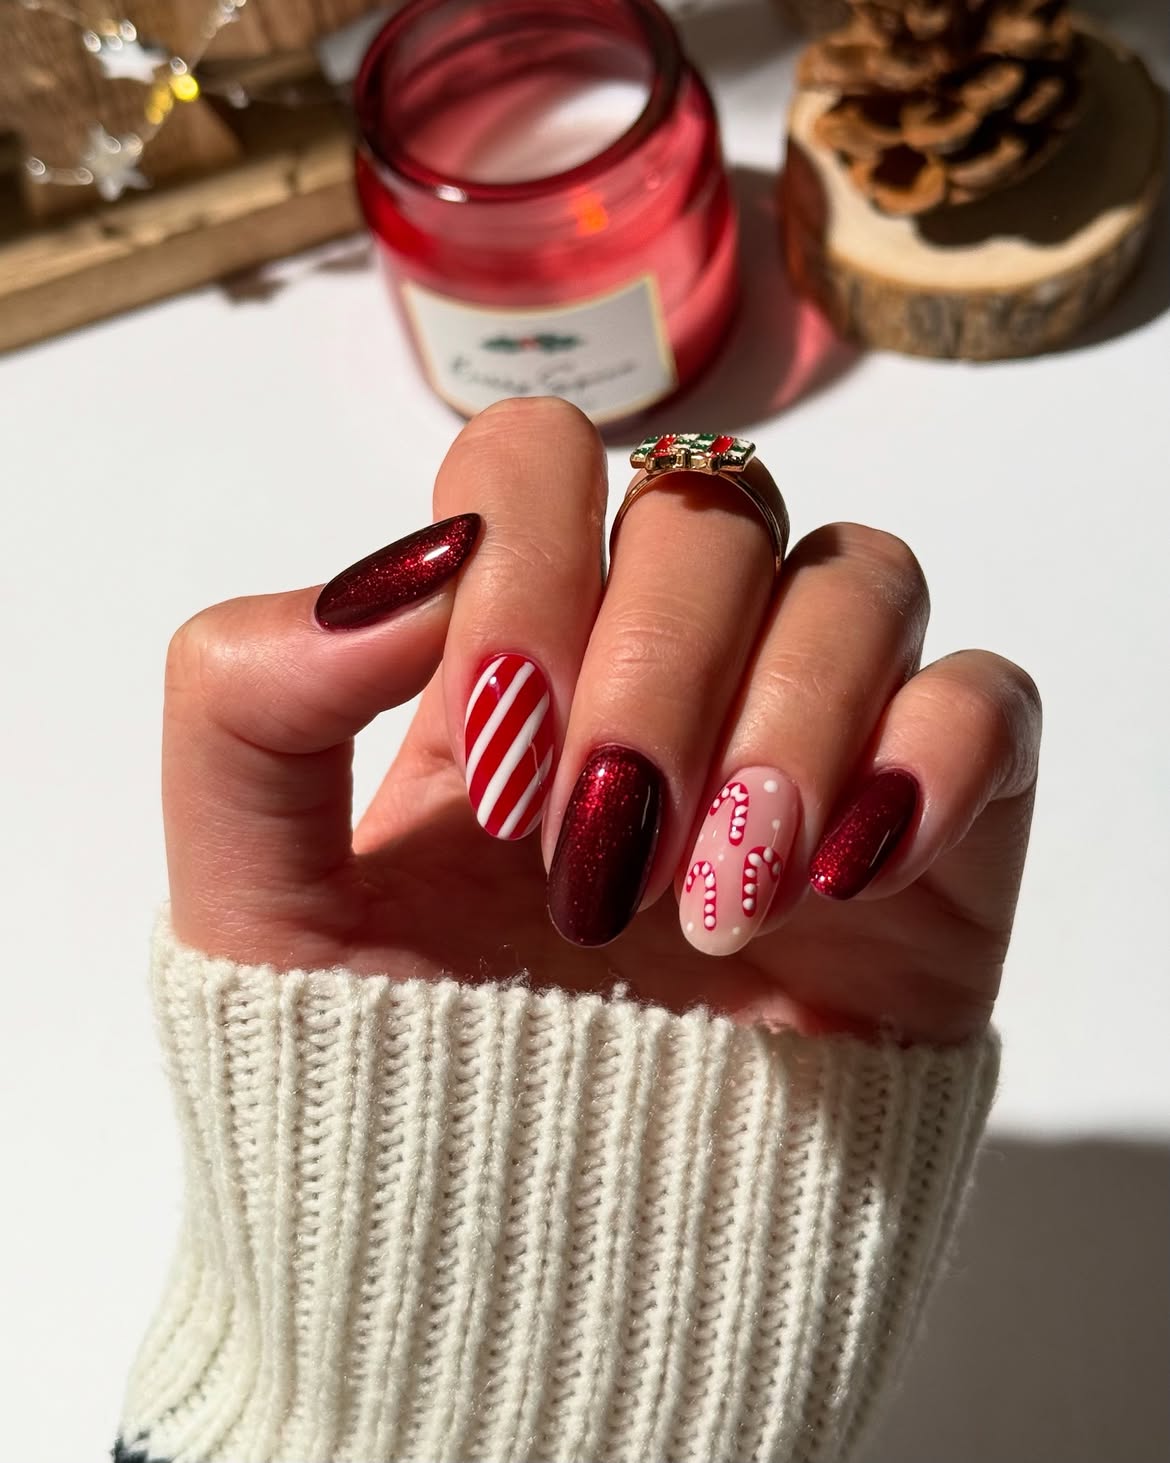
The tiny candy canes make this manicure stand out. Three red and white canes sit on a pale pink nail, with a few white dots filling the space around them. Beside it, one bright red nail has bold diagonal white stripes.
Deep burgundy glitter covers the other nails. Its darker shade gives the playful candy details some balance, while the sparkle carries through the whole set. To recreate this look, keep the small candy canes on one nail and let the striped nail provide the bigger pattern.
17. Ruby Red Christmas Nails With a Glowing Shimmer
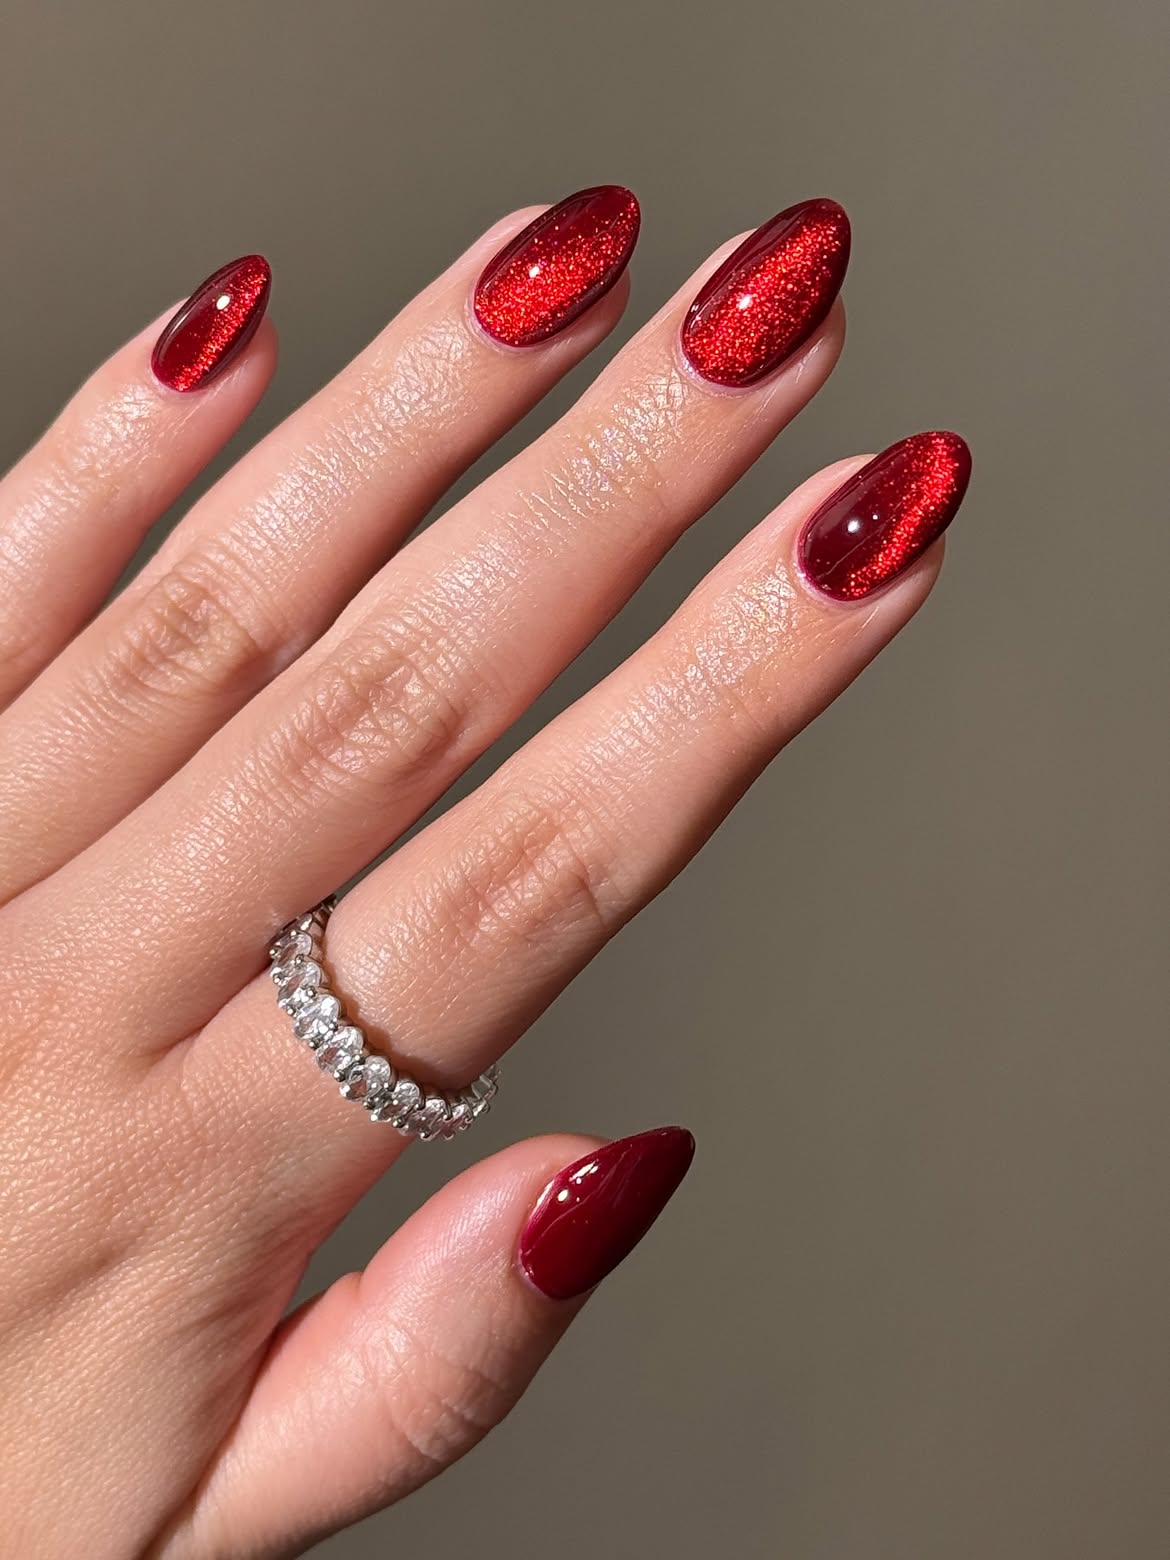
Fine red sparkle glows through the center of these almond nails, while the edges appear deeper and darker. The contrast gives the color a rich ruby look that changes as the light catches it. A glossy wine red thumb adds a quieter shade to the same hand.
This design gets its Christmas feel from color and shine. The smooth finish makes the shimmer look especially bright, and the tapered shape gives each nail a neat point. It is a simple choice if you like festive red nails with no painted motifs.