What are Green Christmas Nail Designs for Chic Holiday Looks

Green nails bring a fresh look to Christmas manicures. Deep forest green can feel elegant and understated, while emerald glitter adds the sparkle many people love during the holidays. You can keep every nail one rich shade or pair green with soft pink, white, and gold for a more detailed design.
These Green Christmas Nail Designs offer ideas for different nail lengths and styles. You will find simple glossy nails with one festive accent, along with snowflakes, tiny bows, ornaments, sweater textures, and berry sprigs. Some designs make a statement with glitter or metallic polish. Others use small details that are easy to wear throughout December.
As you browse the looks, think about how much nail art you want and which colors you wear most often. A single decorated nail can make a green manicure feel festive, while a different pattern on each nail gives you more room to play. Use these ideas to choose a look you will enjoy wearing at holiday gatherings and beyond.
14+ Green Christmas Nail Designs
1. Forest Green Christmas Nails With Gold Star Details
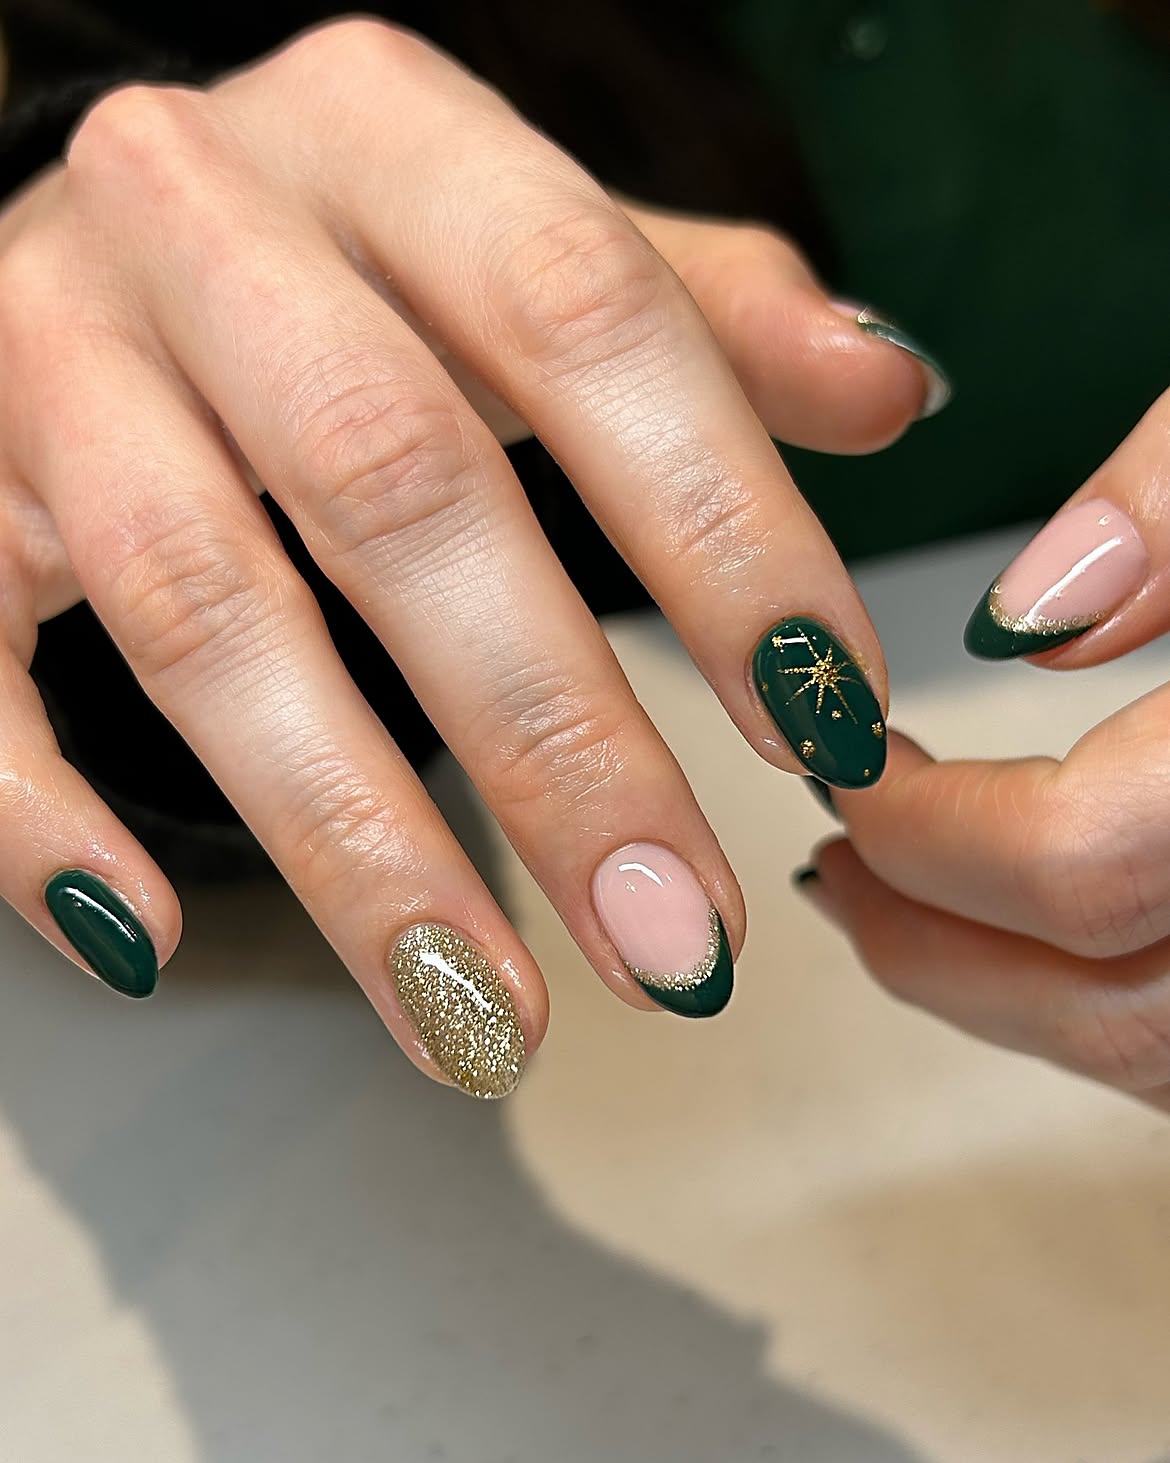
The dark green polish gives this set its rich holiday color. A gold starburst sits on one green nail, while a full glitter nail brings in extra shine. The soft pink nails give both details room to stand out.
To recreate the balance:
- Keep the green tips curved and leave plenty of pink showing.
- Add a fine gold line where the green meets the pink.
- Choose just one nail for the star and one for full glitter.
The glossy finish ties everything together. If you want a quieter version, keep the green tips and star, then swap the glitter nail for solid green.
Choose your level of sparkle
Soft
Pink nails with curved green tips.
Festive
Add one gold star on a green nail.
Extra shine
Make one nail entirely gold glitter.
2. Emerald Christmas Nails With a Snowflake and Green Stripes
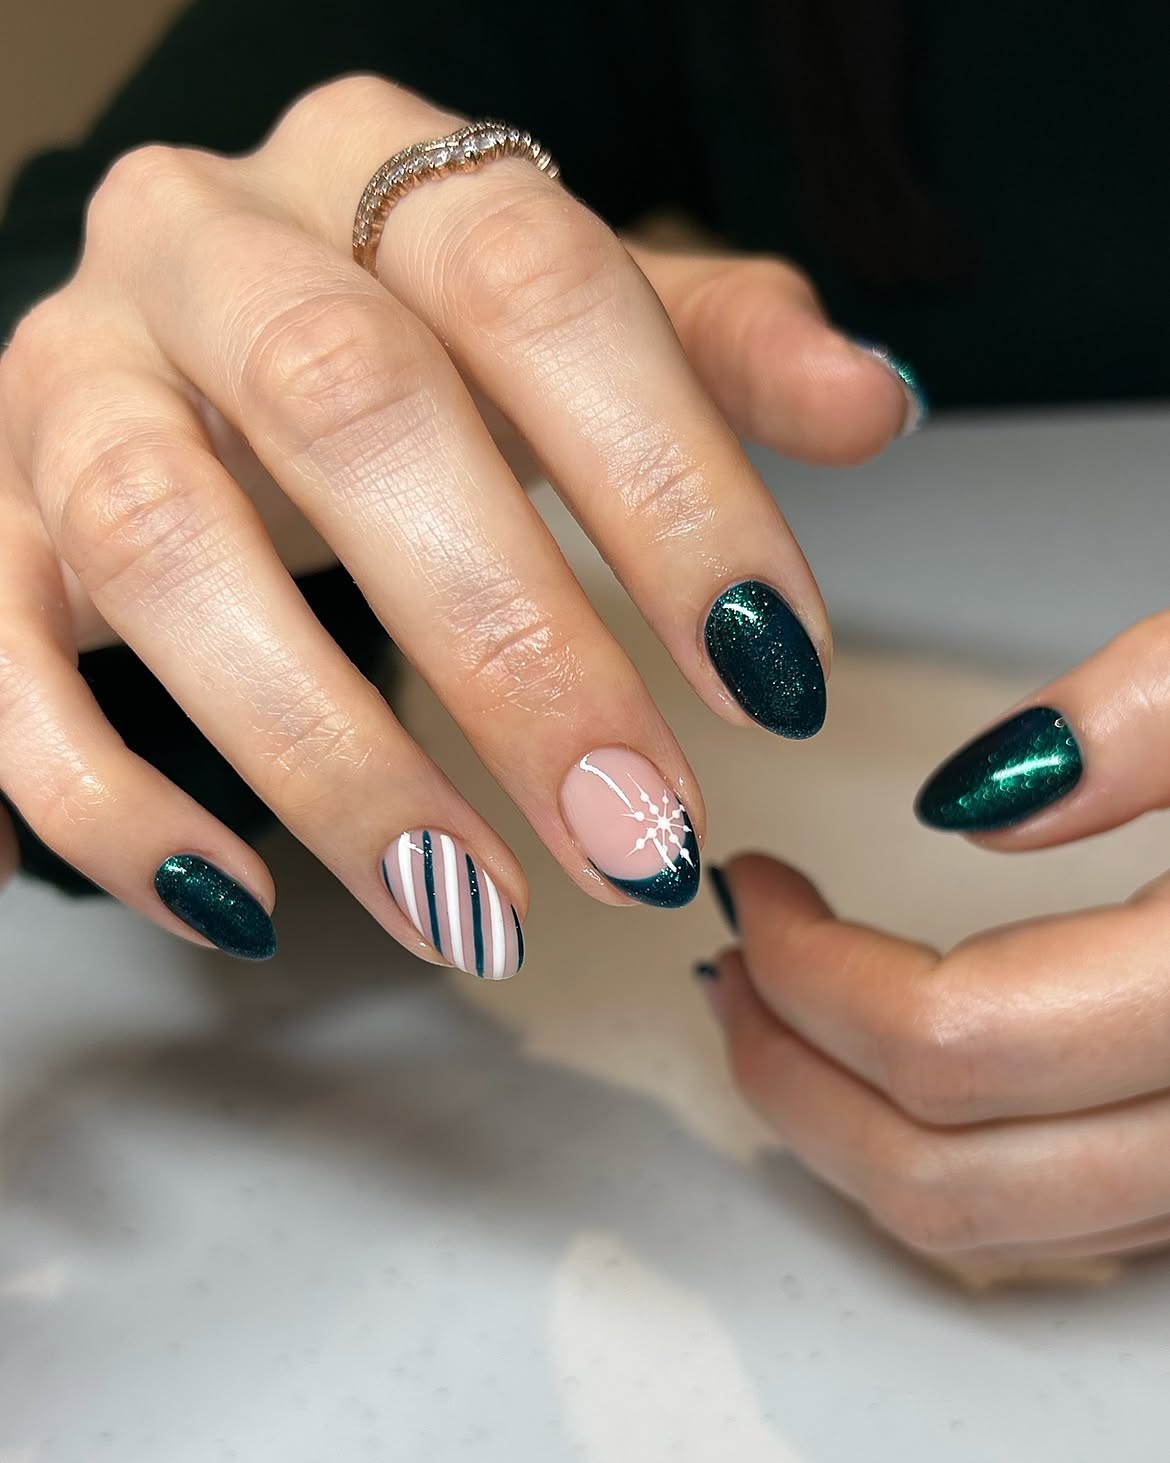
A white snowflake and a striped accent nail give this set two different holiday details. The snowflake sits on soft pink and overlaps a deep green tip. On the next nail, slim green and white stripes leave the pale base showing between them.
The other nails have a dark emerald shimmer. They catch the light without competing with the nail art, so your eye moves between the snowflake and the stripes. Keep those details on separate nails if you recreate the look. A glossy finish brings out the shine in the green polish.
💡 An easier way to try it
Use a small snowflake nail sticker if painting the fine white lines feels tricky. Keep the striped nail simple with a few straight lines and space between each one.
3. Green Gift Wrap French Tips With Tiny Bows
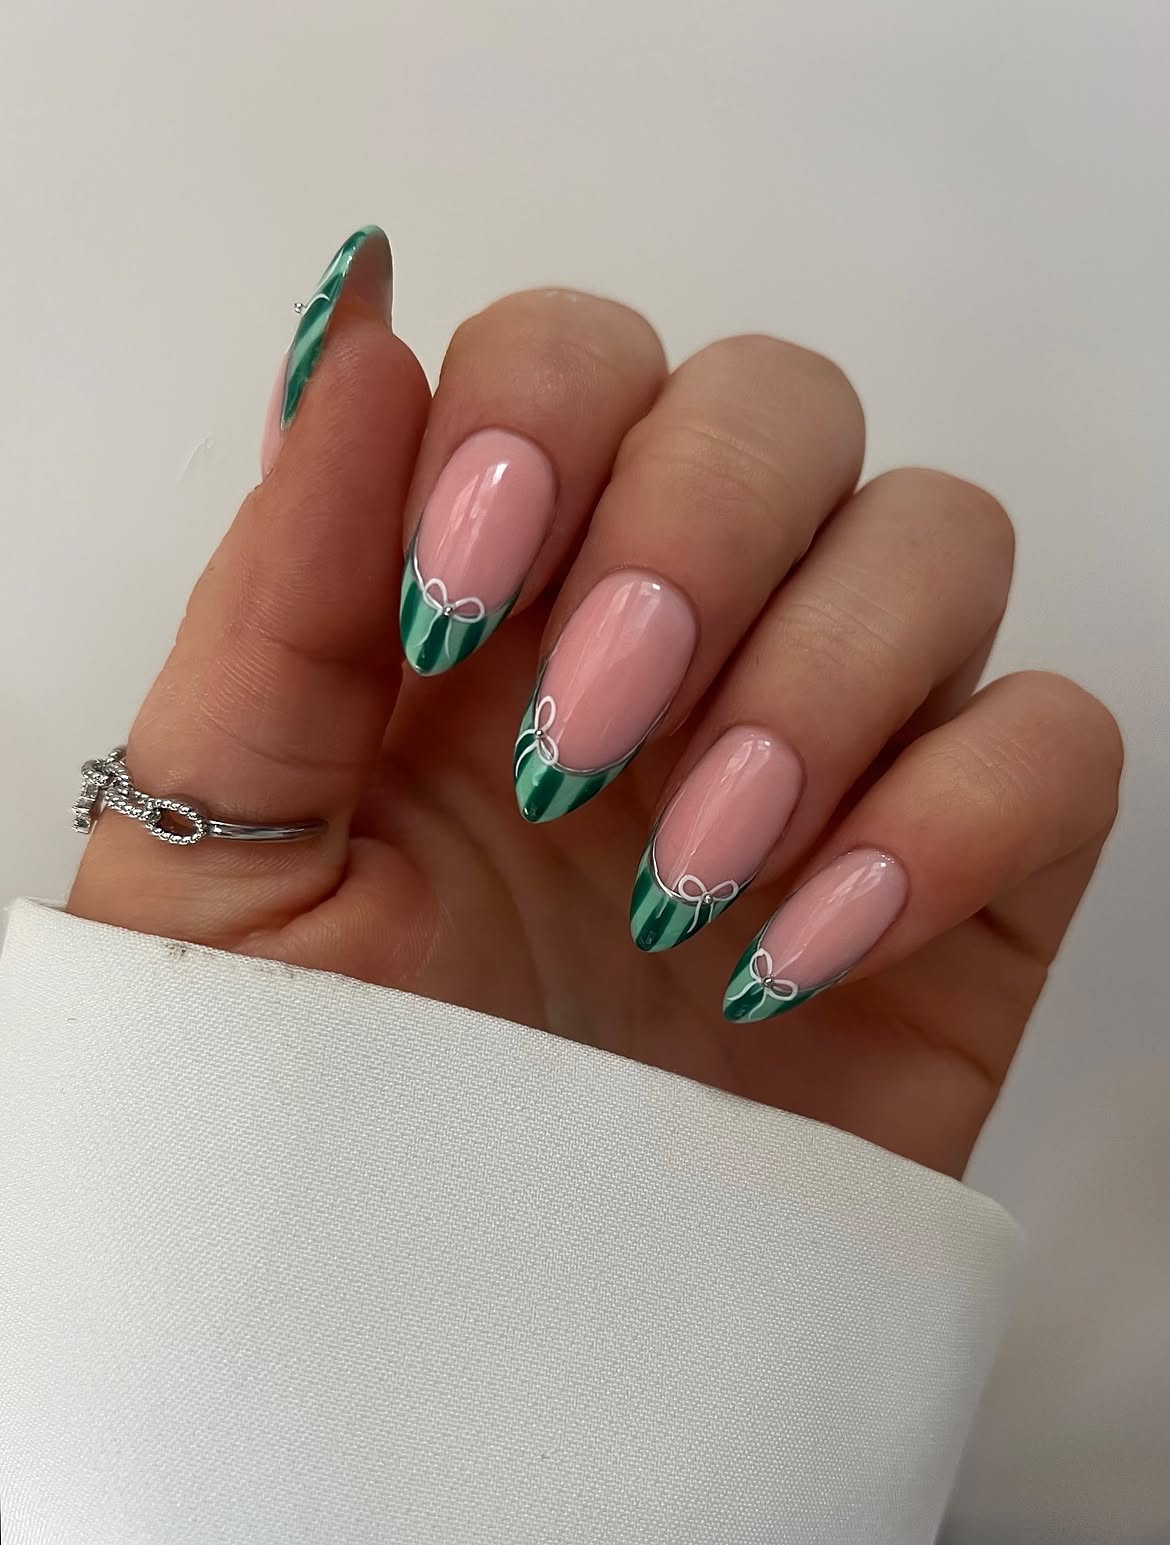
These nails borrow the look of Christmas gift wrap without covering the whole nail in color.
The long almond tips have alternating shades of green, with a fine metallic line separating them from the soft pink base. Small pale bows sit where the color begins. Because the same pattern appears on each nail, the details feel neat rather than crowded.
Give the tips enough depth for the stripes to show clearly. If you like the bow detail but want less to paint, place bows on only two nails and keep the striped tips across the rest.
Keep the green striped tips on every nail. Add a small bow to just one or two.
Pair every striped tip with a fine metallic outline and a tiny bow along the edge.
Green nails feel fresh and elegant, while these 17 Red Christmas Nail Designs bring a classic Christmas touch to your manicure ideas.
4. Deep Green Christmas Nails With One Little Tree
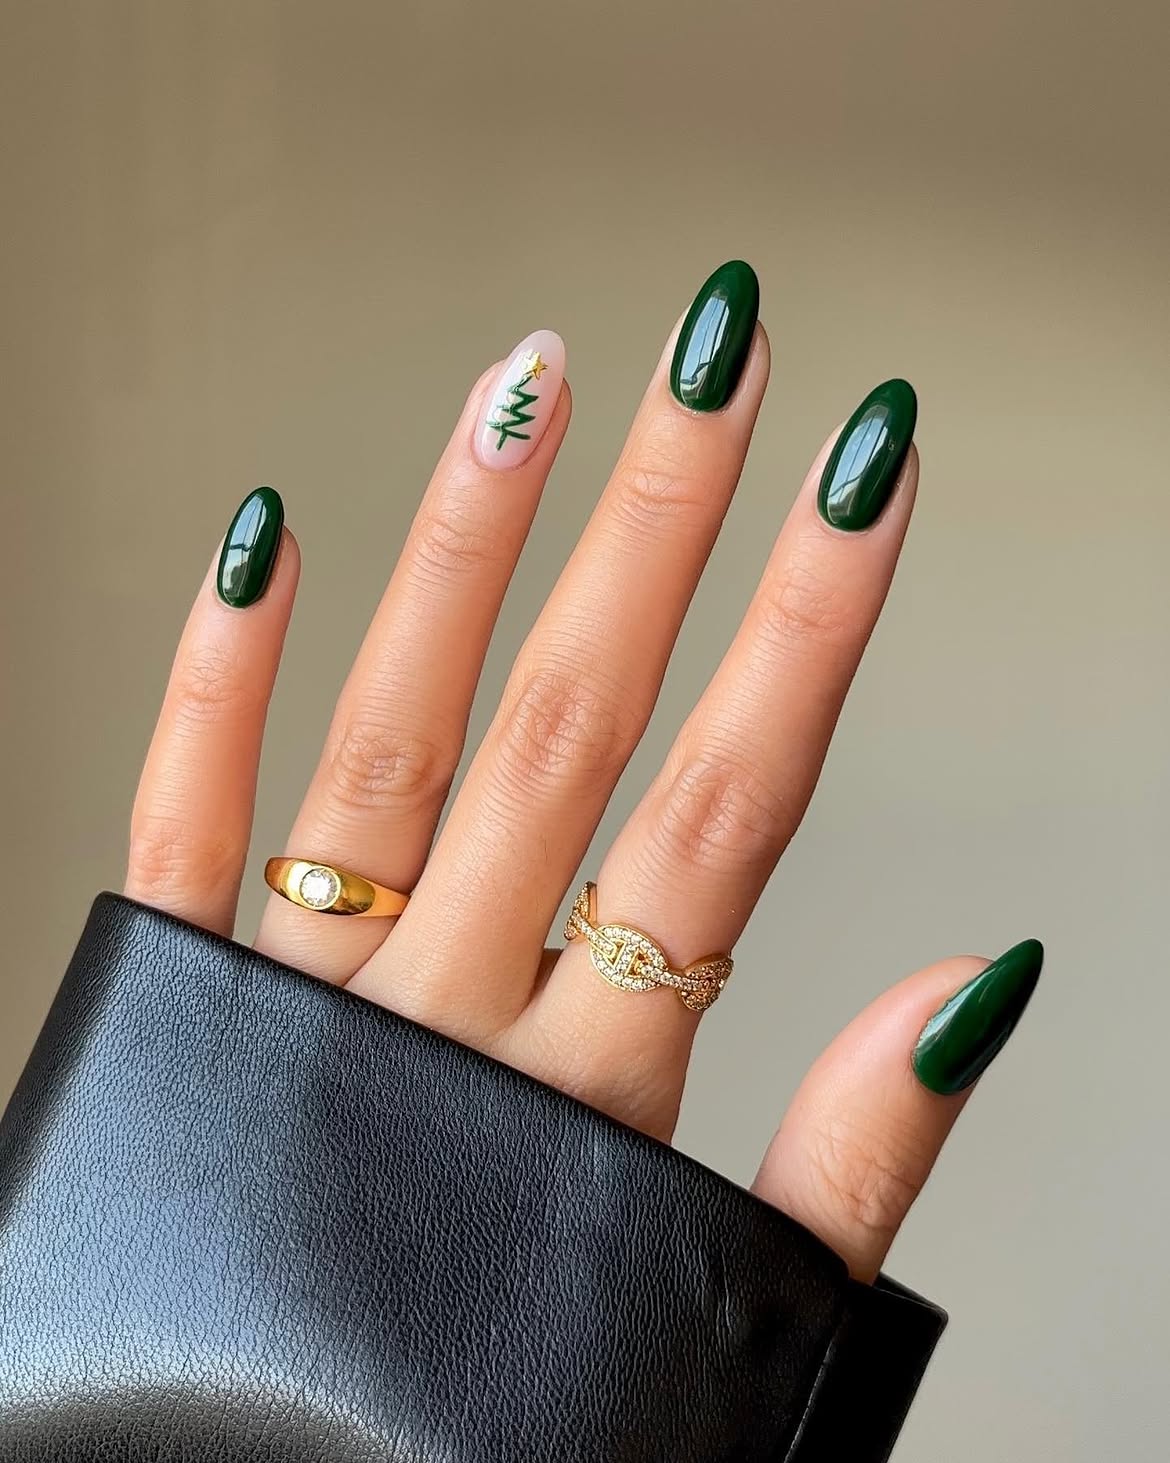
Most of this manicure is glossy, solid green. The single pale pink nail carries a loose green Christmas tree with a tiny gold star at the top. That small detail gives the set its holiday theme without filling every nail with art.
The tree line does not need to be perfectly straight. Its gentle bends make it feel hand painted, while the matching green polish connects it to the rest of the nails. Keep the tree on one finger and use the same deep shade everywhere else. The gold star will stand out more against the pale base.
How to recreate the accent nail
Paint one nail pale pink and the remaining nails deep green.
Draw a loose green zigzag that widens toward the bottom.
Place a small gold star at the top and finish with a glossy coat.
5. Metallic Green Christmas Nails With White Ribbon Art
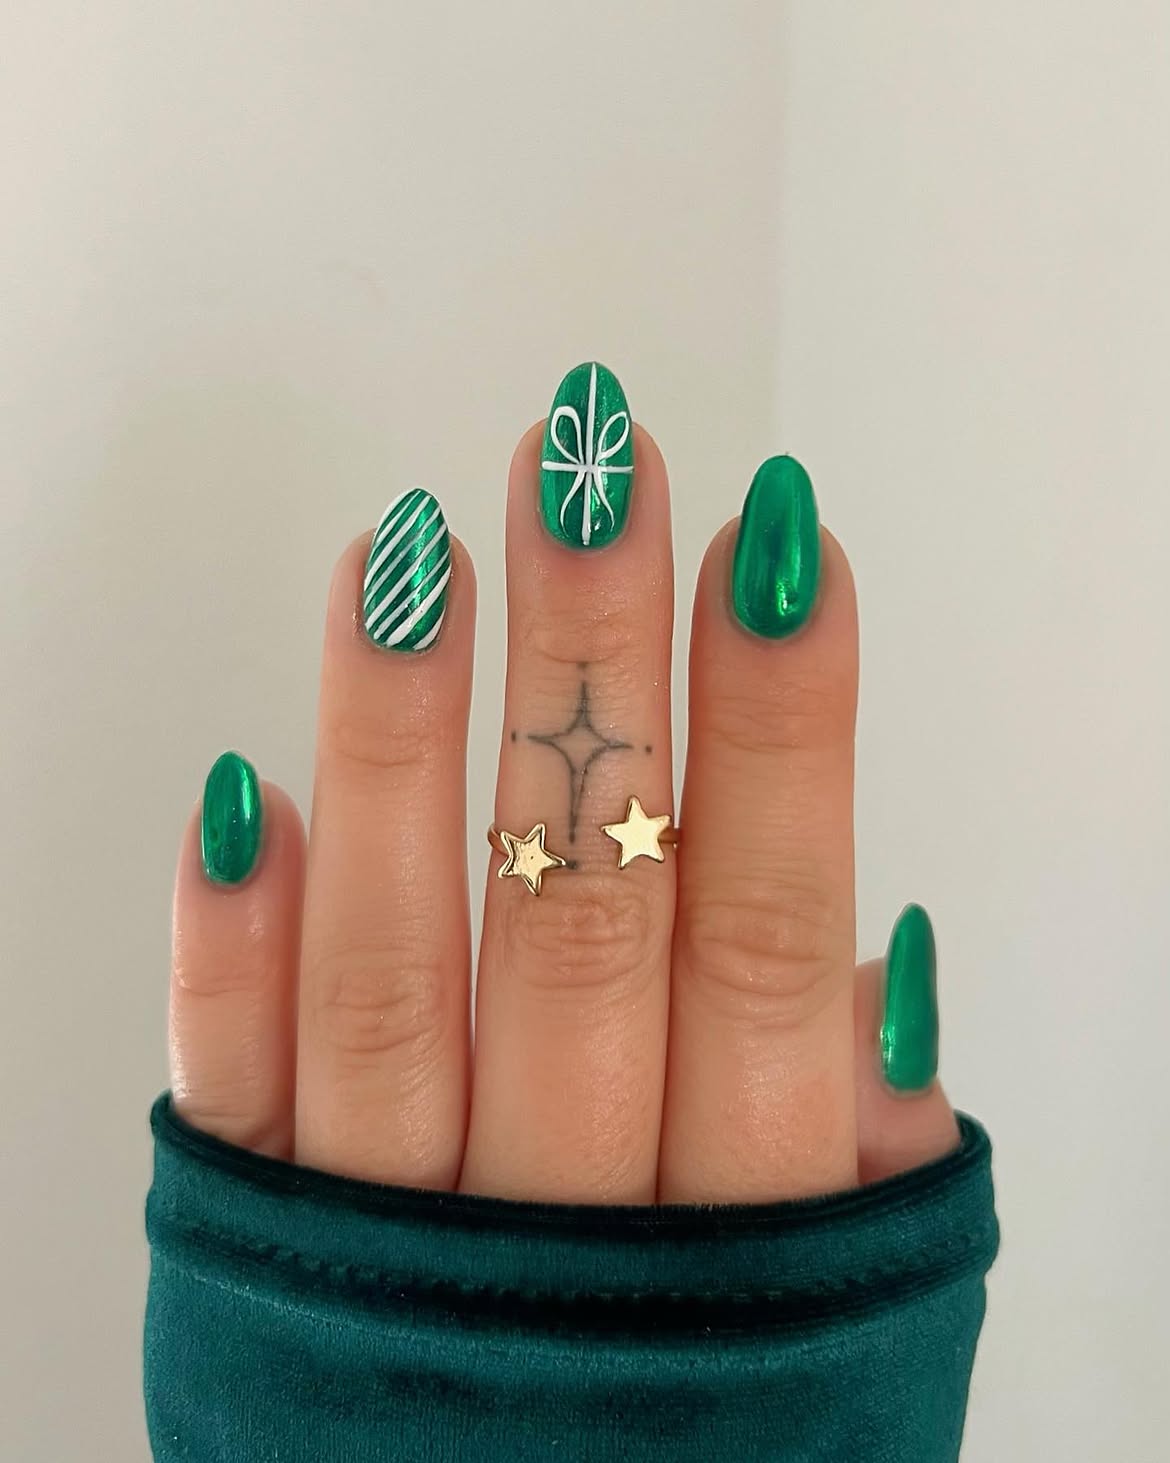
Bright, reflective green covers this whole set. One nail has diagonal white stripes, while the center nail shows a white ribbon tied into a bow. The other nails stay solid green, giving the two patterns space to stand out.
The full green base makes this a bolder take on gift themed nails. For a similar look, put the stripes and ribbon on separate fingers. Keep the white lines slim so the green still shows through, especially around the loops of the bow. A fine nail art brush can help with the ribbon, while striping tape can guide the straight diagonal lines.
Use slim white lines for the ribbon.
Leave several nails solid green.
Thick white strokes can hide the green finish.
Putting both patterns on every nail loses the contrast.
6. Short Green Glitter Christmas Nails With Snowflakes
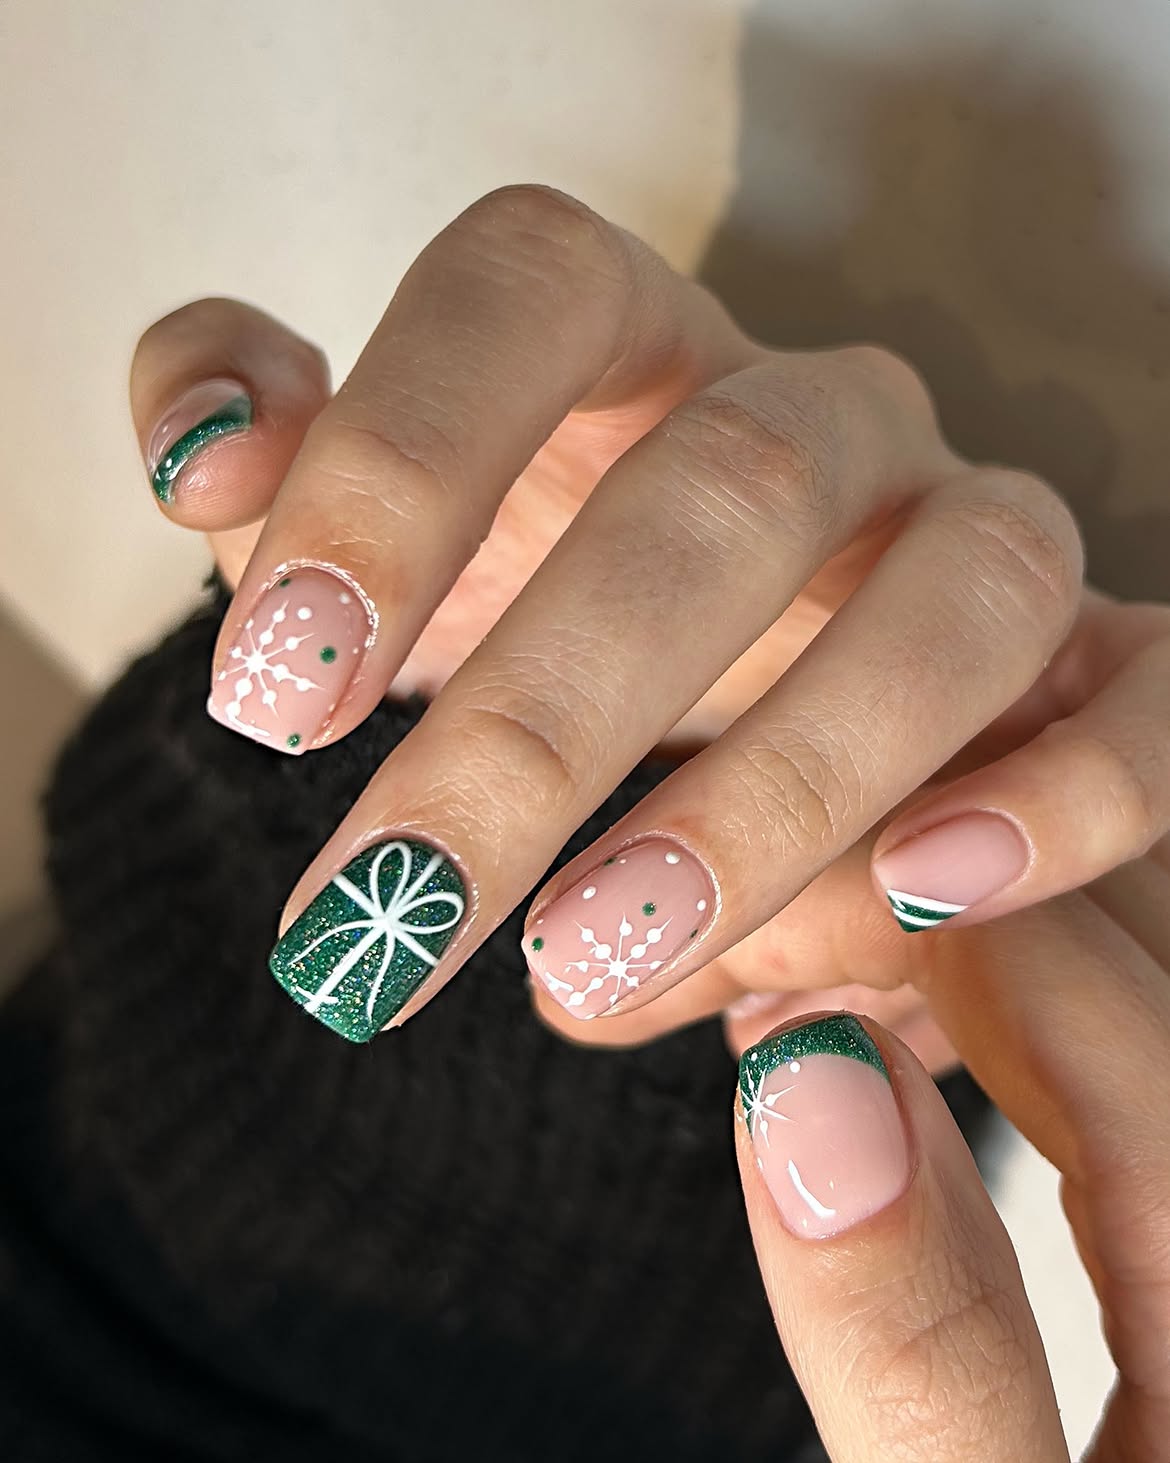
A soft pink base gives the white snowflakes room to show on these short nails. Small green dots sit around the flakes, while a full green glitter nail carries a white ribbon and bow. Slim green tips bring the sparkle onto a few more fingers.
The softly squared shape keeps the art compact. Leave some pink space around each snowflake so its lines stay clear, and put the ribbon on just one nail. That gives every detail a place to shine. For a closer match to the design, choose a fine green glitter rather than large glitter pieces.
Salon checklist
7. Icy White Christmas Nails With Emerald Glitter
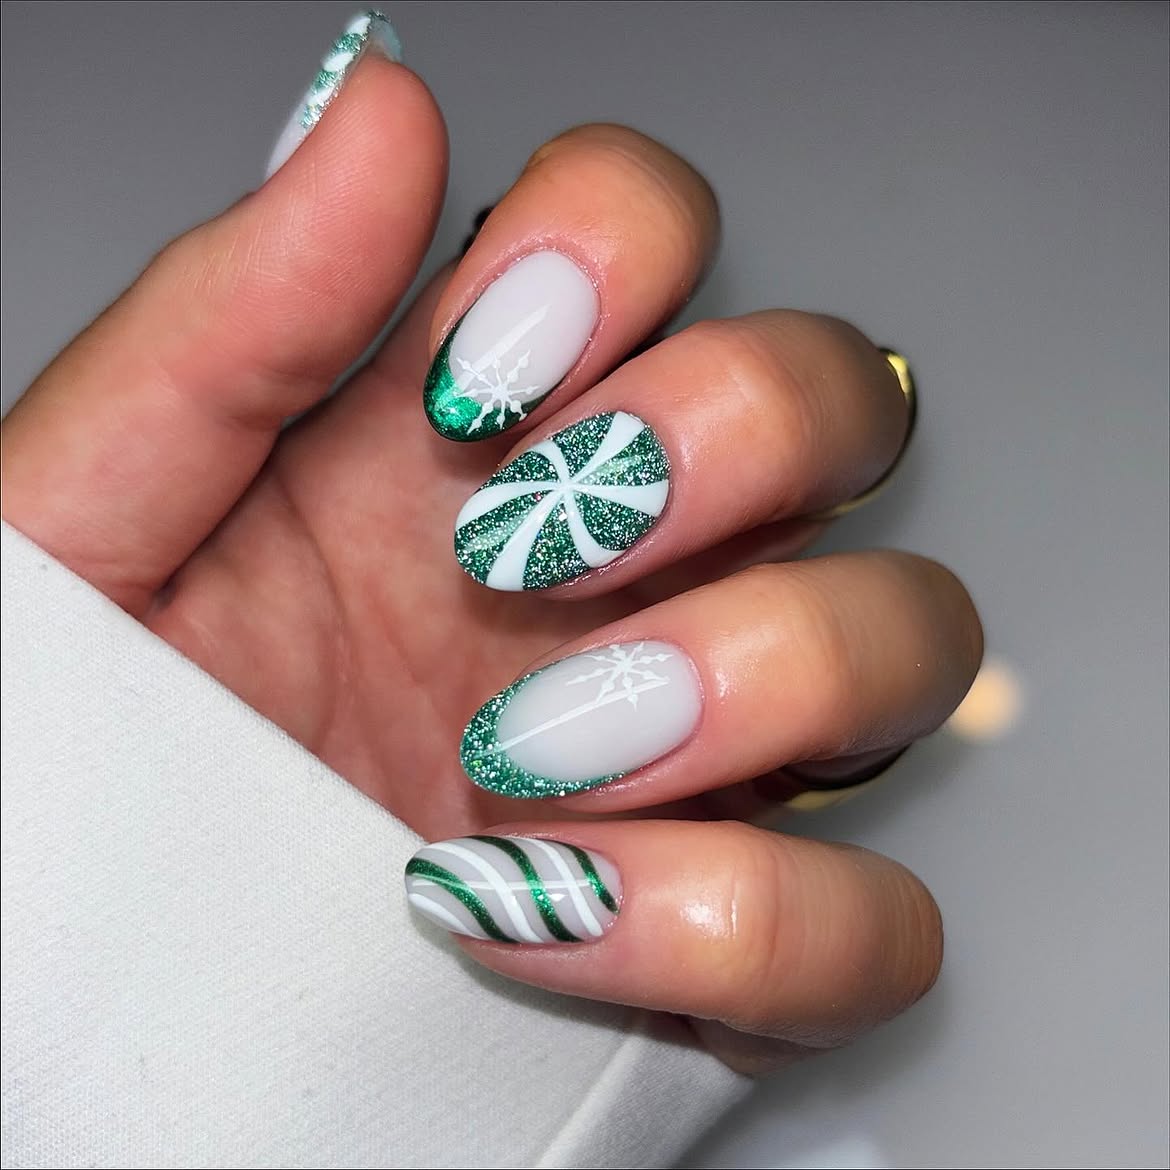
Milky white gives this green Christmas set a frosty look. Emerald glitter curves around the tips of two pale nails, each with a delicate white snowflake. Another nail is covered in green sparkle and crossed with white lines like a wrapped gift. The thumb adds sweeping green and white stripes.
The different line widths help each detail read clearly. Broad white bands define the gift nail, while finer lines keep the snowflakes delicate. If you want the white flakes to show more, let part of each one overlap the green glitter at the tip.
| Nail | Placement guide |
|---|---|
| Pale nails ❄️ | Curved green glitter tips with fine white snowflakes. |
| Gift nail 🎁 | Full green glitter with wider crossing white lines. |
| Striped nail 🌿 | A pale base with sweeping green and white stripes. |
8. Evergreen Christmas Nails With Fine Gold Snowflakes
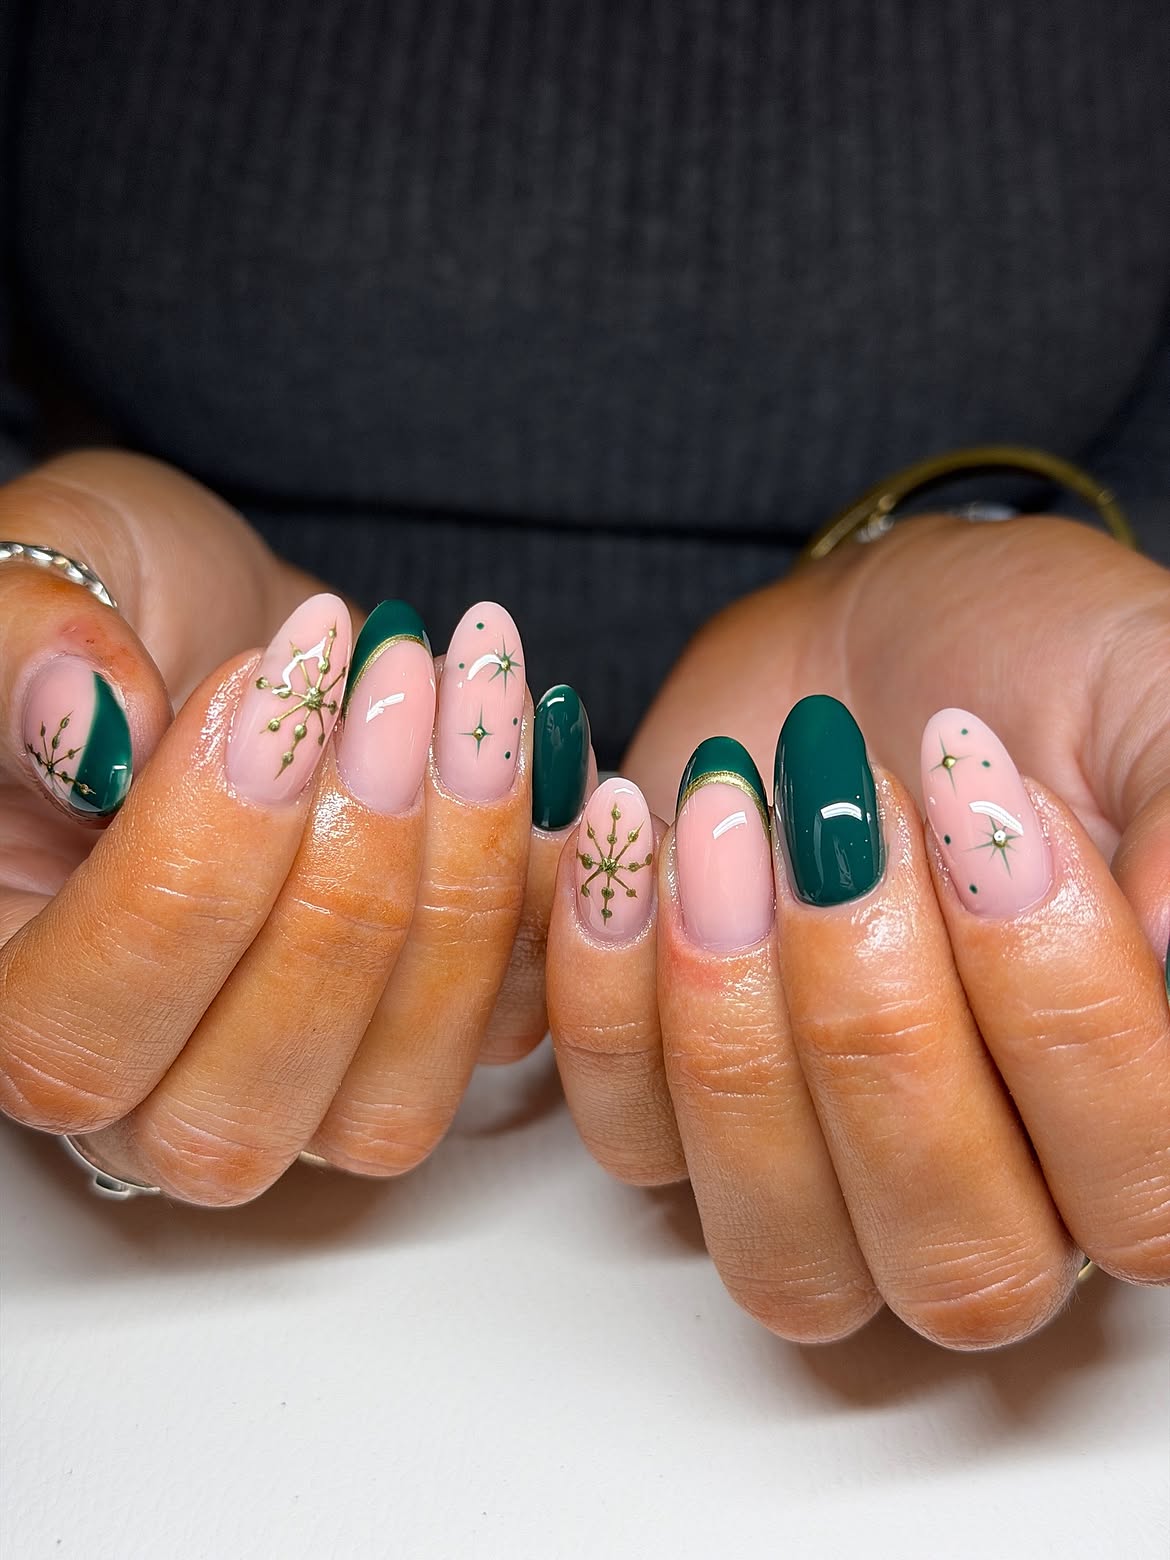
Fine gold details give this manicure its festive look. The pale pink nails carry branching snowflakes, small starbursts, and scattered green dots. Some have deep green tips with a slim gold curve beneath them. Solid evergreen nails bring the stronger color across both hands.
There is plenty of pink space around the tiny designs, so you can see each one clearly. To recreate the look, ask for thin lines and a different small detail on each pale nail. Keep a few nails solid green to break up the artwork and let the gold catch the light.
Use the same fine gold tone along the green tips and in the snowflake details. The motifs can vary from nail to nail while the color keeps the set connected.
9. Dark Green Christmas Nails With Gems and a Silver Bow
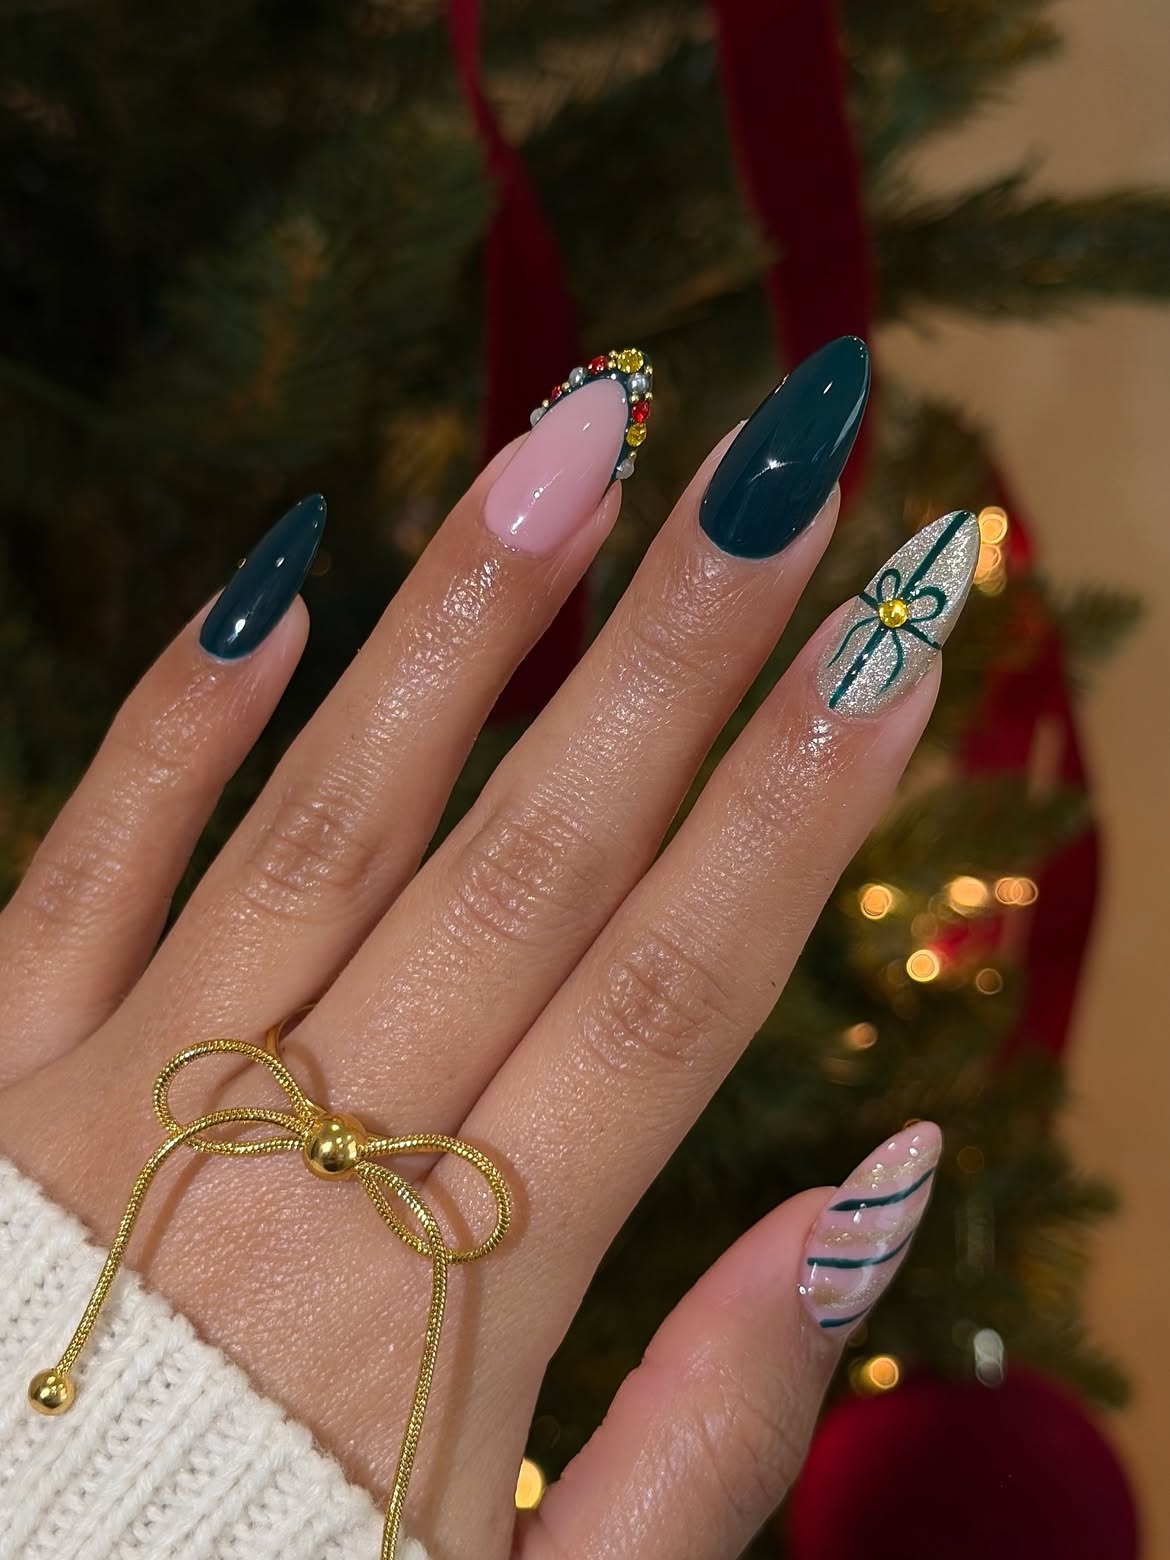
Long, pointed nails give this set room for several holiday details. Two stay glossy dark green. A pale pink nail has a tip edged with small red, gold, and clear gems, while a silver glitter nail carries a deep green bow with a gold colored center. Curved stripes add another pattern on the thumb.
The solid green nails give the eye a pause between the decorated ones. To recreate that balance, keep the gems close to the edge so the pink base remains visible. Let the silver bow nail be the main accent, with the jeweled tip adding a smaller flash of color.
From easy glitter tips to small holiday details, explore 16 Budget Friendly Christmas Nails to Do at Home for more affordable festive inspiration.
10. Forest Green Gingham Christmas Nails
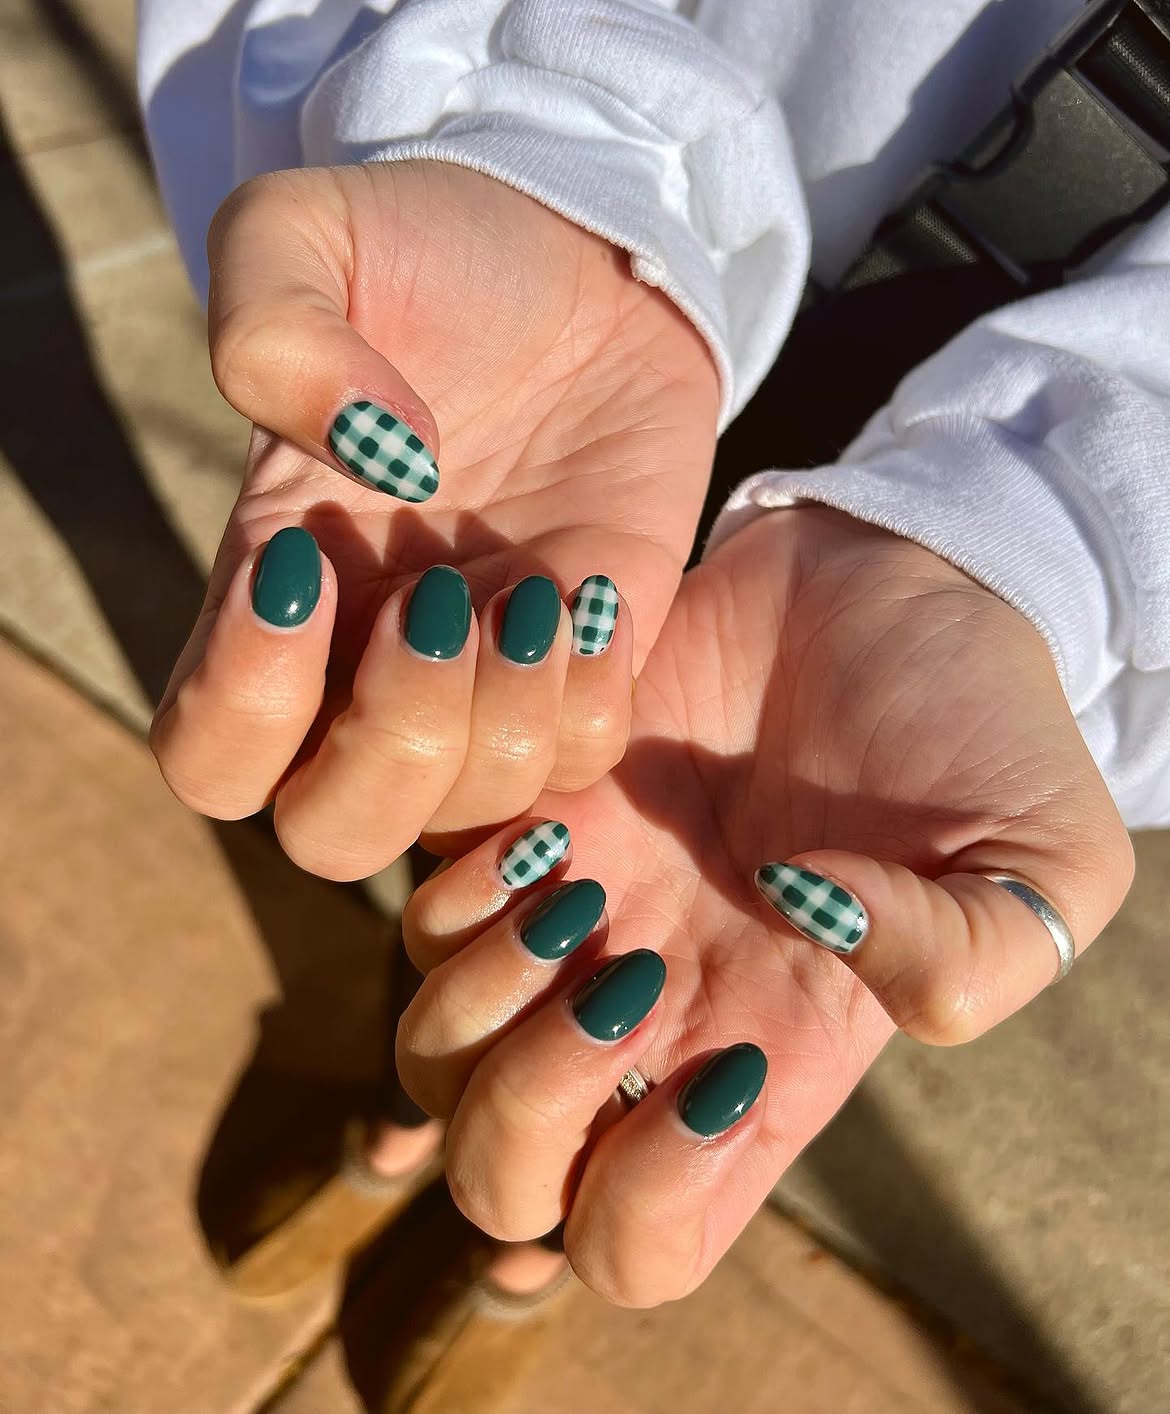
The green and cream checks give this manicure a cozy, festive feel. Both thumbs and two smaller accent nails carry the gingham pattern. The remaining nails are glossy forest green, using the same dark shade seen in the checks.
The short oval shape keeps the little squares easy to see. If you recreate this set, leave a bit of pale space between the green bands so the grid stays clear. Matching the solid polish to the darkest checks will make the patterned and plain nails feel connected.
Build the gingham pattern
Start with a pale cream base on the accent nails.
Add evenly spaced green bands in both directions.
Deepen alternating squares, then coat the other nails in matching solid green.
11. Mistletoe Inspired Green Christmas Nails With White Berries
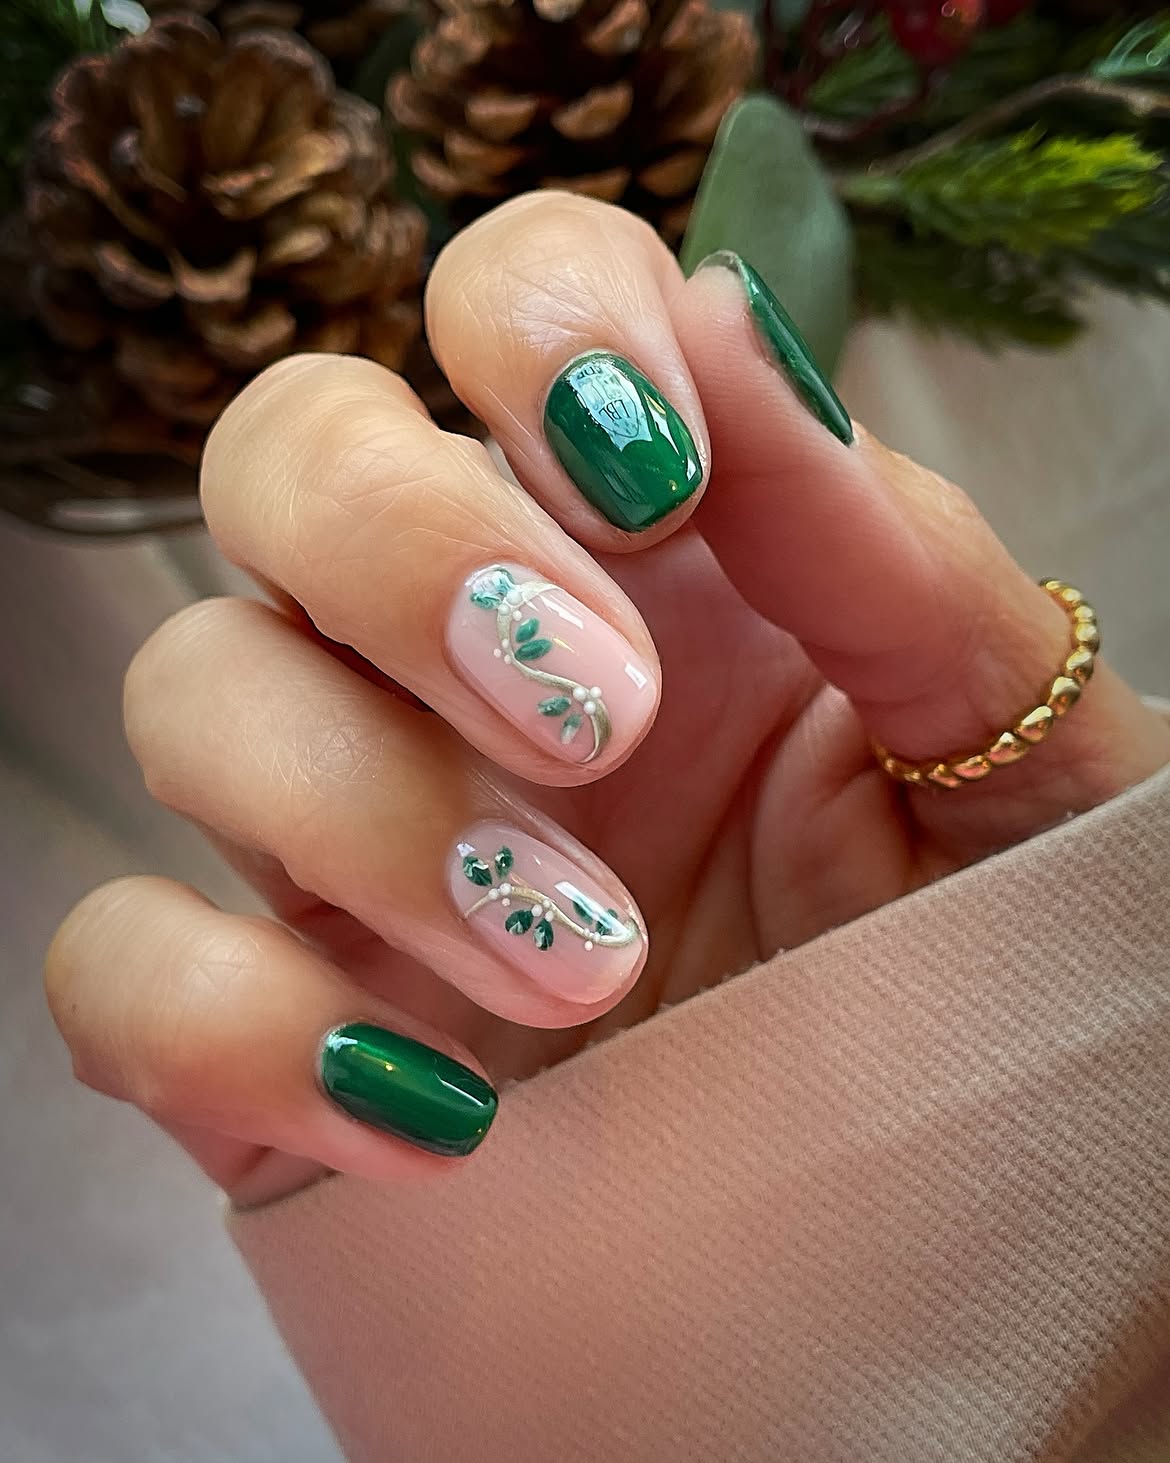
Tiny leaves and white dots bring a winter greenery feel to this manicure. On two soft pink nails, thin curved stems carry small green leaves and clusters of white berries. The other nails stay glossy forest green.
The branches have room to curl across the pale base, which makes the small details easy to see. For a similar look, place the greenery on just two nails and keep each stem light. A fine brush can shape the leaves, while a dotting tool can make the little white clusters. The solid green nails carry the color through the set.
Draw a slim curved stem first.
Add small leaves and a few grouped white dots.
Avoid thick stems that cover the pink base.
Keep the leafy art off the solid green nails.
12. Green Sweater Christmas Nails With Holly Berries
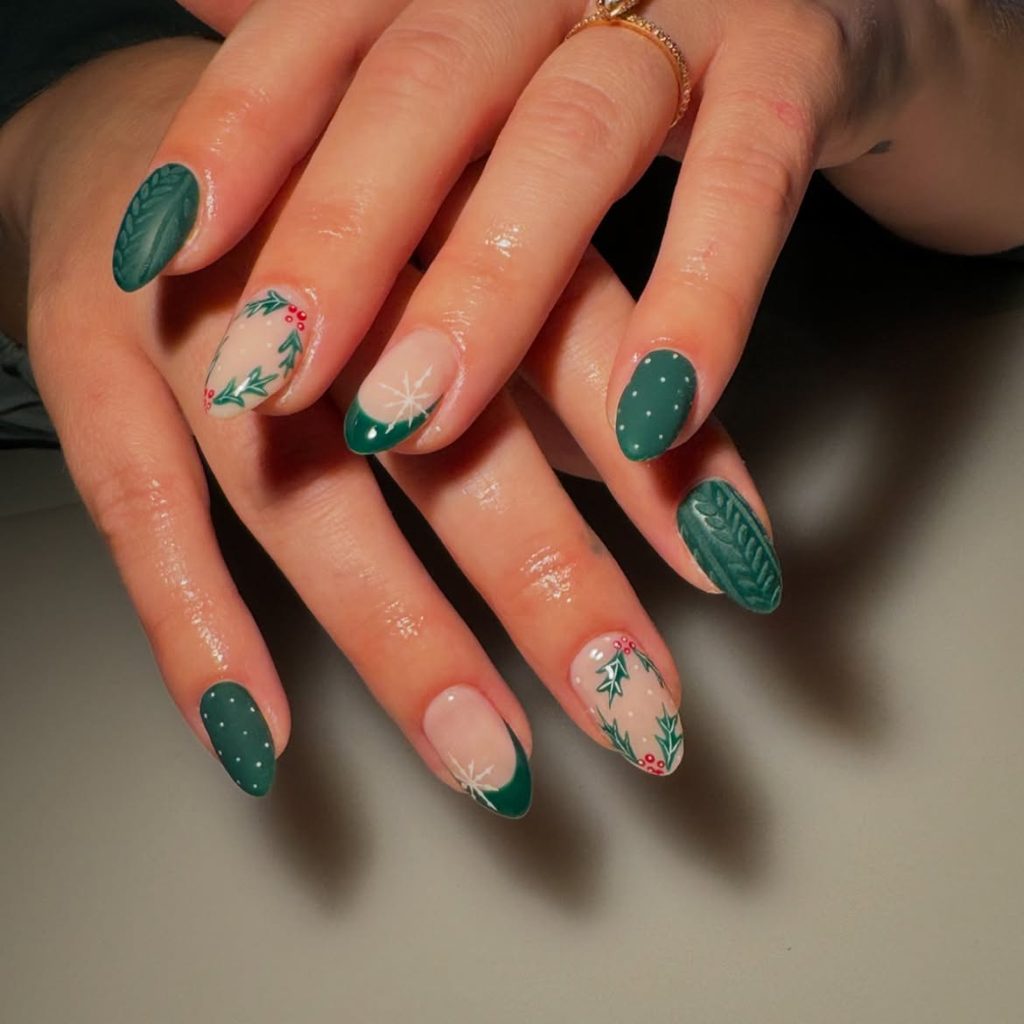
Texture makes this set stand out. One green nail on each hand has a raised pattern that looks like a knit sweater. Other green nails carry tiny white dots, giving the solid color a softer winter feel.
The pale nails add another layer: pointed green leaves and small red berries appear beside curved green tips and fine white starbursts. Spreading those details across both hands keeps each pattern easy to see. Ask for the knit pattern on a full green nail so its texture stays visible, and keep the red berries small enough to remain an accent.
13. Green Glitter Christmas Nails With Hanging Ornaments
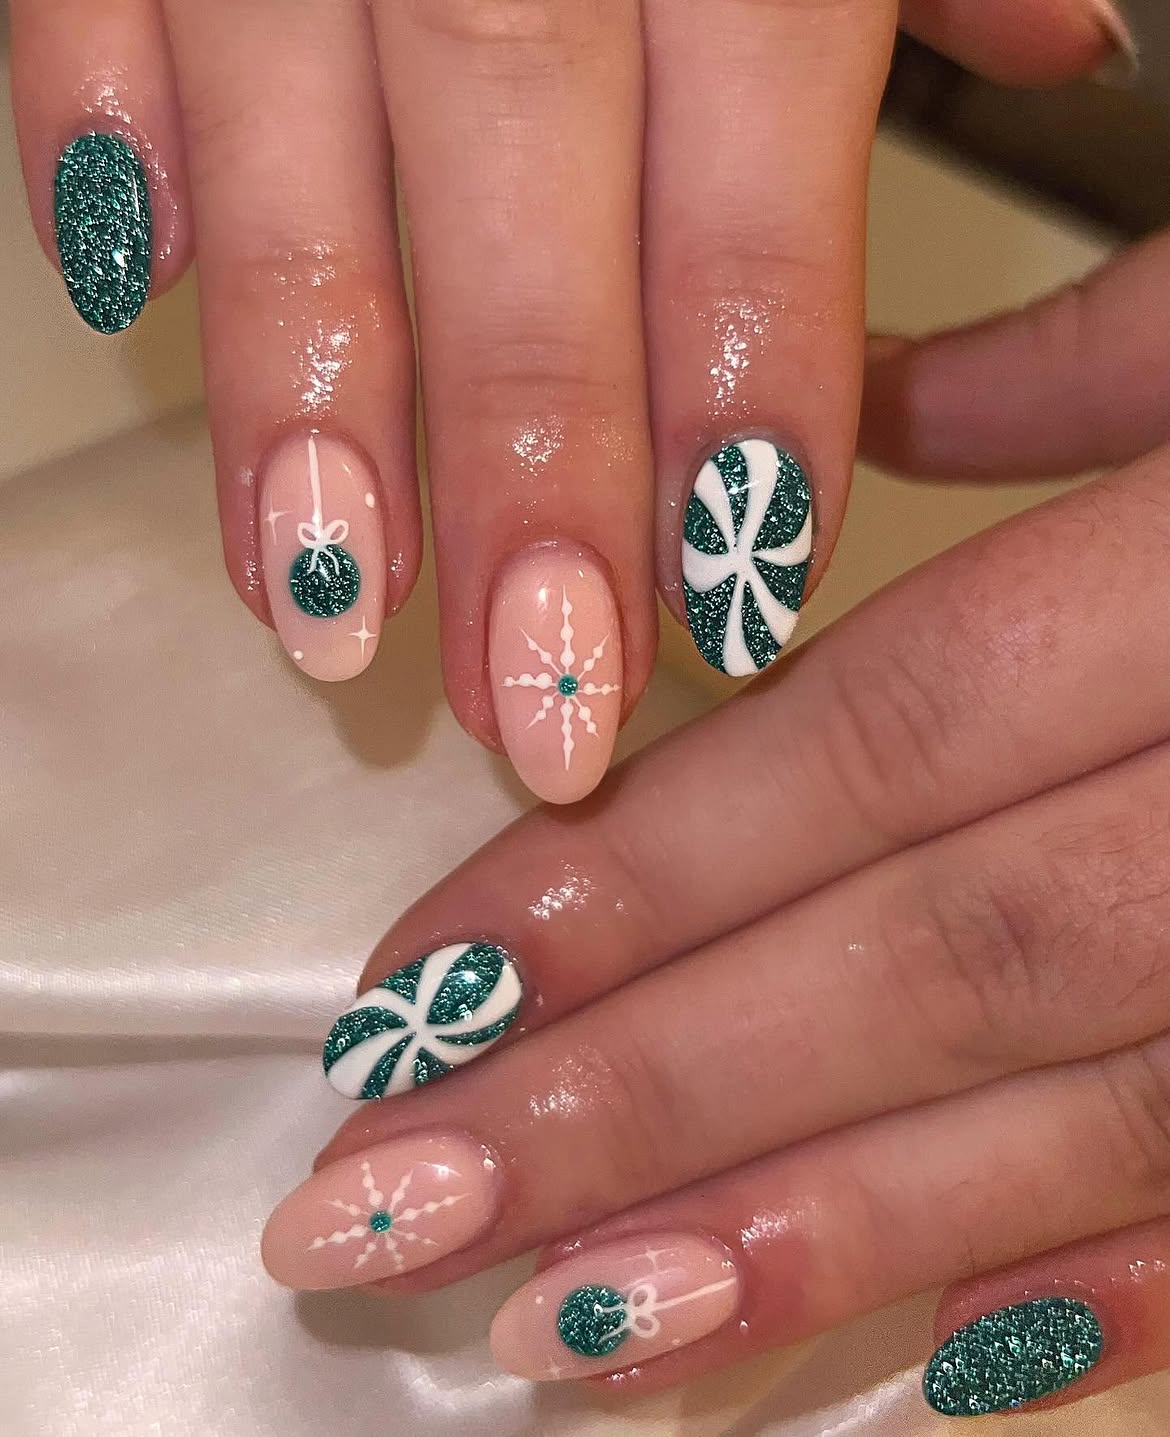
The hanging ornaments give this set its playful detail. Small green glitter circles sit on pale pink nails, each suspended from a thin white line and tiny bow. Other pink nails carry white snowflakes with green centers.
Full glitter nails bring in more sparkle. Some are left solid, while others have broad white curves that stand out against the dark green. Keep the ornament lines much finer than those curves if you recreate the design. That difference makes the little baubles easy to recognize, with enough pink space around them to see their shape.
💡 Paint the ornament first
Place a small green circle in the lower half of the pink nail. Add the thin white hanging line and bow above it, leaving open space on either side.
14. Emerald Ribbon Christmas Nails With Gold Outlines
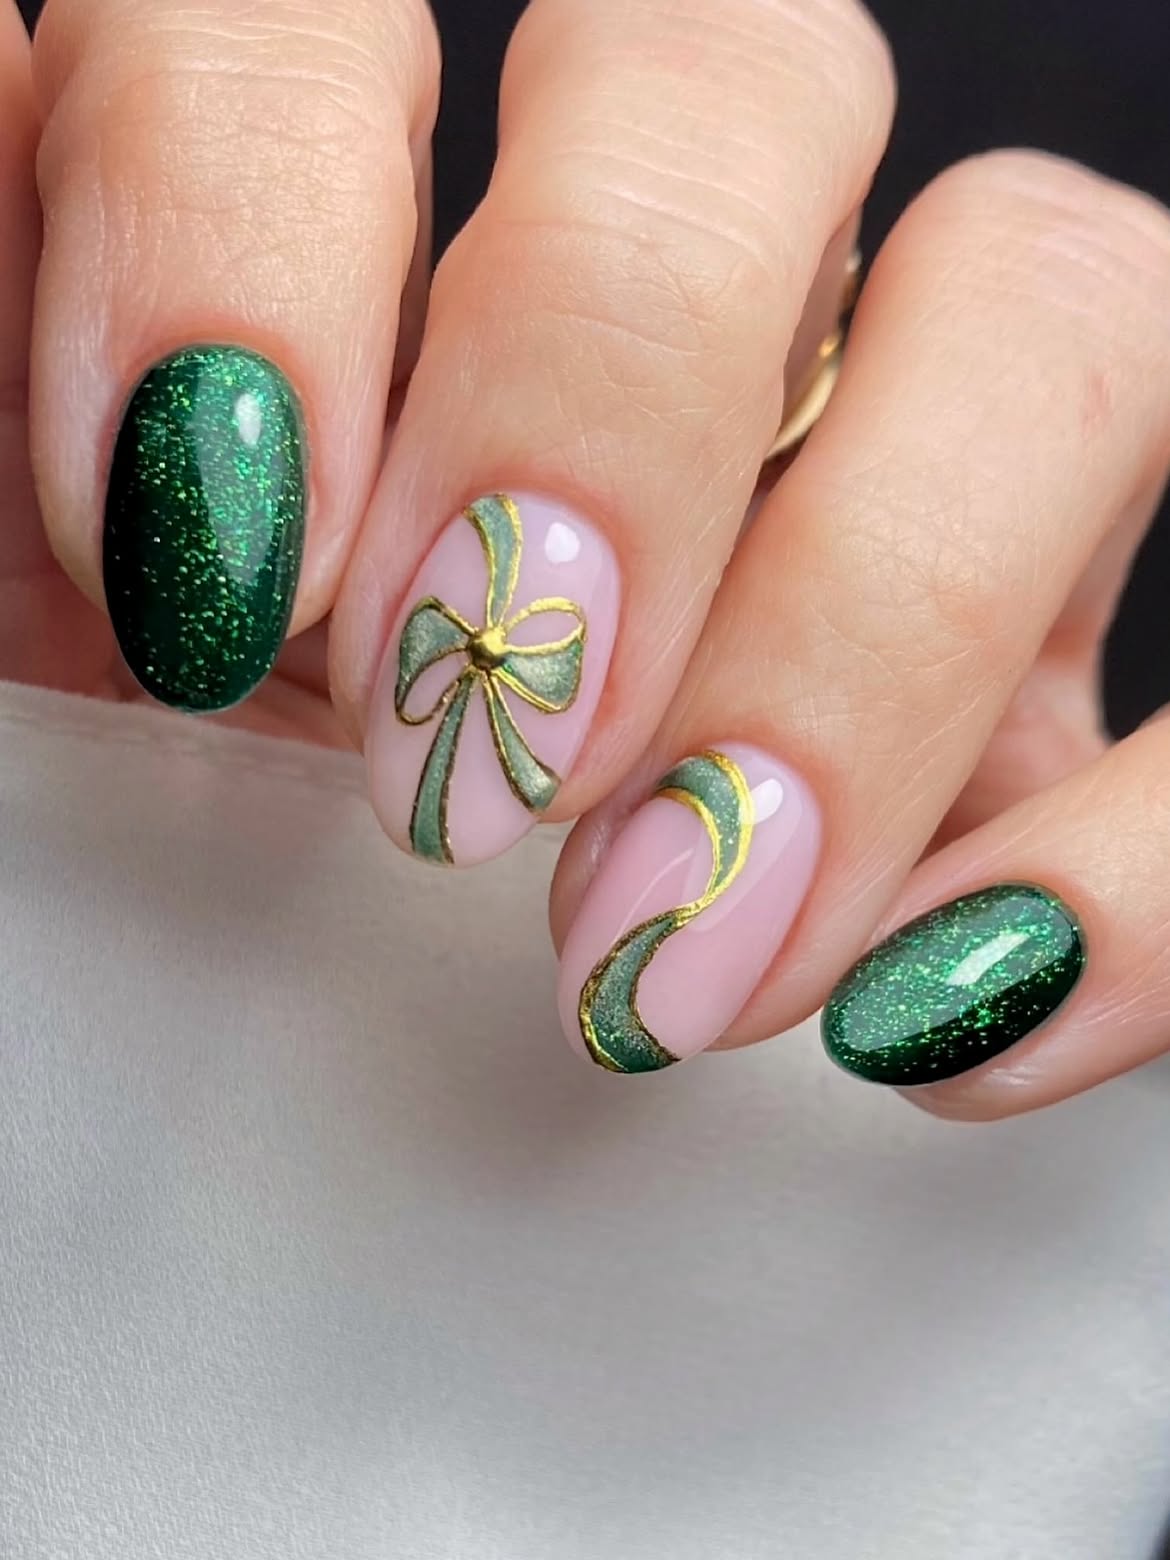
The ribbon is the main detail in this manicure. One soft pink nail carries a large green bow edged in gold. On the next, a green ribbon curls down the nail in a loose wave. The other nails glow with fine emerald sparkle.
That mix gives the painted shapes room to show. The bow fills much of its nail, so its loops remain clear on the rounded shape. To recreate it, use the bow as the focal point and place the curling ribbon beside it. Trace the green shapes with a narrow gold line, leaving most of each ribbon green.
Paint one green bow on pink and keep every other nail emerald shimmer.
Add a separate curling ribbon nail and trace both green shapes with fine gold edges.
15. Deep Green Christmas Nails With Tiny Berry Sprigs
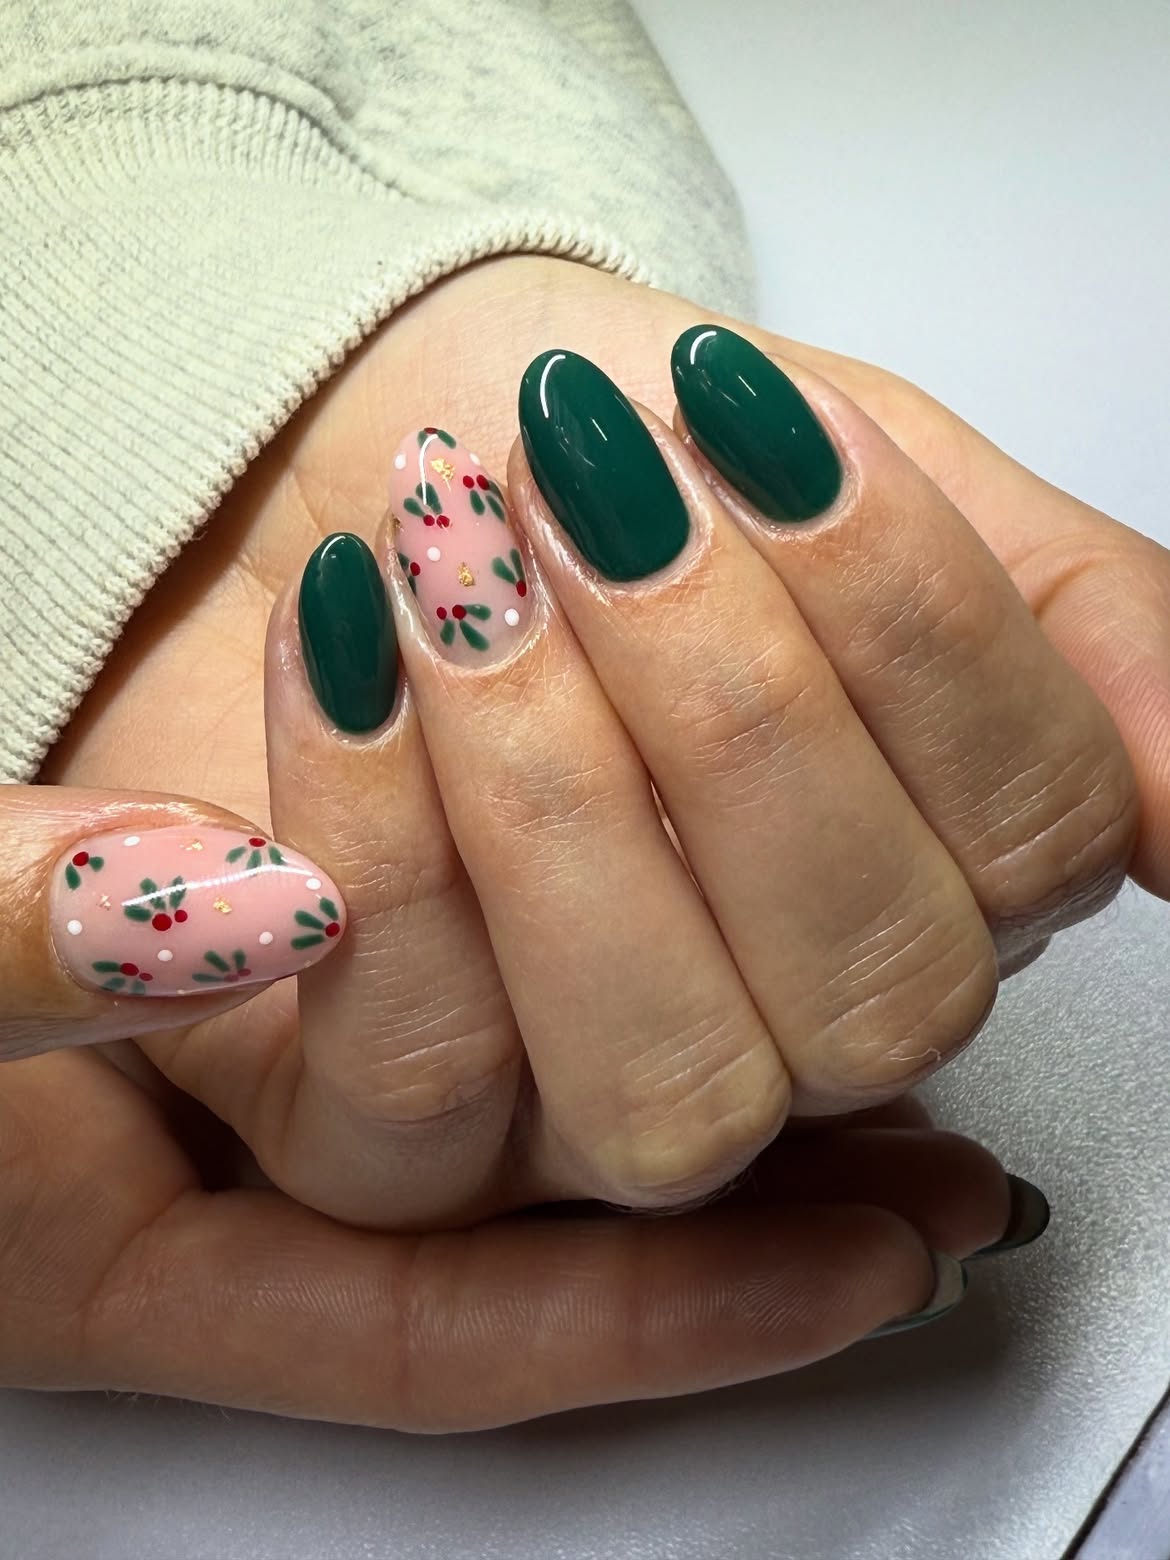
Glossy evergreen polish gives this short manicure its rich color, while two pale pink nails carry the festive details. Small green sprigs, red berry dots, and a few tiny gold accents are scattered across the pink base. The spacing keeps the pattern light, so the solid green nails still stand out.
This design works especially well on short oval nails. Ask for the sprigs and berries to vary in direction rather than repeating one identical cluster. A clear glossy top coat brings the simple green nails and detailed pink nails together.