How to Style White Christmas Nail Designs for Holiday Season
Choosing your Christmas nails often starts with one detail you like. It might be a delicate snowflake, a ribbon bow, or the cozy look of a sweater pattern. White brings these ideas together while leaving room for your own style.
White Christmas Nail Designs offer several ways to wear that holiday look. Milky polish gives a softer finish, bright French tips create a clear outline, and pearly shimmer lets the shine become the main detail. You can also bring in silver glitter, tiny red berries, or a gingerbread accent.
Start with the nail length and shape you enjoy wearing. Then choose the detail you want people to notice first. A small starburst can sit neatly on a shorter nail, while a longer shape gives bows and flowing stripes more space.
The ideas below show how these choices work together, with practical suggestions for adjusting each design. As you browse, look at the amount of white, the placement of the accents, and the surface texture. Those details will help you choose a manicure that fits your holiday plans.
15+ White Christmas Nail Designs
1. White Christmas Nails with Snowflakes, Stripes, and Sweater Texture
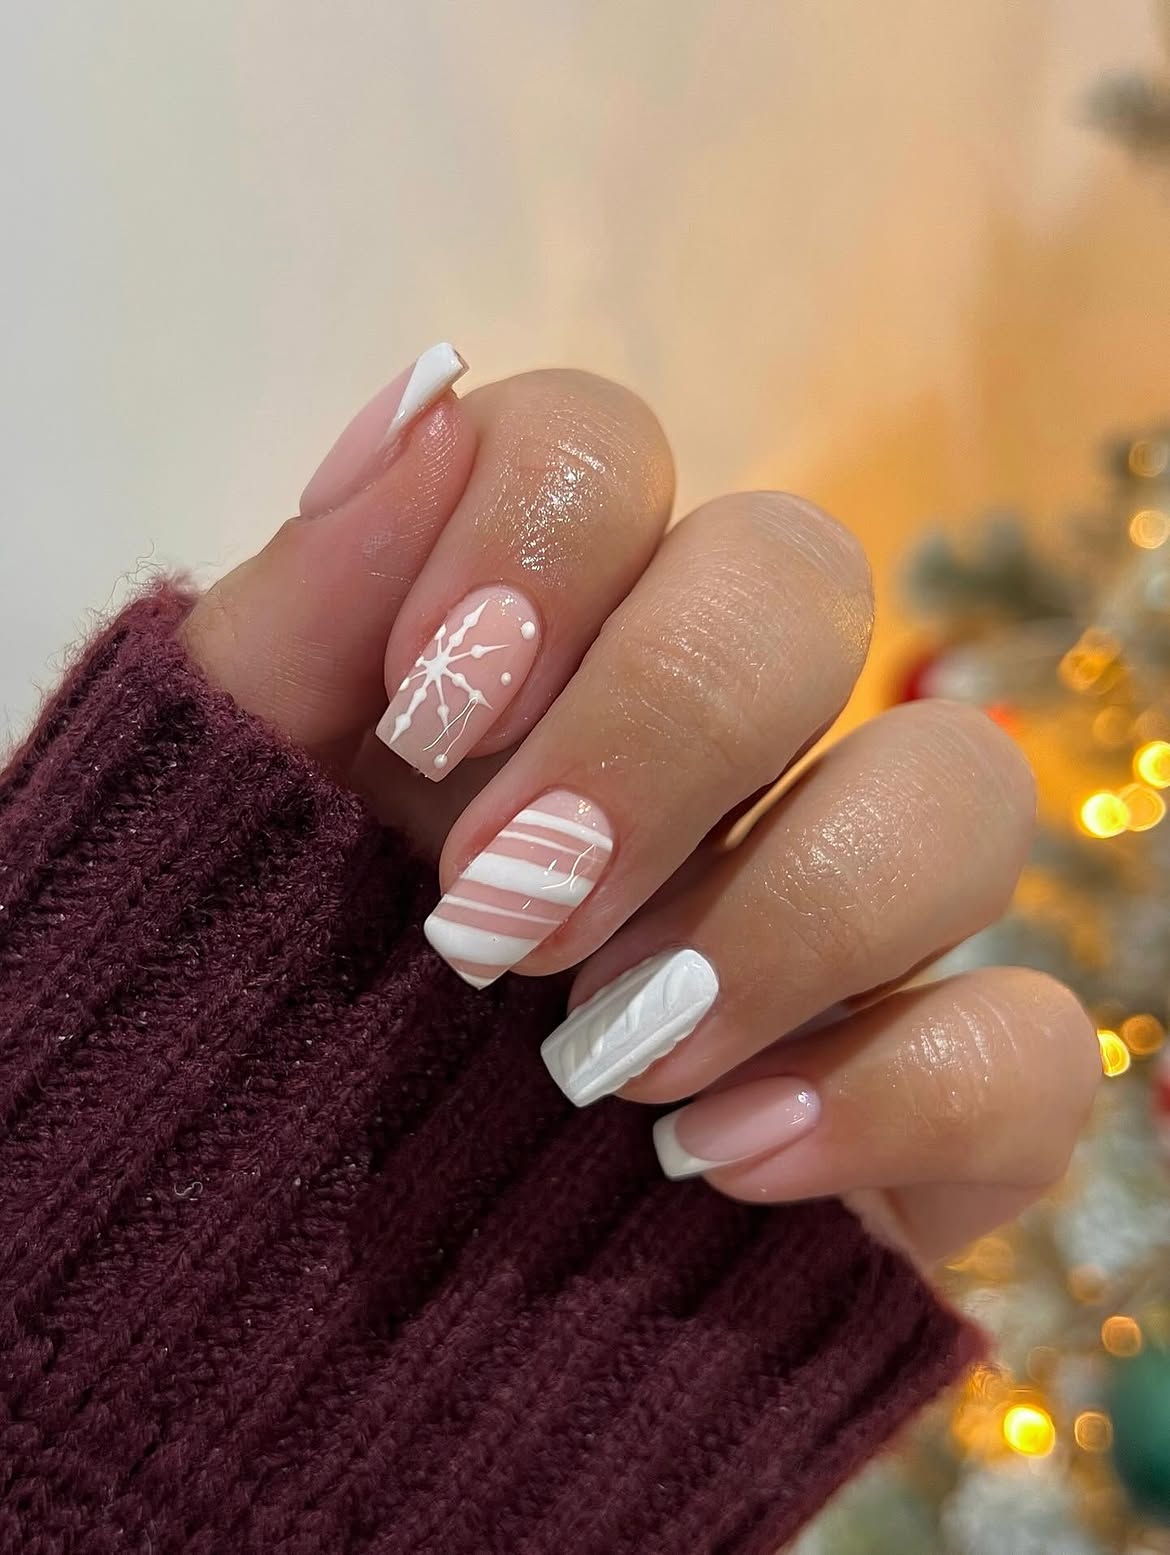
Soft pink gives these white Christmas nails a gentle backdrop. The square shape leaves room for several patterns, while the matching colors keep the set looking coordinated.
Three details make this design worth saving:
- A white snowflake with small dots gives one nail a snowy finish without covering the pink base.
- White stripes alternate with pink gaps on another nail, bringing in a candy cane reference without red.
- A raised white pattern resembling cable knitting adds texture beside the glossy nails.
The French tips on the remaining nails give your eye somewhere to rest. That balance matters when several designs share one hand.
Three ways to adapt this set
Less detail
Keep one snowflake nail and use simple French tips on the remaining nails.
Smooth finish
Ask for a flat painted sweater pattern if you prefer a smooth surface over raised texture.
More white
Choose broader French tips while leaving pink space around the snowflake and between the stripes.
2. White Ribbon Bows with Snowflakes and Double French Tips
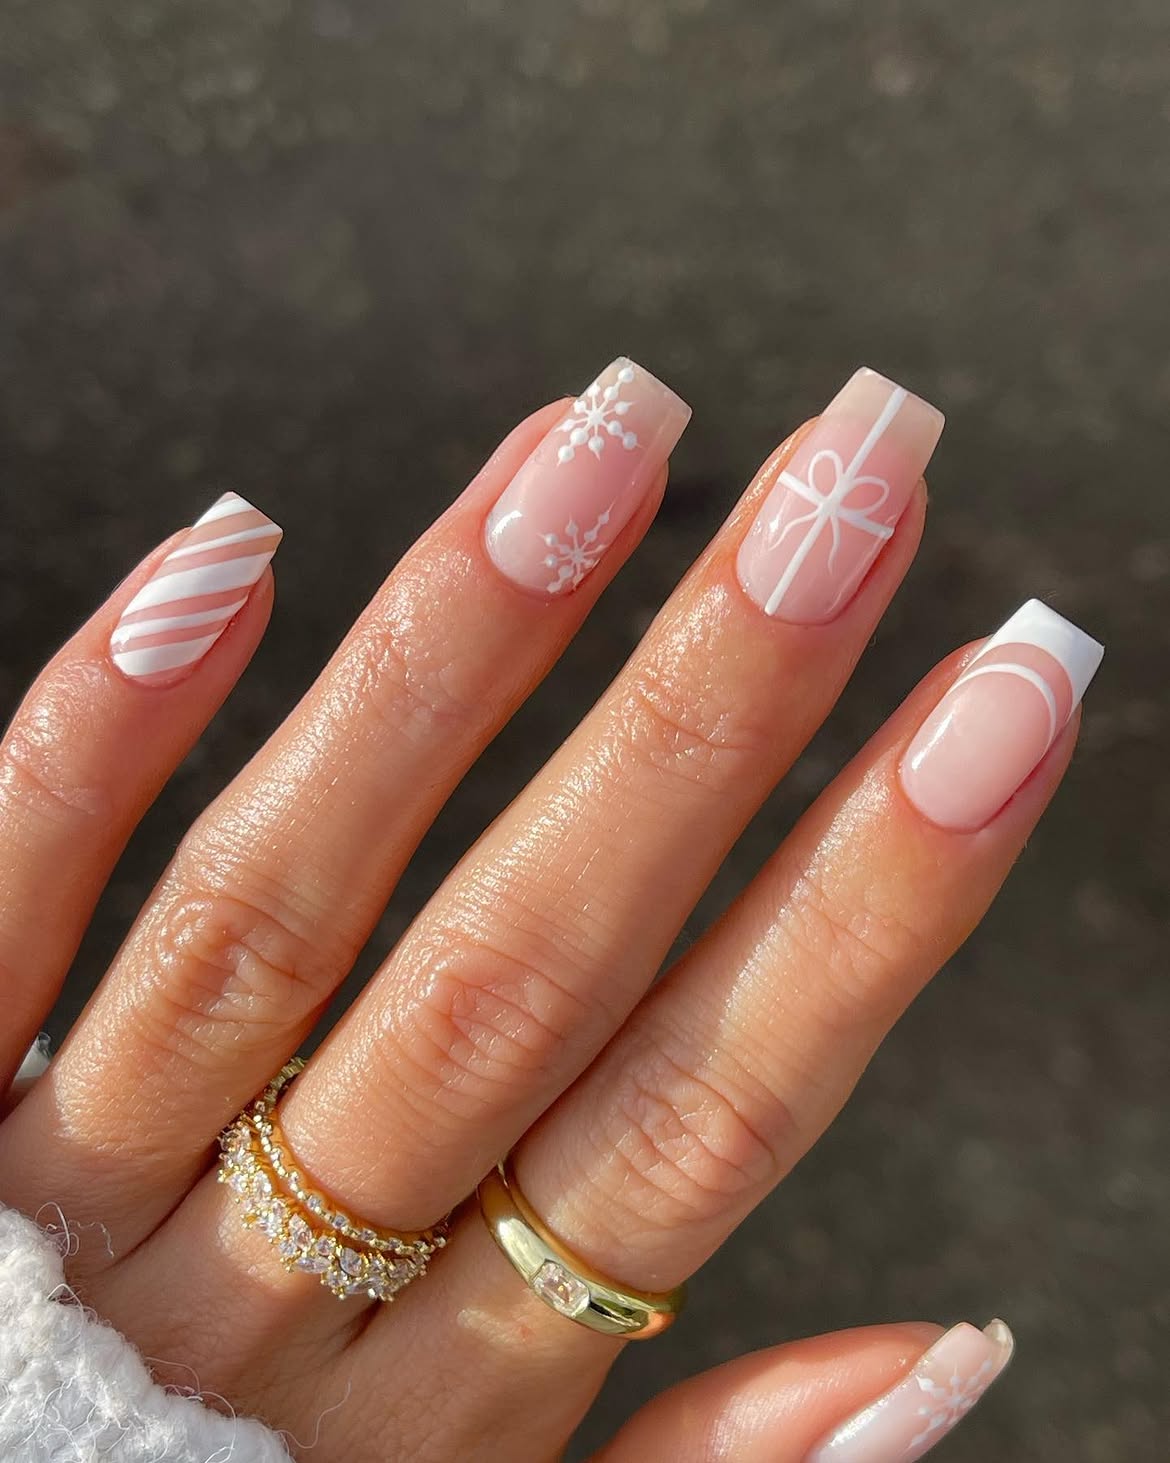
The ribbon bow gives this set its Christmas character. Thin white lines cross a glossy pink nail like gift wrapping, with delicate loops where they meet. Nearby snowflakes and diagonal stripes carry the same color across the hand.
To borrow this combination:
- Give the bow its own nail. Leave the surrounding pink clear so the ribbon shape is easy to see.
- Add a fine white curve beneath a broad French tip on another nail. The pink gap between them makes this small detail stand out.
- Place snowflakes near opposite ends of an accent nail, keeping its center open.
The square tips give the ribbon lines a neat frame. Show your nail artist the bow and double French detail close up, since those finer lines are what distinguish this set.
💡 Keep the bow readable
Check the bow at arm’s length before the design is finished. A little pink space inside each loop helps it stay recognizable. If the lines look crowded, simplify the ribbon tails rather than making every stroke thicker.
3. Milky White Almond Nails with an Iridescent Glitter Accent
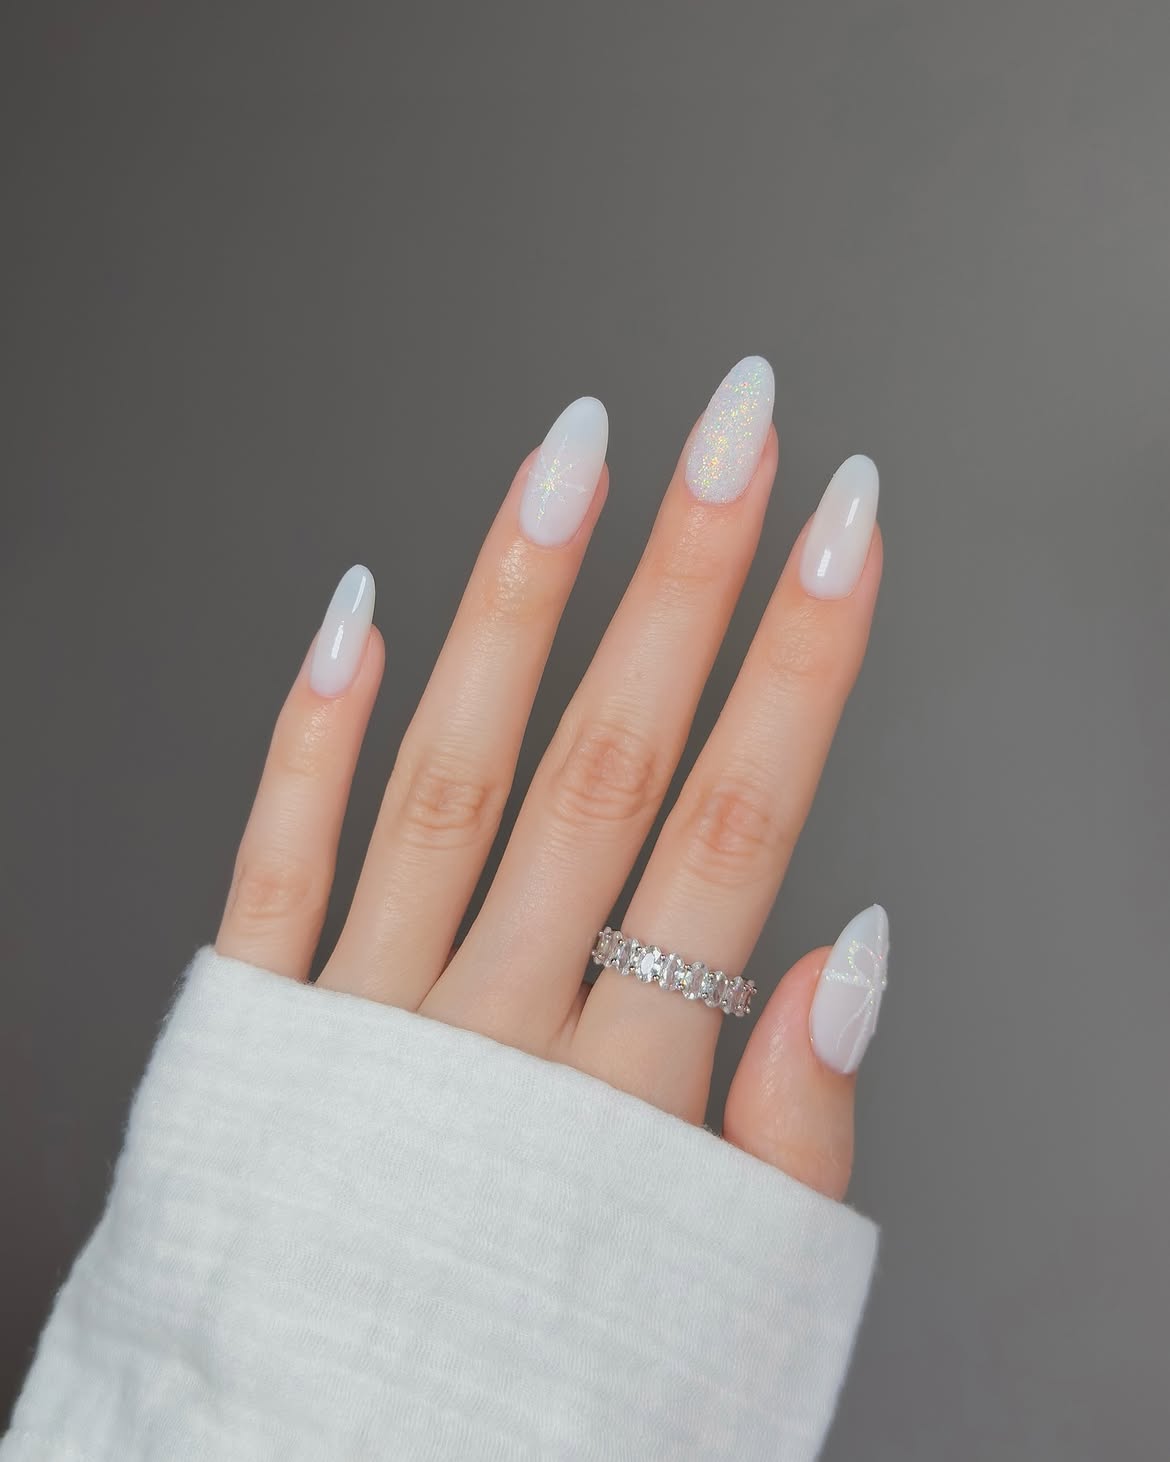
A single glitter nail carries most of the sparkle here.
The long almond nails have a soft milky white finish, with a faint pink tone showing near the base. Fine iridescent glitter catches several colors in the light, while pale snowflake and ribbon details keep the Christmas theme delicate.
The plain nails create breathing room. Their glossy surface makes the rounded tips easy to appreciate and gives the more detailed nails space to stand out.
The glitter changes the finish. Ask to see a sample over your chosen white polish so you can judge how much sparkle you want across the whole accent nail.
Keep the same almond shape throughout the set. The matching outline helps the different finishes look coordinated.
Choose your white base
| Sheer milky white | Opaque white |
|---|---|
| Ask for a translucent finish that leaves a hint of the natural nail visible. | Ask for solid coverage if you want a stronger white background. |
| Check that the white line art remains visible against the soft base. | Check a glitter sample first, since white line art will have less contrast against a solid white base. |
Pair your favorite snowy white details with inspiration from these 15 Green Christmas Nail Designs to create your own holiday combination.
4. White French Tips with Silver Stars and a Ribbon Bow
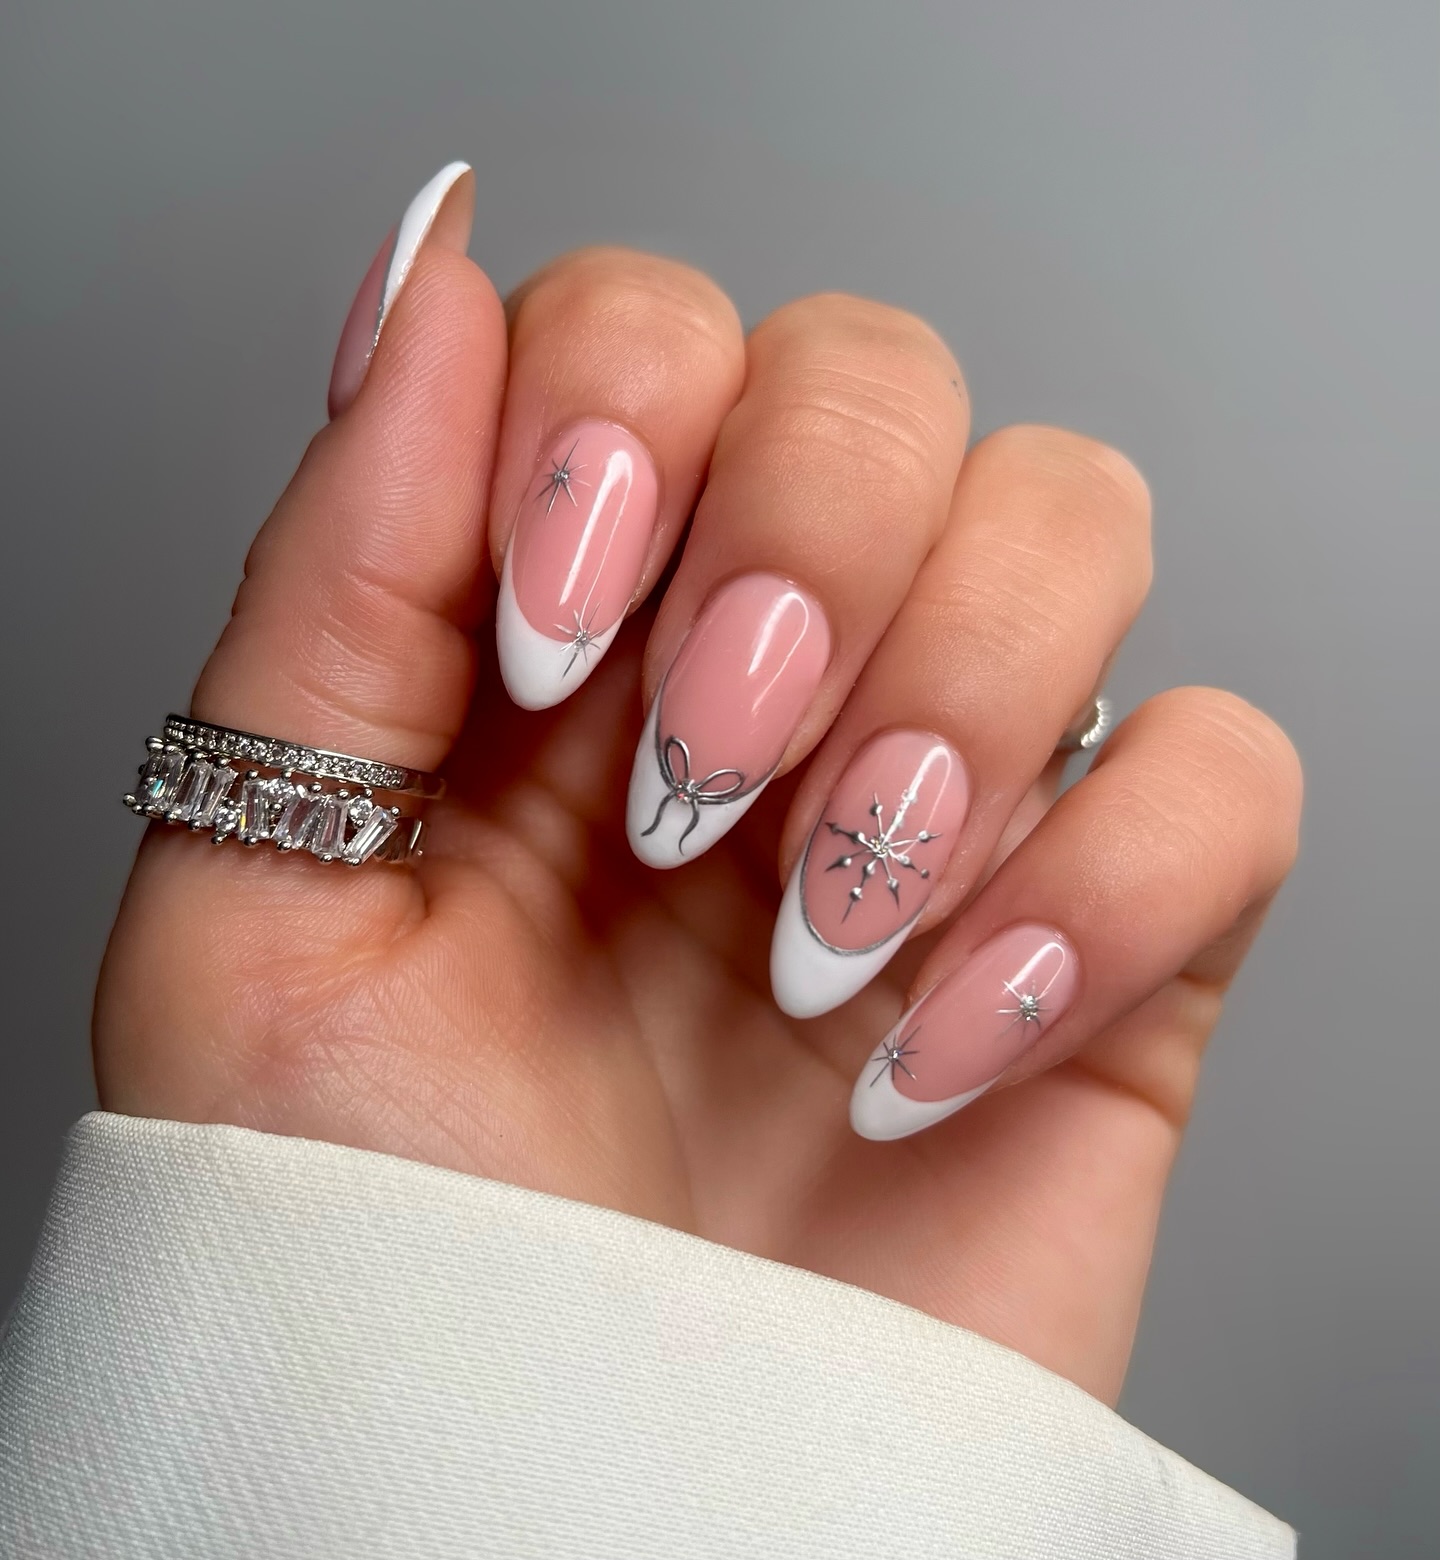
Silver details give these white French tips a dressier Christmas finish. The glossy pink base keeps the fine metallic shapes visible, while the long almond tips provide room for a bow, a snowflake, and scattered starbursts.
Look closely at how the silver is placed:
- A fine metallic line follows the curved edge of a French tip, making the border part of the design.
- The ribbon bow sits near another white tip, with its tails extending toward the end of the nail.
- Small starbursts sit at different heights, so the decoration feels loosely scattered.
To recreate the look, show your nail artist the silver edging as well as the larger motifs. That narrow border is easy to overlook in a full hand design.
The silver toned rings shown here carry the same shine into the styling.
DECIDE THE SILVER FINISH FIRST
Ask to see a bright reflective silver and a softer silver shimmer. Choose the finish you prefer, then use it consistently for the tip borders, bow, and snowflake so the metallic details look connected.
5. Solid White Christmas Nails with One Striped Accent
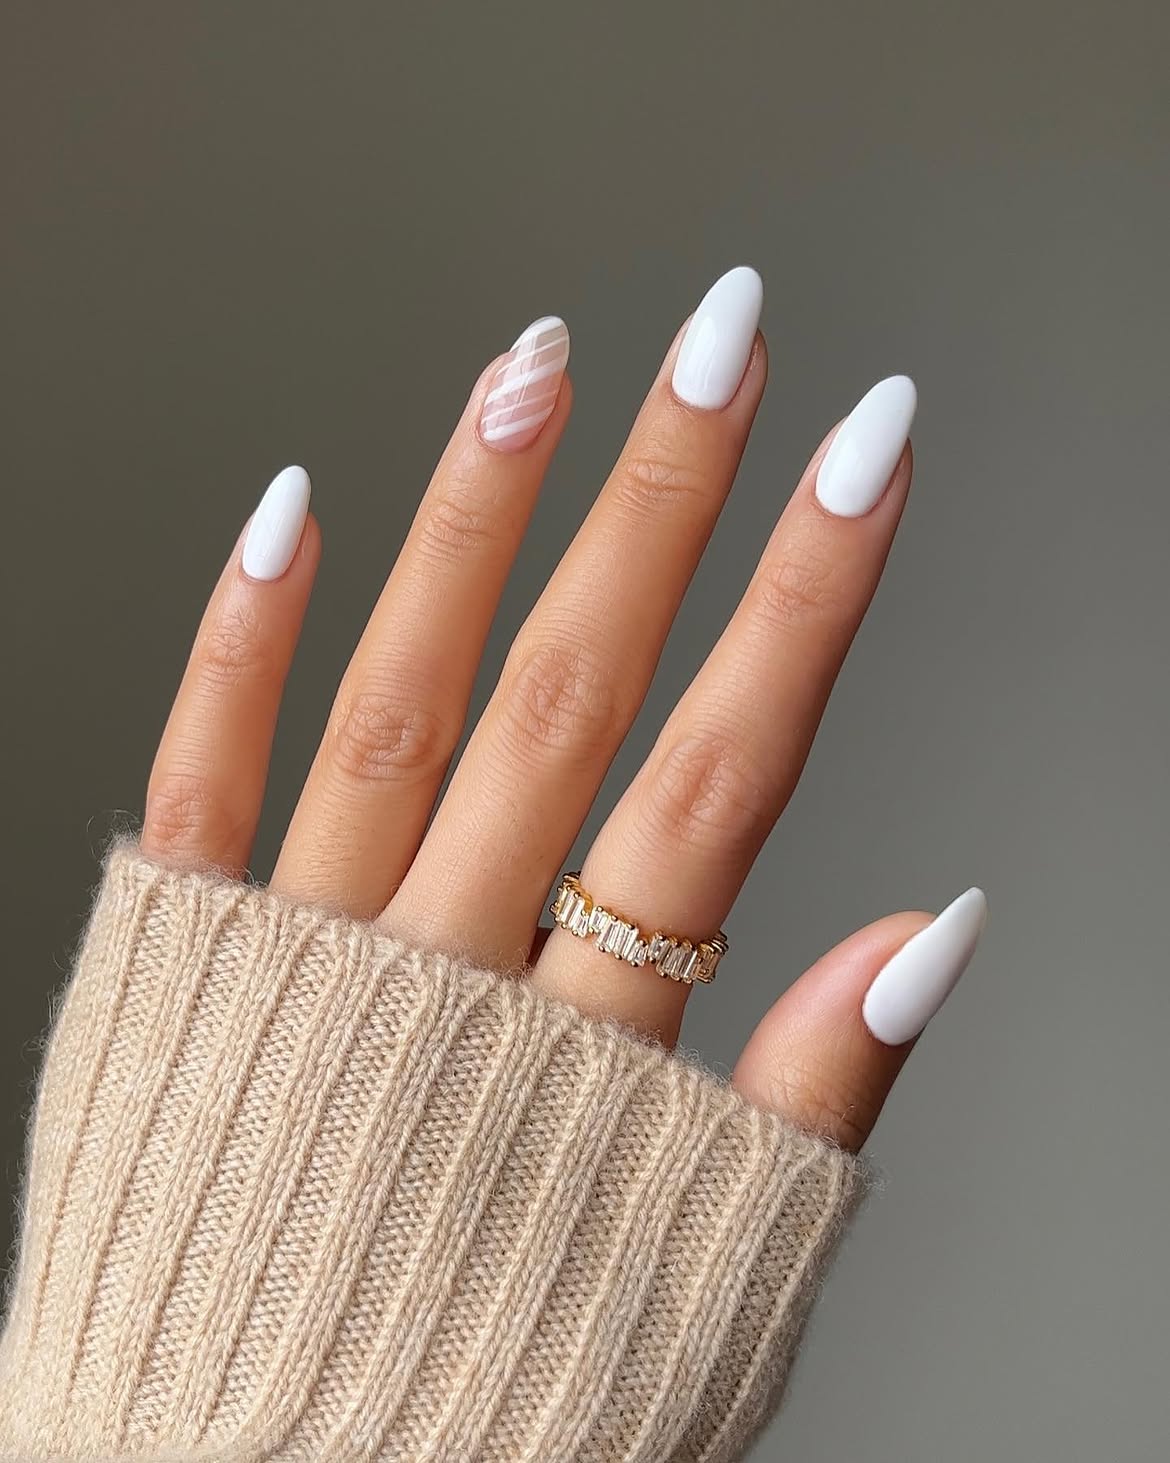
Bright white polish makes the striped nail the first detail you notice. Most of this set is covered in solid white, while the ring finger keeps a translucent pink base beneath diagonal white bands.
Keep the same balance in three parts:
- Choose a clean white shade for the plain nails.
- Leave the accent base lightly tinted so the gaps between the stripes remain visible.
- Mix narrower and broader bands, keeping them angled in the same direction.
The almond tips soften the straight lines of the pattern. This is a useful choice if you want a Christmas manicure built around one small detail.
You can also move the striped accent to your thumb if you want it to show when holding a mug in holiday designs.
Fit the stripes to your nail length
💅 Shorter nails
Use fewer diagonal bands and leave clear pink gaps. Give each stripe enough room to remain separate.
🖌️ Longer nails
Carry the pattern along the nail, alternating band widths. Keep the spacing steady as you approach the rounded tip.
6. Carry Sweater Texture onto White French Tips
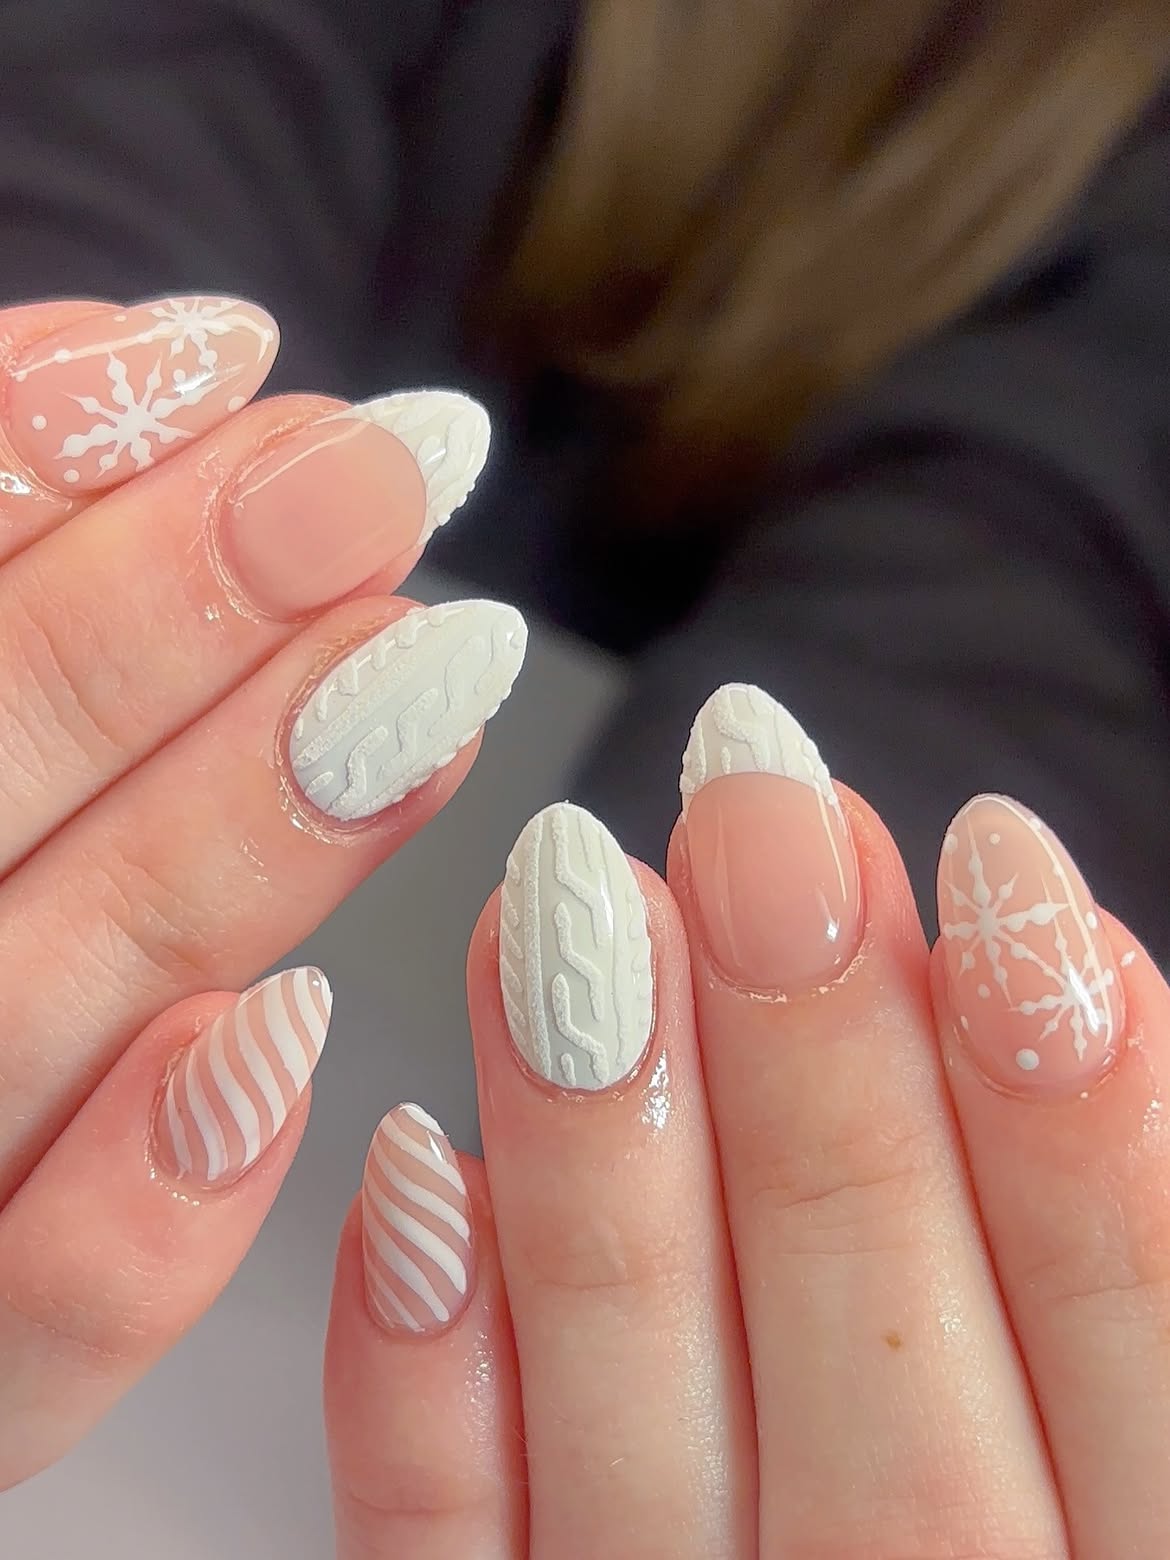
Sweater texture reaches the French tips in this set. A warm pink base sits beneath soft white details, with snowflakes and curved stripes connecting the designs across both hands.
The useful detail here is how the cable pattern appears in two places.
On a full white nail, raised lines run along the length, giving the sweater pattern room to show its twists and narrow channels.
On a French tip, the same texture fills only the white section. The glossy pink below keeps the curved boundary visible and gives the nail a different finish.
You can borrow both placements for a coordinated Christmas set. Keep the cable pattern larger on the full accent nail and simplify it across the smaller tips.
Choose where the French tip begins before adding texture, so the curve stays clear beneath the raised detail.
🧶 Before choosing sweater texture
Ask to feel a finished texture sample so you can choose a raised finish you are comfortable wearing.
Compare the white shade in daylight to decide how creamy or bright you want it to look.
Use the photo of both hands as your reference, then agree on the pattern placement for each hand.
7. Short White Christmas Nails with Silver Starbursts
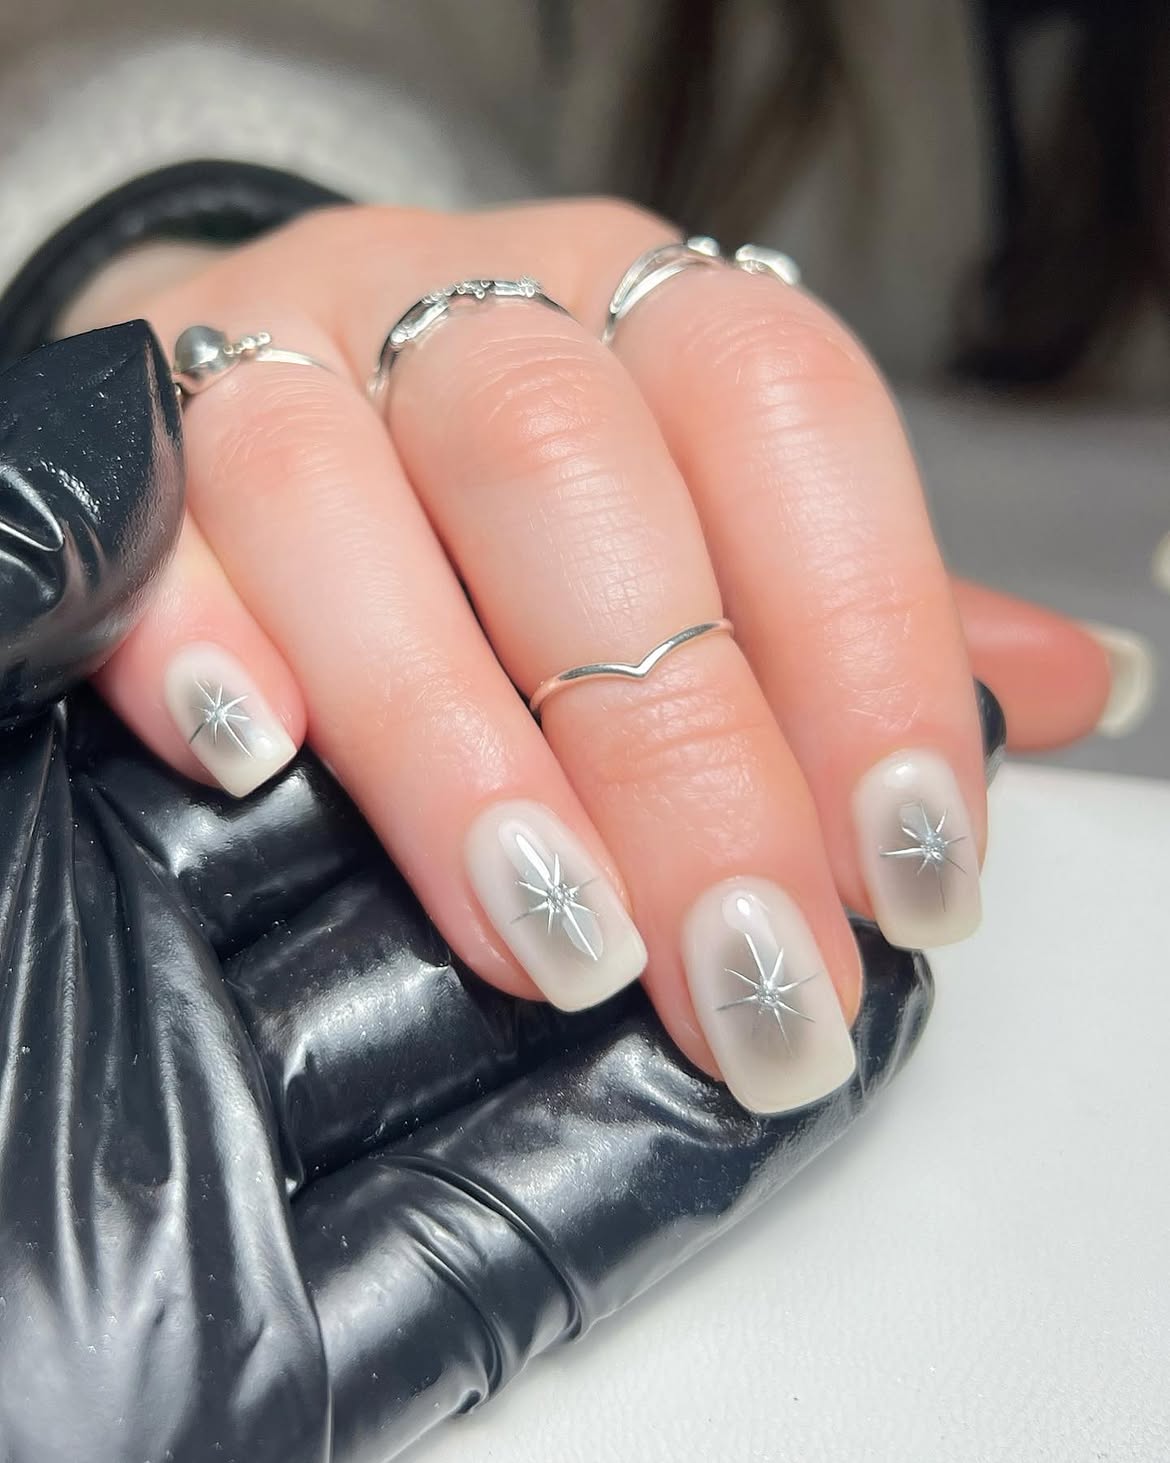
Silver starbursts give these shorter square nails a clear Christmas detail. The milky white base has a soft translucent look, letting the metallic shapes stand out without needing a strong background color.
The same motif repeats across the four front nails, but the rays vary slightly in length and direction. That small difference keeps the set from looking too rigid.
Two details are worth borrowing:
- Bright reflective centers give the stars a focal point, especially when the light catches them.
- Gently rounded square corners keep the outline neat beside the pointed star rays.
You can use this idea when you want decoration on several nails while keeping the design consistent. Choose the square shape first, then size each star to suit the nail it sits on.
Plan the star placement
Choose the center point while viewing the nail straight on, so the star sits where you want it in the finished design.
Give the longest rays room along the nail, adjusting the shorter side rays to fit its width.
Leave a visible white margin around the rays so the star shape stays separate from the nail edges.
8. Pearly White Christmas Nails with a Cool Blue Sheen
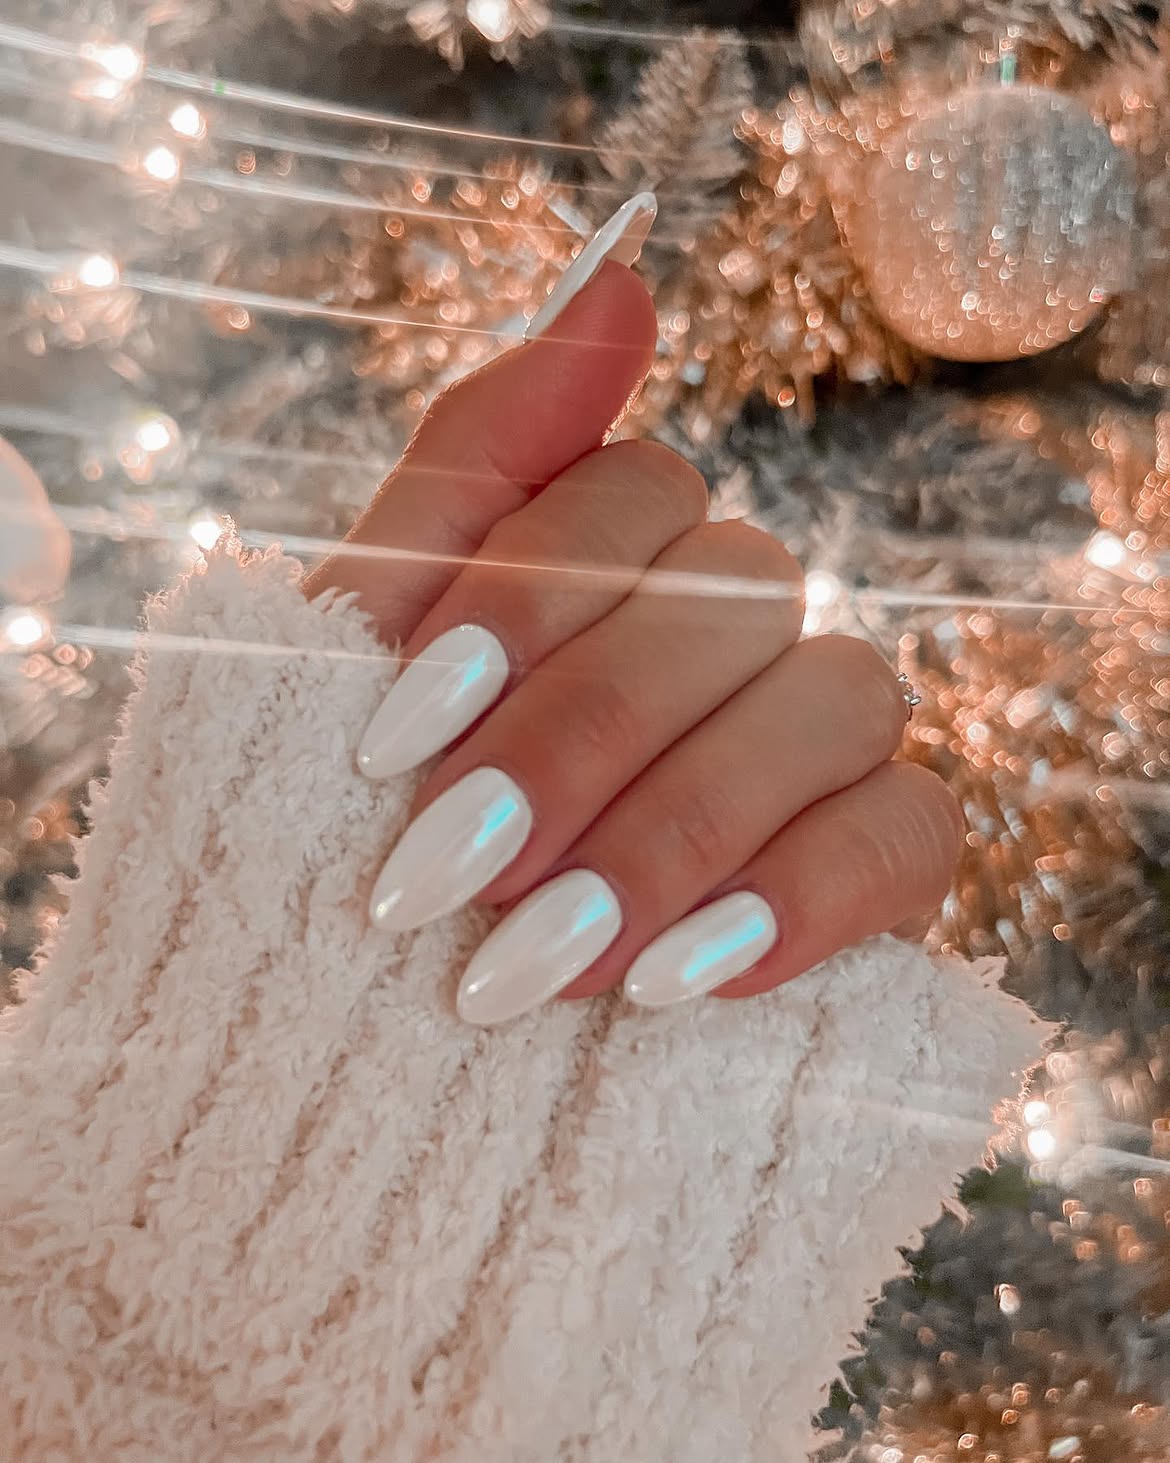
The shine is the decoration here.
These long almond nails have a smooth white finish that catches cool blue reflections. The color stays consistent across the hand, so the rounded tips and pearly surface get most of the attention.
Style them with soft texture. The chunky cream sleeve shown here makes a useful pairing, bringing a softer surface beside the reflective nails. Pull the cuff back just enough to show the full manicure.
For a similar holiday design, position your hand in front of the tree and focus on the nails. Let the ornaments and warm lights sit farther behind, keeping their detail softer.
Turn your hand slightly between photos to find the angle that shows the sheen most clearly.
💡 Choose the finish in ordinary light
Ask to see a pearly white sample in room light as well as under brighter lighting. Check how white the base looks and how much colored reflection appears, then choose the finish you would enjoy wearing beyond the photo.
9. Extra Long White Sweater Tips with a Scooped Edge
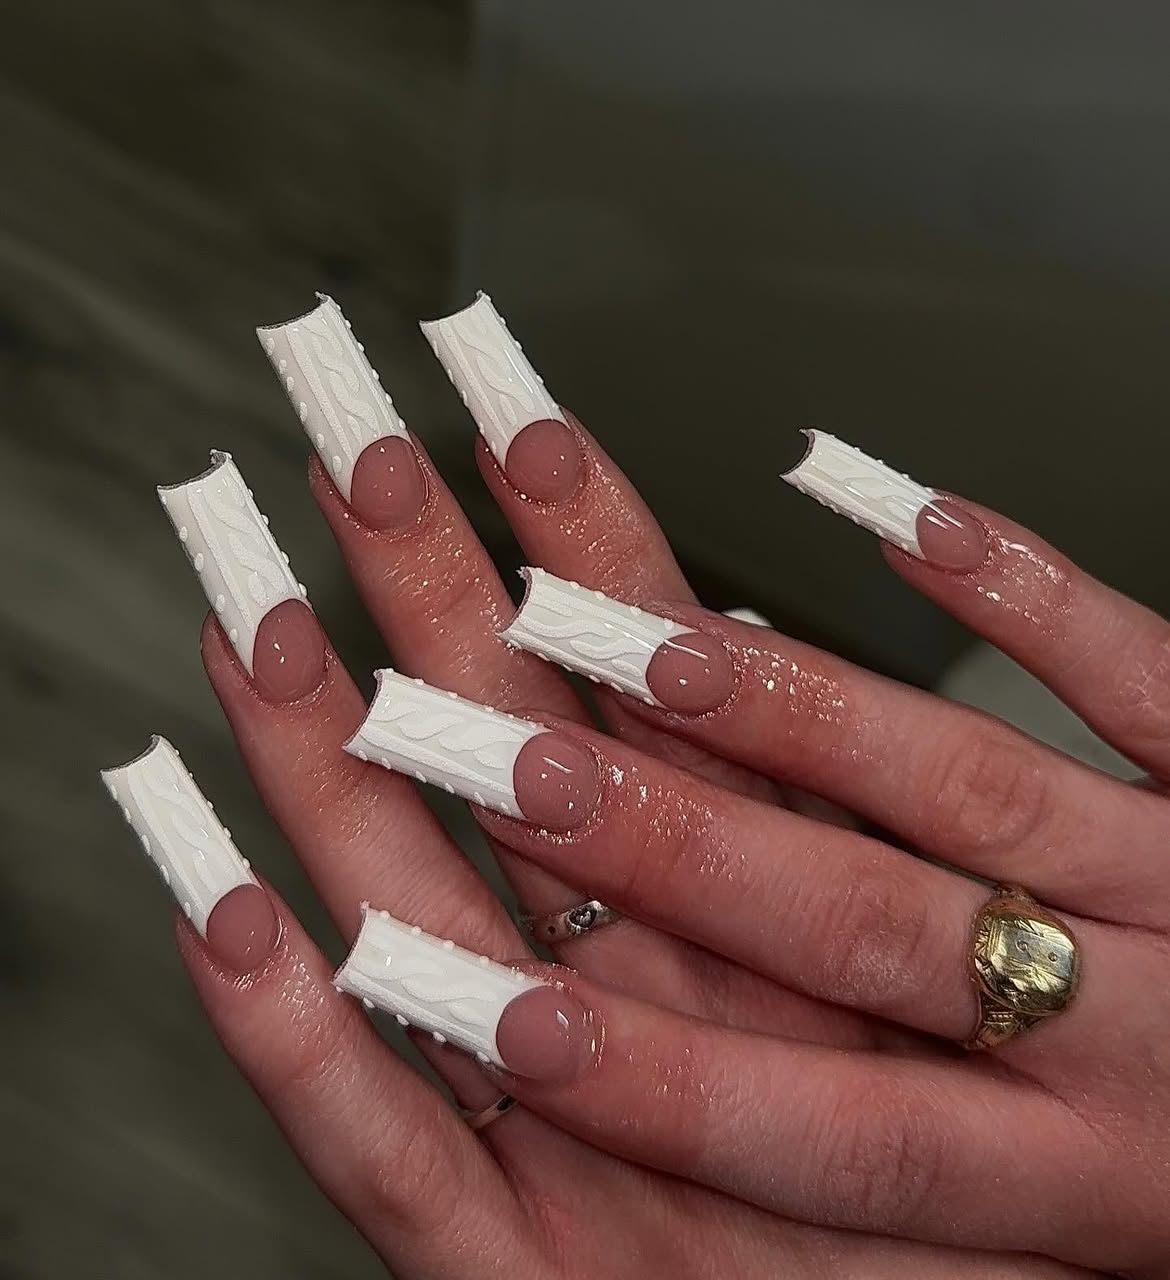
The inward curve at the end of each nail gives this set its distinctive outline. Extra long white tips extend above glossy rose pink bases, with raised cable patterns filling much of the white area.
Three details define the look:
- Scooped tip edges dip through the middle and rise at the corners.
- Long cable lines follow the nail length, making the sweater pattern easy to see.
- Small raised dots border the sides, adding detail around the larger twists.
The same treatment repeats across both hands, so the unusual shape becomes the main feature of the set.
Choose your preferred length before planning the cable pattern. A shorter version can keep the curved edge and side dots, with fewer twists fitted into the white section.
Check the outline before adding texture
Straight on
Confirm how deep you want the tip curve and how pronounced its corners should look.
From the side
View the nail profile as well as the top, so you can judge its full shape.
Hand relaxed
Check the length with your fingers resting naturally before committing to the detailed pattern.
If you love festive nails that feel easy to wear, these 16 Christmas Nails You Can Do Without a Nail Salon share simple ideas you can try at home.
11. Nude Nails with White Snowmen, Snowy Trees, and Icicles
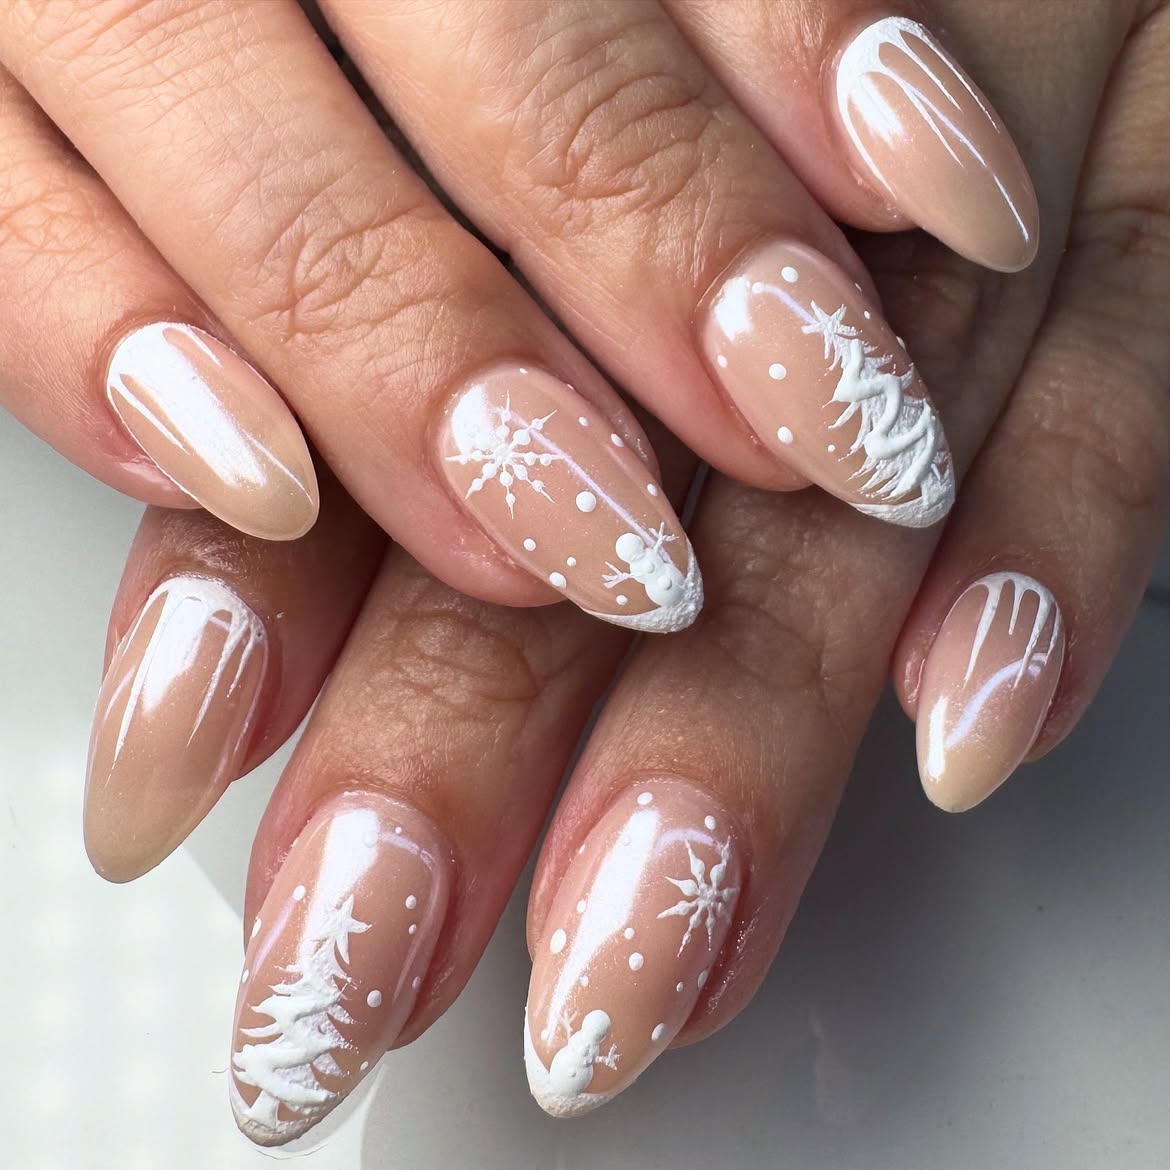
Small snowmen and snow covered trees turn these almond nails into miniature winter scenes. A warm nude base with fine shimmer gives the white artwork a clear backdrop, while scattered dots suggest falling snow.
Build a similar scene in layers:
- Place a small white snowbank along the tip.
- Add a snowman or tapered tree above it, leaving space around the main shape.
- Finish with a snowflake higher on the nail and a few separate snow dots.
The simpler nails have white lines that resemble hanging icicles, extending down from the cuticle area. They continue the winter theme while leaving more of the shimmering base visible.
Give the tree and snowman separate accent nails. Each little scene needs enough space for its outline to remain recognizable.
Choose how much texture you want
🖌️ Smooth version
Ask for flat painted trees, snowmen, and snowbanks with a glossy finish. Keep the winter scene through its shapes and placement.
❄️ Raised version
Concentrate the raised detail on snowy branches and the snowbank, keeping finer lines flatter so the smaller shapes stay distinct.
11. Raised White Bows with Snowflakes and Tiny Hearts
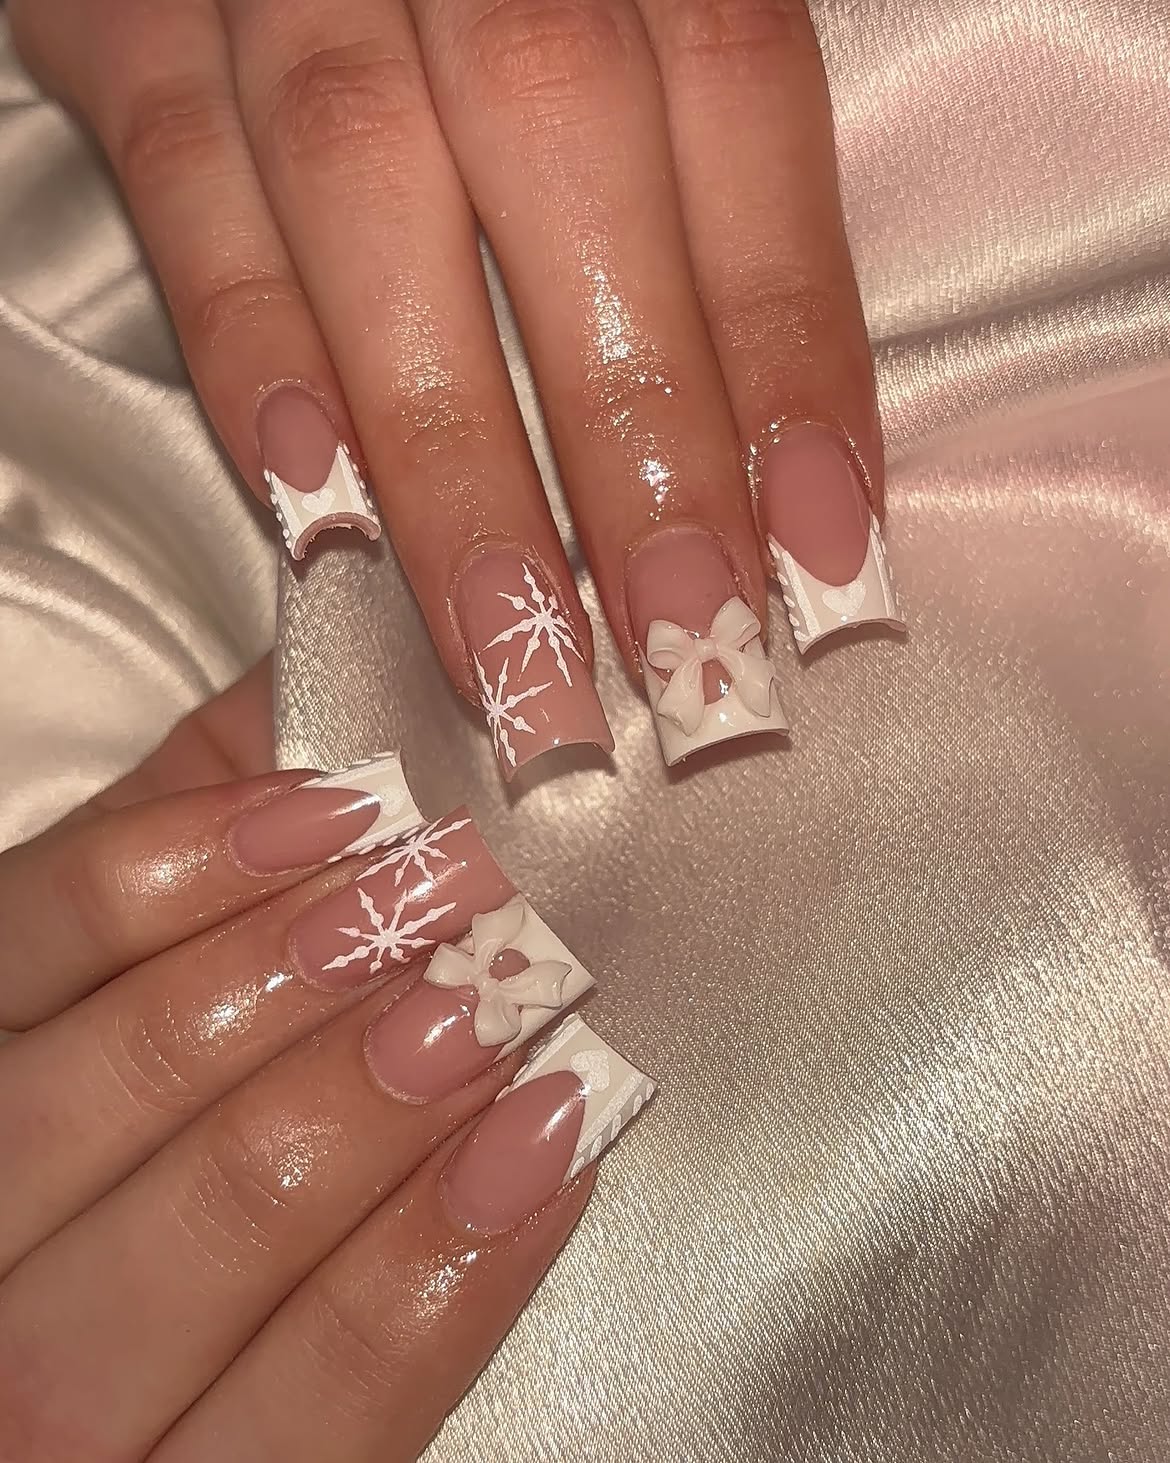
Ribbon loops stand above the nail surface in this Christmas set, giving the white bows a sculpted shape. Glossy pink bases, deep French tips, and fine white snowflakes carry the design across both hands.
The bow placement is worth borrowing. Each bow sits over a white tip, with pink space visible around its center. That opening helps the loops and tails remain separate.
The tiny hearts soften the plain tips. Fine edging frames each white section, leaving a small heart as its central detail. These quieter nails balance the larger bows.
Keep the snowflakes on separate pink accent nails so their branches have room to spread.
For your version, choose the bow size before filling in the smaller details. Its loops should fit comfortably within the nail’s outline.
CHECK THE BOW HEIGHT
Ask to see the raised bow from the side before choosing its height. If you often wear fitted gloves or close cuffs, discuss a lower profile while keeping the loops and ribbon tails clearly defined.
12. Frosted White French Tips with a Sheer Snowflake Accent
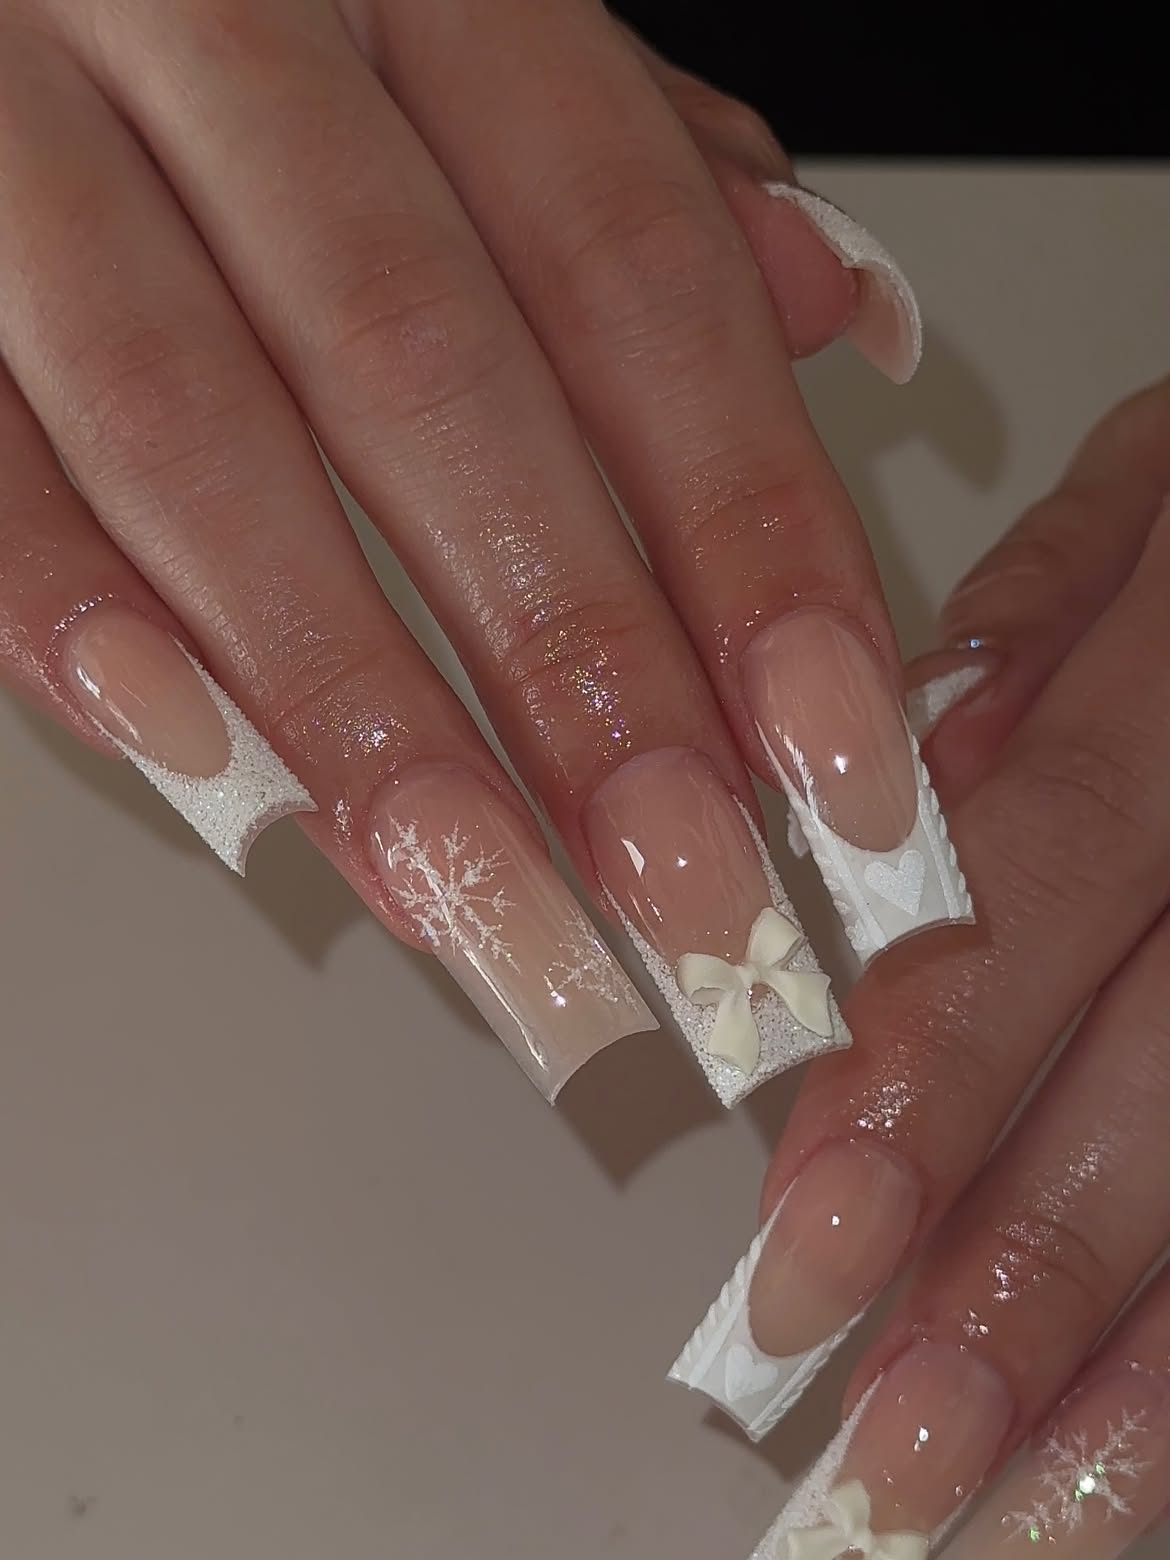
Fine sparkle gathers around the white French tips in this set. The glossy nude bases remain smooth, making the grainy looking tip finish easier to notice.
The snowflake nail brings in a different detail: a sheer background that continues toward the end of the nail, with delicate white branches spread across it.
Keep these two finishes distinct:
- Frosted tips give the white sections a snowy surface, with sparkle concentrated around their edges.
- The sheer accent leaves space behind the snowflakes, helping their smaller branches remain visible.
A creamy raised bow sits over one sparkling tip, adding a ribbon detail to the combination.
When borrowing this look, leave the snowflake nail translucent through its free edge. That clear looking section helps distinguish it from the more heavily decorated white tips.
Choose where to put the sparkle
13. White Snowflakes with Silver Edged Stripes
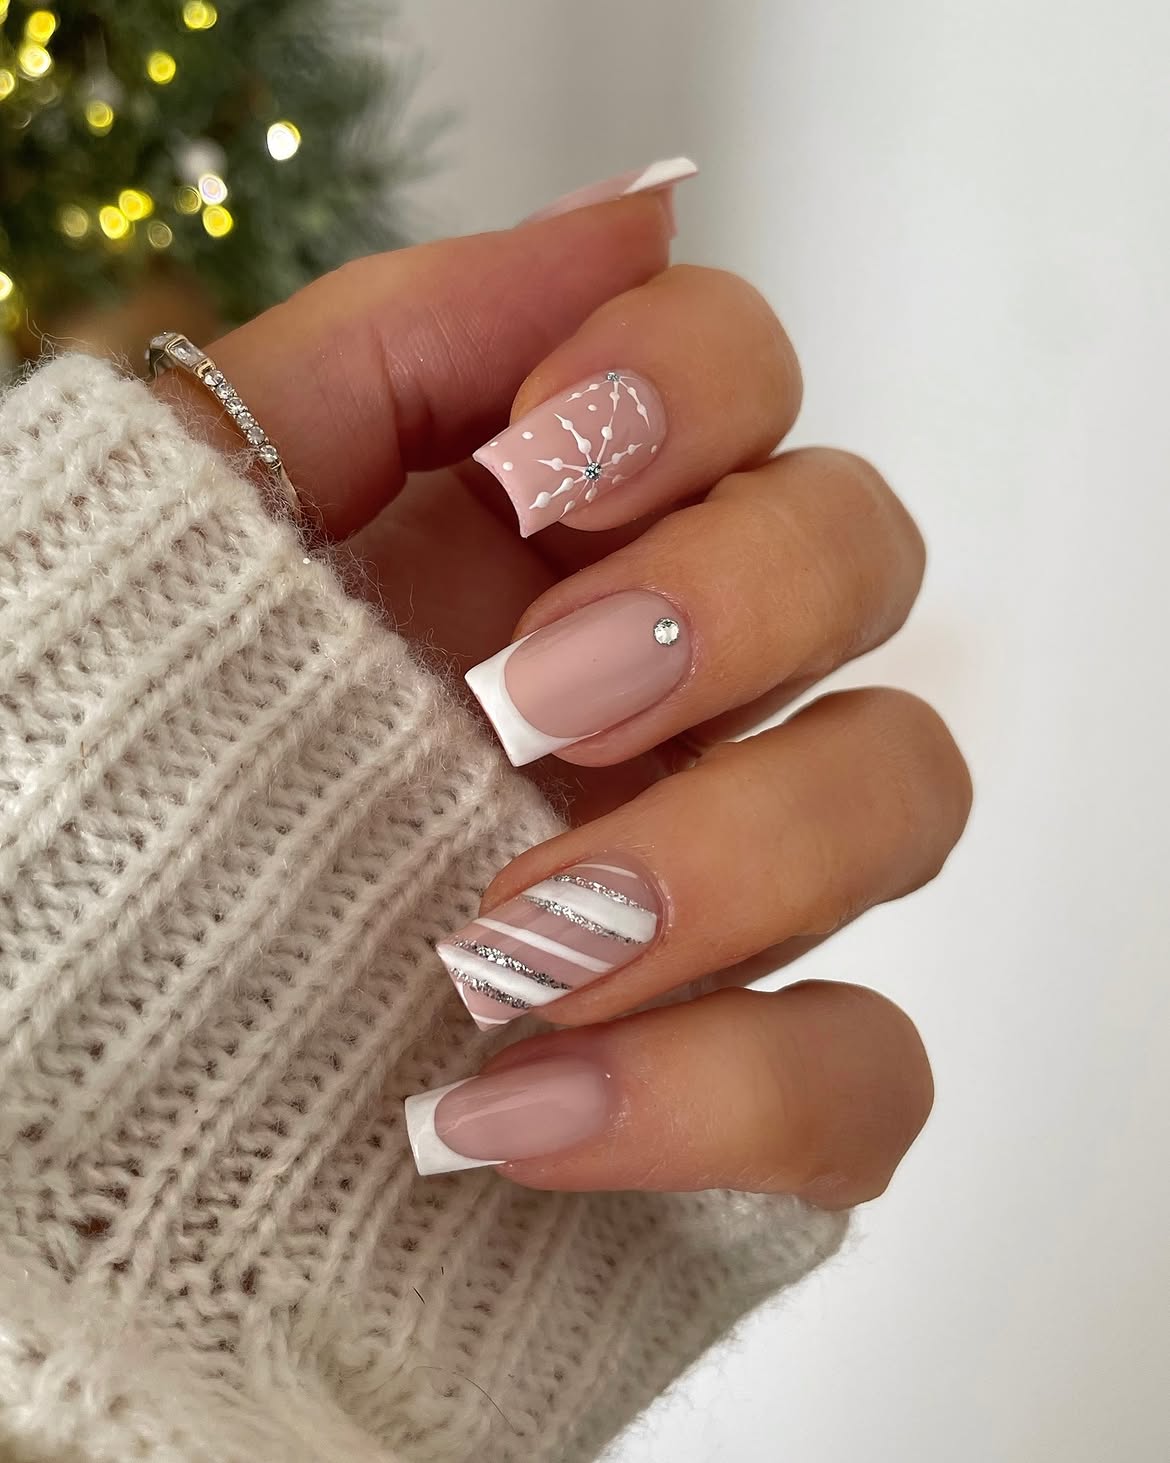
Let the silver details guide your accessories for this white Christmas manicure. Glossy pink bases and square white French tips frame a striped accent, while tiny reflective stones brighten the snowflakes and one cuticle.
To borrow the look, give each detail its own space:
- Keep the snowflakes soft. Rounded white drops along the branches give them a delicate shape. Small dots fill the nearby gaps.
- Mix stripe widths. Broad white bands sit beside finer lines, with silver tracing selected edges.
- Use stones sparingly. A single stone near the cuticle decorates a plain French nail without covering its pink center.
Pair the set with a slim silver ring and a cream knit sleeve. The simple French nails give your eye somewhere to rest between the patterned accents.
14. White Sweater Tips with a Gingerbread Accent
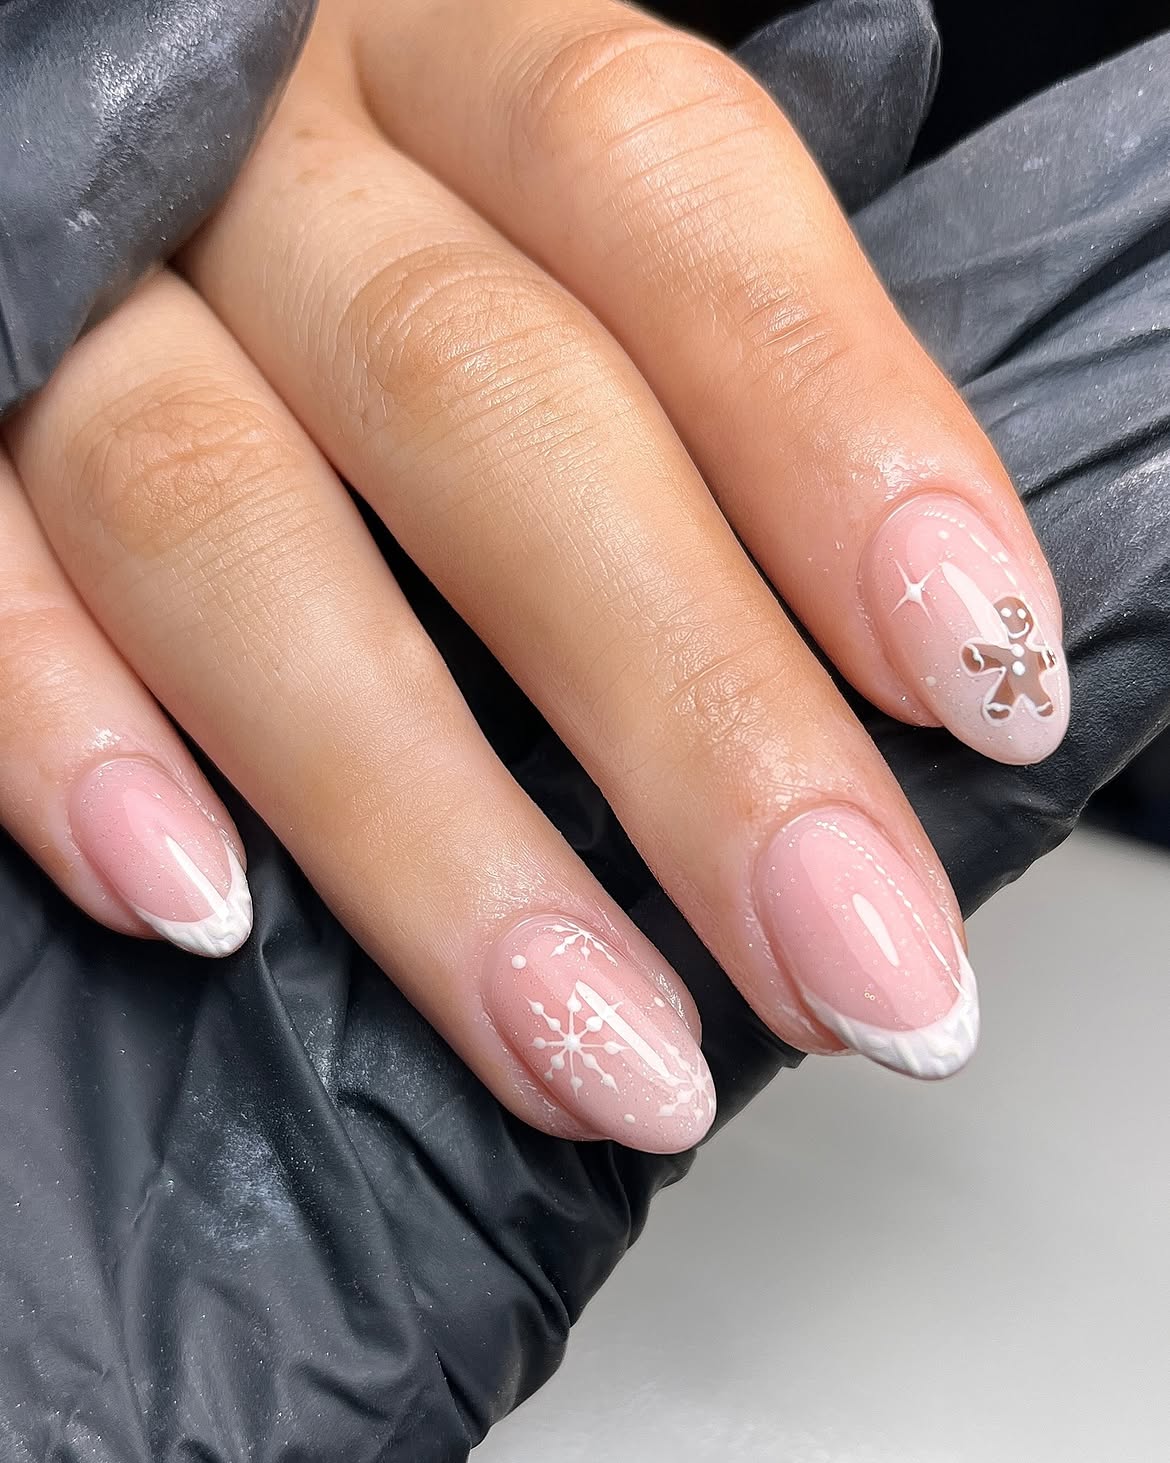
One tiny gingerbread figure gives this white and pink set a playful holiday detail. The rounded nails have a glossy pink shimmer base, with textured white French tips and delicate snowflakes spread across the other nails.
Give the gingerbread figure some space. It sits toward the tip, leaving pink visible above and around it. The brown shape stands out clearly, while its white outline, smile, and buttons connect it to the rest of the manicure.
Repeat white across the set. Sweater patterns decorate the French tips, and small dots surround the snowflakes. These details keep the cookie accent part of a shared winter theme.
Cream knitwear and warm brown accessories pick up both colors without competing with the tiny nail art.
🍪 Scale the gingerbread details
Choose the amount of icing detail that fits your accent nail.
More room for detail
Include the face, buttons, and icing around the hands and feet. Leave small brown gaps between the white marks so each detail stays distinct.
A smaller accent nail
Use a clear cookie silhouette, a simple face, and two buttons. Skip the extra icing lines around the limbs to keep the little figure readable.
15. White Sweater Nails with Red Berry Accents
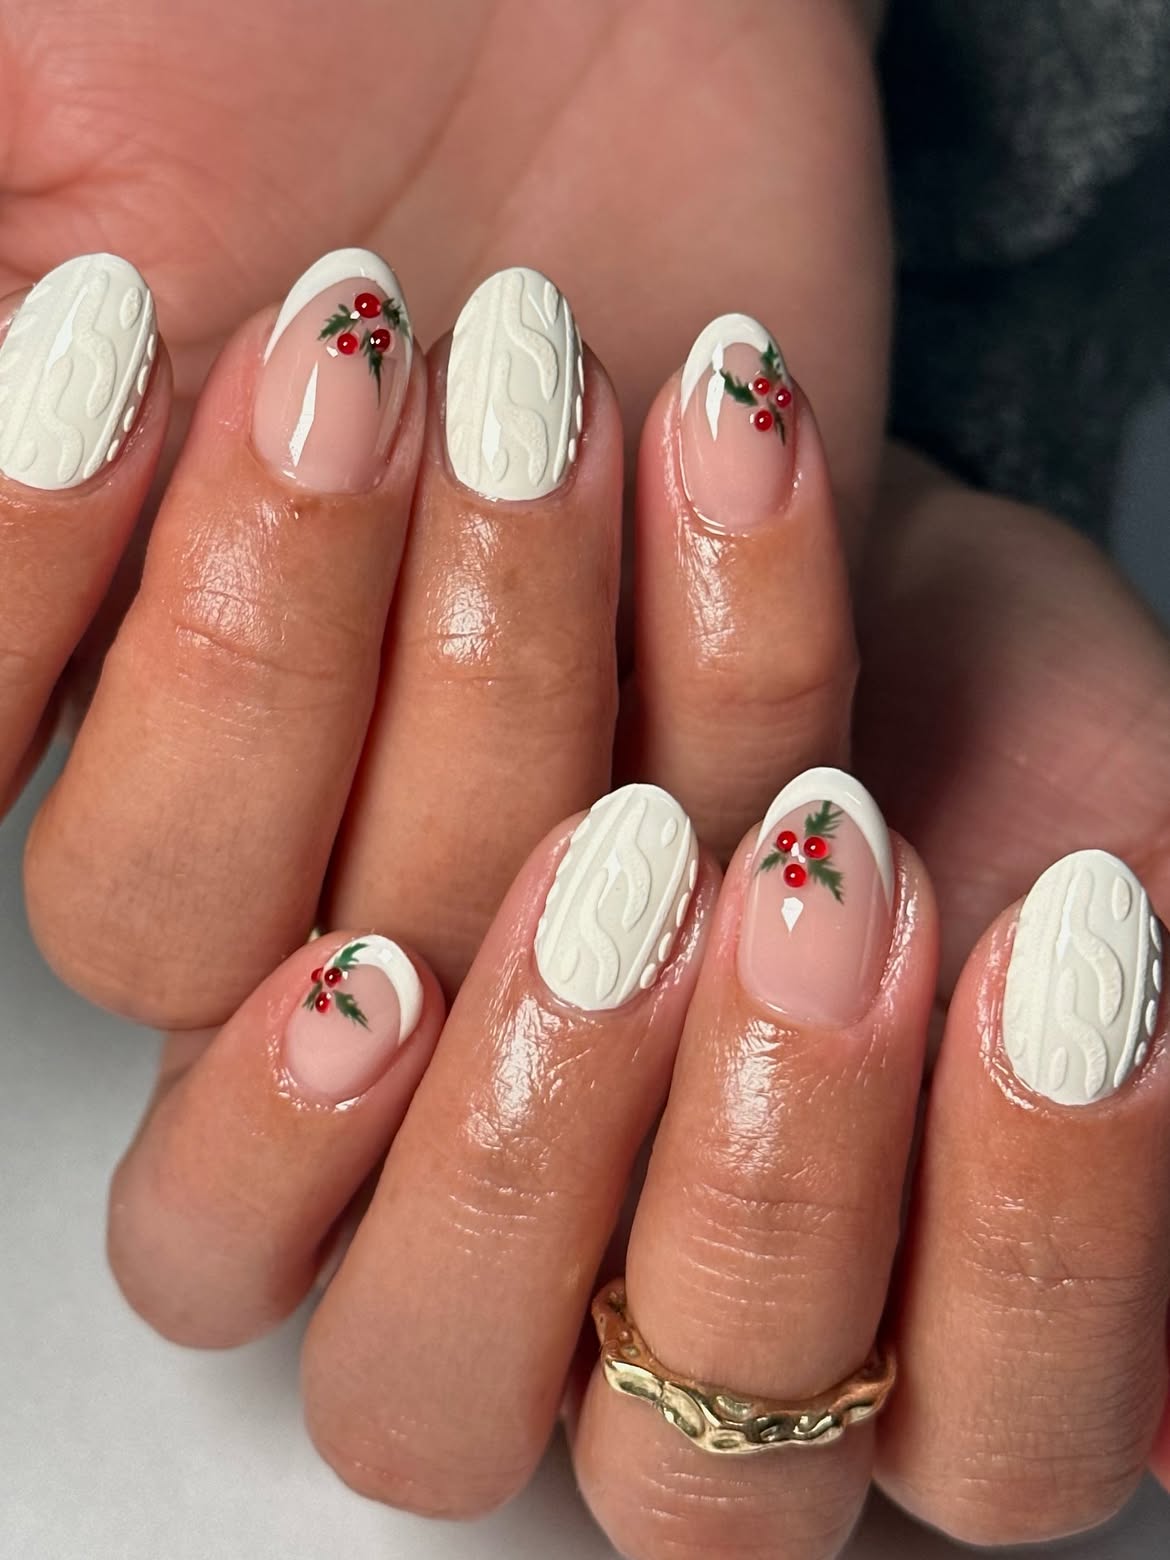
Red berries and green sprigs give these creamy white nails a clear Christmas theme. Full sweater patterns alternate with glossy pink French nails, creating a mix of soft texture and shine on the rounded shapes.
The berry accents stay small, leaving most of each pink base visible:
- Place the sprigs near the French curve. The greenery overlaps the white tip slightly, connecting the painted detail to its border.
- Keep the berries grouped. Three glossy red dots form a compact cluster among the fine green leaves.
You can borrow this arrangement without adding snowflakes or extra sparkle. The berries already supply a bright detail.
Before choosing your finish, ask to see the sweater texture beside the glossy pink base. That comparison helps you decide how much contrast you want between the alternating nails.
Match the white shades first
Compare the French tip color with the sweater nail color. Choose warm cream for both, or brighter white for both, then vary the surface finish. This keeps the texture as the main difference between the white sections.
16. White Snowflakes with a Silver Glitter Cuticle Fade
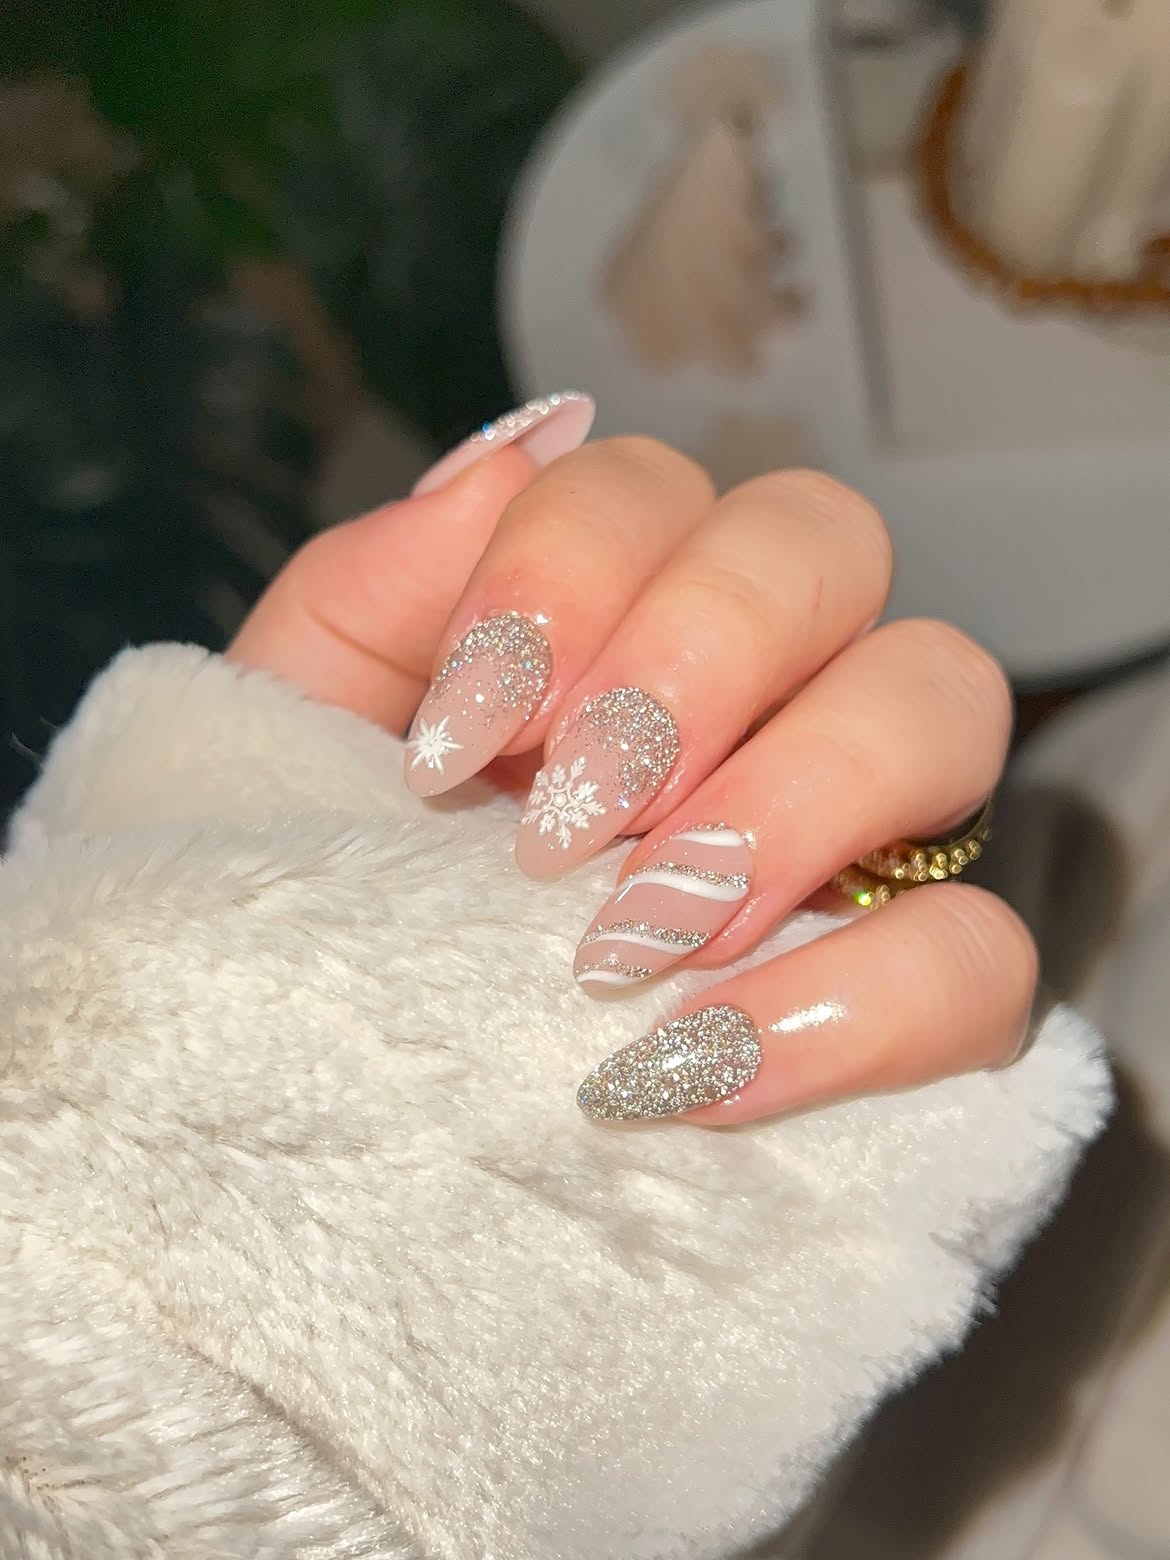
Move the sparkle toward the cuticles for a different take on snowy nails. Here, dense silver glitter fades down pink almond nails, leaving space for white snowflakes closer to the tips.
The set uses three ways to carry that sparkle:
- A glitter fade frames the base of the snowflake nails, with scattered flecks trailing toward the middle.
- Glitter beside white waves gives the striped accent a flowing shape. Pink gaps separate the curved bands.
- One fully sparkling nail brings the brightest finish into the mix without adding another painted motif.
For your own version, choose the glitter density first. Then size and position the snowflakes within the clearer pink area so their fine branches remain easy to see.
📷 Capture the sparkle and the nail art
Save a few views of your finished manicure to show both the glitter and the painted details.
Start with soft light
Take a photo near a window in indirect daylight. Use this view to record the pink base and gradual glitter fade.
Try a slight tilt
Turn your hand a little between shots. Choose an angle that catches the glitter while keeping the white snowflake visible.
Save two distances
Keep one close view of the snowflake and one full hand photo. Together, they record the line detail and the placement of each accent.