15 Pink Christmas Nail Designs for a Bright Holiday Manicure
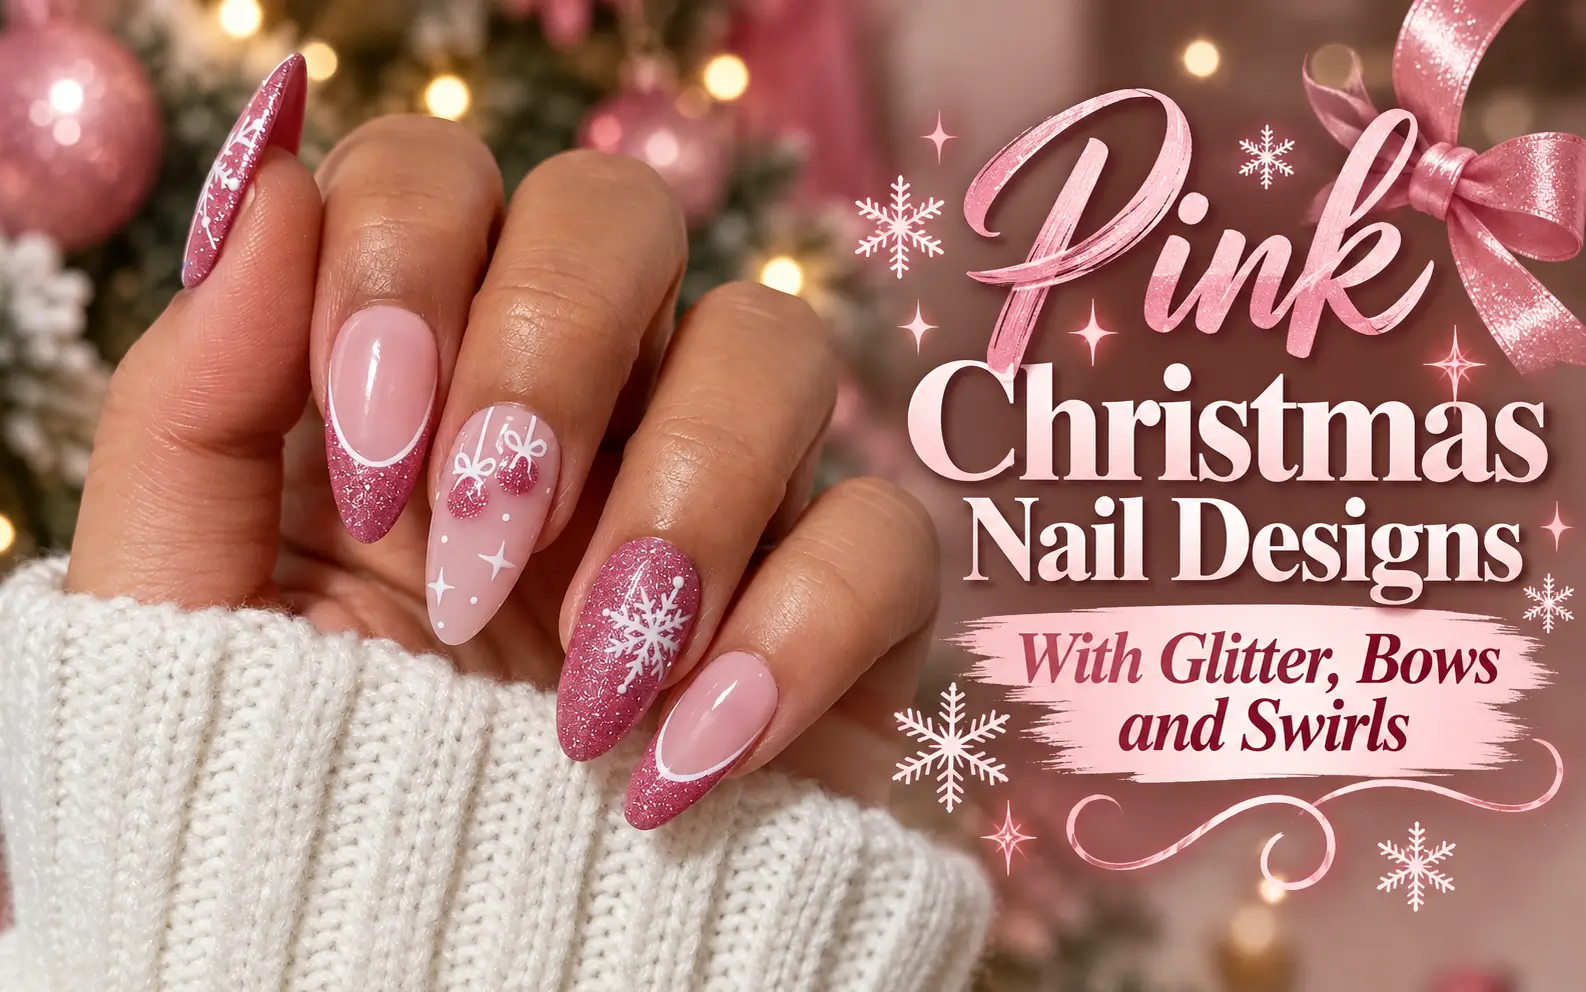
Christmas nails often bring red and green to mind, but pink gives familiar holiday details a fresh, playful look. A soft blush base makes snowflakes and sweater patterns feel delicate, while fuchsia glitter brings out candy stripes, bows, and ornaments. You can use these details on short rounded nails or longer almond and square shapes, depending on what you find comfortable.
These pink Christmas nail designs show how much you can do with one color family. Some keep things simple with a single snowflake or a glitter French tip. Others bring together gingerbread, gift wrap ribbons, peppermint swirls, and small gems. If you like detailed nail art but do not want every nail covered in patterns, a solid pink nail can give the design some space.
Browse the ideas below to find a shade and style that suits you. You can save a favorite design for your nail appointment or use the details as a starting point for your own holiday manicure.
15 Pink Christmas Nail Designs 2026
1. Pink Glitter Snowflakes and Candy Cane Swirls
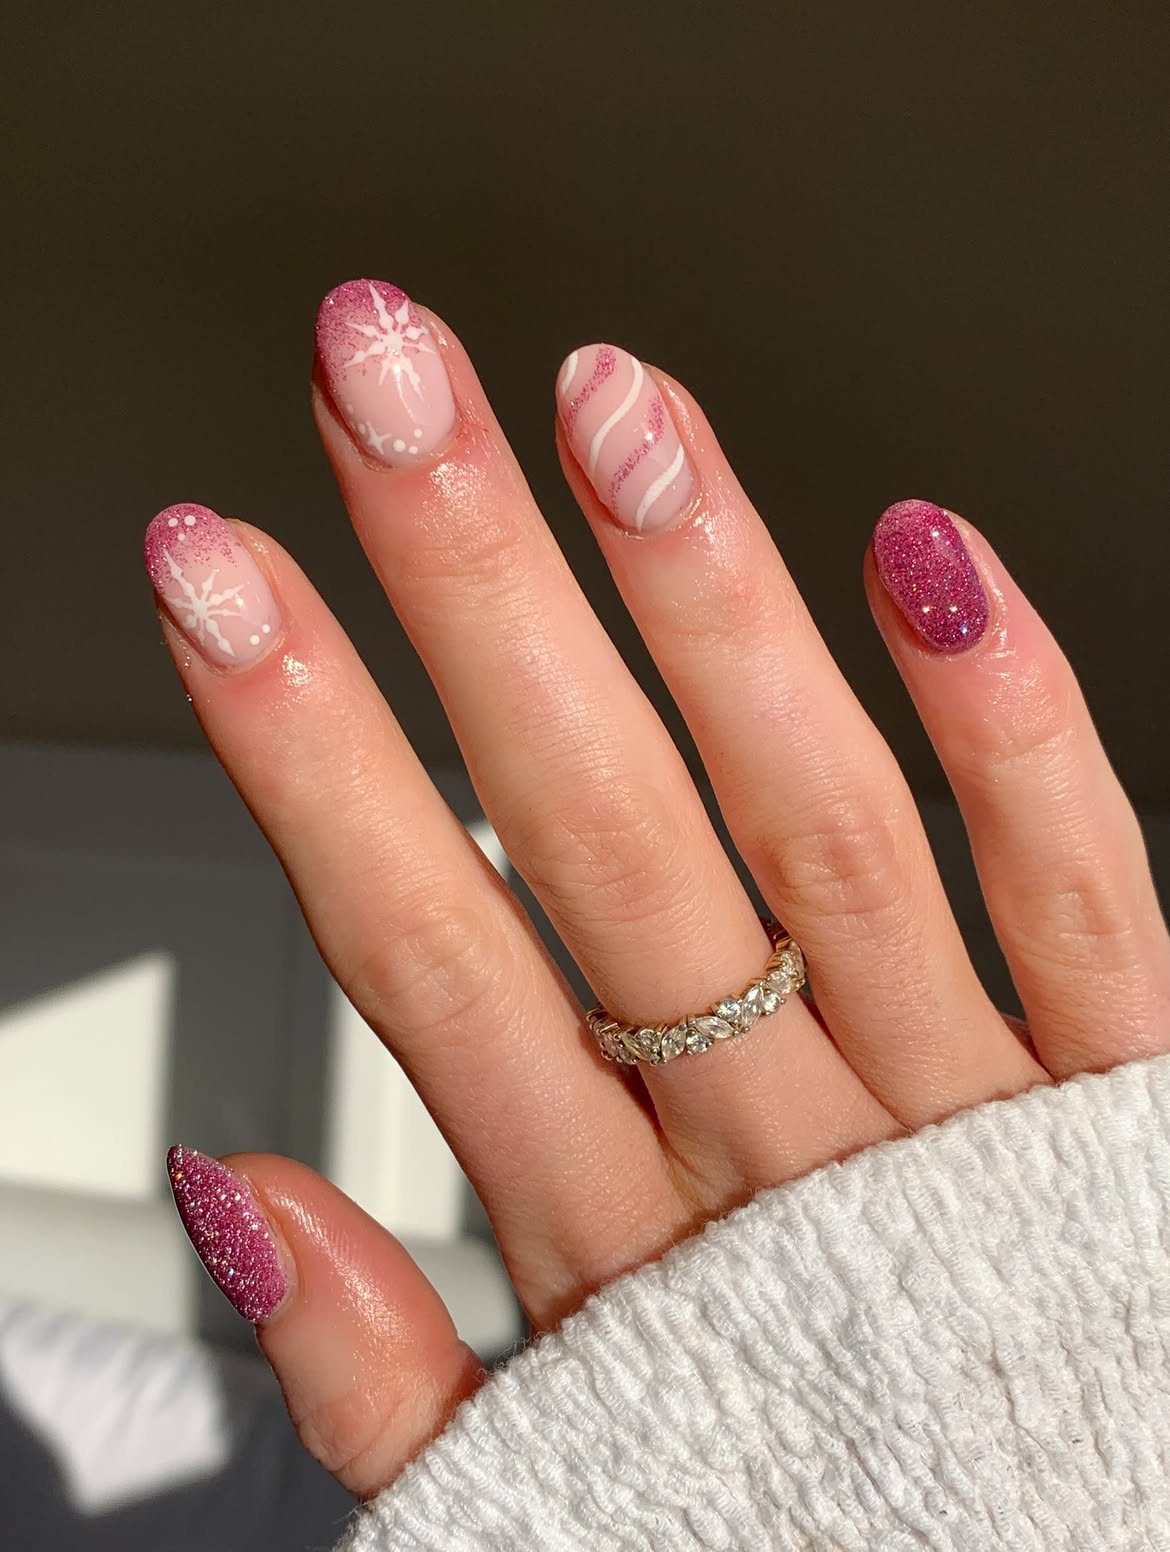
The sparkle on this set is concentrated on the thumb and little finger. The other nails have a soft pink base, which gives the white details room to show. Two nails carry snowflakes and small dots, while the curved white and glitter stripes on the ring finger bring in the candy cane idea.
It is a useful design if you want pink Christmas nails without putting a pattern on every finger. The short, rounded shape keeps the mix of glitter and nail art easy to wear. If you are showing this photo to a nail artist, point out the glitter fading from the tips of the snowflake nails. That small detail helps connect the pale nails to the fully glittered ones.
How to build the look
Start with a sheer pink base on the three patterned nails.
Add pink glitter to the thumb and little finger, then fade a little glitter over the tips of the snowflake nails.
Paint white snowflakes and dots on two nails, then finish the remaining nail with curved white and glitter stripes.
2. Pink Christmas Nails With Gingerbread and a Glitter Bow
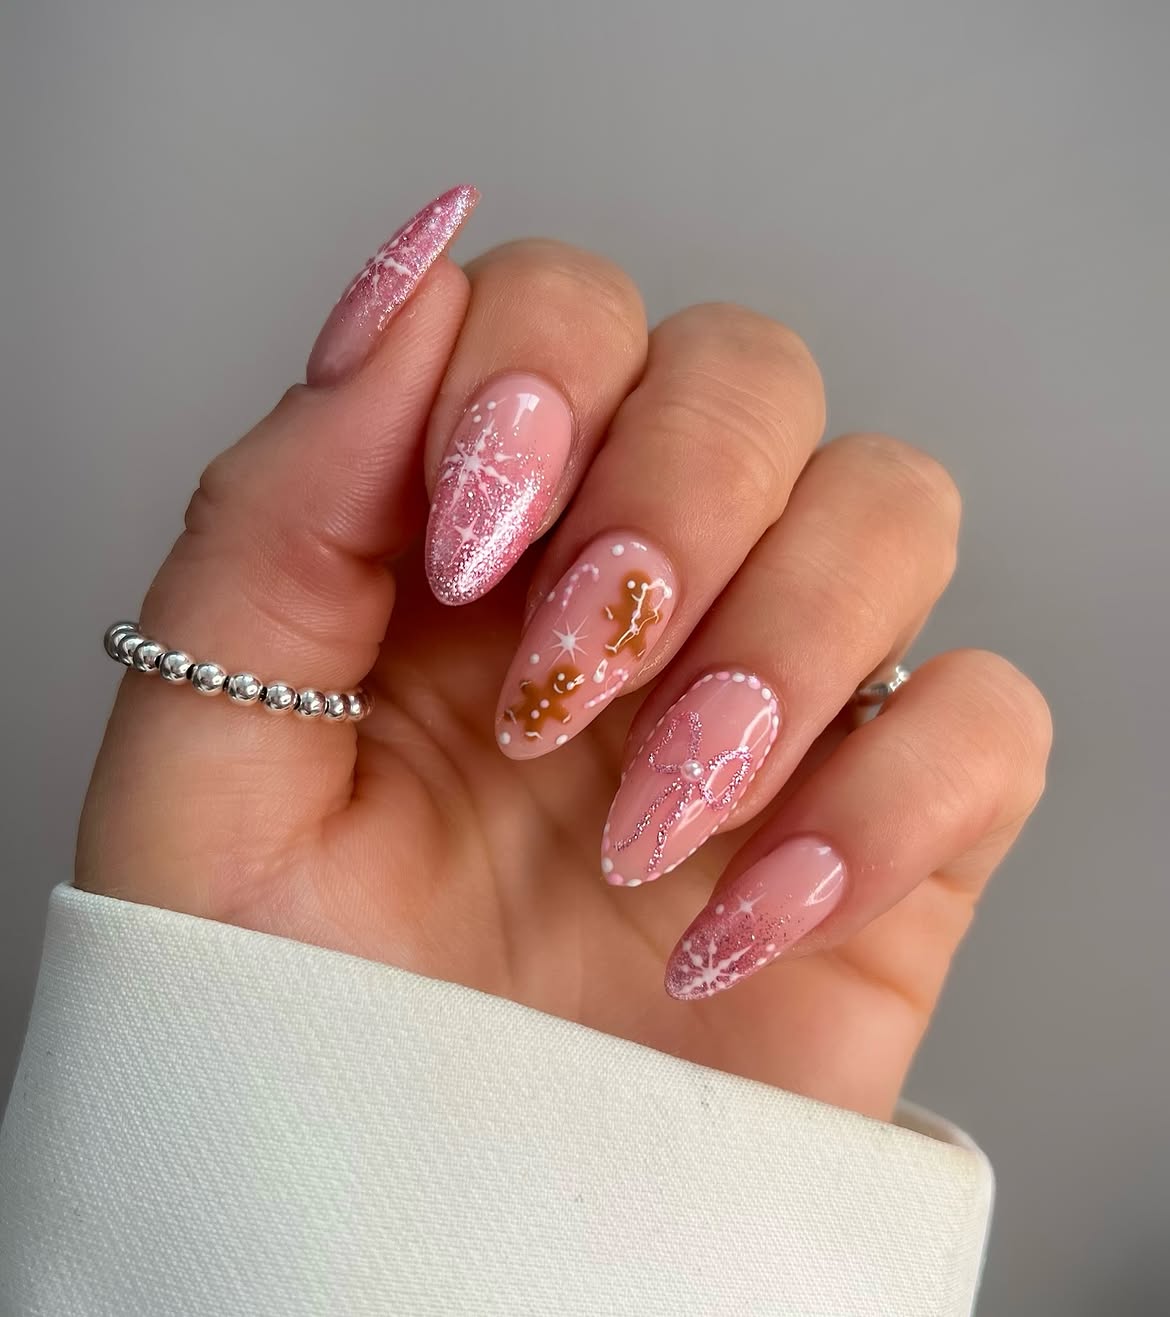
The little gingerbread figures give this set its Christmas character. They sit on a glossy blush pink nail with white dots and a small star, while the other fingers bring in softer details:
- Pink glitter fades over the tips of the snowflake nails.
- A glitter bow makes the ring finger the main accent.
- A pearl like detail sits at the centre of the bow.
The long almond shape gives each design enough space to be seen clearly. If you want to recreate the set, ask for a translucent pink base so the gingerbread figures, white snowflakes, and bow stay easy to see.
For shorter nails
Choose one snowflake nail and keep the bow as your main accent.
For softer sparkle
Keep the glitter near the tips and let more of the pink base show.
For the full look
Mix snowflakes, gingerbread figures, and one raised bow across the set.
3. Pink Gift Wrap Nails With Glitter French Tips
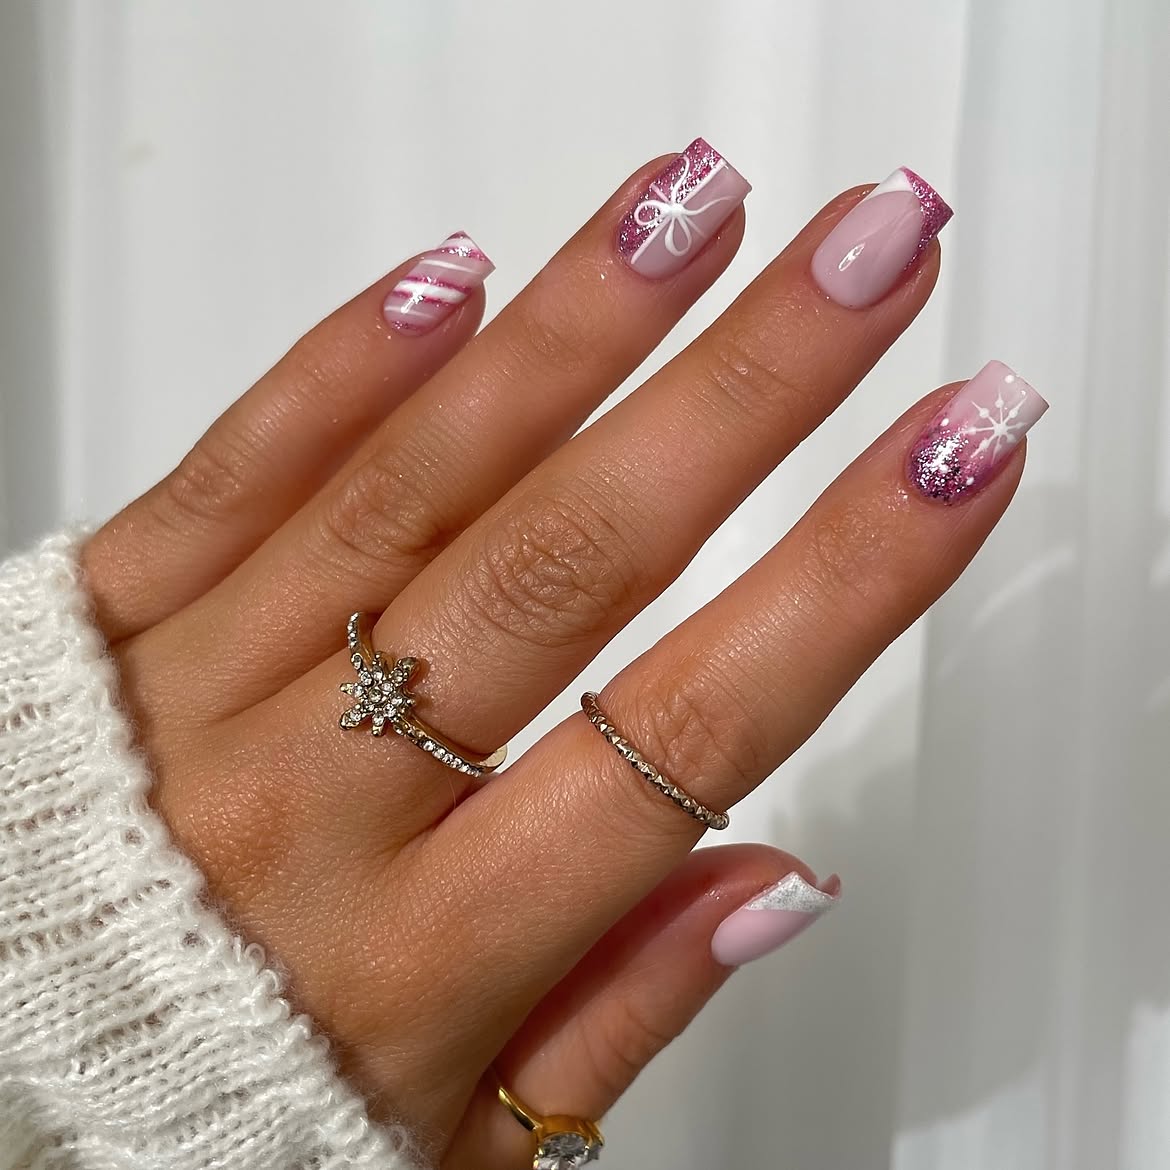
The white bow makes one nail look like a tiny wrapped present. Around it, the design switches between pink candy stripes, a neat French tip, and a snowflake over rosy glitter. Giving each detail its own nail lets you notice the small artwork without the set feeling crowded.
The squared tips suit this design particularly well. They give the stripes and glitter edges a clean finish, while the pale pink base keeps the brighter details in balance. If you want a simpler version, keep the bow and candy stripe, then use matching pink tips on the other nails.
| Full design | Simpler version |
|---|---|
| Use a bow, candy stripes, and a snowflake on separate nails. | Keep the bow and choose either the stripes or the snowflake. |
| Mix glitter sections with white and pink French tips. | Use matching pink tips on the remaining nails. |
If you love the soft holiday look of pink nails but want something cooler and more classic, these 16 White Christmas Nail Designs are full of snowy details, shimmer, and elegant winter ideas.
4. Hot Pink Gift Wrap Nails With Gold Glitter Tips
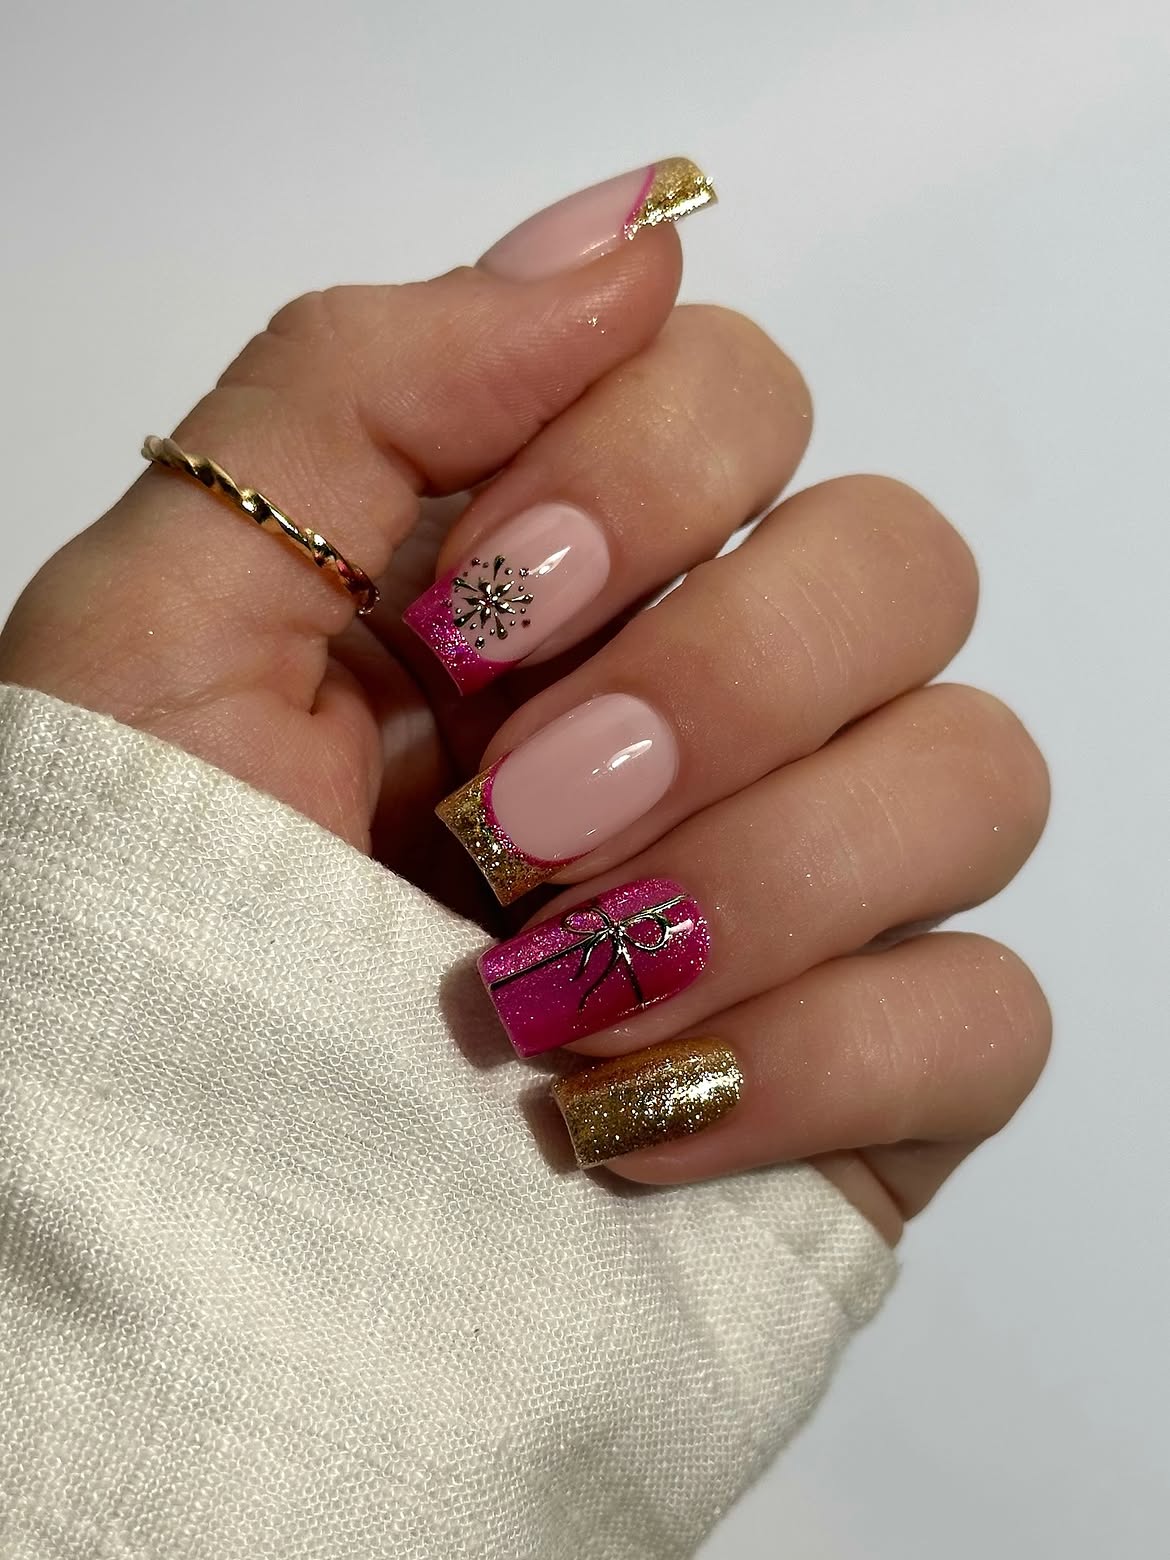
Gold gives this pink Christmas set a brighter party feel. One nail is covered in gold glitter, while two pale pink nails have gold glitter tips. The hot pink accent looks like a wrapped gift, with a fine dark ribbon and bow drawn across it.
What makes the mix work:
- The pale pink nails give the bold glitter colours some space.
- Square tips make the gold edges look crisp.
- A dark metallic snowflake adds a Christmas detail without another large pattern.
If you like a stronger pink and gold combination, the gift nail is the detail to show your nail artist first.
💡 Nail art tip
Ask for fine ribbon lines on the gift nail. Thick lines can cover too much of the hot pink glitter and make the bow harder to see.
5. Pink Ornament Nails With Glitter French Tips
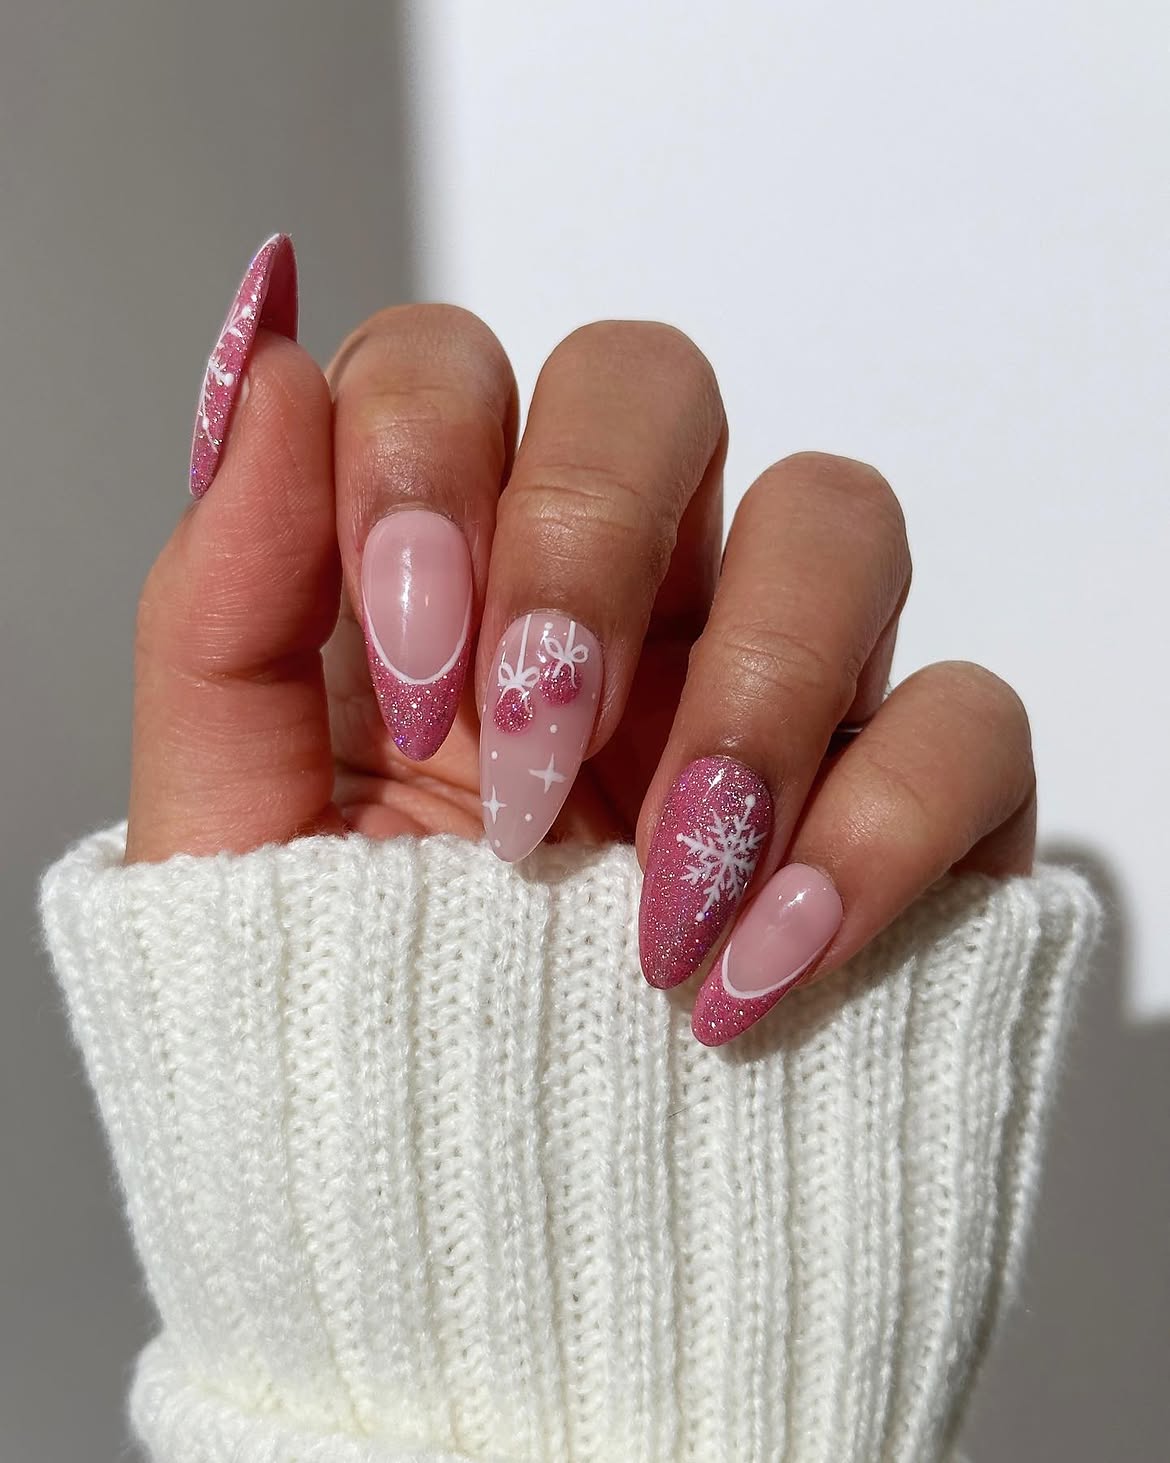
Two tiny pink ornaments are the detail that sets this manicure apart. They hang from fine white bows on a sheer pink nail, with small stars and dots filling the space around them. Beside it, a rose glitter nail carries one large white snowflake. The other visible nails have sparkling pink French tips with thin white outlines.
The clear space around the ornaments matters here. If you show this design to a nail artist, ask them to leave most of that nail pale pink so the hanging design stays easy to see. The long almond tips also give the glitter French edges plenty of room to show.
SHORT NAIL OPTION
Keep the two hanging ornaments on one pale pink accent nail. Add a pink glitter tip to one other nail and leave the rest simple, so the small ornament art still stands out.
6. Pink Christmas Nails With Red Ribbons and Candy Stripes
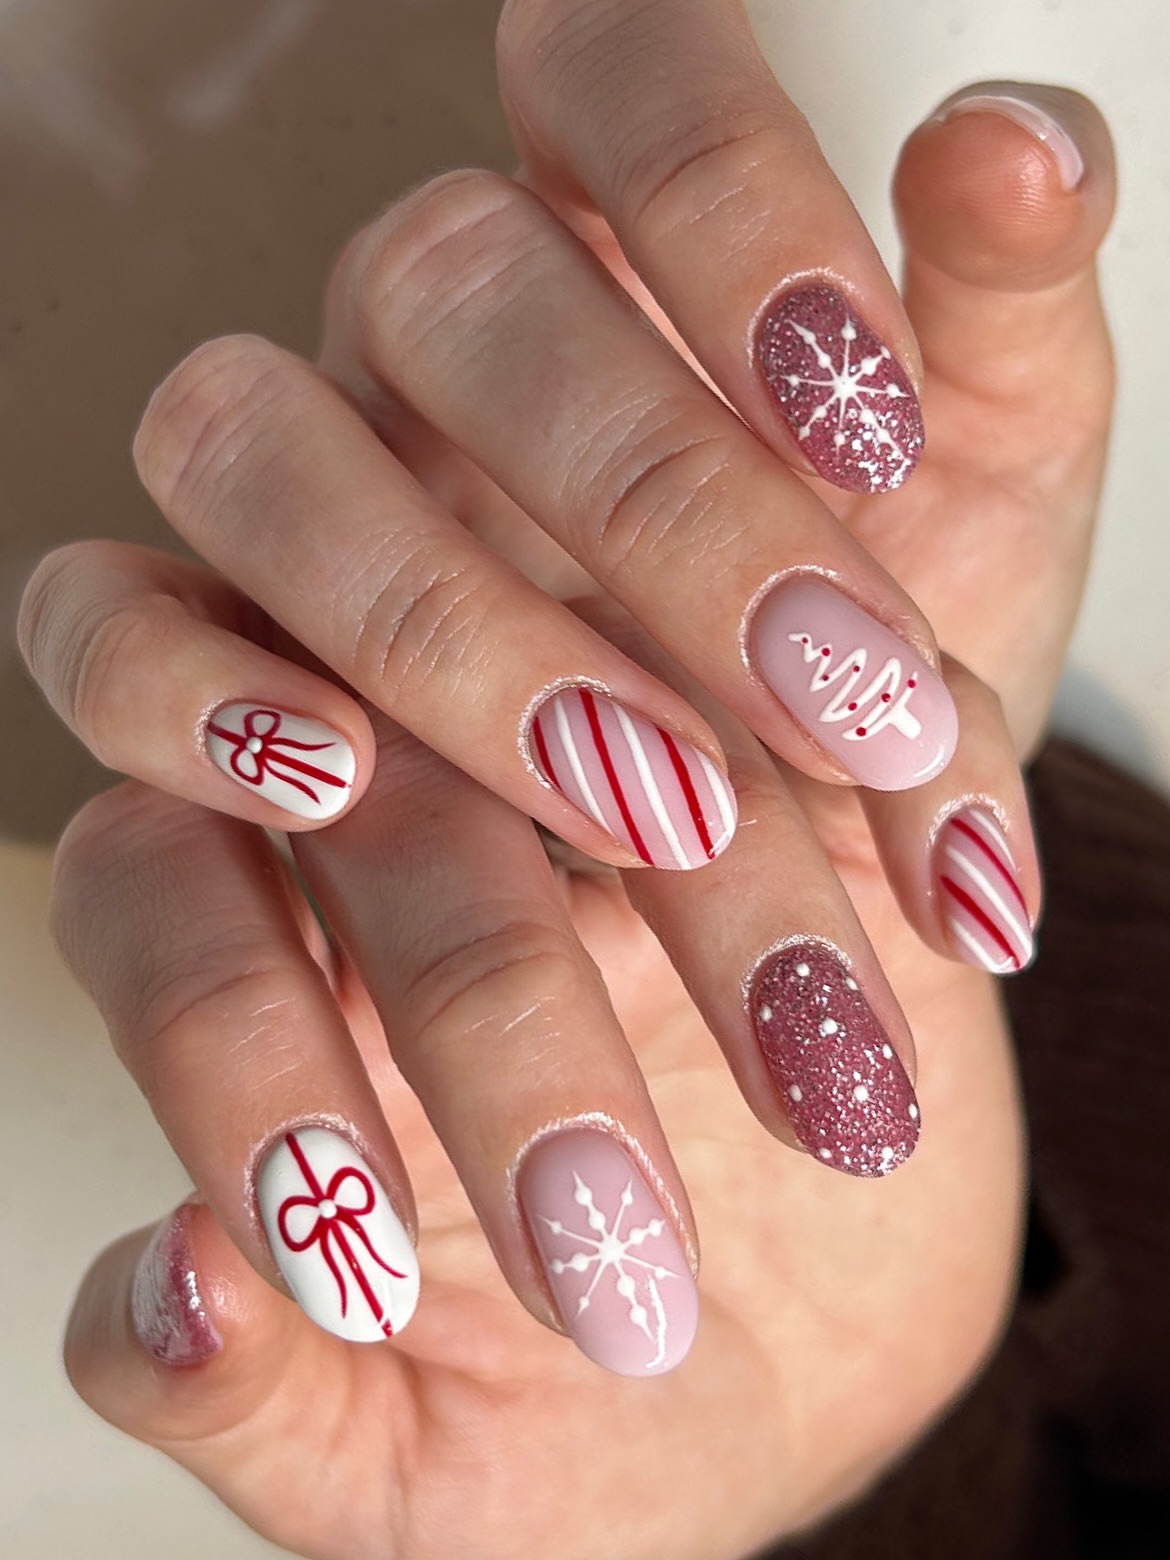
Fine red lines give this set its Christmas look. On the white nails, they form little bows and diagonal candy stripes. The pale pink nails carry a white tree with red dots and a delicate snowflake. Rosy glitter adds another texture, with a snowflake on one nail and scattered white dots on another.
There are several designs here, but the colours hold them together. The short, softly rounded shape also gives each motif enough room without needing long nails. If you recreate the set, keep the red lines fine so the bows and stripes stay clear against the white base.
🎀 Want more red?
Repeat a fine ribbon or candy stripe on one more white nail. Keep the pink nails simple so the red details remain clear.
❄️ Want more pink?
Keep one white bow nail, then use pale pink or rose glitter on the others. The red ribbon can still carry the Christmas theme.
7. Soft Pink Snowflakes With Lilac Shimmer Tips
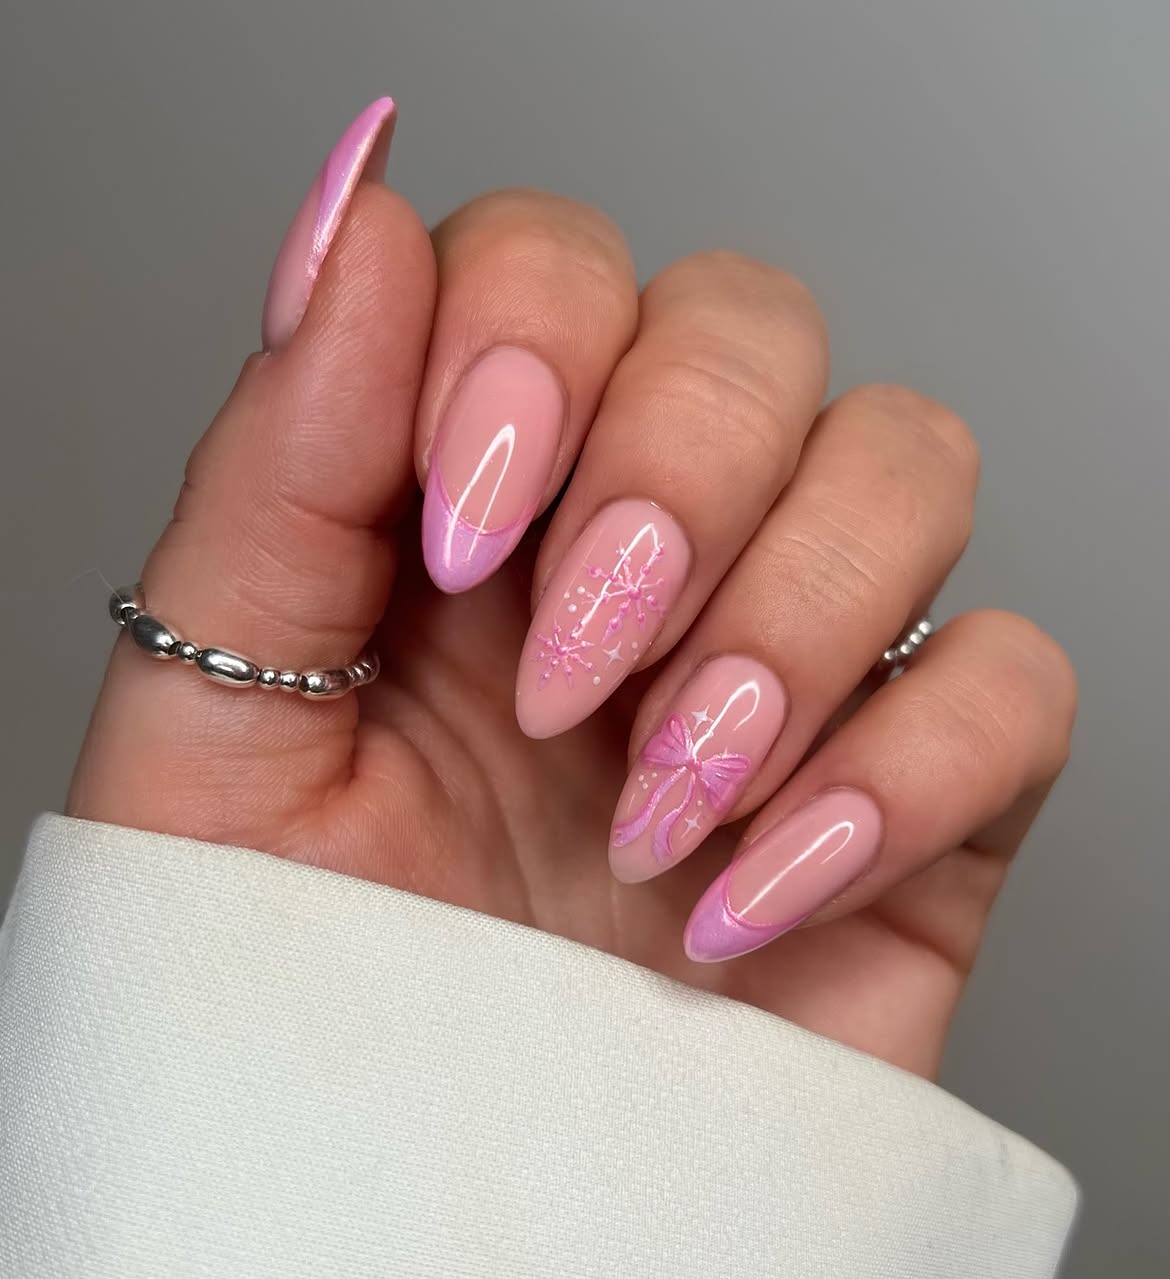
The lilac shimmer at the tips gives this set a soft winter colour. A blush pink base stays visible on every nail, while one finger carries fine pink snowflakes and tiny dots. Another has a pink bow that appears slightly raised. The remaining nails are mostly simple, allowing those two details to stand out.
The long almond shape shows the lilac edges clearly without needing a thick band of colour. If you take this photo to a nail appointment, point out how light the snowflake lines are. Heavy lines would change the delicate look of the centre nail.
Salon brief
8. Pink Sweater Texture and Gingerbread Christmas Nails
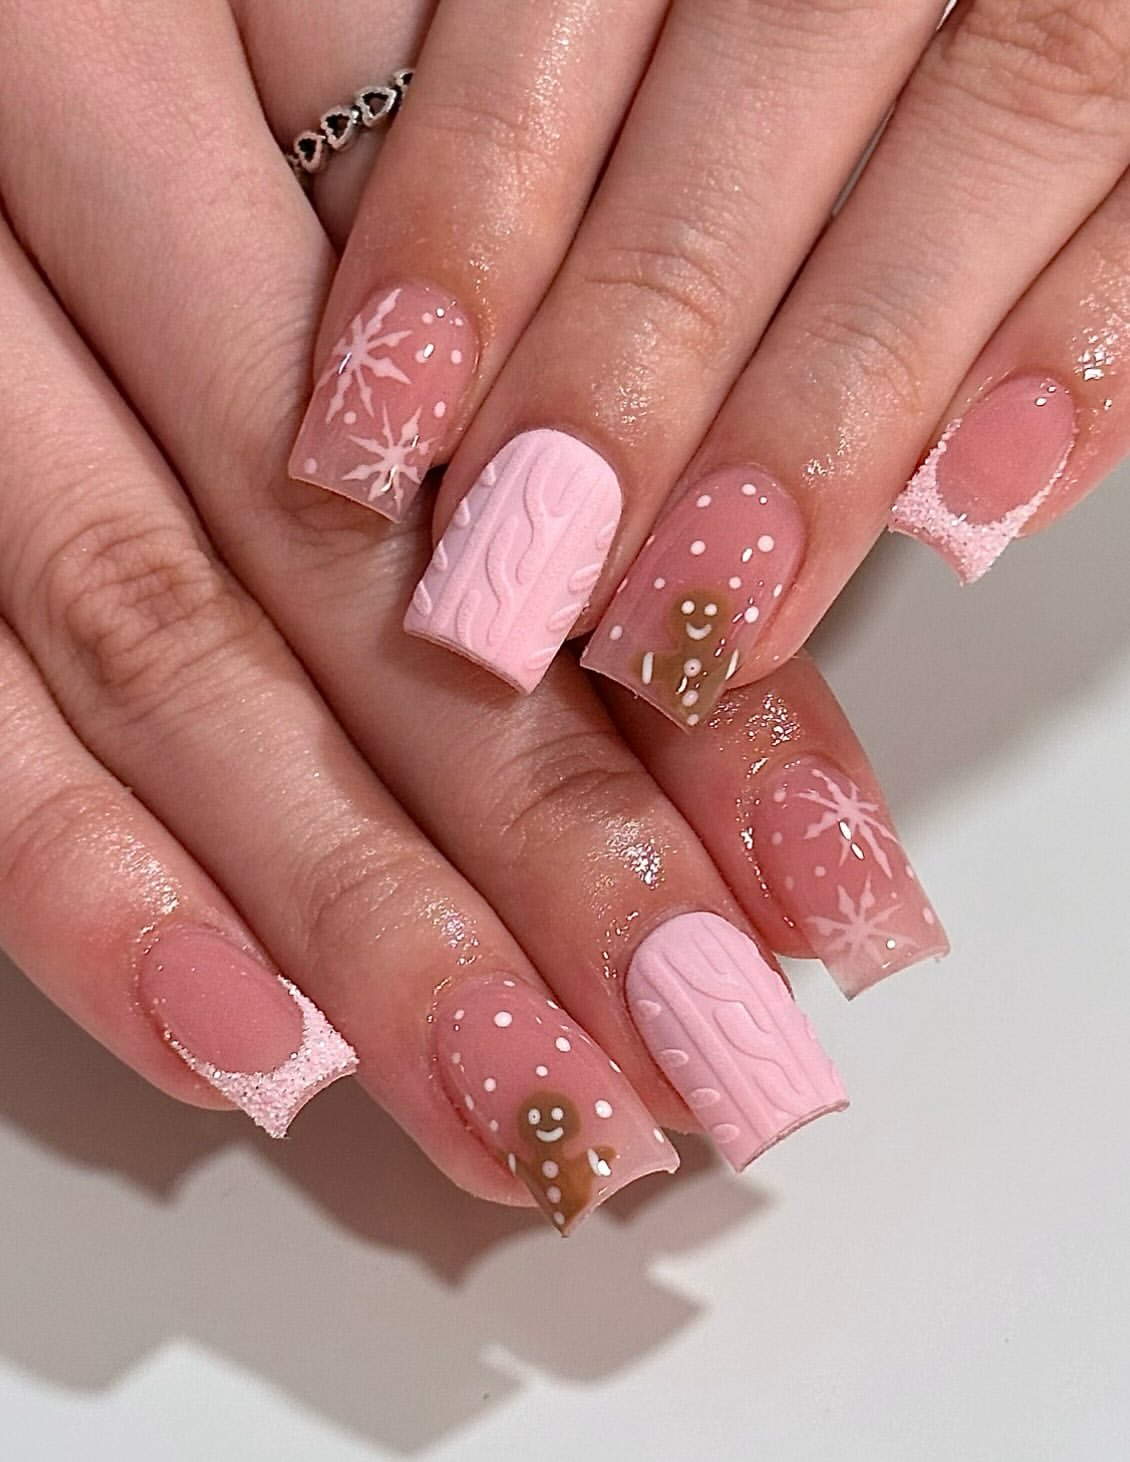
The raised sweater pattern is the detail worth saving from this set. Its soft pink, almost matte finish gives the manicure a cosy texture beside the glossy nails.
Elsewhere, tiny gingerbread figures sit on sheer blush nails among white dots. Other nails carry white snowflakes, while the French tips look dusted with pale pink sparkle. The long square shape gives each detail its own space.
If you are recreating this look, ask for the sweater pattern in the same pale pink as its base. That keeps the texture visible without making it compete with the gingerbread art.
9. Baby Pink Christmas Tree Nails With Gem Details
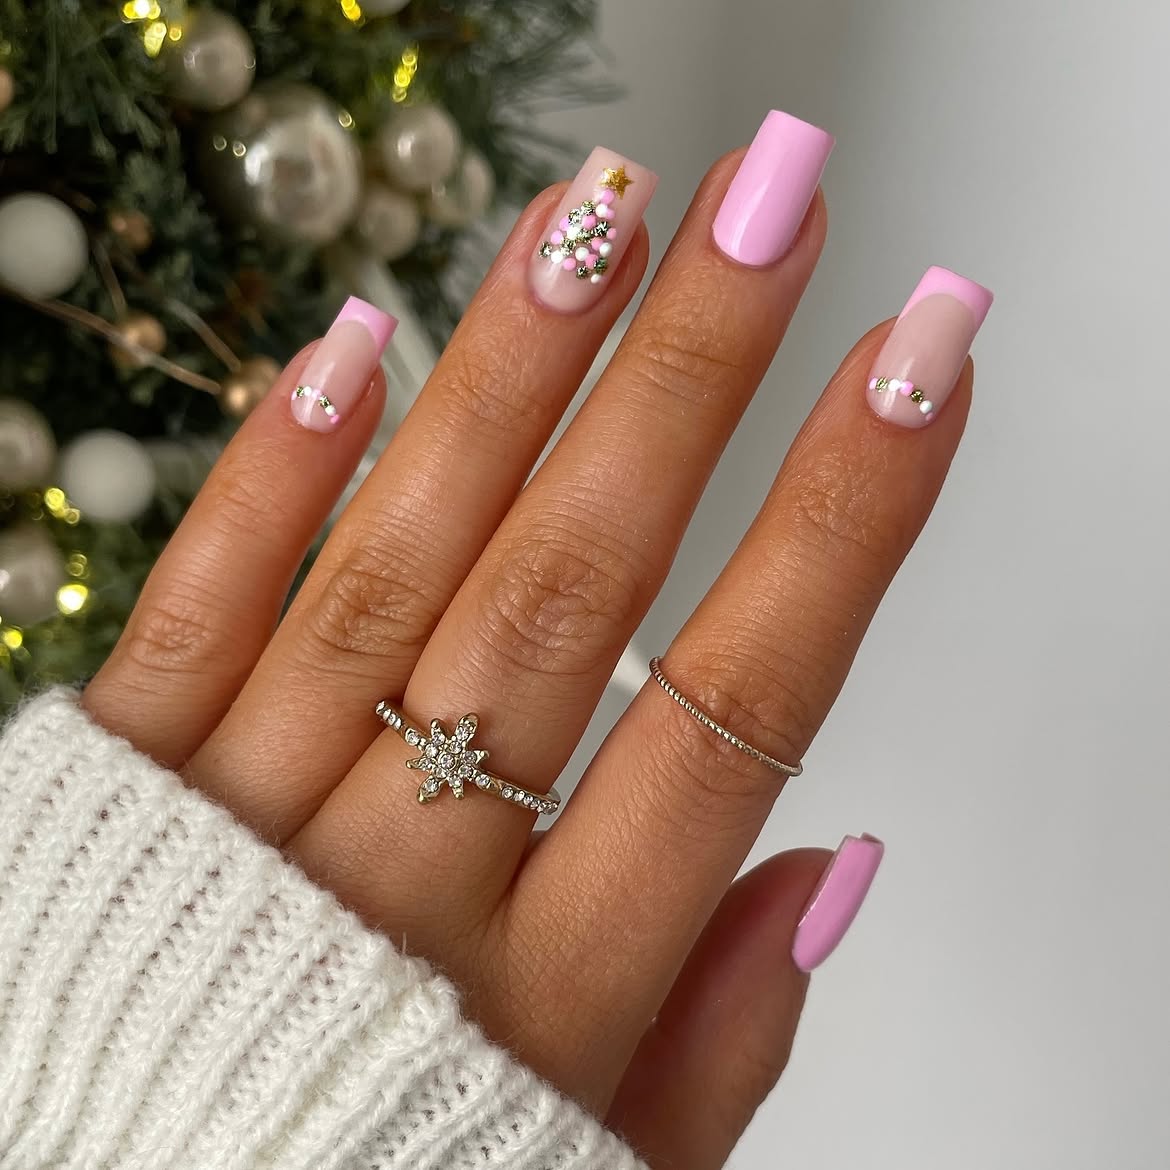
Small reflective stones form a Christmas tree on the accent nail, with round pink ornaments and a gold star at the top. The sheer blush base leaves the tree easy to see.
The other nails are quieter. Some are painted solid baby pink, while the French tips use the same shade. A few small gems near the cuticles connect those nails to the tree without repeating it. The long square tips give the pink colour a clean edge.
If you want to copy this set, keep the tree on one finger. Its careful arrangement is the feature that makes the manicure memorable.
✨ Gem finish
Arrange small reflective pieces in a tree shape and finish it with one star. Keep the surrounding nail sheer.
🎨 Painted option
Ask for small painted dots in a tree shape if you prefer a flatter accent. Add a tiny star at the top.
You can also explore these 17 Red Christmas Nail Designs for rich seasonal nail ideas that feel bright, polished, and ready for every Christmas gathering.
10. Pink Peppermint Swirls With Frosted Snowflakes
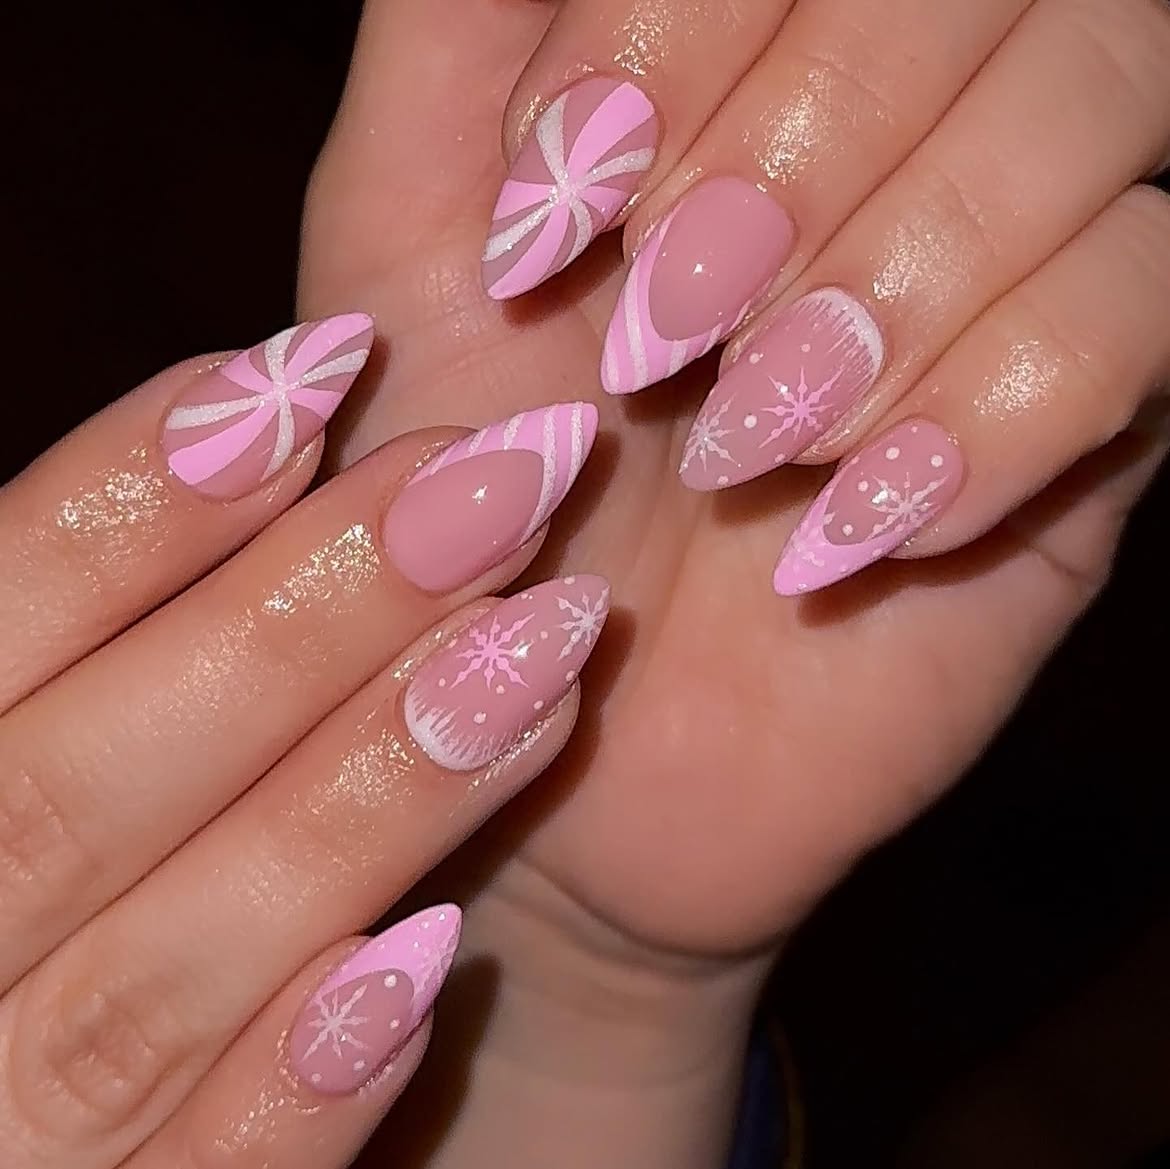
Pink and silvery white bands fan out across the accent nails like peppermint sweets. On other fingers, the same colours appear as curved French tips, linking the different patterns without covering every nail.
The snowflake nails add another detail to look at. Fine white flakes and dots sit over the blush base, with soft frosted strokes near the edges. The long almond shape lets the pink bands narrow neatly toward each tip.
If you want this look, ask for the swirl bands to be wide enough to see clearly. The slim silvery lines can then separate the pink sections without making the pattern too busy.
How to arrange the patterns
Begin with a sheer blush base across the set.
Fan pink and silvery white bands across the feature nails, then echo the curves at a few tips.
Leave separate nails for the fine snowflakes, dots, and frosted edge details.
11. Tiny Gingerbread and Snowy Pink Square Nails
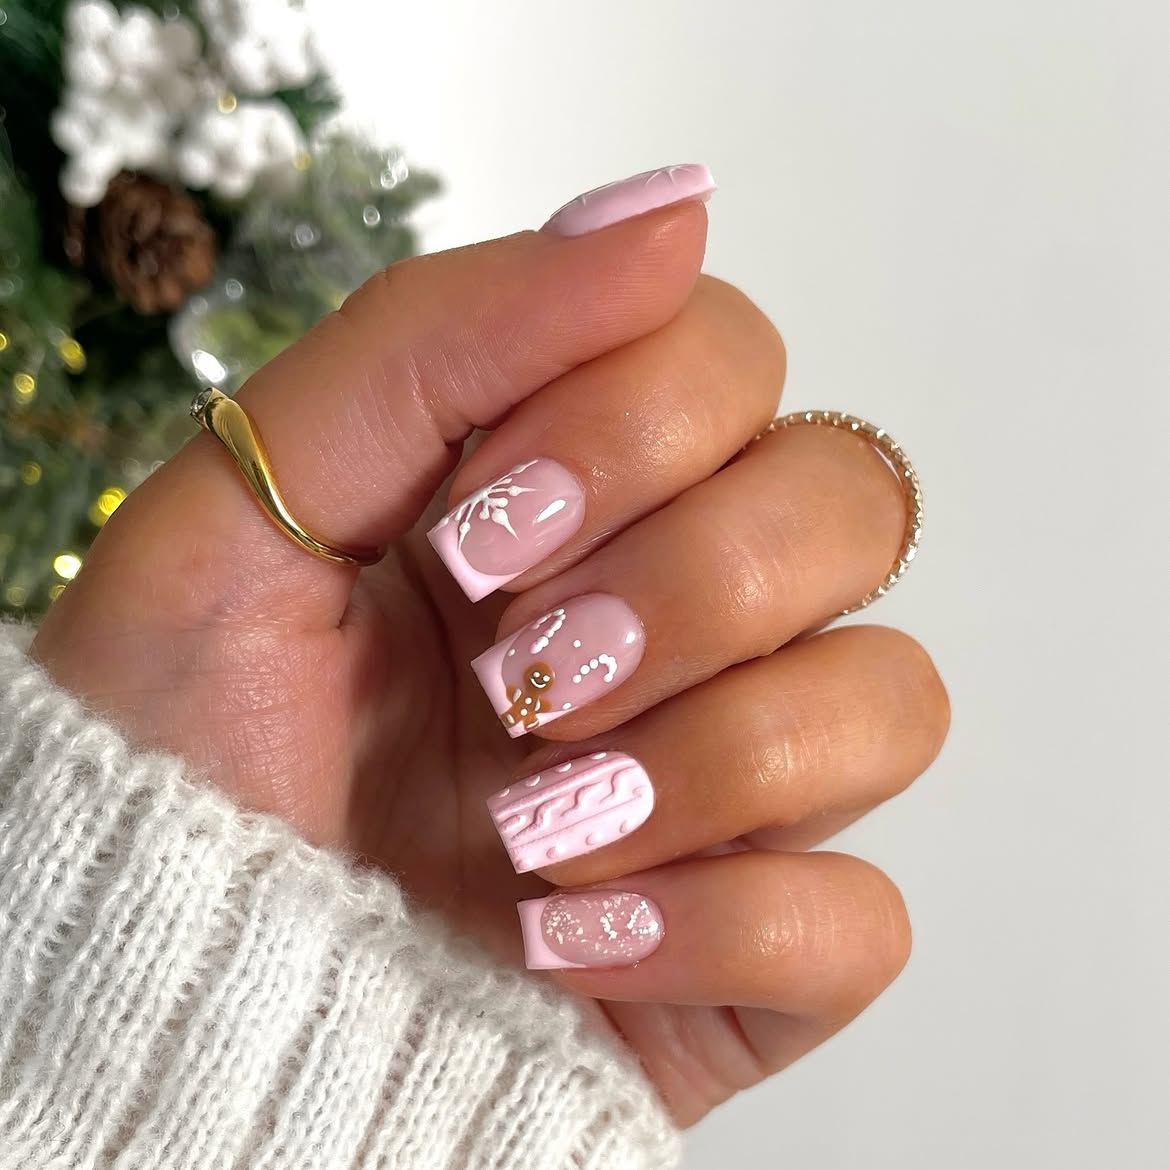
A little gingerbread figure peeks up from the edge of one blush nail. White dots and candy cane shapes surround it, but leave enough open space to see its face.
The other nails each add a different small detail:
- A white winter branch sits over a sheer pink base.
- Raised pale pink lines give one nail a sweater texture.
- White flecks scatter across the little finger like snow.
The square tips keep the designs compact. If you take this design to a nail artist, ask them to leave the pink base visible around the gingerbread figure. That space helps its tiny white details show.
| Detail | Keep it clear |
|---|---|
| Gingerbread figure | Place it near the tip and leave blush pink space around its face. |
| Sweater texture | Use raised lines in a similar pale pink shade. |
| Snowy flecks | Keep them on a separate nail so the little character remains the focus. |
12. Two Tone Pink Snowflakes With Outlined French Tips
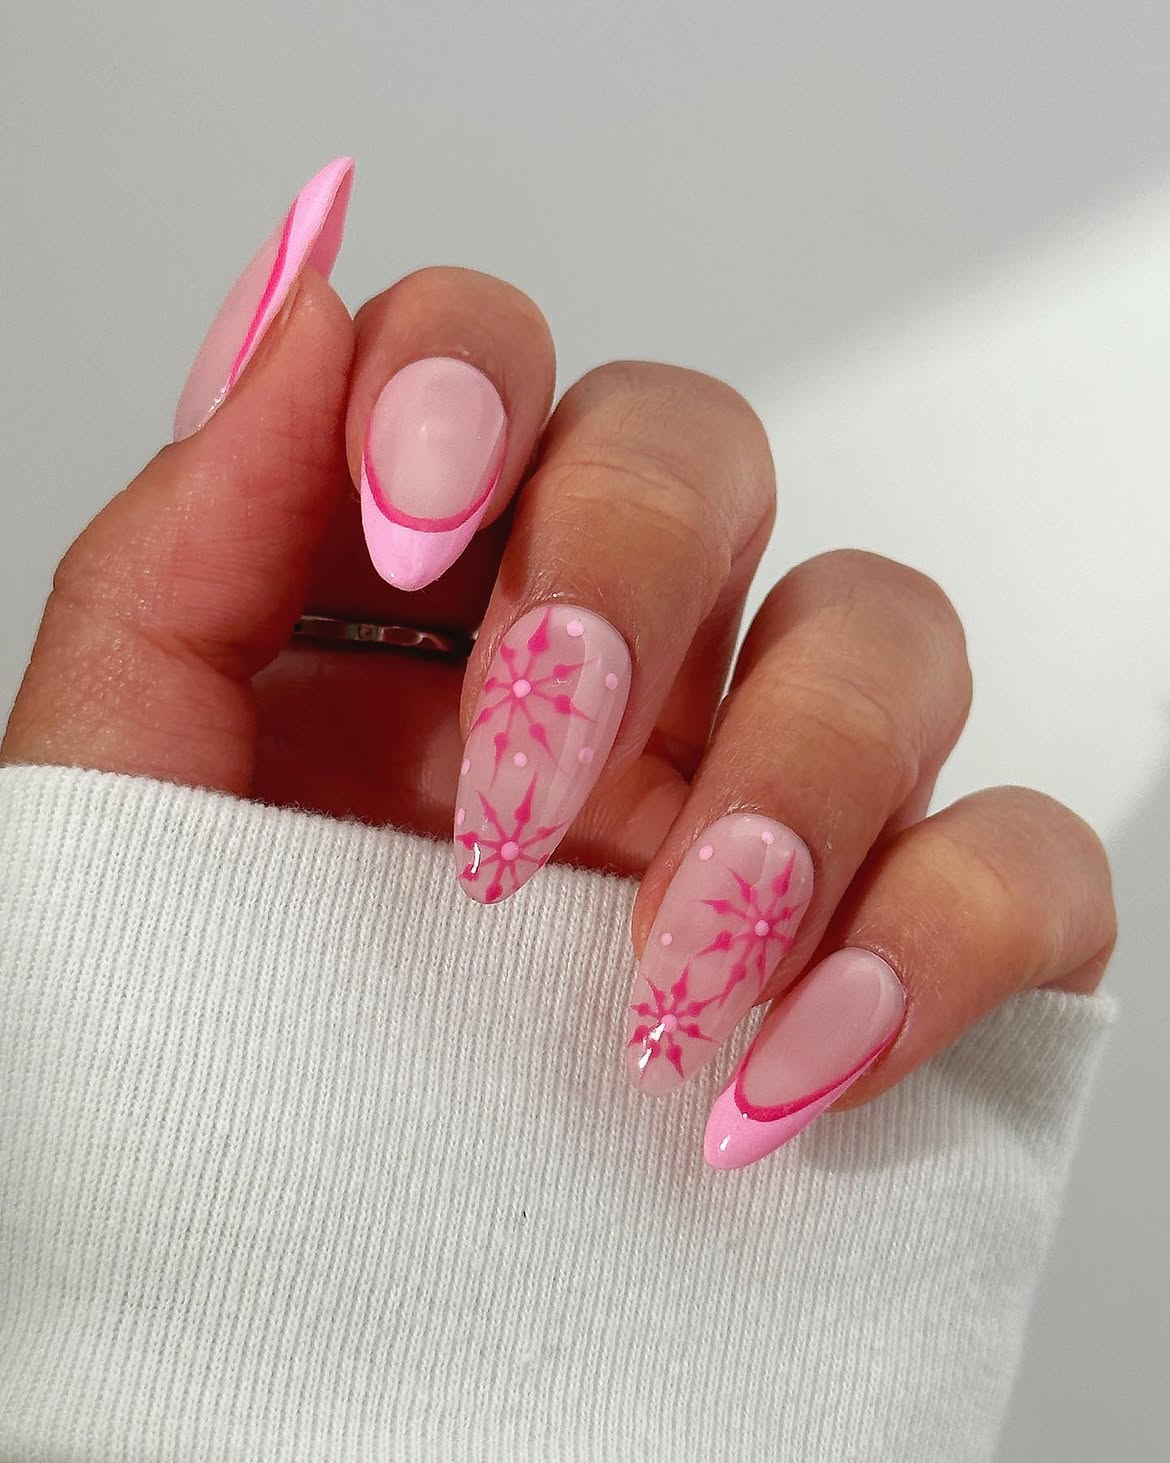
The bright pink snowflakes have long, pointed arms that look almost like little starbursts. They sit on two sheer blush nails with scattered pale dots. Around them, the other nails use light pink French tips traced with a deeper pink curve. That slim outline makes the soft tips much easier to see.
The same pink shades repeat across the snowflakes and tips, giving the long almond set a clear pattern. If you want a shorter version, keep one snowflake nail and use the outlined French tip on the rest.
💡 Tip for the outlined edge
Paint the pale pink tip first. Then trace its curved border with a slim line of deeper pink, using that same deeper shade for the snowflakes.
13. Pale Pink Winter Sprig and Heart Nails
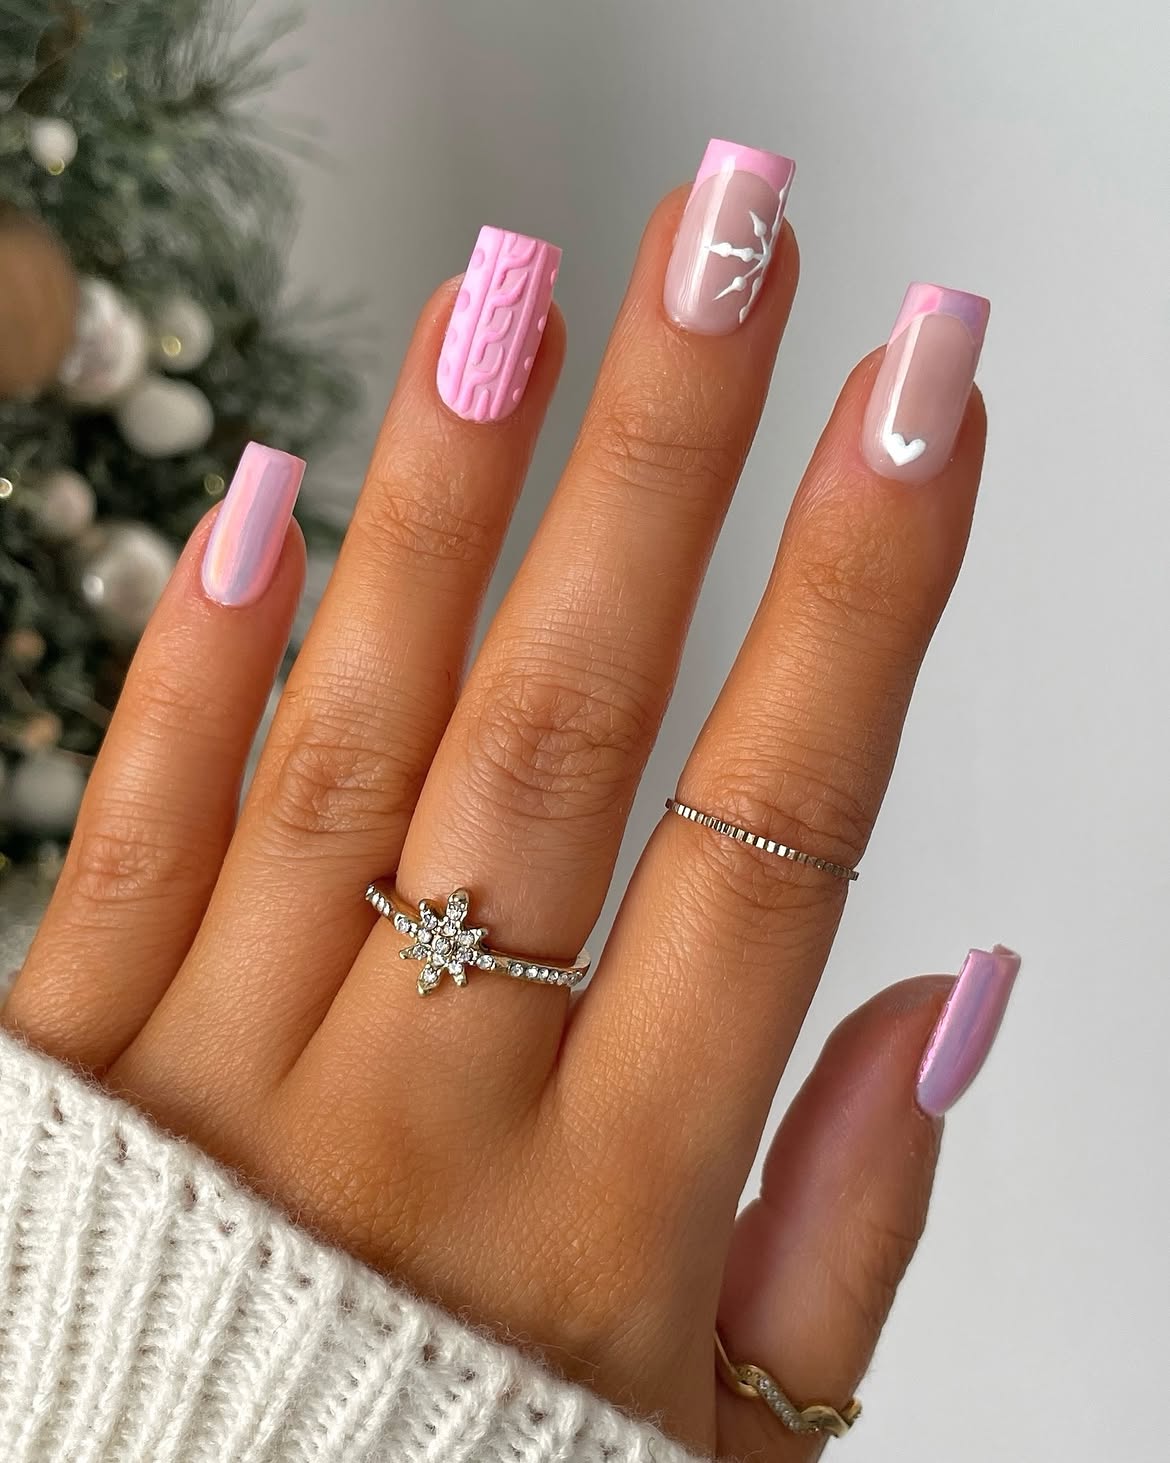
The tiny white heart is easy to miss at first, but it gives this pale pink set a gentle finish. Beside it, a white winter sprig runs along one sheer nail. A single raised cable pattern brings texture to another, while the outer nails have a smooth pearly sheen.
Soft pink French tips connect the small white details across the hand. Because the colours are close, their placement matters. Ask for the sprig along the side of its nail, leaving some clear pink space beside it. That keeps the fine leaves visible on the long square shape.
Fine line art
A sheer pink base gives the white sprig space to show.
Raised texture
Keep the cable pattern on one opaque pink nail.
Soft sheen
Use smooth pearly pink nails around the detailed accents.
14. Hot Pink Snowflakes With a Glitter Edge
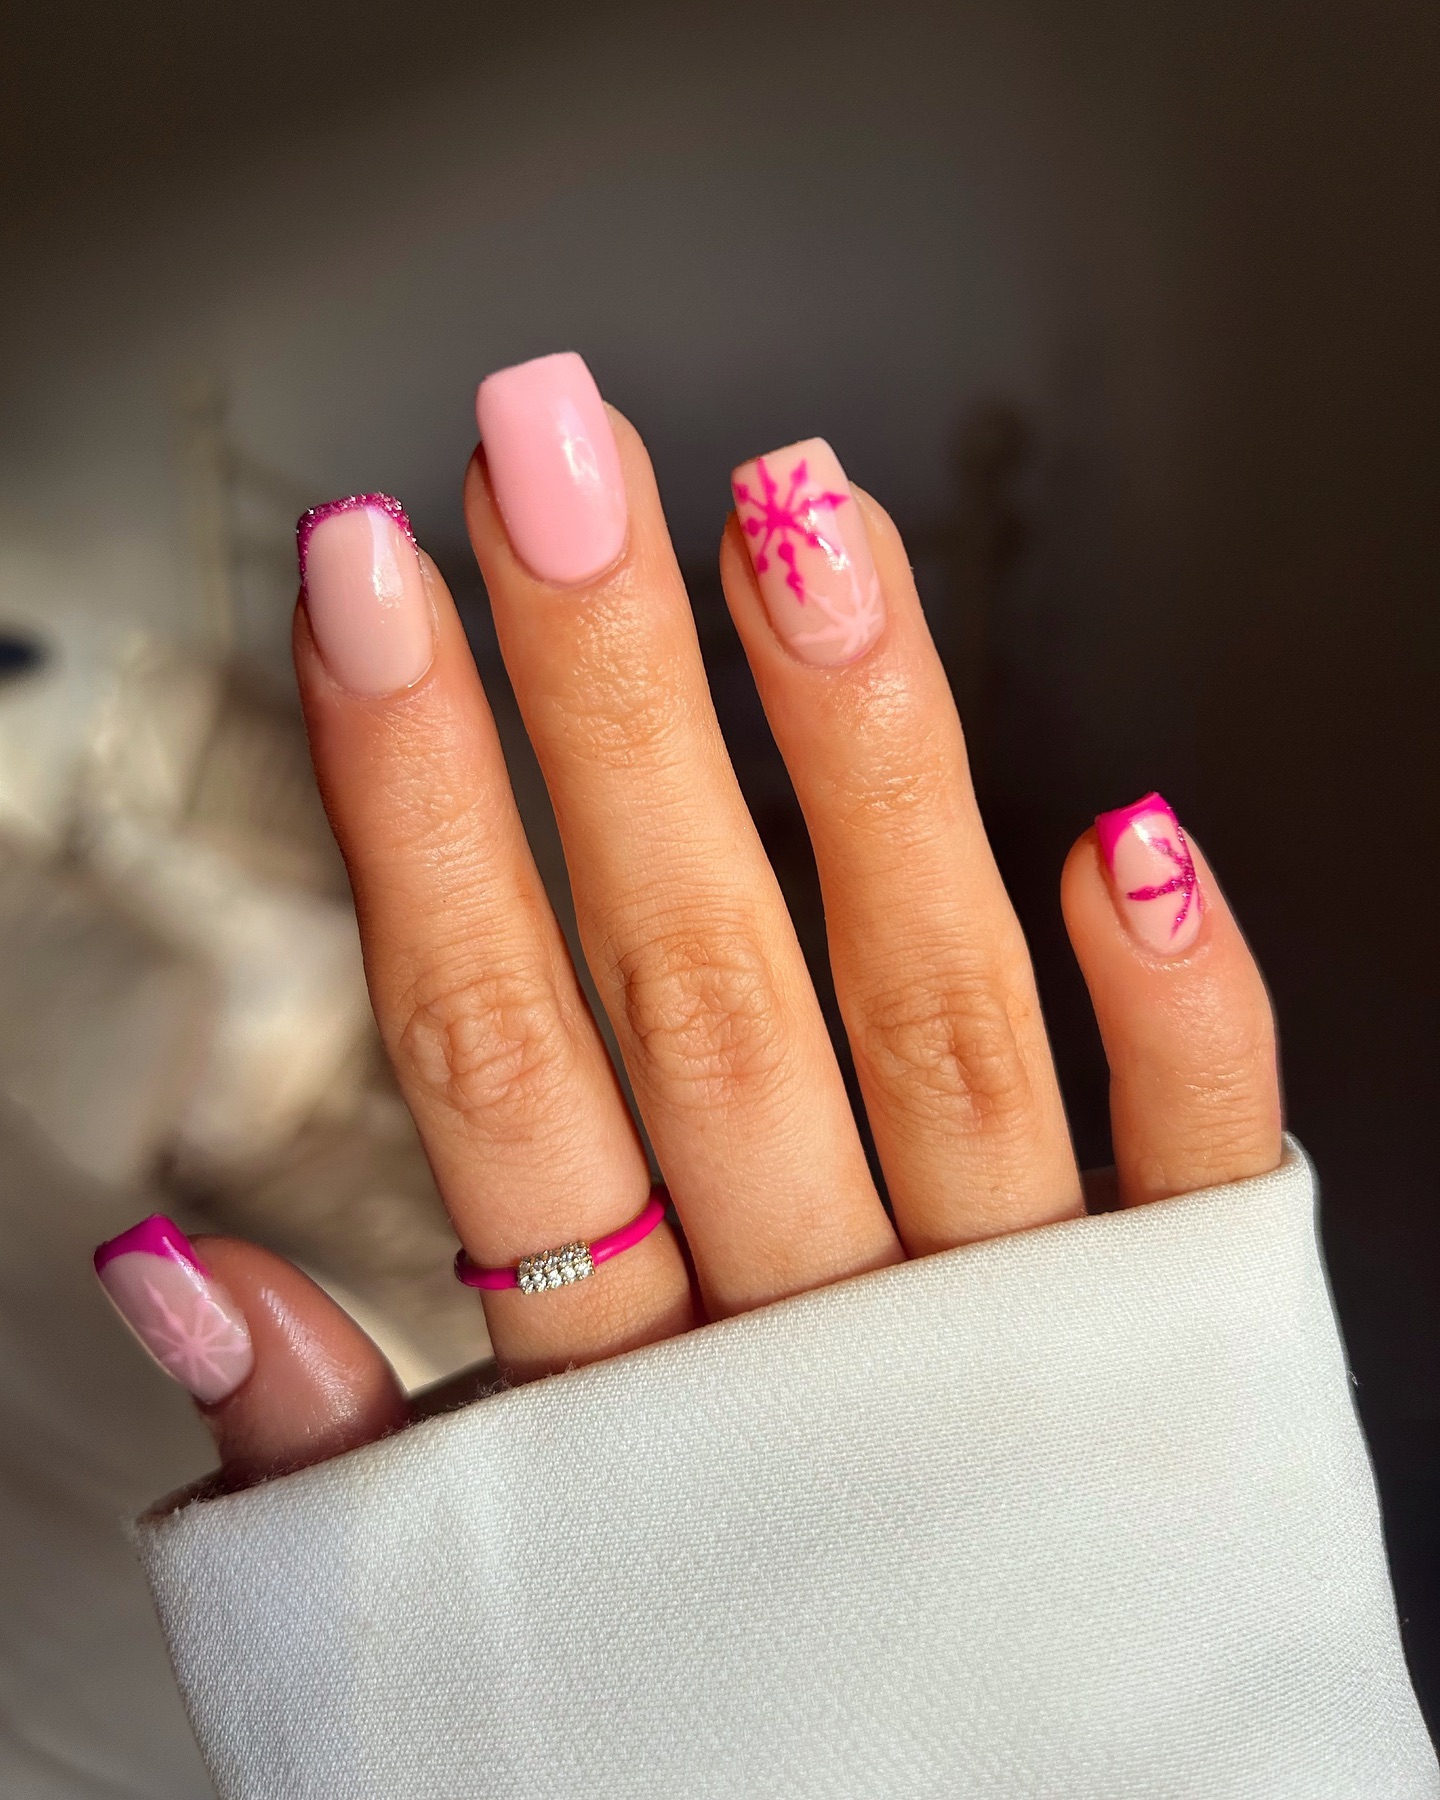
One nail is painted solid baby pink, giving the brighter details around it some space. A narrow fuchsia glitter edge follows the square tip of another nail. The ring finger has a bold hot pink snowflake and a softer pale one over a sheer base. The thumb and little finger bring that stronger pink back at their tips.
The square shape makes the thin glitter edge look especially sharp. If you recreate this set, keep the large snowflake on a translucent nail and leave one nail plain pink. Both details help the fuchsia art stand out.
15. Fuchsia Glitter Peppermint Mix
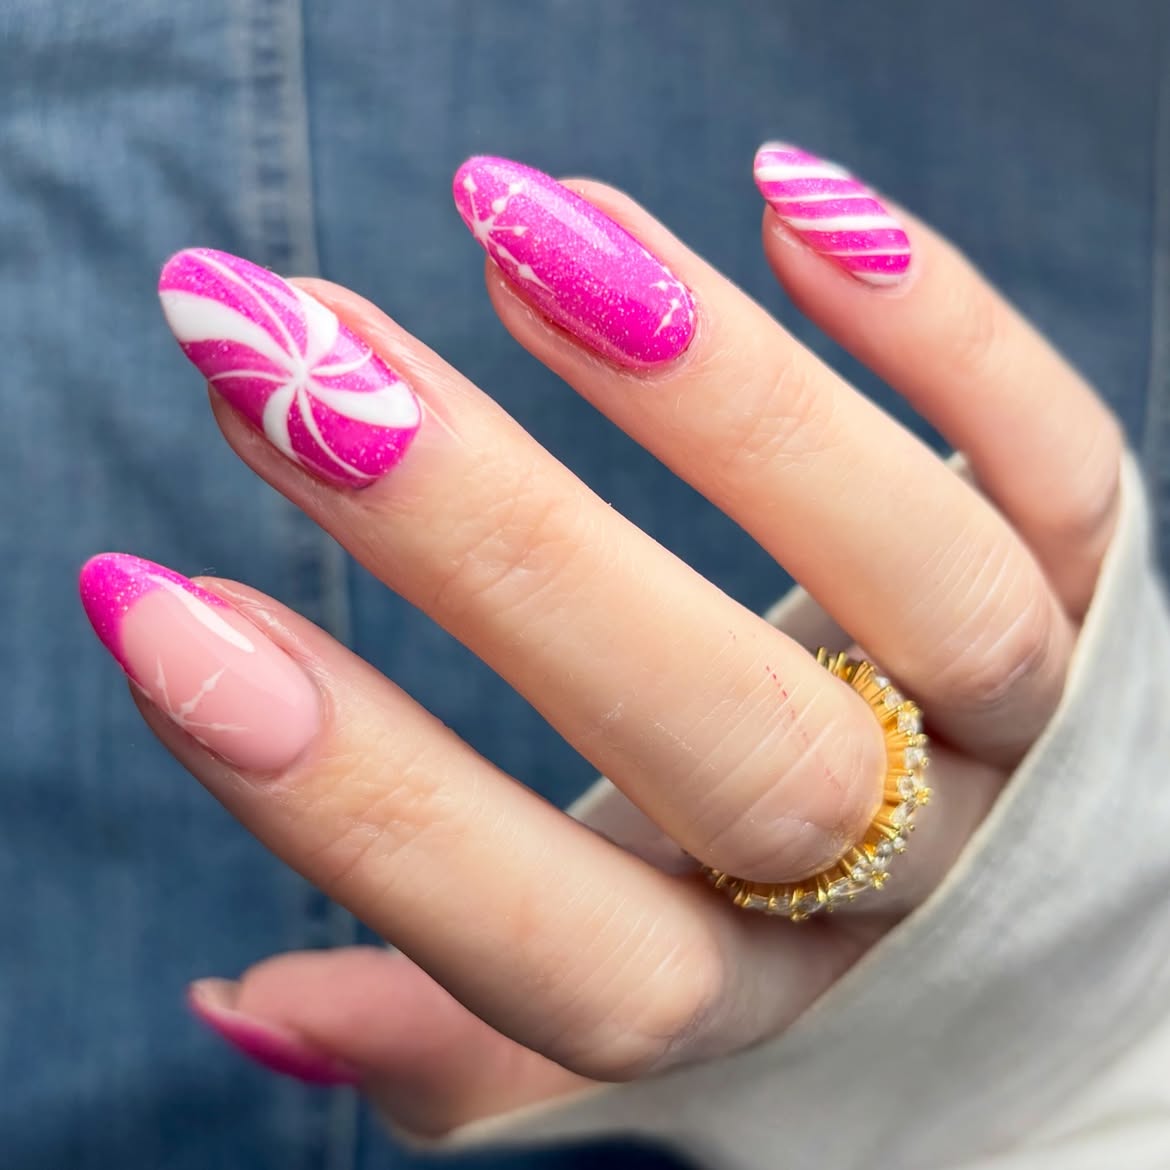
Fuchsia glitter gives these almond nails their bright Christmas color, while white details make each pattern easy to spot. One nail has broad peppermint swirls that meet near the center. Another has neat diagonal candy stripes, and the full glitter nail carries small white starbursts. A sheer blush nail with a fuchsia glitter French tip gives the set a softer moment.
To recreate the look, paint the broad white swirls first, then add the finer lines once they are dry. Keep the diagonal stripes evenly spaced and finish with a glossy top coat to smooth the painted details.
Design map
Four details that make the set
Mix bold candy patterns with one softer French tip.
Broad white curves meet over fuchsia glitter like a peppermint sweet.
Evenly spaced white bands run diagonally across another glitter nail.
Tiny white starbursts add a light detail to the solid glitter finish.
A fuchsia glitter tip sits over a sheer blush base for a softer finish.