How to Style White and Gold Christmas Nails for Festive Glam
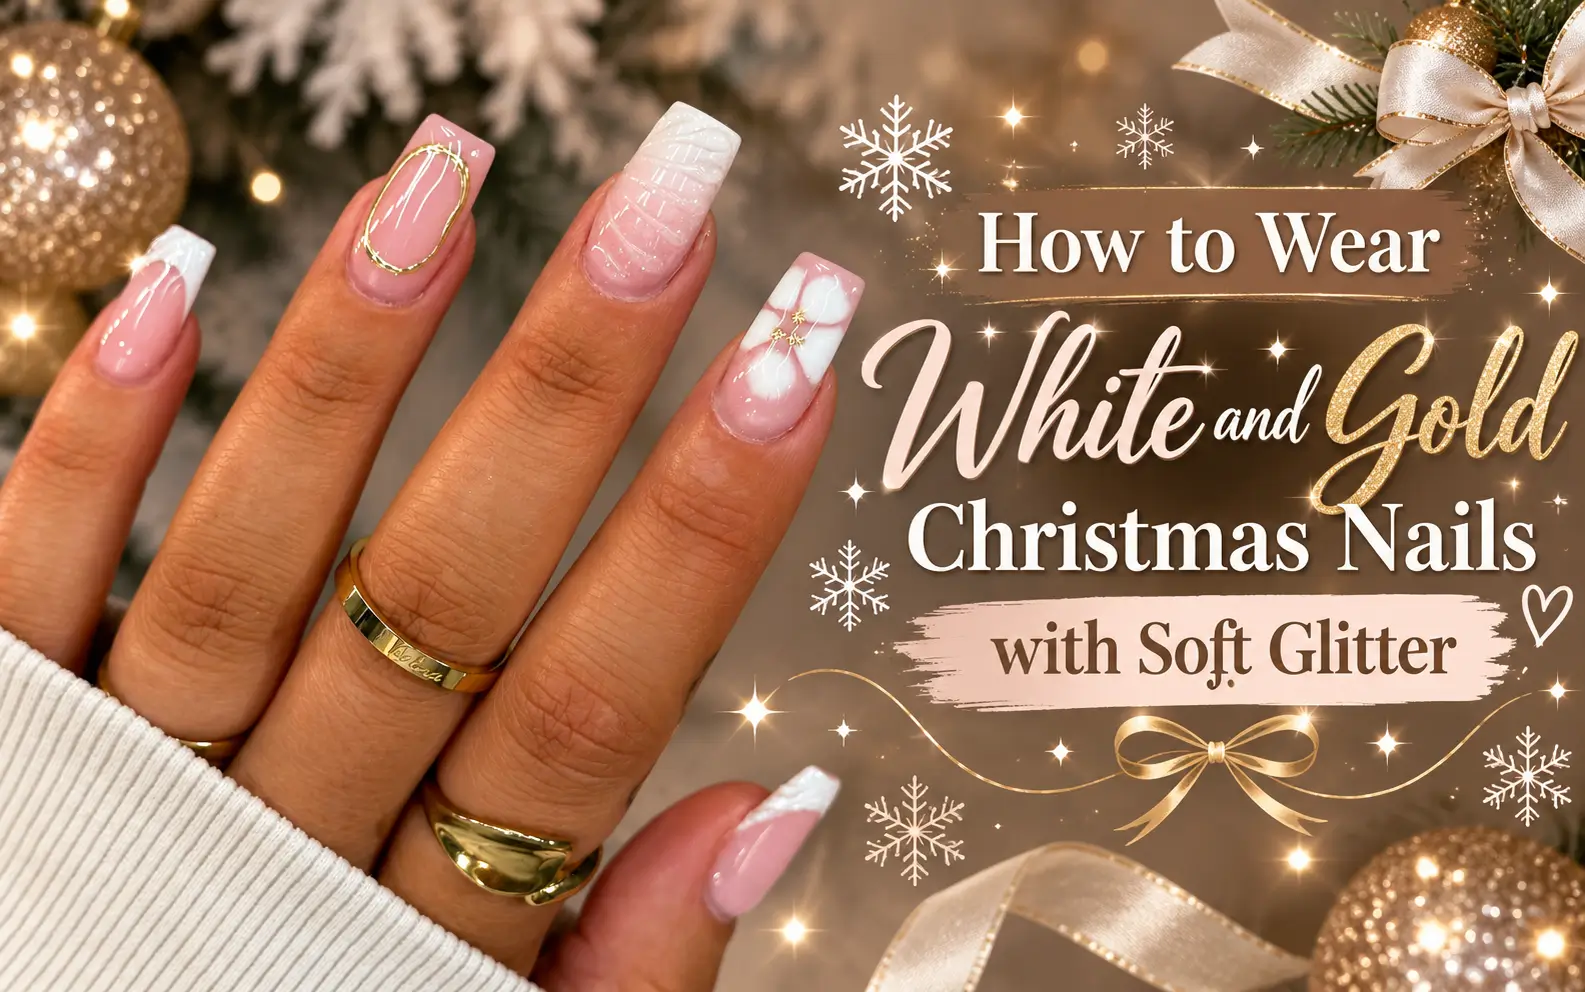
Holiday nails can feel festive without a drop of red or green. A soft white tip, a little gold glitter, or a tiny bow can be enough to make a manicure feel ready for Christmas. White and Gold Christmas Nails give you room to play with shine and detail while keeping the colors easy to wear.
The designs below show how different this palette can look from one set to the next. You will find short square nails with a gold snowflake, long ivory nails with beaded ornaments, sheer pink bases with white ribbon art, and glitter fades dotted with tiny stars. Some designs use only a fine gold line. Others let a whole nail sparkle.
As you browse, notice the details you would want on your own nails and how they might fit your usual length. Save the designs you like so you can show your nail artist the shape, finish, and placement you have in mind.
14+ White and Gold Christmas Nails Designs 2026
1. White Ribbon and Gold Glitter Christmas Nails
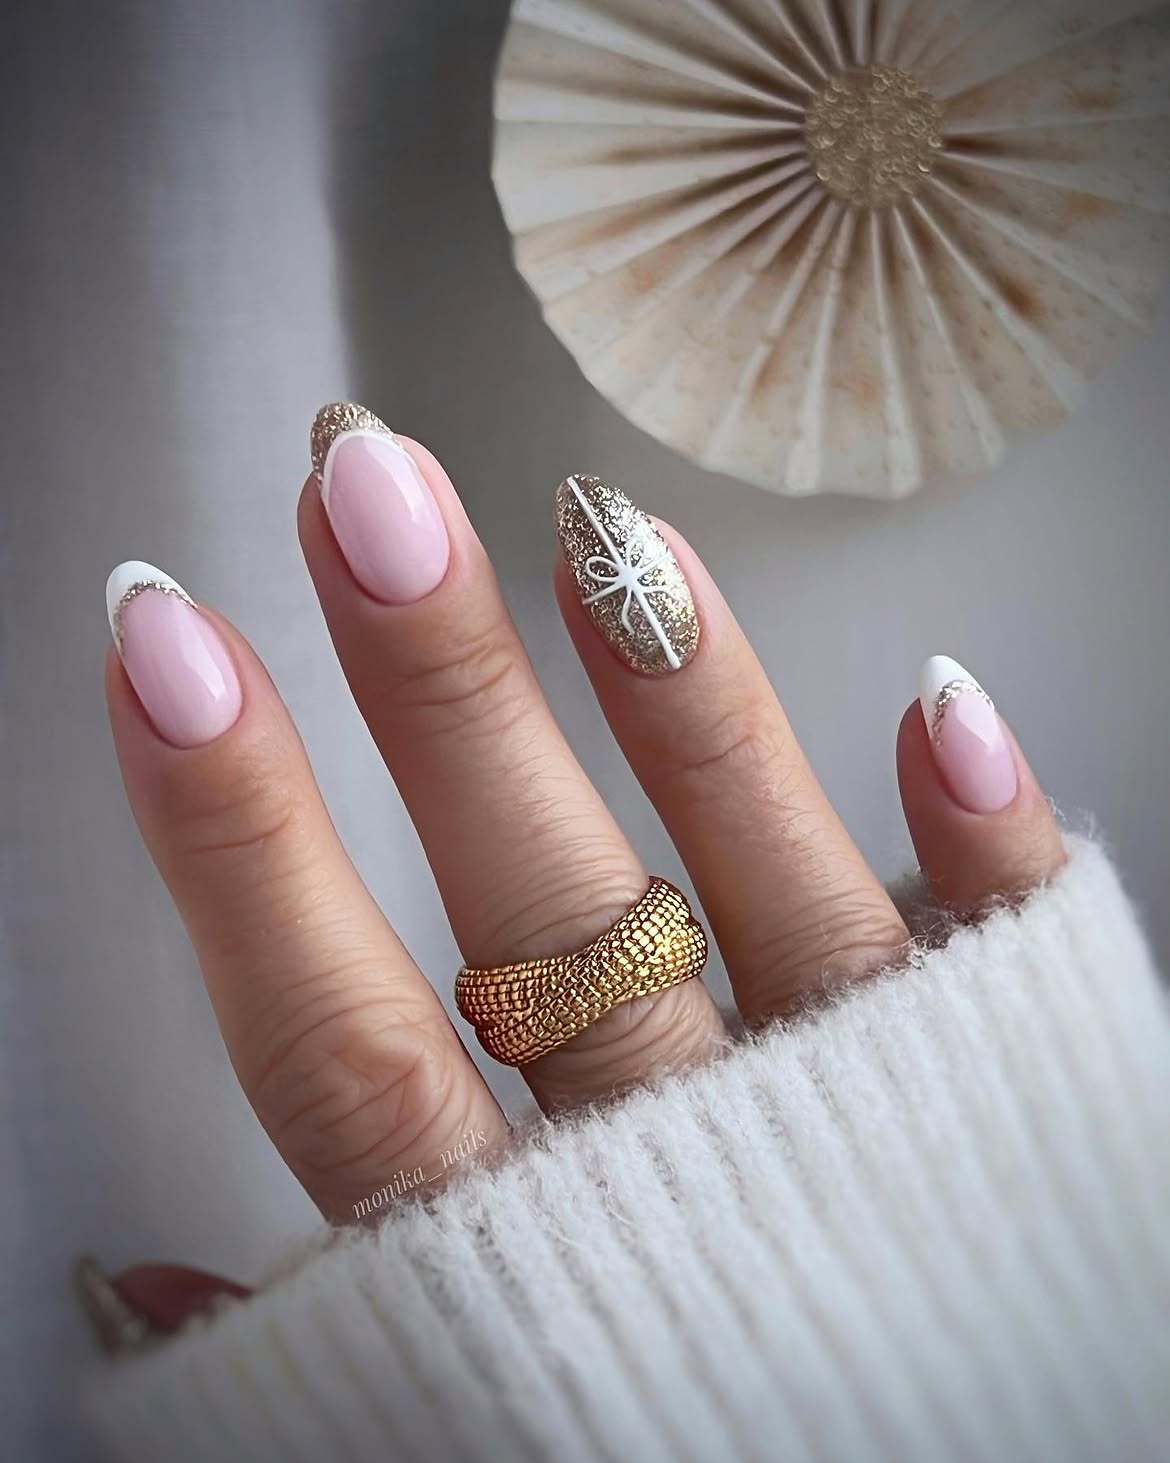
The white bow makes the gold glitter nail look like a tiny wrapped gift. Around it, the sheer pink base keeps the manicure soft, while white French tips and thin gold edges carry the festive detail across the other nails.
One nail has a glitter tip instead of a white one, which breaks up the pattern without making the set feel busy. The glossy finish works well with the gold ring and cream knit shown in the photo. If you want to recreate it, keep the bow on just one nail so its fine white lines stay easy to see.
How to ask for this manicure
Start with a sheer pink base and a glossy finish.
Add white French tips with fine gold glitter along their lower edges. Give one nail a glitter tip.
Cover one accent nail in gold glitter, then draw a slim white ribbon and bow over it.
2. Milky White Christmas Nails with Fine Gold Details
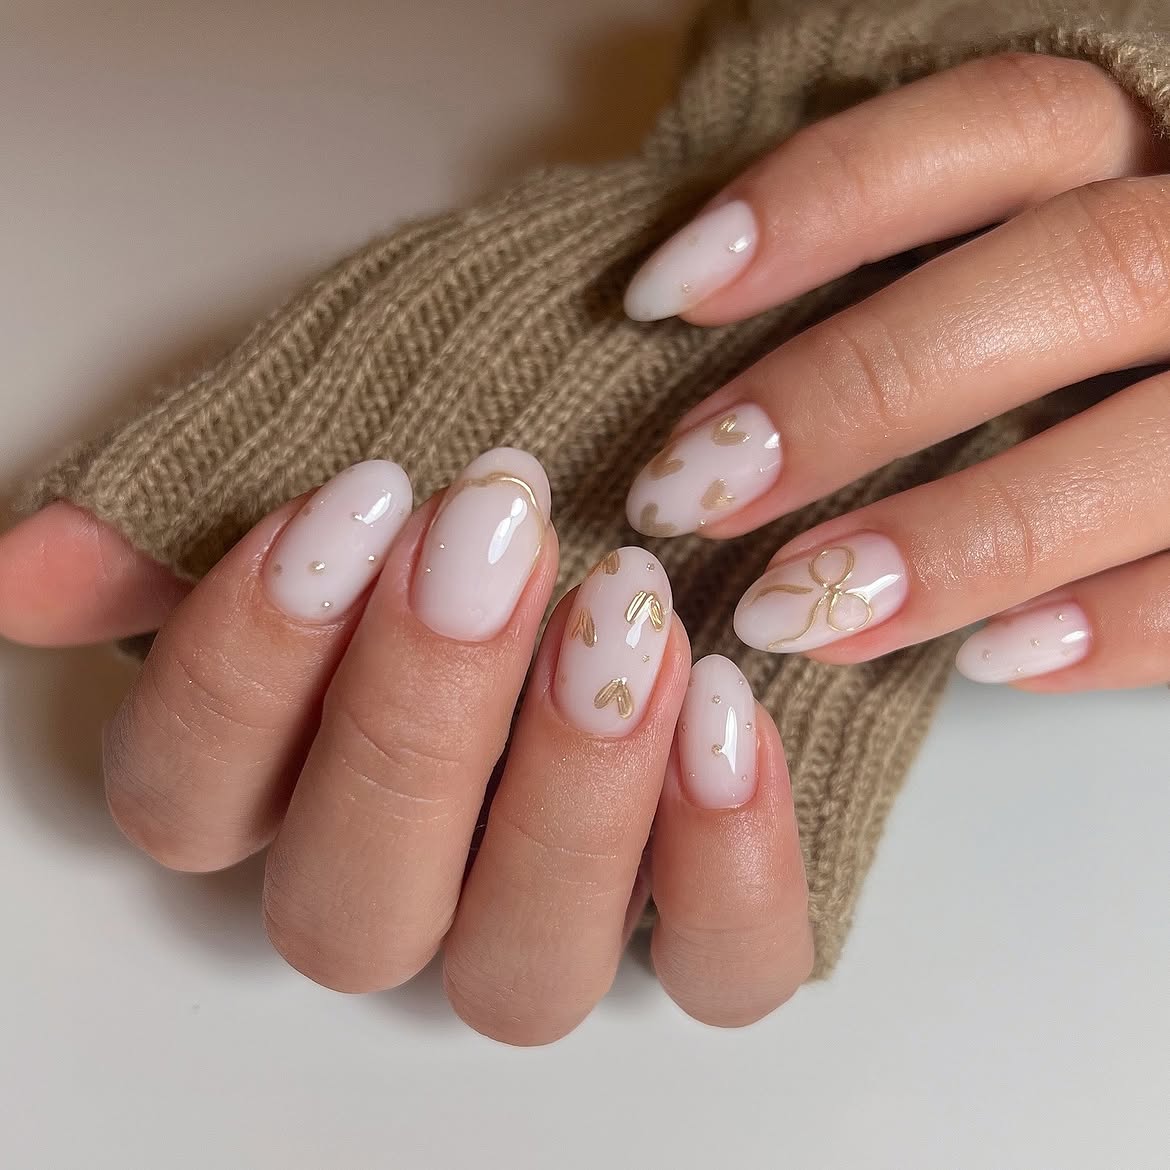
Gold takes a quieter route in this set. A milky white base covers the almond shaped nails, leaving room for small metallic details to stand out.
- Tiny gold dots add shine without covering the pale base.
- A curved gold line follows one nail tip.
- An outlined bow draws the eye, while scattered gold marks keep the other nails from looking plain.
The open space around each detail gives this manicure its soft look. If you show the photo to your nail artist, point out the thin lines and the space between the accents. Those details matter more here than adding extra glitter.
Style this softer gold look
Cozy clothes
Pair with cream or beige knitwear for a gentle winter look.
Holiday outfit
Choose an ivory or champagne outfit to pick up the pale base and warm gold.
Jewelry
Try a plain gold ring so the small nail details stay easy to see.
3. Pearly White Nails with Scattered Gold Foil
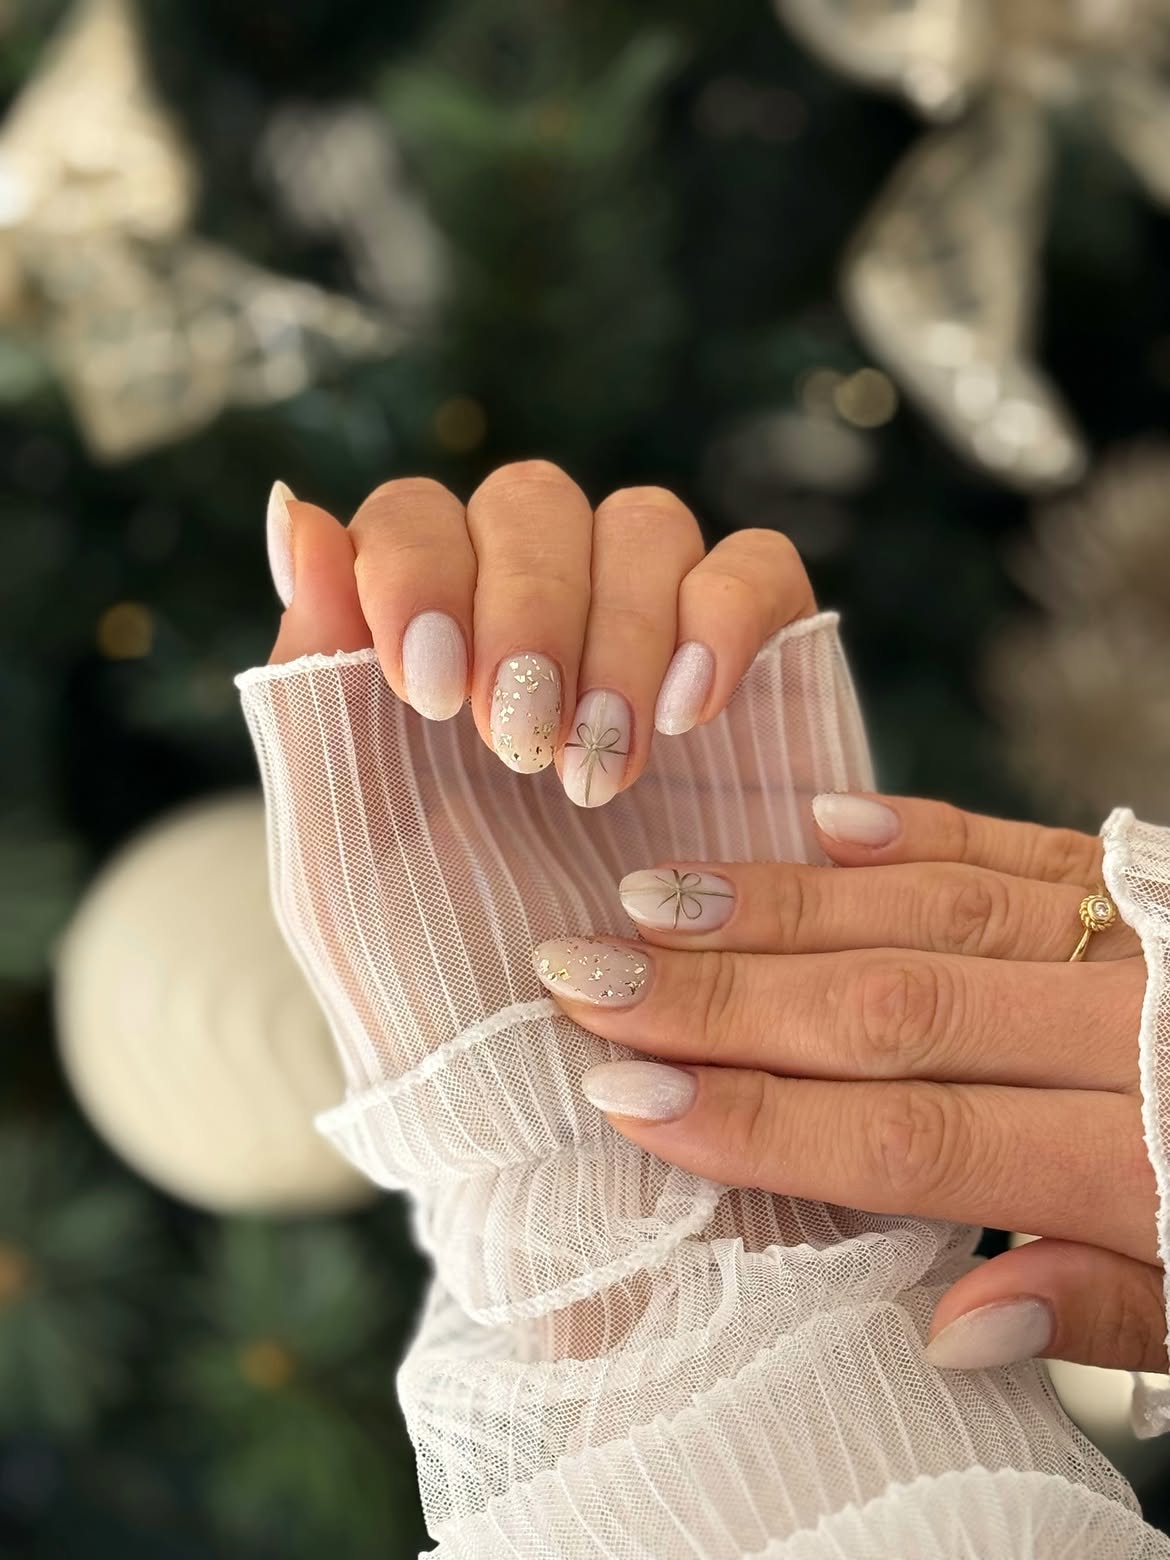
These nails use shine in two ways. Several have a smooth pearly white finish that catches the light softly. On the accent nails, small gold flecks sit over a sheer blush base with space between them. Thin gold bow outlines connect the two finishes without making every nail identical.
The scattered flecks are the detail to point out if you take this photo to a nail artist. Ask for small, uneven pieces rather than a solid coat of gold. The rounded shape and light colors suit the delicate white sleeves in the photo. For a quieter version, you could keep the foil to one nail on each hand.
| Pearl shimmer | Gold foil |
|---|---|
| Gives the solid white nails a soft, even glow. | Creates small, uneven flashes of shine on the sheer nails. |
| Ask for a fine shimmer that leaves the white looking smooth. | Ask for gaps between the flecks so the pale base still shows. |
Gold works beautifully with white, while 17 Red and Green Christmas Nails offer a richer, traditional holiday color mix.
4. White Sweater Christmas Nails with a Gold Frame
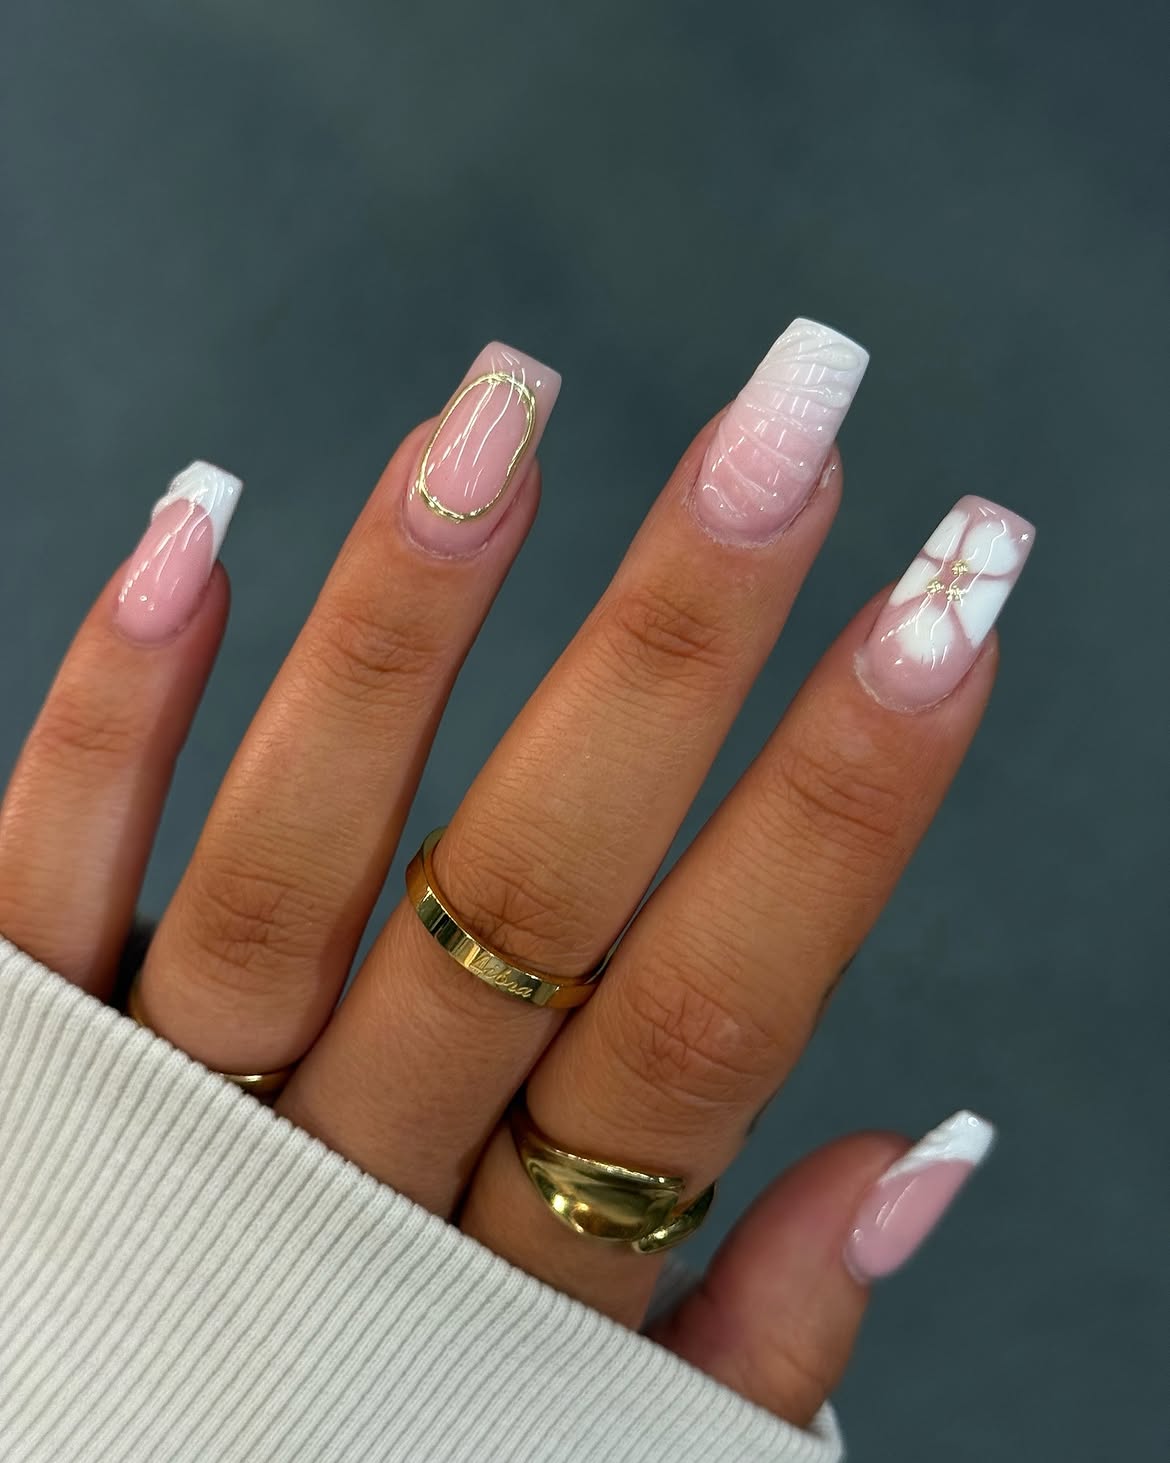
The raised white pattern is the detail to notice here. Its ridges look like knit fabric against the glossy blush base. A thin gold oval frames a separate nail, giving the set a second focal point.
White French tips keep the longer square nails connected. Another nail carries a fine white ribbon design with a small gold center. Each detail has its own space, so the mixed designs are still easy to see.
To recreate this look, keep the pink base sheer and the gold outline narrow. The textured nail needs room to stand out. The white cuff and gold rings in the design also give you a simple way to style the manicure for winter.
✅ Keep the details clear
Give the raised sweater pattern its own nail.
Use a slim gold outline so the pink center remains visible.
📌 Leave some space
Keep the knit ridges free of extra gold details.
Let the French tips stay simple beside the accent nails.
5. Jeweled Christmas Nails with White and Gold Swirls
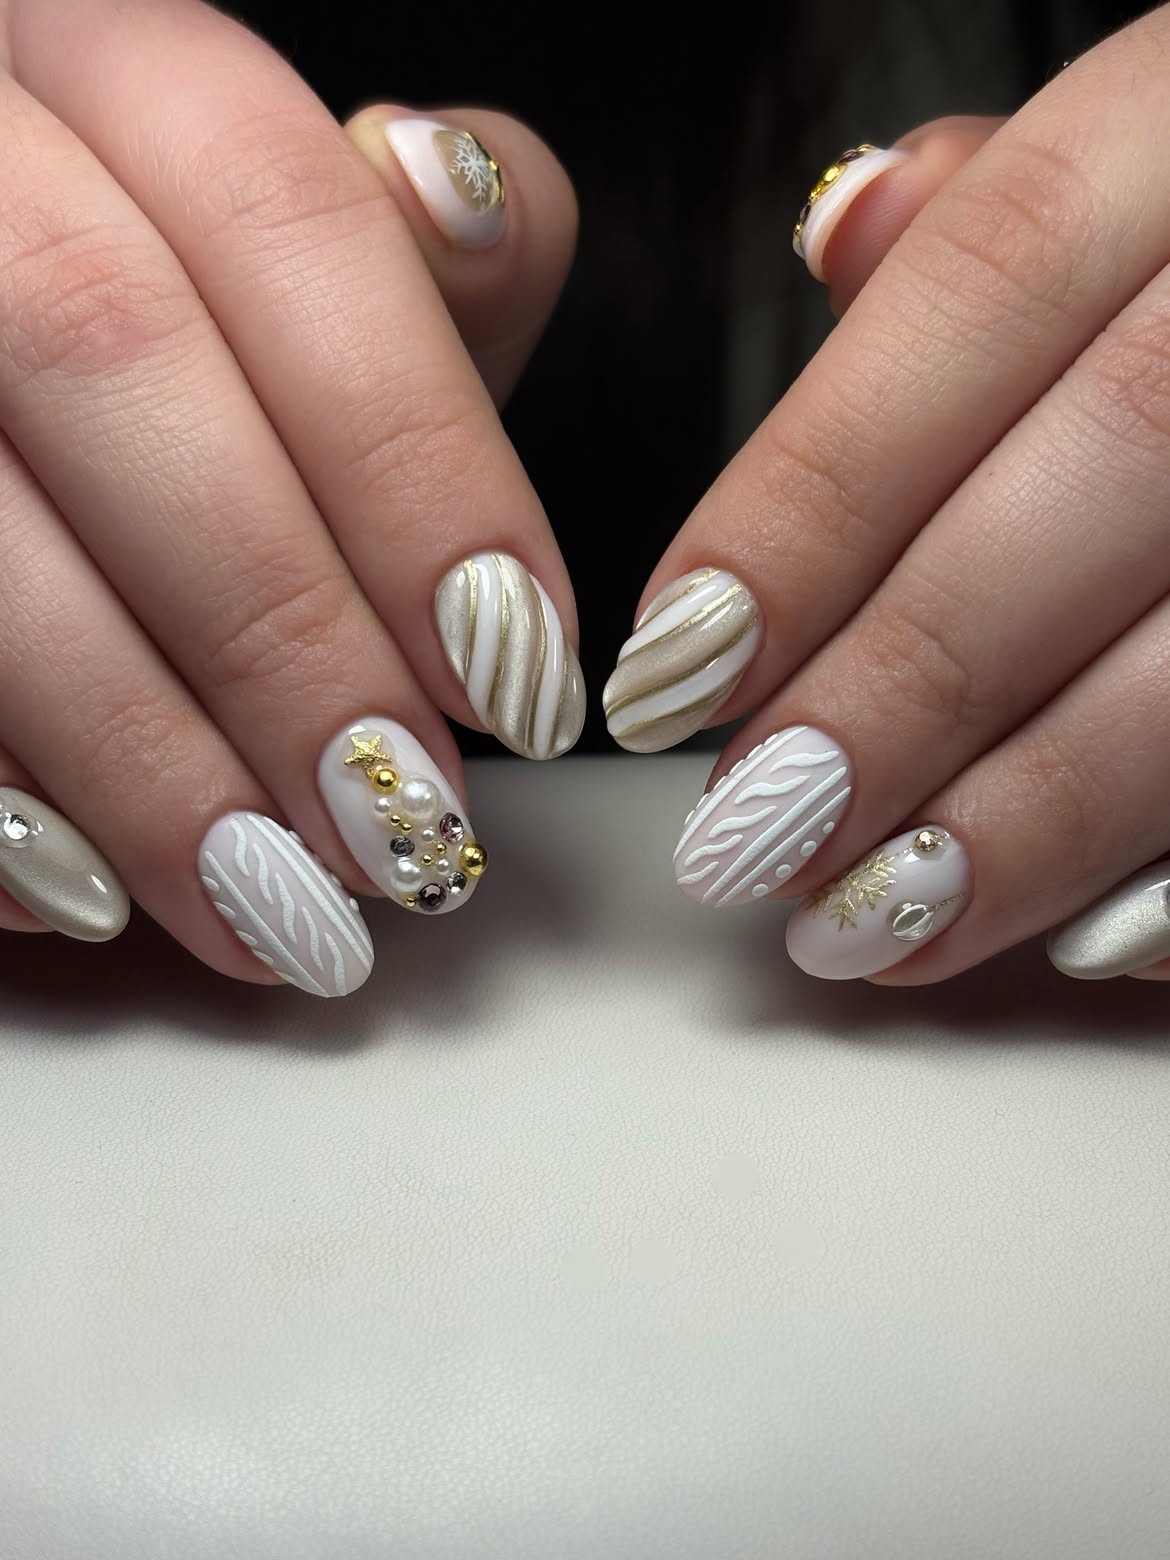
A small gold star sits above pearl like beads and reflective stones on one nail. Together, they suggest a tiny Christmas tree. The other hand has a finer gold ornament detail, so the two hands coordinate without matching nail for nail.
Curved white and gold bands bring movement to the set. Raised white strokes add texture, while the smooth pearly nails give the eye a place to rest. Keeping all those details in white, cream, and gold helps them sit together.
If you use this design as a salon reference, show both hands. The placement of the jeweled nail matters as much as the colors.
6. White French Nails with a Metallic Christmas Tree
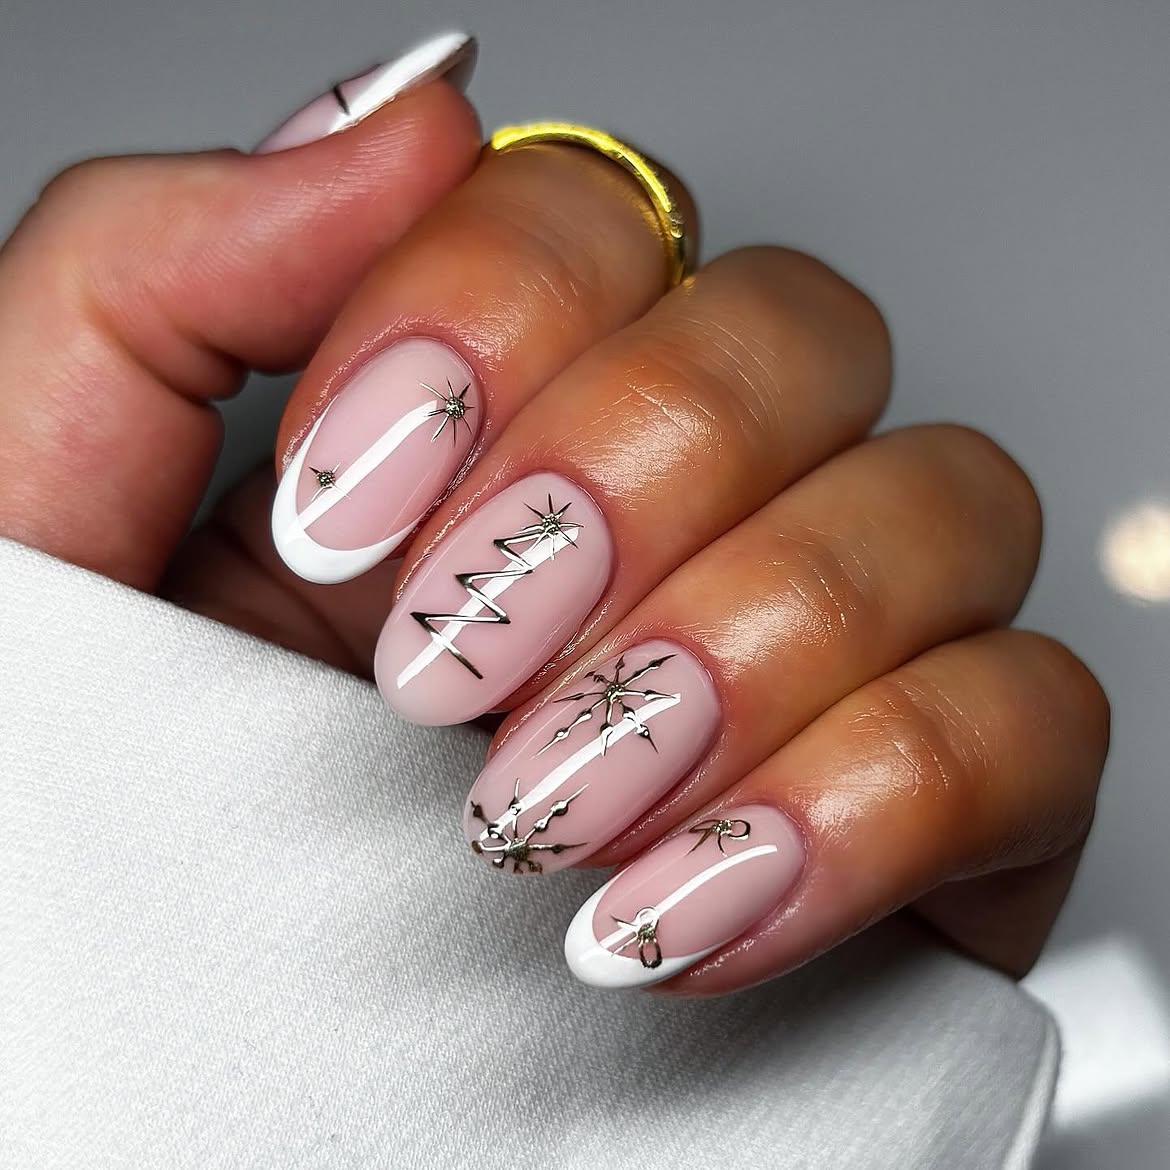
A zigzag tree makes this set feel like Christmas without red or green polish. It sits on a sheer pink nail with a tiny metallic star at the top.
- Curved white tips frame the outer nails.
- Slim white strokes run through the design and connect the nails.
- Fine star and snowflake shapes fill the center nails without hiding the pink base.
The open background gives each small shape room to show. If you recreate the set, keep the white curves narrow and the metallic lines fine. The tree will be easier to see that way, especially from a little distance.
💡 For shorter nails
Keep the zigzag tree on one nail and place a single metallic star on another. You can leave out the larger snowflake and still carry the same Christmas idea.
7. Short White Christmas Nails with a Gold Snowflake
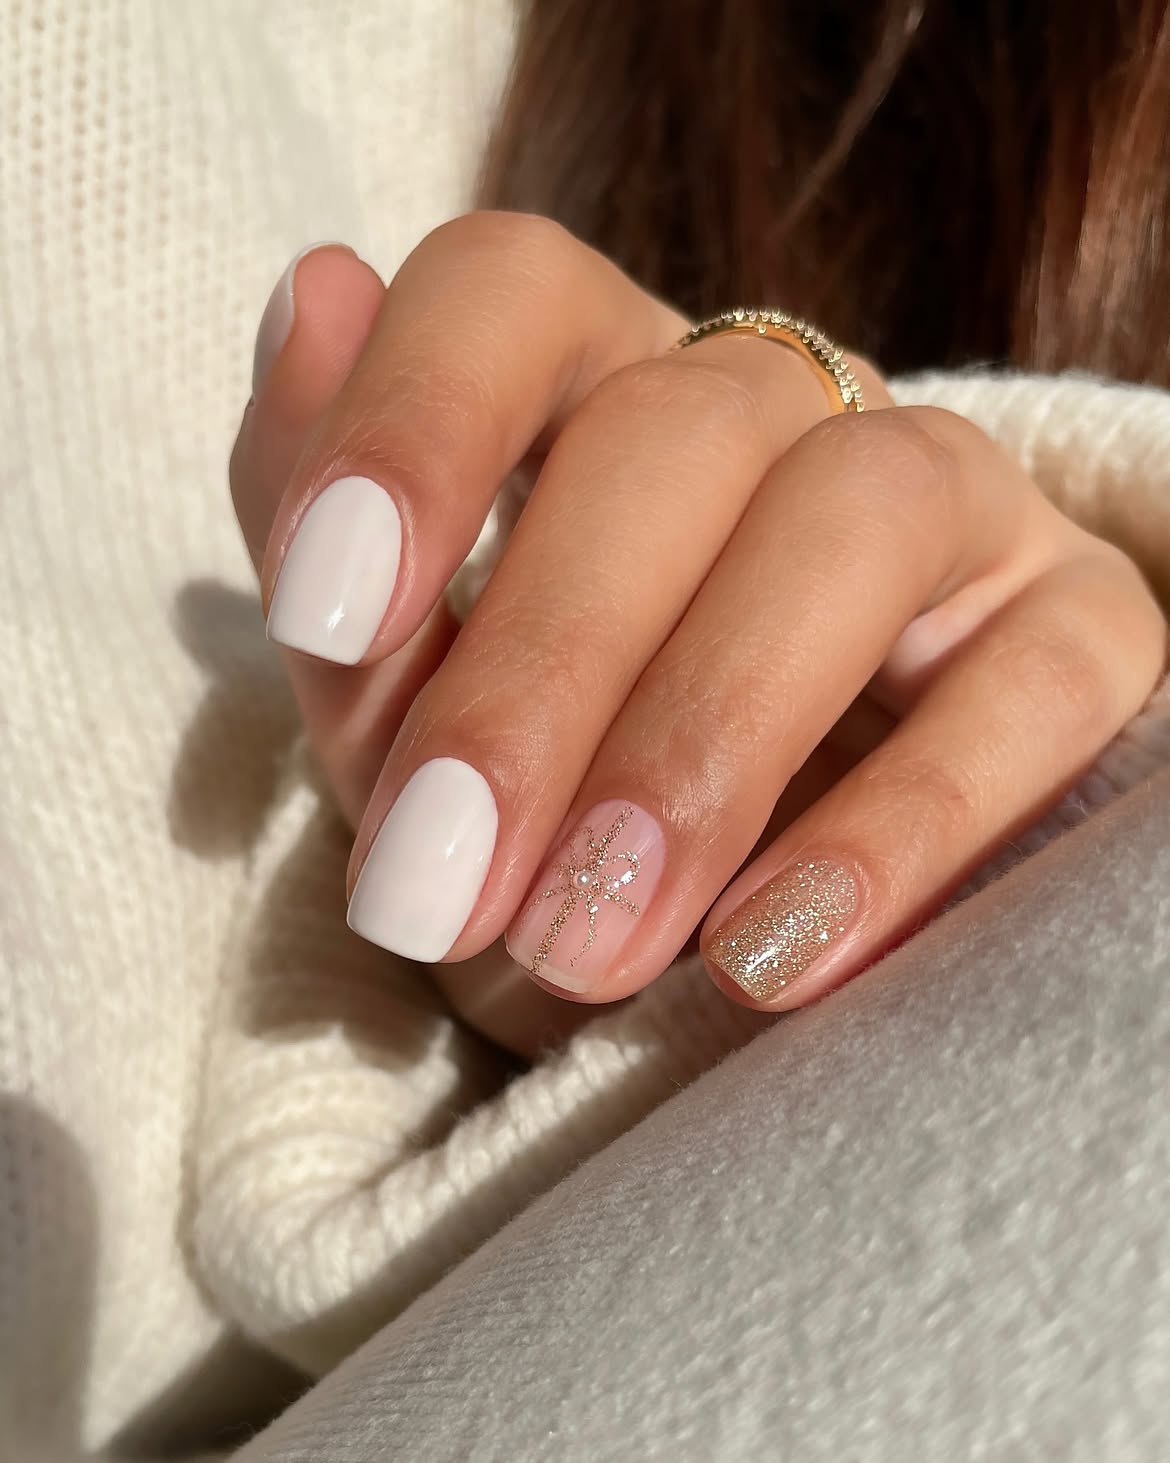
Short square nails let the color contrast do the work here. Two nails are glossy milky white. Another has a pale pink base with a fine gold snowflake and a small light bead at its center. The last nail is covered in champagne gold glitter.
The plain white nails give the snowflake space to stand out, while the glitter nail supplies plenty of shine on its own. This is a useful reference if you want Christmas nail art at a shorter length. Ask for a soft blush base beneath the snowflake so its thin gold branches remain clear.
Choose the shape
▣ Short square, as shown
The straight tips give the solid white nails a crisp edge. Keep the snowflake centered on its pink nail.
◯ Short round, a softer option
Keep the same white, pink, and gold placement. Scale the snowflake down so its tips have room near the nail edges.
8. White Candy Cane Stripes with Gold Holiday Accents
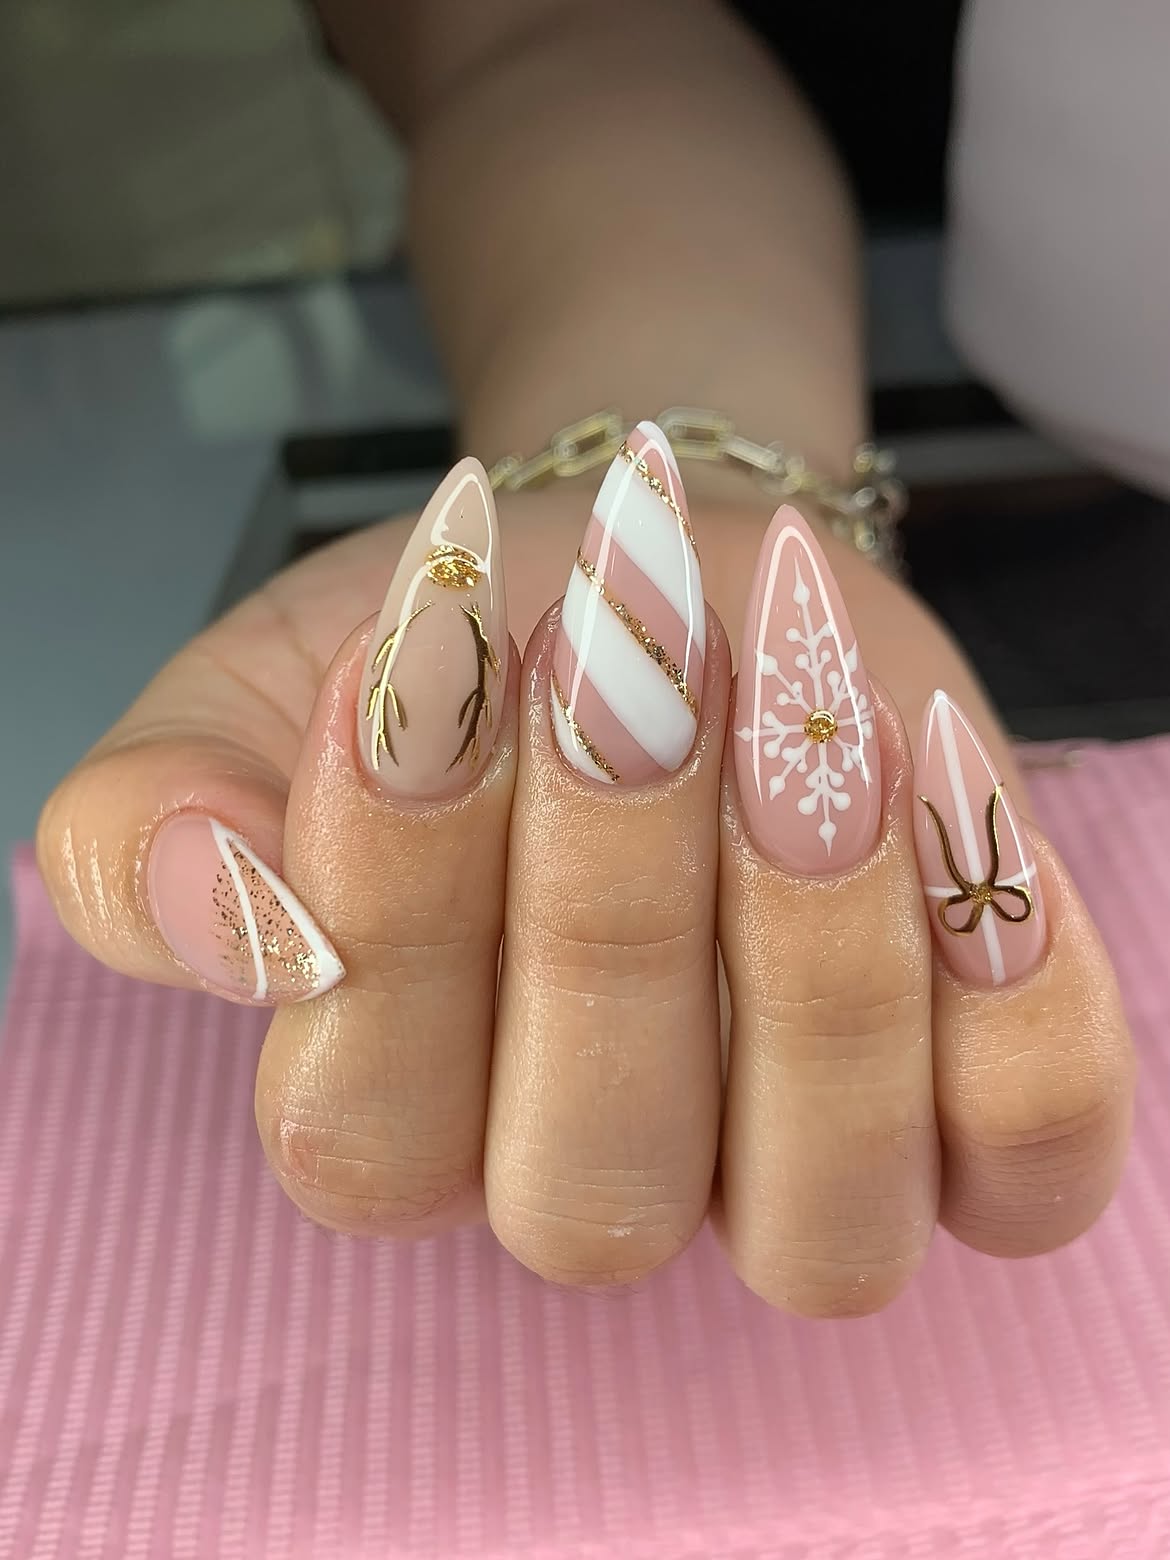
Each nail carries a different holiday detail. Wide white diagonal bands cross one long almond nail, with fine gold glitter tracing their edges. Beside it, a large white snowflake has a small gold center.
Look across the rest of the hand and you can spot a slim gold bow, gold lines that suggest antlers, and a slanted glitter section on the thumb. The sheer pink base leaves room around these designs, so the white shapes remain easy to see.
For a set like this, decide which design goes on each finger before the appointment. The large snowflake and diagonal stripes draw the most attention, so their placement sets the balance for the whole hand.
WHY THIS MIX WORKS
Repeat small gold details across the hand, then leave pink space around the larger white designs. The nails can have different motifs and still look like one set.
9. Gold Starburst Nails with White Corner Tips
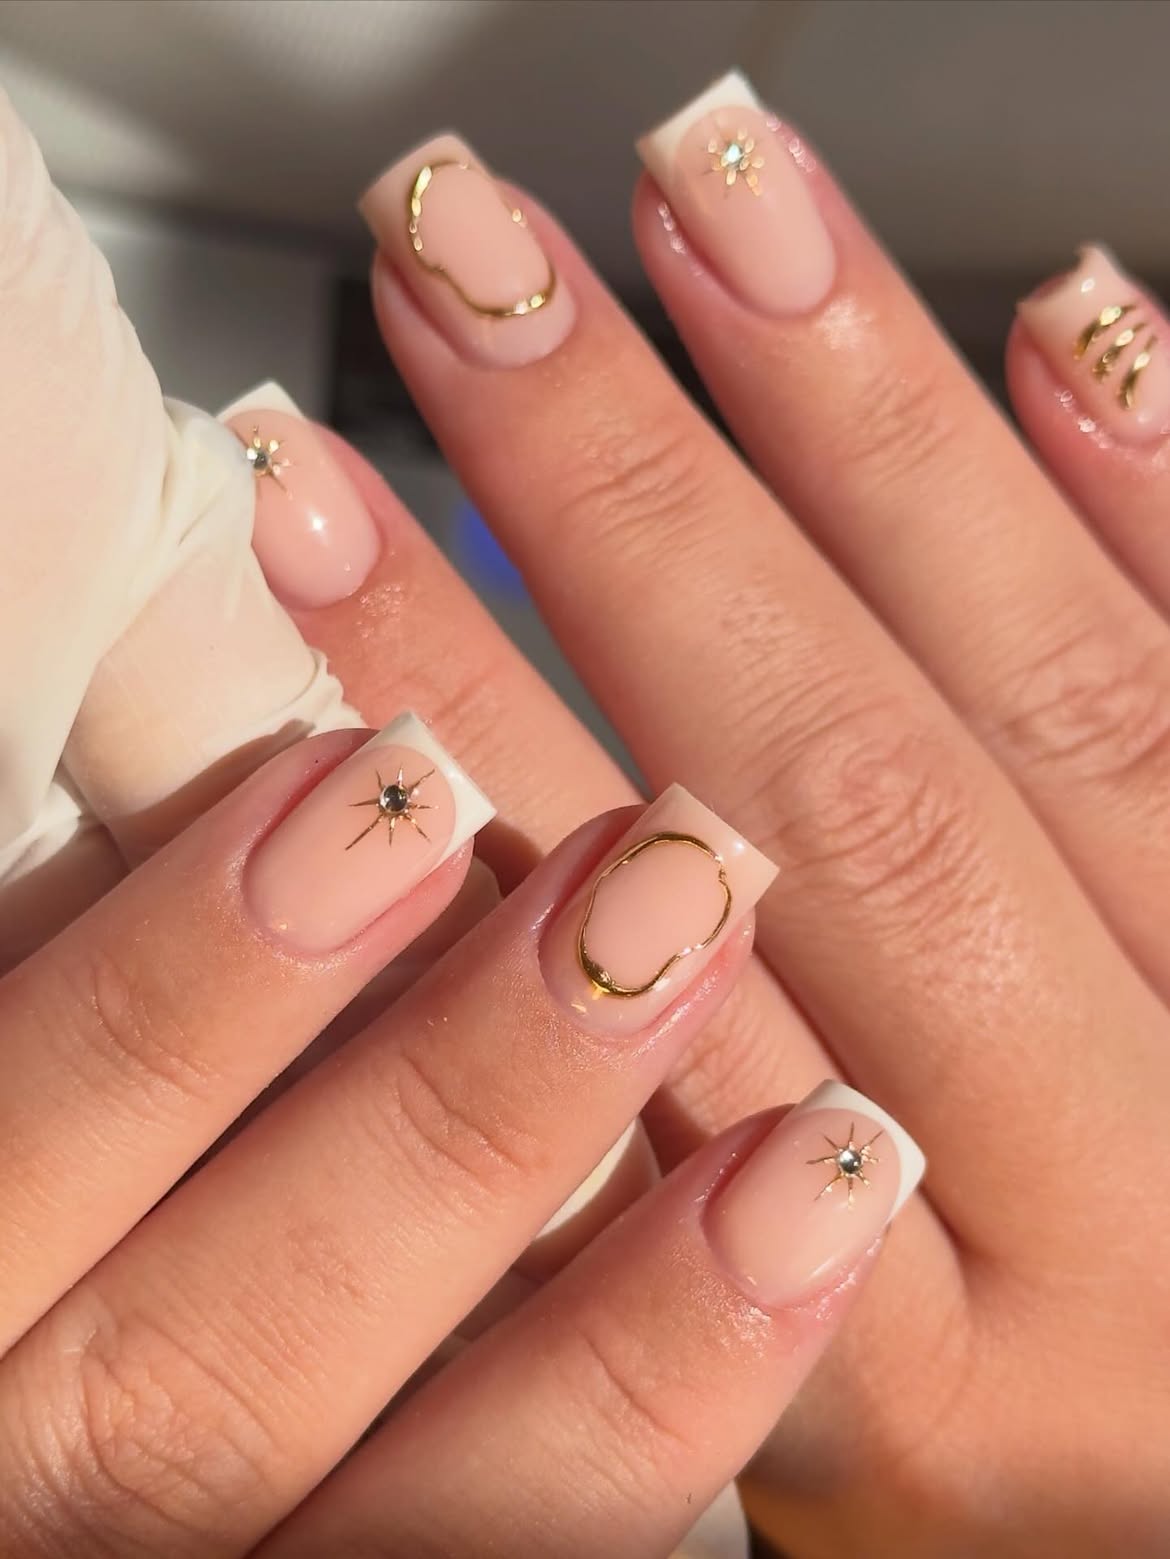
Little gold stars do most of the festive work here. Their fine rays spread from small reflective centers on a glossy pink base. Angled white tips give several of the short square nails a clean edge.
The gold details have space between them. One nail carries a starburst, another has a loose oval outline, and a smaller nail has curved gold strokes. The stars look like tiny holiday lights, which gives this set a different feel from the snowflake designs.
Keep the gold rays thin if you recreate it. Their shape is easier to see when the pink base remains open around each one.
Make a simpler version
Many of these white and gold looks begin with a soft pink base. See more ideas in these 15 Pink Christmas Nail Designs.
10. Diagonal Gold Glitter Nails with White Gift Bows
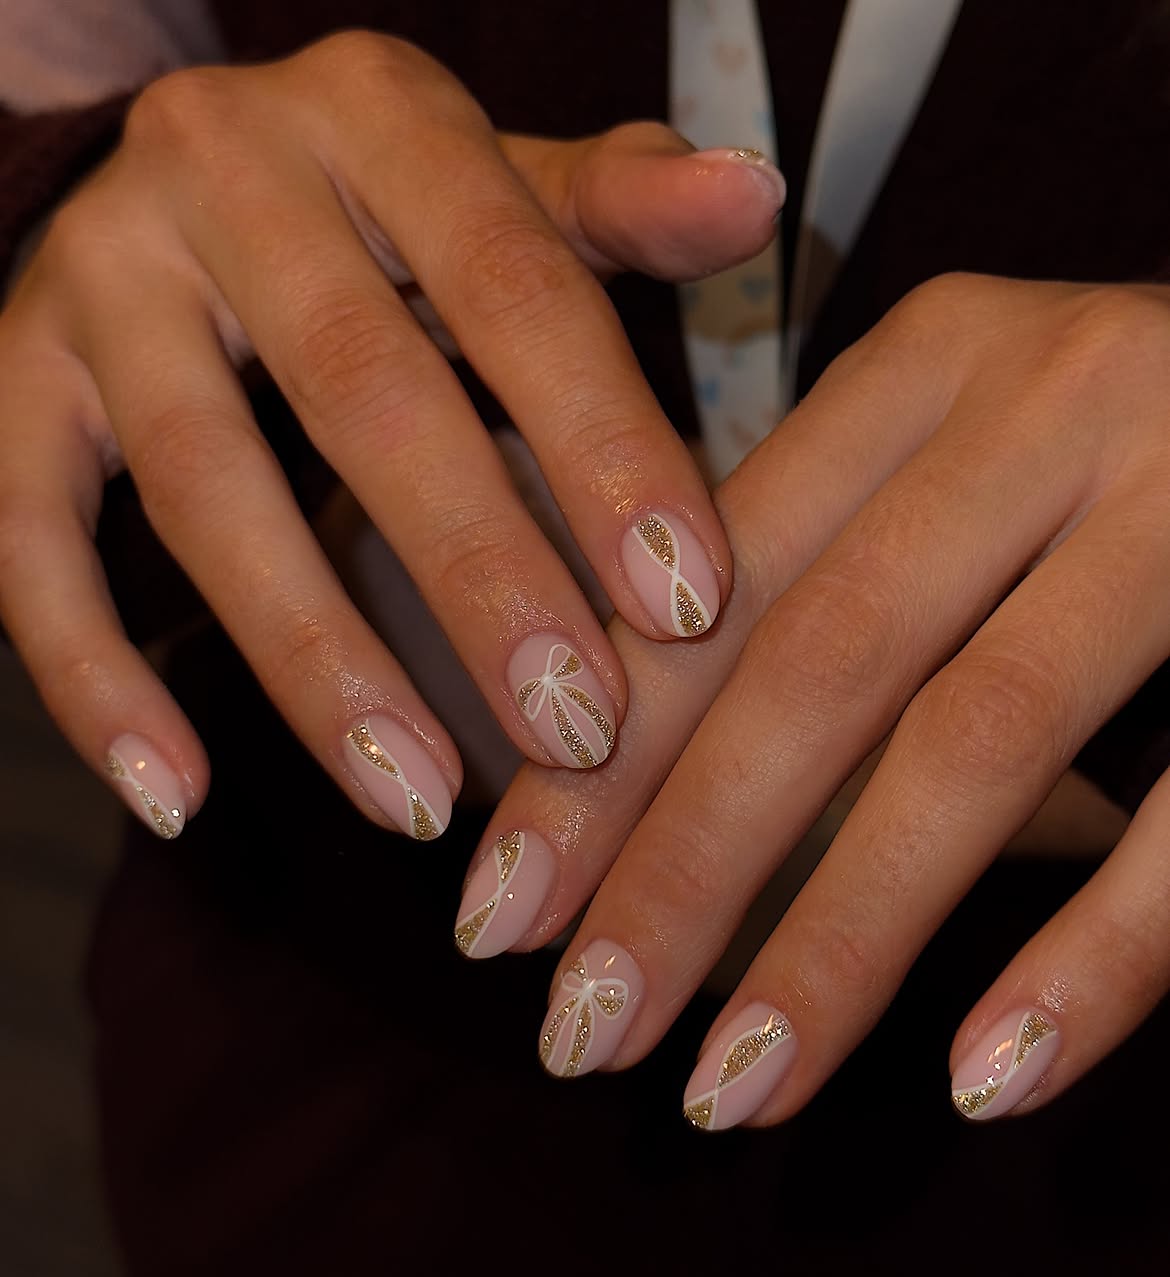
Slim gold glitter sections sweep across these nails at different angles. White curves border the glitter, while the pale pink base stays visible between the bands. Small dots fill a few of the open spaces.
A fine white bow appears on each hand, making the set look like wrapped gifts without placing a bow on every nail. The rounded shape gives the loops and diagonal strips enough room. If you recreate it, vary the angle of the gold from finger to finger. That small change keeps the repeated pattern lively.
Build the wrapped look
Start pale
Use a soft pink base that can show between the designs.
Angle the gold
Place slim glitter sections at varied angles, then trace them with white.
Add the bows
Draw a thin white bow on an accent nail of each hand.
11. Milky White Ombre Nails with Tiny Gold Stars
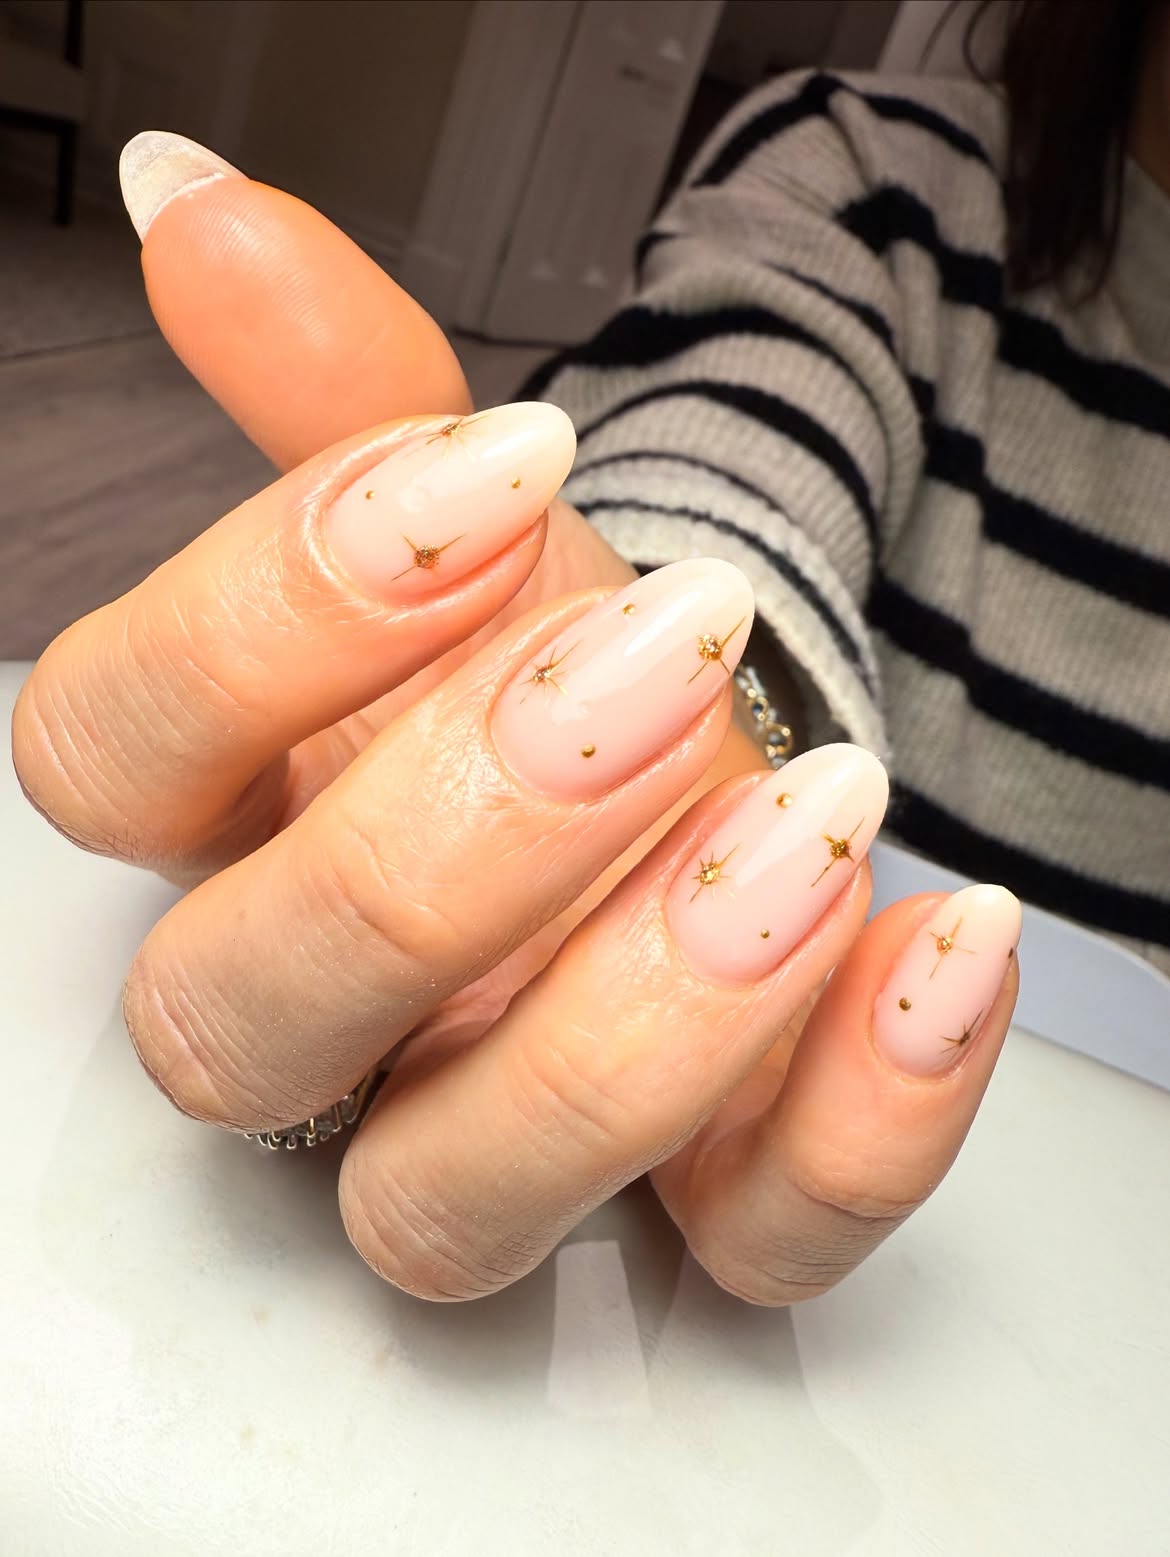
The soft white fade gives these stars room to shine. Each almond shaped nail moves from sheer pink at the base to milky white near the tip, with no sharp French line between them.
Gold starbursts and tiny dots sit at different heights across the nails. The repeated marks connect the set, while their loose placement keeps it from looking too uniform. The white still looks soft under the bright light, and the small gold points catch the eye.
Ask for the pink to white fade first, then add fine star rays and spaced dots. Leave plenty of the pale base uncovered.
✨ Keep the airy look
Vary the height of the small stars.
Place a few separate dots between them.
📌 Leave room for the fade
Keep most of each nail free of gold.
Let the white blend softly instead of forming a solid tip.
12. Gold Glitter Fade Nails with White Winter Stars
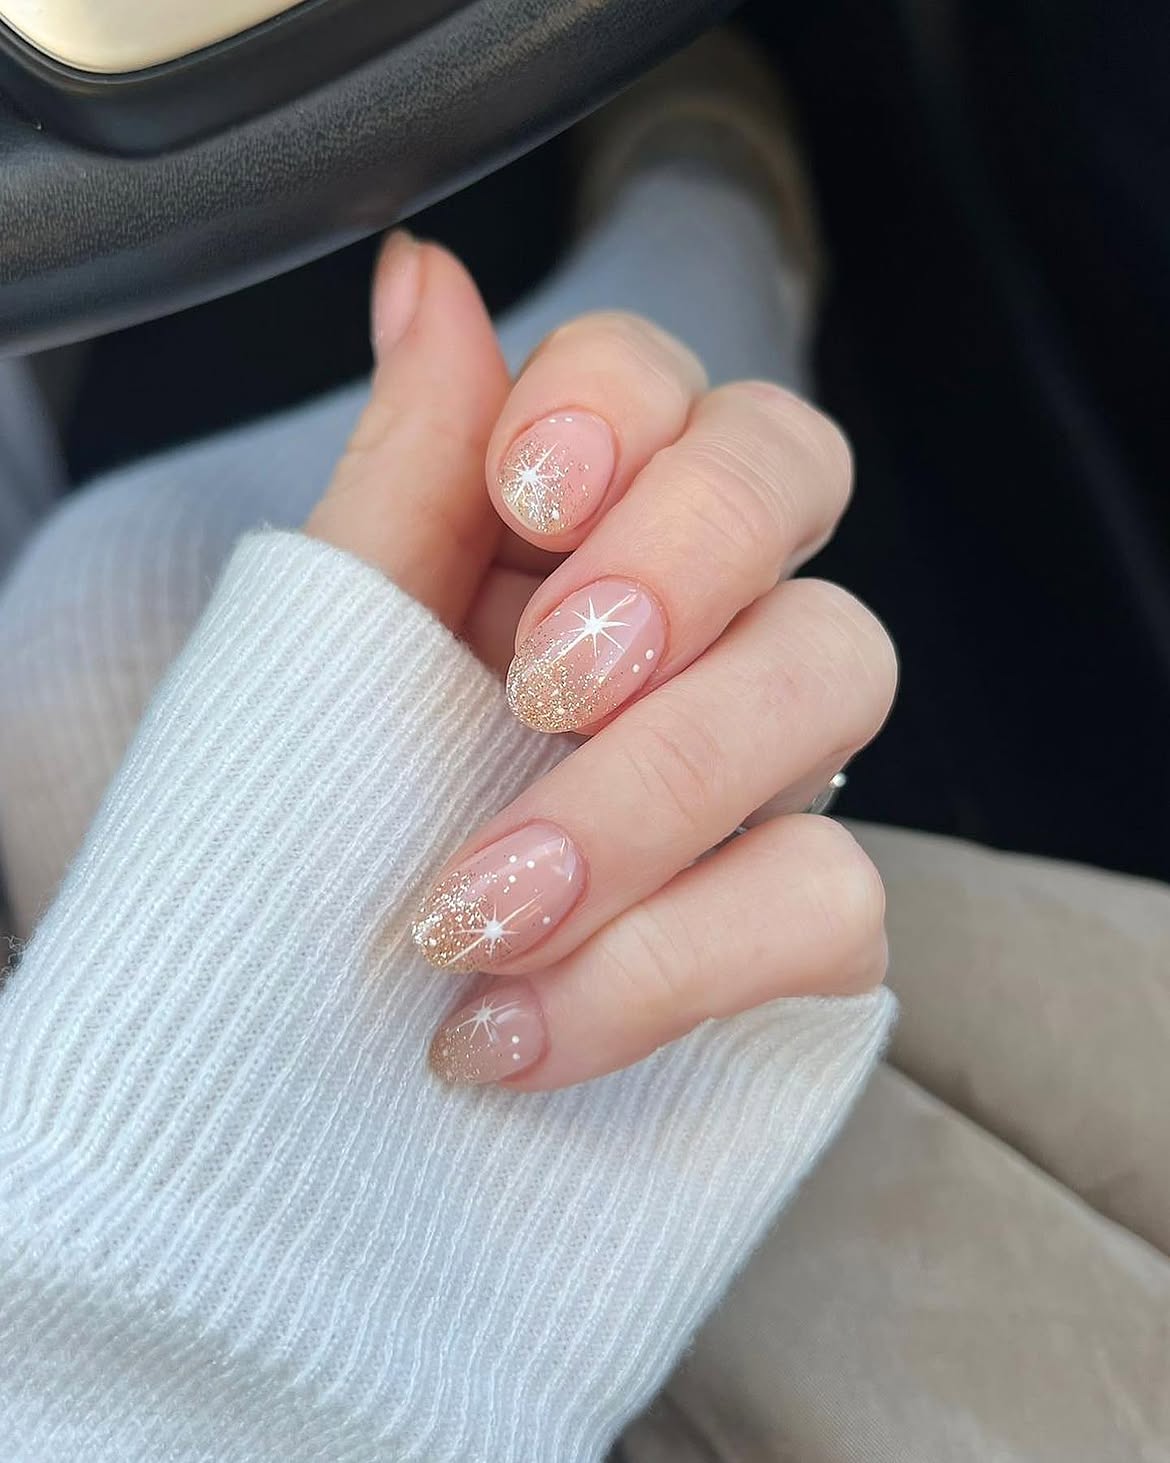
Champagne gold glitter gathers near the tips and thins out over a sheer pink base. White starbursts and small dots sit above it, with a fine snowflake on one nail. The glossy finish keeps the pale colors bright.
Look closely at the placement:
- The glitter is strongest at the free edges.
- The white stars vary in size rather than repeating one shape.
- Pink space remains near the cuticles.
That mix gives the nails sparkle while keeping the little white designs clear. To get a similar look, let the glitter fade gradually and place the larger star where it has open pink space around it.
Layer the glitter fade
Use a sheer pink base so the natural looking color stays visible.
Concentrate gold glitter at each tip and use less as it moves toward the center.
Finish with white stars, one small snowflake, and a few spaced dots.
13. Full Gold Glitter Nails with a White Present Bow
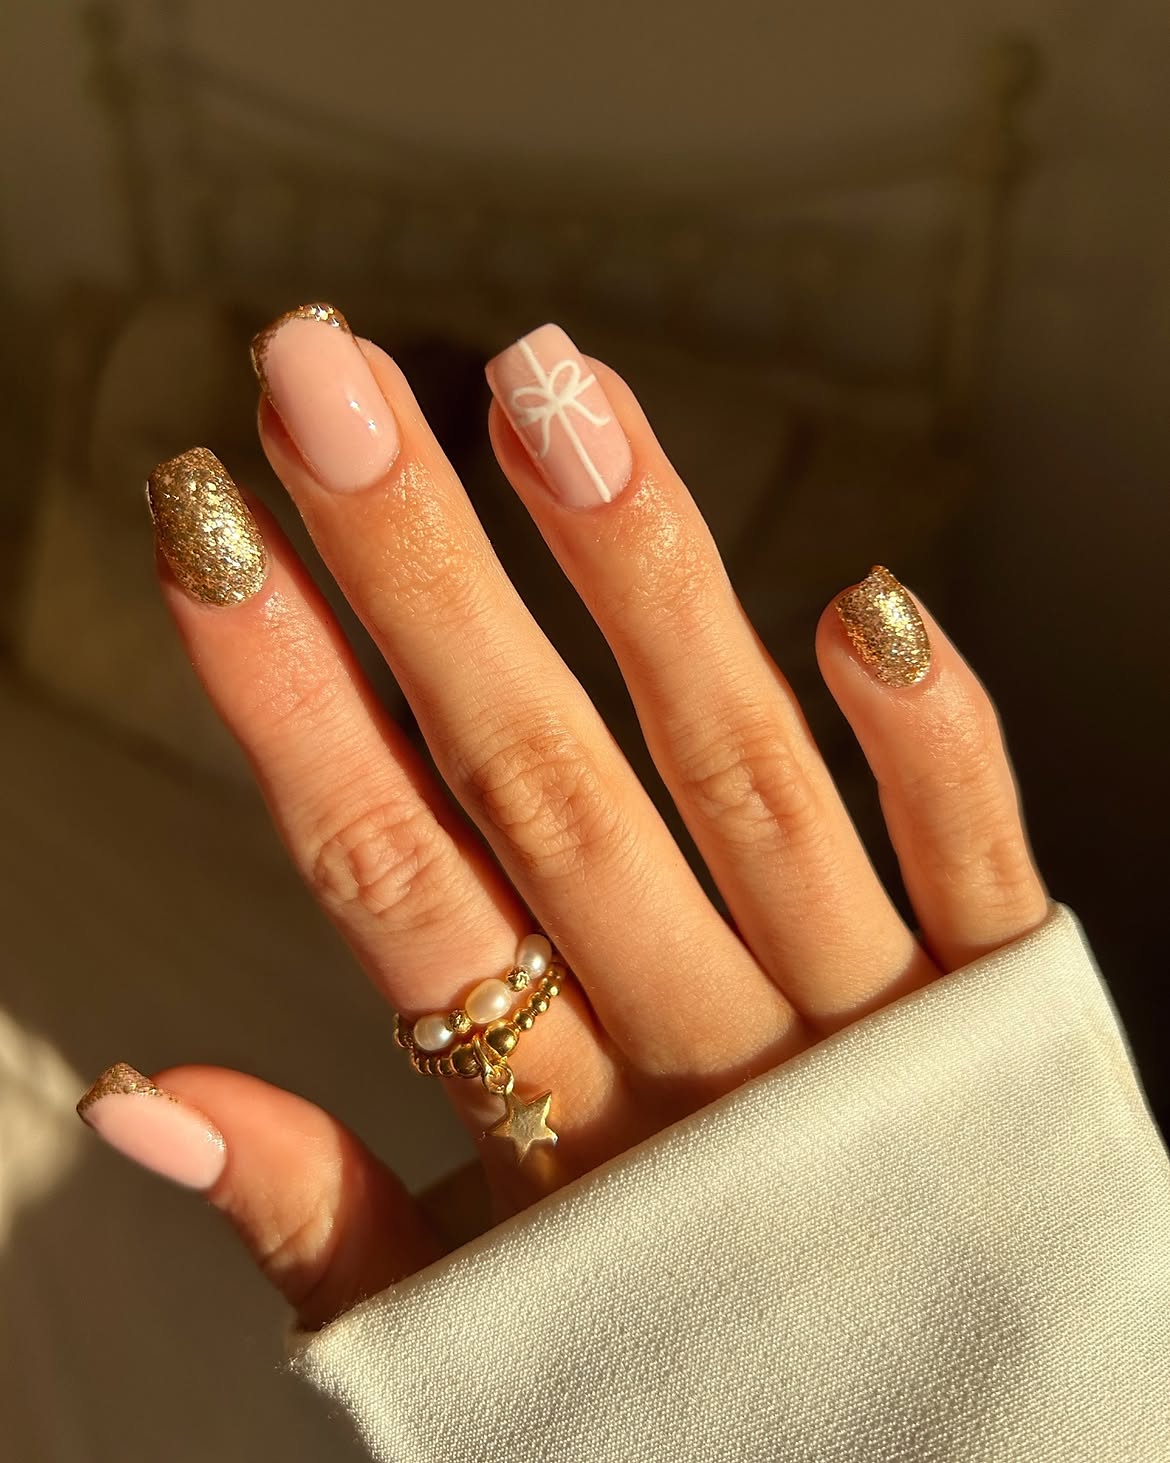
Two nails are covered in gold glitter, placing the strongest sparkle at both sides of the hand. Between them, pale pink nails bring the design back to a softer finish. One has a narrow gold tip, and another has a thin white ribbon and bow drawn over the pink base. The thumb repeats the glitter tip.
Keeping the bow separate from the full glitter nails makes its loops and long ribbon lines easy to see. The cream sleeve and small gold rings in the design suit the warm colors. If you recreate this set, use the same shade of gold for the full nails and the fine tips so everything feels connected.
| Gold nails | Pink nails |
|---|---|
| Cover the outer accent nails in warm gold glitter. | Leave the center nails glossy and pale. |
| Repeat that gold in narrow tips on the pink nails. | Put the white bow on open pink space so its lines remain clear. |
14. Pearly Ivory Nails with a Gold Bead Christmas Tree
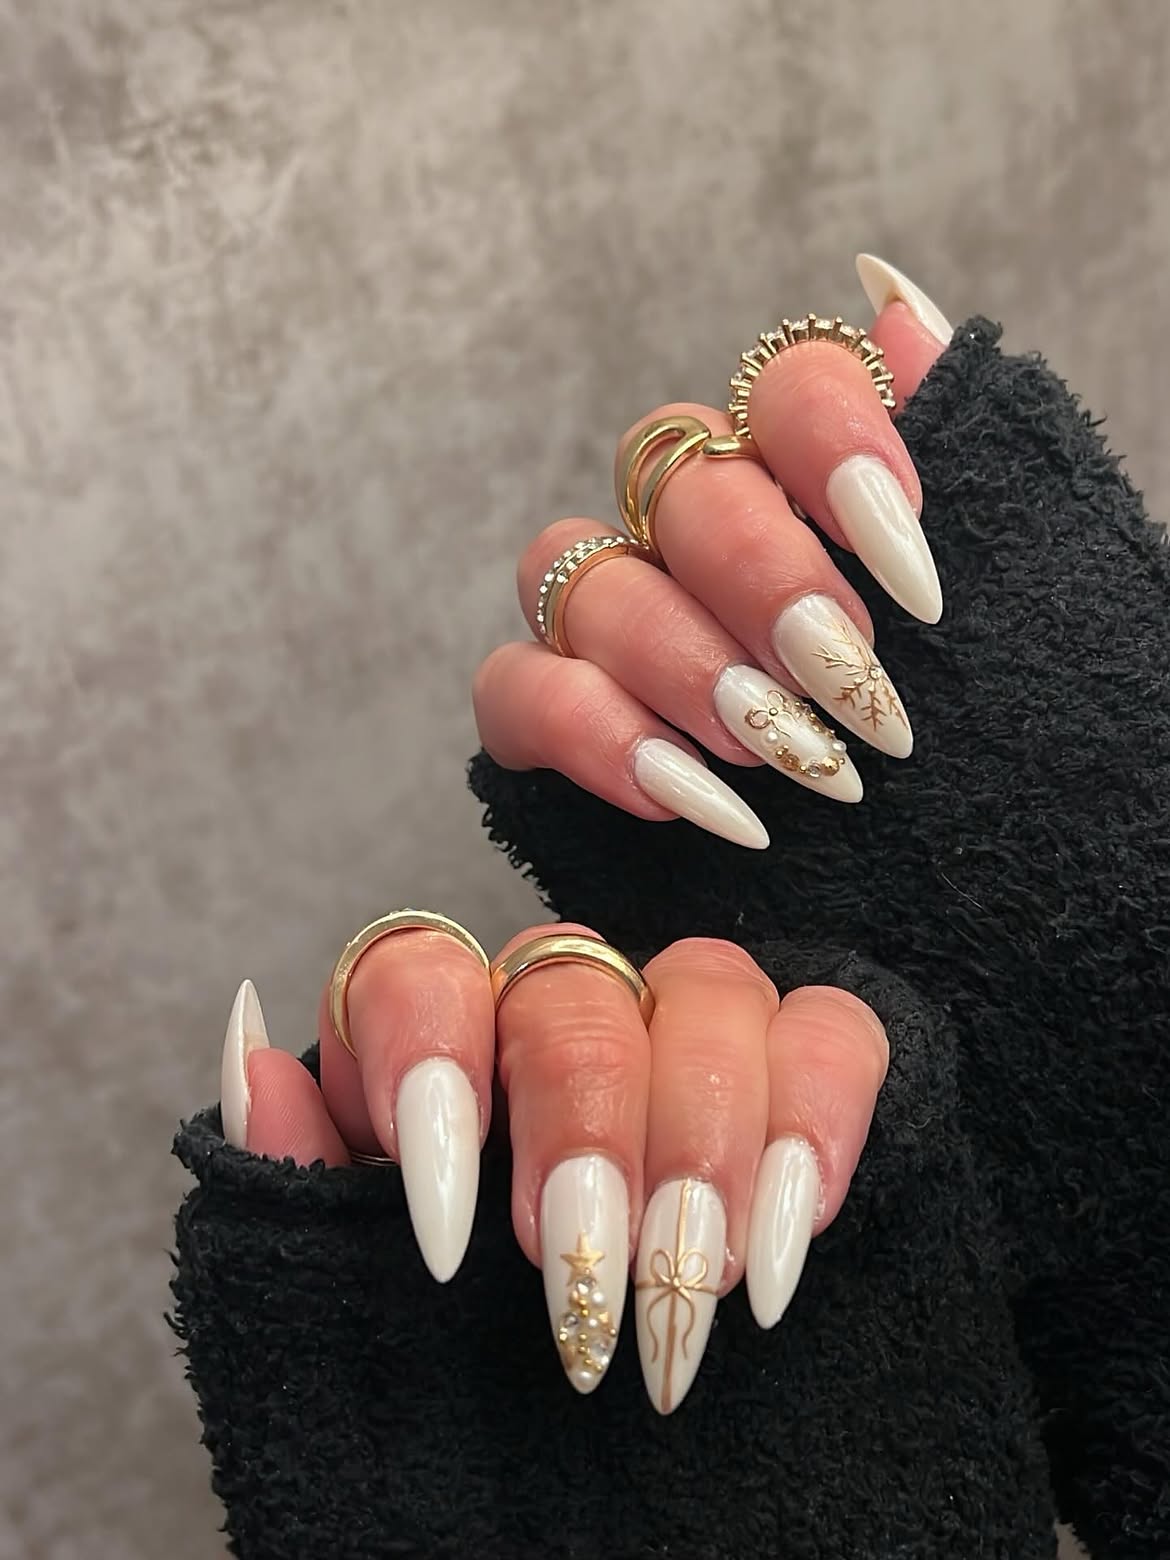
An opaque ivory base changes the feel of this manicure. The long pointed nails have a soft pearly shine that stands out against the black sleeves. Thin gold lines and small raised beads bring holiday detail to selected fingers.
One branching gold design suggests antlers. On the other hand, a star sits above beads arranged like a little Christmas tree, beside a nail with a fine gold bow. The plain ivory nails give those small motifs room to show.
If you want the same arrangement, show your nail artist the design of both hands. Each hand has its own decorated nails.
Plan the accents across both hands
First hand
Put branching gold lines near the beaded accent. Leave the surrounding ivory nails simple.
Second hand
Place the star and bead tree beside the slim gold bow. Keep the other nails pearly ivory.
15. Beaded Starburst Christmas Nails with White Tips
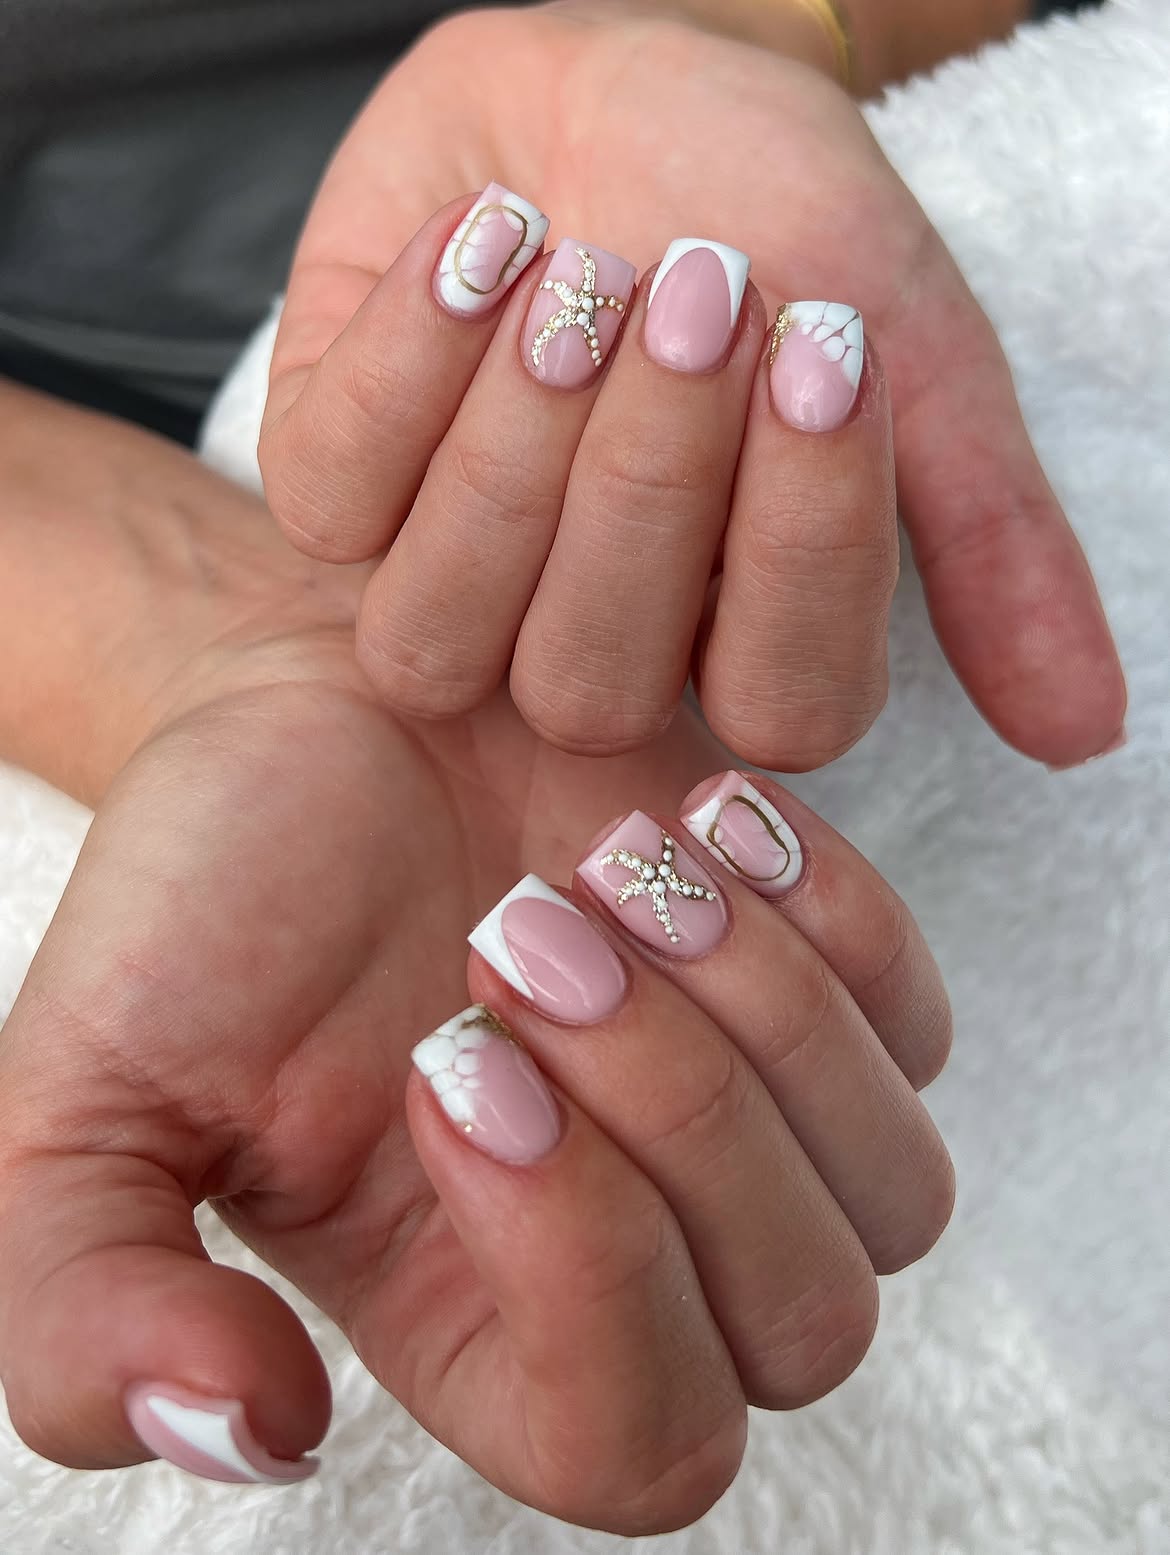
Tiny beads form the main decoration on these short square nails. They spread from a bright center on one nail of each hand, with fine gold detail around them. The glossy pink base makes the raised shape easy to see.
The surrounding nails each add something small:
- White French arches leave a wide pink center.
- Thin gold loops frame a couple of nails.
- Small white shapes sit near the corners of others.
The beaded stars have plenty of space despite the short length. To recreate them, keep the outer beads slightly inside the nail edges so each arm stays separate.
💡 Bead placement tip
Use one larger bead at the center and smaller ones along each ray. Leave a little pink space between the rays so the star shape remains clear on short nails.