The Best Christmas Nail Designs for Beginners That Look Chic
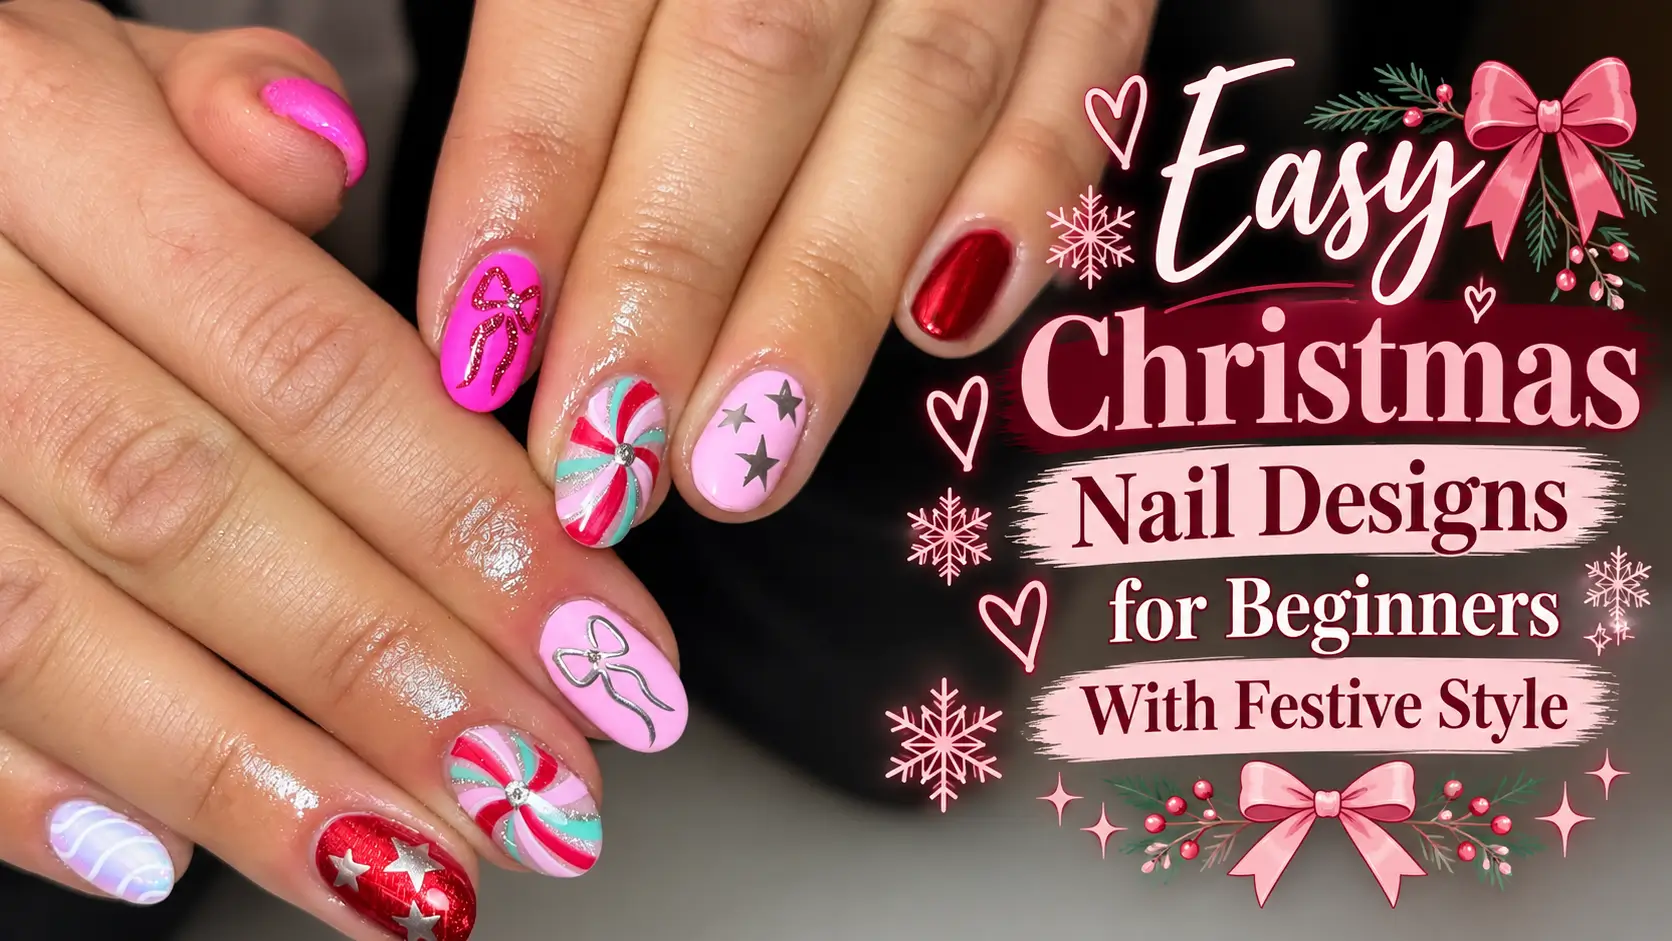
Christmas nail art can look polished without being difficult to create. With simple lines, dots, French tips, glitter, bows, and festive colors, beginners can achieve a stylish manicure at home. The key is choosing designs that use basic shapes while still capturing the cheerful spirit of the season.
These Christmas Nail Designs for Beginners include everything from candy cane stripes and tiny trees to elegant snowflakes, gift inspired details, and sparkling accent nails. Some are bright and playful, while others use soft nude shades, deep red polish, and delicate gold touches. Browse the ideas below to find a festive look that matches your style and skill level.
16+ Christmas Nail Designs for Beginners
1. Pair Red French Tips With Tiny Christmas Trees
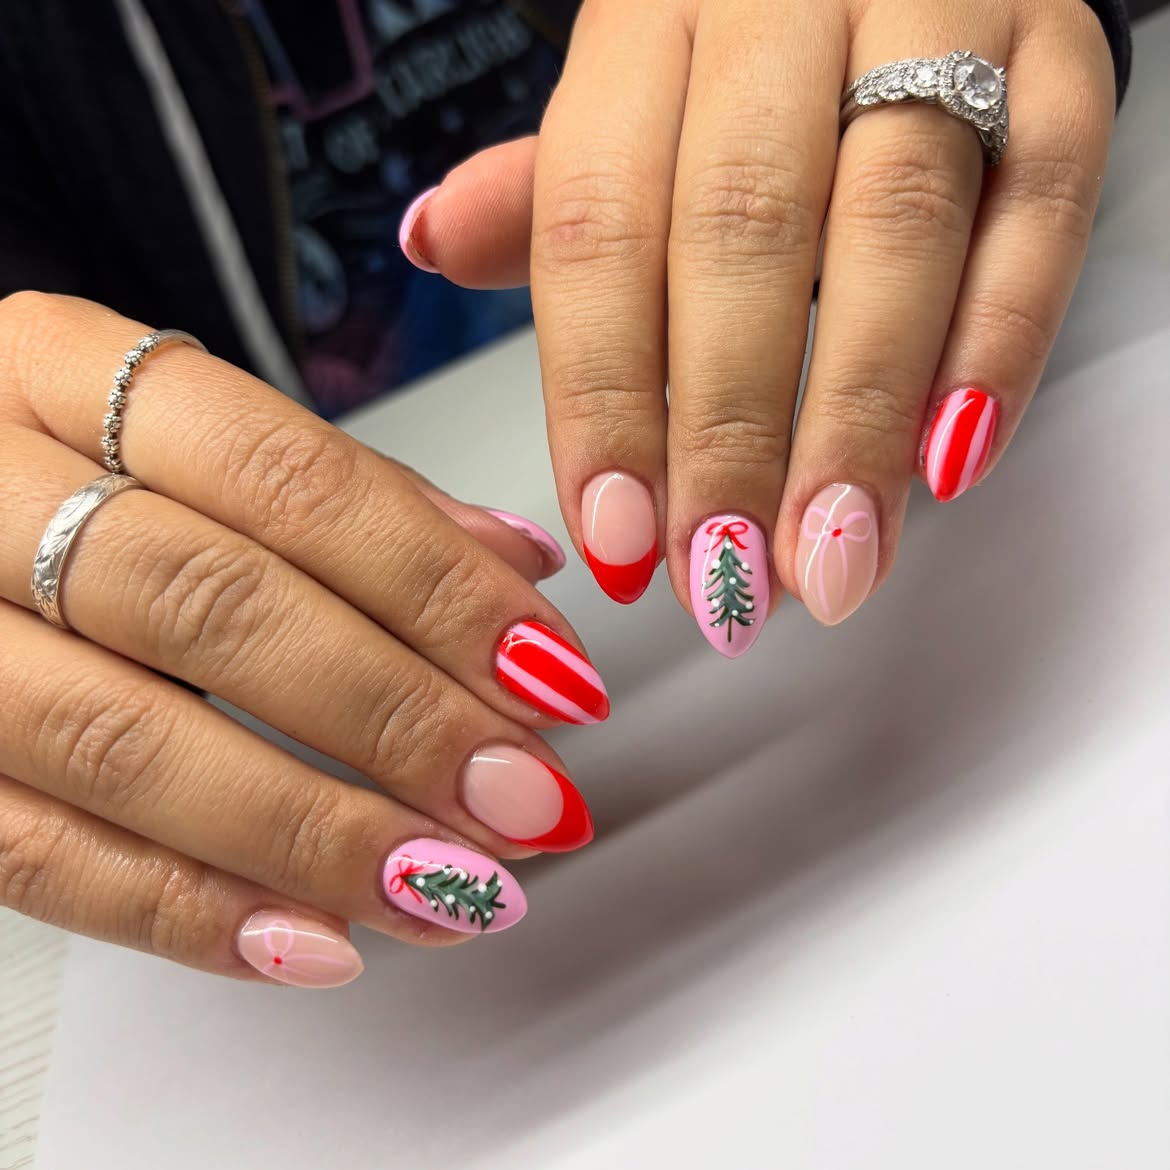
Soft blush and nude bases keep this Christmas manicure bright without making every nail feel crowded. The bold red French tips create a clean festive base, while candy stripes bring a playful holiday detail. Small green trees with red bows become the main feature, and the thin pink ribbon art softens the stronger colors.
Keep the design manageable: paint the solid tips and stripes first, then add one detailed accent nail on each hand. A fine nail brush can create the trees and ribbons, but small nail stickers also work well for beginners. Finish with a glossy top coat to smooth the raised artwork and give the full set an even shine.
Recreate this Christmas nail look
2. Frame White French Tips With Holly and Ribbon Art
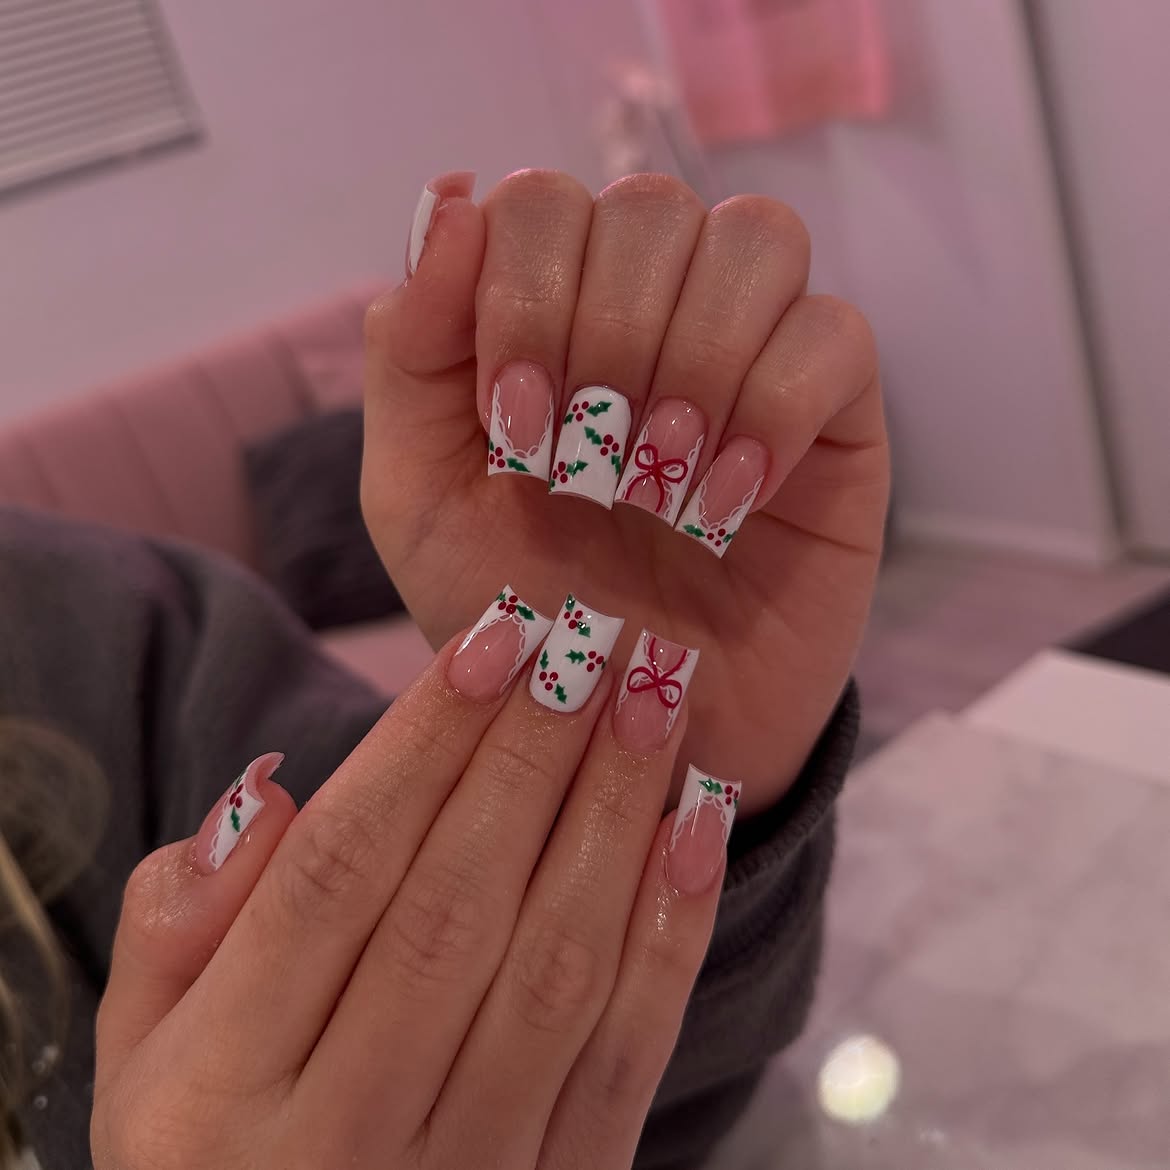
Gift wrap details give this manicure a clear Christmas theme while the sheer pink base keeps it light and polished.
Base: A glossy nude pink leaves plenty of open space around the artwork.
Tips: Crisp white sections appear in different shapes, including full tips, curved corners, and slim borders. This change keeps the set interesting without adding more colors.
Details: Red berries, green holly leaves, white swirls, and fine red bows make each nail feel like a tiny wrapped present.
For a simpler version, use holly decals on two nails and paint bows on another two. Leave the remaining nails with plain white French tips. The same idea can also be adjusted for shorter square nails by using smaller bows and placing the holly near one corner.
3. Build a Mix and Match Christmas Nail Set
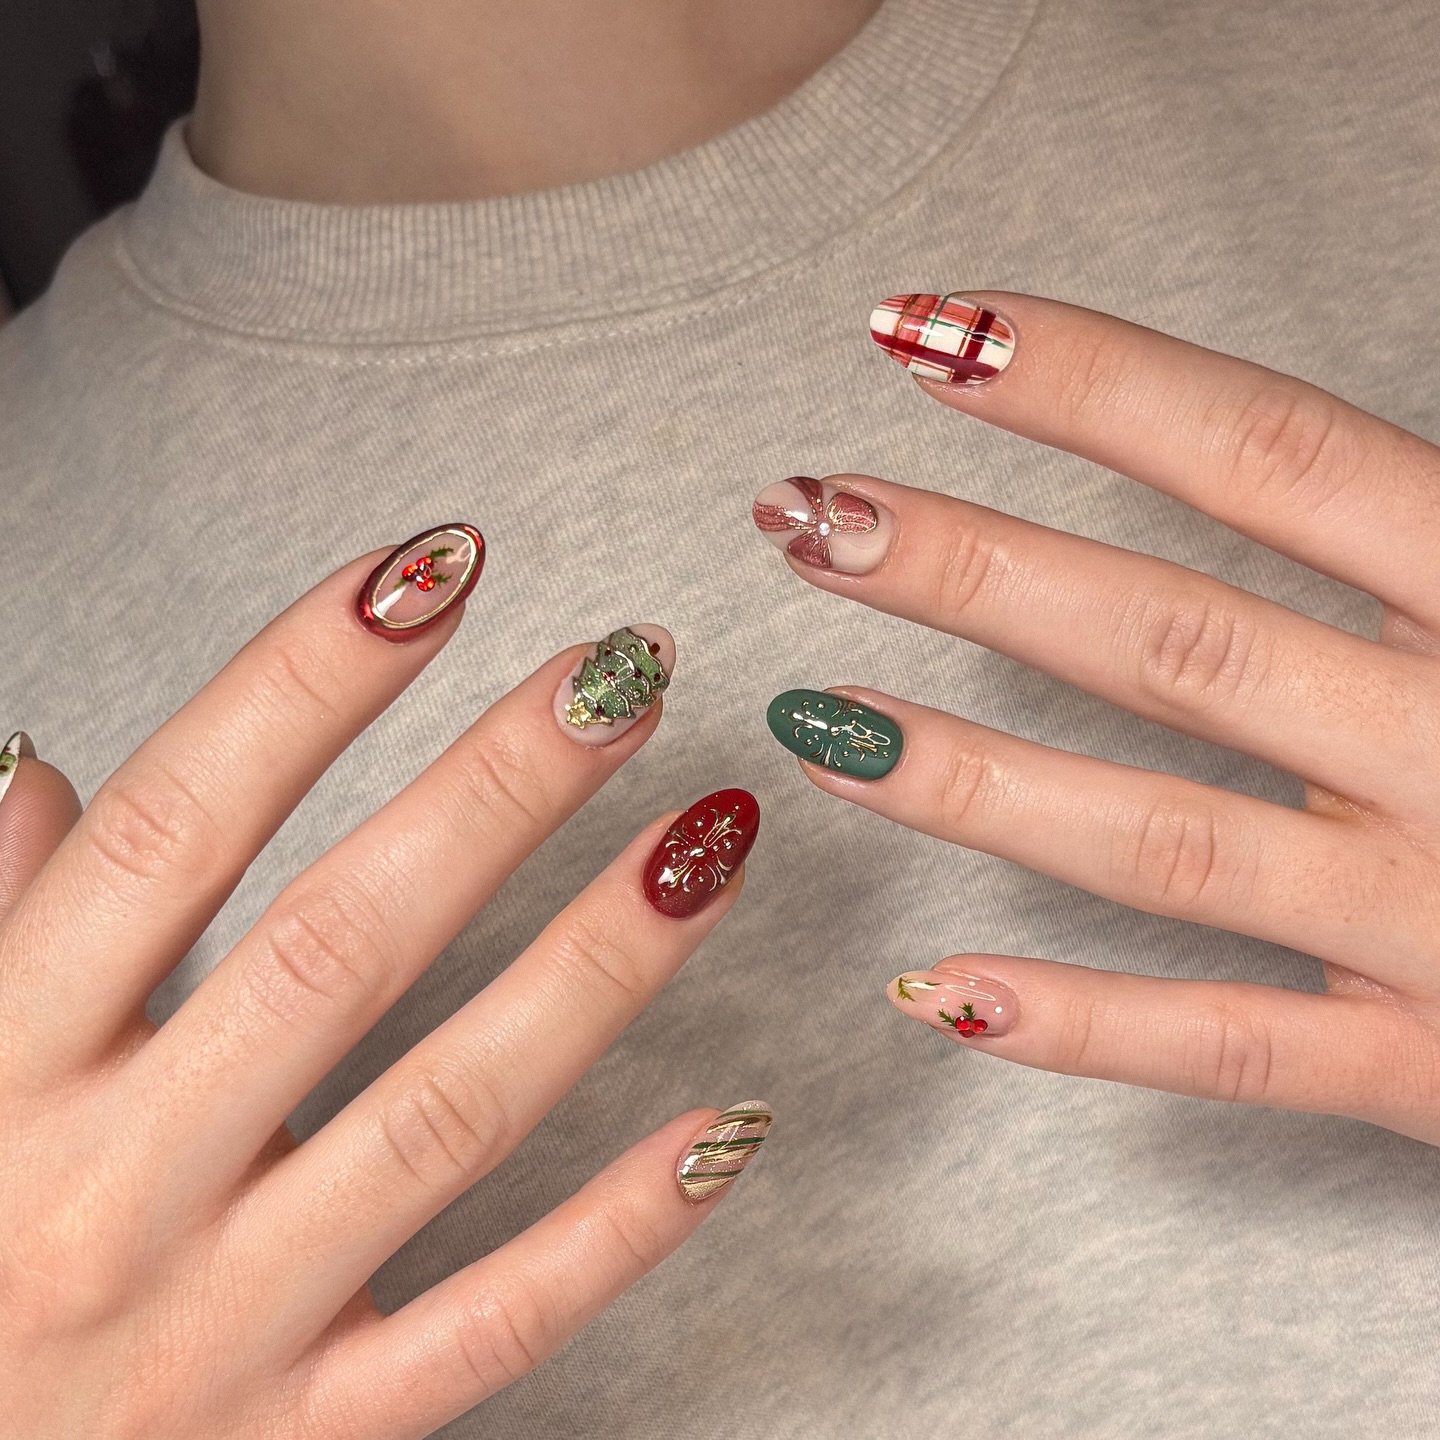
Plaid, bows, holly, metallic lines, and a raised Christmas tree give this manicure plenty of variety. The shared red, green, nude, and gold palette keeps all the different designs connected.
A beginner can simplify the set by choosing only three motifs. Start with solid red and green accent nails, add gold stickers or decals, then reserve the plaid pattern or bow for one feature nail. A thin brush can create the plaid lines, but nail tape makes it easier to keep them straight.
The small gold details matter here. They repeat across the set and help the painted, metallic, and raised elements feel like part of the same collection. Keep the base colors limited, then let one detailed nail become the main focus.
Choose red, green, nude, and gold as the main palette.
Repeat one gold detail across several nails.
Do not place detailed artwork on every nail.
Avoid adding extra colors that compete with the main palette.
For a quick holiday manicure that still feels cute and polished, 16 Easy Christmas Nails to Do at Home has simple designs that pair well with these Christmas nail ideas.
4. Add White Snowflakes to Burgundy V Tips
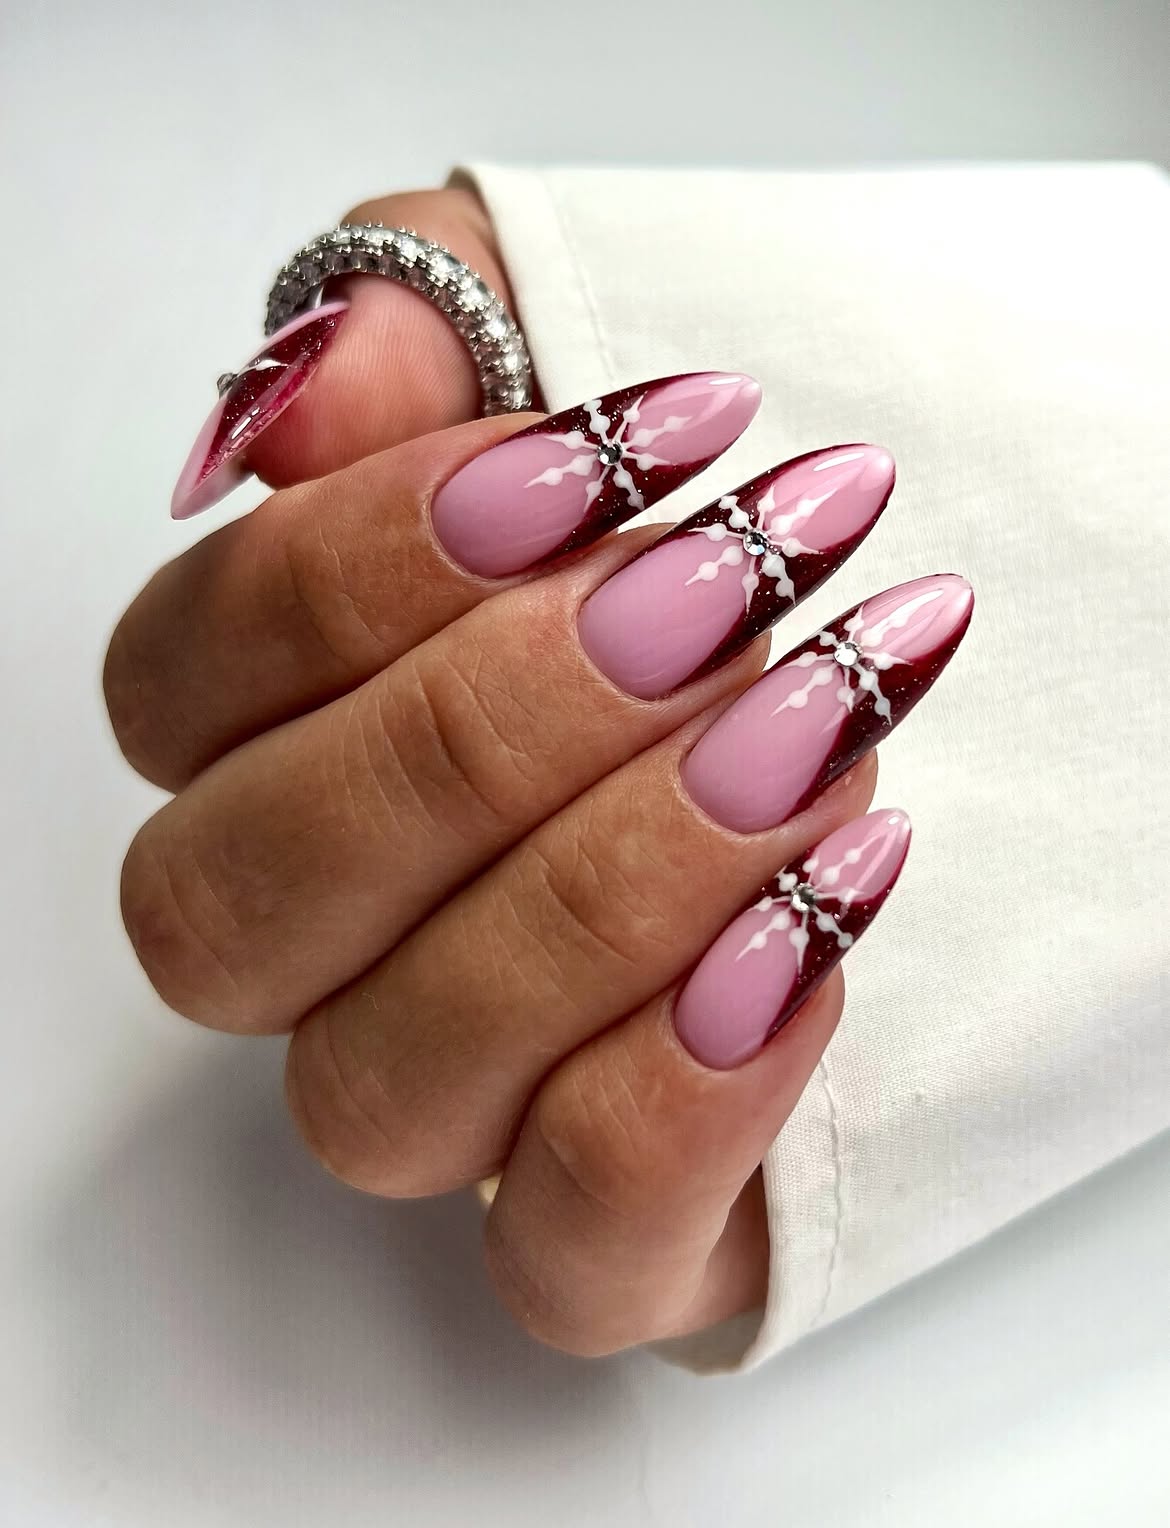
Deep burgundy tips give this pink almond manicure a richer holiday look than classic bright red. Each tip curves inward to form a sharp V shape, while fine shimmer adds a soft sparkle under the glossy finish.
The white snowflakes sit where the burgundy and pink sections meet, making the color border feel intentional. Tiny clear gems in the centers add light without covering the painted details. Since the same motif appears on every nail, the set looks consistent even though each snowflake has small natural differences.
Beginners can paint the burgundy sections first, then build each snowflake with short white strokes and dots. Clean lines matter more than drawing every branch exactly alike.
💡 Quick Tip
Draw three thin white lines crossing at the center, then add two short branches to each line. Place a tiny clear gem in the middle to hide small uneven marks.
5. Use Colorful Starbursts for Retro Christmas Nails
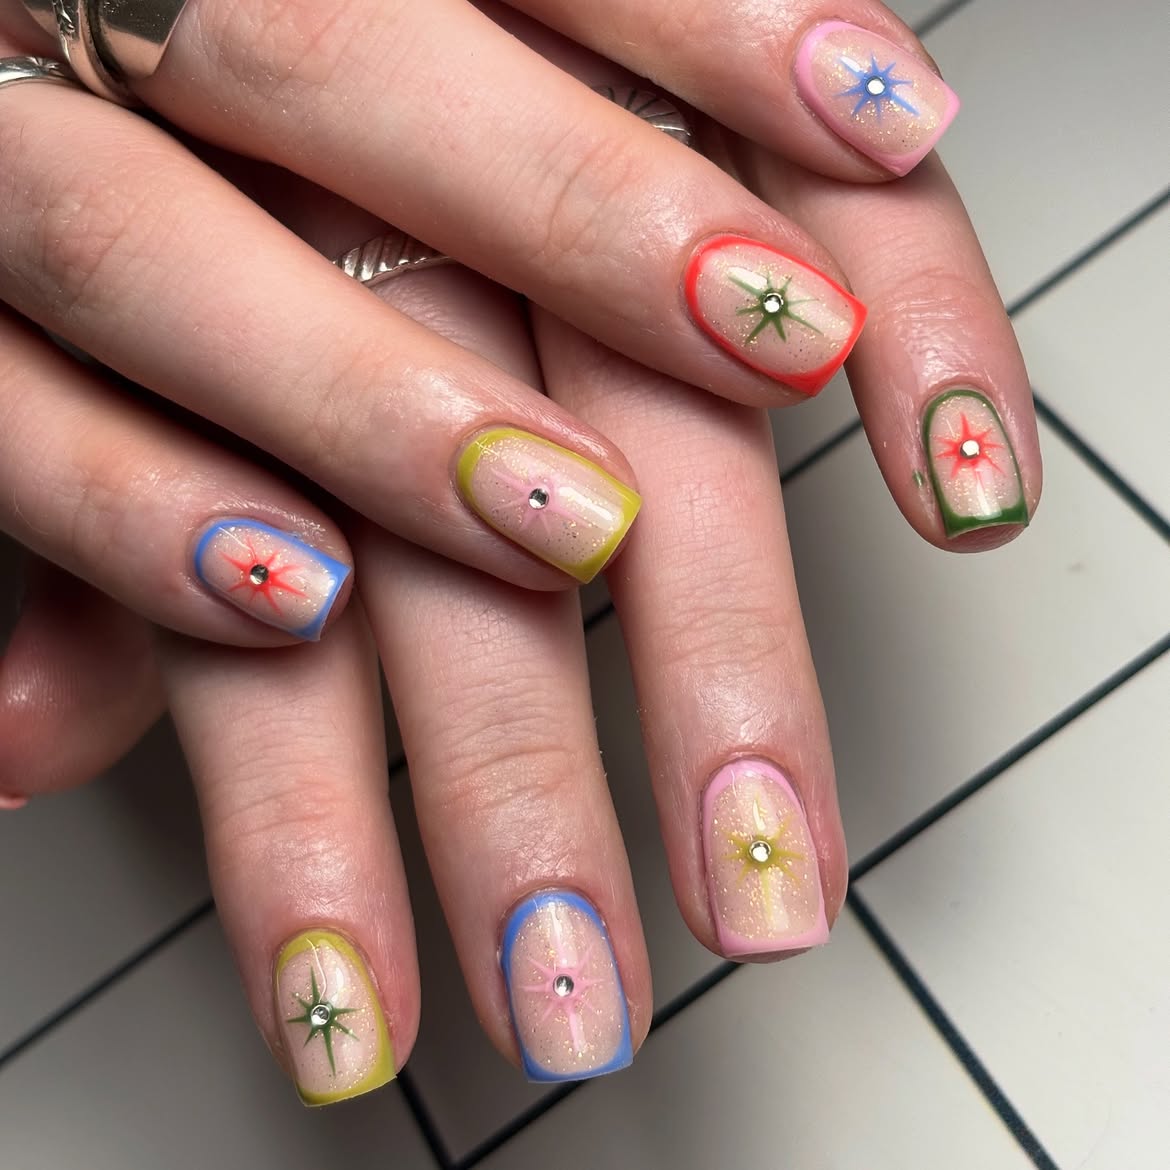
Pastel outlines and sharp starbursts turn a sheer shimmer base into a playful Christmas manicure. Blue, pink, lime, red, and deep green give each short square nail its own color while the repeated design keeps the set connected.
Keep the base sheer. A pale glitter polish lets the bright borders and stars remain easy to see.
Change one color at a time. Outline each nail with a single shade instead of mixing several colors on one nail.
Add one bright center. A tiny silver gem hides the meeting point of the starburst lines and gives the design a small flash of light.
Use a fine brush for the borders and draw four long lines before adding shorter rays. Slight differences between the stars suit the relaxed retro style.
6. Paint Tiny Hanging Christmas Characters on Short Nails
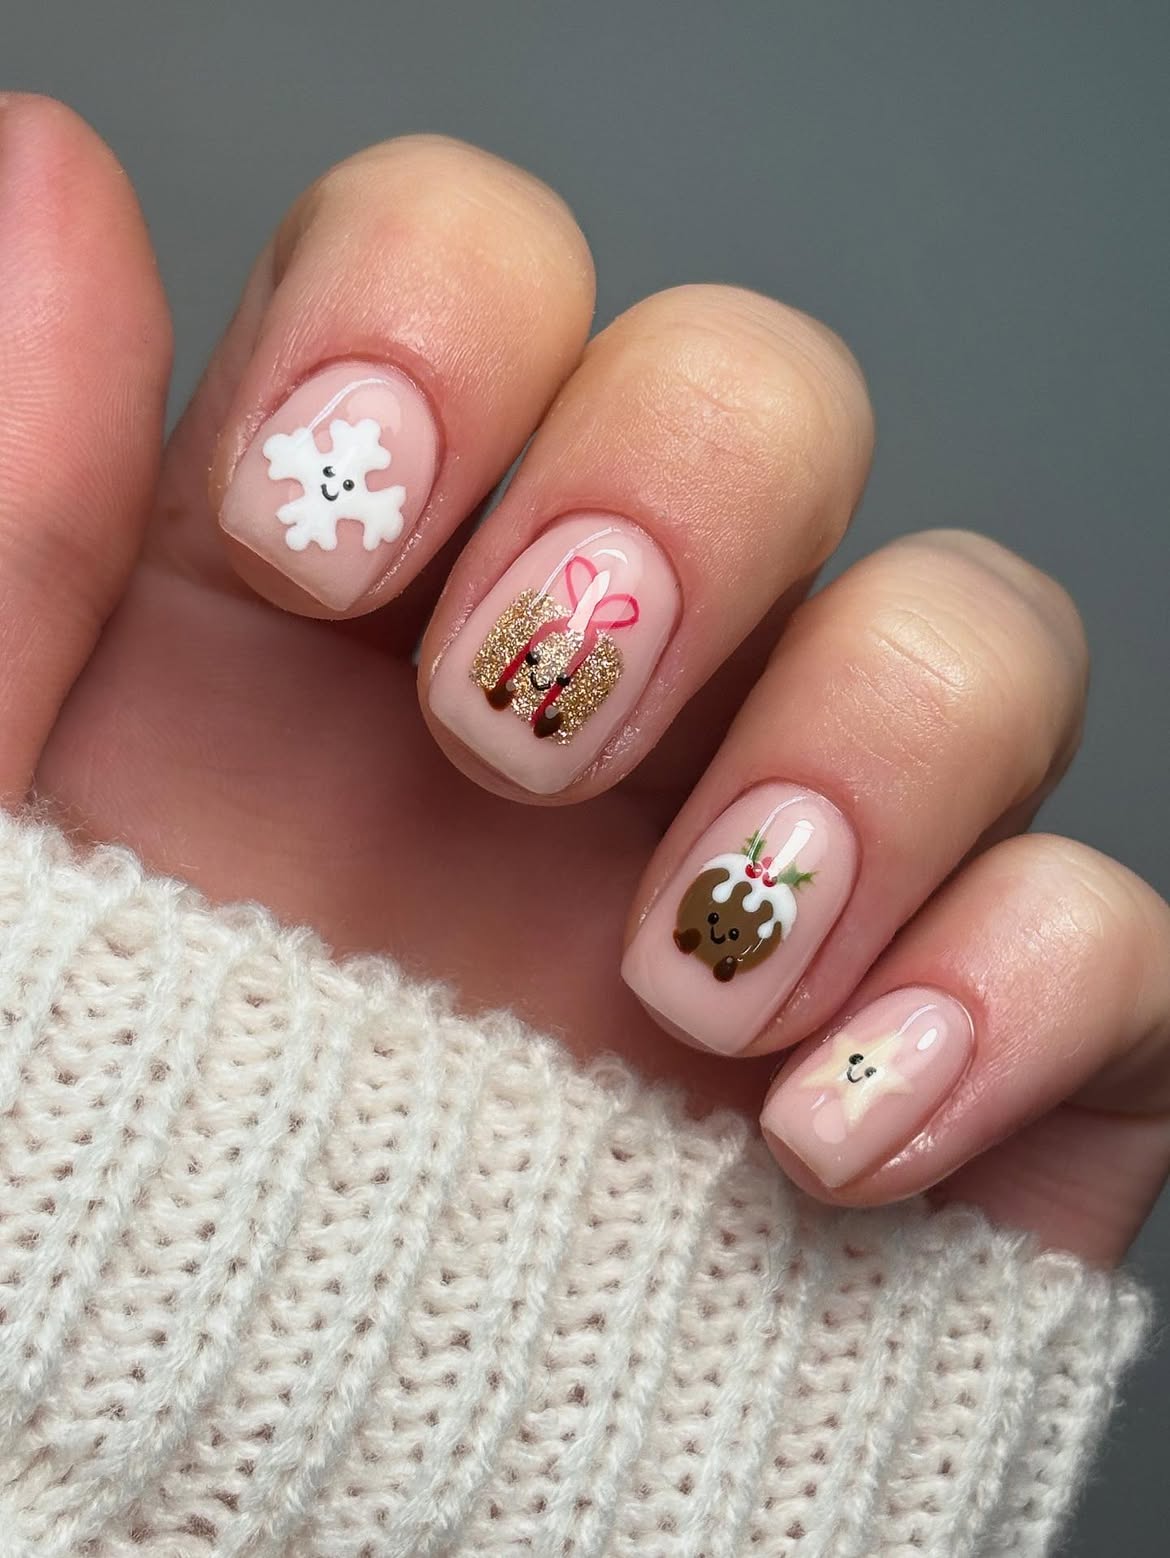
Cute holiday characters make this short square manicure feel cheerful without relying on strong base colors. A milky nude polish creates a calm background for the smiling snowflake, glittery gift, Christmas pudding, and pale star.
Each motif hangs from a thin white line, which makes the separate designs feel connected. Small black faces add personality with only two dots and a curved smile. The brown pudding brings warmth, while white icing, red berries, green leaves, and gold glitter provide familiar Christmas details.
Beginners can simplify the artwork by painting only one character and repeating it across the set. Another easy option is to use small decals, then add the hanging lines and faces by hand.
Apply a milky nude base and let it dry fully.
Paint or place one small Christmas character near the center of each nail.
Add a thin hanging line, two eyes, a tiny smile, and a glossy top coat.
7. Combine a Reindeer Accent With Gold Gift Bow Art
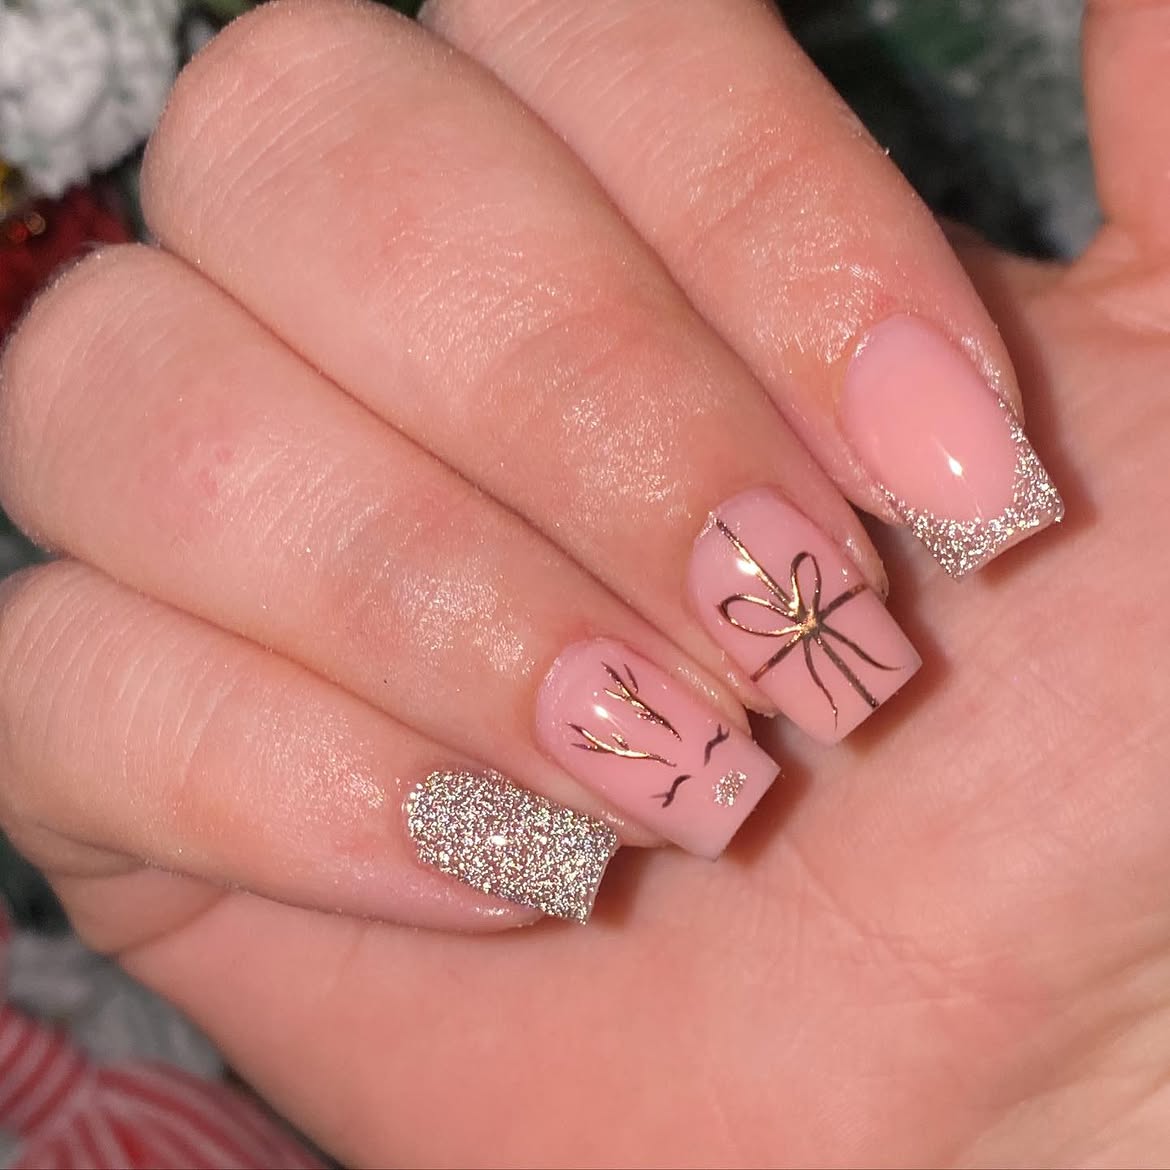
Gold glitter does most of the festive work in this soft pink manicure. One nail is fully covered in sparkle, while another uses glitter only along the square tip. The change in coverage gives the set contrast without introducing another color.
The reindeer face is simple enough to become the main beginner project. Thin dark lines shape the eyes and mouth, gold strokes form the antlers, and a small glitter nose adds a sweet finish. On the next nail, a loose metallic bow makes the design look like a wrapped Christmas present.
Paint the glitter nails first, then choose either the reindeer or bow for your accent. Keeping only one detailed motif makes the manicure quicker and easier to balance.
| Full glitter nail | Glitter French tip |
|---|---|
| Creates the strongest sparkle | Keeps more of the pink base visible |
| Use on one accent nail | Repeat on several nails if desired |
| Needs an even glitter layer | Needs a clean curved or straight edge |
8. Keep Christmas Nails Soft With Pearl White and Gold Bows
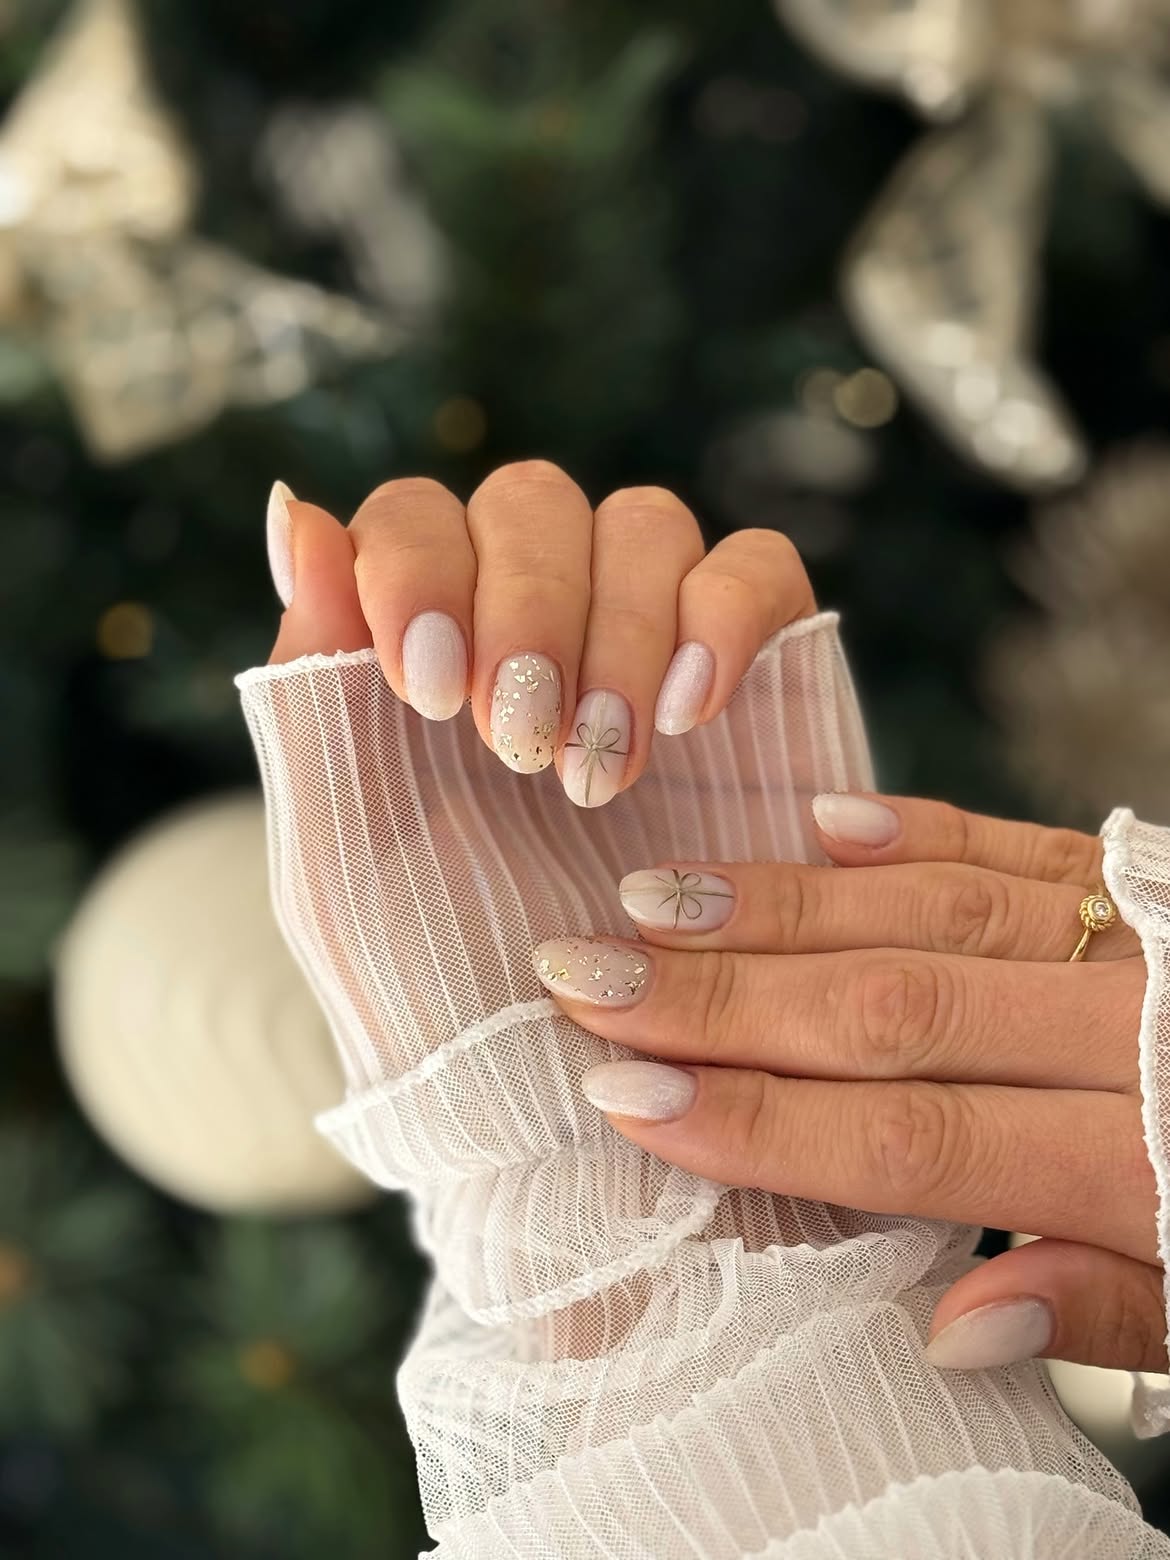
Muted color can still feel festive. This manicure uses pearl white, sheer ivory, and scattered gold foil for a quiet Christmas look that catches the light without bright red or green.
The shimmer nails create a smooth base across the set. Gold foil appears on only two accent nails, so the larger flakes feel special rather than heavy. Fine metallic bows on the remaining feature nails resemble delicate gift ribbon and connect with the gold pieces nearby.
For an easier version, apply pearl polish to most nails and press loose foil into one accent nail while the polish is still tacky. Use a thin liner for the bow, or place a metallic bow sticker over the dry base. A glossy top coat helps seal the foil edges.
Pearl polish, scattered gold foil, and fine bow lines share a soft shine, helping three different finishes look calm and connected.
9. Outline Burgundy French Tips With Fine Gold Glitter
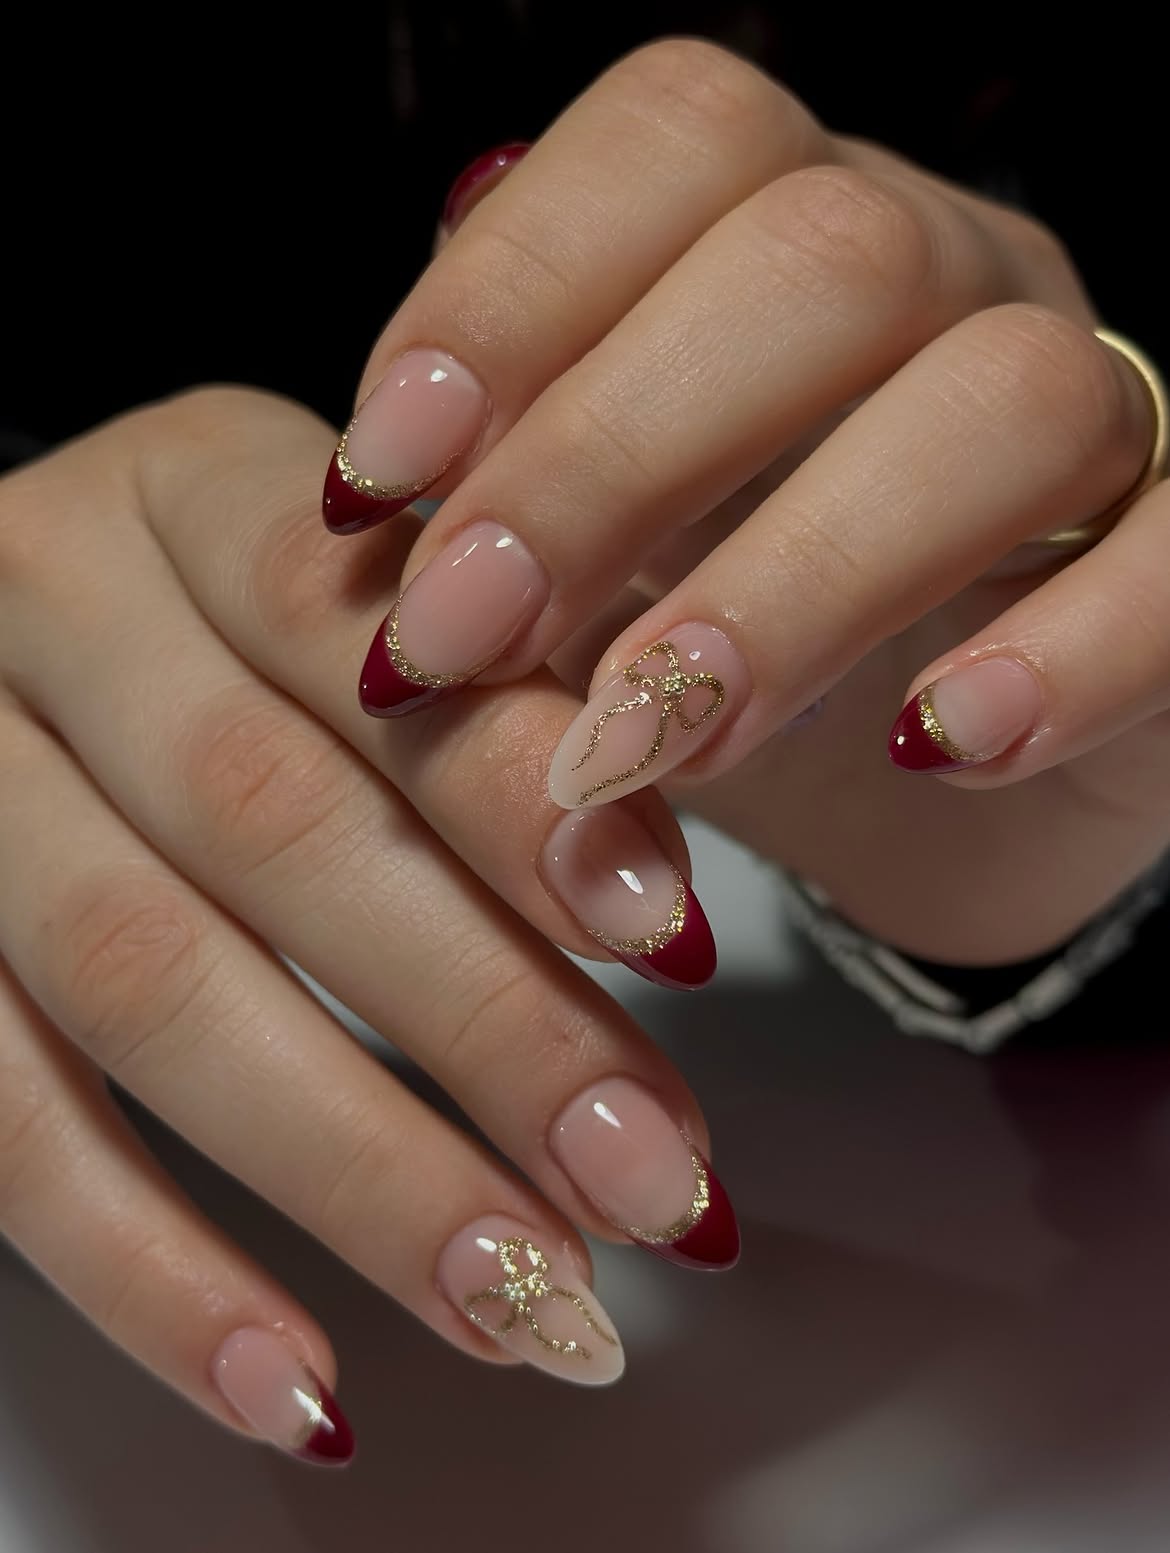
A thin gold curve gives these burgundy French tips a polished Christmas finish. The deep red color follows the pointed almond shape, while the narrow glitter border separates it cleanly from the glossy nude base.
The beginner formula is simple: paint the burgundy tips first, let them dry, then trace the inner edge with a fine gold glitter liner. The sparkling border can help cover tiny uneven areas where the red polish meets the base.
One accent nail replaces the French tip with a large gold ribbon drawing. Keeping that bow on a single nail prevents the set from feeling too detailed. If drawing loops feels difficult, use a metallic bow sticker and add two long ribbon tails with a thin brush.
Burgundy tips look bold, but small changes along the curved edge may remain visible.
A slim gold border sharpens the tips, hides minor uneven marks, and matches the ribbon accent.
If you love a more dramatic holiday manicure, explore 18 Long Christmas Nail Designs for elegant festive ideas with extra space for sparkle, bows, and detailed art.
10. Scatter Tiny Christmas Motifs Across Nude Coffin Nails
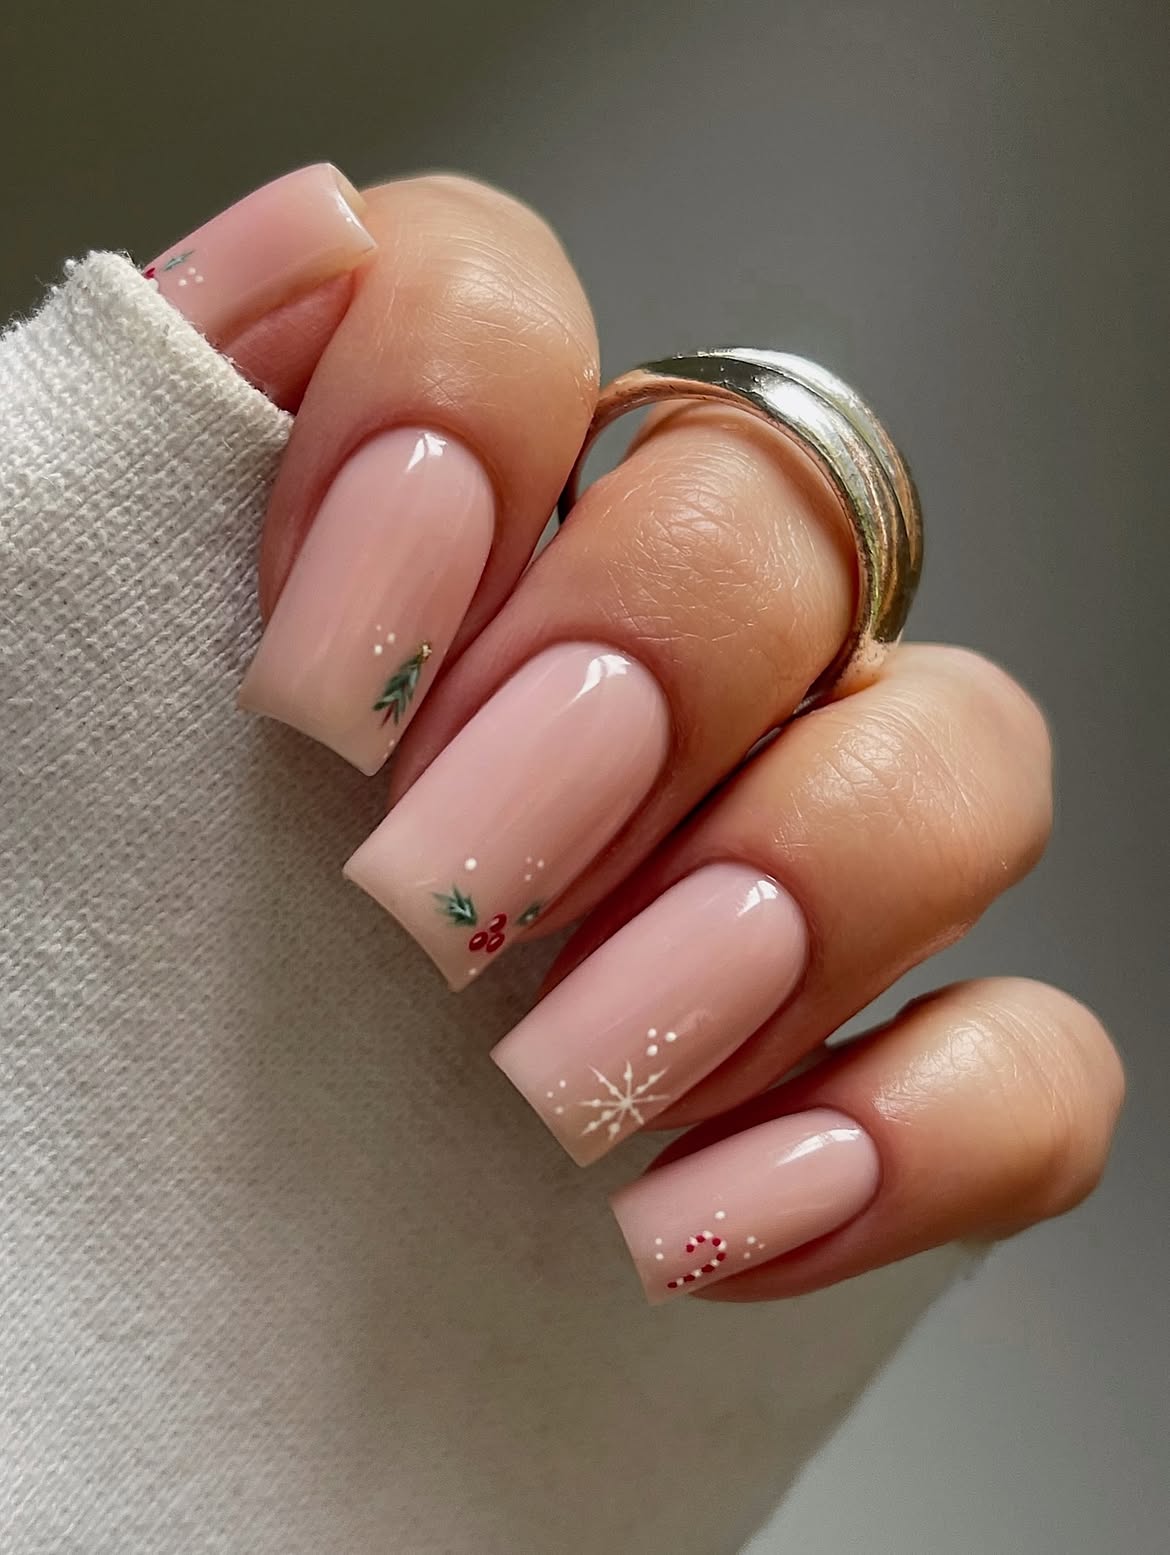
Glossy nude polish gives these long coffin nails a clean background for tiny Christmas details. Instead of filling each nail with artwork, the designs sit close to the corners and tips, leaving plenty of open space.
The set uses four simple motifs:
- A small green pine sprig with white snow dots
- Three red berries framed by short green leaves
- A fine white snowflake with scattered dots
- A miniature red and white candy cane
Each detail uses only a small amount of color, so the manicure stays neat and easy to wear. Beginners can paint one motif on each hand and leave the other nails plain. A dotting tool works well for snow and berries, while a very fine brush helps with leaves and snowflake lines.
📌 Beginner Shortcut
Place each motif near one corner of the nail. Small corner artwork needs fewer lines, leaves more room for mistakes, and still gives the manicure a clear Christmas theme.
11. Mix Gold Gift Wrap Details With Red and Green Accents
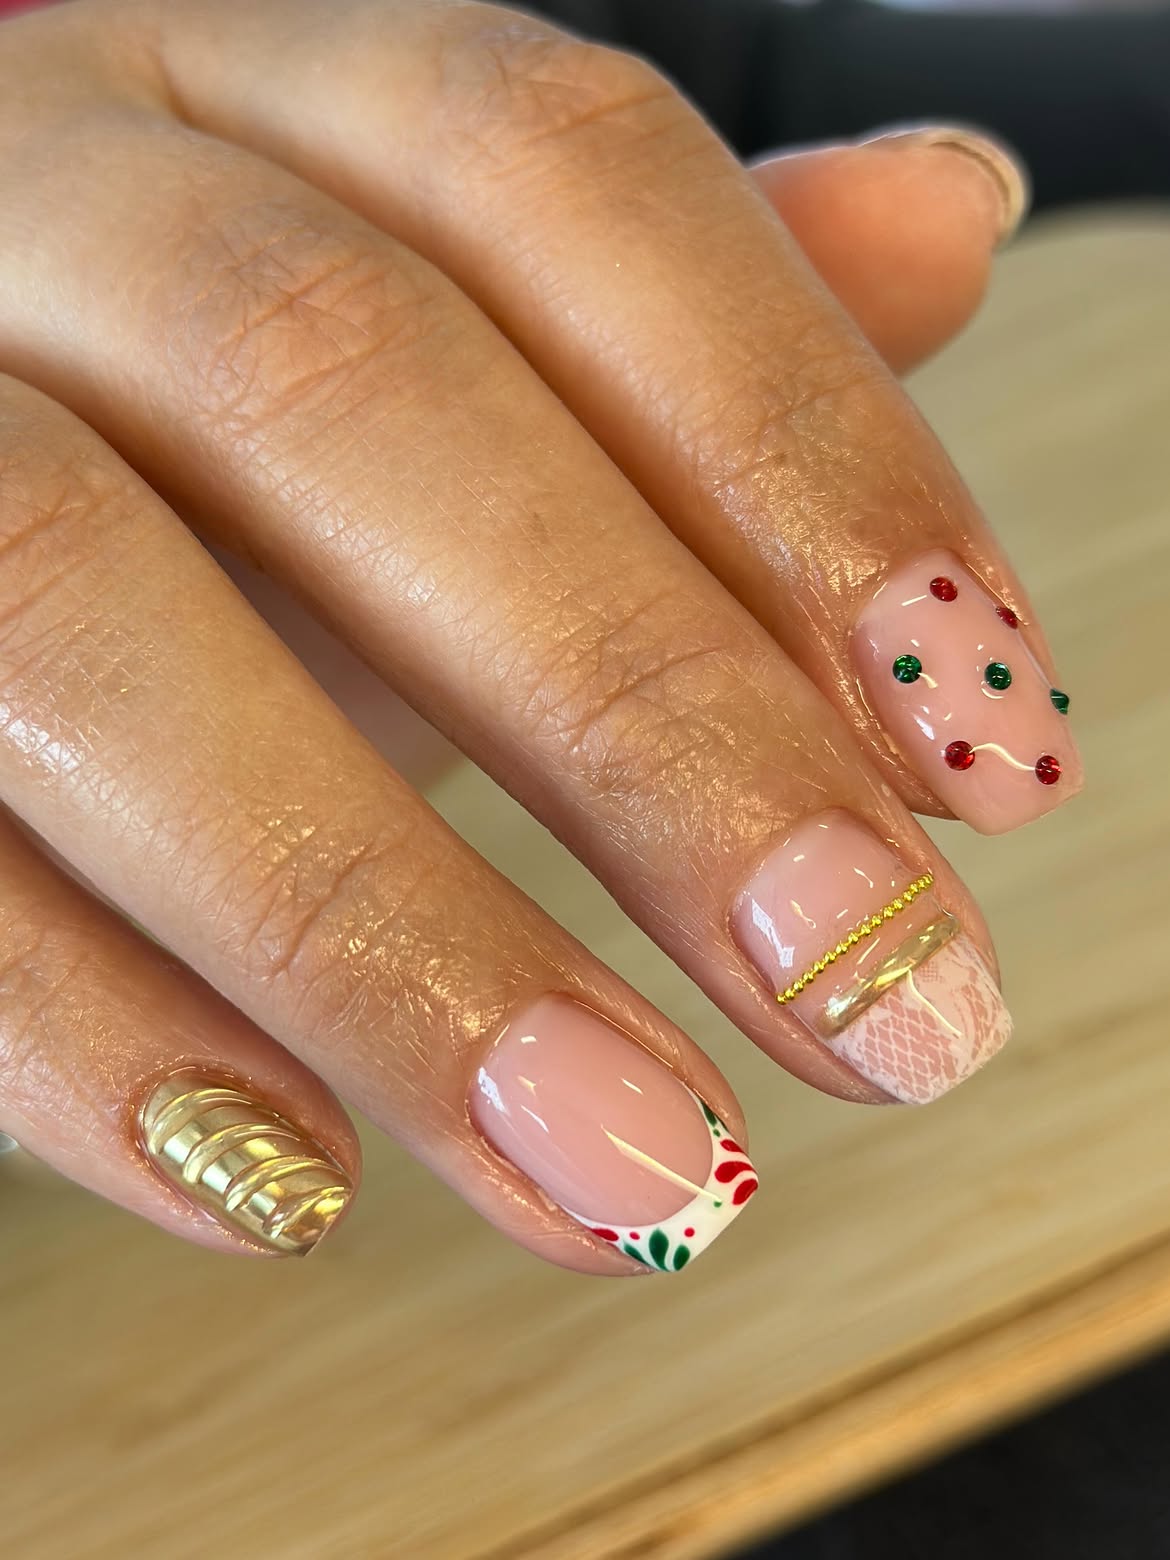
Several small finishes make this manicure feel like a collection of Christmas decorations. The glossy nude base keeps the look grounded, while red, green, white, and metallic gold bring the seasonal details.
One nail uses a white French tip with tiny red and green artwork. Another resembles a wrapped present, combining a lace style tip, a slim gold band, and a metallic ribbon. Raised gold waves cover the smallest nail, adding texture beside the flatter painted designs. Scattered red and green gems complete the set with a simple ornament inspired detail.
Beginners can recreate the idea with one gift nail and one metallic accent. Gold striping tape can replace the raised lines, and small decals can handle the detailed tip artwork.
12. Pair Pearl White Almond Nails With Gold Christmas Details
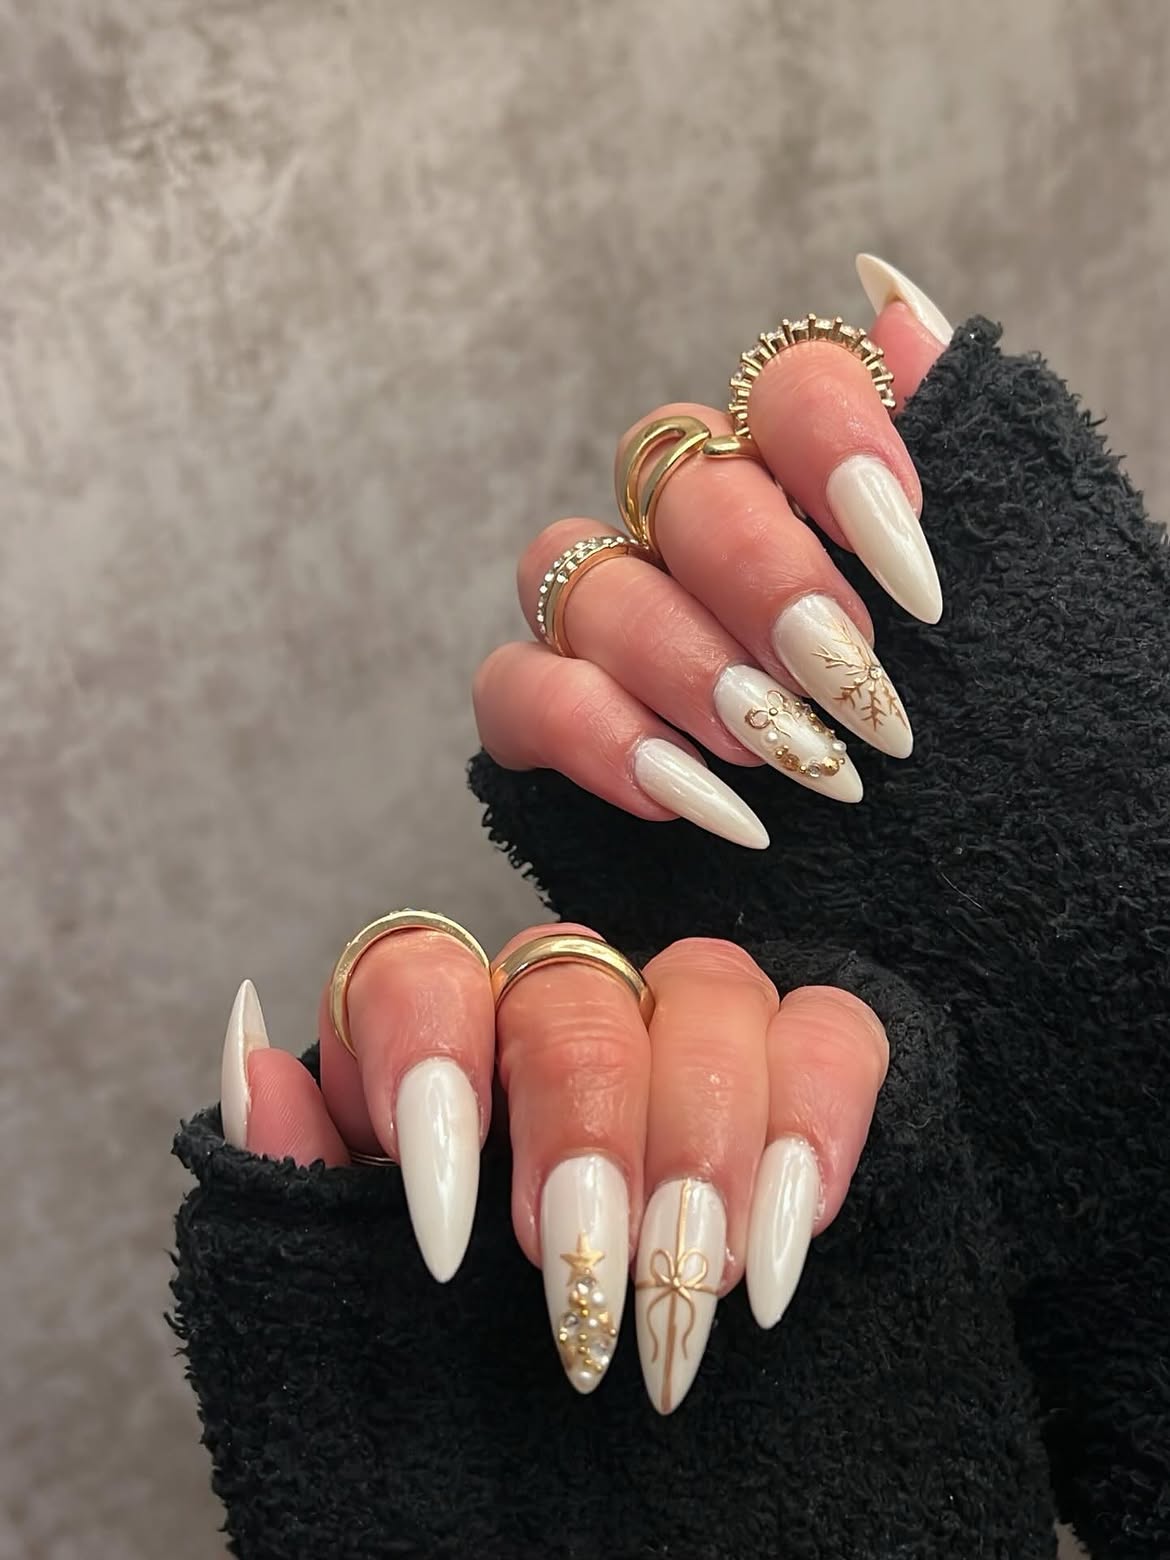
Pearl white polish creates a bright winter base for these long almond nails. The soft reflective finish changes gently in the light, while gold artwork and raised decorations add the Christmas theme.
Each accent nail takes a different approach. A fine ribbon drawing resembles a wrapped present. A small tree is shaped with a gold star, metallic beads, and clear stones. Another nail features a delicate gold snowflake, while a curved arrangement of pearls and gold pieces suggests a decorative wreath.
For a beginner version, choose only the ribbon or tree and keep the other nails in plain pearl polish. Gold stickers can replace painted line work, and flat nail gems are easier to place than several raised pieces.
Gather these simple supplies
13. Brighten Christmas Nails With Pink Peppermint Swirls
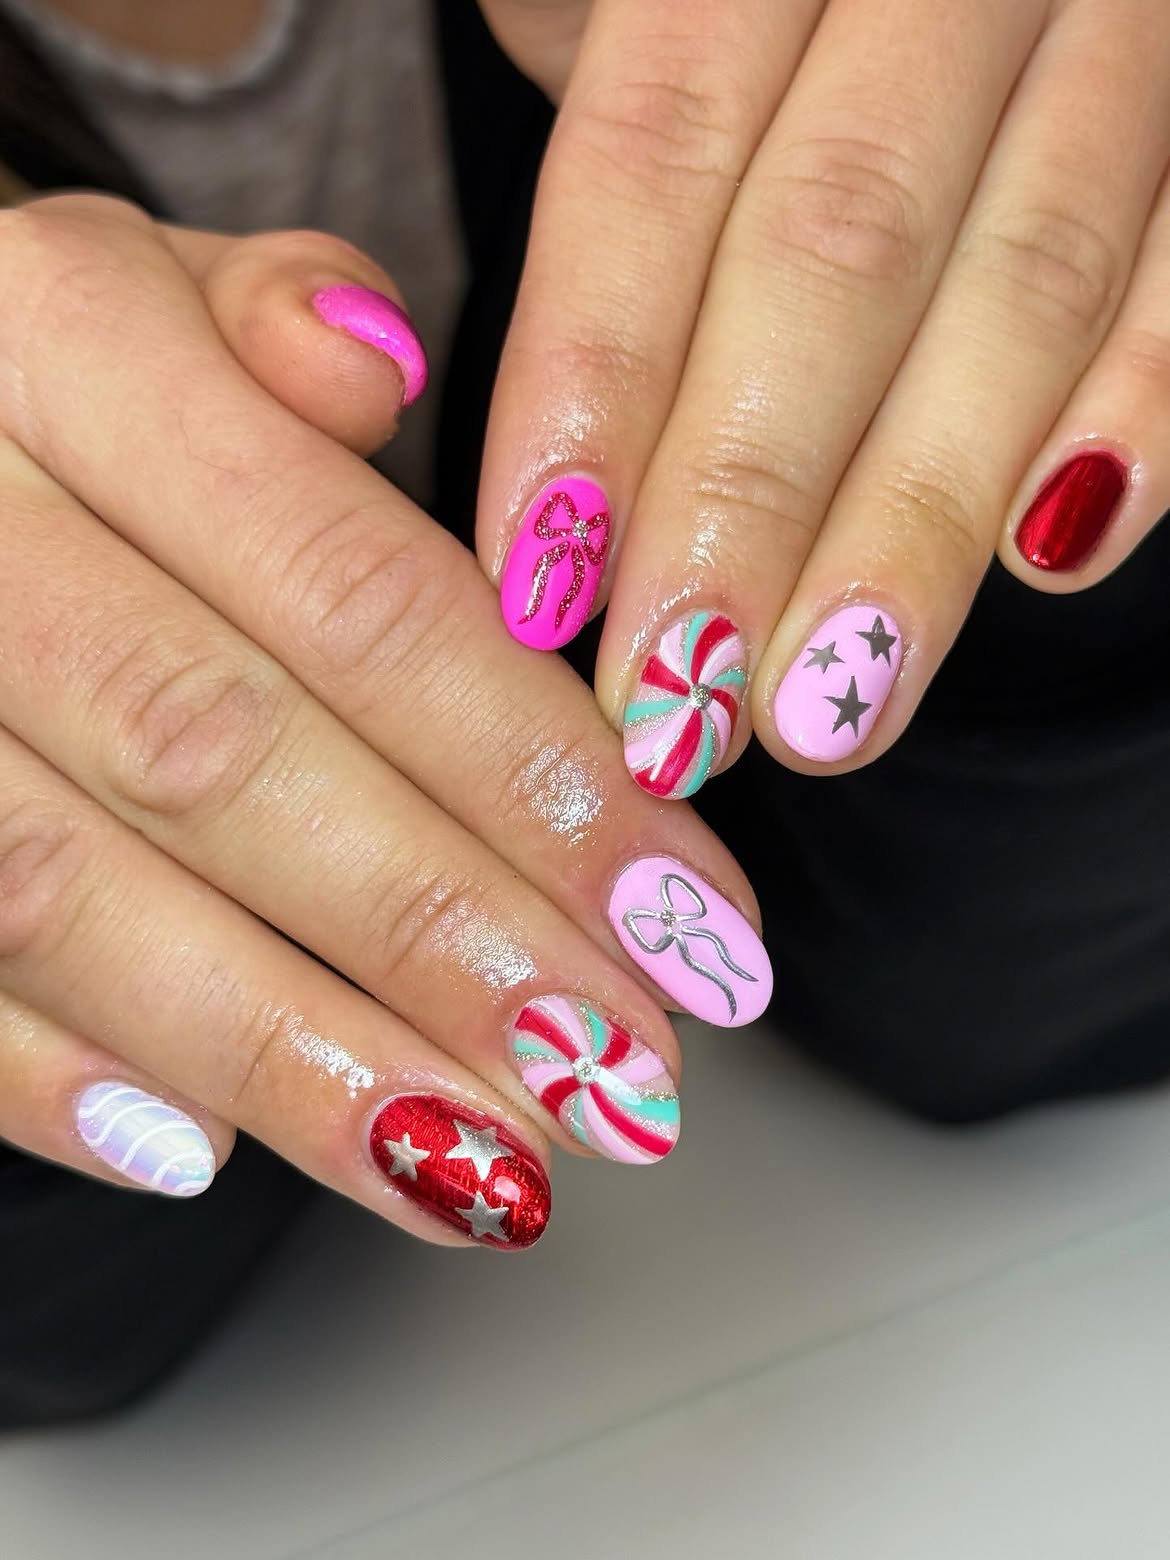
Hot pink and soft blush give this Christmas manicure a playful candy inspired look. Red, white, mint green, and silver details bring in seasonal color without following the usual dark green palette.
The peppermint swirl nails become the main feature. Curved red, white, pink, and mint sections meet around a small silver center, creating a spinning candy effect. Silver bows and stars repeat the metallic color across the other nails. Deep red chrome adds a stronger finish beside the softer pink polish.
Beginners can paint the swirl on one accent nail and use star decals on another. Keep the remaining nails solid pink or red. This reduces the amount of detailed painting while preserving the cheerful mix of color and shine.
14. Keep Burgundy Nails Simple With Santa and a Gingerbread House
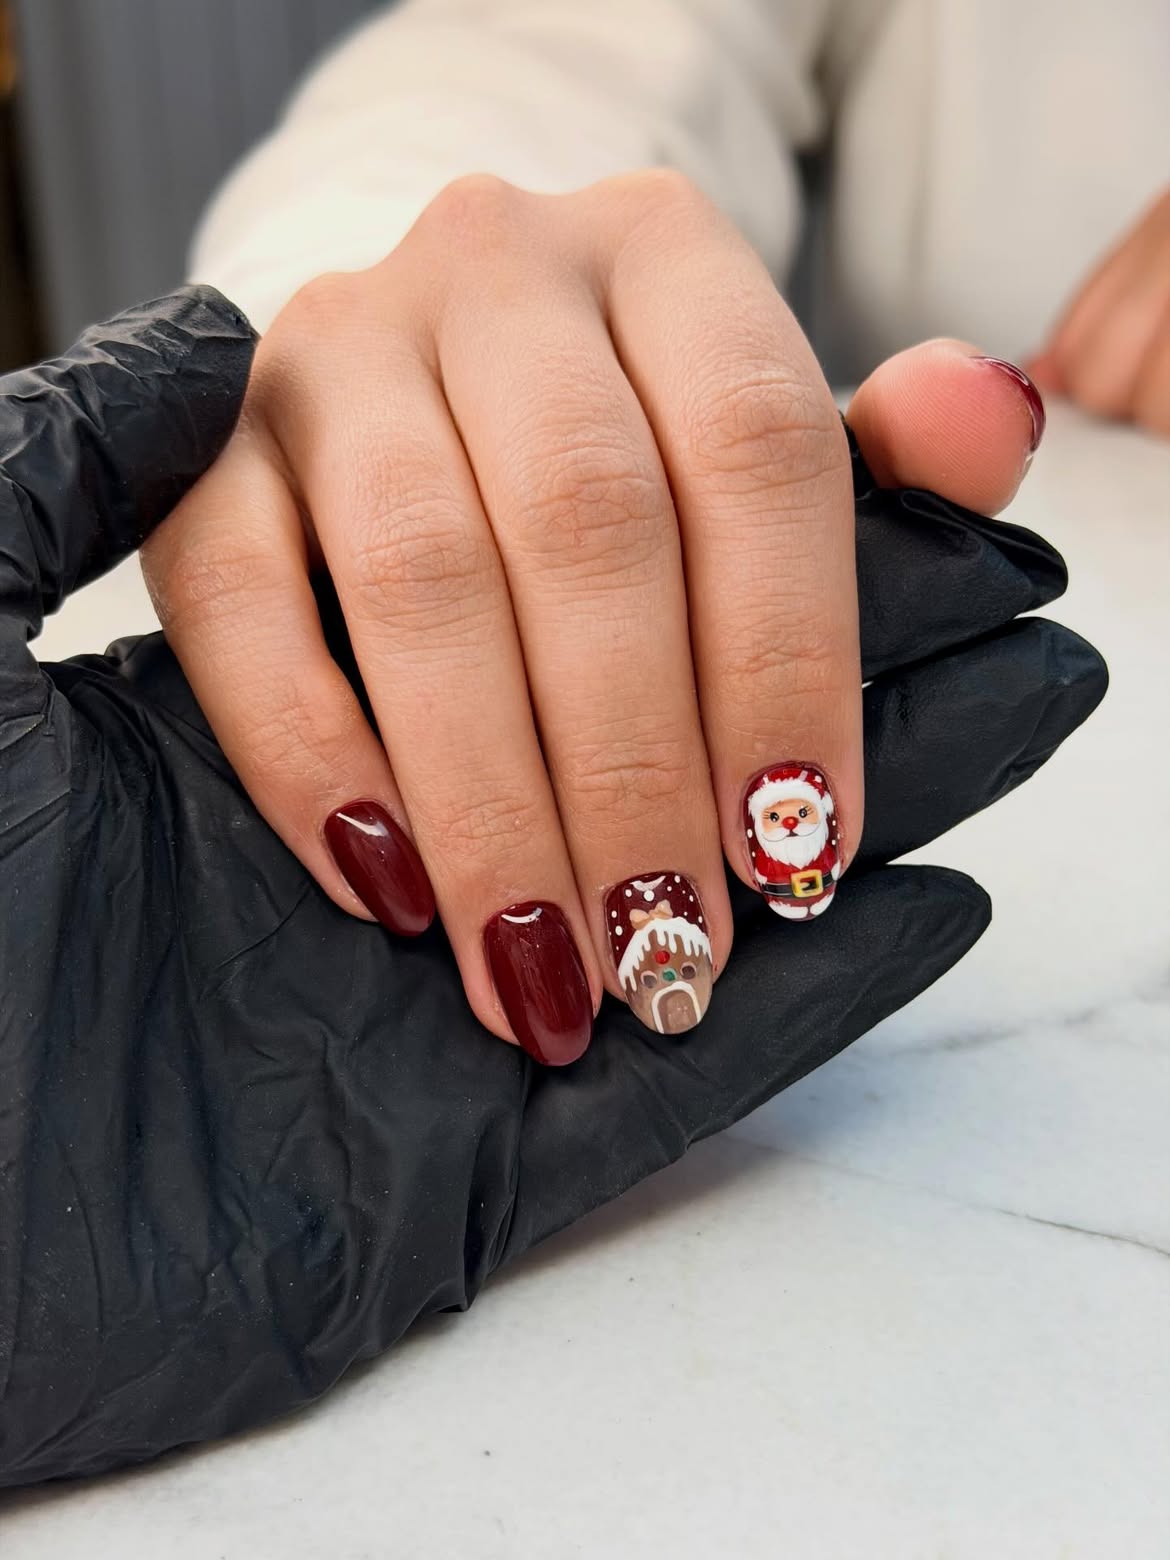
Deep burgundy polish gives this short manicure a warm Christmas base. Three solid nails keep the set easy to manage, while two illustrated accents carry the full holiday story.
The gingerbread house uses brown walls, white icing, colorful candy dots, and a snowy roof. Small white dots around it resemble falling snow. On the next nail, Santa appears in his red suit with a white beard, black belt, and gold buckle.
Detailed character art can be challenging for beginners, so decals are a useful shortcut. Another option is to paint a simpler gingerbread house shape and replace Santa with his red hat. The rich base color will still make the small white, red, and brown details stand out.
Two detailed accent nails tell the Christmas story, while three solid burgundy nails keep the manicure balanced and beginner friendly.
15. Add Hot Pink Bows to Soft Blush Christmas Nails
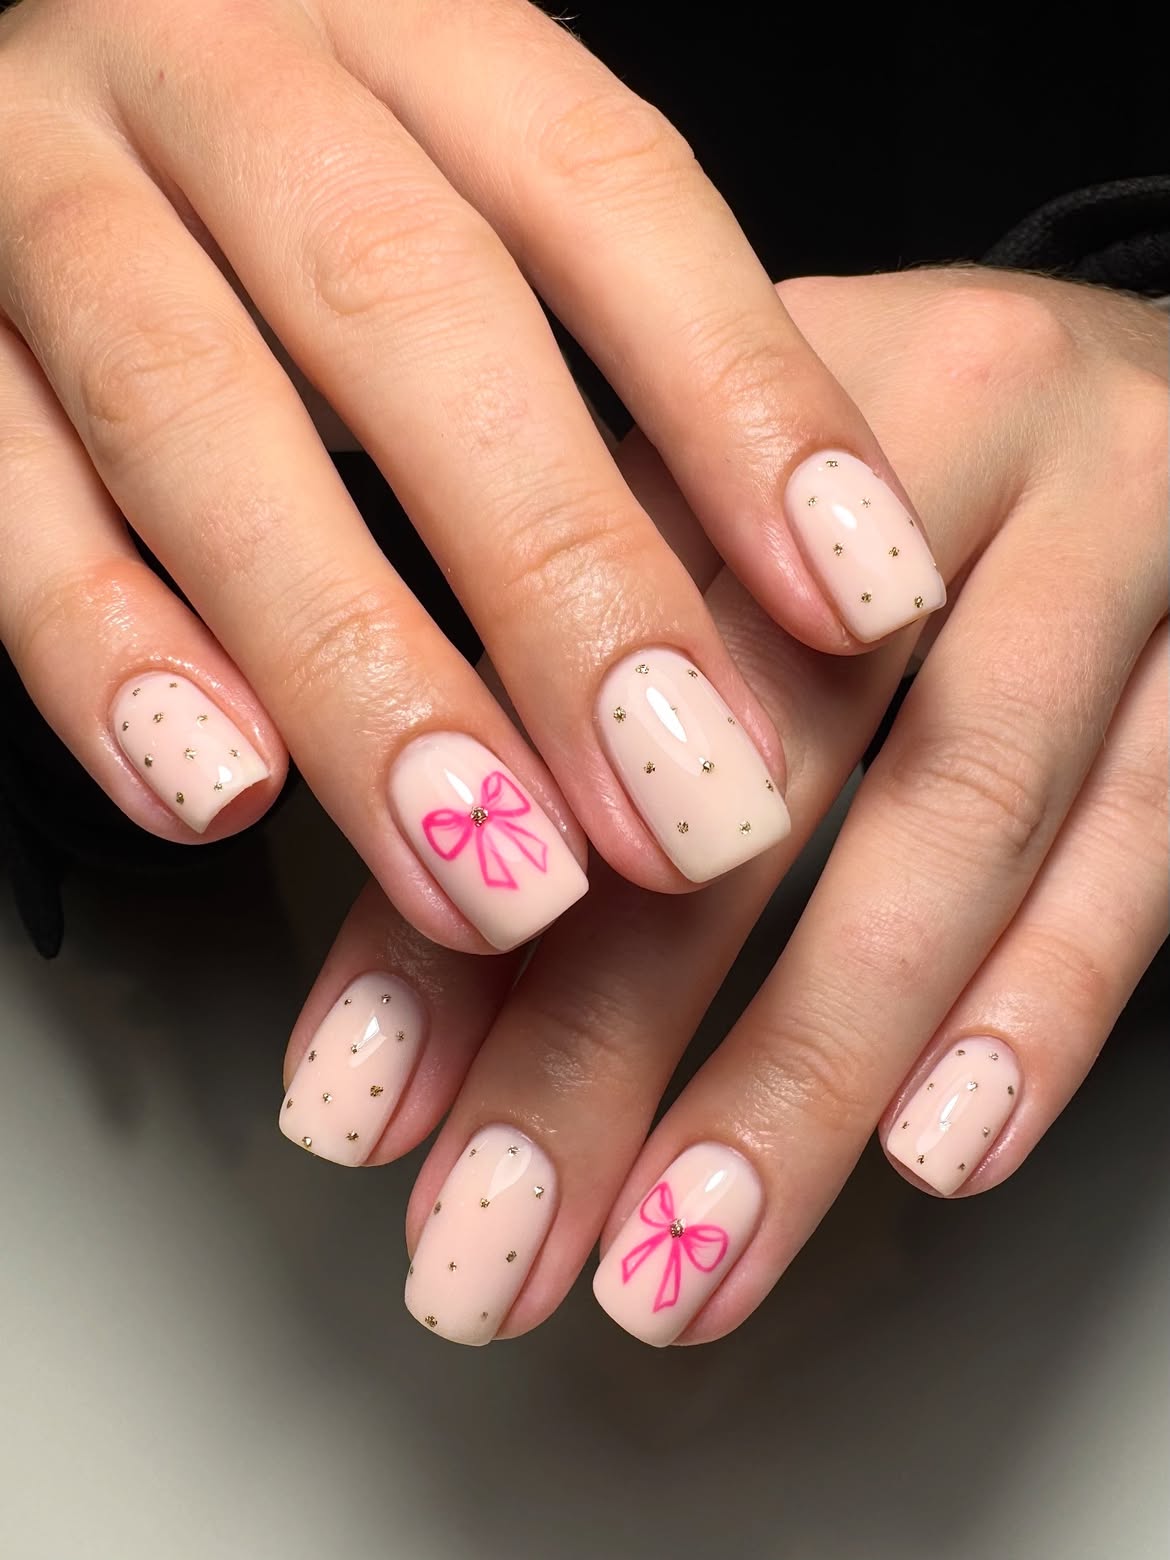
A creamy blush base gives this short square manicure a clean and gentle finish. Tiny gold flecks are scattered across most nails, while bright pink ribbon art turns two accent nails into miniature Christmas gifts.
Key details to copy:
- A smooth pale blush base on every nail
- Small gold dots placed with uneven spacing
- One thin pink bow on each hand
- A single gold bead at the center of each ribbon
The open space keeps the small decorations visible and prevents the manicure from looking crowded. Beginners can create the gold dots with a fine dotting tool or toothpick. Paint the bow as two loops first, then add the center, tails, and gold detail.
Leave visible gaps between the gold dots.
Keep the pink bow on one accent nail per hand.
Do not crowd every nail with large gold pieces.
Avoid thick ribbon lines that hide the soft base.
16. Layer Jelly Red Nails With Plaid and Gold Details
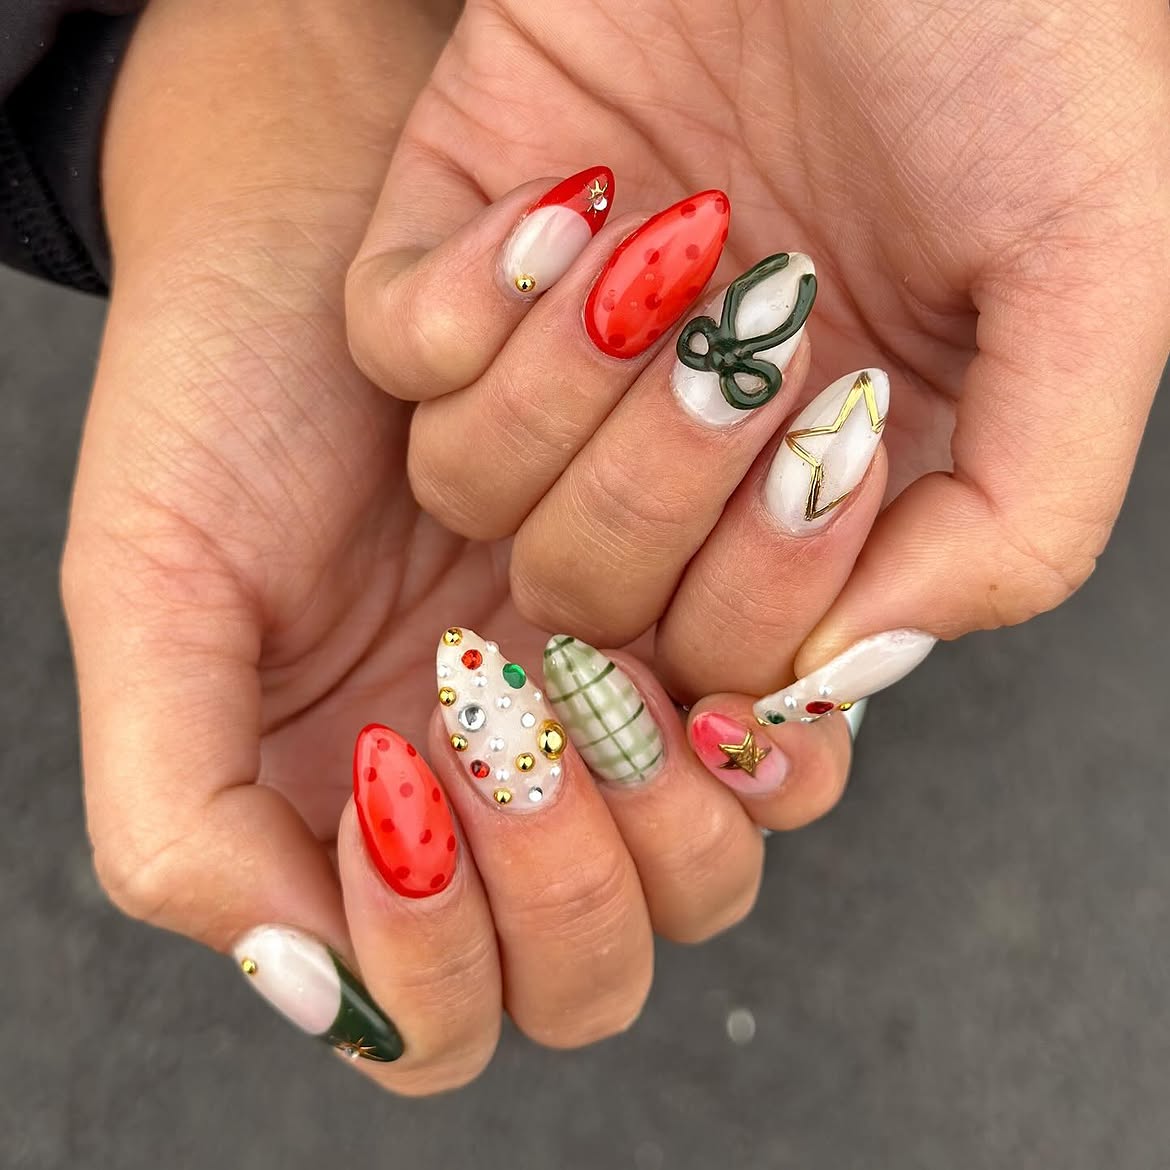
Translucent red polish, creamy white bases, green plaid, and metallic decorations give this almond manicure several distinct textures. The repeated red, green, white, and gold palette keeps the mixed designs connected.
Jelly red nails with darker dots bring a playful candy effect. A thin green plaid pattern adds a softer fabric inspired detail, while a large green bow and gold outlined star create clear feature nails. The most decorated nail uses pearls and colorful gems arranged over white polish.
Beginners can copy the color story without recreating every raised element. Use a dotting tool for the red pattern, paint plaid on one nail, and place a gold star sticker on another. Keep the remaining nails white or use simple red and green tips.
| Beginner version | Detailed version |
|---|---|
| Red jelly dots on one or two nails | Red jelly dots across several nails |
| One simple green plaid accent | Plaid, raised bow, and outlined star |
| Flat gold stickers | Pearls, gems, and metallic pieces |
17. Bright Gift Wrap Mix
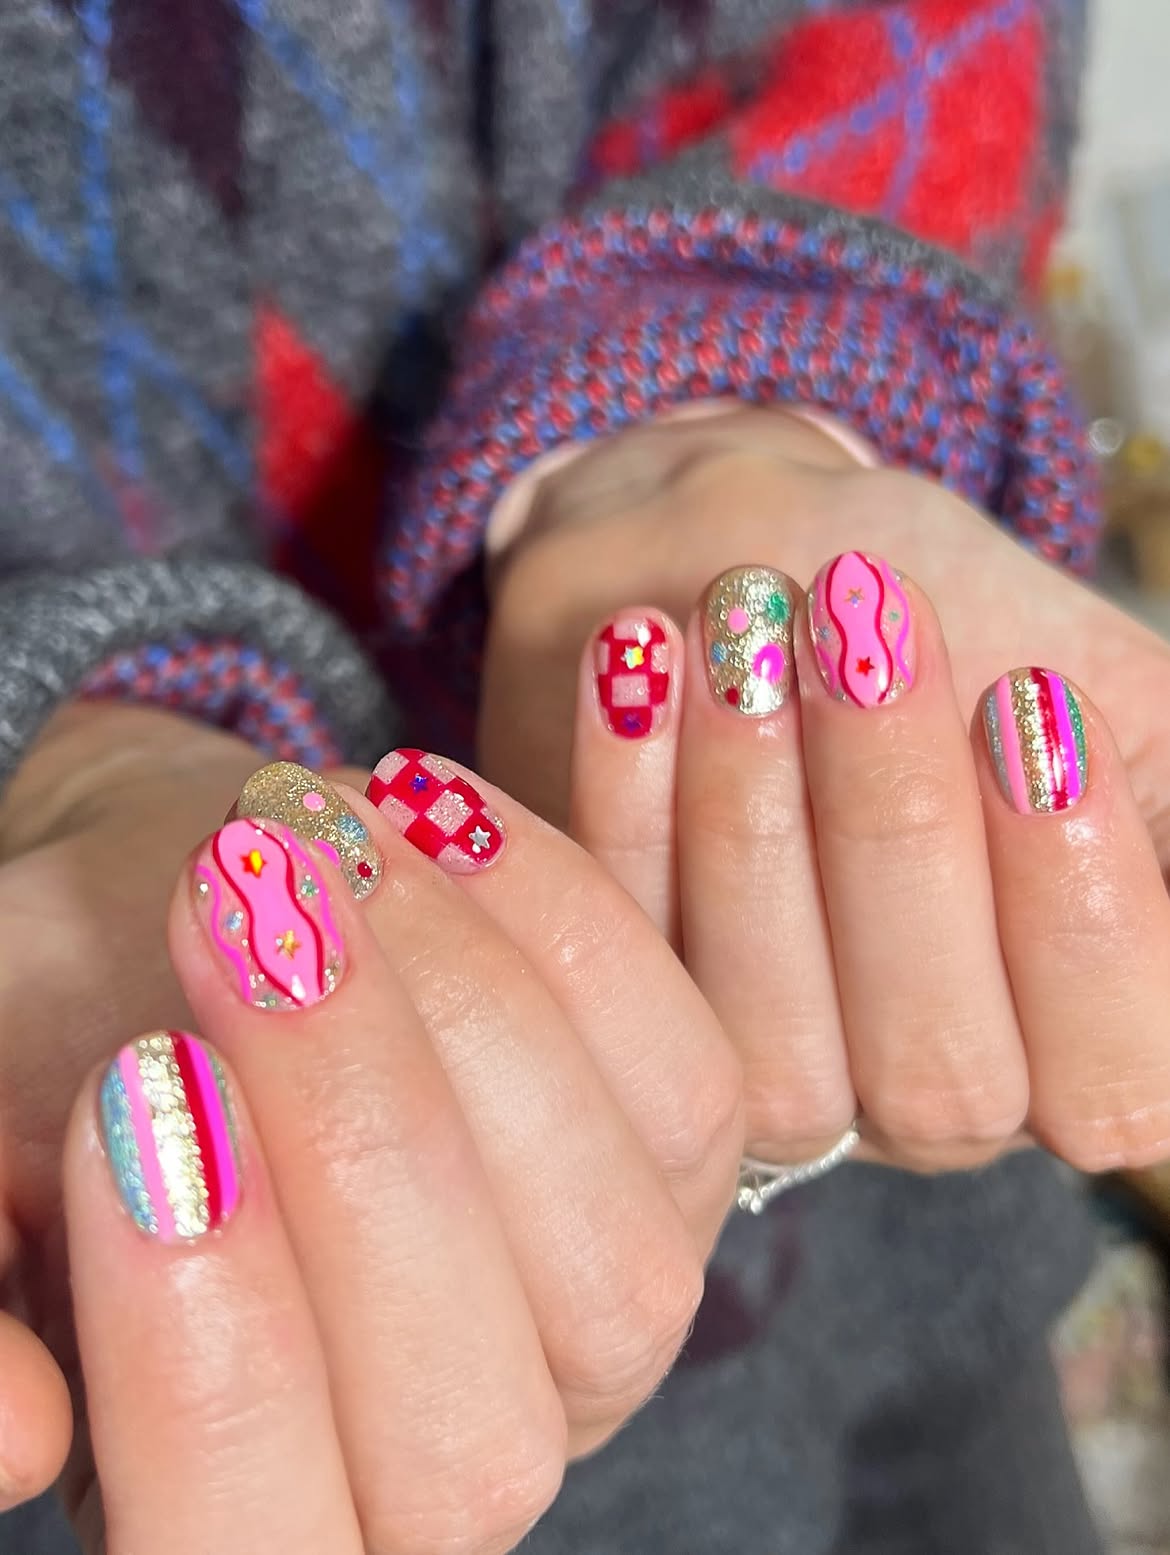
These playful Christmas Nail Designs for Beginners turn short rounded nails into tiny wrapped presents. Begin with pink, red, gold, and silver bases, then give each nail one simple pattern. Straight stripes, loose waves, gift box checks, and scattered glitter create variety without requiring advanced painting skills.
Use a thin brush for the curved pink lines and striping tape for the crisp vertical bands. The red gift nails can be built from chunky squares, so small imperfections blend into the festive pattern. Finish with tiny stars, dots, or gems where extra sparkle feels balanced. Keeping the colors consistent helps every different design feel connected.
Alternate pink, red, gold, and silver.
Choose stripes, waves, checks, or glitter.
Place a few stars, dots, or gems across the set.