17 Cute Green Nails: Mint, Sage, Emerald and Floral Designs!
Green nail polish has much more range than one bottle on a salon shelf might suggest. A pale mint tip can feel fresh and delicate, while deep teal shimmer brings a richer look with almost no extra art. The fun begins when green meets blush pink, tiny flowers, checks, stars, pearls, gold foil, or loose ribbon lines.
These 17 Cute Green Nails show how many ways the color can work on short squares, soft ovals, and long almond shapes. Some designs rely on one glossy shade. Others mix sage, lime, emerald, and olive across French tips, reversed florals, checkerboards, and botanical accents. There are quiet options for readers who like clean details, along with brighter sets that make color the main event.
As you browse, notice how each manicure balances detailed nails with simpler ones. That small choice keeps patterns clear and makes even bold combinations easier to wear. Save the ideas that match your nail length, favorite green shade, and the amount of nail art you enjoy.
17 Cute Green Nails Inspo 2026
1. Soft Mint French Tips With Matching Solid Accents
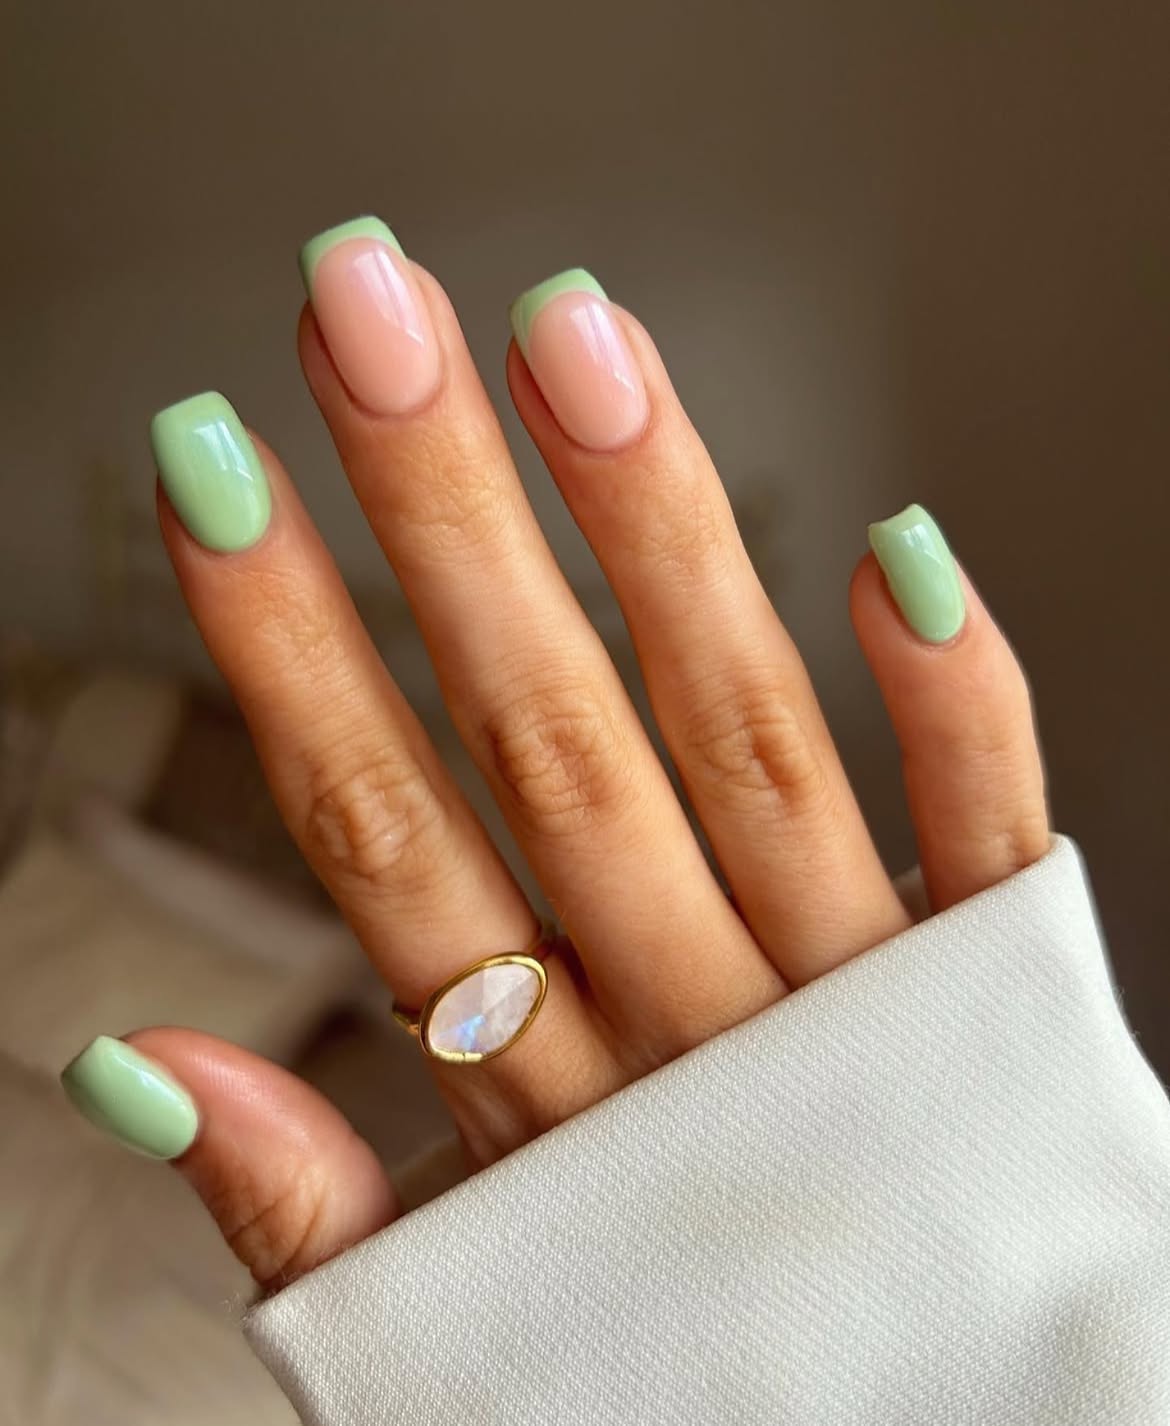
Pale mint gives this manicure a fresh look without covering every nail in color. The thumb, index finger, and little finger carry the solid green shade, while the two center nails use a sheer blush base with matching mint tips.
What makes the design work:
- The repeated mint shade connects both nail styles.
- Square tips keep the French lines clean and noticeable.
- The sheer pink base adds warmth beside the cool green polish.
- A glossy finish brings out the smooth color and neat edges.
Use a thin nail art brush to shape the green tips, then clean the curves with a small brush dipped in remover. Apply the same top coat across every nail so the solid and French sections feel like one complete set.
2. Pearly Mint French Nails With Tiny Dewdrop Details
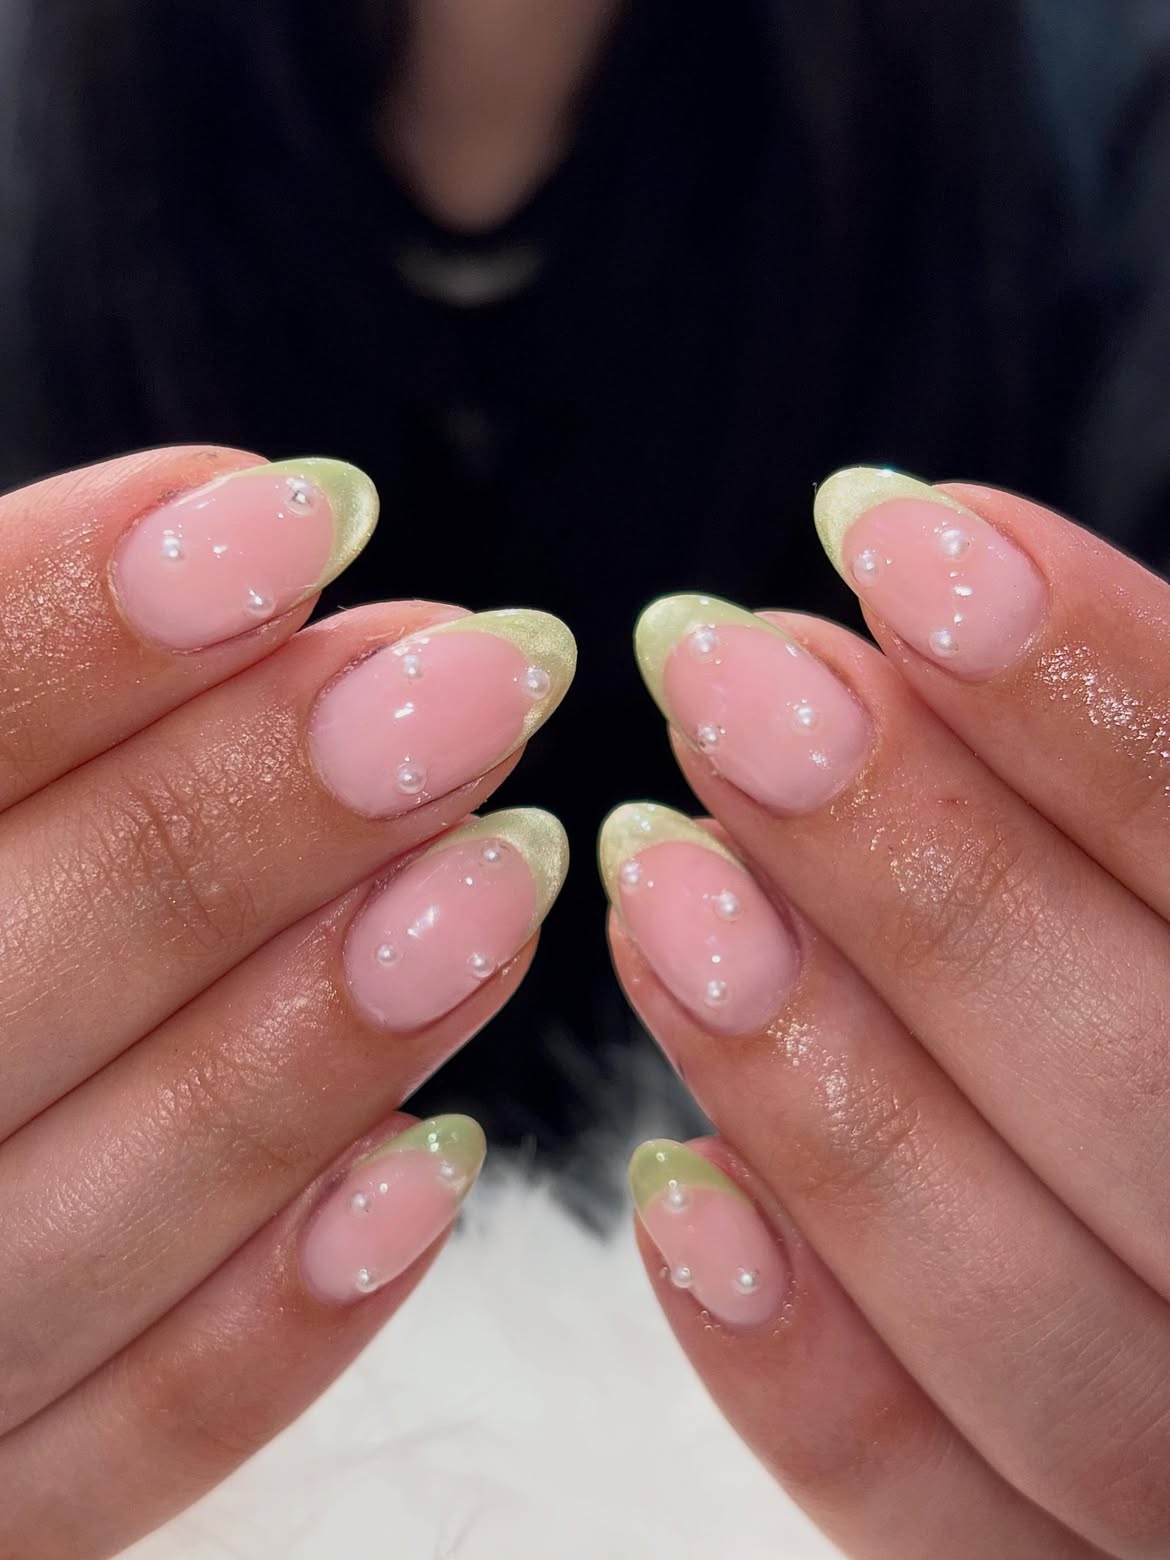
Tiny pearl accents turn this soft green French manicure into a delicate, textured look. Each almond shaped nail has a milky pink base, a lightly shimmering mint tip, and scattered white beads that resemble small drops of morning dew.
The pearl placement feels loose rather than heavily patterned. Some sit near the cuticle, while others float across the center of the nail. This keeps the design playful and lets the green tips remain visible.
For a similar result, paint the French edges with a sheer green shimmer instead of a dense cream polish. Add the pearls only after the color has cured. Leave a little breathing room between them so the manicure still looks light and clean. The gentle sparkle and raised details catch the light without overwhelming the soft palette.
💡 Keep the pearls secure
Set each pearl into a small dot of thick gel. Seal around its base with a fine brush, but avoid covering the entire pearl so its rounded shine stays visible.
3. Lime Green Swirl Nails With Layered Wavy Lines
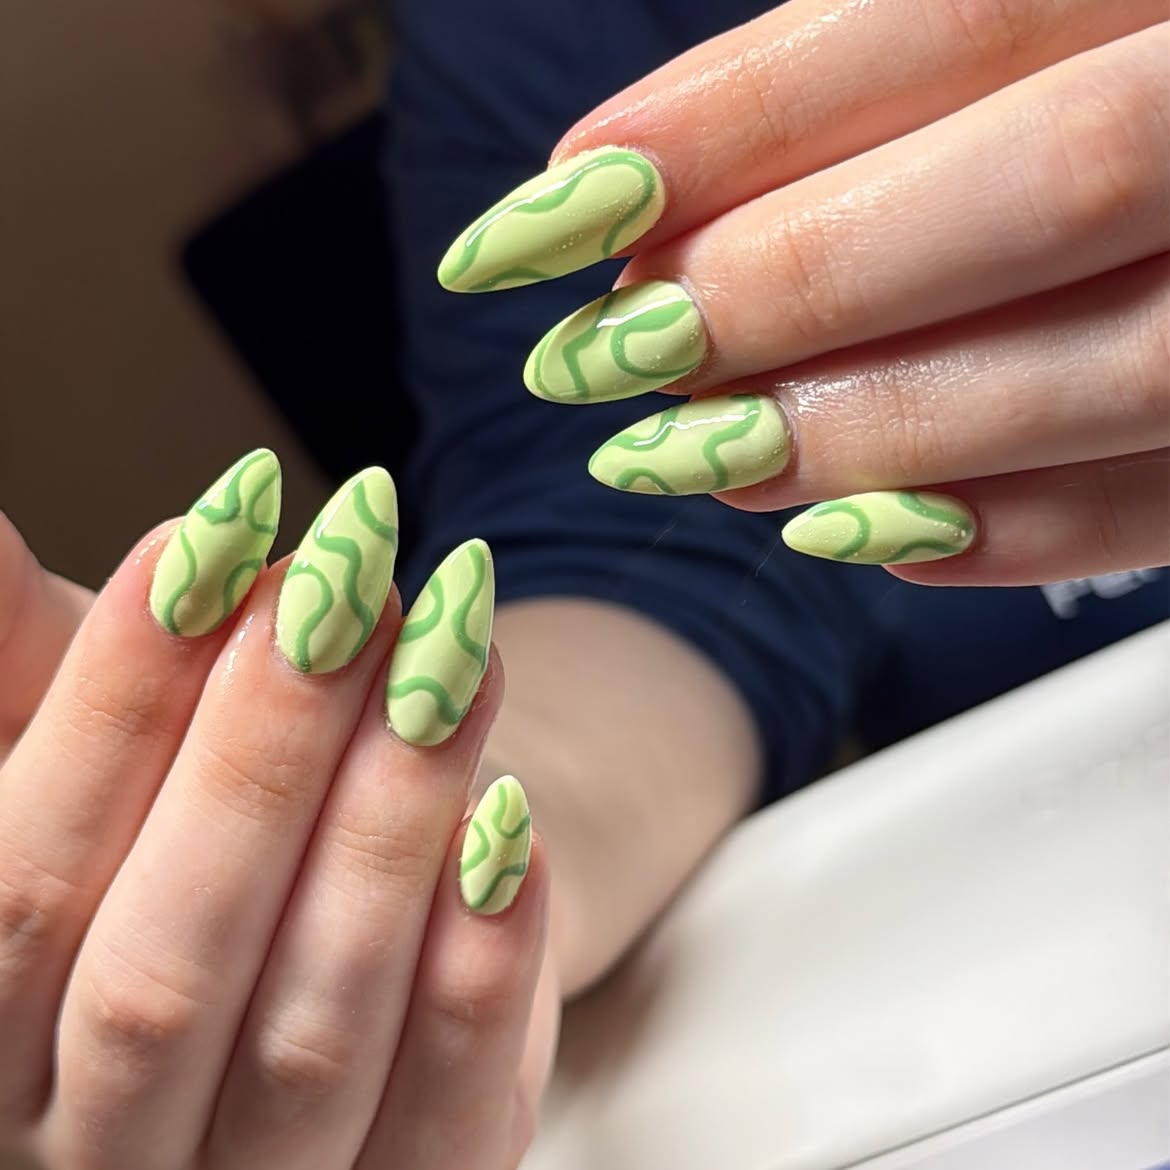
Flowing green lines give this long almond manicure an energetic, almost liquid pattern. A pale lime base covers every nail, while deeper green curves travel in different directions across the glossy surface.
Build the look in three moves:
- Apply the lighter green shade as a smooth base.
- Draw loose curves with a fine brush and the darker green polish.
- Add a second line beside selected curves to create more depth.
The design works because the pattern changes from nail to nail. Some lines form wide loops, while others bend close to the edges. Keeping the same two colors across the set prevents the varied swirls from looking busy. Let each curve follow the length of the almond shape to make the nails appear even more graceful.
Vary the width and direction of each curve.
Leave open areas so the lime base can show through.
Do not copy the same swirl onto every nail.
Avoid pressing hard with the brush, which can make the lines thick and uneven.
For a cleaner take on this color trend, 18 Simple Green Nails brings together soft shades, minimal accents, and easy green manicures you can wear anytime.
4. Mint French Square Nails With Blurred Pink Blooms
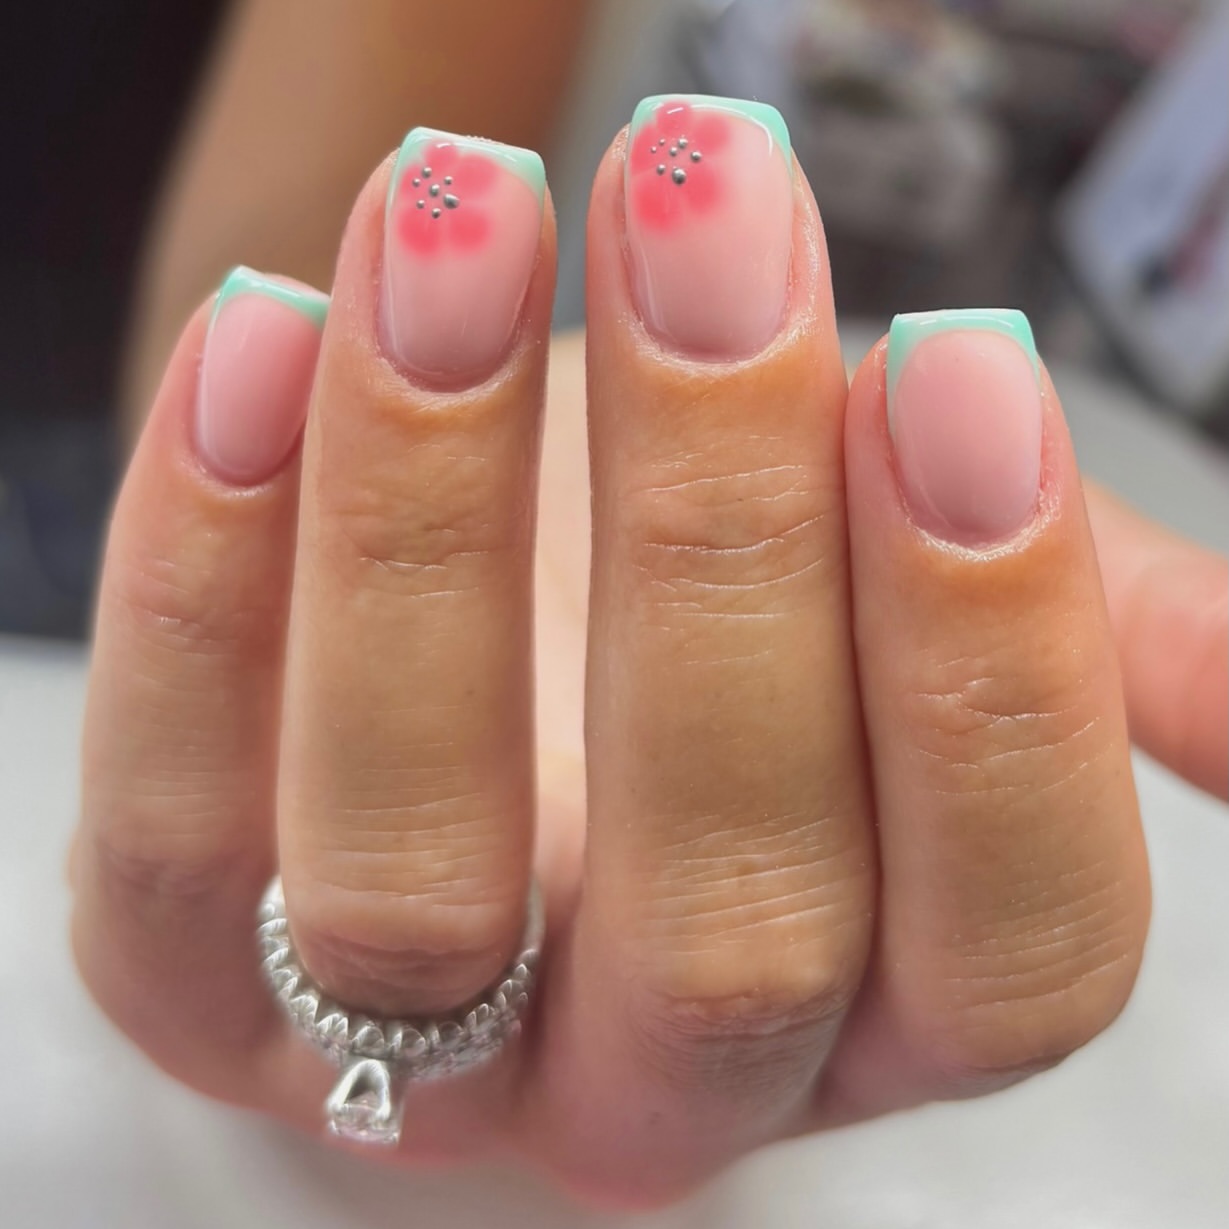
A milky pink base gives this square manicure a soft, translucent glow. Slim mint tips outline each nail, while the two center nails carry blurred pink flowers with tiny silver toned dots at their centers.
Two details share the attention:
The French edge: The narrow green line follows the square shape and adds color without hiding the natural looking base.
The floral accents: Soft pink petals sit close to the tips, leaving plenty of open space near the cuticles. Small metallic dots make each flower easy to notice.
Keeping the outer nails free from extra decoration helps the flowers stand out. To recreate the faded petals, lightly tap pink polish onto the nail with a small sponge or soft brush. Add the silver dots after the petals dry, then finish with a glossy top coat.
5. Olive Green Checkerboard Nails With Tiny White Flowers
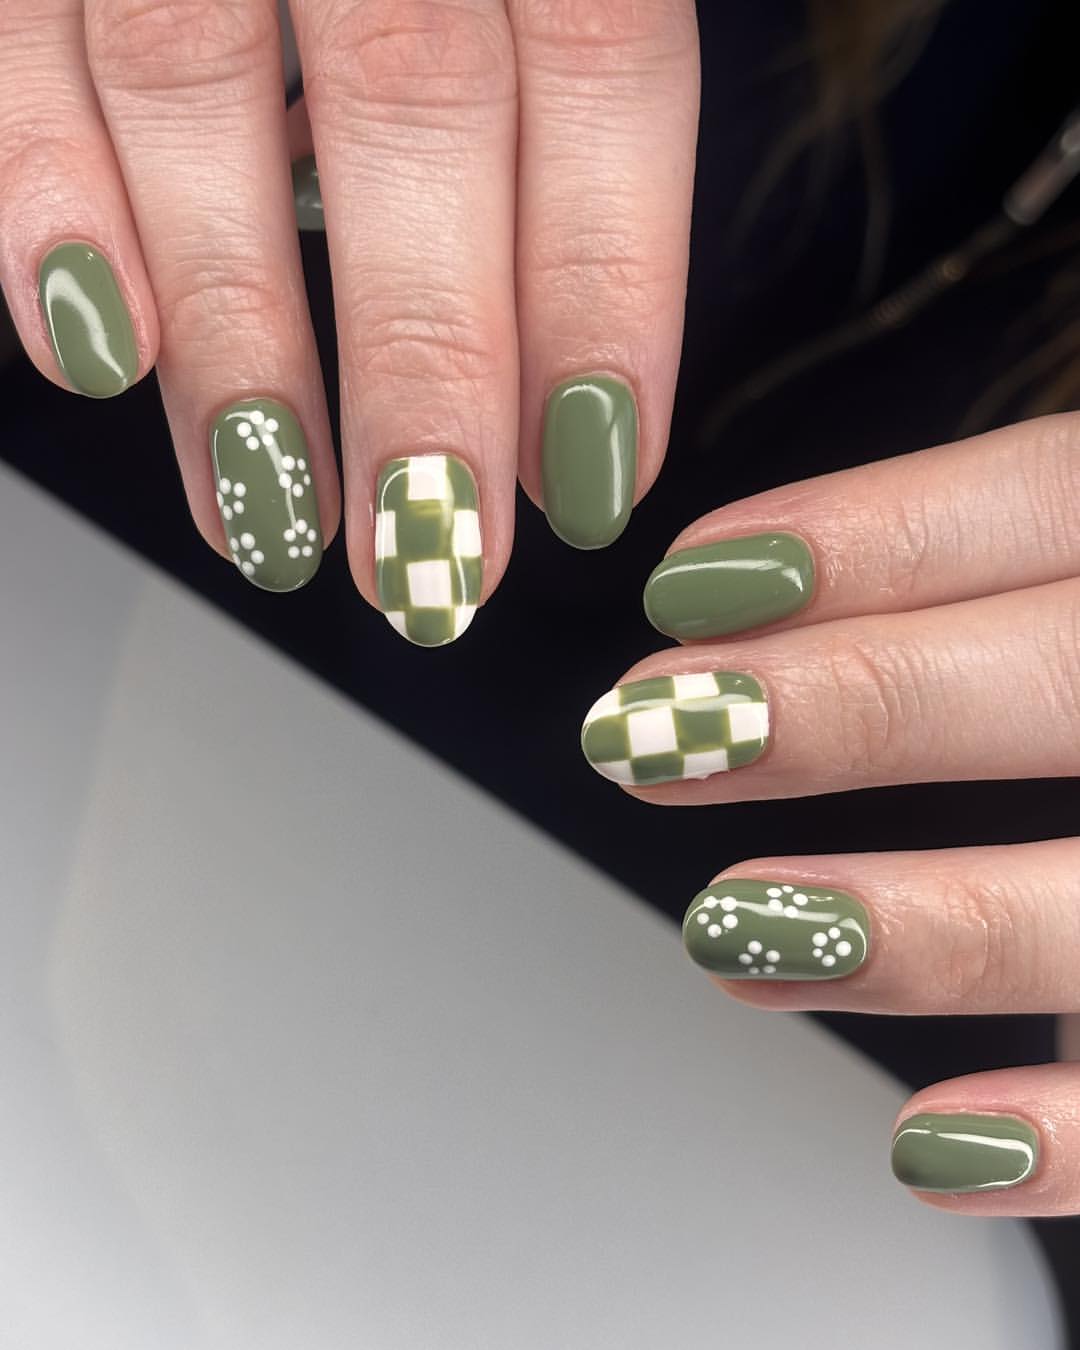
Retro checks and dotted flowers bring two different patterns into one olive green manicure. Most nails use a glossy solid color, giving the detailed accent nails enough room to stand out.
Solid olive nails create a calm base and connect the whole set.
Cream checkerboards add a bold geometric element. The slightly uneven painted squares give the pattern a relaxed, handmade feel.
Dotted flowers soften the checks with small clusters of white petals. Their simple shape keeps the floral nails playful rather than crowded.
The short oval shape suits the design because there is enough space for each pattern without making the manicure feel heavy. Paint only a few patterned nails on each hand, then change their placement for a balanced but less predictable result.
Tools for recreating the patterns
6. Lucky Clover Green Nails With Gold Celestial Accents
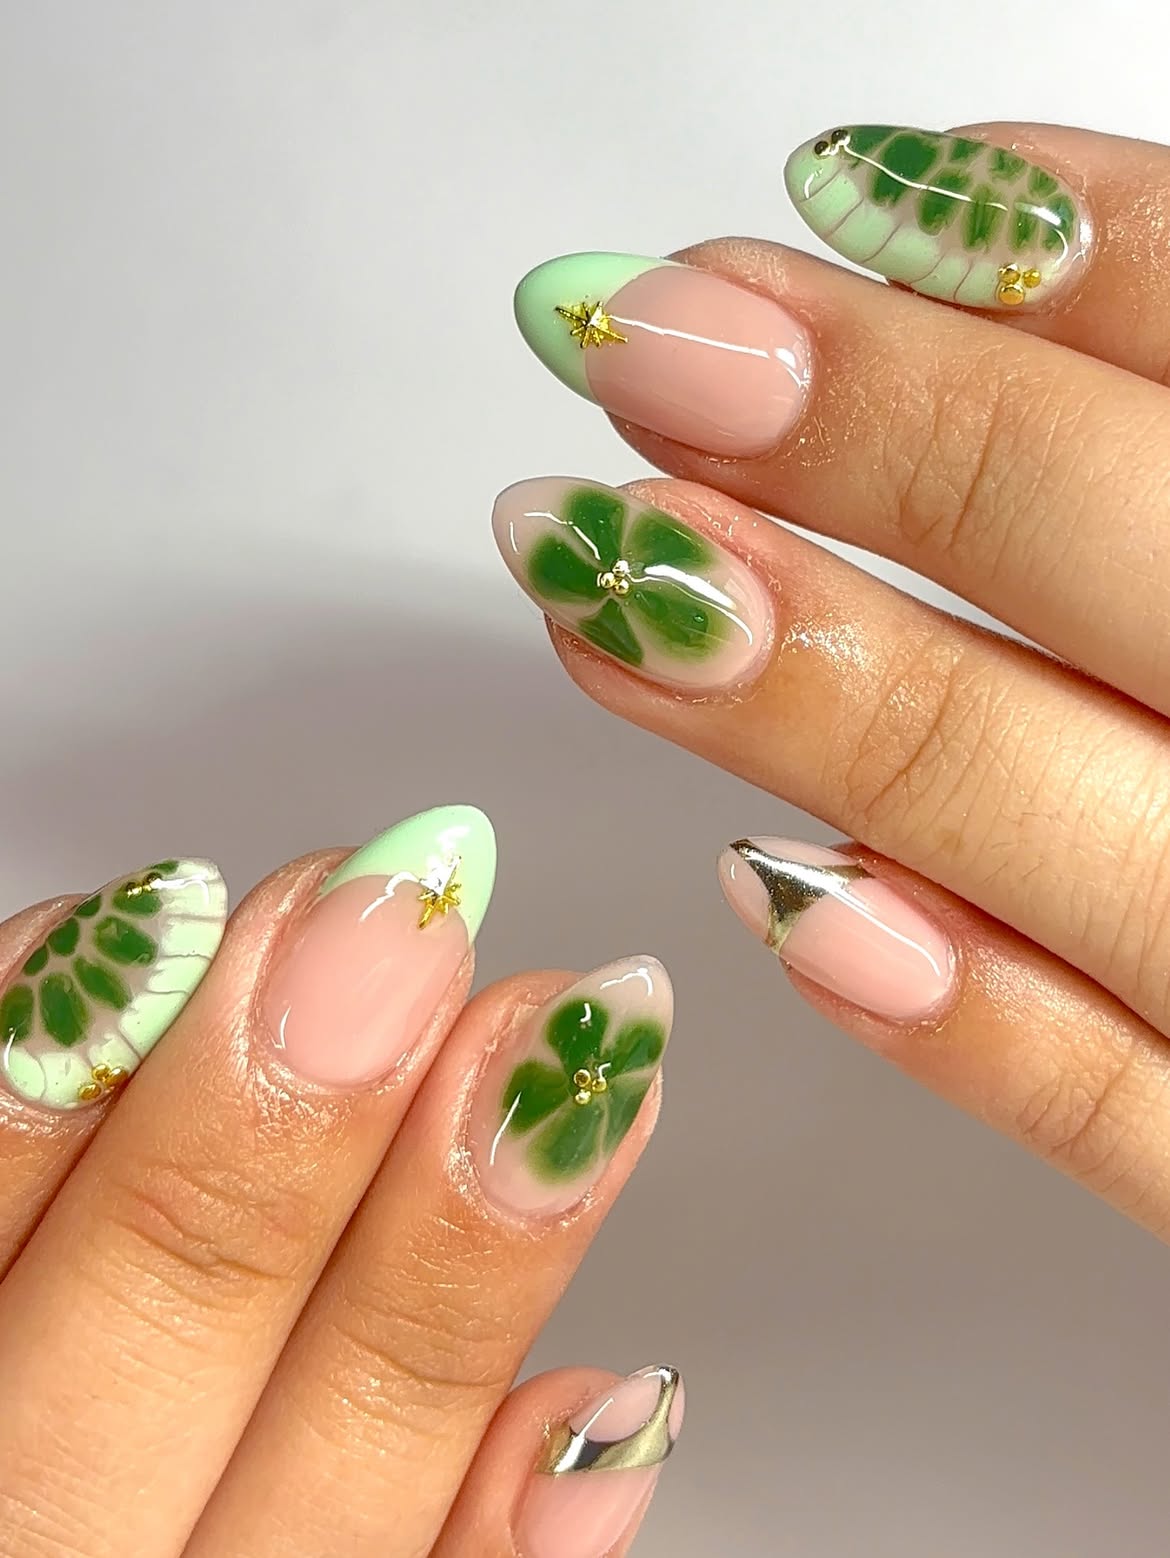
Four leaf clovers take center stage in this detailed green manicure. Soft nude bases keep the set airy, while mint tips, leafy panels, and deep green clover petals build a rich botanical theme.
Gold toned details appear in several forms. Tiny beads mark the center of each clover, small star charms decorate the mint French tips, and reflective metallic sections sharpen the outer accent nails. The mix feels connected because every nail repeats at least one color or finish from another part of the set.
A smart way to recreate this design is to divide the art into levels. Use clovers and leafy patterns for the busiest nails, simple mint tips for visual rest, and metallic corners for a clean flash of shine. This lets every detail remain visible instead of competing for attention.
Pair detailed botanical nails with open French tips and a small metallic accent. The quiet spaces give the clovers and gold details room to shine.
7. Sage Polka Dot Nails With Pink Floral Accents
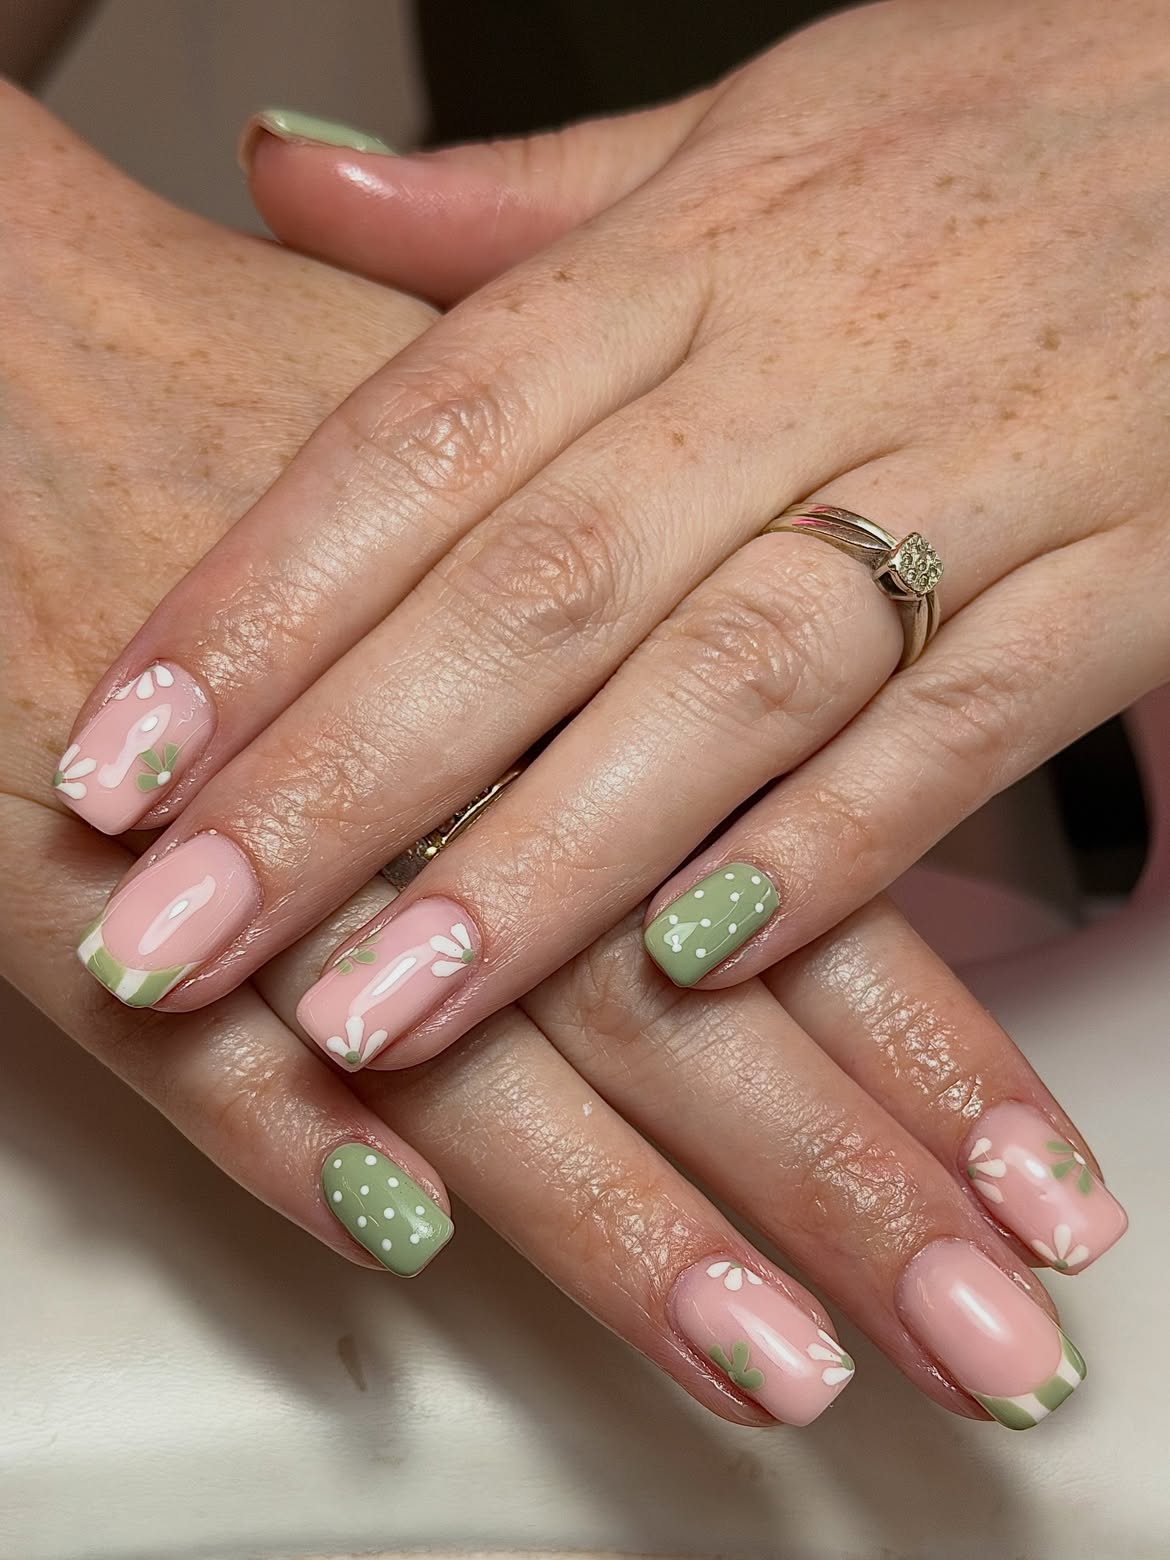
Soft pink and muted sage divide this short square manicure into several playful patterns. White flowers grow inward from the edges of the pink nails, with small green leaves linking them to the rest of the set.
The sage accent nails use scattered white dots and thin curved stems. On the French nails, blocks of green and cream create a checked tip that feels bolder than a single color edge. Although the patterns change, the limited palette keeps everything connected.
Leave part of the pink base uncovered around the flowers. That open space makes the petals easier to see and stops the shorter nails from looking crowded. Place the detailed patterns on different fingers across both hands so the manicure feels balanced without becoming too matched.
| Quieter version | Full pattern mix |
|---|---|
| Use one sage dot accent on each hand. | Add floral nails beside the sage accents. |
| Finish the remaining nails with plain pink. | Use checked French tips to complete the set. |
8. Two Tone Green Nails With Checks, Hearts, and Mini Florals
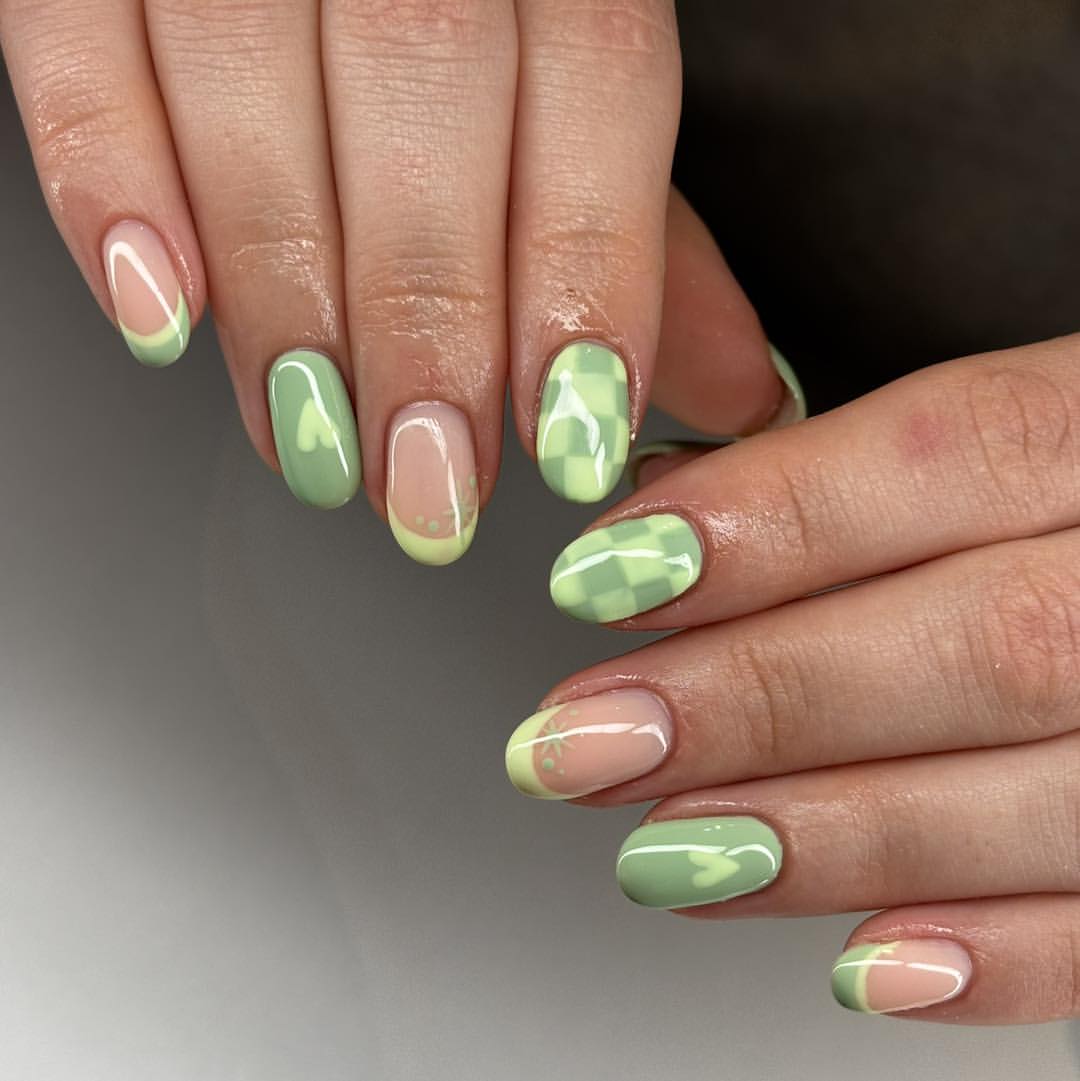
A tonal palette lets checks, hearts, French tips, and tiny flower stems sit together without making this manicure feel scattered. Muted sage creates the main color, while a brighter lime shade brings certain details forward.
- The checkered nails use both greens in wide blocks, giving the short oval shape a bold focal point.
- Small lime hearts sit on solid sage nails, adding a softer detail with plenty of open space around them.
- The nude nails carry curved green tips and fine botanical marks, which keep the natural base visible.
The clever part is the color plan. Every pattern uses shades from the same green family, so even the busiest nails belong together. Choose one muted green and one brighter partner, then swap which shade leads on each nail.
Paint the solid sage nails and the nude bases first.
Build the checks and curved tips with the brighter green shade.
Add the hearts and fine stems last, then seal every nail with clear gloss.
9. Shimmery Sage Nails With Black Polka Dot French Tips
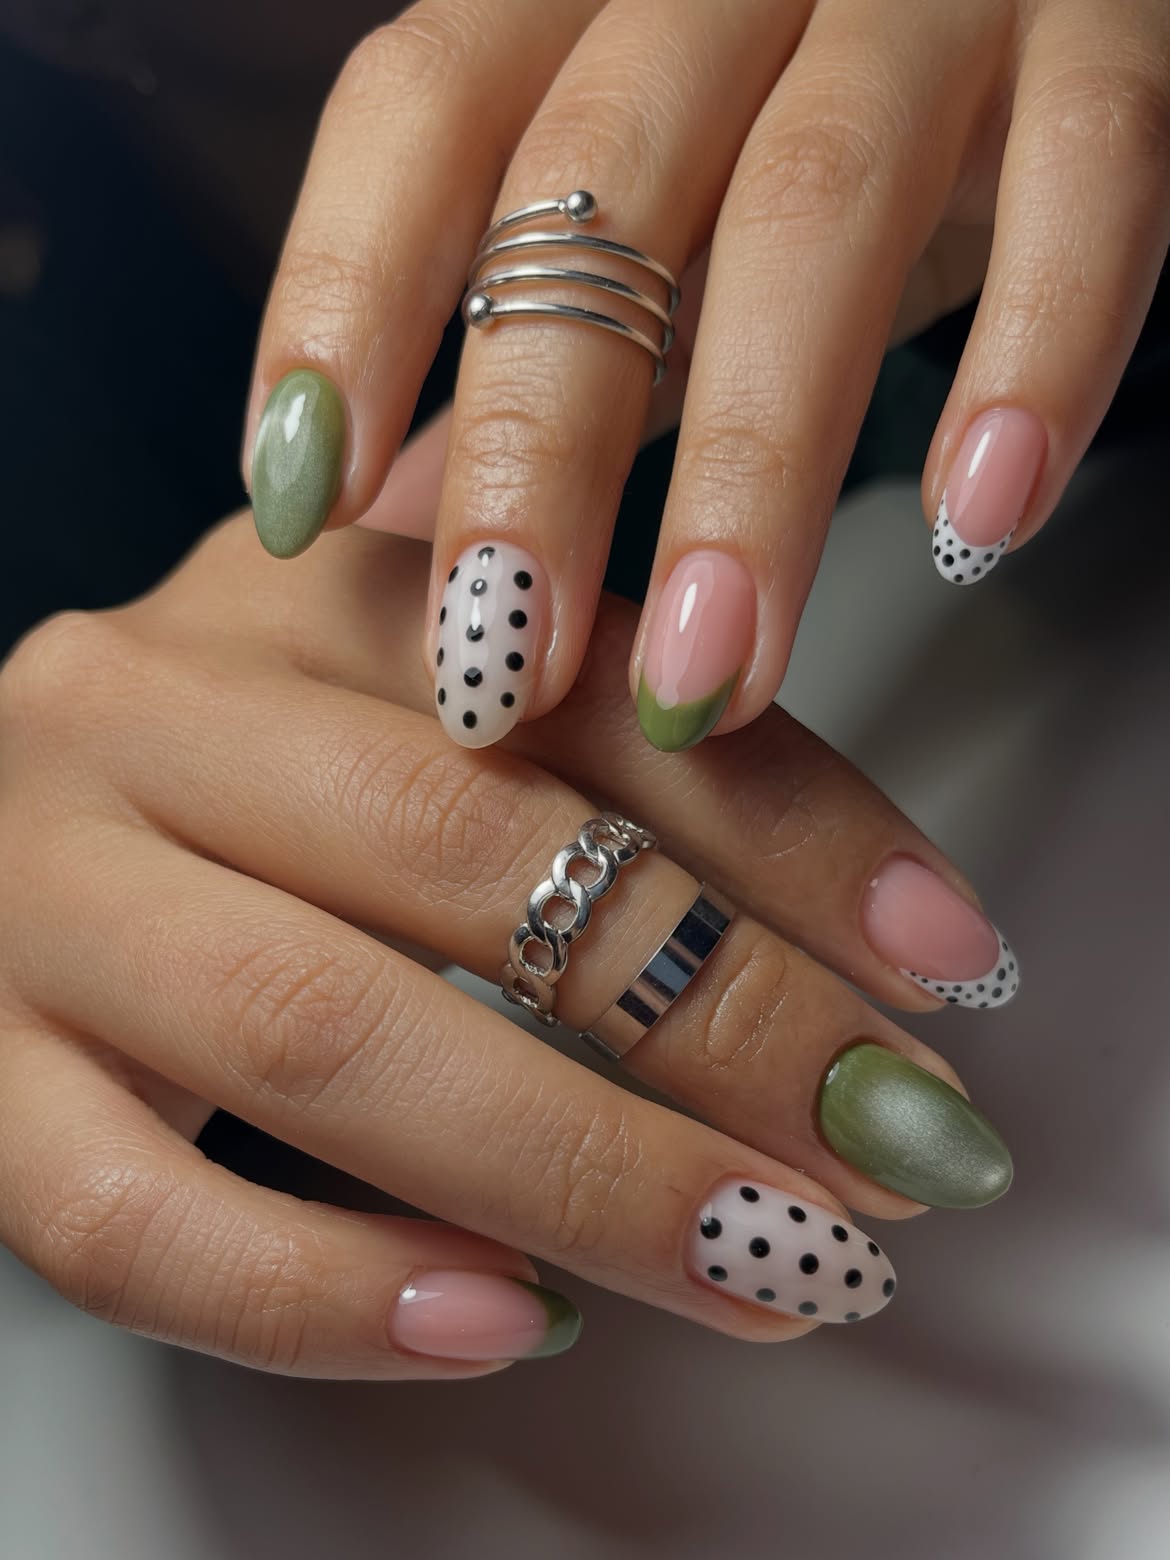
Black dots bring a graphic twist to this muted green manicure. The almond nails move between softly shimmering sage polish, olive French tips, and creamy white sections covered with neat black spots.
Why the mix feels balanced:
- The sage shimmer adds depth without introducing another color.
- Black dots give the pale nails a clear, playful pattern.
- Nude space around the French tips keeps the design light.
- Repeating each feature across both hands creates a steady rhythm.
Use different dot sizes on the full accent nails, then keep the dots smaller along the French edges. This small change prevents the repeated pattern from looking flat. A glossy finish ties the metallic green, natural pink, and dotted white surfaces together.
Alternate nude pink, creamy white, and shimmering sage across the nails.
Add olive tips and black dots, changing their scale to separate the accent styles.
If you love green nails with a brighter seasonal twist, 17 Red and Green Nails has fresh designs that mix classic shades with playful nail art.
10. Pastel Mint Nails Sprinkled With Tiny Black Stars
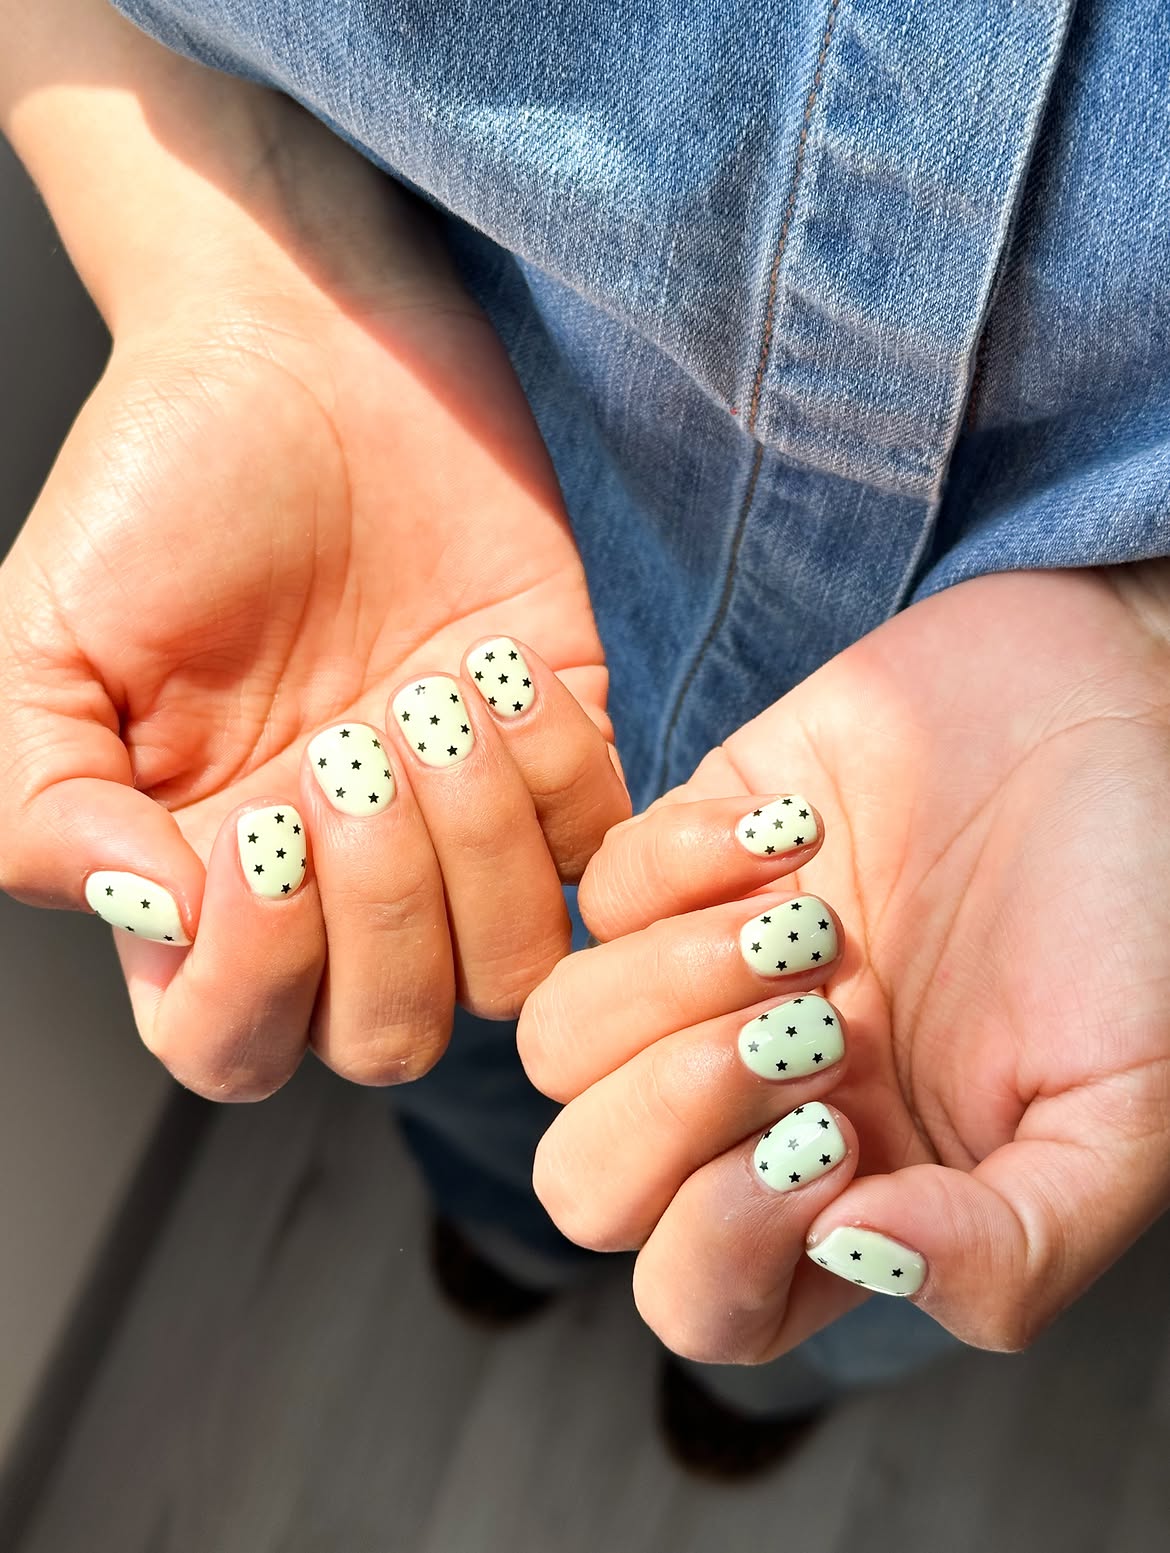
A scattering of tiny black stars gives this pale mint manicure a playful night sky twist. The creamy green base covers every short rounded nail, creating a clean background for the dark details.
Contrast does most of the work here. The stars are small, but their crisp black color makes them easy to spot. Their loose placement also matters. Some sit near the edges, others fill the center, and the changing gaps keep the pattern from looking like a strict grid.
This design is easy to scale for different nail lengths. Use fewer stars on smaller nails and leave open areas of mint between them. Finish with a smooth layer of clear gloss so every motif sits flat and the soft color keeps its shine.
- ✦Rotate the stars so they do not all face one direction.
- ✦Change the spacing slightly from nail to nail.
- ✦Press each motif flat before applying the glossy seal.
11. Deep Teal Green Nails With Fine Sparkle
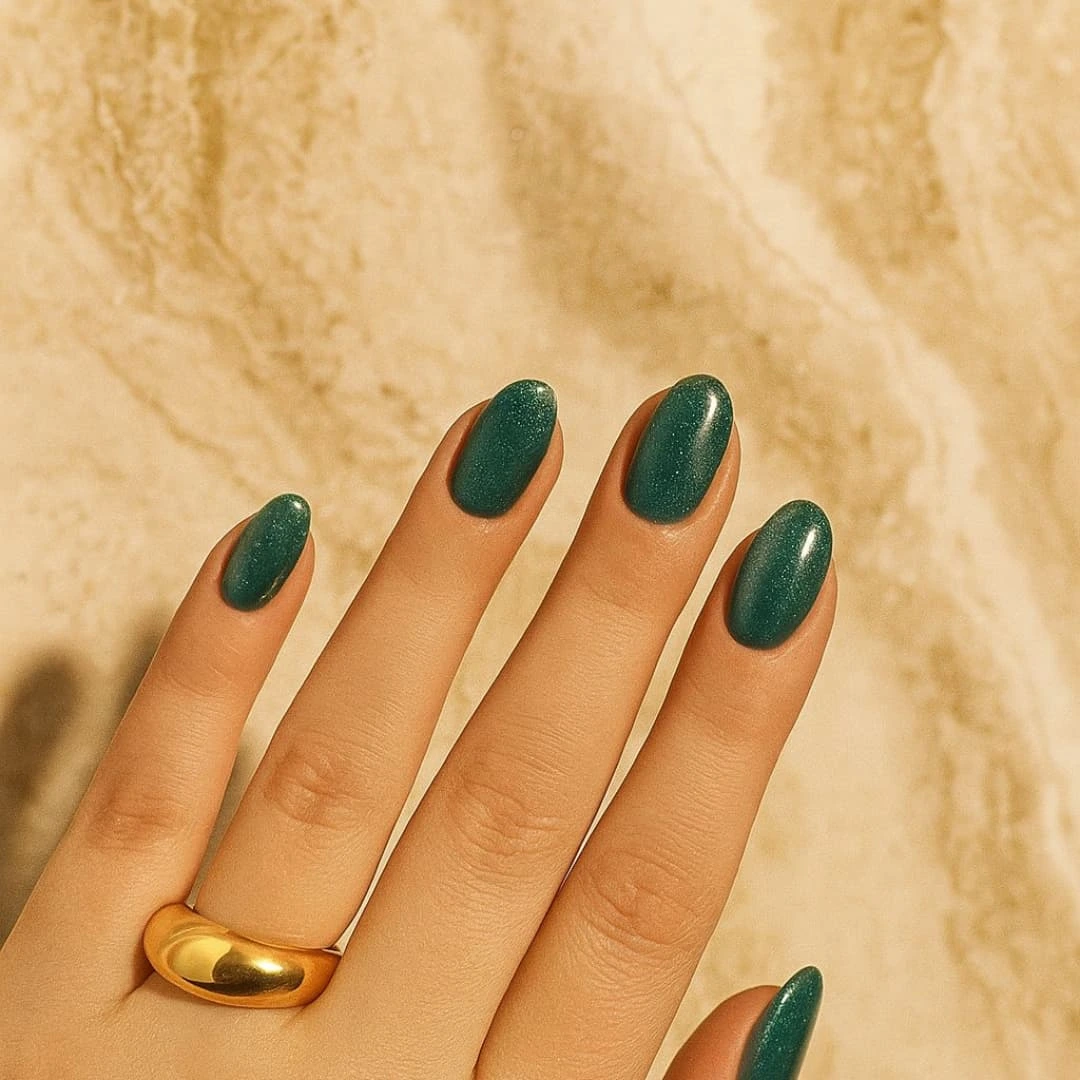
A rich teal shade gives this manicure depth, while fine shimmer keeps the solid color from feeling flat. The sparkle is spread evenly across every nail, so it catches warm light in a soft glow rather than a bold glitter flash.
Keep the finish clean:
- Apply thin coats to prevent streaks in the dark color.
- Let each layer dry before adding the next one.
- Follow the curve of the medium oval shape when sealing the tips.
- Use a glossy top coat to bring the fine shimmer forward.
The single color makes this look easy to wear, but the deep green still has plenty of character. It also pairs naturally with simple gold jewelry, as the warm metal stands out against the cooler polish.
📌 Good to know
Apply a clear base coat before using a deep green pigment. It creates a smoother surface and may help protect the natural nail from visible color staining.
12. Muted Sage Nails With Gold Foil and White Leaves
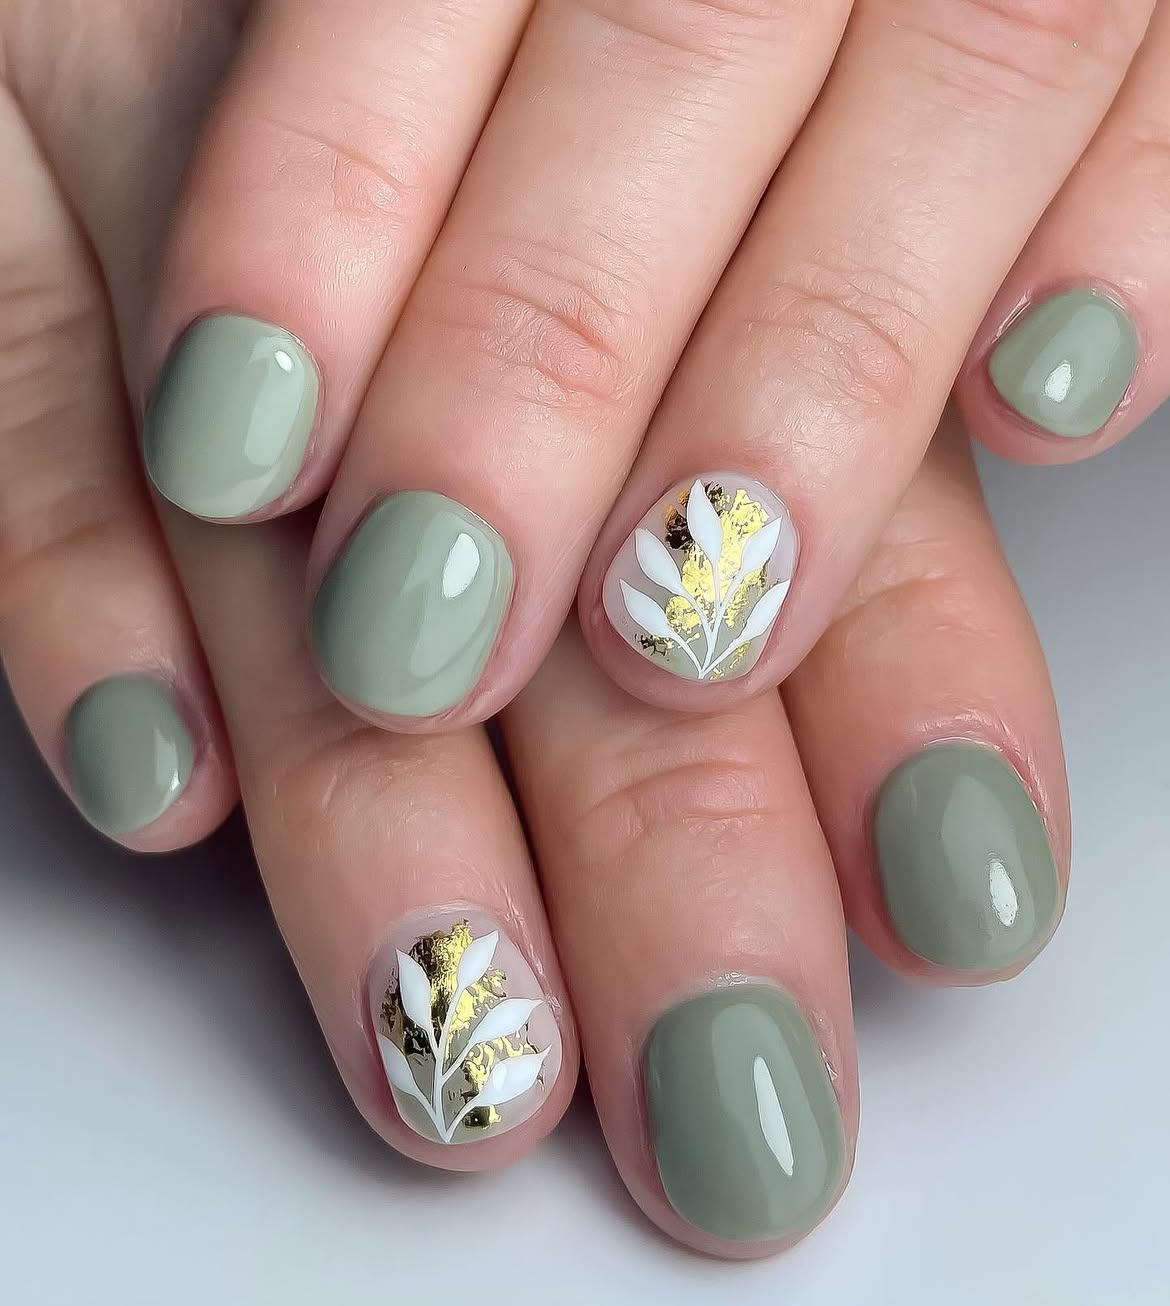
Muted sage creates a calm backdrop for the brighter botanical accents in this short manicure. Most nails carry the same smooth green polish, while one nail on each hand uses a translucent base layered with broken pieces of gold foil and a white leafy branch.
The foil is irregular rather than arranged in a solid block. Small gaps let the natural base show through and give the metallic pieces a lighter appearance. Painting the slim white stem over the gold creates a clear silhouette that remains visible against both surfaces.
Keep the decorative nails limited so the sage color still leads the design. Press the foil onto a tacky layer, seal it once to smooth any raised edges, then paint the leaves. A final clear coat brings the glossy green and reflective gold together.
13. Reversed Green Flower Nails With Lime and Emerald
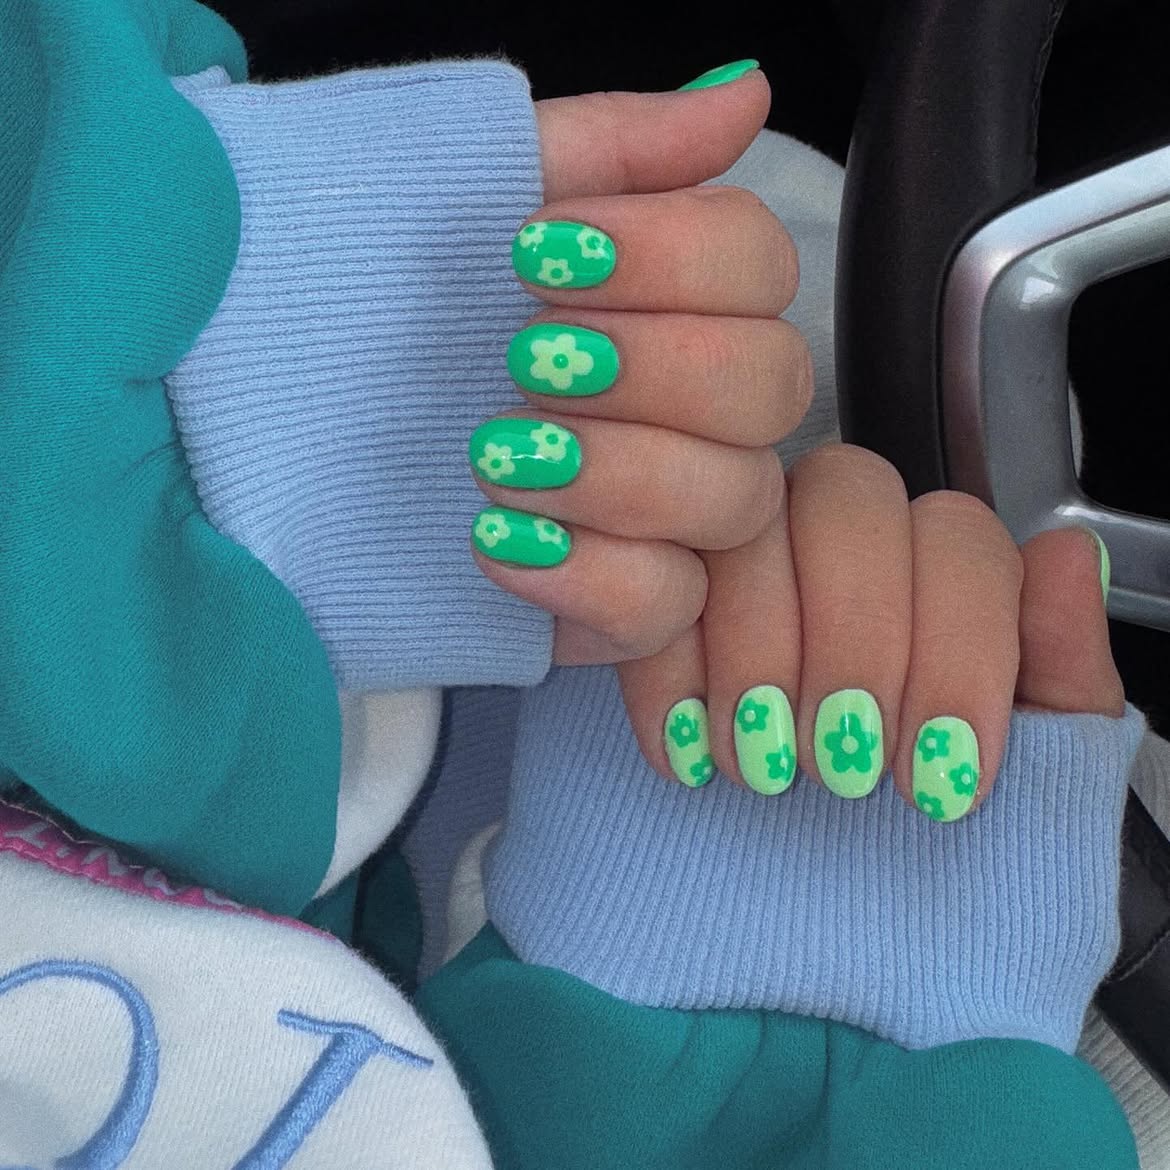
Color swapping turns a simple flower motif into a lively mismatched manicure. Both hands use the same two bright greens, but the base and petal colors trade places.
On one hand: Vivid emerald covers the nails, with pale lime flowers scattered across the surface.
On the other hand: Light lime becomes the background, while the deeper green forms the petals and centers.
The repeated rounded flowers connect both sides even though the color balance changes. Larger blooms fill the center of selected nails, while smaller flowers sit near the edges and corners. This varied placement suits the short rounded shape and stops the pattern from feeling too regular. Use a dotting tool to build each flower, then add a contrasting center before sealing the art with gloss.
Reverse the same two colors across the hands.
Mix large center flowers with smaller edge blooms.
Avoid adding a third strong color that breaks the mirrored palette.
Do not place every flower in the same spot.
14. Layered Green Wave French Tips
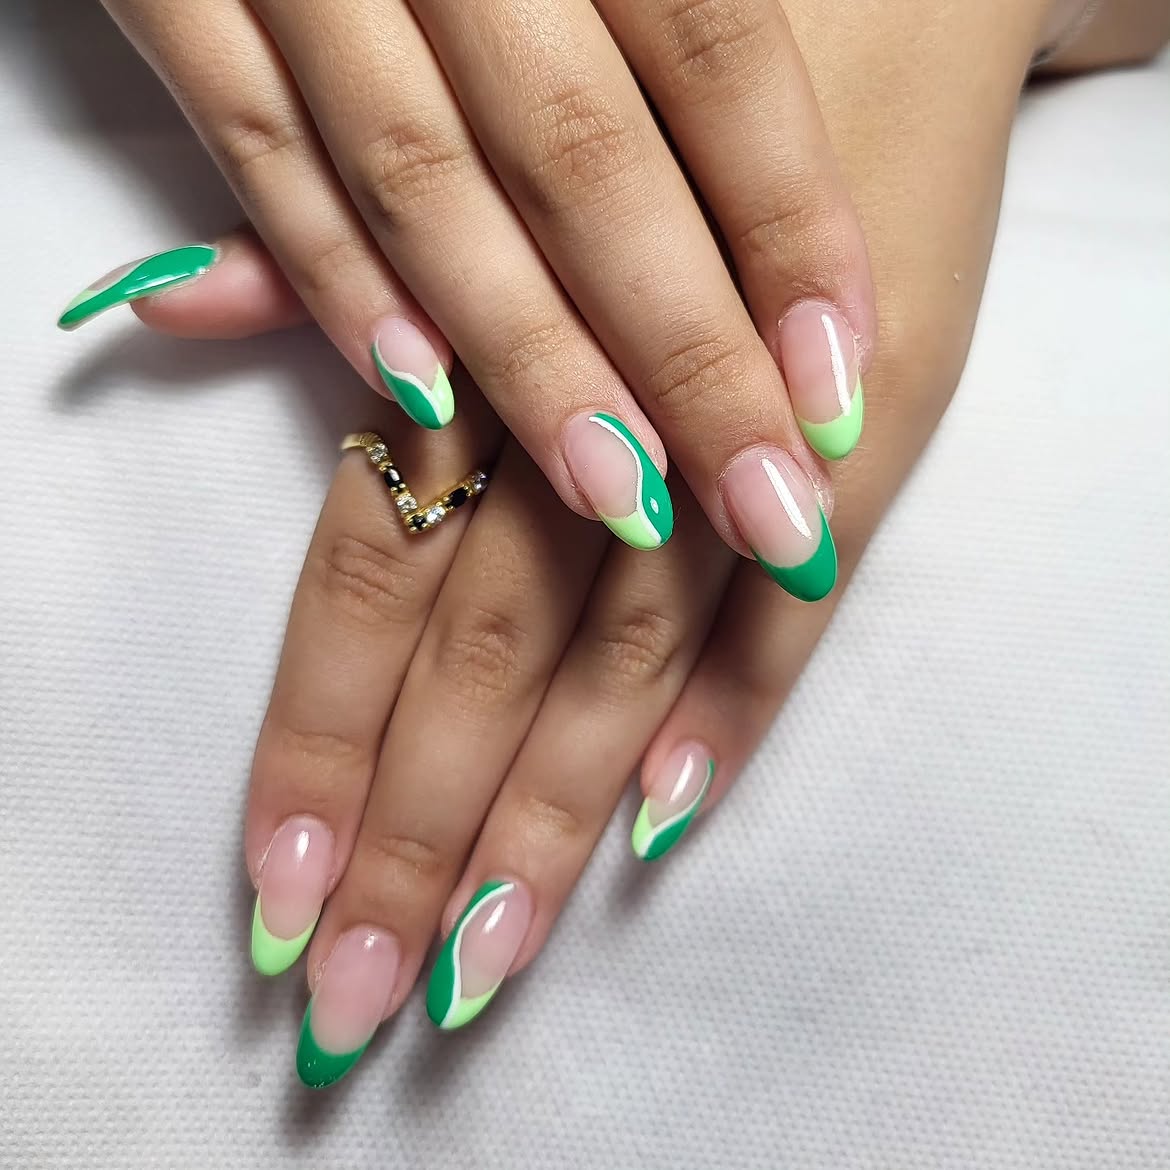
Sweeping side curves replace the usual straight French edge in this bright green manicure. Emerald and lime travel around the almond tips, sometimes meeting at the center and sometimes running along opposite sides of the nail.
A sheer pink base keeps the design open and makes the curved color blocks easy to follow. Thin strips of bare nail separate several of the green sections, adding another line without introducing more polish. The changing layout gives every finger its own movement while the repeated colors hold the set together.
Sketch the largest emerald curve first, then place the lighter green beside it. Follow the tapered almond shape rather than forcing every wave to match. The result looks strongest when some nails carry both shades and others feature one clean green tip.
15. Pearly Olive Nails With White Scalloped Accents
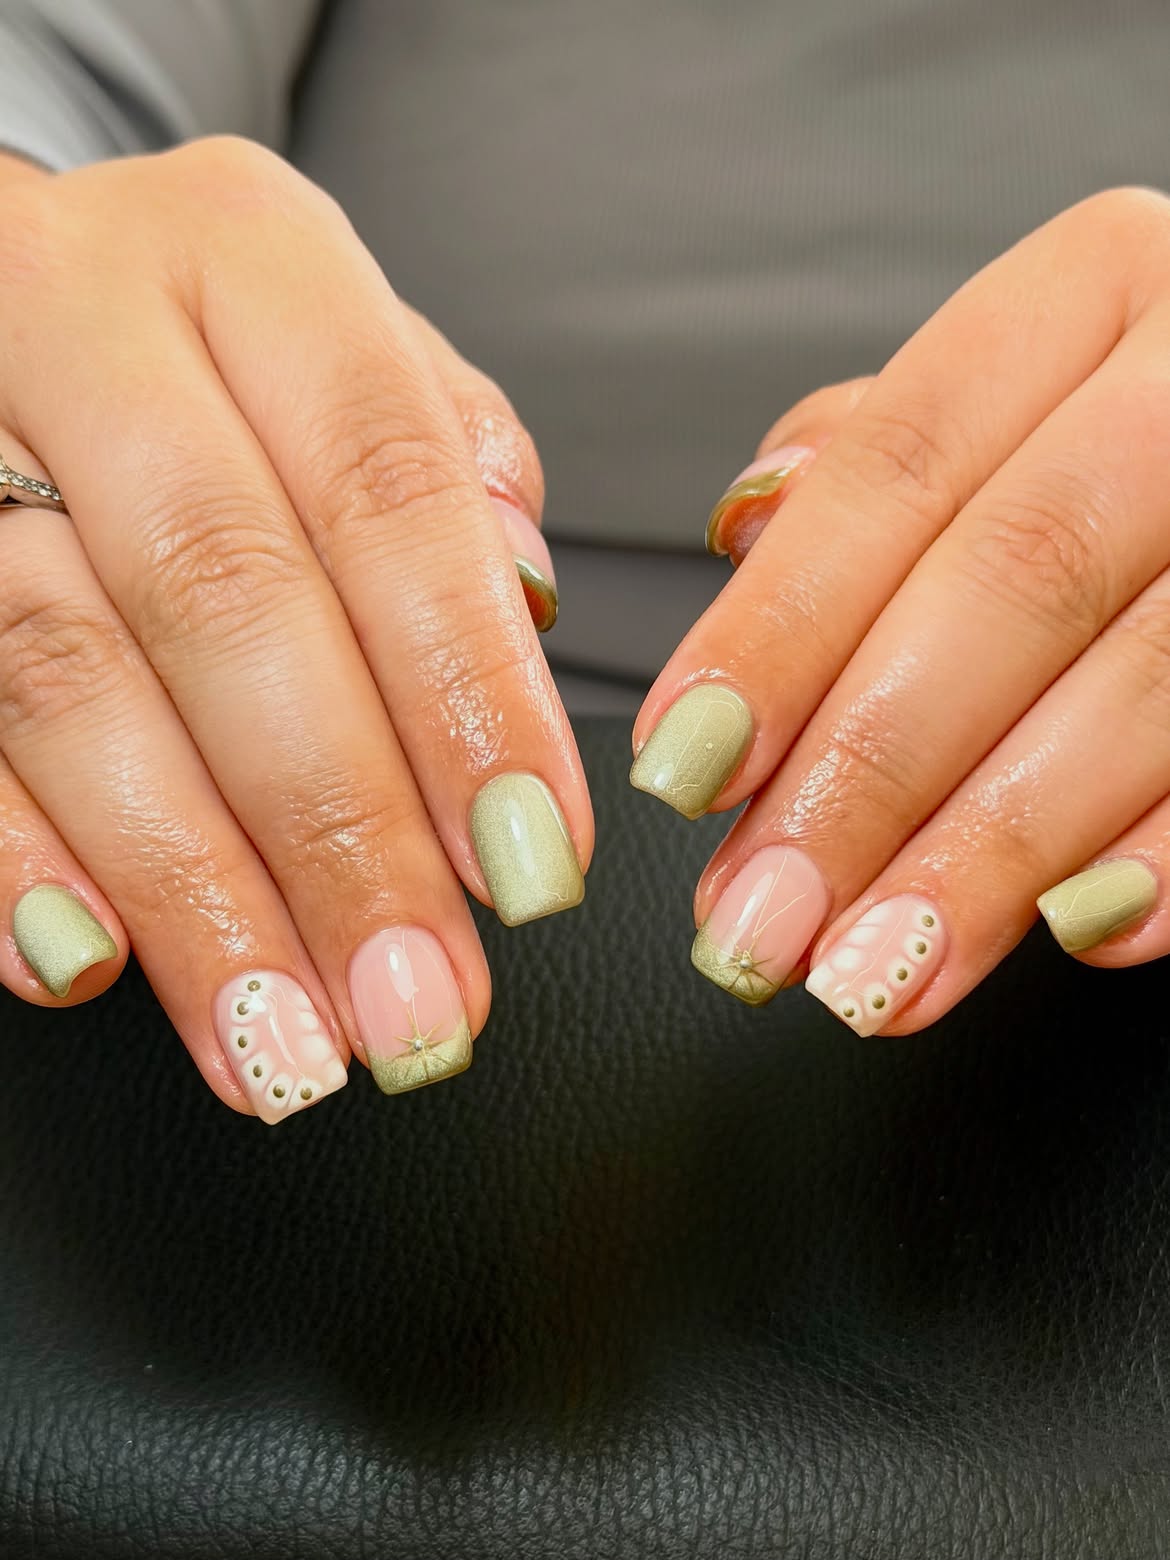
Soft olive shimmer meets delicate white detailing in this short square manicure. The solid green nails have a fine pearly glow, while the feature nails introduce nude space, gold toned pieces, and textured white art.
A closer look at the mix:
- Olive French tips frame the natural pink base.
- Small starburst charms create a bright focal point near the tip.
- White scalloped shapes form a decorative panel on selected nails.
- Tiny metallic dots outline the panel without covering the artwork.
The repeated olive finish connects each variation. Keep the largest details on only a few nails and let the solid shimmer act as visual rest. This balance allows the white pattern and metallic pieces to remain clear on a shorter nail length.
Build the accent without crowding it
16. Neon Green Stiletto Nails With Teal Ribbon Lines
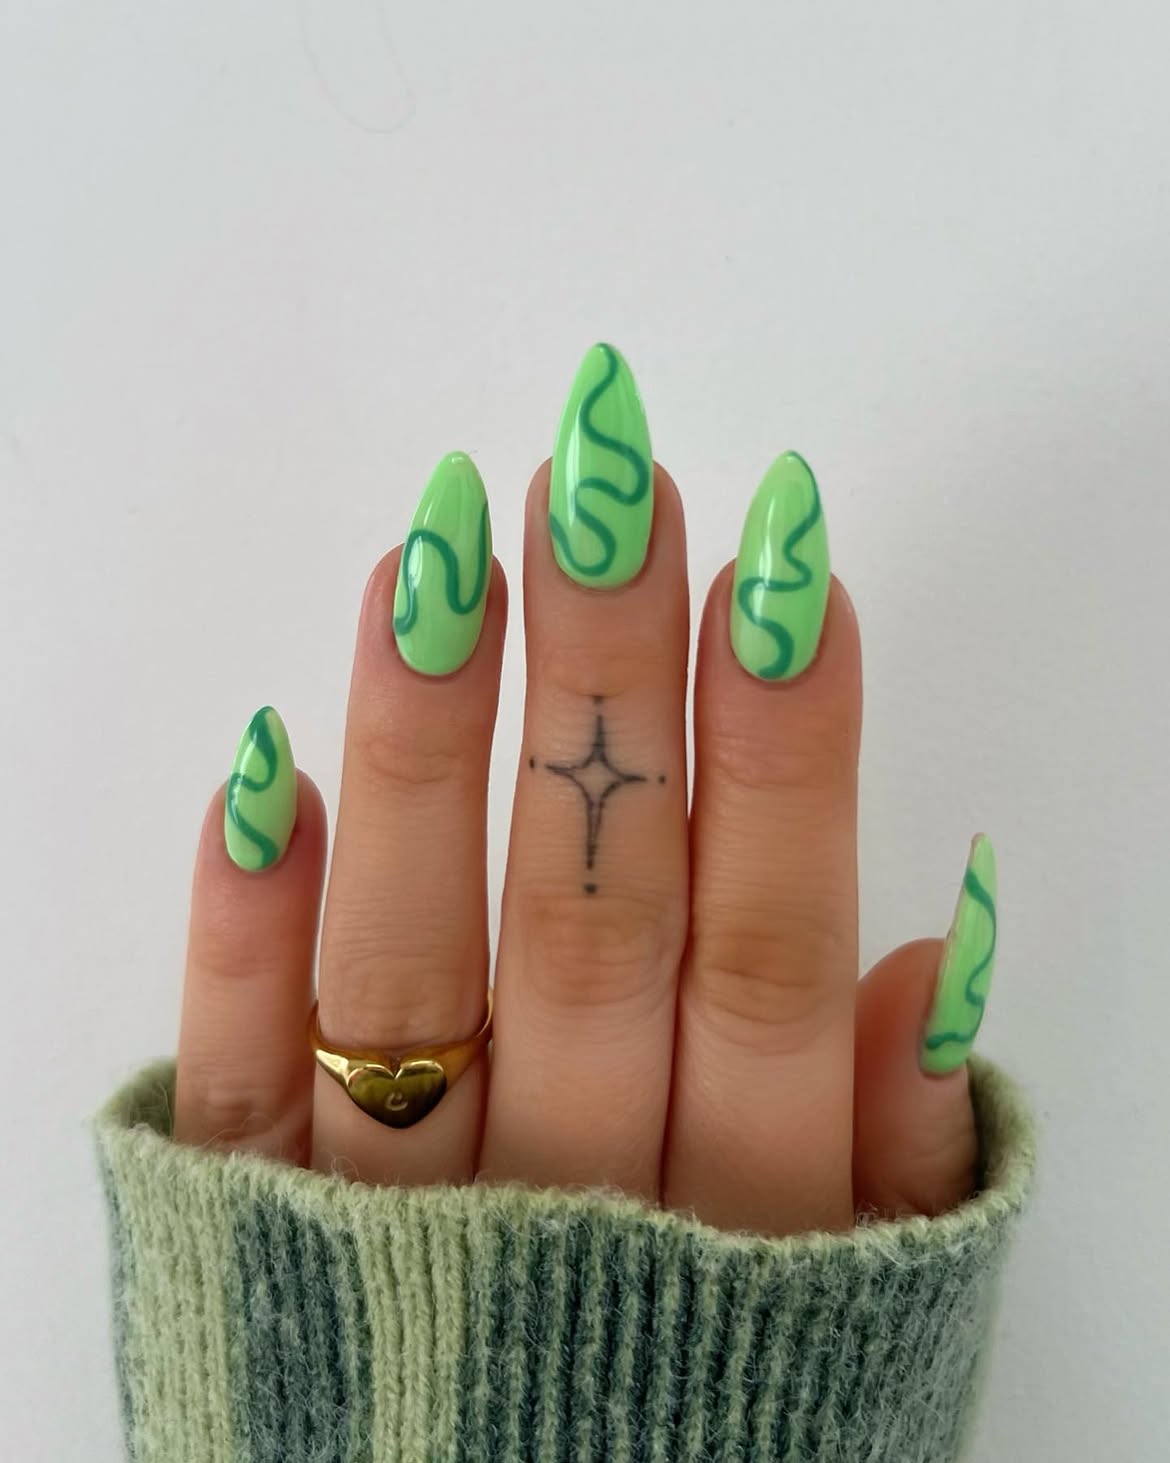
One loose teal line is enough to give these neon green nails a bold graphic look. The bright lime base fills each long pointed nail, while the darker curves twist from one side to the other like narrow ribbons.
The open layout separates this design from a busier swirl manicure. Instead of filling every gap, each line travels through a wide field of green. Some curves form deep loops, while others stretch into softer bends. The changing paths make the nails feel connected without copying the same drawing.
For smoother lines, rest the painting hand on a steady surface and pull the brush in one slow motion. Turn the finger as the curve moves rather than forcing the wrist into a sharp angle. Keep the teal line narrow so the neon base remains the strongest feature.
Use one confident curve on each nail and change its path slightly. Fewer lines keep the neon green background bright and visible.
17. Apple Green Nails With Glossy Pink Floral Accents
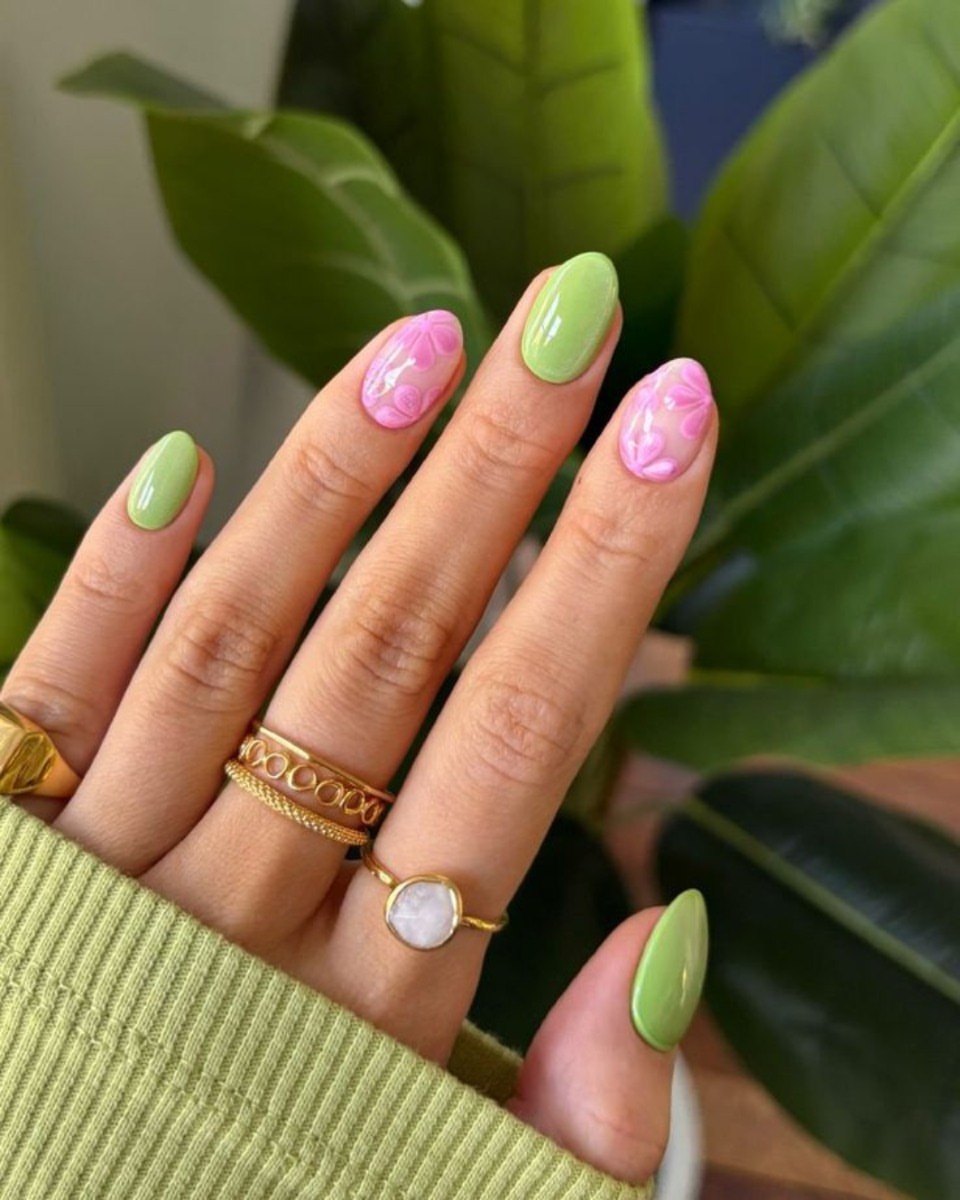
Bright apple green and candy pink create a cheerful color pairing in this almond manicure. Most nails use a smooth green polish with a faint pearly glow, while two feature nails carry layered pink petals over a translucent rosy base.
The green nails: Full color keeps the set fresh and gives the detailed artwork a simple background.
The pink nails: Tonal petals overlap and curve across the surface, creating a glossy raised effect without adding another shade.
Limiting the floral texture to two nails lets it stand out. The matching shine also helps the solid and decorative finishes belong in the same manicure. Paint the green nails first, then build the pink petals in thin layers. Let each petal hold its shape before adding clear gloss around the raised artwork.
| Softer version | Bolder version |
|---|---|
| Use one pink floral accent nail. | Place pink accents on two nearby fingers. |
| Keep the petals small and widely spaced. | Layer larger petals across most of the nail. |