17 Dark Green Nails With Shine, Gold and Botanical Art Ideas

Green nails can look quiet and polished one moment, then rich and dramatic the next. The real trick is choosing the finish, shape, and amount of detail that suit the mood you want. Dark Green Nails offer plenty of creative options, especially when forest, emerald, teal, sage, and nearly black shades are paired with soft pink bases, fine gold lines, or nature inspired artwork.
This collection brings together 17 looks based on real visual details. You will find glossy almond and oval shapes, short square styles, smoky aura effects, glowing cat eye finishes, botanical branches, tiny dots, marbled accents, metallic curves, playful charms, and bold butterfly wing art. Some designs keep every nail in one deep shade, while others use a single accent or a rich mix of patterns.
Use these ideas to notice what makes each manicure work. Pay attention to color placement, line weight, texture, and balance, then borrow the details that suit your nail length and personal style.
17 Adorable Dark Green Nails Designs 2026
1. Glossy Dark Green Nails with a Long Almond Shape
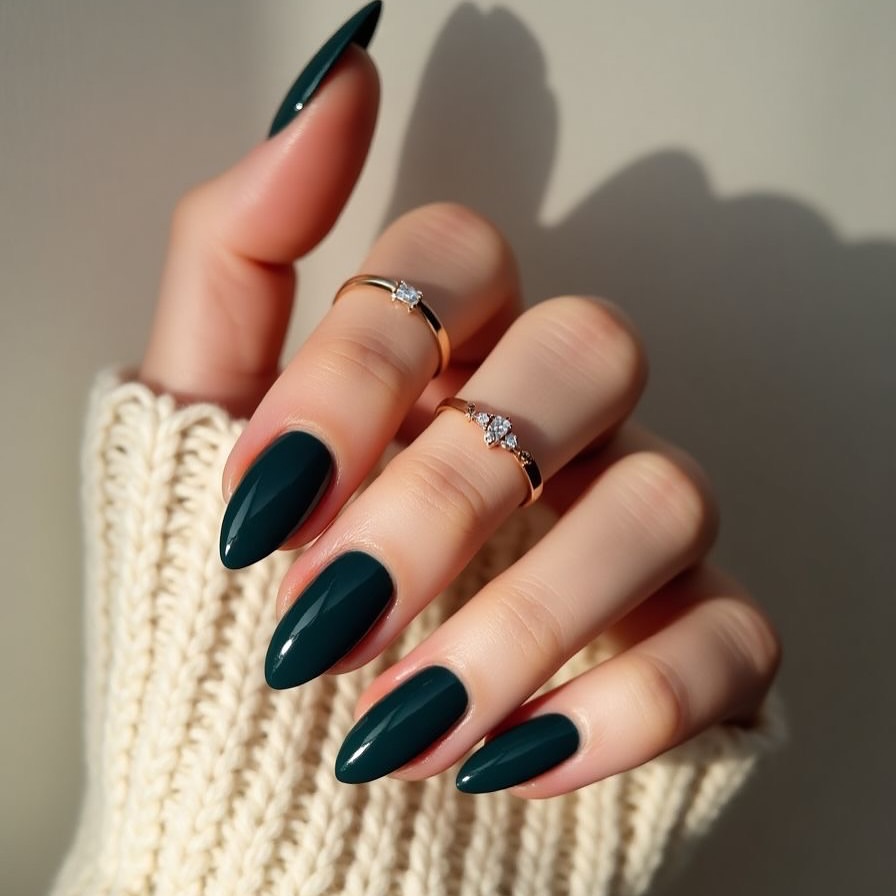
Deep green looks polished here because the color stands on its own. The nails have a long almond shape, smooth coverage, and a crisp shine that catches the warm sunlight. The cream knit sleeve and slim gold tone rings make the green appear even richer without competing with it.
What makes this version work:
- Keep every nail the same deep green for a calm, connected look.
- File the sides evenly and soften each tip into a narrow almond point.
- Apply thin coats so the surface stays smooth.
- Finish with a glossy top layer and clean edges around the cuticles.
This idea suits anyone who wants a rich color with very little visual clutter.
2. Deep Green Dots with a Playful Accent Nail
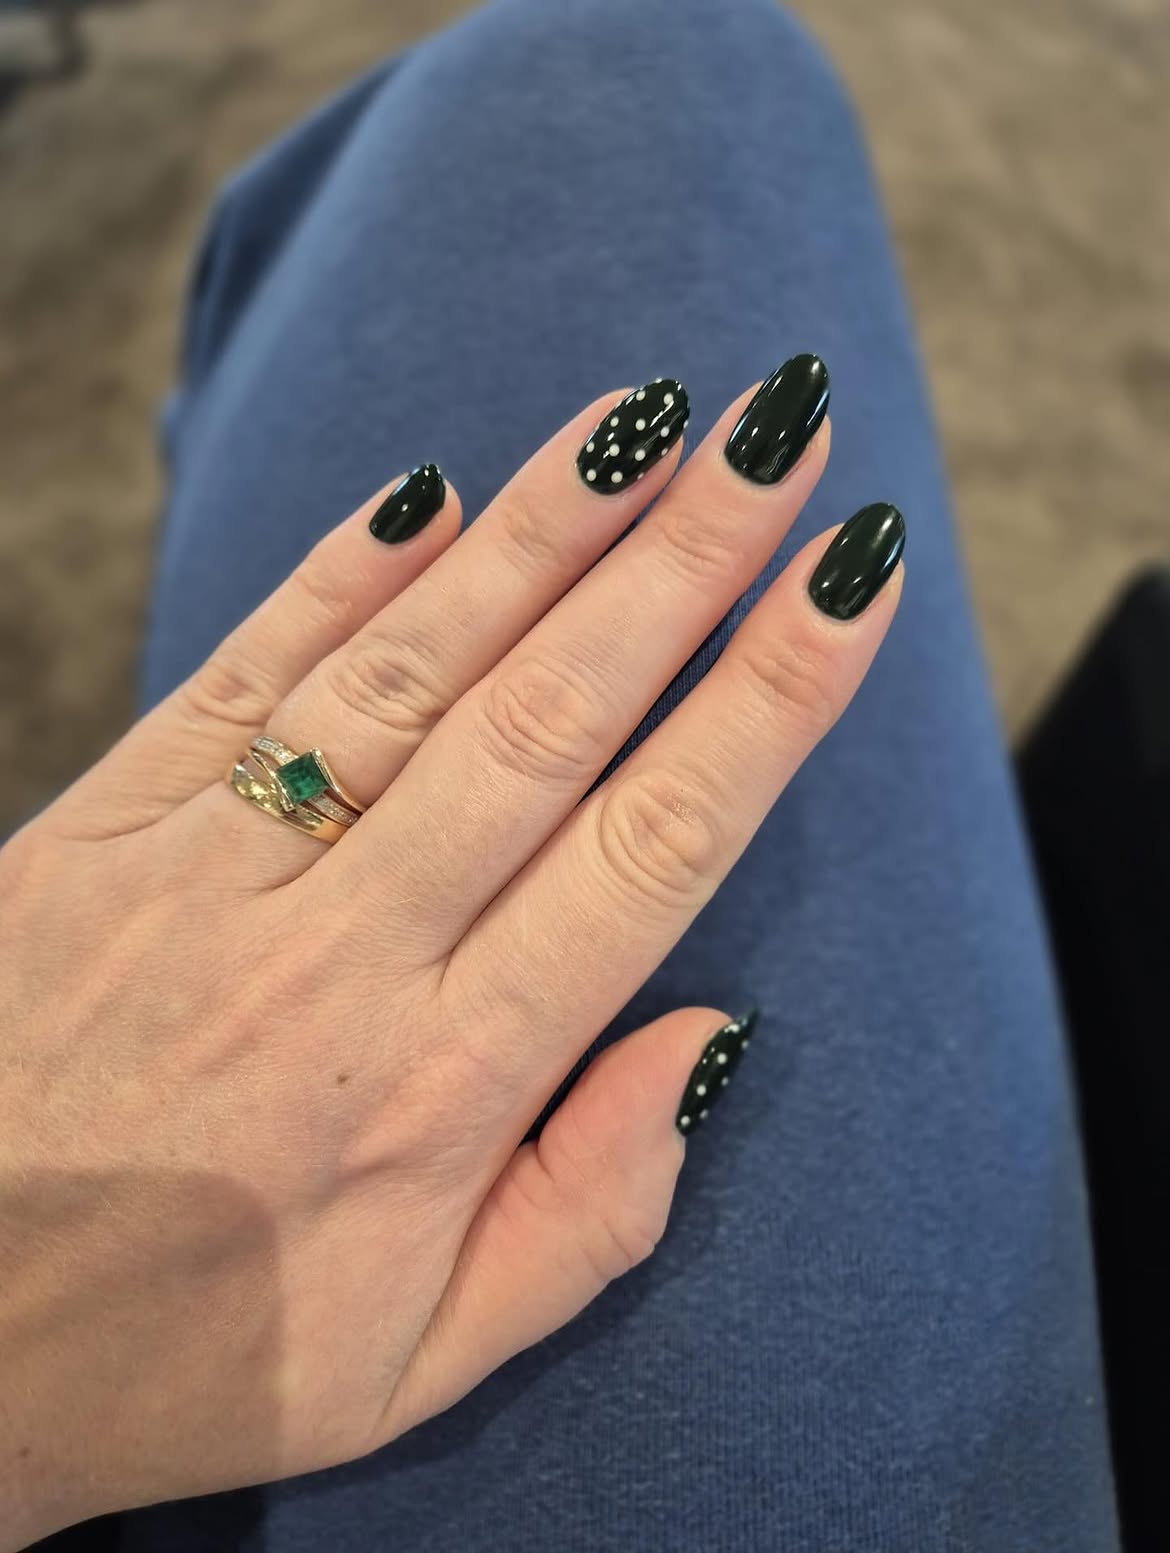
Small white dots break up the nearly black green without taking over the manicure. Most nails stay solid and glossy, while one central accent nail carries a loose dotted pattern crossed by slim curved strokes. A similar detail appears on the thumb, which helps the design feel connected.
A simple balance to copy:
- Paint three nails in uninterrupted dark green.
- Use one central nail for the fullest dotted detail.
- Repeat part of the pattern on the thumb.
Keep the dots slightly varied in size and spacing. That loose placement gives the design more character than a rigid grid. Thin curved strokes add movement while allowing the dark base to remain visible.
Leave most nails solid and glossy.
Vary the placement of the white dots.
Repeat a smaller detail on the thumb.
Do not crowd every nail with dots.
Avoid making every dot identical.
Keep the curved lines slim and light.
3. Emerald Cat Eye Nails with a Glassy Square Finish
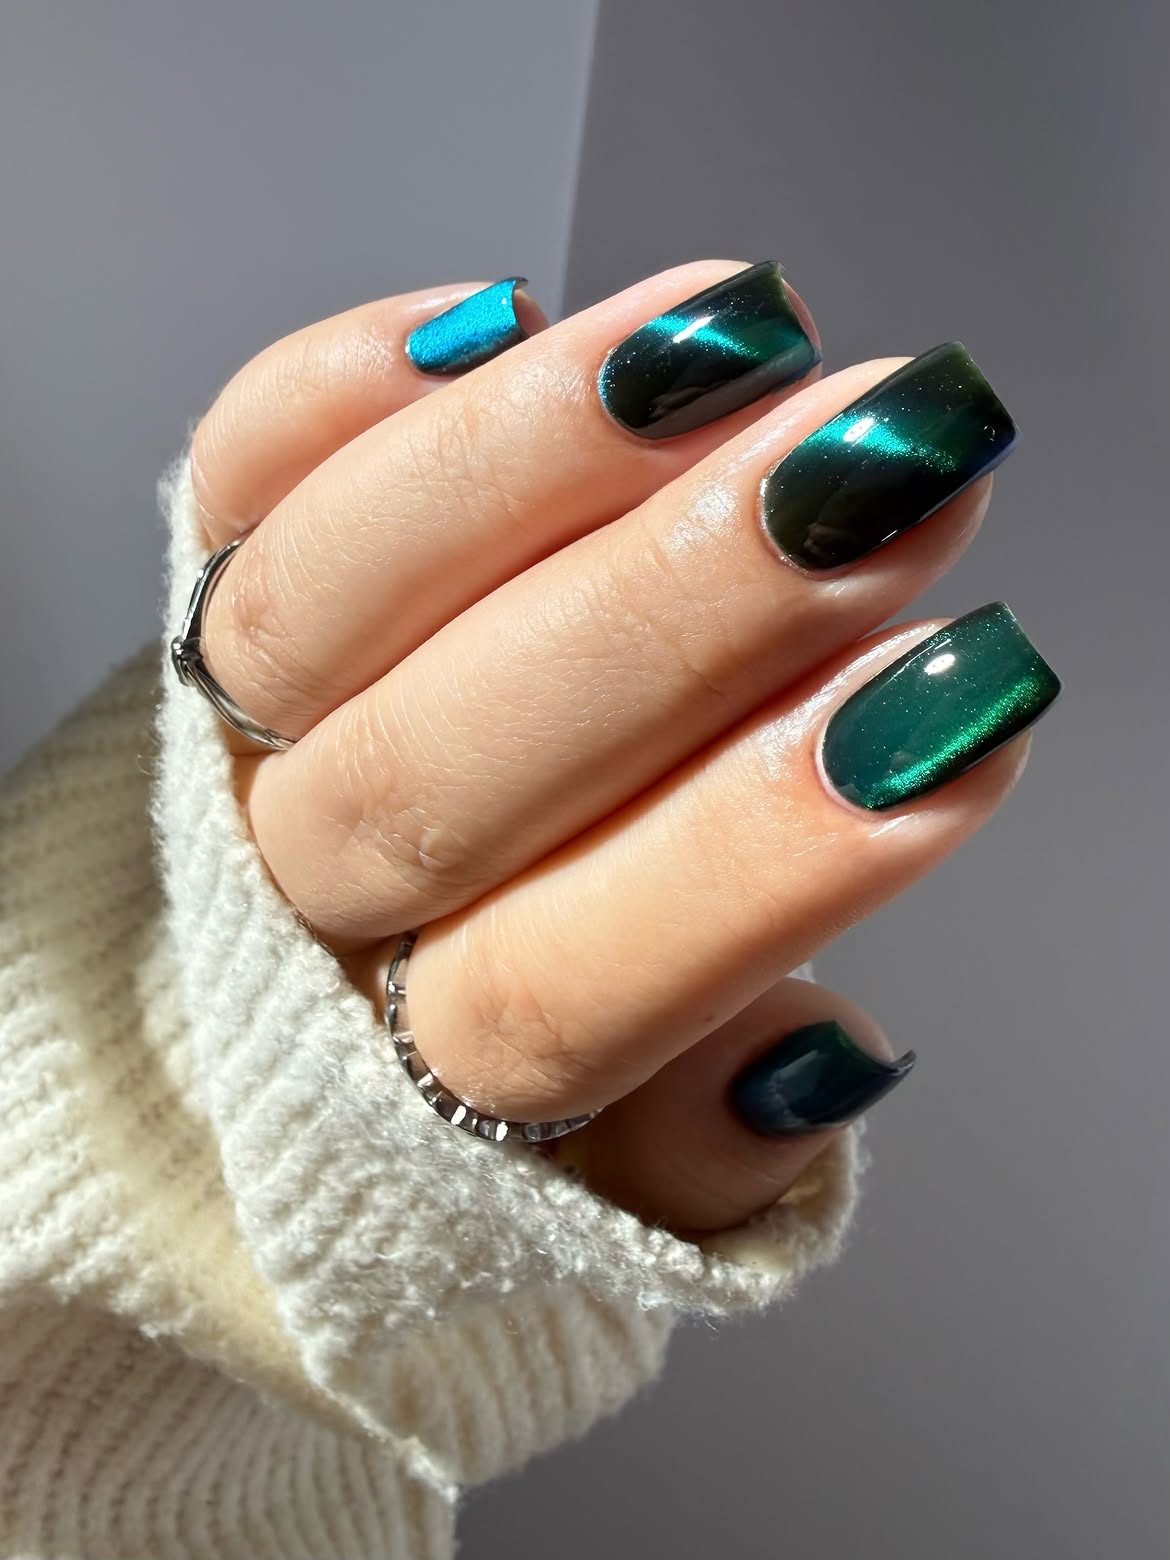
Light does most of the decorating in this manicure. Each square nail shifts from near black edges to a bright emerald band through the center. Fine shimmer becomes visible where the light hits, while the glossy surface makes the color look almost glassy.
Color: The dark base gives the emerald reflection more depth.
Light: A narrow glowing band changes position as the hand moves.
Shape: Straight sides and broad square tips provide enough space for the shifting color to show clearly.
For a similar result, keep the reflective band narrow and angle it in roughly the same direction on every nail. Small differences between the nails make the movement feel natural.
A narrow emerald reflection creates contrast against the dark base, so the manicure changes with the light without needing extra decoration.
For a lighter twist on this rich shade, explore 18 Summer Green Nails filled with juicy greens, glossy finishes, and playful warm weather details.
4. Nearly Black Green Nails on a Short Rounded Shape
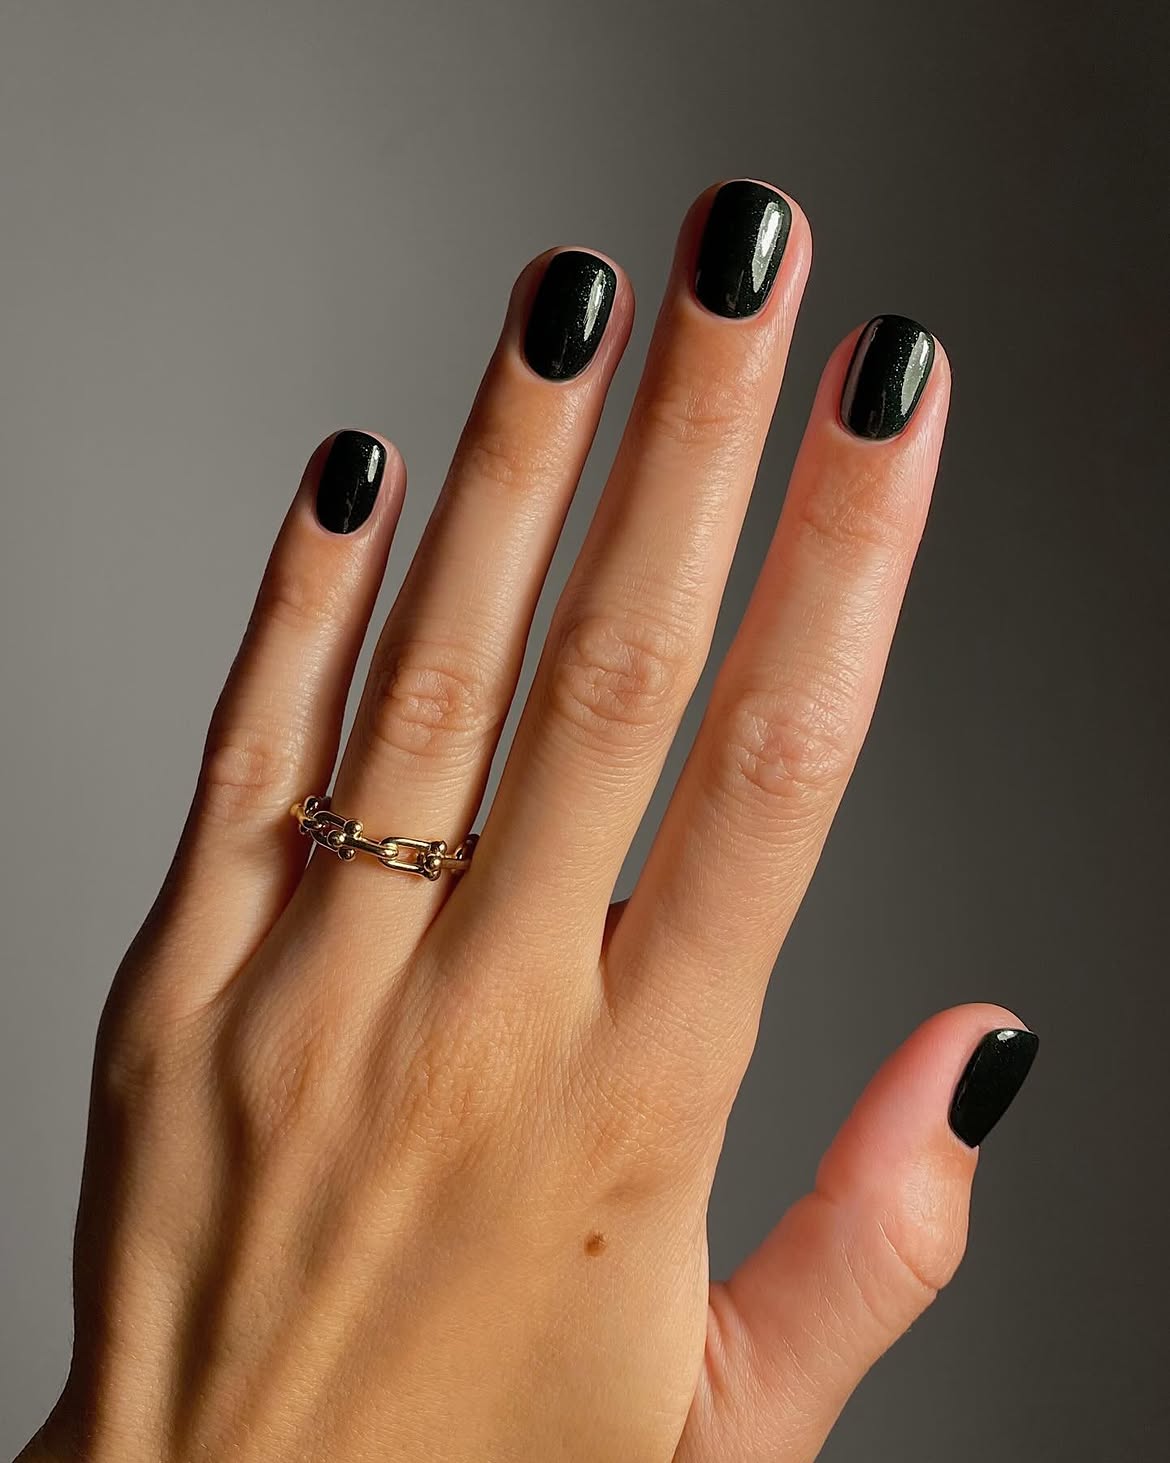
Short nails give deep green a sharper, more wearable edge. In this design, the color reads almost black in shadow, then reveals a muted green cast where sunlight reaches the surface. The rounded square shape keeps the manicure neat, while the glossy finish provides the only decoration.
The close up lesson: Deep shades make uneven edges easier to notice, so clean cuticle lines and consistent shaping matter. The simple gold tone chain ring warms the cool polish without distracting from it.
The result feels quiet and refined. It works especially well for readers who like rich seasonal color but prefer shorter nails and minimal nail art.
Shape first. File each nail into a short rounded square with even side edges.
Build the color. Apply thin layers until the green looks deep and even.
Add clean shine. Use a glossy final layer and tidy the skin around each nail.
5. Dark Green Botanical Nails with Delicate Leaf Accents
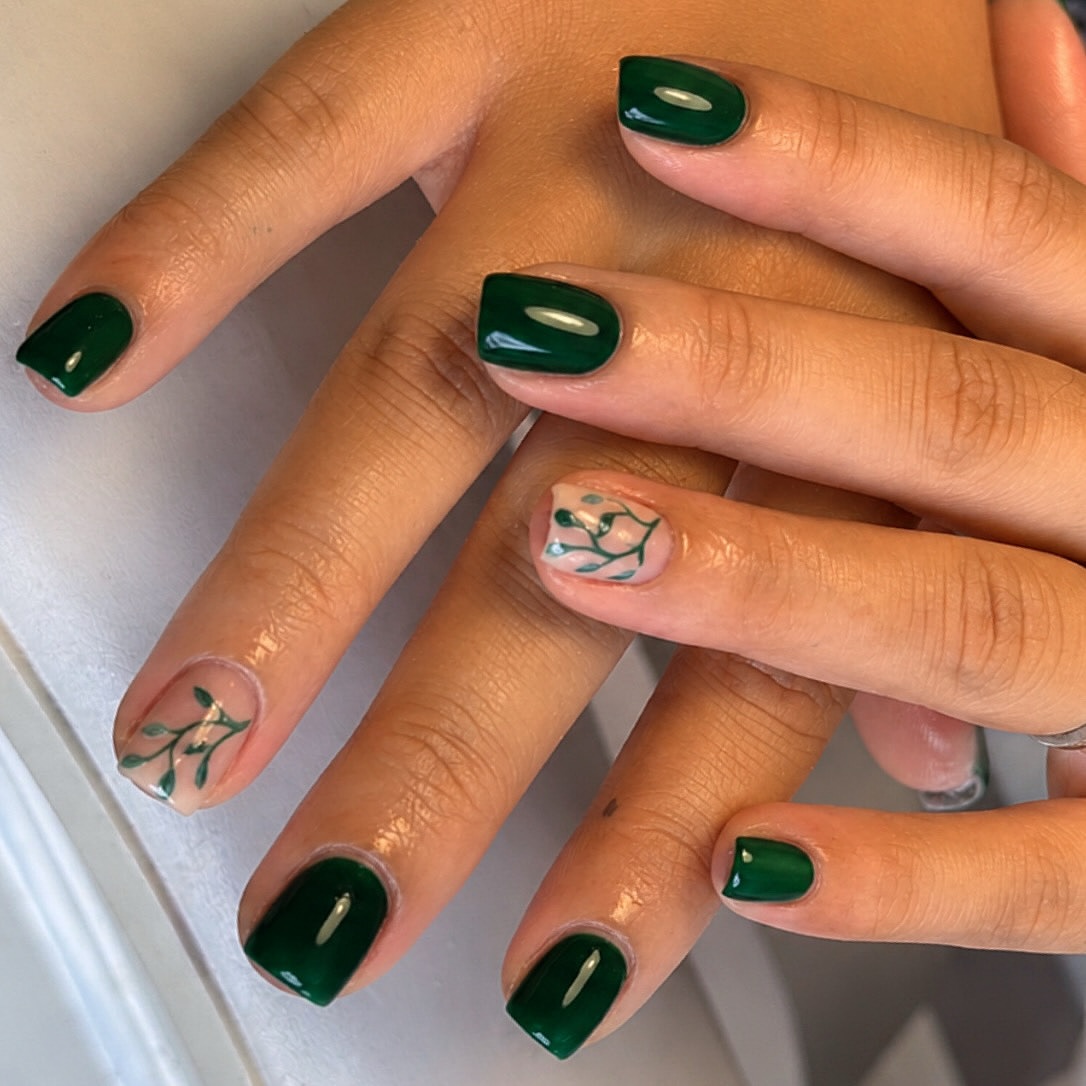
Bare sections bring breathing room to this rich green manicure. Most nails are covered in a glossy forest shade, while selected accent nails keep a sheer neutral base. Fine green stems and pointed leaves connect both finishes without making the design feel crowded.
Solid nails: These provide the strong color and keep the manicure grounded.
Botanical accents: The slim branches create movement and allow the natural looking base to remain visible.
Keep the leafy lines thin and leave open space around each branch. The short square shape also helps the design feel tidy and practical. Repeating the artwork on only a few nails makes every accent easier to notice.
Build the botanical mix
6. Deep Teal French Tips with Flowing Marble Accents
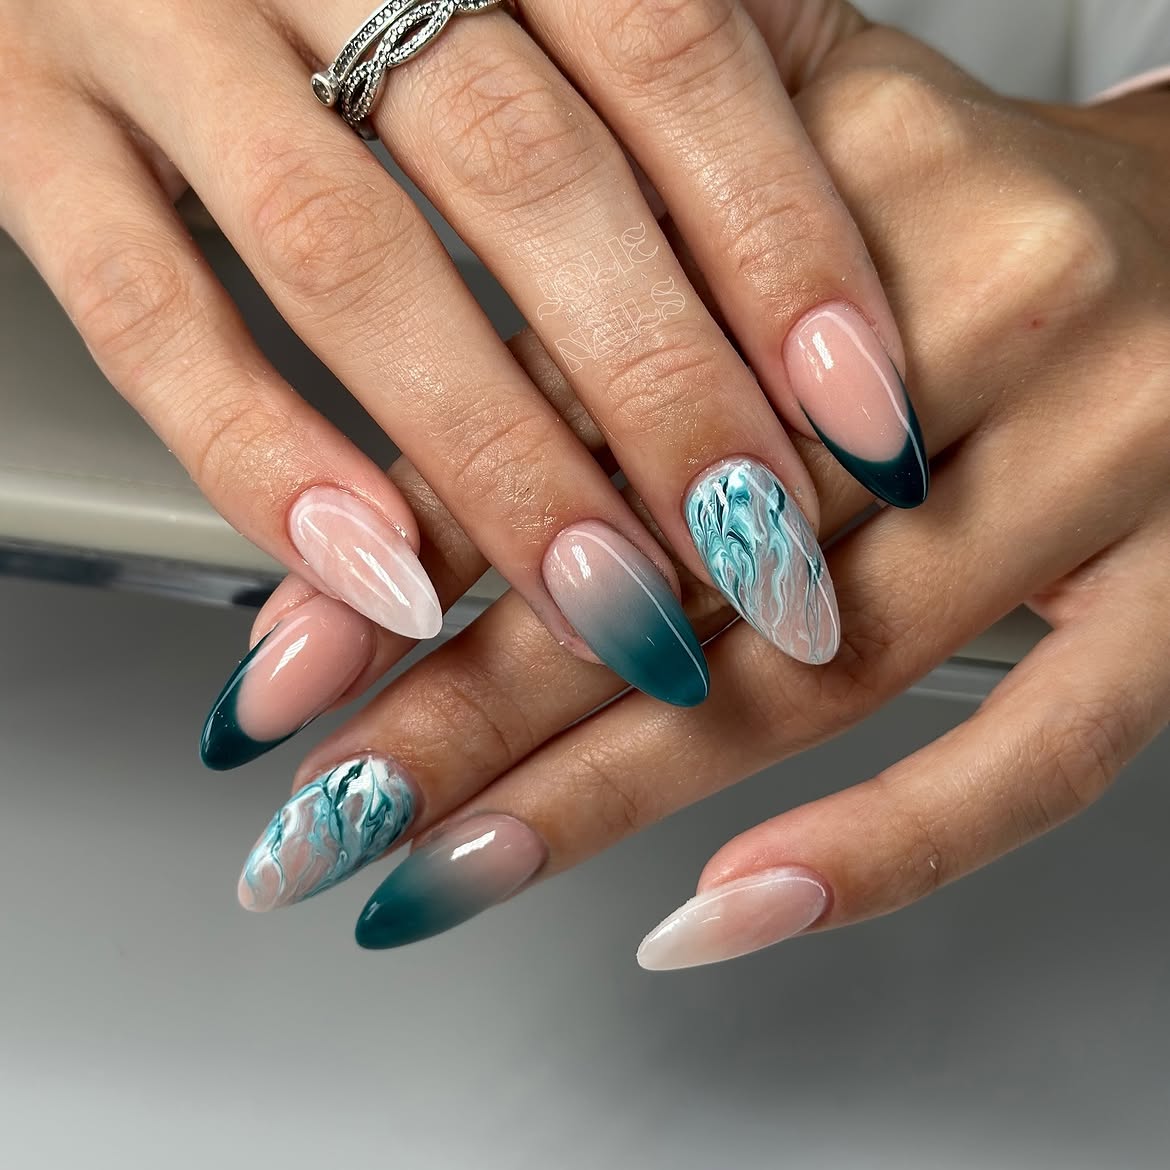
A soft nude base allows several green techniques to share the same manicure. Some almond nails have curved teal tips, others fade gently from neutral into deep green, and selected accents carry flowing white, aqua, and green lines.
The repeated palette keeps everything connected, even though the artwork changes from nail to nail.
The rhythm is the useful idea: place a simple nail beside a detailed one, then repeat that balance across both hands. Keep the almond length consistent and use the same deep teal on every tip and fade. This gives the marbled accents room to stand out without making the full set feel busy.
7. Glossy Emerald Nails with a Matte Leaf Accent
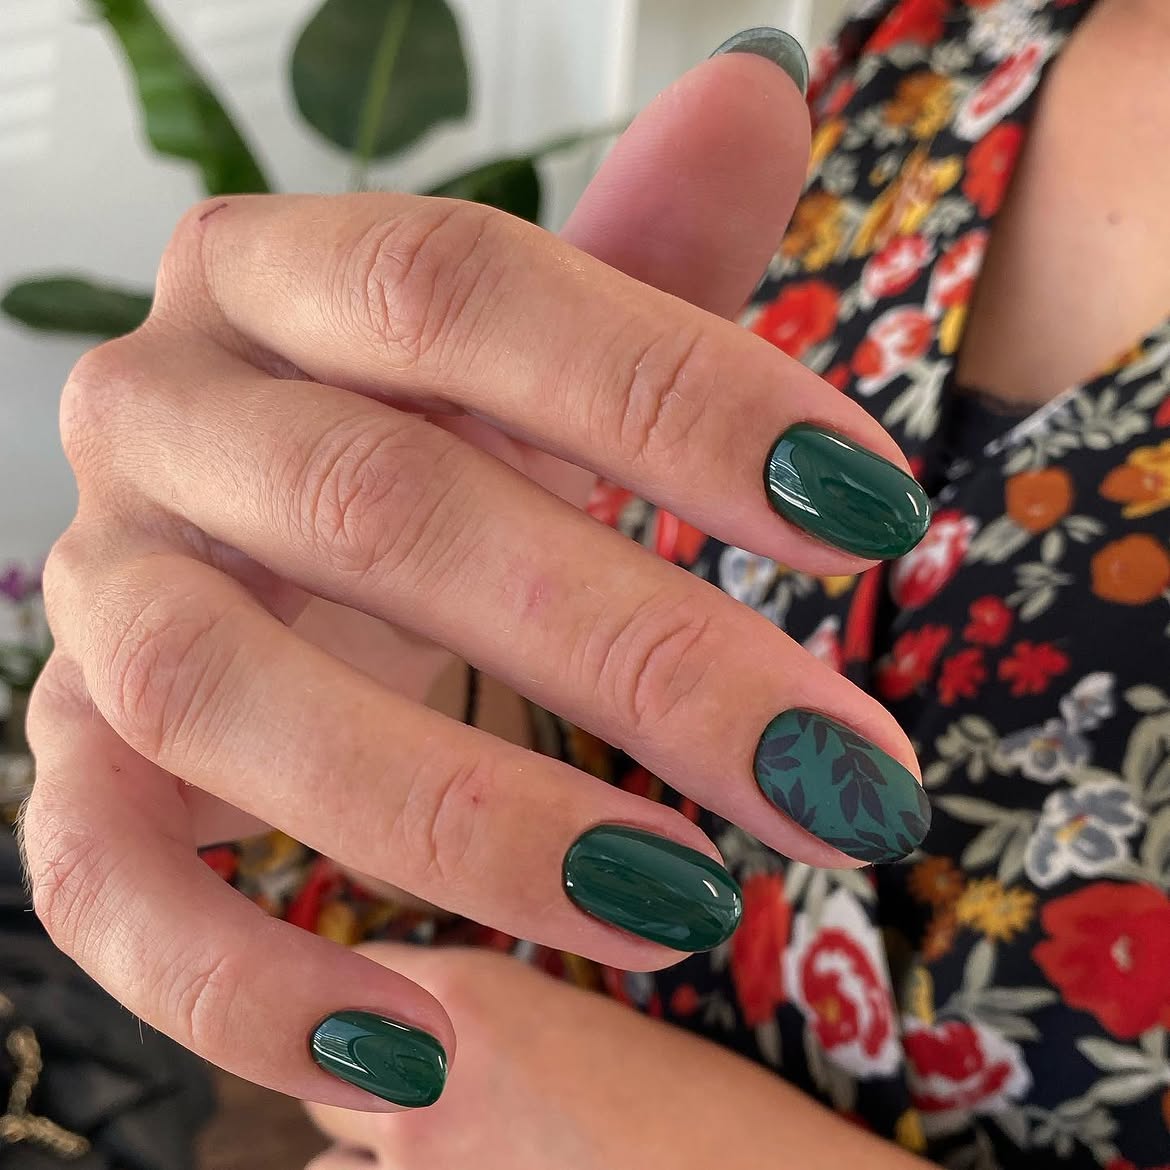
Texture, rather than a new color, separates the accent nail from the rest. Four nails use a rich forest green with a smooth glossy finish. The accent nail has a softer matte surface with dark leafy shapes layered over a muted green base.
Because every shade belongs to the same green family, the patterned nail feels connected to the solid ones.
What to copy: Choose one nail for the botanical pattern and change its finish as well as its artwork. Keep the leaf shapes tonal instead of introducing a bright contrasting color. Limiting the design to one accent nail allows the quiet pattern and glossy green to support each other.
| Glossy green nails | Matte leaf accent |
|---|---|
| Smooth high shine surface | Soft matte surface |
| Solid forest green color | Muted green with dark leaves |
| Creates the color foundation | Provides the patterned break |
8. Forest Green Almond Nails Framed with Tiny Vines
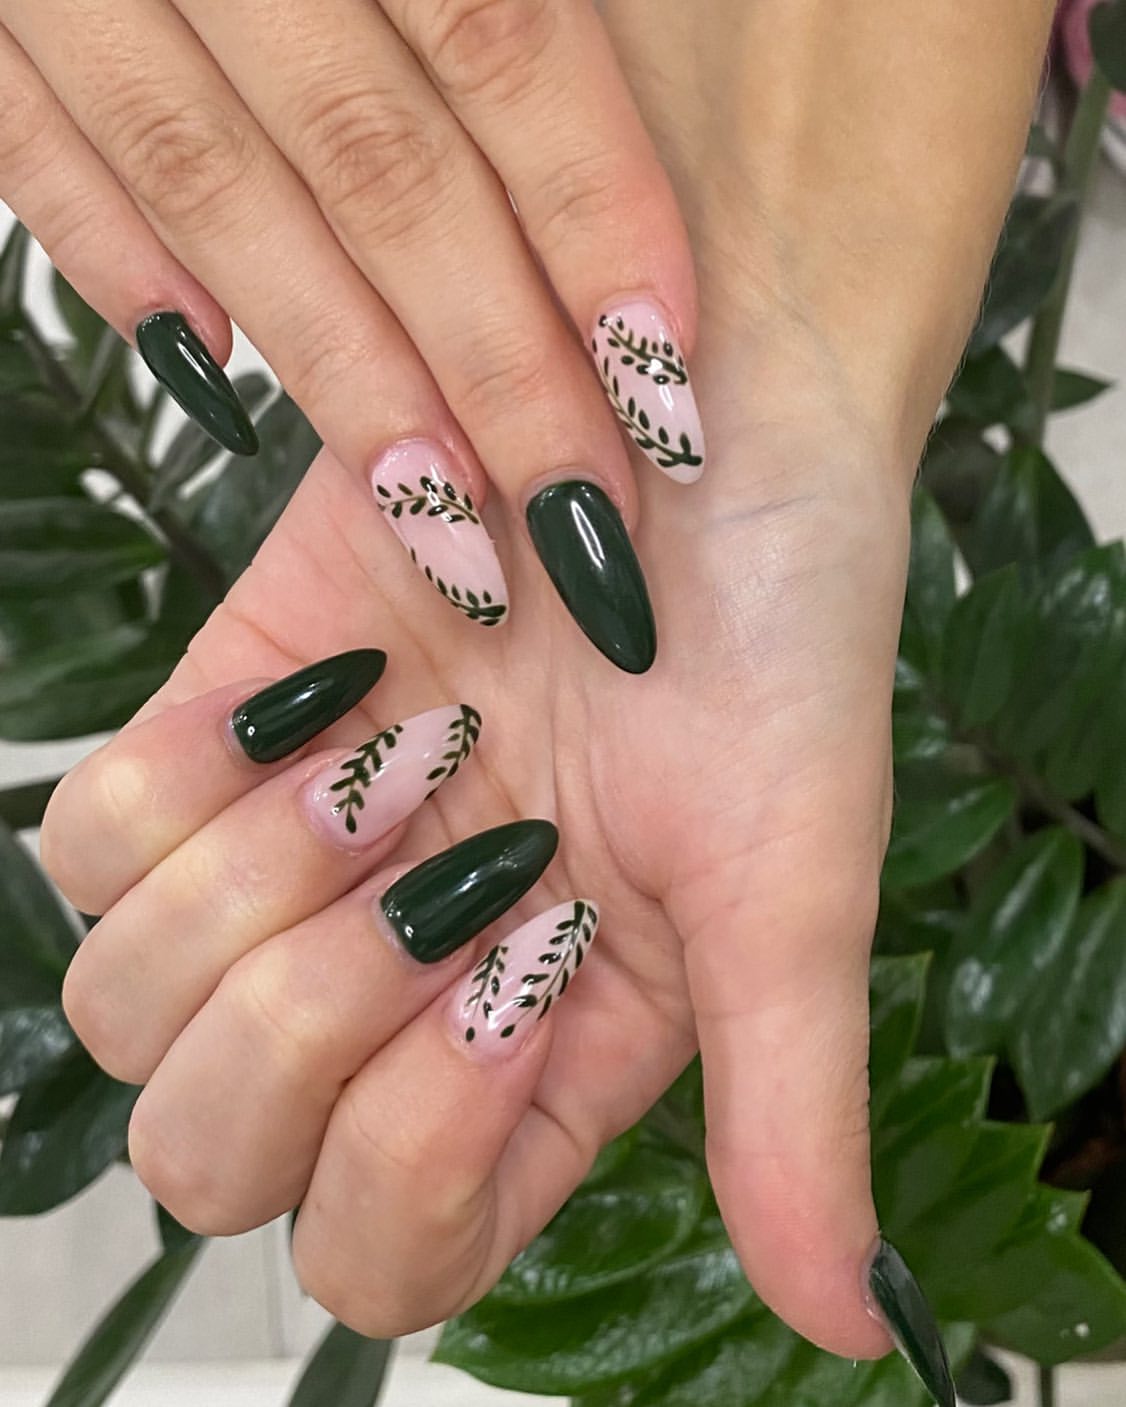
Instead of centering every branch, this manicure lets the greenery grow inward from the edges. Glossy forest green nails alternate with pale pink accents, creating a clear rhythm across both hands.
On the pink nails, slim stems curve around corners and travel along the sides. The small leaves point in different directions, which gives the artwork a natural flow. Some branches frame the tip, while others sweep diagonally across the nail.
The long almond shape provides room for these varied placements. Keep the branches narrow and leave plenty of the pink base visible. That open area prevents the detailed vines from competing with the solid green nails.
🌿 Placement Tip
Paint each branch from one side of the nail and stop before it reaches the opposite edge. The open pink area keeps every vine clear and easy to notice.
9. Smoky Green Aura Nails with a Deep Forest Border
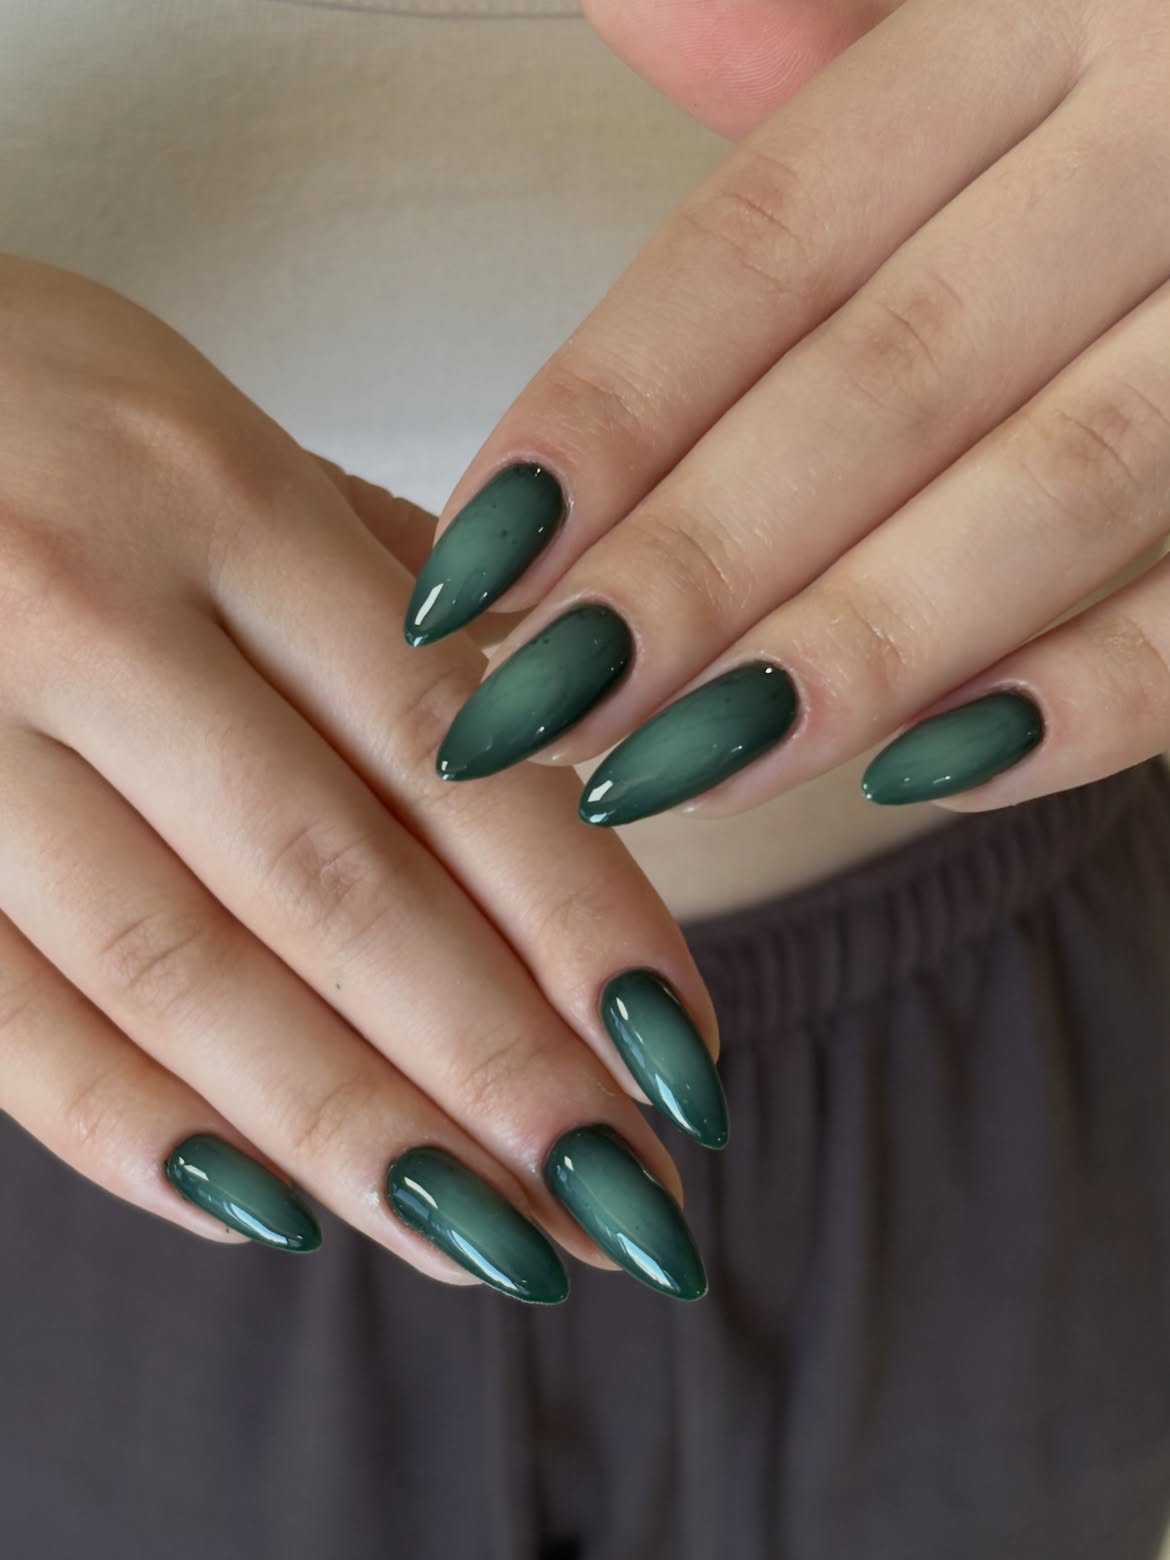
Smoky color placement gives these almond nails their depth. A misty sage green appears through the center, while deeper forest tones gather around the edges and tips. The glossy surface catches narrow highlights and keeps the blended color looking clear rather than cloudy.
There is no sharp line between the two shades. That soft transition is what creates the hazy aura effect.
For a similar result, keep the lighter area diffused and slightly uneven instead of shaping it into a strict oval. Repeat the same color placement across every nail so the long almond set feels connected. The depth comes from blending, so no extra art is needed.
One solid green creates a clean surface with a single level of depth.
A misty sage center and deeper green border make the surface look softly dimensional.
For more late summer manicure inspiration, explore Early September Nails with warm tones, simple details, and polished designs for the new month.
10. Bottle Green Square Nails with a Street Style Edge
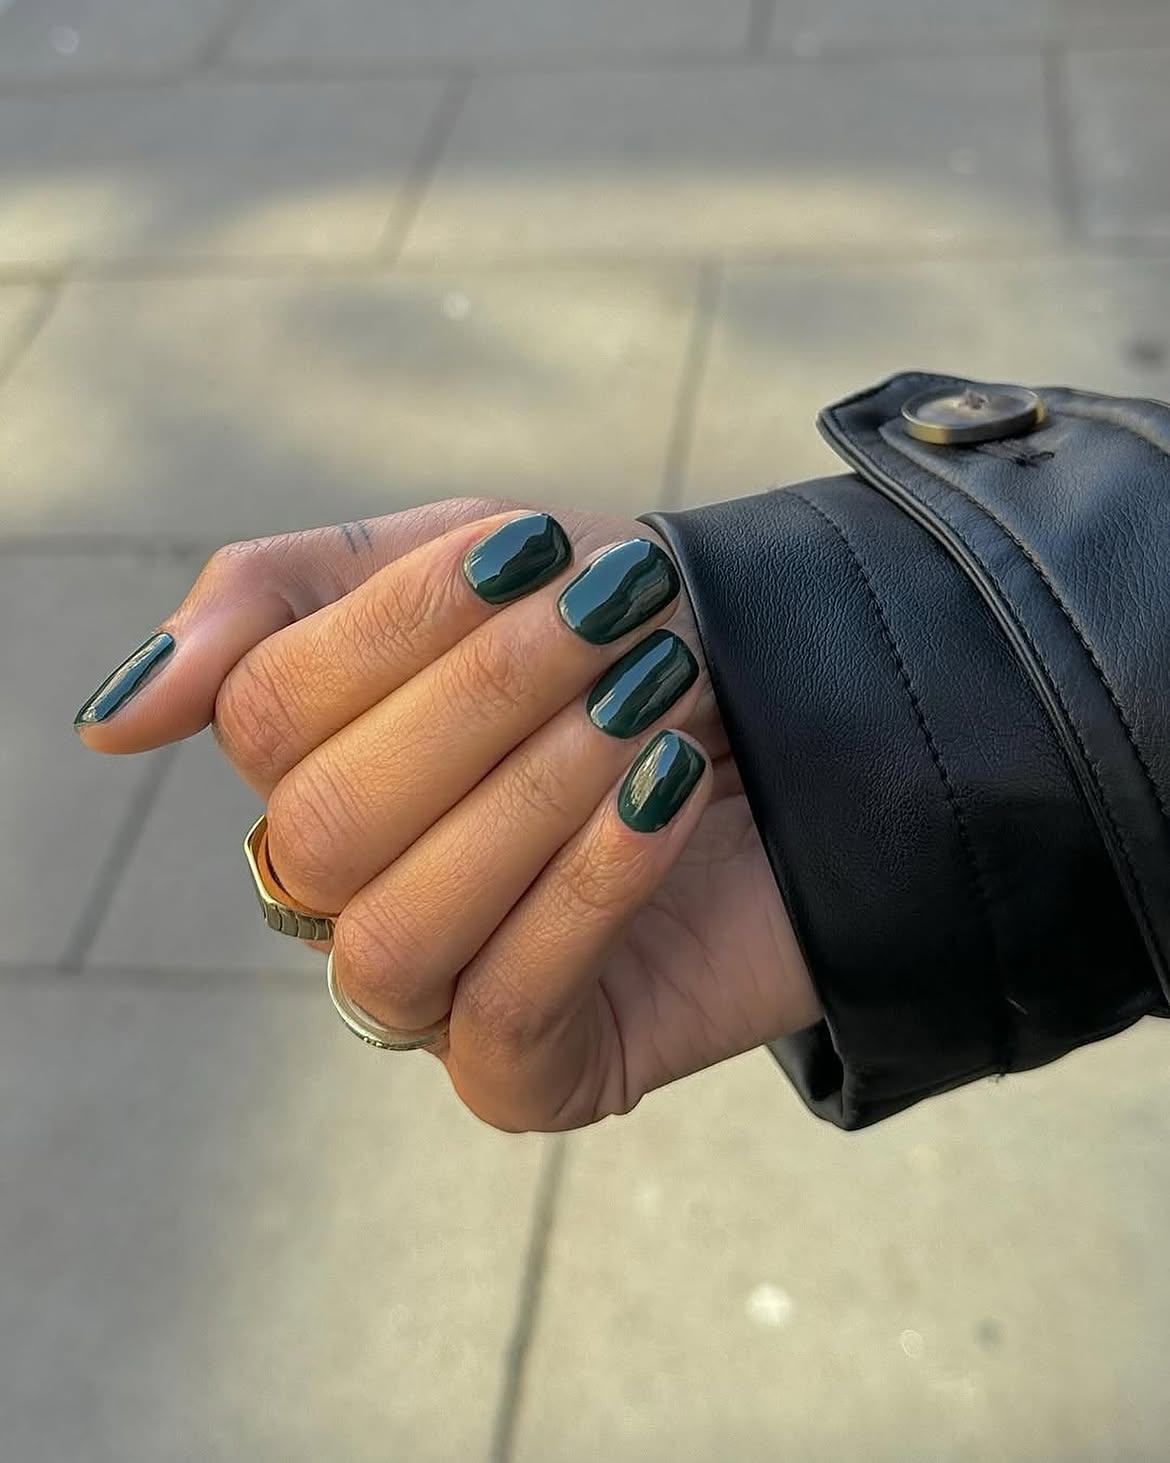
Bottle green feels crisp and modern on short square nails. The shade is deep enough to look dramatic indoors, while sunlight reveals its cool green tone. Each nail has a smooth surface, softly squared corners, and a strong glossy reflection.
Why the shape matters: A shorter length keeps the dark color looking neat and easy to wear. Slightly softened corners also prevent the square tips from appearing too sharp.
The black leather cuff repeats the depth of the polish, while the gold tone rings bring warmth to the overall look. No nail art is needed because the rich color, clean shape, and reflective finish already create enough contrast.
- ▸ Color pairing: Black clothing makes bottle green appear deeper.
- ▸ Jewelry: Warm gold tone rings soften the cool polish.
- ▸ Shape: Short square tips keep the solid color tidy.
- ▸ Finish: High shine allows the green tone to show in natural light.
11. Emerald French Tips with Gold Curves and Fine White Lines
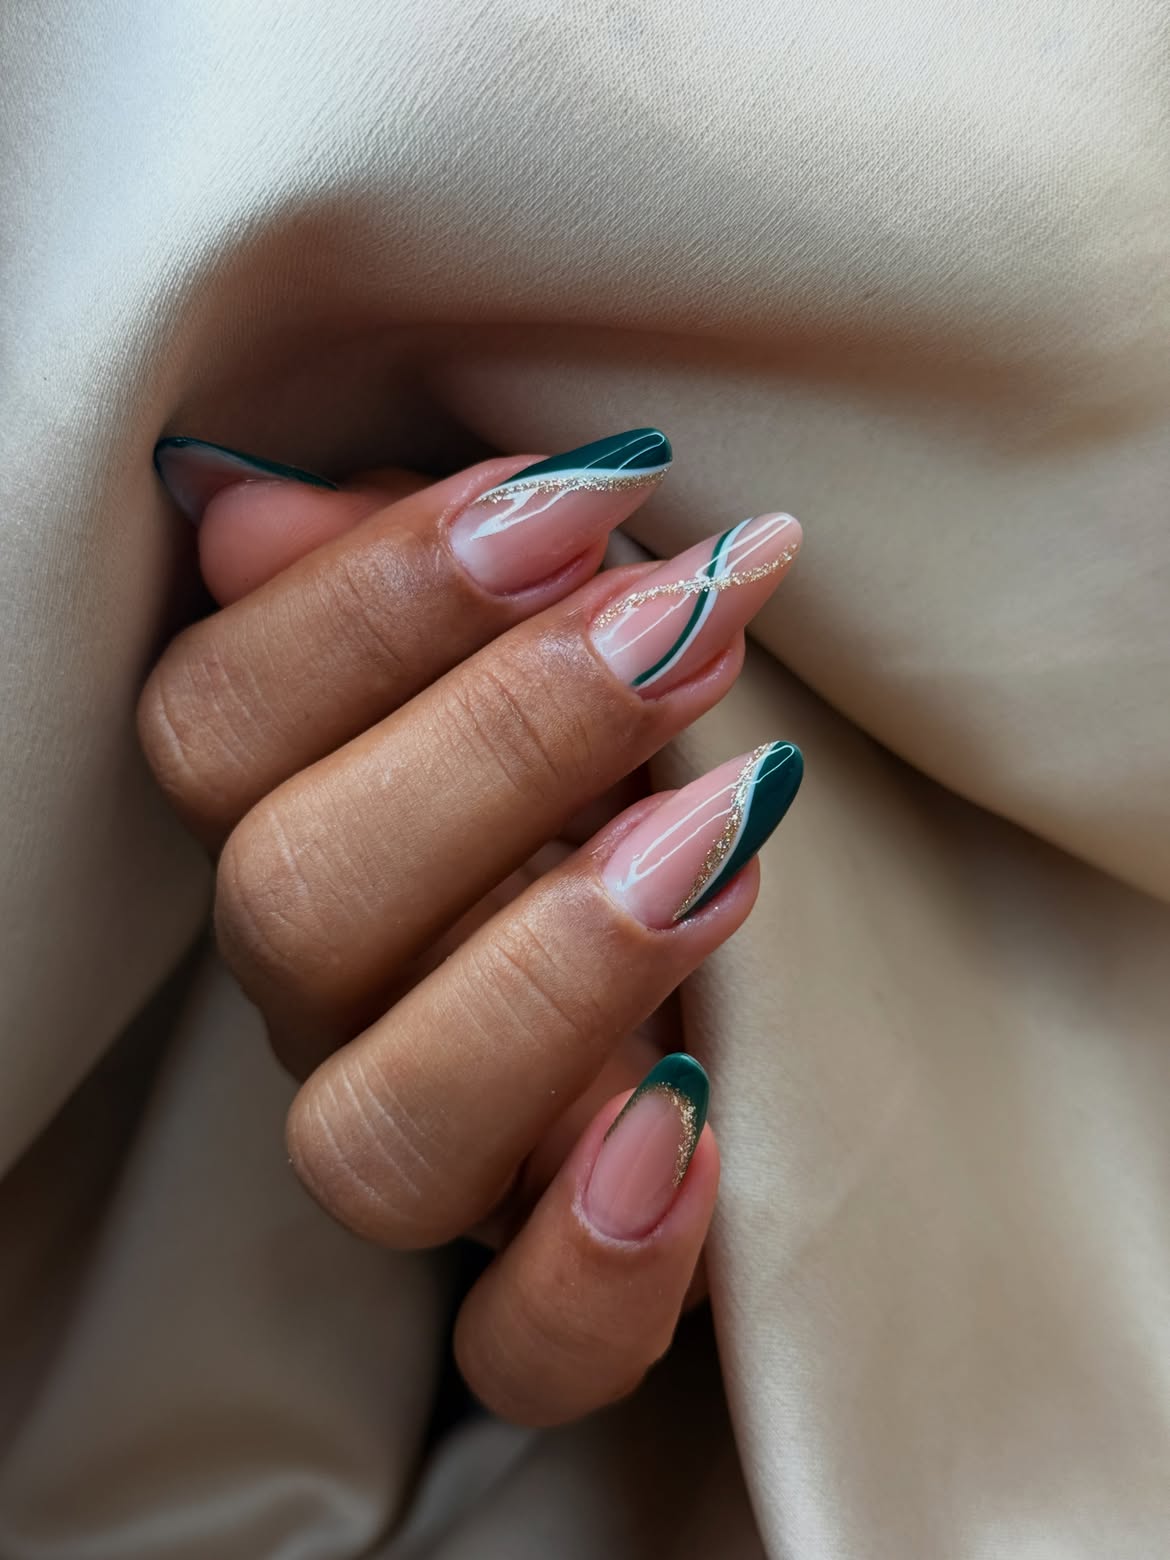
Fine lines turn a classic French tip into something more graphic. Each long almond nail begins with a sheer pink base. Deep green forms angled tips or sweeping side sections, while a narrow gold glitter line follows the border.
Fine white curves cross a few nails and create movement without covering the pink base.
Notice the restraint: The green sections stay broad and bold, but the gold and white details remain narrow. This difference in line weight keeps every layer visible. Place the main green shape first, trace part of its edge with gold, then add only one or two white curves. Too many crossing lines would hide the clean almond shape.
Leaves open space around the artwork.
Create the bold tips and side sections.
Trace the curves with fine, controlled detail.
12. Smoky Green Oval Nails with a Striped Bow Accent
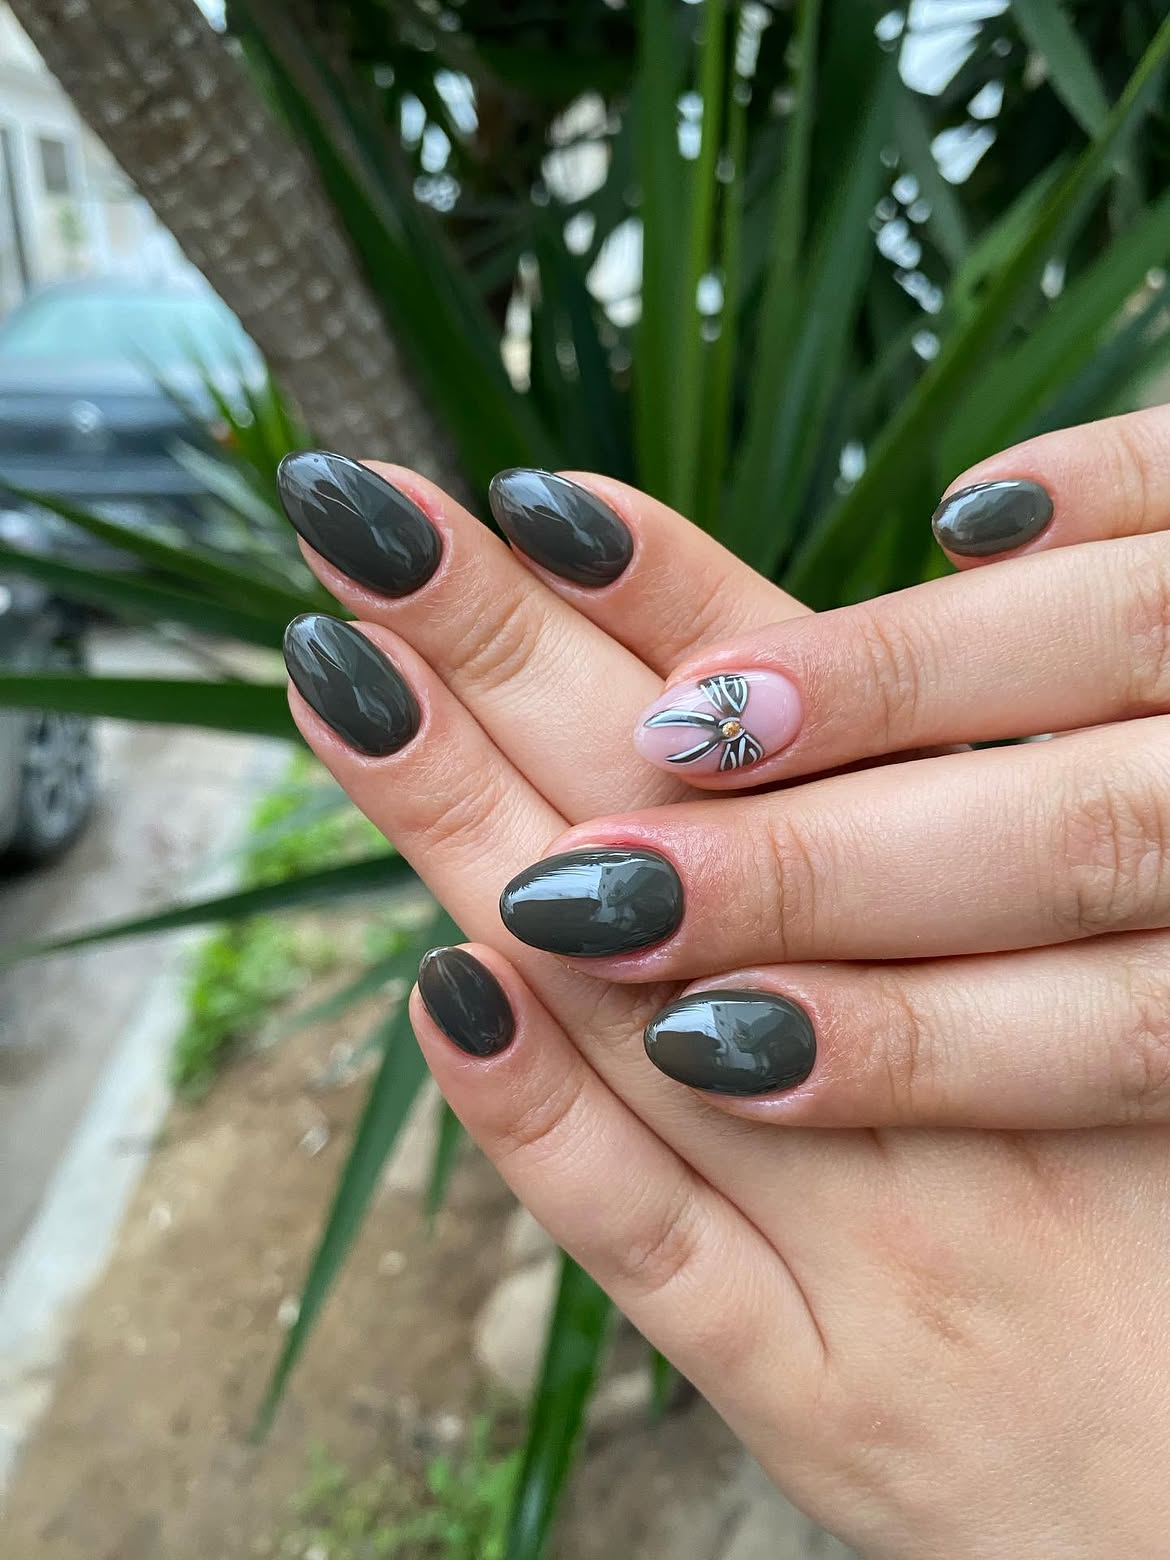
A single bow changes the mood of this otherwise understated green set. Most nails use a smoky, nearly black green with a glossy finish and softly rounded oval shape. The ring finger switches to a pale pink base and places a striped bow across the center.
A small gold tone detail marks the middle of the bow and creates one bright point against the darker lines.
Rather than repeating the artwork, keep every other nail solid. This gives the bow a clear place in the design and prevents the rounded short nails from feeling crowded. Match the bow outline to the dark base color so the accent still belongs with the rest of the manicure.
Glossy smoky green
Short oval shape
Simple solid coverage
Pale pink base
Dark striped bow
Small gold tone center
13. Deep Green Frame Nails with a Glowing Center
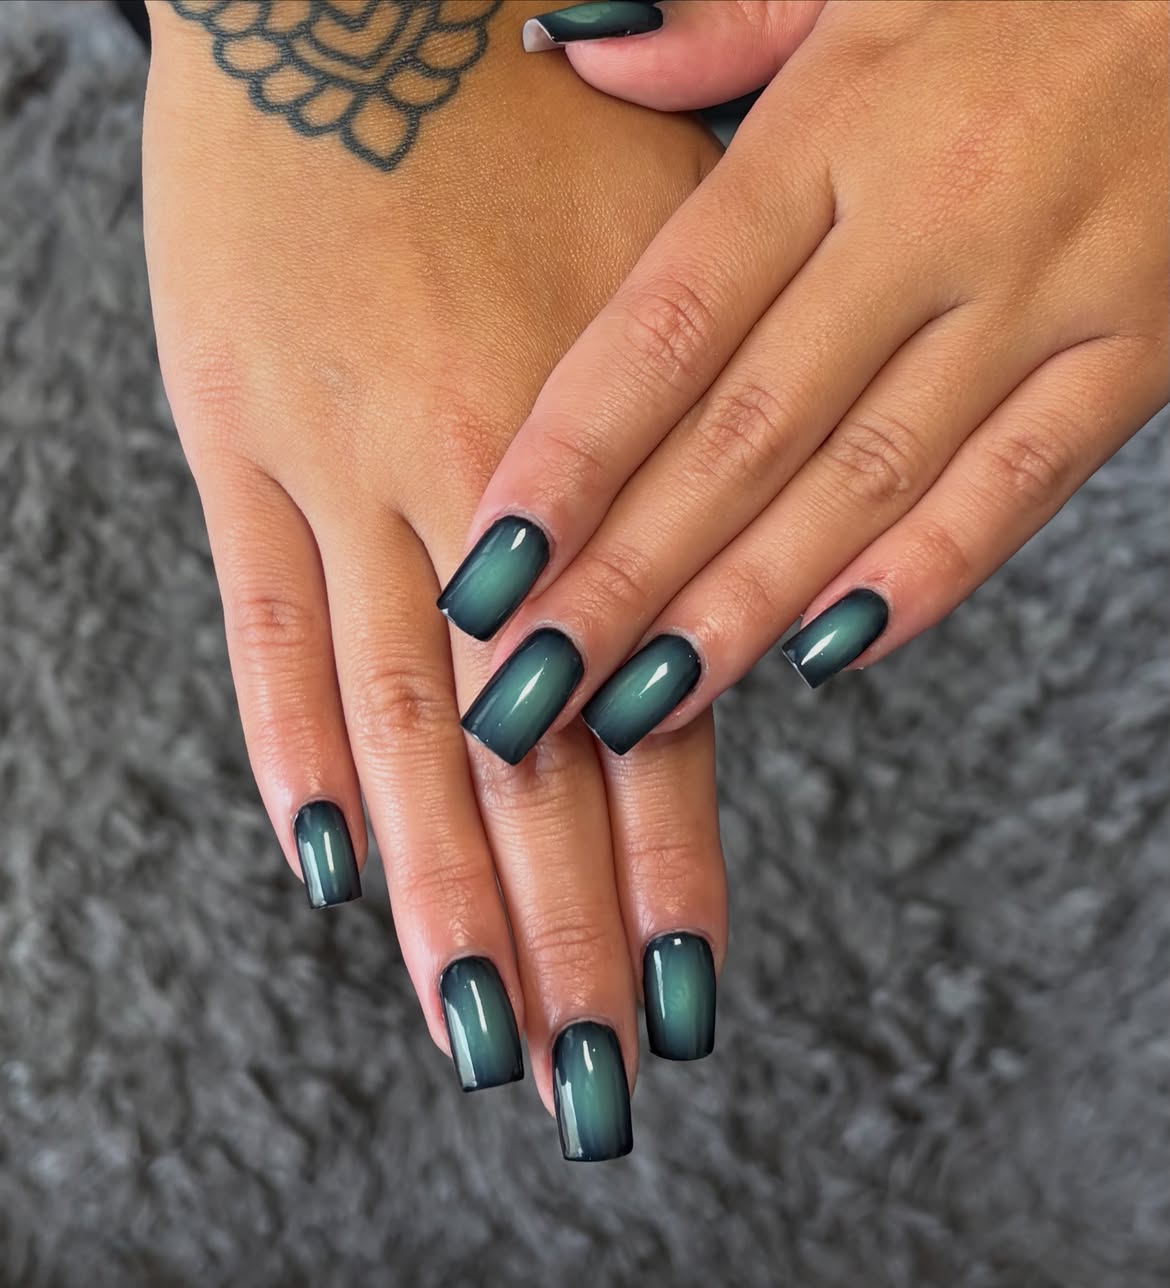
The squared tips turn this smoky gradient into a framed design. A pale green glow runs down the center of each long nail, while the sides and tips deepen into charcoal green. Because the darker border follows a straight shape, it reads like a clean outline rather than a loose haze.
The strongest detail is the placement. Keep the brightest area vertical and close to the center of every nail. Let the dark shade remain heavier along the side edges and across the square tip.
A glossy final layer sharpens the reflection and makes the soft center appear deeper beneath the surface. Consistent border width helps the full set look balanced.
Center the pale green glow.
Keep both side borders similar in width.
Carry the dark shade across the square tip.
Do not let the bright center touch one side.
Avoid a sharp line between the two greens.
Keep the border from changing width on each nail.
14. Teal Corner Tips with Slim Gold Stripes
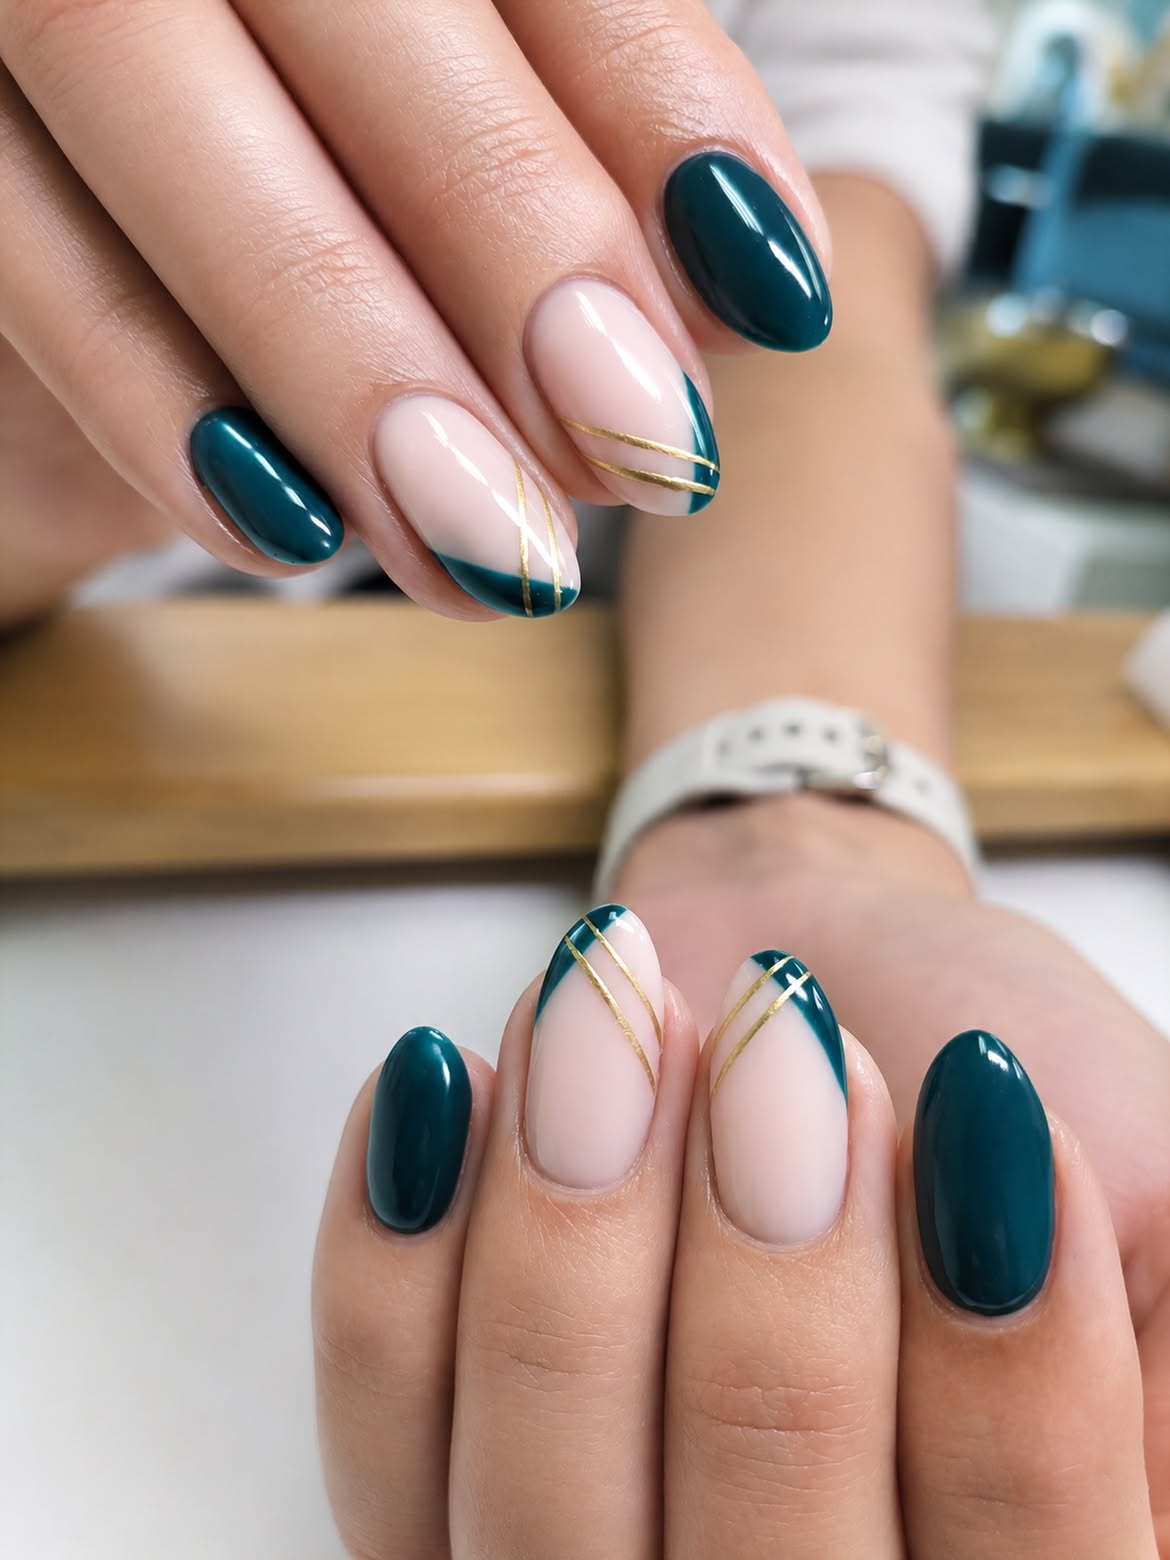
Diagonal corners make this teal and blush set feel crisp without using a full French tip. Solid teal nails anchor both hands, while the accent nails keep a pale pink base and place green along one side or across the tip.
Fine gold lines trace the color border or sweep across the open pink area. Some lines sit close together, while others cross at a narrow angle. The direction changes from nail to nail, but the limited palette keeps the set connected.
Use the angles as a guide: Shift the teal corner to different sides, keep the gold lines narrow, and leave a few nails fully green. That mix gives the detailed nails enough space to stand out.
Open blush base, one angled teal corner, and one or two slim gold lines. Three clear layers are enough to make each accent nail feel finished.
15. Emerald Nails with a Tiny Blue Ladybug Accent
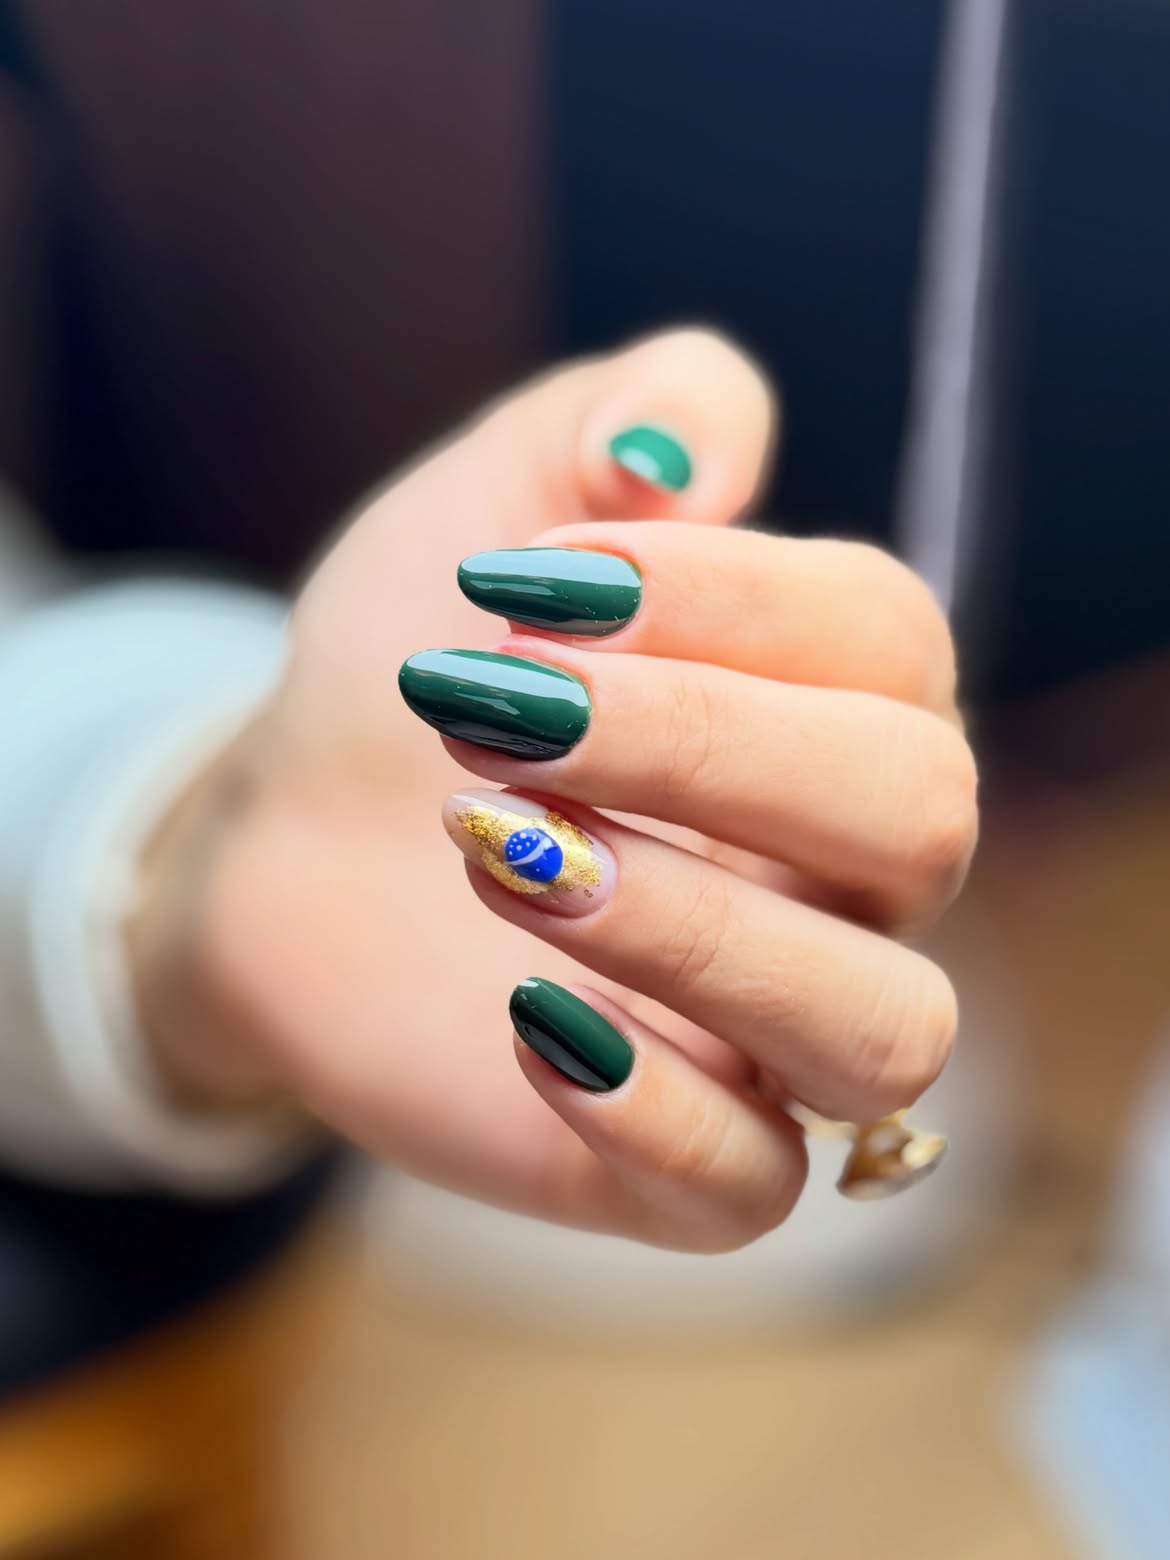
A bright blue charm gives this dark green manicure an unexpected playful detail. Most oval nails stay solid emerald with a smooth glossy finish. The accent nail switches to a sheer neutral base, scattered gold colored flecks, and a raised blue ladybug shape with small white spots.
The gold detail creates a warm bridge between the dark green nails and the bright blue centerpiece.
Keep the raised decoration limited to one nail so it remains easy to notice. Loose gold flecks work better around it than a heavy background pattern. The surrounding solid nails also provide a calm frame for the colorful accent.
Build the base. Keep most nails solid emerald and glossy.
Open the accent. Use a sheer neutral nail with scattered gold colored flecks.
Add one focal piece. Place the blue spotted charm near the center and leave space around it.
16. Forest Green Nature Nails with Clover and Butterfly Wing Art
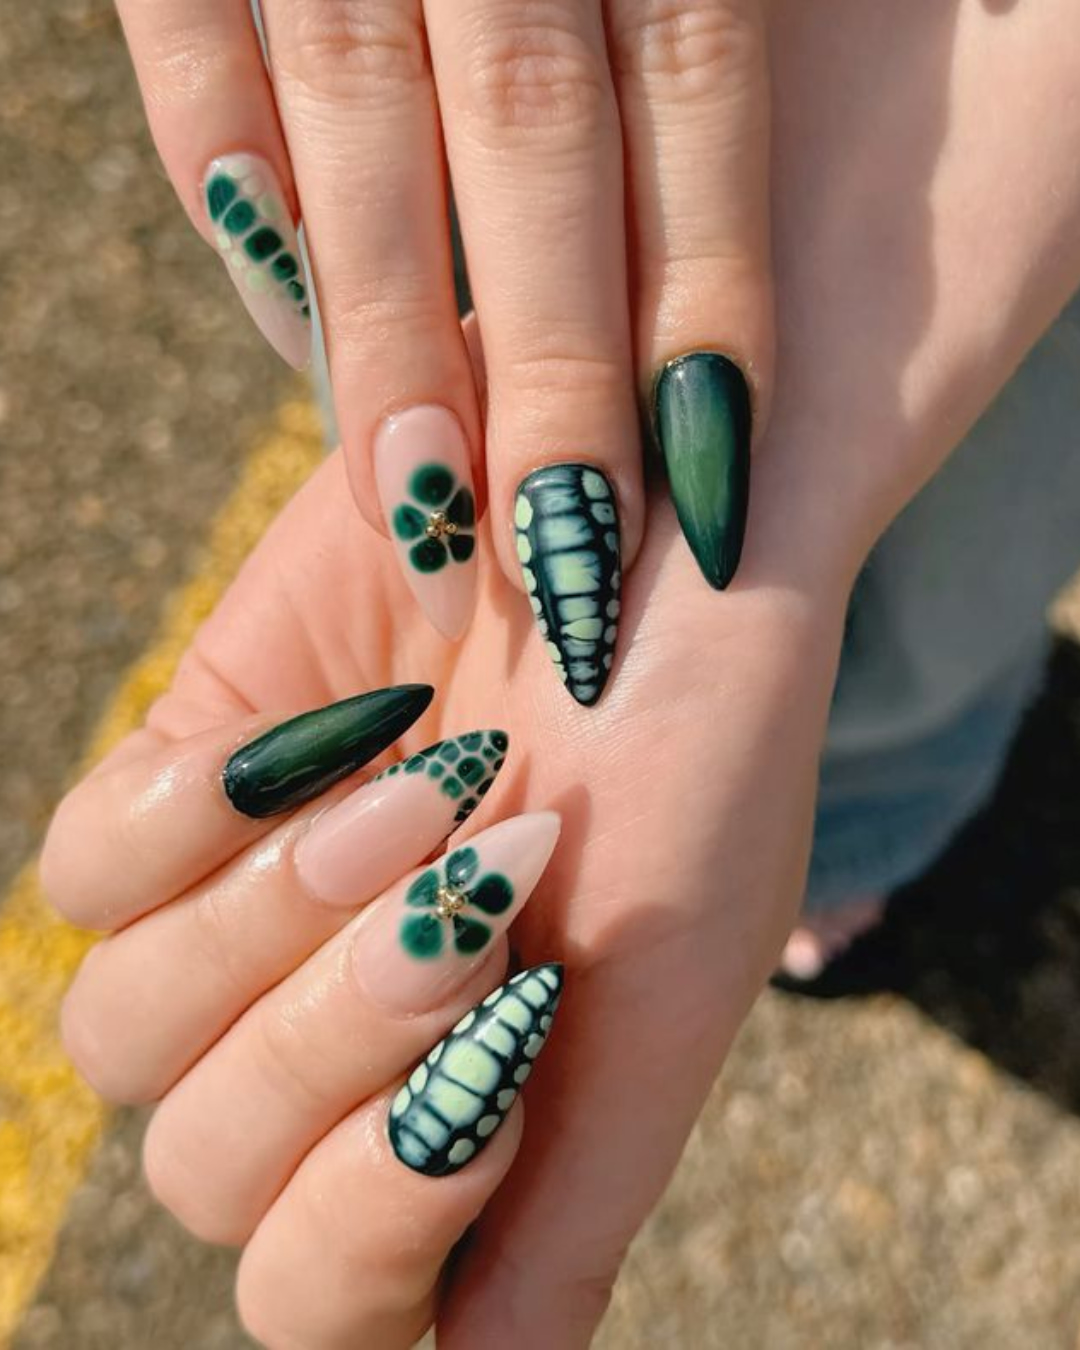
Several nature motifs can share one manicure when the palette stays tightly controlled. These long pointed nails combine glowing forest green, nude clover accents, scale shaped green tips, and pale wing patterns outlined in a much darker shade.
Tiny gold tone centers give the clovers a small warm highlight. The detailed wing nails use pale green sections framed by dark lines, creating the strongest pattern in the set.
Why it stays connected: Every design returns to the same green family and pointed shape. Keep a few nails solid so the eye has somewhere to rest. Place the most detailed wing art apart from the clovers rather than grouping every decorated nail together.
17. Classic Forest Green Nails with a Soft Oval Shape
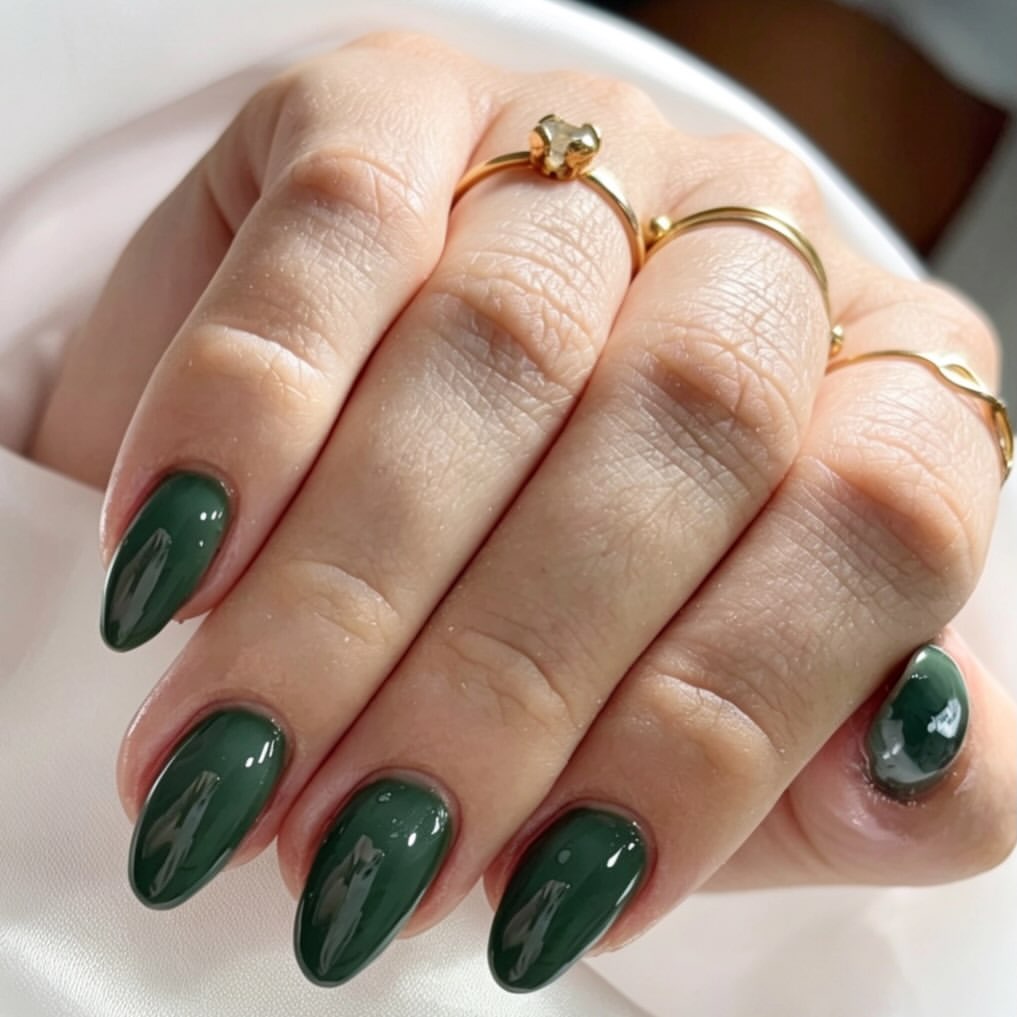
Glossy forest green looks softer here because the nails are kept at a medium oval length. The color stays consistent across every nail, allowing the smooth shape and high shine to carry the design.
- Gently tapered sides create a balanced point between rounded and almond nails.
- The length feels noticeable without becoming overly dramatic.
- Warm gold tone rings also bring out the richness of the green against the pale fabric.
The finish is the main detail, so even coverage matters. Apply thin layers, keep the cuticle line clean, and seal the edges carefully. With a solid shade this deep, neat shaping and clear reflection provide all the interest the manicure needs.
📌 Good To Know
Dark solid polish makes small streaks and uneven edges easier to see. Thin coats, tidy cuticles, and a smooth glossy finish matter more than extra decoration.