16 Black and Green Nails With Bold Patterns, Art and Details
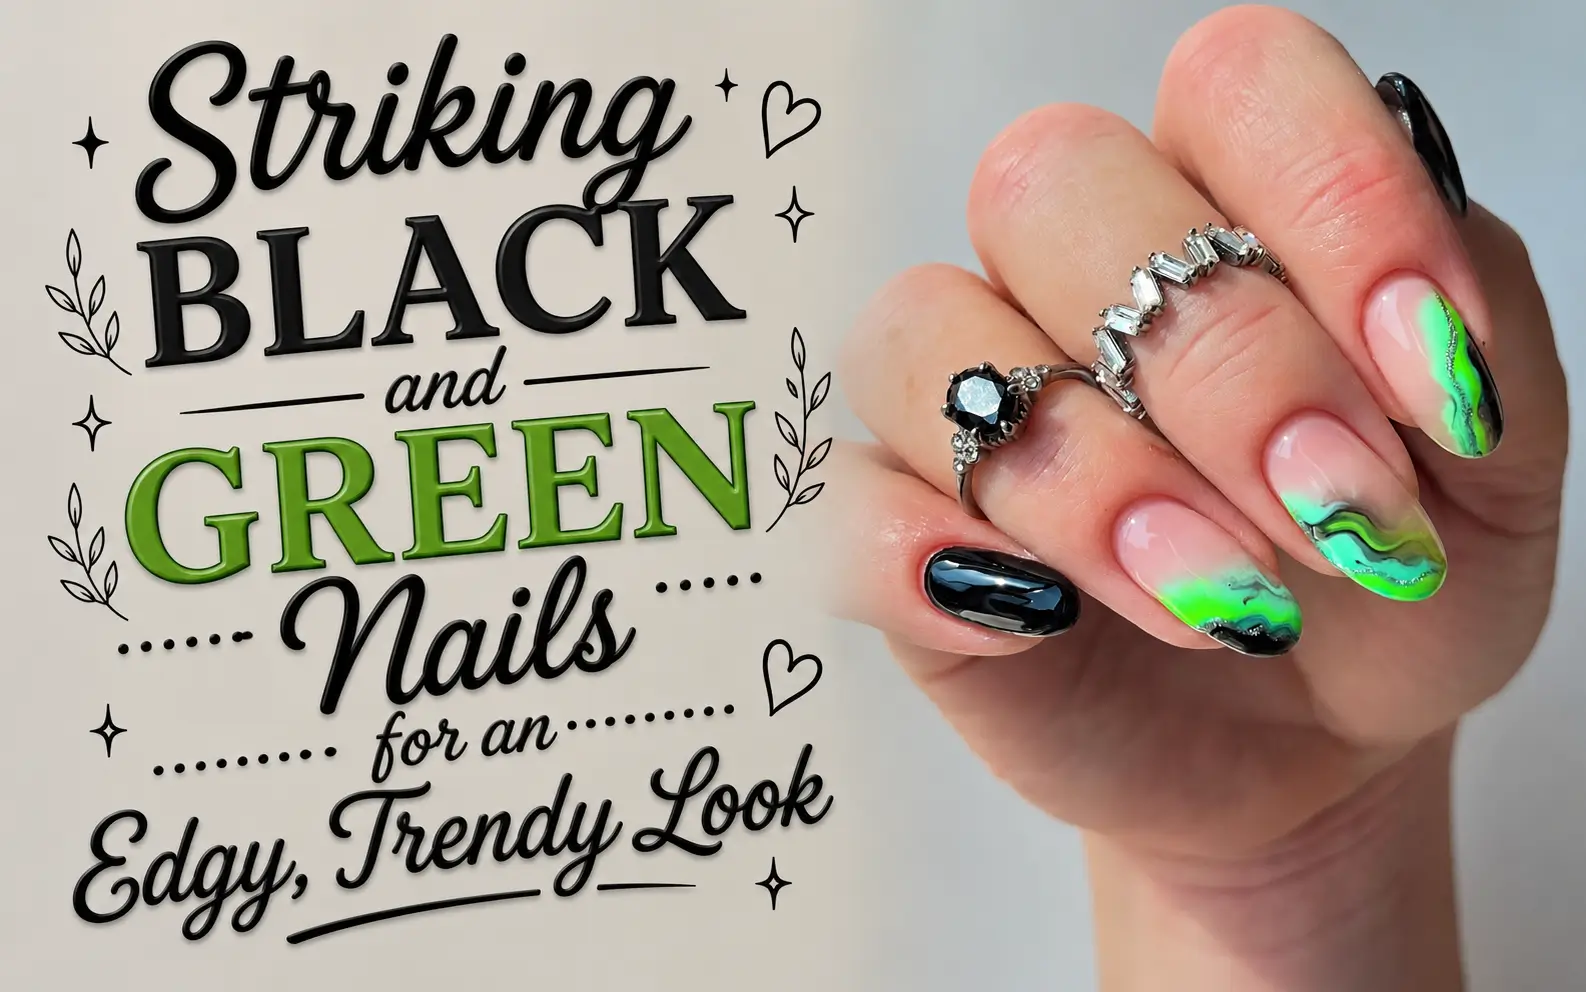
Black and green can feel moody, playful, polished, or loud depending on how the colors are placed. That is what makes this pairing so useful for nail art. A deep black border can sharpen a soft olive center, while neon green can turn simple curves and dots into a graphic statement. These 16 Black and Green Nails show how much variety can fit inside one color story.
The collection includes glossy checkerboards, smoky gradients, marble tips, tortoiseshell accents, tiny flowers, celestial lines, raised ripples, shimmer, gems, and bold mixed patterns. Some ideas use short rounded nails with clean details. Others take advantage of long square shapes and more room for layered artwork.
Each entry points out the feature that makes the design work and offers a practical way to recreate the balance without copying every detail. Look for the finish, pattern, and color placement that suit your style, then save your favorite references for your next manicure.
16 Cute Black and Green Nails Designs 2026
1. Olive Swirls Give Black and Green Nails an Artful Edge
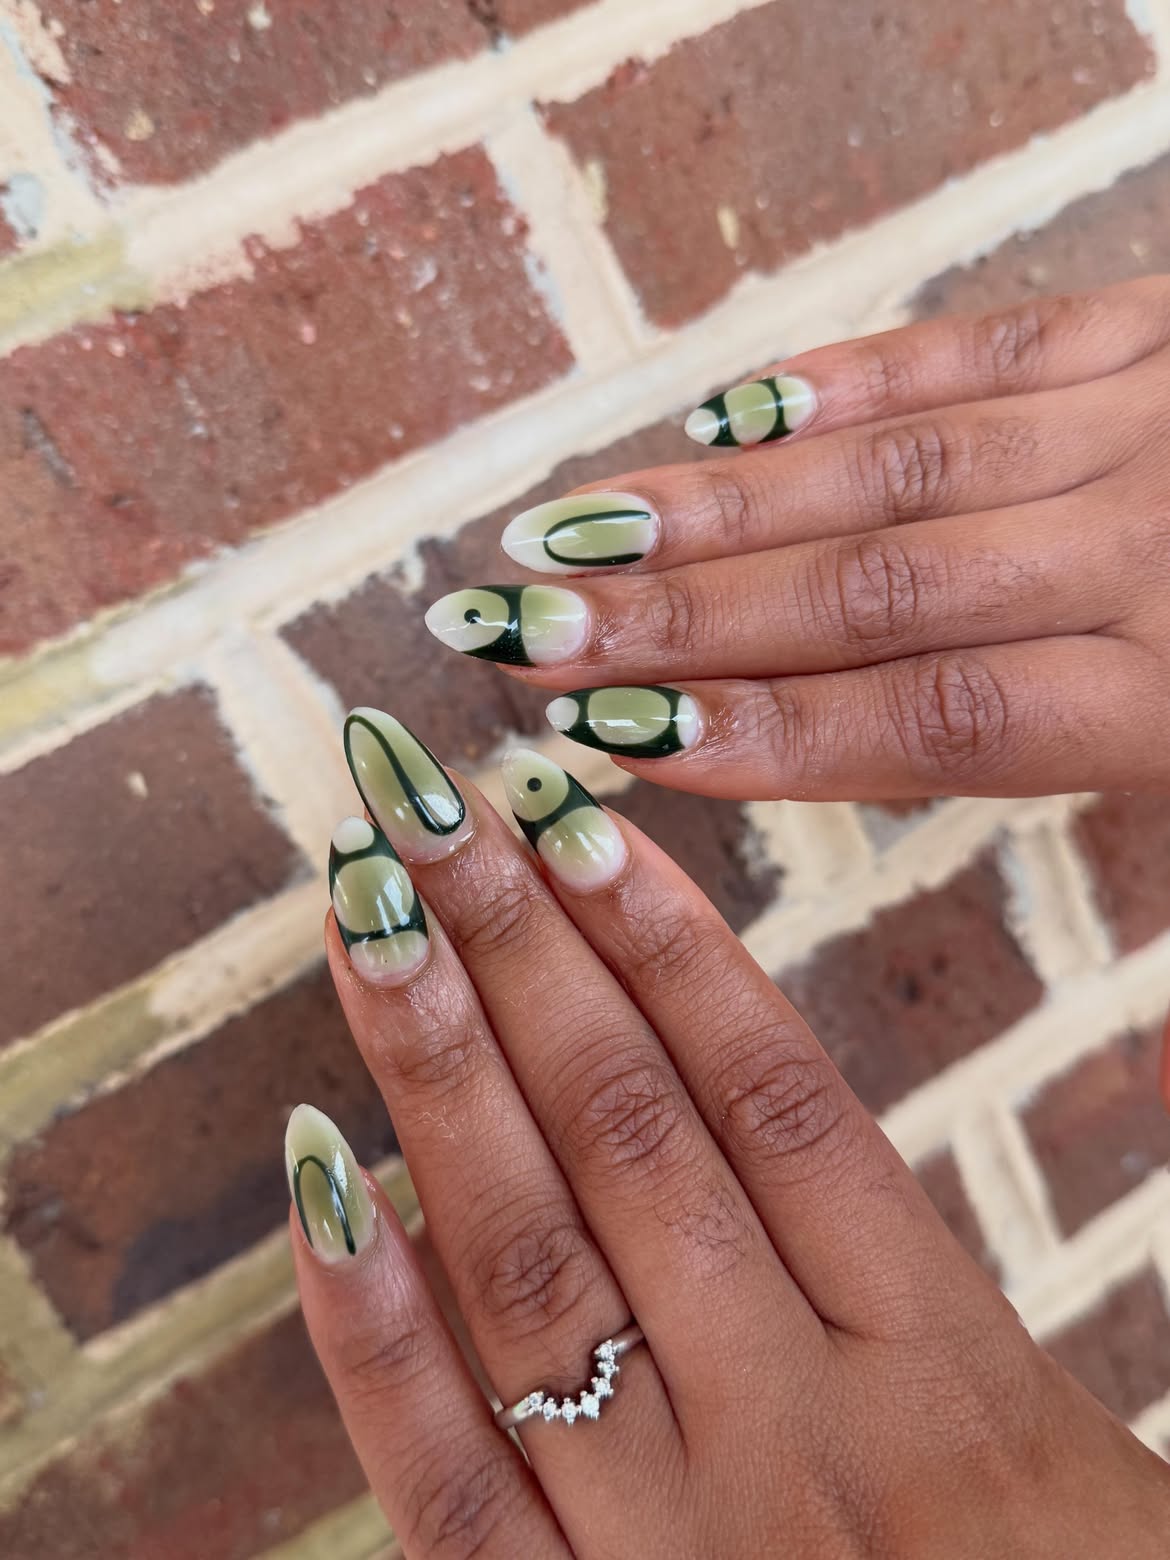
Glossy olive green creates a soft base for the bold black curves in this set. Each almond shaped nail uses the same colors differently, so the design feels connected without looking copied from finger to finger.
What makes it work:
- Thick black outlines give the lighter green sections a clear shape.
- Cream areas create breathing room between the darker details.
- Small dots, loops, and curved blocks keep every nail visually distinct.
The varied placement is the useful idea here. Keep the olive, black, and cream palette consistent, then change the curve or block on each nail. This preserves the playful mood while helping the full set feel balanced.
2. Smoky Black Borders Frame an Olive Green Glow
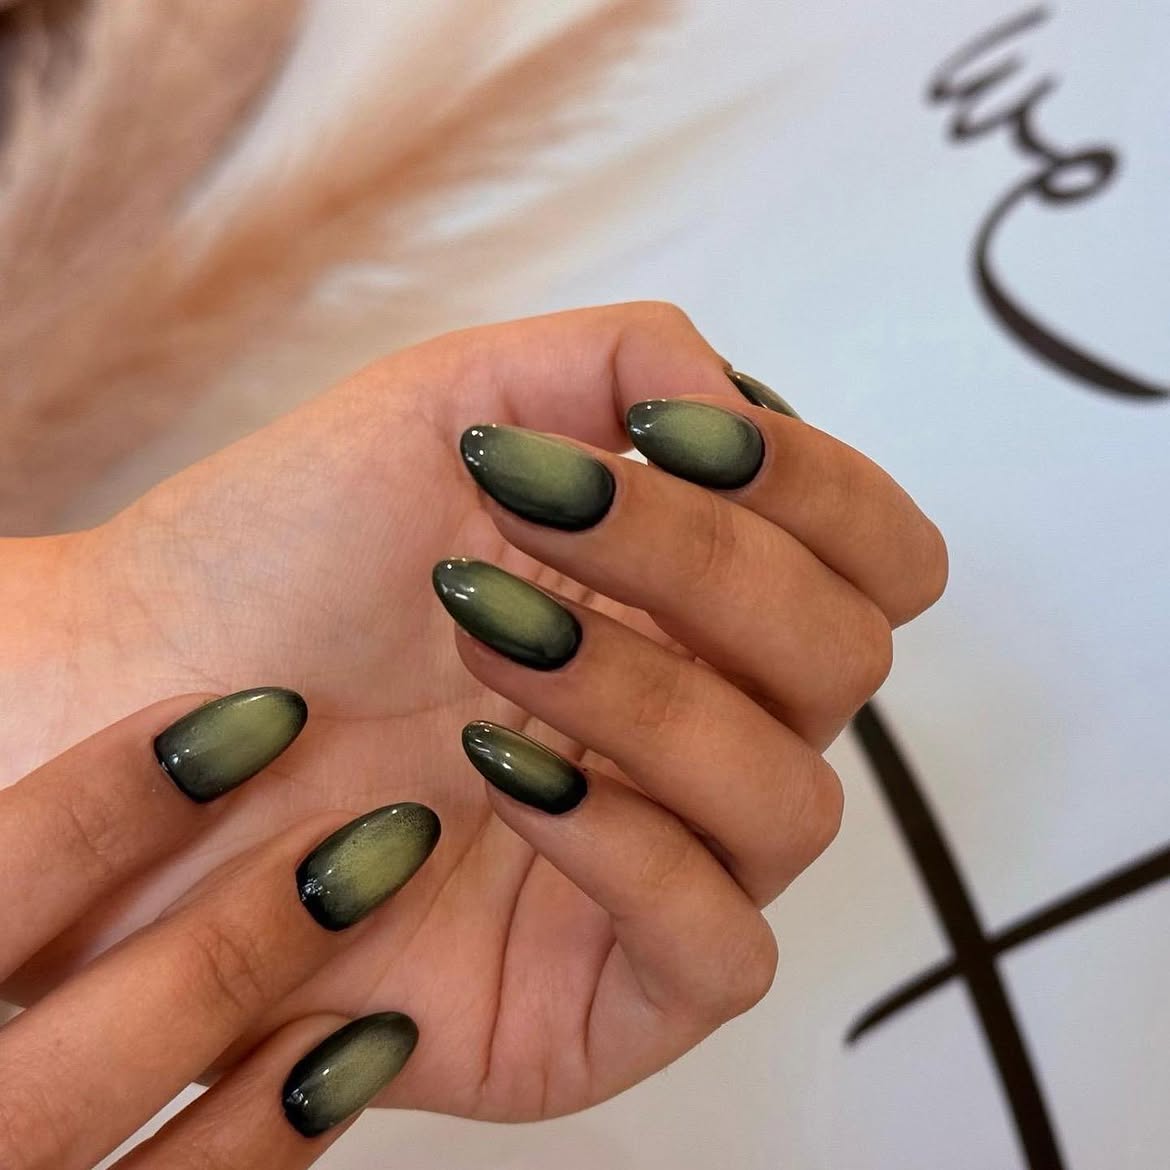
A soft olive center seems to glow through the dark edges of these glossy nails. The smooth fade creates depth without adding patterns, gems, or separate accent nails.
Center: A muted green highlight draws the eye toward the middle.
Edges: Smoky black shading outlines each nail and strengthens the shape.
Finish: The high shine makes the color shift more noticeable under light.
This approach works especially well with the short rounded shape shown in the image. Keep the brightest green area narrow and slightly diffused, then allow the black border to remain visible around every side. The repeated finish makes the full set feel calm, rich, and consistent.
The olive center catches the light while the smoky black border gives every nail a clear, softly framed shape.
3. Celestial Line Art Breaks Up Dark Green Glitter
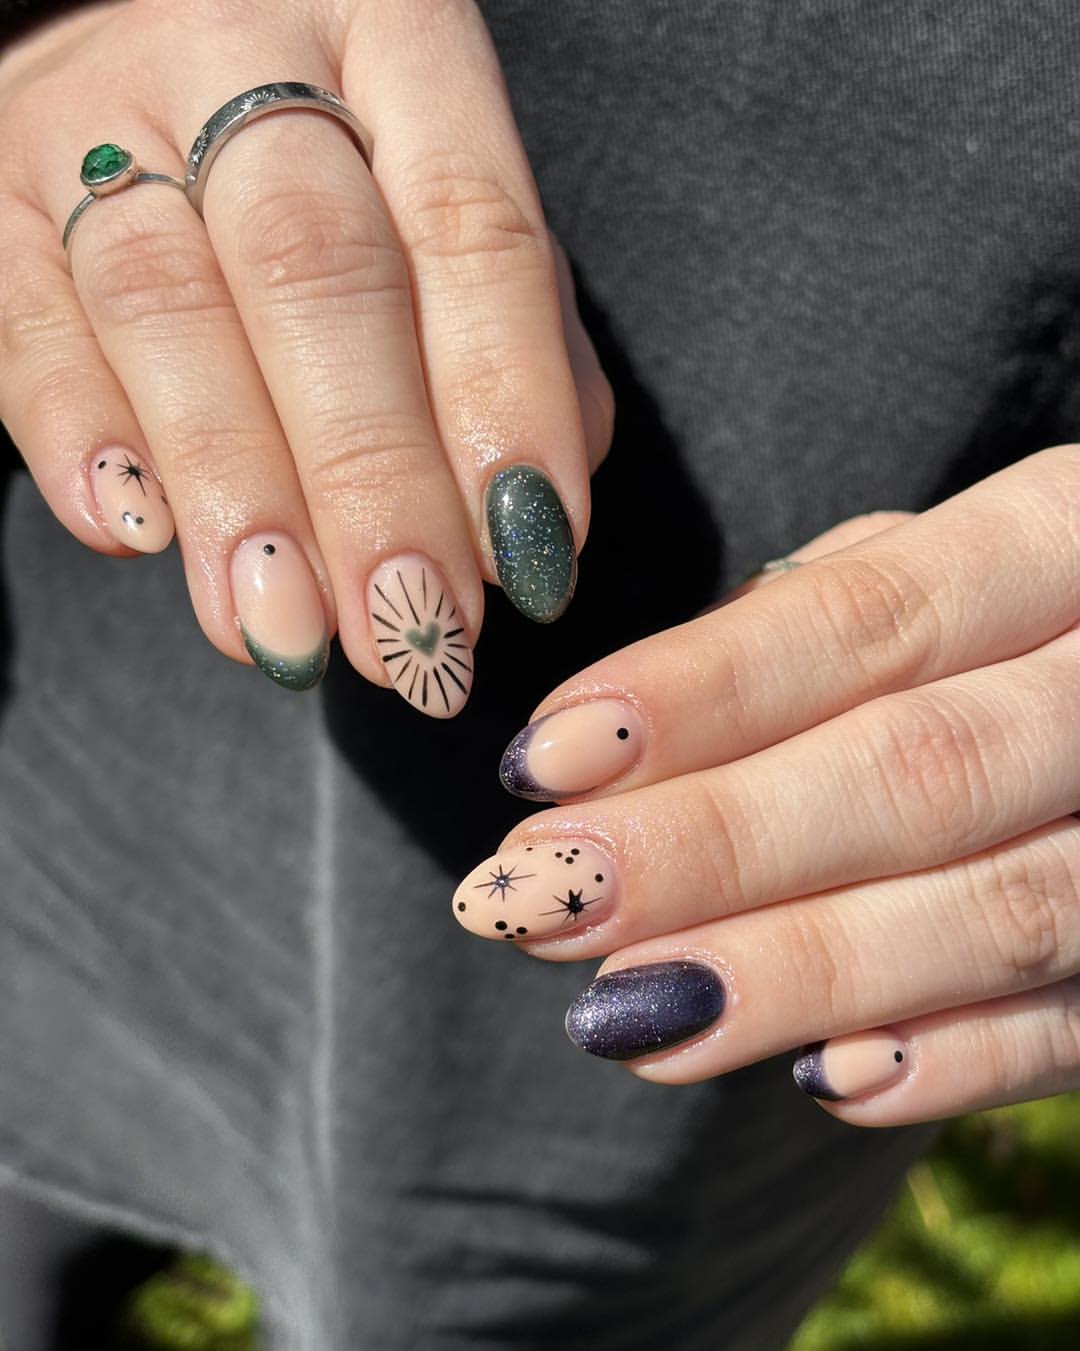
This mixed manicure pairs sheer nude sections with dark sparkling color and tiny black celestial details. One hand leans forest green, while the other introduces smoky violet, but the repeated stars and dots keep both sides connected.
Build the mix in three parts:
- Use dark green glitter on one complete accent nail.
- Add curved green tips to a few nude nails.
- Finish the remaining spaces with fine black stars, rays, and scattered dots.
The large sunburst design creates a clear focal point, while the smaller symbols prevent the surrounding nails from feeling empty. Leaving several nude areas visible also keeps the detailed set light and readable.
💡 Keep the symbols balanced
Choose one large celestial motif, then use smaller stars and dots on the other nails. Too many large designs would compete with the green glitter.
For more bold color inspiration, check out 17 Blue and Green Nails filled with glossy blends, bright accents, and creative designs that feel just as striking.
4. Lime Gradients and Black Curves Create a Liquid Look
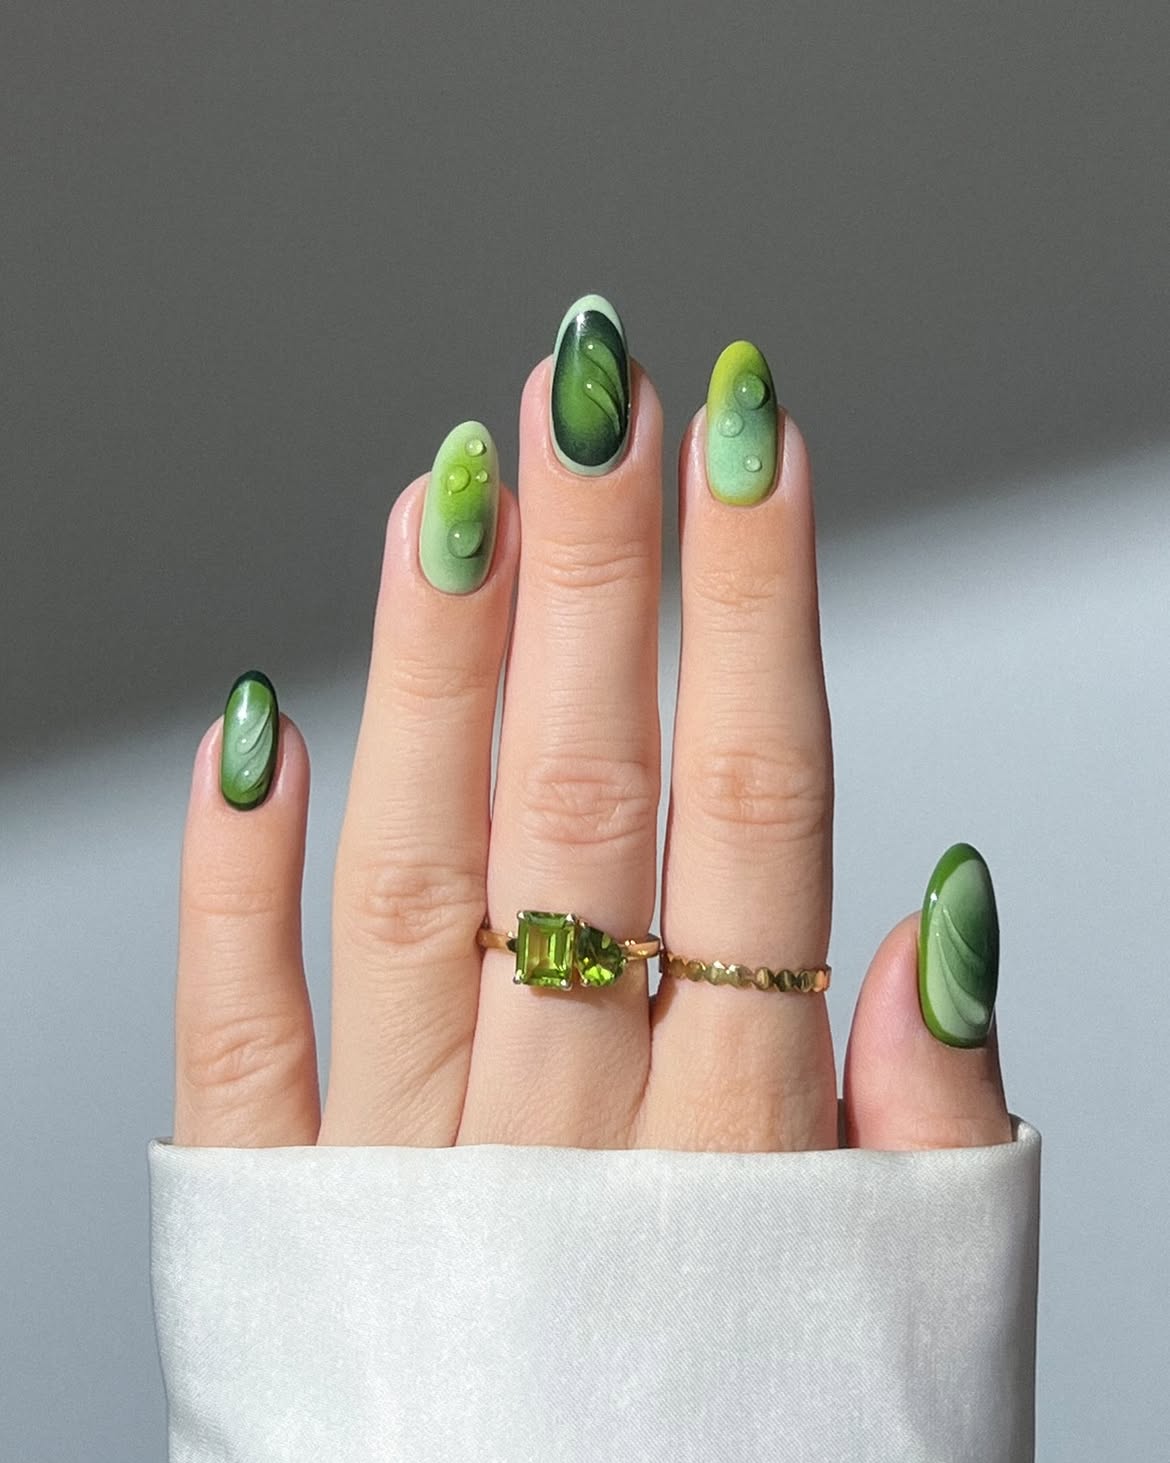
Color movement is the main event in this glossy green set. Pale mint, bright lime, and deep forest tones flow into one another, while fine black curves give the softer sections a clear direction.
Some nails carry dark borders and layered wave lines. Others stay lighter and use raised clear droplets as the focal detail. That change in texture keeps the single color family from feeling repetitive.
To recreate the balance, place the darkest green on a few nails and reserve the brightest lime for smaller areas. Add black curves sparingly, following the direction of the gradient. The clear droplets look strongest on the simpler nails, where they have enough open space to remain visible.
Blend several visible shades of green.
Place clear droplets on the quieter nails.
Heavy black lines on every nail.
Too many droplets over detailed areas.
5. Deep Green Plaid Gives Square Nails a Tailored Finish
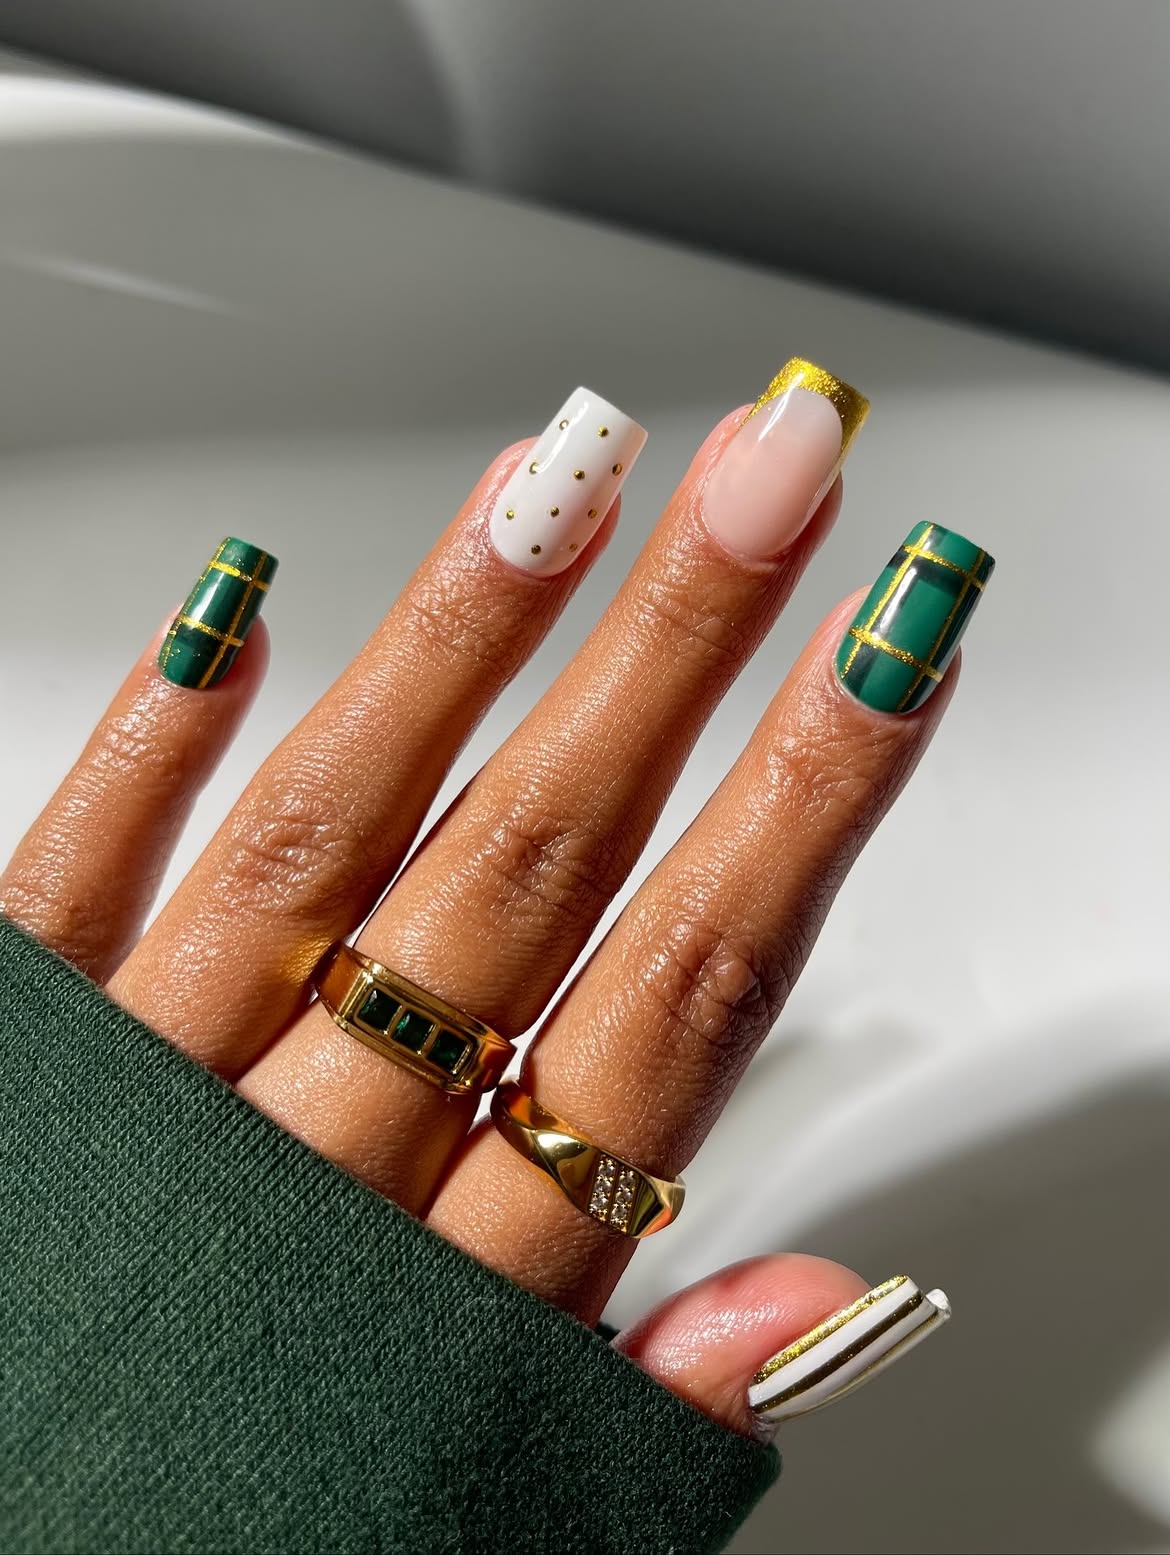
Crisp grid lines bring structure to the glossy green nails in this reference. The design uses metallic gold rather than black, paired with white accent nails, small gold dots, and a matching tip.
For a black and green nails version, keep the same plaid placement and exchange some of the gold lines for fine black ones. A small amount of gold can remain as a warm detail, or it can be removed for a stricter two color palette.
The long square shape gives each grid enough room to stay neat. Keep the vertical and horizontal lines thin, leave uneven spaces between them, and use one or two simpler nails so the plaid remains the main feature.
| As shown | Black and green version |
|---|---|
| Gold plaid over deep green | Fine black plaid over deep green |
| White nails with gold details | Soft nude nails with black details |
6. Black and Green Nails Go Graphic With Mixed Patterns
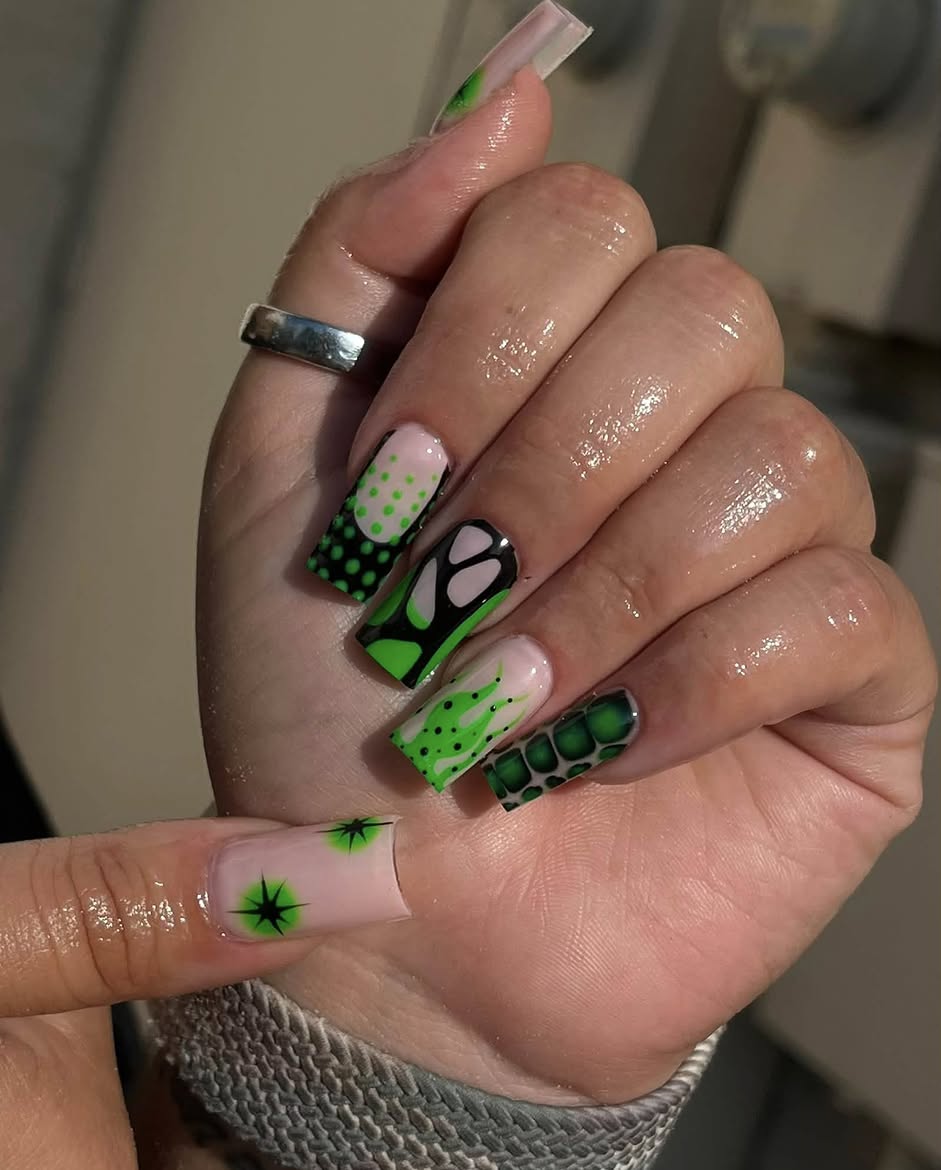
No two nails follow the same layout in this bold neon set. Bright green, glossy black, and a pale nude base repeat across long square nails, giving the different motifs a common thread.
The patterns move from neat dots to loose black shapes, fine green curves, rounded dark blocks, and sharp starbursts. Changing the scale keeps the set readable. Some nails carry large graphic areas, while others use smaller marks with more open space.
To borrow this idea, choose three colors and repeat them across every nail. Let one motif dominate each nail rather than squeezing several patterns into the same space. The result feels playful, loud, and carefully connected.
Build the pattern mix
7. Checkerboard Accents Sharpen Solid Green and Black
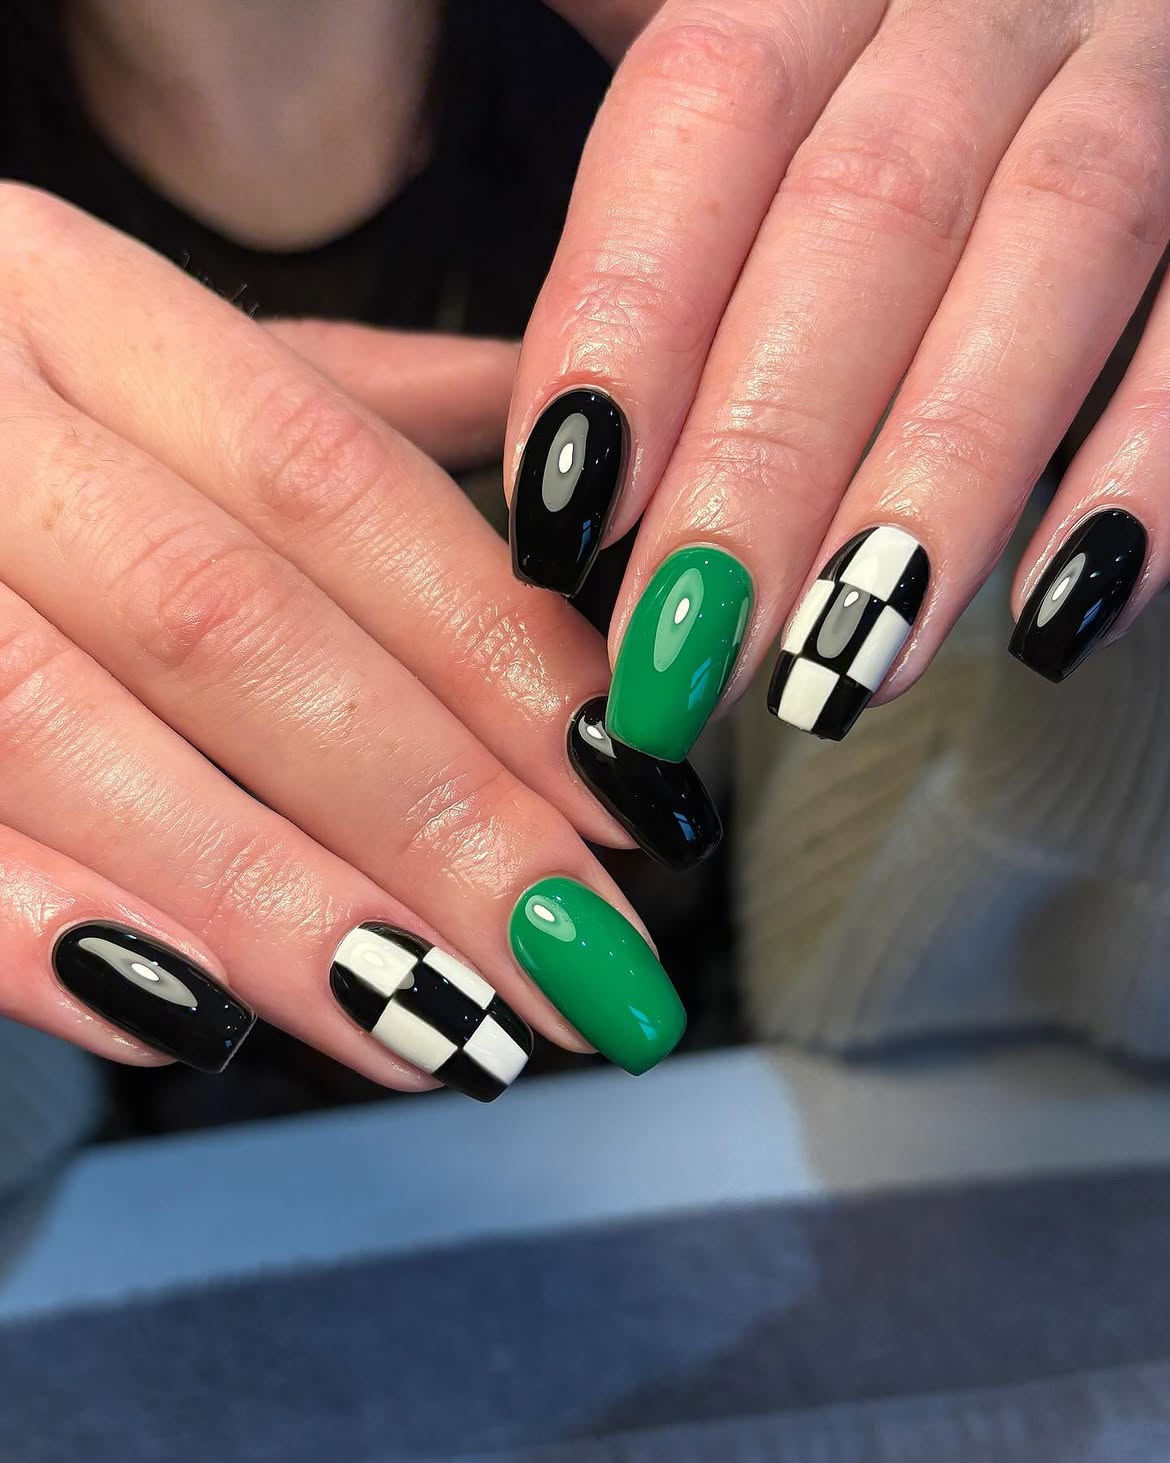
Three simple elements carry this manicure: glossy black, vivid green, and a crisp black and white checkerboard. The solid nails give the eye somewhere to rest, which makes the patterned accents stand out without overwhelming the set.
- The checkerboard appears on only two nails, while black takes up most of the remaining space.
- Green is used less often, but its bright color gives the whole design energy.
- The short square shape also suits the pattern because the straight sides echo the edges of each block.
For a tighter palette, change the white squares to green. Keep the high shine and clean divisions so the graphic effect remains strong.
8. Raised Ripple Accents Add Texture to Dark Green Nails
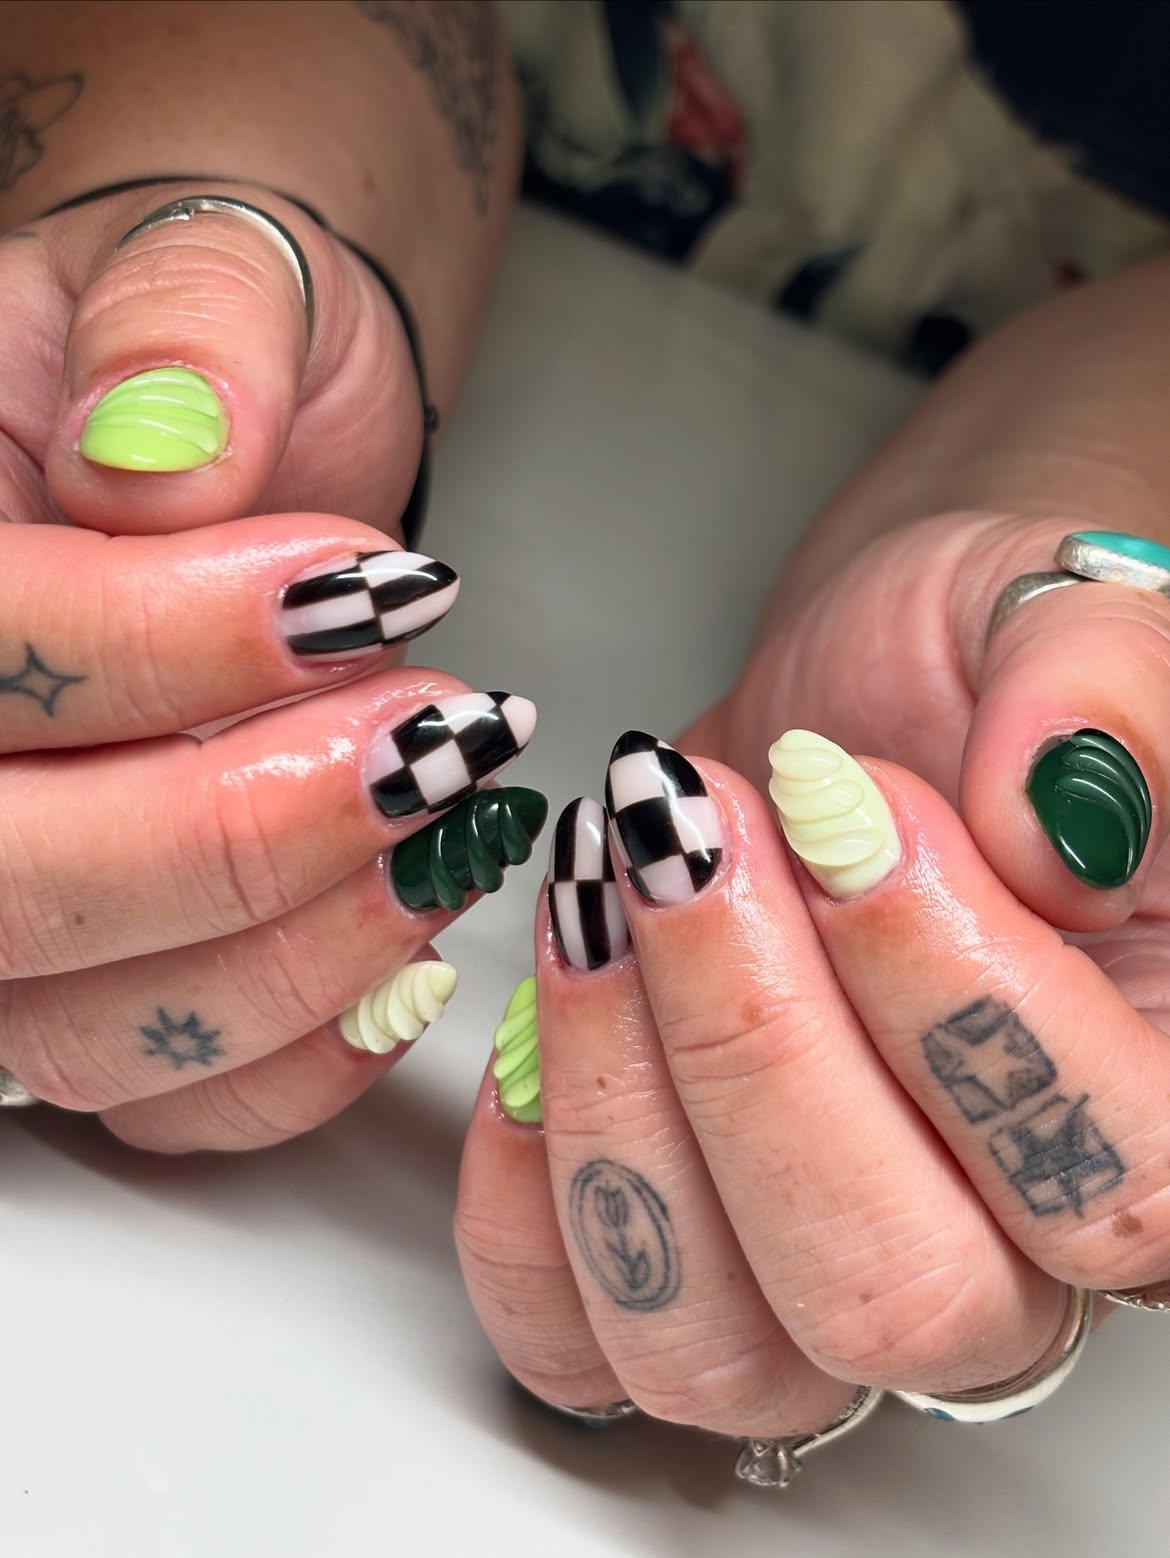
The detail worth noticing here is the curved texture sitting above the glossy green, lime, and cream surfaces. Those raised ripples make the solid nails feel sculpted, giving this set a fresh direction beyond color alone.
Black and cream checkerboard nails provide a flat graphic contrast. Their slightly uneven blocks feel less rigid than a standard grid, which suits the soft curves used on the textured accents.
Keep the ripples on solid colors so their shadows remain easy to see. A mix of dark green, bright lime, and cream adds variety without changing the technique. The checkerboard should stay smooth and limited to a few nails, allowing texture to remain the main idea.
Choose one solid green, lime, or cream base.
Add several curved raised lines in one direction.
Balance the texture with one smooth black patterned nail.
9. Tiny Flowers Soften Lime Green and Black Graphics
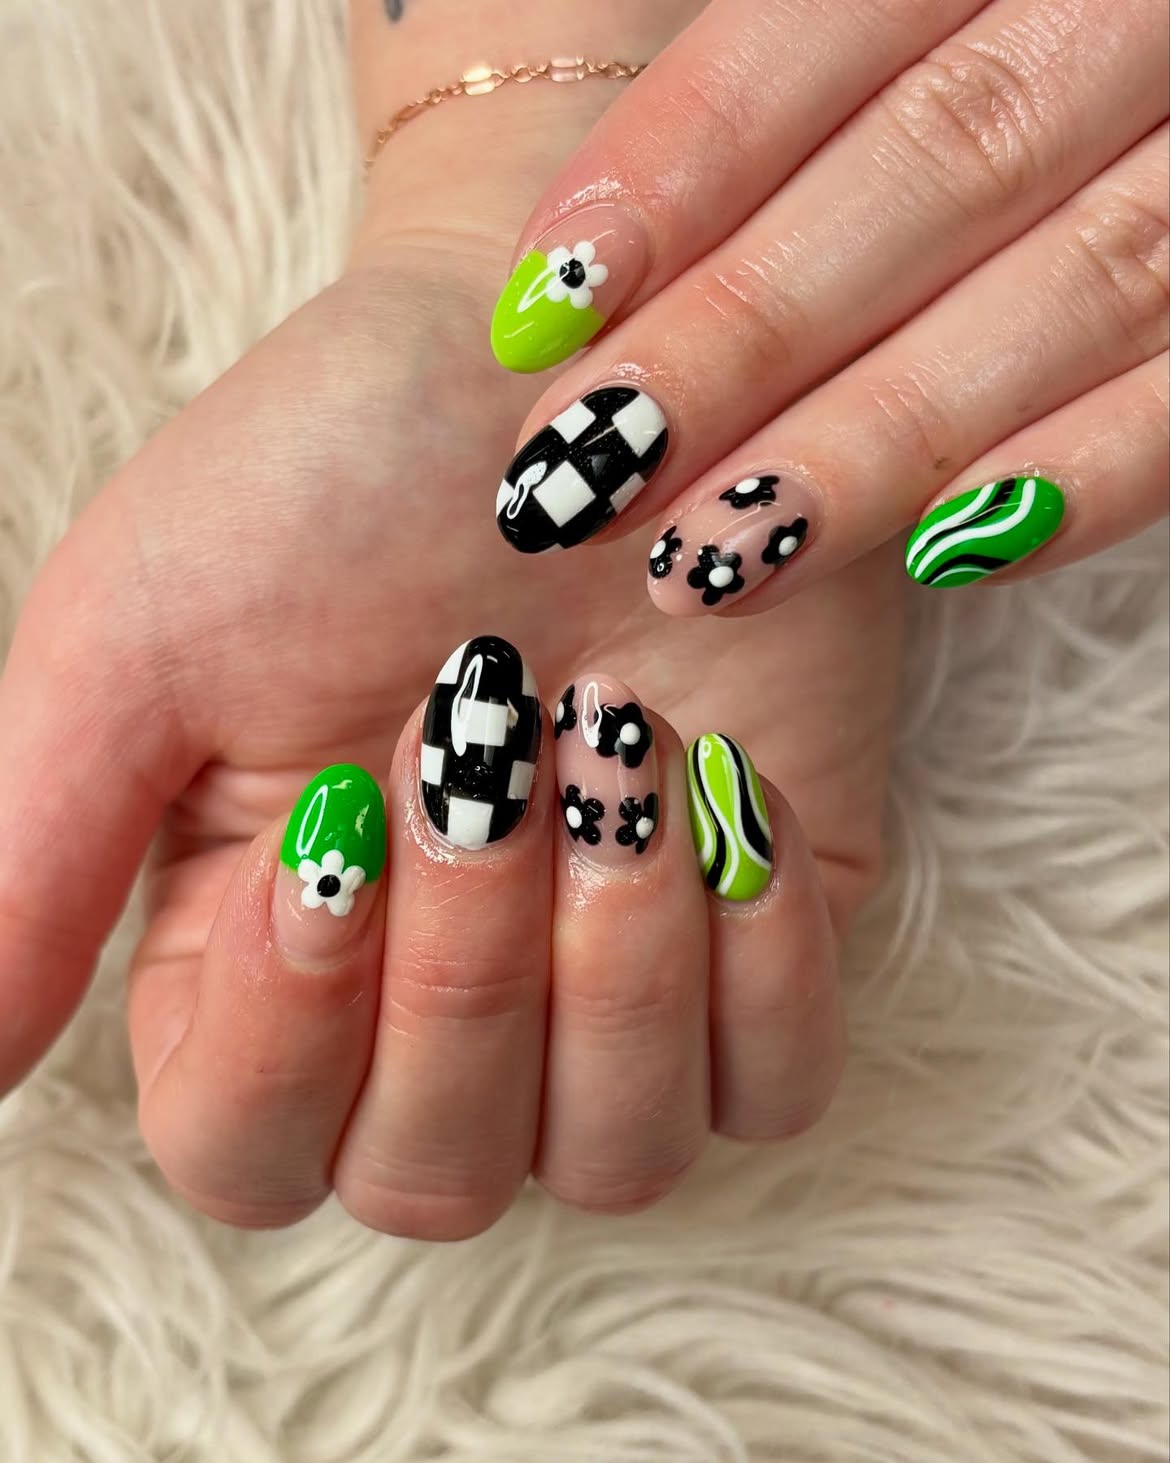
Small flower motifs give this bright manicure a playful counterpoint to its bolder patterns. Black and white checkerboard nails create structure, while lime green sections bring energy through solid color and flowing stripes.
The nude nails keep the flowers easy to see. Black petals with pale centers connect naturally to the checkerboard, while white petals on green tips reverse the same color relationship. This thoughtful repetition makes several different patterns feel like one set.
Use one main motif on each nail and repeat the same three colors throughout. Keep some designs curved and others geometric. That contrast creates variety without losing the cheerful floral theme.
- ▸ Add small black flowers over a sheer nude base.
- ▸ Reverse the colors with white flowers over lime green.
- ▸ Use checkerboard on only two accent nails.
- ▸ Finish with curved green, white, and black stripes.
For a brighter take on the green nail trend, save these 16 Lime Green Nails packed with glossy color, playful patterns, and fresh manicure ideas.
10. Embellished Green French Tips Mix Zebra Lines and Tiny Gems
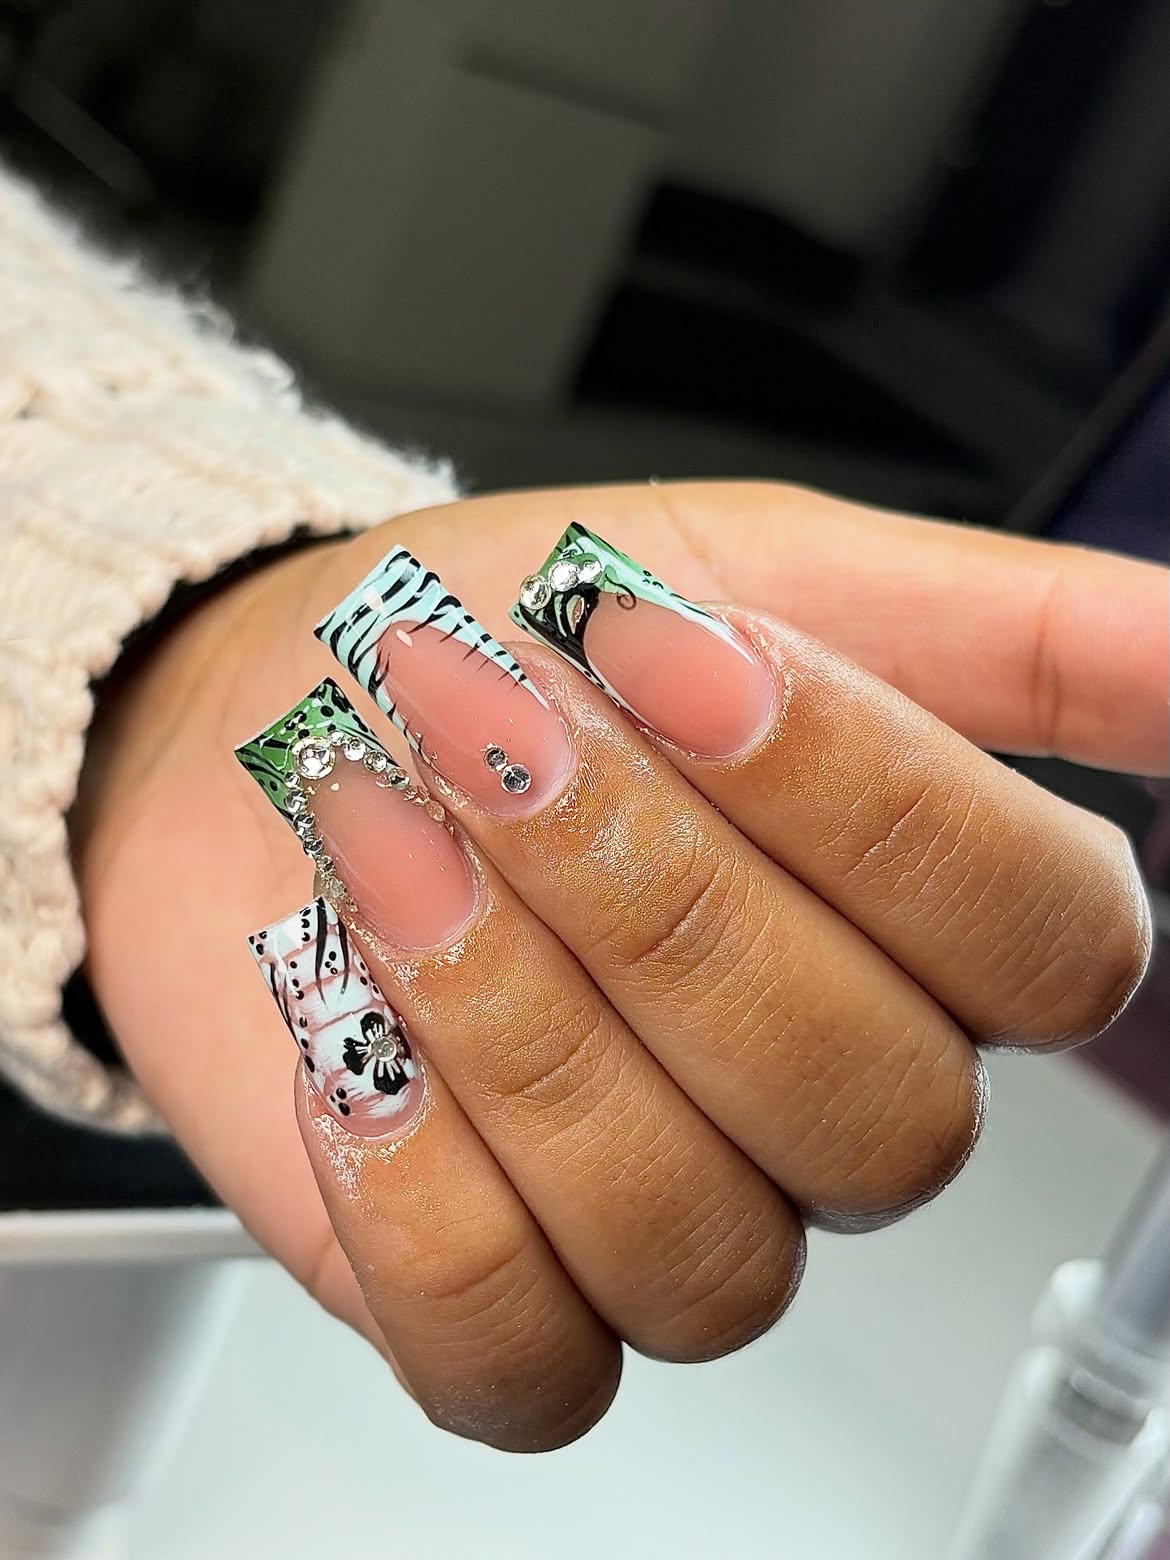
These long square nails keep most of the nude base visible, leaving the detailed green, black, and white artwork around the tips. The open center prevents the layered patterns and gems from looking too heavy.
Details to borrow from this set:
- Alternate pale green zebra lines with darker green patterned tips.
- Use fine black outlines to separate white and green sections.
- Place small clear gems along only a few curved edges.
- Add scattered black dots for a lighter filler detail.
- Reserve one nail for a tiny black butterfly accent.
The patterns change from nail to nail, but the repeated colors and clear embellishments connect the full manicure. Keep the largest gem clusters near the tips so the nude space remains visible.
A sheer nude center with a long square shape and plenty of open space.
Green and black patterned tips finished with white lines, clear gems, dots, and one small butterfly.
11. Neon Marble Tips Flow Into Glossy Black Accents
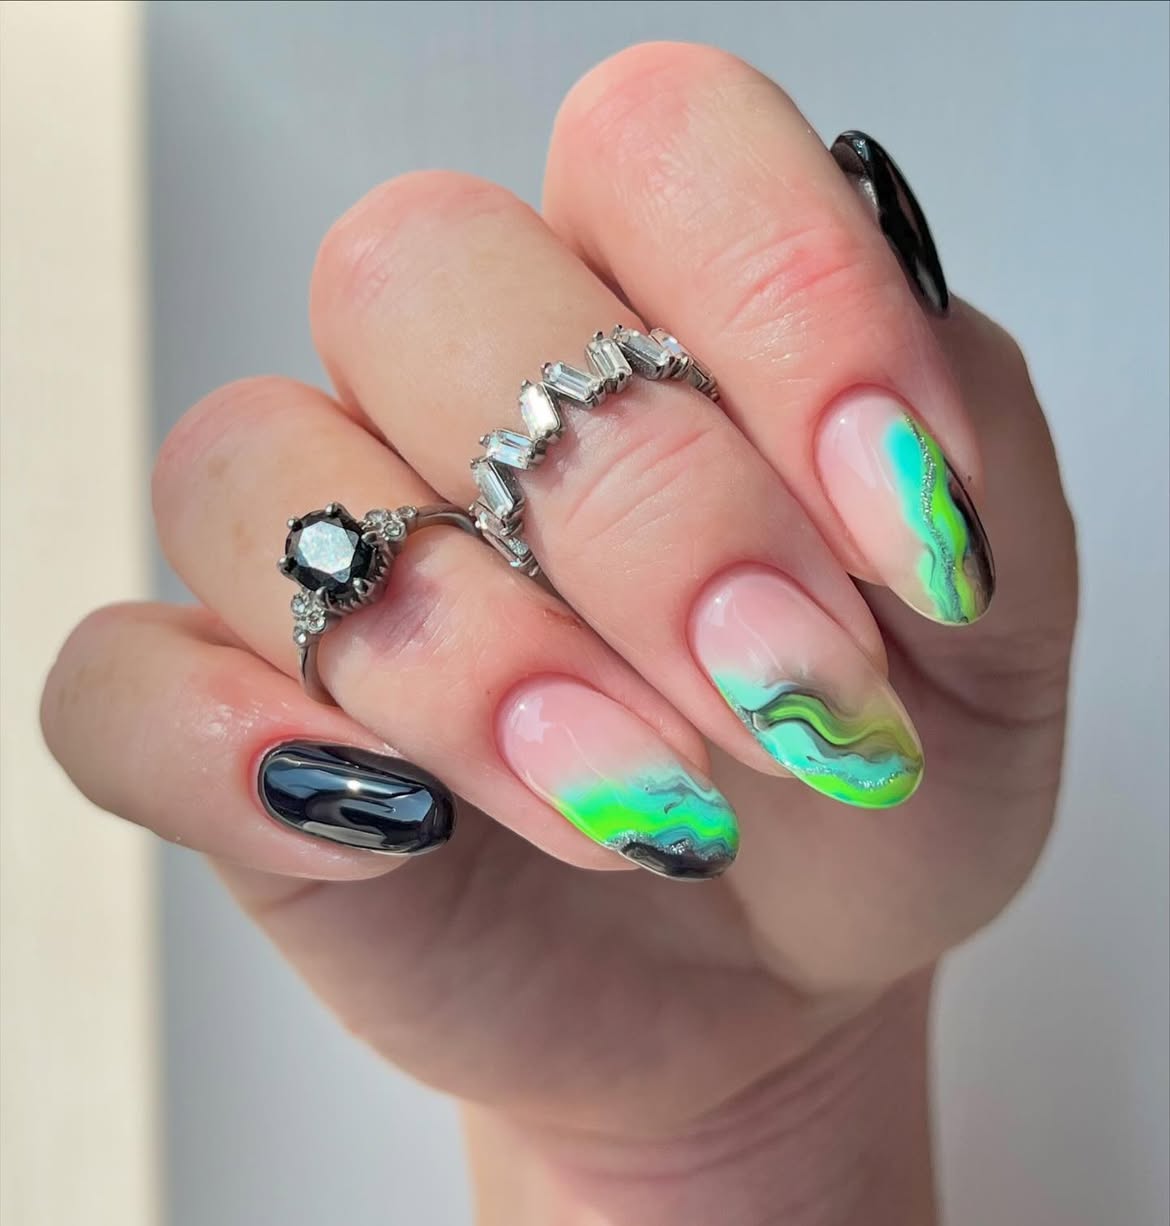
Bright color appears to move across this manicure rather than sitting in fixed sections. Neon green and turquoise blend along the tips and sides, while thin black and silver lines follow the uneven waves.
The sheer pink base keeps the flowing details light. Some nails carry color only near the edge, while others pull the green higher along one side. That uneven placement makes the marble effect feel natural instead of repeated.
Solid glossy black nails act as visual anchors between the brighter designs. To recreate the balance, use black on one or two nails, vary the height of each marble tip, and keep the metallic line narrow enough to support the color rather than cover it.
12. Emerald Curves Cut Through Tortoiseshell Depth
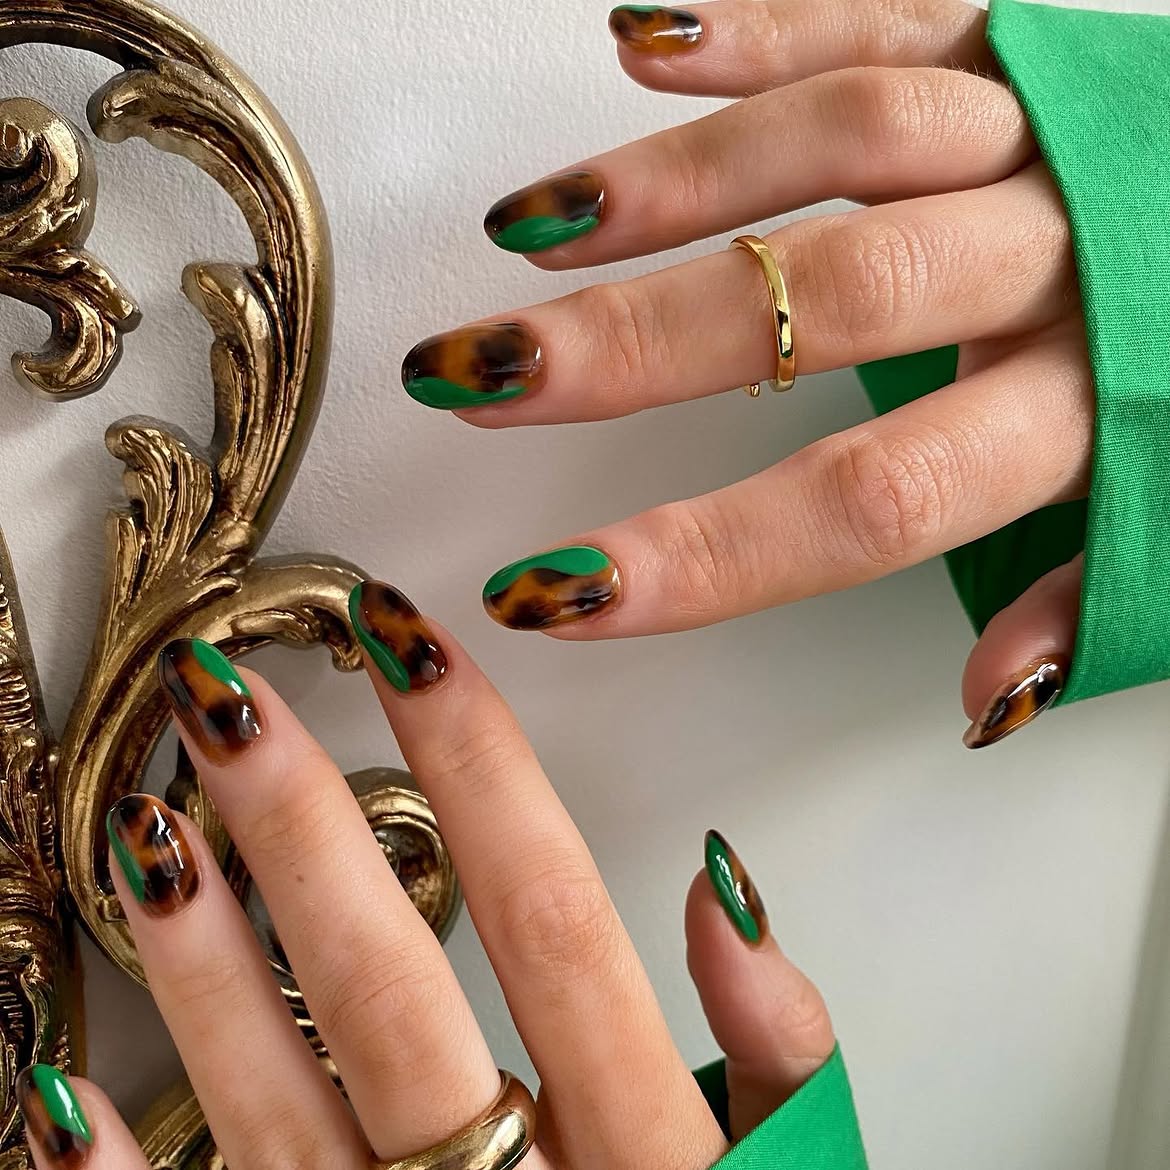
Warm amber, deep brown, and smoky black form the layered tortoiseshell pattern in this set. Bright emerald sections interrupt those darker colors with smooth curves placed near the sides and tips.
The green placement changes on every short rounded nail. Some curves sweep across the edge, while others rise along one side. This variation lets the tortoiseshell remain visible and prevents the brighter color from taking over the design.
For a similar result, build the warm pattern first and leave the shapes slightly uneven. Add one clean green curve over each nail, changing its direction as you move across the hand. A glossy finish strengthens both the translucent amber areas and the darker black patches.
The emerald curves cool down the warm tortoiseshell pattern, while the smoky black patches connect the two color stories.
13. Pink Cow Print Makes Dark Green Nails Feel Playful
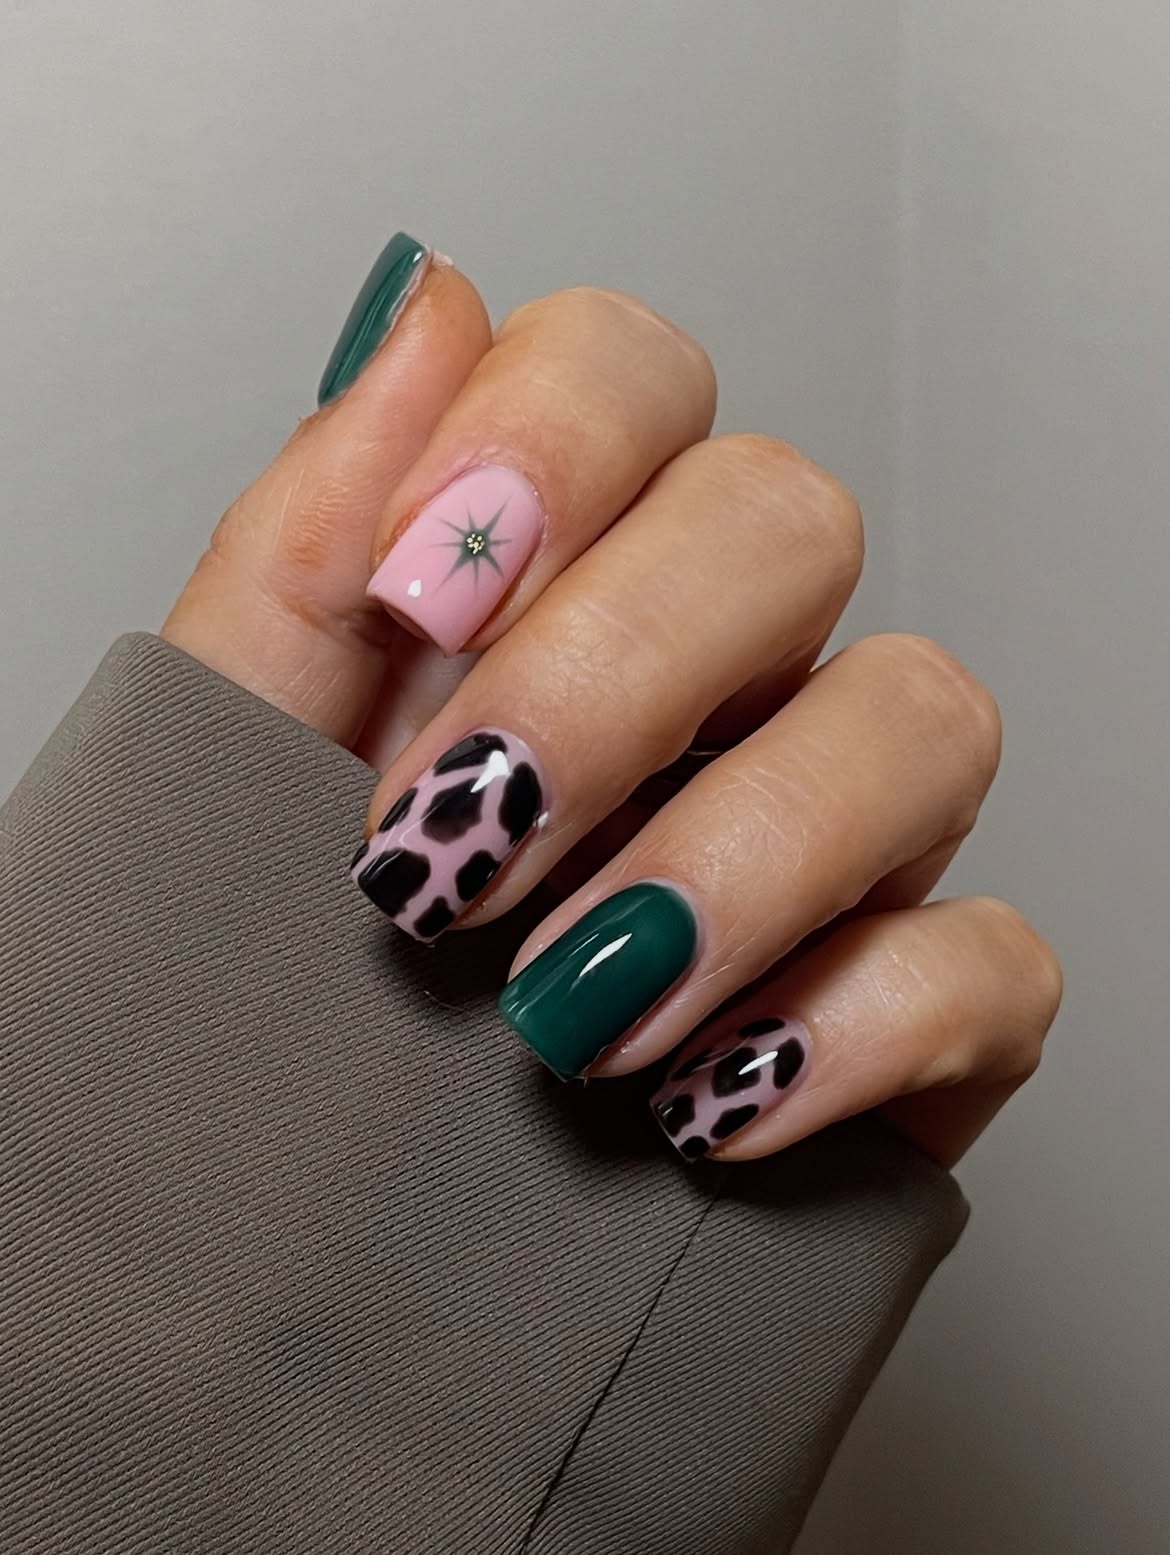
Glossy forest green gives this manicure a rich base, while blush pink and irregular black spots bring in a lighter, playful pattern. The medium square shape offers enough room for the markings without making them look crowded.
Use these details to recreate the mix:
- Paint two nails in solid dark green for visual weight.
- Use blush pink beneath the black cow spots.
- Keep each black marking uneven in size and shape.
- Reserve one pink nail for a fine black starburst.
- Add a tiny pale center to make the starburst stand out.
The limited palette keeps the animal print and celestial accent connected, even though they are different motifs.
14. Turquoise Color Blocks Balance Black and White Prints
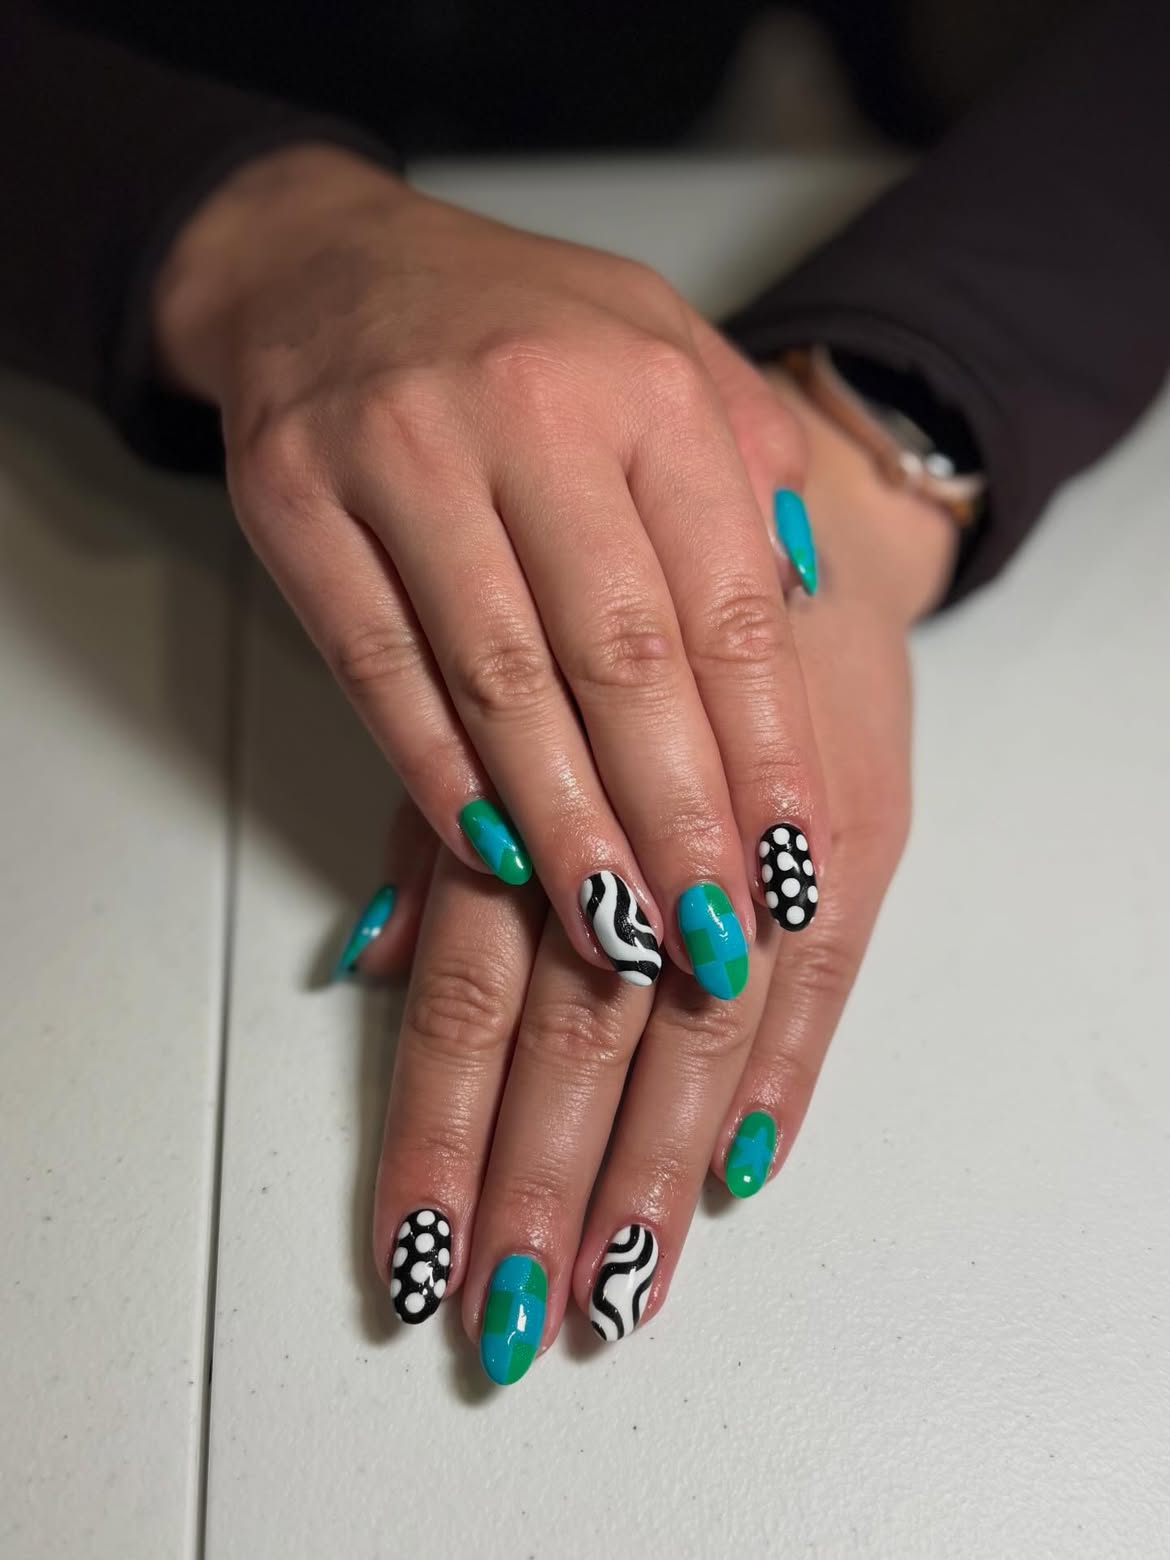
This set relies on a clear three part rhythm. Turquoise and green share the solid nails, curved black lines move across white accent nails, and large white dots brighten the glossy black sections.
The color blocks are especially useful because they connect the cool turquoise to the brighter green without adding another pattern. Their curved divisions also echo the wavy black lines on the white nails. Repeating each design on both hands makes the mixed manicure feel planned rather than random.
Keep the dots large, the waves narrow, and the color blocks simple. Those changes in scale help every motif remain easy to recognize on the short oval shape.
📌 Keep the pattern scale varied
Pair large white dots with narrow black waves and broad color blocks. Using three different scales stops the motifs from competing.
15. Neon Green Frames Tie a Maximalist Pattern Mix Together
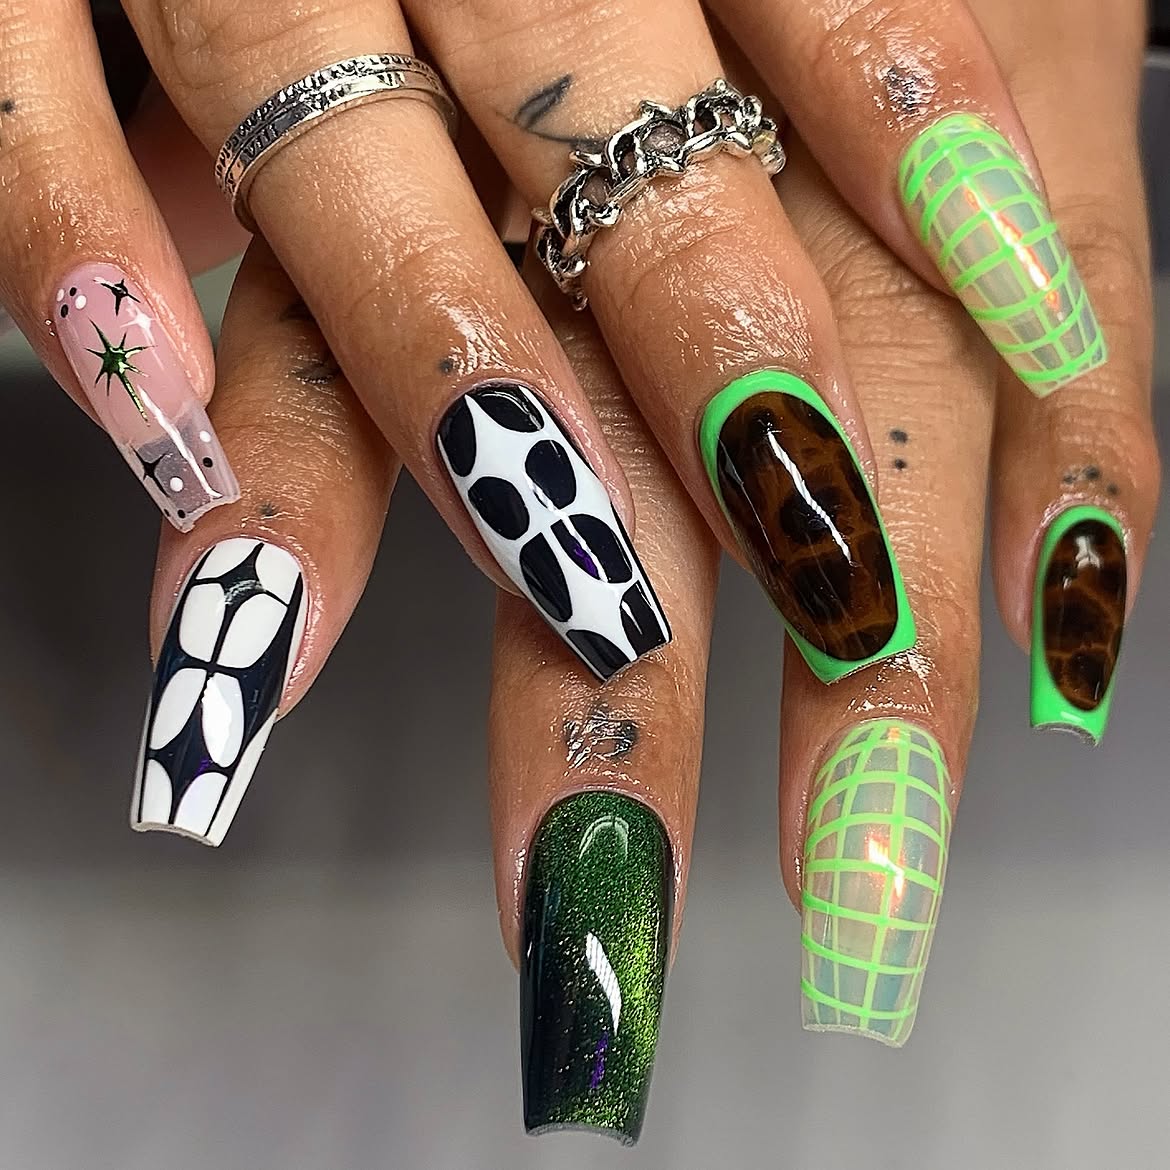
This long square manicure combines several strong ideas, yet bright green appears often enough to connect them. It outlines the tortoiseshell centers, forms open grids over sheer nails, and reappears in the shimmering solid accent.
Details that hold the set together:
- Use neon green as a border, grid, and repeated accent color.
- Frame warm tortoiseshell sections with clean green edges.
- Mix bold black shapes with large white spaces.
- Include one deep green shimmer nail for visual weight.
- Keep the pink celestial nail lighter than the busier patterns.
- Repeat curved shapes across different designs.
Consistent color, shape, and shine are what make this detailed set feel connected.
Repeat neon green across several patterns.
Balance detailed nails with one solid shimmer.
A different color family on every nail.
Heavy detail without any quieter spaces.
16. Black Drip Lines Stretch Across Electric Green Shimmer
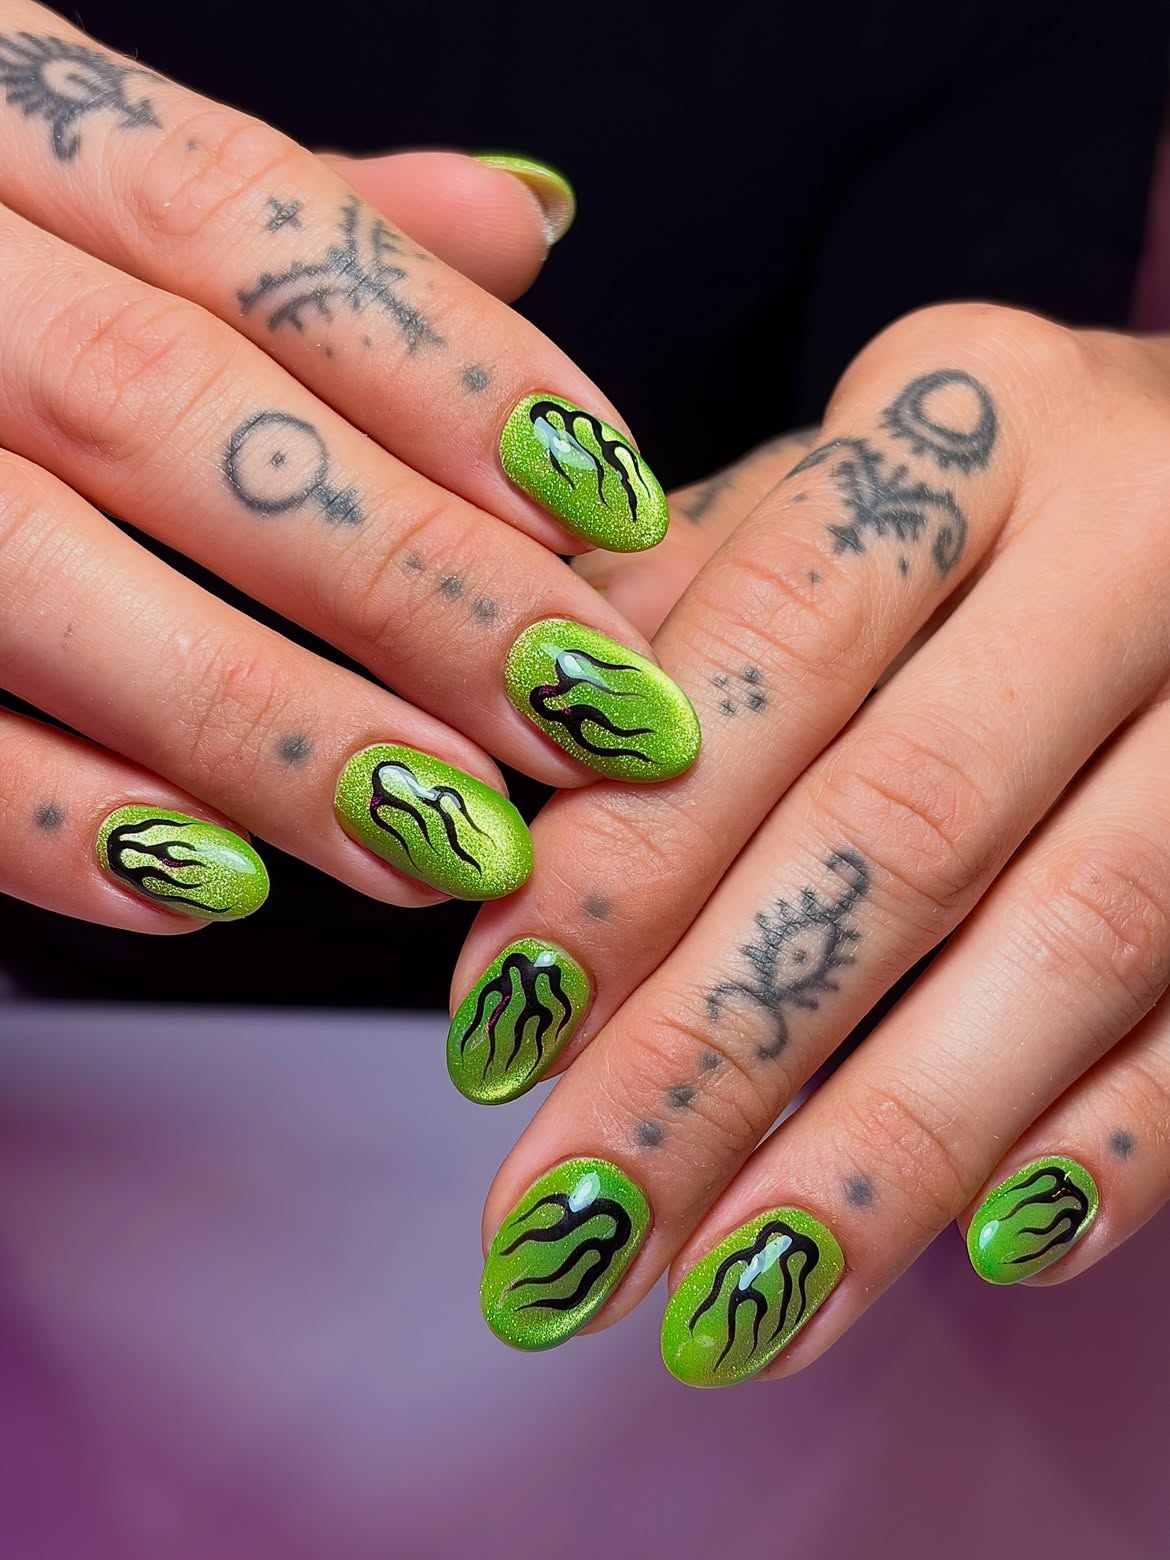
Electric lime green creates a bright, reflective base for the flowing black shapes in this manicure. The fine shimmer gives the rounded nails extra depth, while the dark lines remain sharp enough to stand out against the glow.
Each nail uses a slightly different arrangement. Some black curves begin near the tip, while others rise from the base or sweep across one side. Keeping the lines uneven makes the repeated idea feel active rather than copied.
Use two or three black curves on each nail and allow plenty of green to remain visible between them. The smooth oval shape supports the movement, and the glossy finish strengthens the contrast without requiring any extra decoration.
Electric green with fine visible shimmer.
Two or three uneven black curves per nail.
High shine over a smooth oval shape.