20 Short Green Nails: Fresh Colors and Stylish Nail Designs!
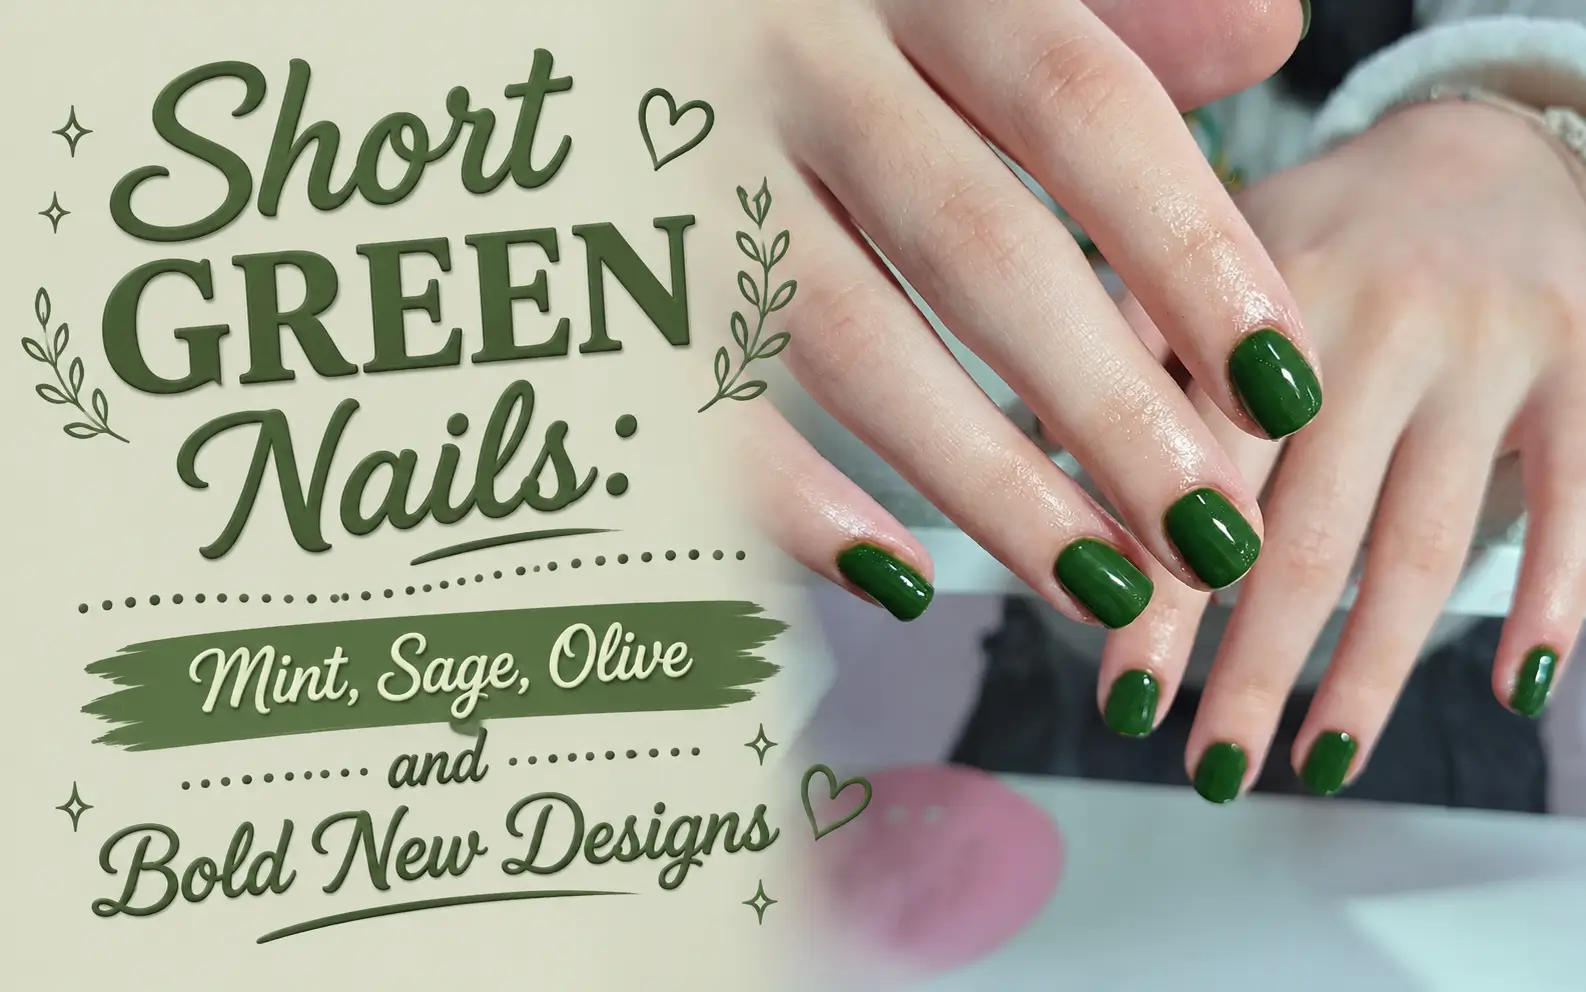
Green polish has far more range than one plain shade. On shorter nails, the right color, finish, and placement can make even a simple manicure feel fresh and considered. These Short Green Nails move through bright mint, deep forest, earthy olive, cool sage, turquoise, and electric lime, with plenty of ideas for different moods.
Some designs keep the focus on smooth solid color, while others use French tips, flowing lines, dots, florals, checkerboards, marble effects, or animal print. Metallic gold and silver details bring extra contrast without crowding the small nail surface.
The best part is how adaptable these looks are. You can stay understated with a pale sage gloss, choose a vivid green for stronger color, or combine several patterns in one balanced set. Look closely at the shapes, spacing, and accent placement as you browse. A small change in the tip, finish, or detail can give short nails a completely different character.
20 Short Green Nails Inspo 2026
1. Mix Green Checks, Florals, and Wavy Lines on Short Nails
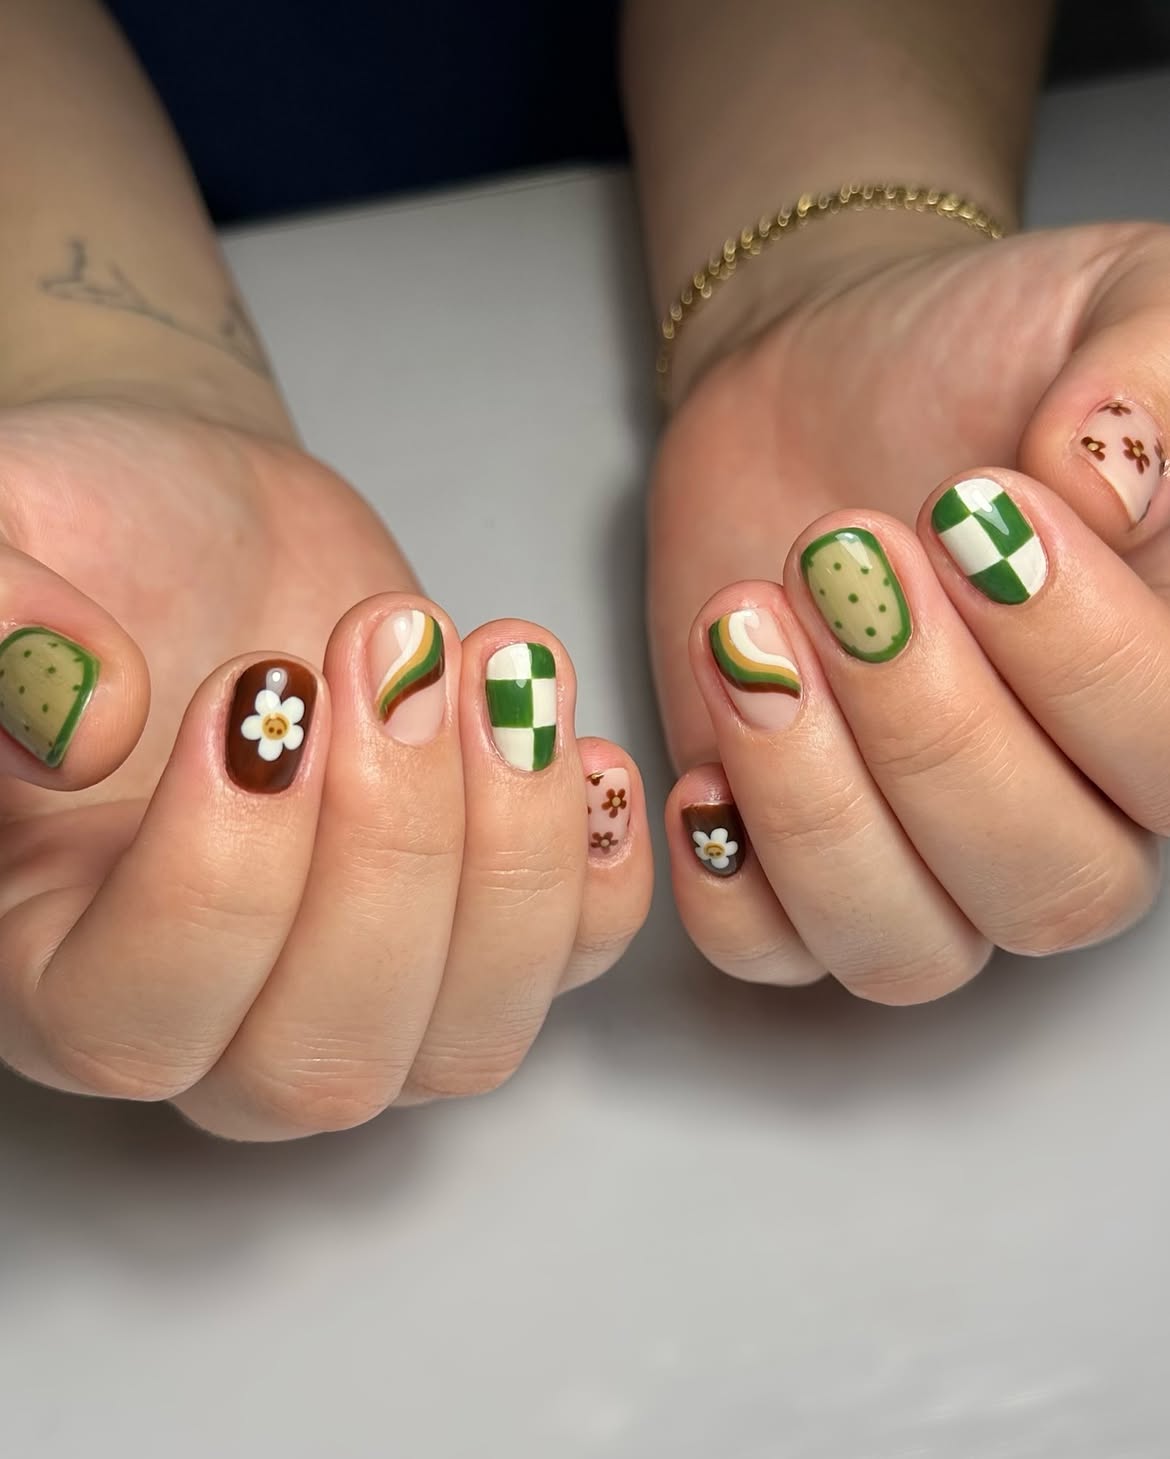
A playful mix of patterns gives these short rounded nails a lively, handmade look. Forest green and cream checkerboards create the strongest graphic detail, while chocolate brown nails with small white flowers bring warmth to the set.
What makes the design work:
- Green outlined oval motifs add a fresh, organic shape.
- Curved cream, mustard, and green lines soften the bold checks.
- Tiny brown flowers connect the nude nails with the darker accents.
- Repeating the same colors keeps every nail connected, even though each design is different.
Keep the nail length compact and use only three or four main colors. That balance lets the detailed artwork stay clear without making the manicure feel crowded.
2. Pair Deep Green Dots with a Sheer Nude Base
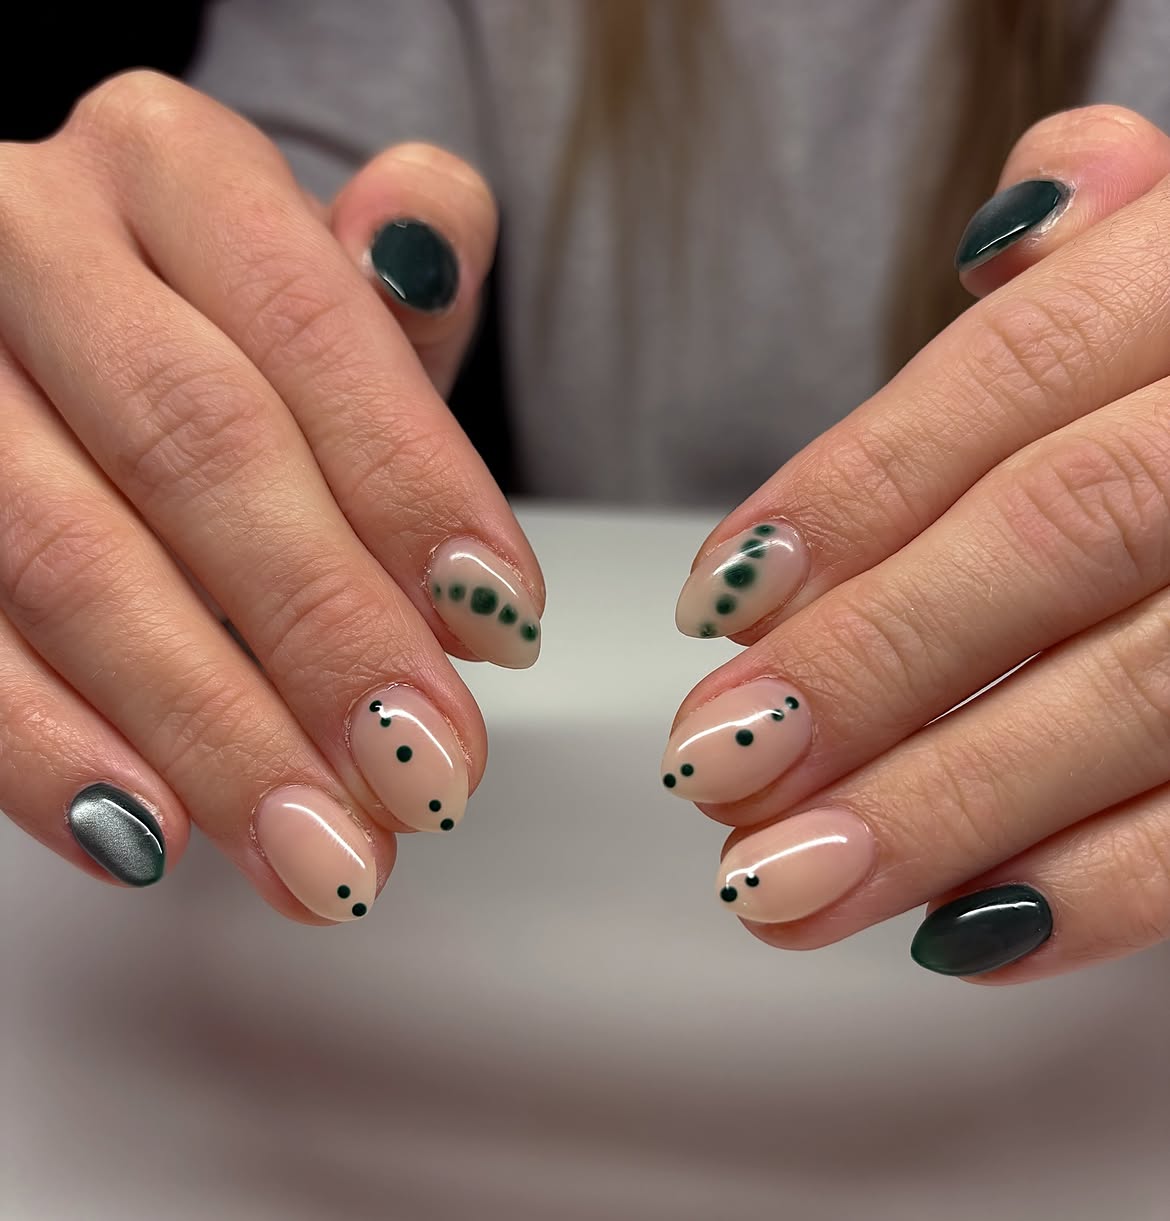
Deep forest green polish gives this short oval manicure a rich, modern anchor. Most nails stay sheer nude with tiny green dots placed near the tips and cuticles, creating plenty of open space.
A few accent nails use soft, blurred green circles that look suspended beneath the glossy surface. One metallic charcoal nail introduces a subtle change in finish without pulling attention away from the green palette.
How to recreate the balance:
- Paint several nails with solid deep green.
- Keep the remaining nails sheer and glossy.
- Place dots in small uneven groups instead of straight rows.
- Add one softly blended accent or metallic detail.
The restrained dot placement makes the manicure interesting while keeping the short shape clean and easy to wear.
💡 Placement Tip
Leave generous space between the green dots. Small uneven clusters look lighter and more natural on short nails than a crowded repeated pattern.
3. Let Bright Mint Green Lead a Short Square Manicure
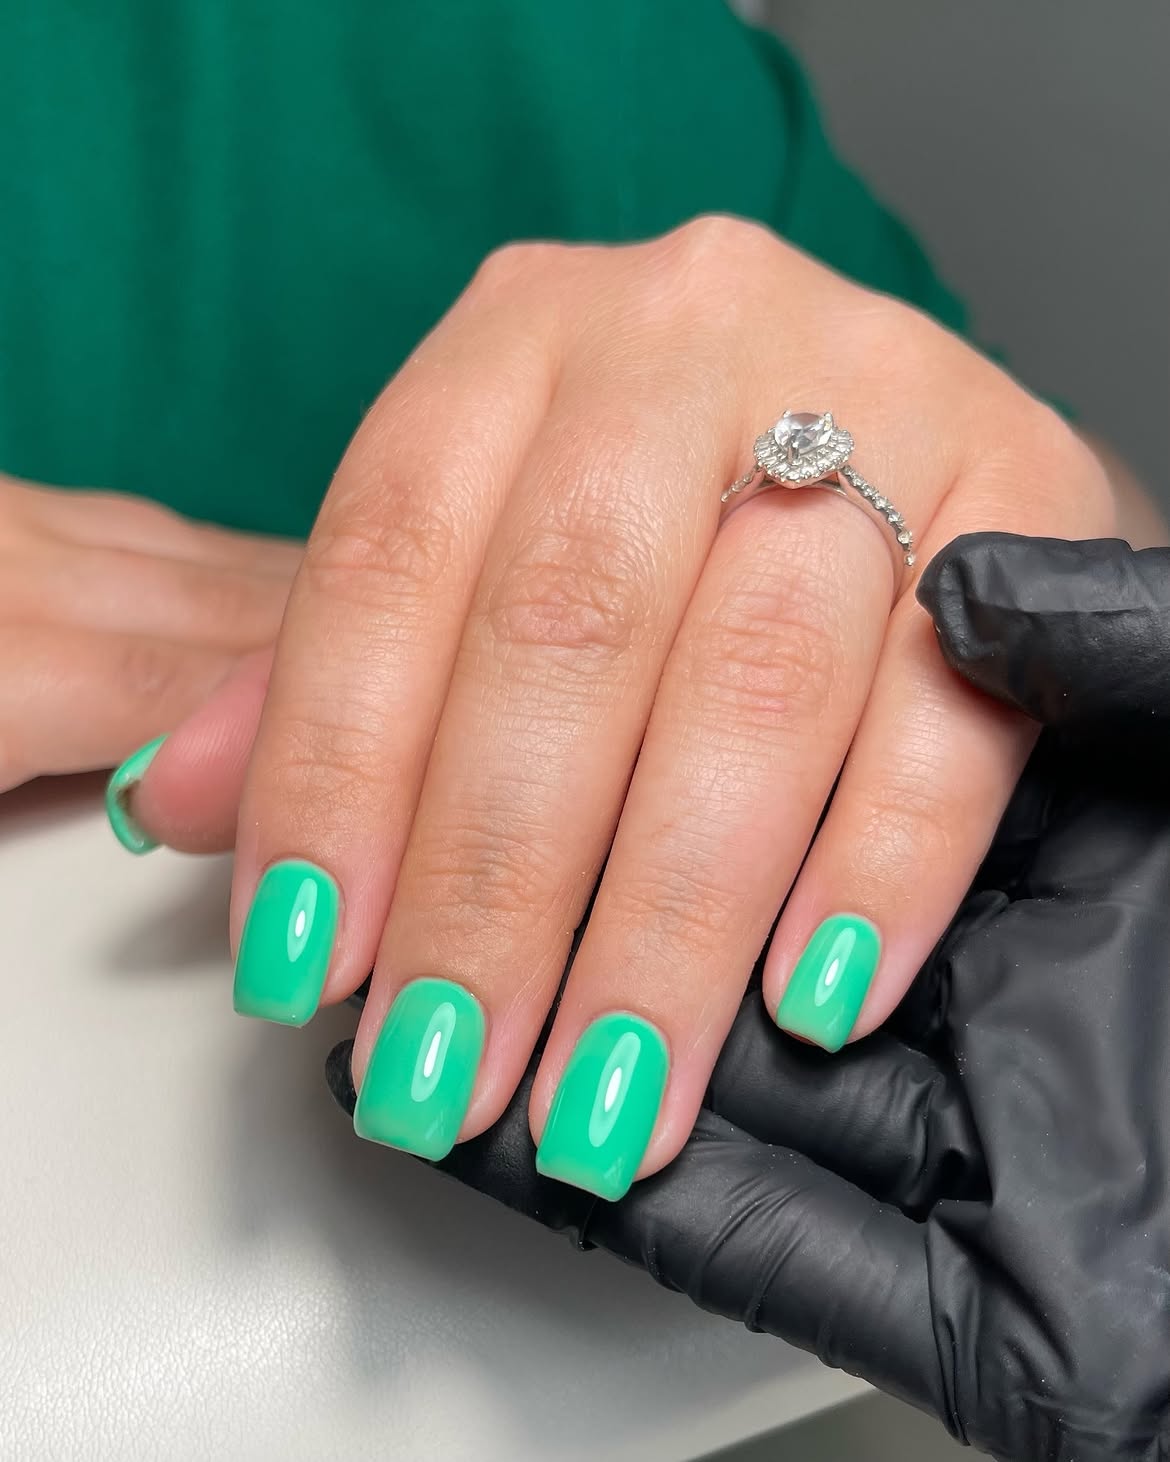
Clean color does all the work in this bright mint green manicure. Every nail uses the same saturated shade, giving the short square shape a crisp and confident finish without patterns or added decoration.
Shape: The straight tips and softly rounded corners keep the manicure neat.
Color: A vivid mint tone feels fresh while remaining easy to pair with simple clothing and silver jewelry.
Finish: Strong shine makes the solid color look smoother and more dimensional.
For a similar result, keep every nail at an even length and apply the color in thin layers. Careful cuticle lines matter because there is no artwork to distract from uneven edges. Finish with a glossy clear coat to bring out the brightness.
Want to give green a more colorful twist? These 18 Purple and Green Nails feature bold contrasts, charming florals, and fresh mixed color ideas.
4. Layer Mint French Tips with Green Floral Art
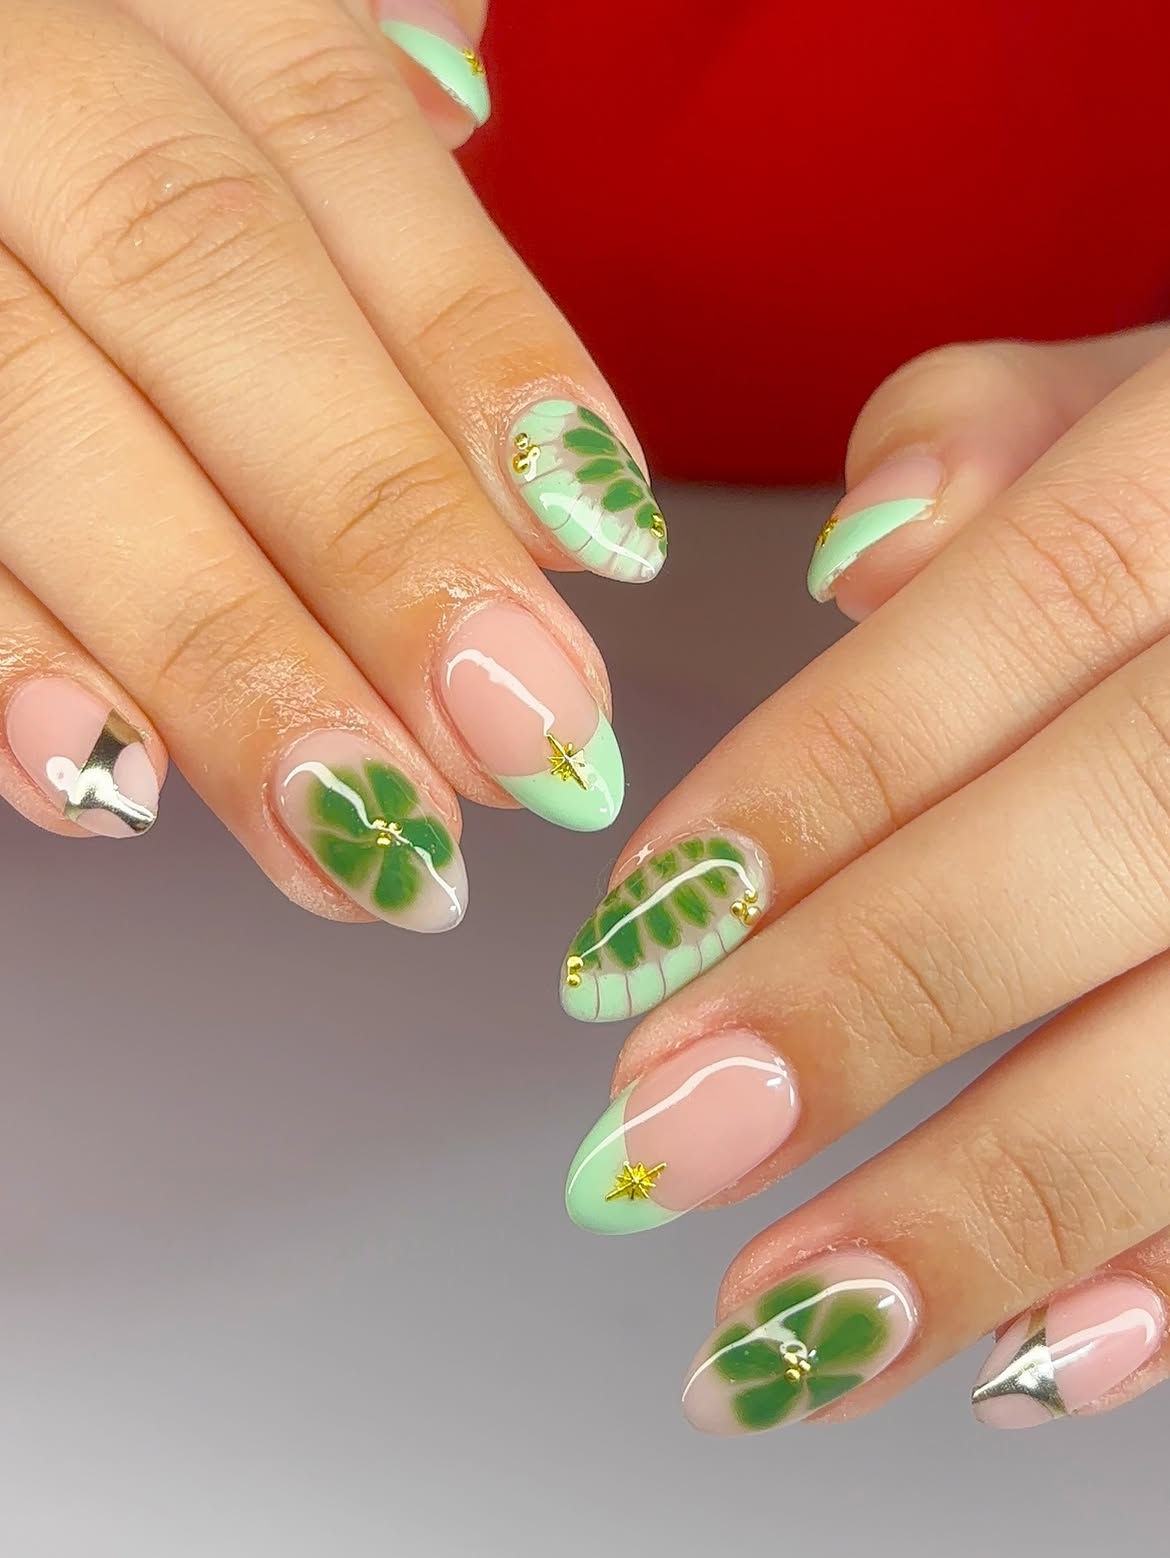
Soft mint French tips frame the short oval nails while leaving the sheer pink base visible. The lighter green creates a calm foundation for deeper green petals, fine curved lines, and small metallic details.
Some nails feature softly blended floral shapes beneath a glossy surface. Others stay simpler with mint tips and tiny gold star accents. Silver details appear on a few nails, giving the botanical theme a sharper finish.
The set works because the decoration changes from nail to nail, but the mint color keeps everything connected. To recreate it, choose two detailed floral nails on each hand and keep the others lighter. Small metallic pieces should sit close to the tip or center so they do not overpower the green artwork.
Repeat the same mint shade across the whole set.
Place detailed flowers beside simpler French tips.
Covering every nail with dense floral artwork.
Using large metallic pieces that hide the green details.
5. Combine Olive Green with Tortoiseshell and Fine Black Stripes
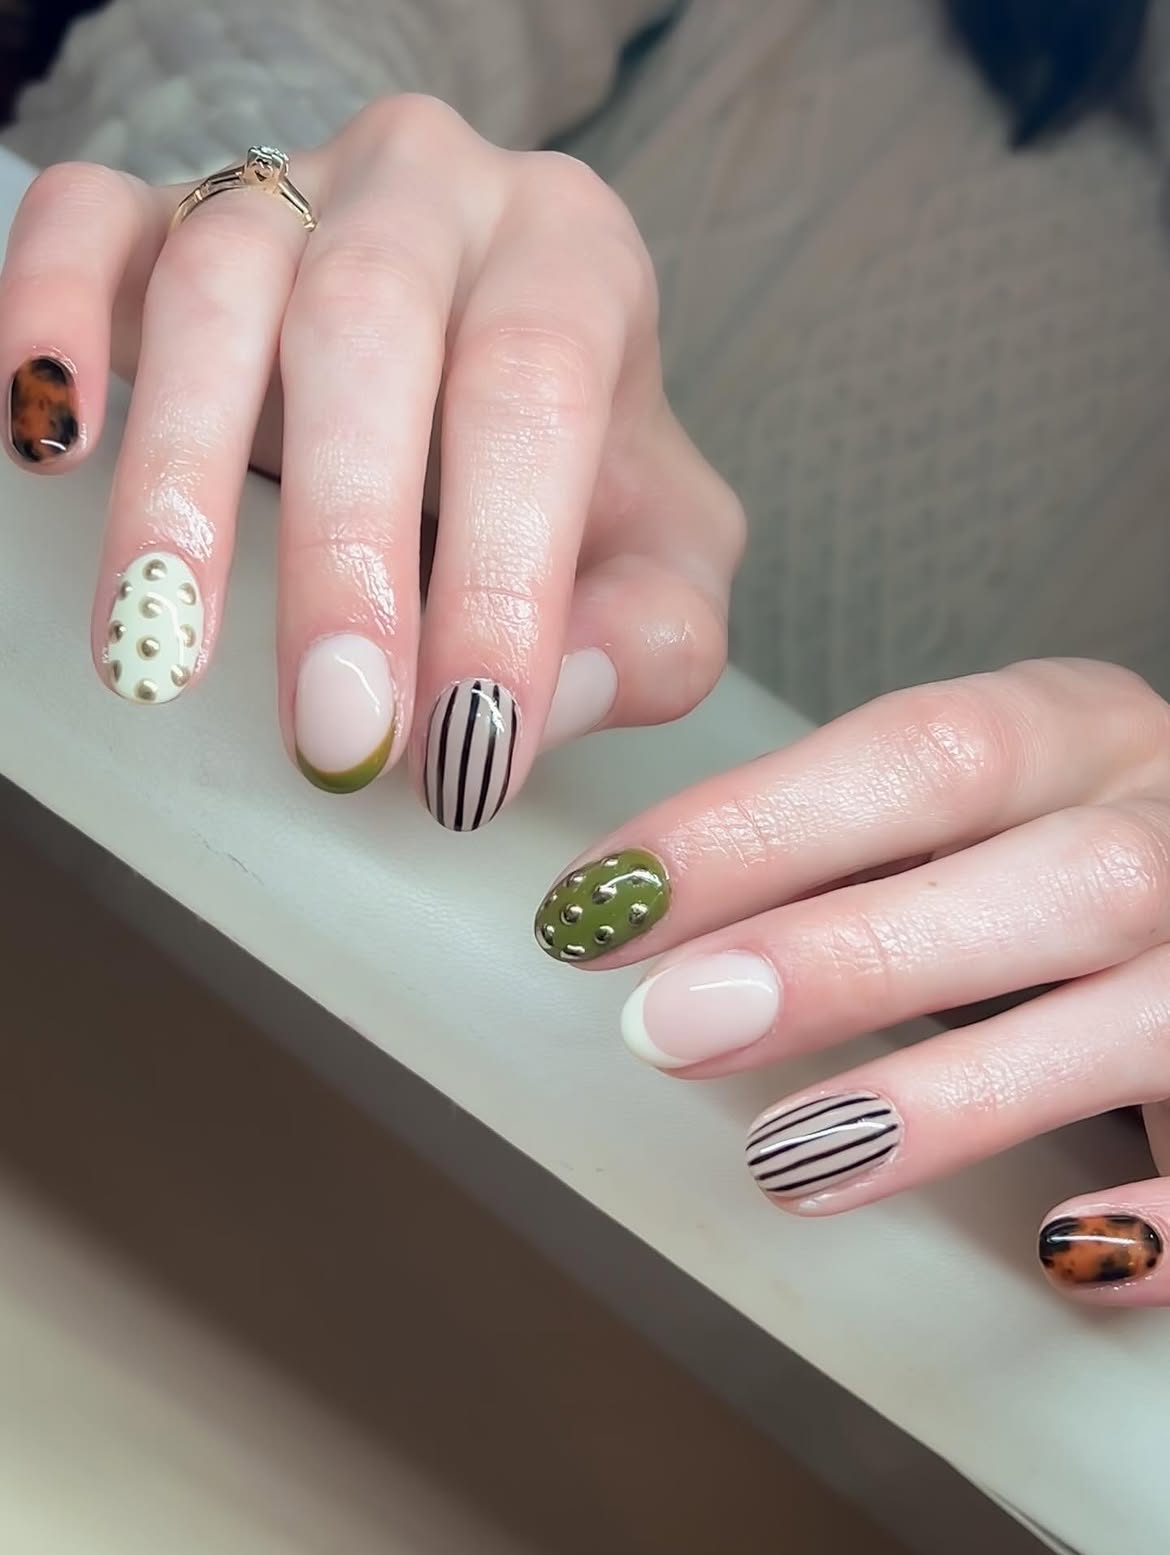
Olive green feels richer when it sits beside warm tortoiseshell and clean black lines. This short oval manicure uses several patterns, but the soft cream base and earthy palette keep the set connected.
Three details hold the design together:
- Thin black stripes bring order to the busier tortoiseshell nails.
- Olive green appears as both a solid accent and a curved French tip.
- Small metallic beads create raised texture on the cream and green nails.
The plain cream French nail gives the eye a quiet place to rest. That matters in a mixed manicure because every nail does not need equal decoration. Keep the stripes narrow, use tortoiseshell on only a few nails, and repeat the metallic details sparingly for a balanced result.
Cream creates breathing room, olive green grounds the palette, and tortoiseshell brings warmth without taking over the short nail shape.
6. Curve Neon Green French Tips Around Short Almond Nails
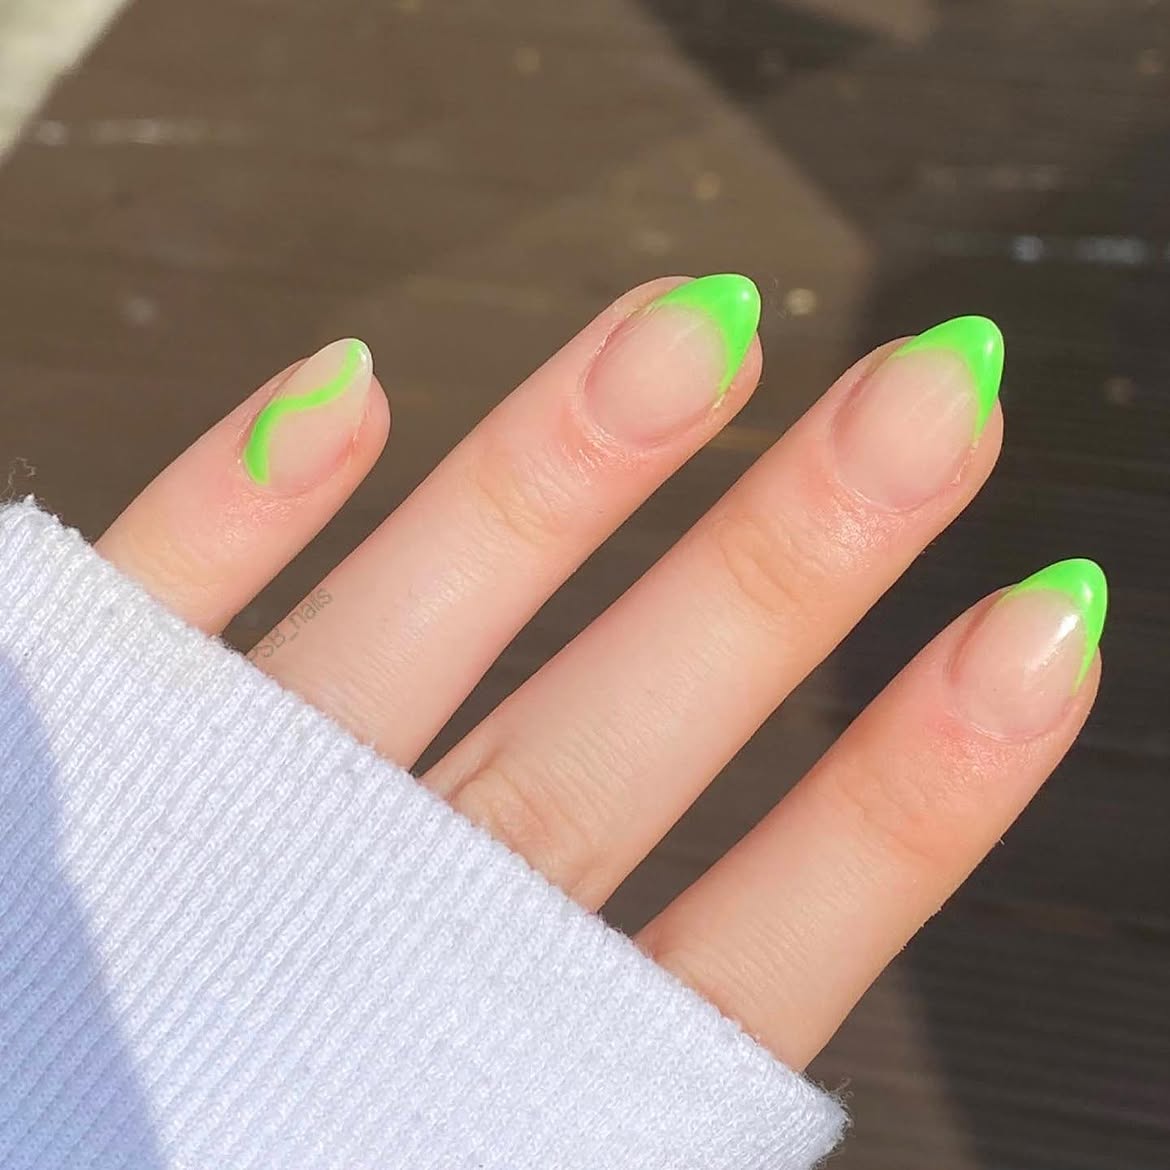
Electric lime polish turns a simple French manicure into something sharper and more playful. The sheer nude base keeps most of each nail visible, while the bright green follows the compact almond shape.
Two tip styles appear across the hand. Some nails have a fuller green edge that curves around the point. Others use a slim side sweep that moves diagonally across the nail. Mixing these placements creates movement without adding extra colors or decoration.
Ask for a thin, fluid curve rather than a heavy straight band. The green should follow the natural outline of each nail, especially near the sidewalls. Keep the nude base clean and glossy so the neon detail remains the clear focus.
| Full Green Tip | Curved Side Sweep |
|---|---|
| Frames the almond point | Creates light movement |
| Use on the main accent nails | Use to vary the remaining nails |
7. Add Fine Gold Bands to Sage Marble Short Nails
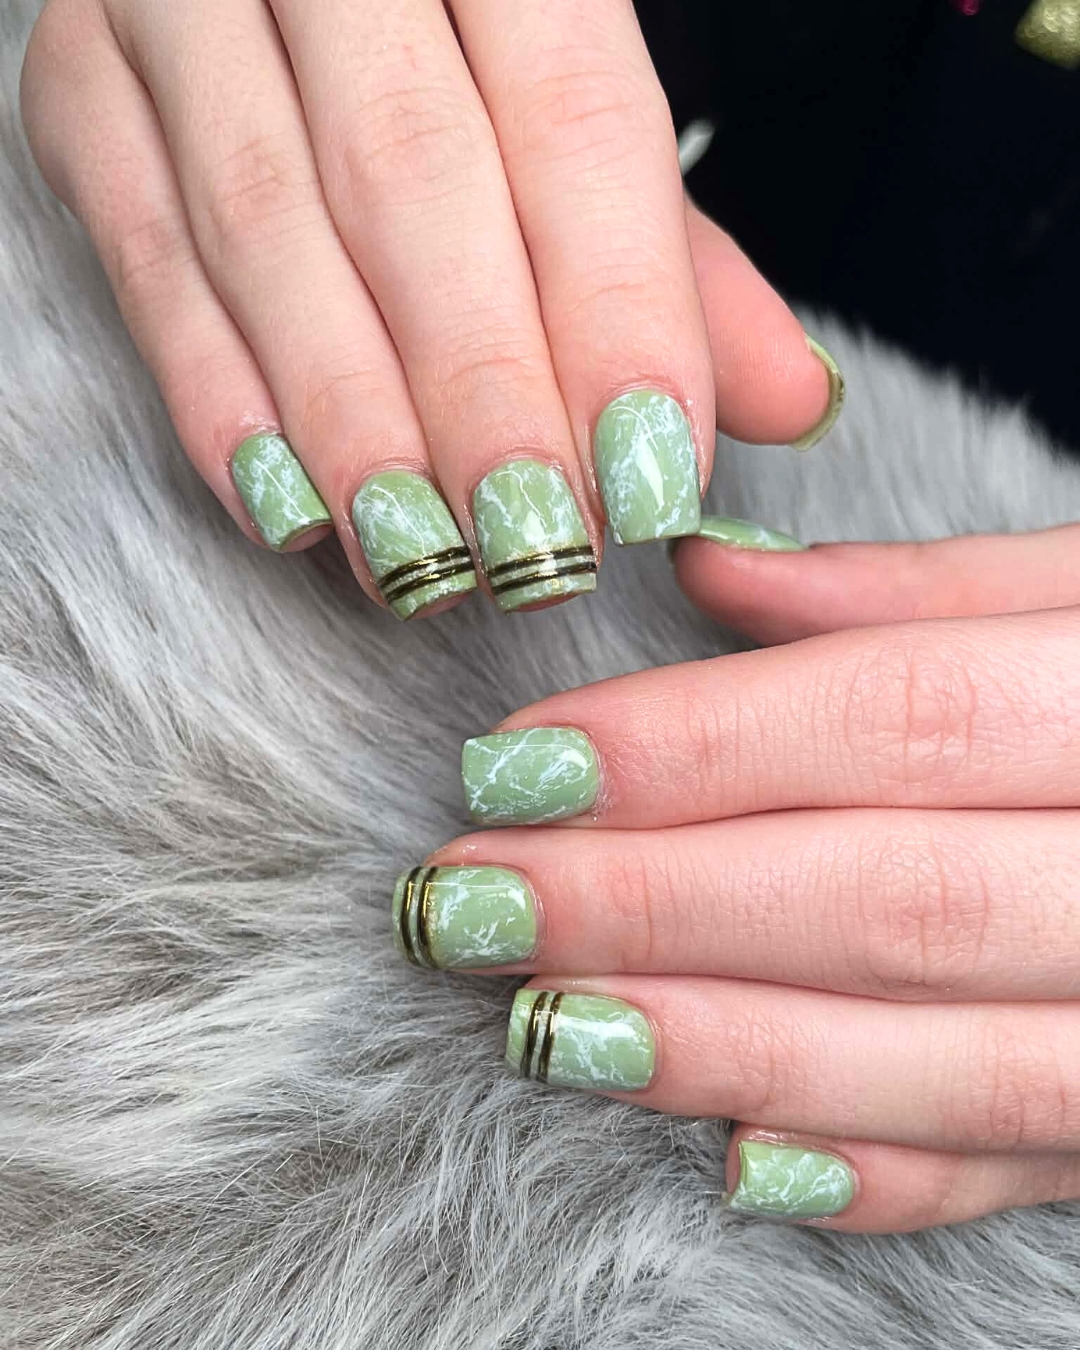
Sage green becomes more polished when it is paired with wispy white marbling and narrow gold bands. The short square shape gives the soft stone pattern a clean outline, while the glossy finish keeps the muted color from looking flat.
The white veining changes slightly on every nail, which makes the pattern feel natural rather than copied. Slim metallic bands appear near the tips of selected nails. Their straight placement creates a crisp contrast with the loose marble lines.
Keep the gold decoration limited to a few nails so the sage base remains visible. The bands should run parallel to the square edge, with a small gap between them. Use fine white lines in different directions and soften a few sections before sealing the design with gloss.
Recreate This Look
8. Paint Dark Leaf Silhouettes over Metallic Chartreuse Nails
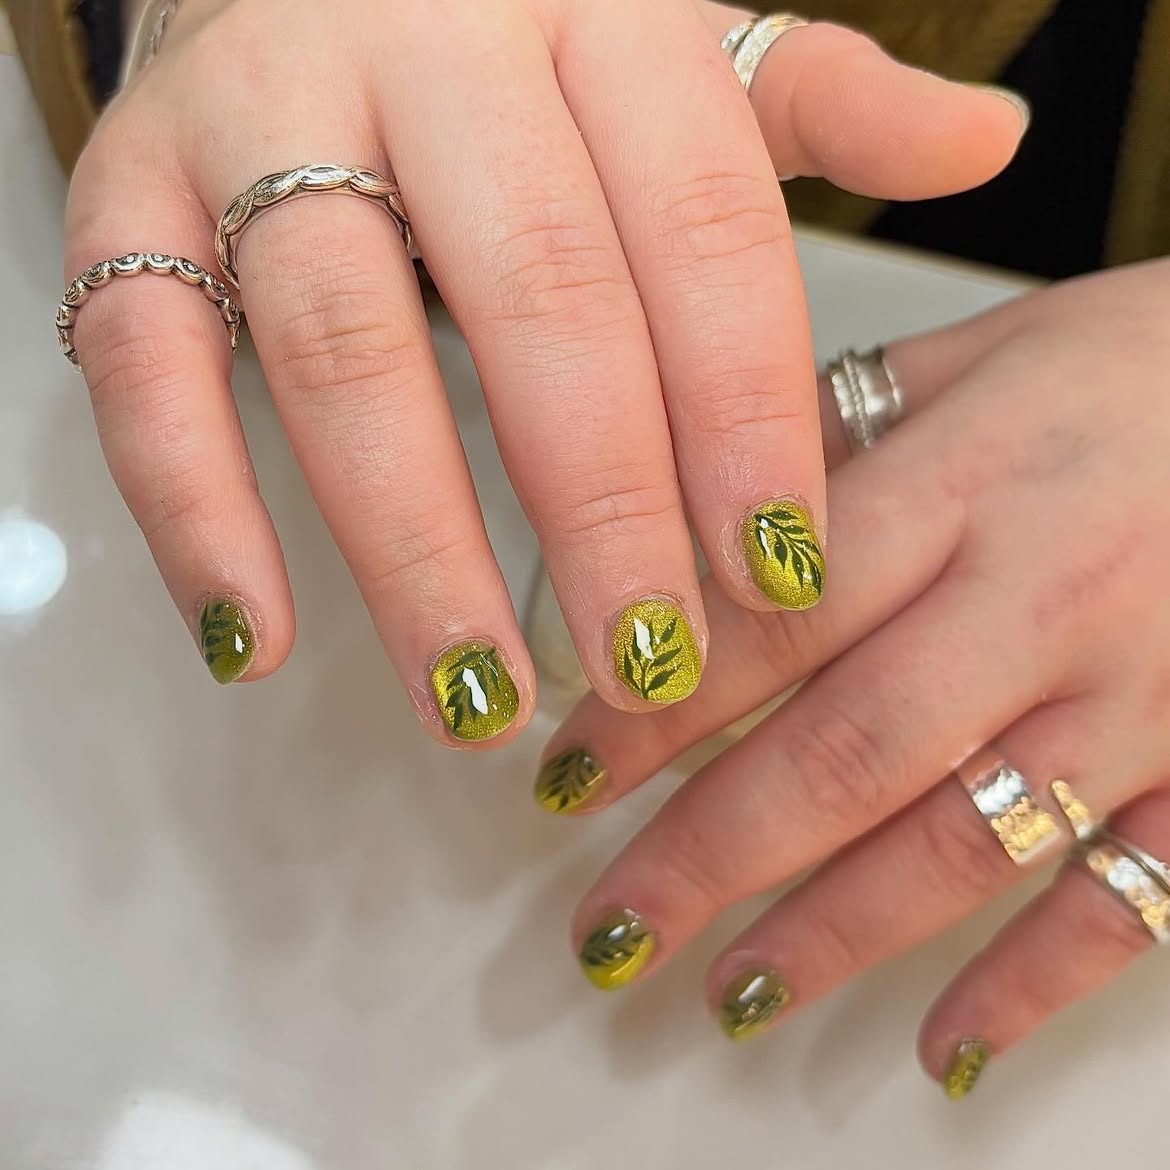
Metallic chartreuse gives these short rounded nails a strong glow that shifts between yellow and olive green under the light. Dark leafy shapes sit over the reflective base, creating clear contrast without covering the shimmer.
Build the design in three layers:
- Apply an even metallic green base.
- Paint slim stems that curve with each nail.
- Add pointed leaves in different sizes and directions.
Leave open areas between the leaves so the bright background remains visible. The botanical placement does not need to match on every nail. Changing the direction of the stems makes the set feel more natural and gives each nail its own detail. A glossy finish strengthens the metallic effect and keeps the darker artwork sharp.
Metallic green creates shine, but the surface can feel visually uniform.
Dark stems and leaves create contrast while allowing the reflective green base to remain visible.
9. Draw Neon Lime Waves over a Milky Yellow Base
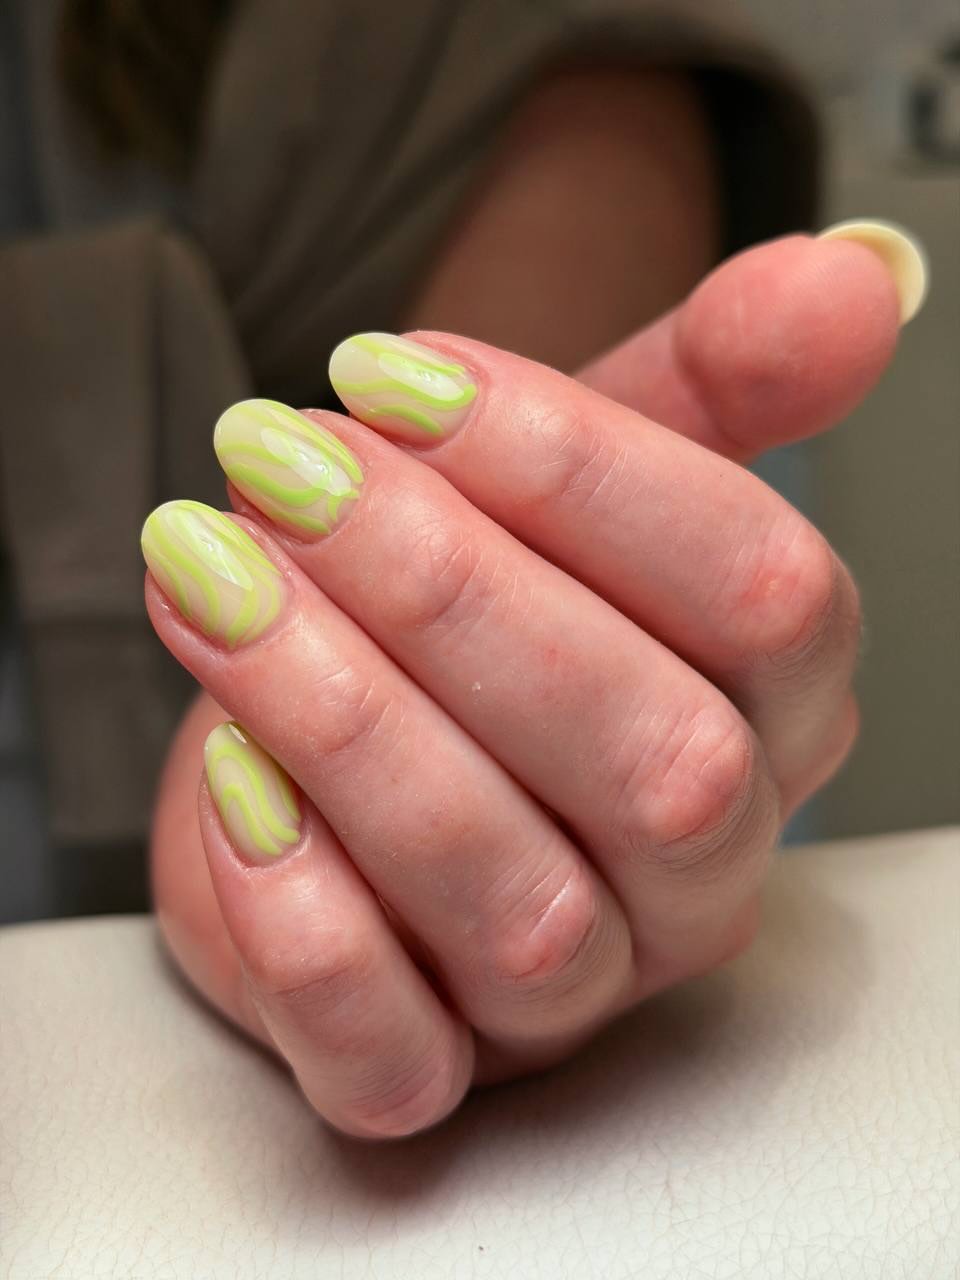
Thin lime waves bring movement to these short oval nails without hiding the soft base underneath. The pale yellow wash gives the manicure a warm glow, while the brighter green lines twist across each nail in loose, irregular paths.
The pattern feels lively because no two nails use the same arrangement. Some lines run close together, while others leave wider areas of the base visible. A thick glossy finish softens the edges and makes the two green tones look more connected.
Use a fine brush and draw each line in one steady motion. Change the direction and spacing as you move from nail to nail. Avoid making the curves symmetrical, since the uneven flow is what gives this design its character.
- ▸ Keep the base sheer enough to show its soft yellow tone.
- ▸ Vary the width and spacing of the neon green curves.
- ▸ Seal the freeform pattern with a smooth glossy finish.
For another refreshing manicure idea, check out these 17 Blue and Green Nails featuring soft pastels, bold contrasts, and creative patterns.
10. Frame Mint Green Shapes with Thin White Contour Lines
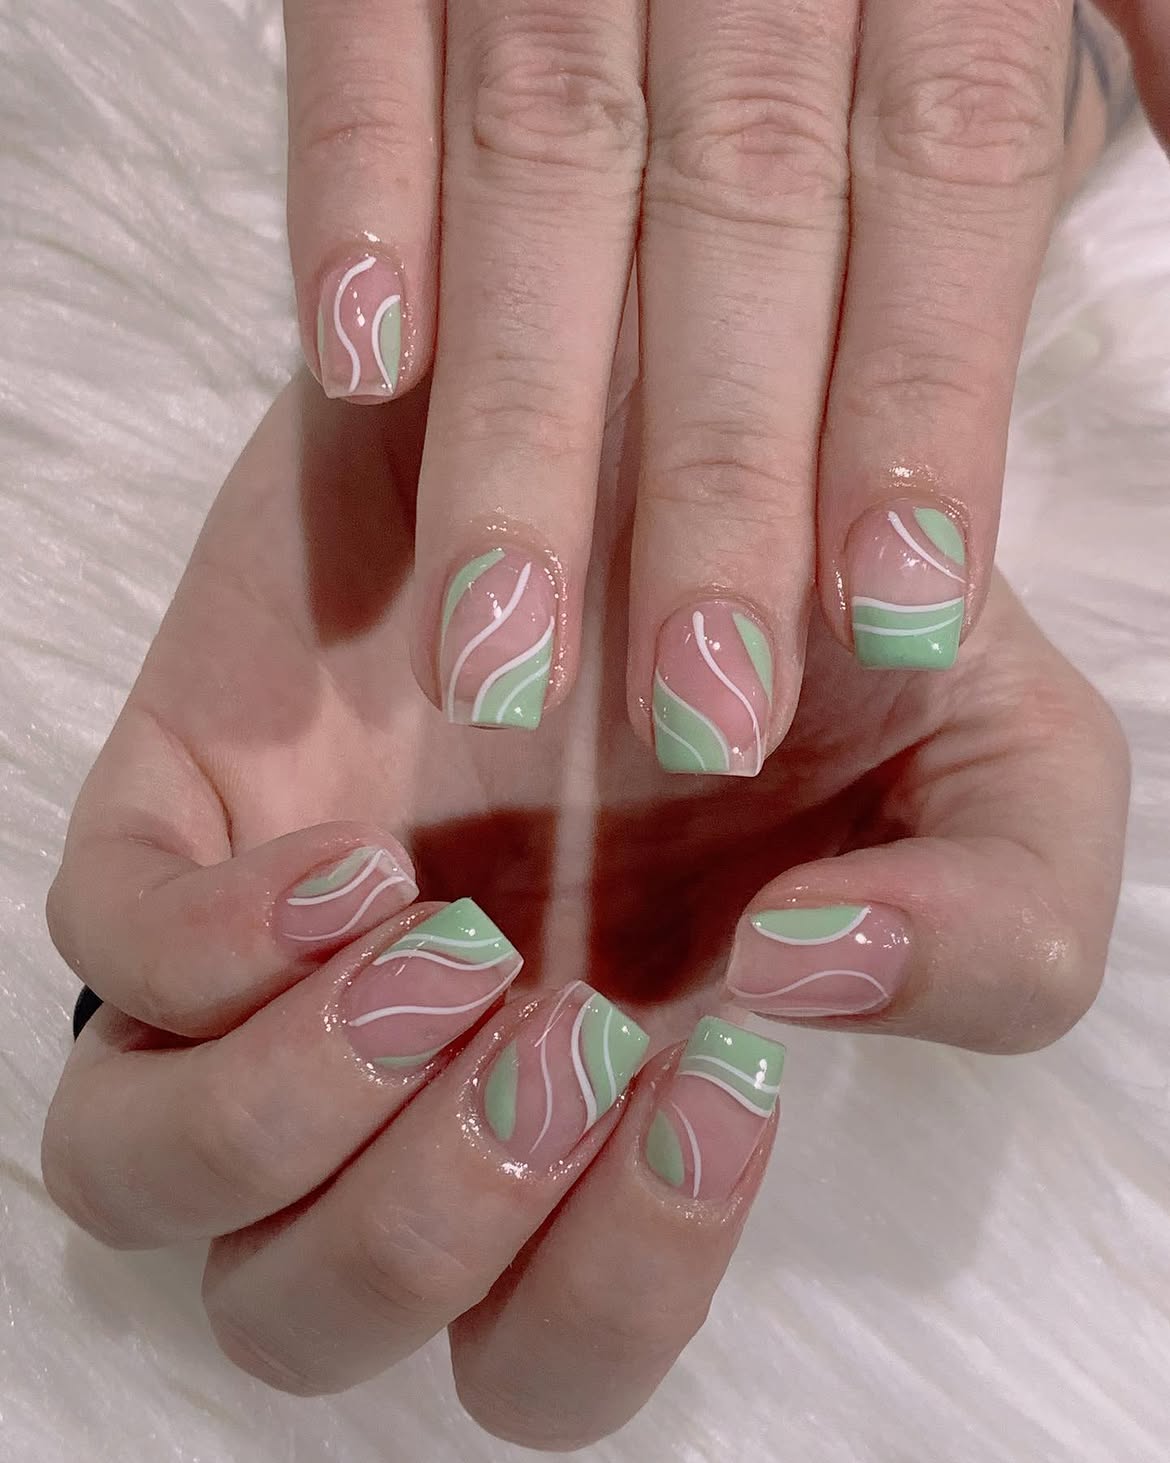
Sheer pink space keeps this short square manicure light, while curved mint sections bring color to the tips and sides. Fine white lines trace some of the green shapes and continue across the bare base, giving the design a layered, flowing effect.
The placement changes on every nail. One tip is filled with mint, another carries a curved side panel, and a few use smaller floating sections. The repeated white lines connect these different layouts without making the set feel overly matched.
Map the larger mint shapes first, then add the fine outlines once the color is smooth. Keep each curve long and clean. Leaving wide areas of the natural base uncovered helps the square shape stay visible beneath the abstract pattern.
Apply a sheer pink base and let its natural tone remain visible.
Place curved mint sections near different tips and side edges.
Trace selected curves with thin white lines and finish with gloss.
11. Choose Saturated Grass Green for a Clean Short Manicure
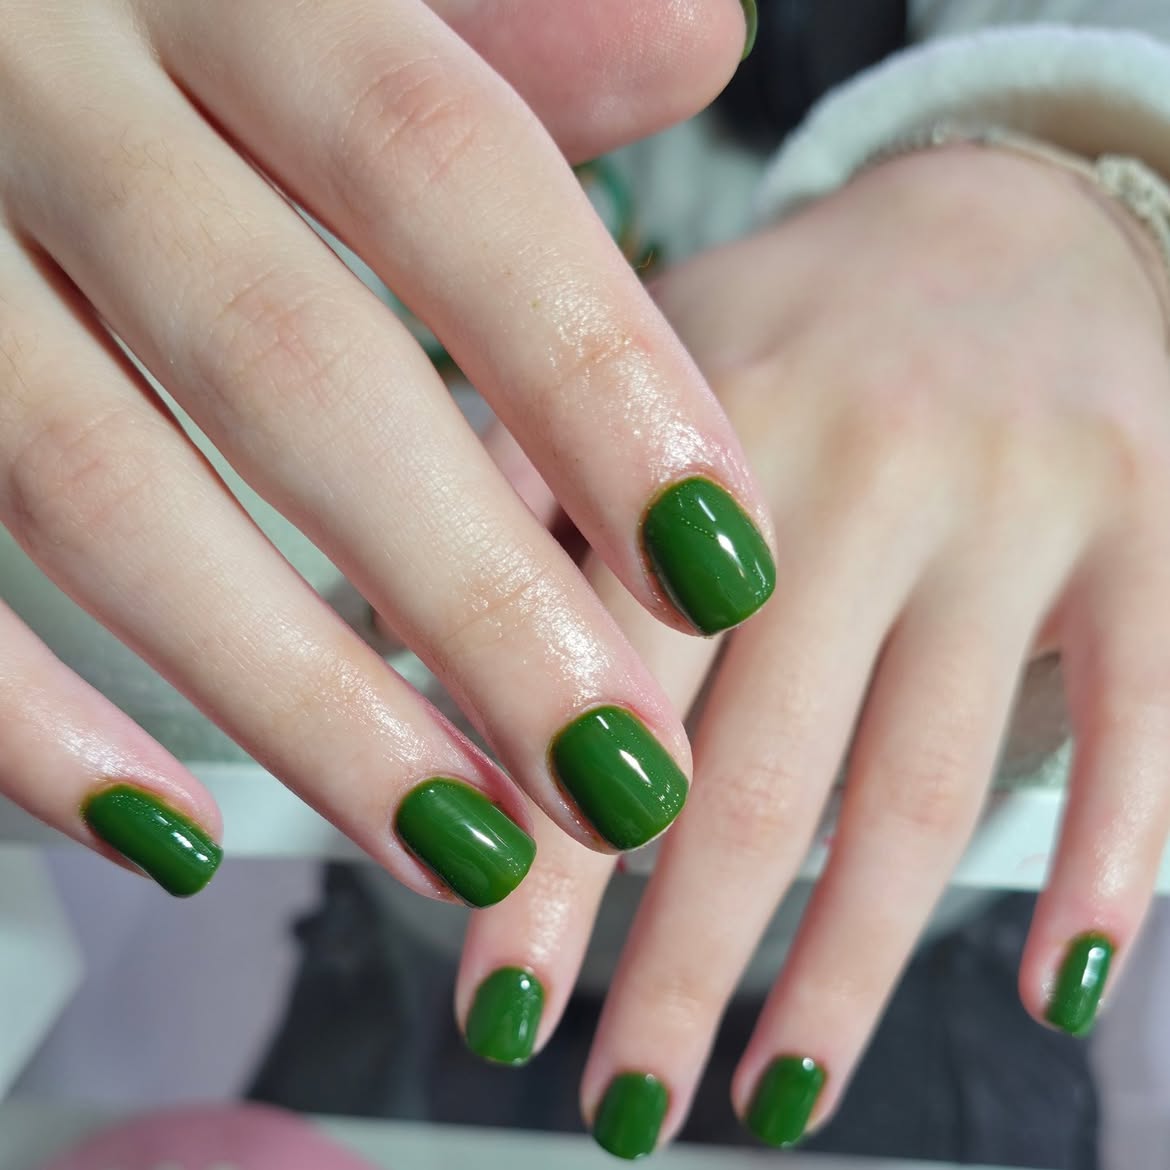
Rich grass green gives this compact square manicure a bold look without any added art. The shade sits between bright leaf green and deeper emerald, so it feels strong while still showing warmth under the light.
Unlike softer mint designs, this manicure depends on smooth coverage and carefully shaped edges. The short length keeps the saturated color neat, and the softly rounded corners prevent the square tips from looking too sharp.
Use thin coats to maintain an even surface, especially near the cuticles. Check the side edges before adding the final gloss because solid green makes small gaps easier to notice. A high shine finish brings depth to the color and creates the clean reflective highlights seen across the nails.
Solid Green Nail Formula
12. Place a Fine Gold Accent at One Olive Green Cuticle
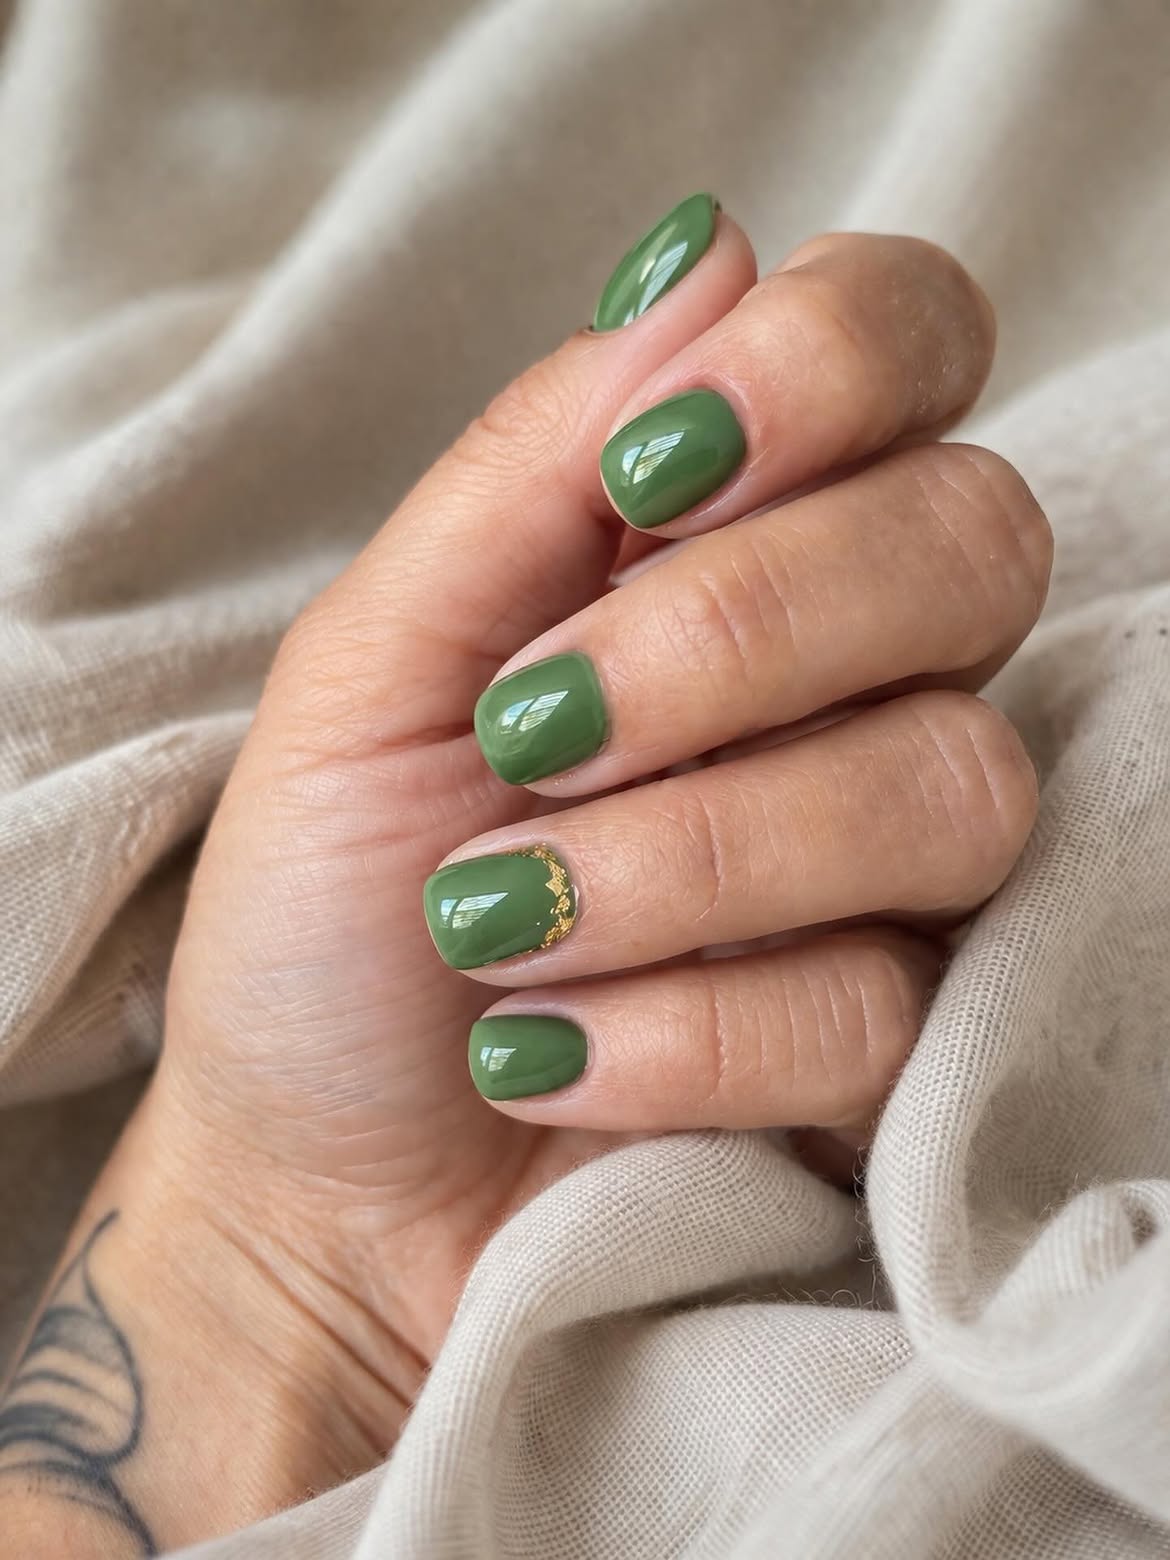
Muted olive polish gives these short square nails a calm, grounded finish. The color is soft enough for a simple everyday manicure, yet deep enough to show clear contrast against the small gold detail.
The accent rule: keep most nails completely plain and decorate only one. Here, an irregular gold curve follows part of the ring nail cuticle, creating a precise highlight without interrupting the solid green set.
For a similar result,
- Apply the olive color evenly across every nail before adding the metallic detail.
- Keep the gold close to the cuticle and let the edge remain slightly uneven.
- That organic shape suits the warm green better than a thick, rigid line.
- Seal the accent carefully so the surface stays smooth and glossy.
📌 Good to Know
A small metallic curve stands out more when the remaining nails stay plain. Keep the gold detail low and narrow so the olive color remains the main feature.
13. Shape Lime French Tips around Clean Square Corners
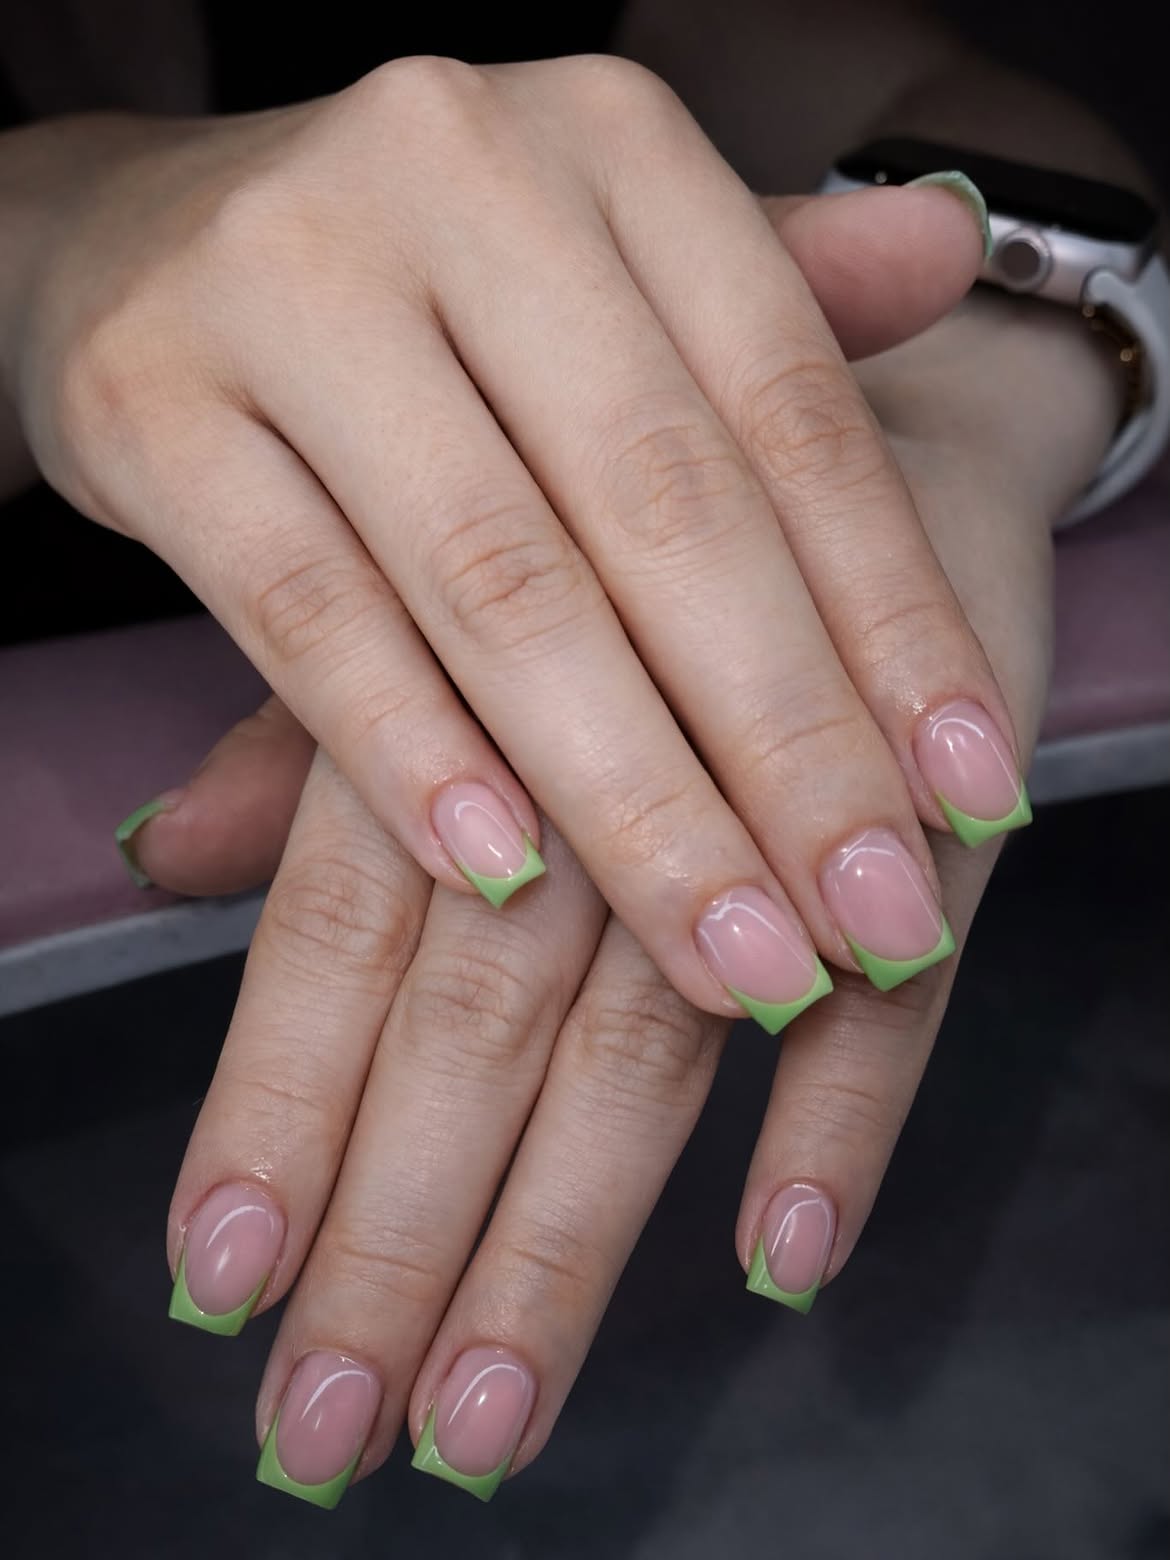
Sharp lime tips give this sheer pink manicure a crisp geometric finish. Instead of following a soft rounded smile line, the green rises along the sides and meets the straight square edge with clear angles.
The transparent rose base keeps the nails looking light, while the bright green creates enough contrast to define the shape. Because the design is simple, matching the tip height across every nail becomes the most important detail.
- Sketch the inner edge before filling the tip with color.
- Keep the green slightly higher near the sidewalls and thinner through the center.
- This placement follows the square corners and creates a more structured result than a traditional curved French tip.
- Finish with gloss so the pink base and lime edge look smooth and connected.
14. Float Gold Botanical Details inside Translucent Sage Nails
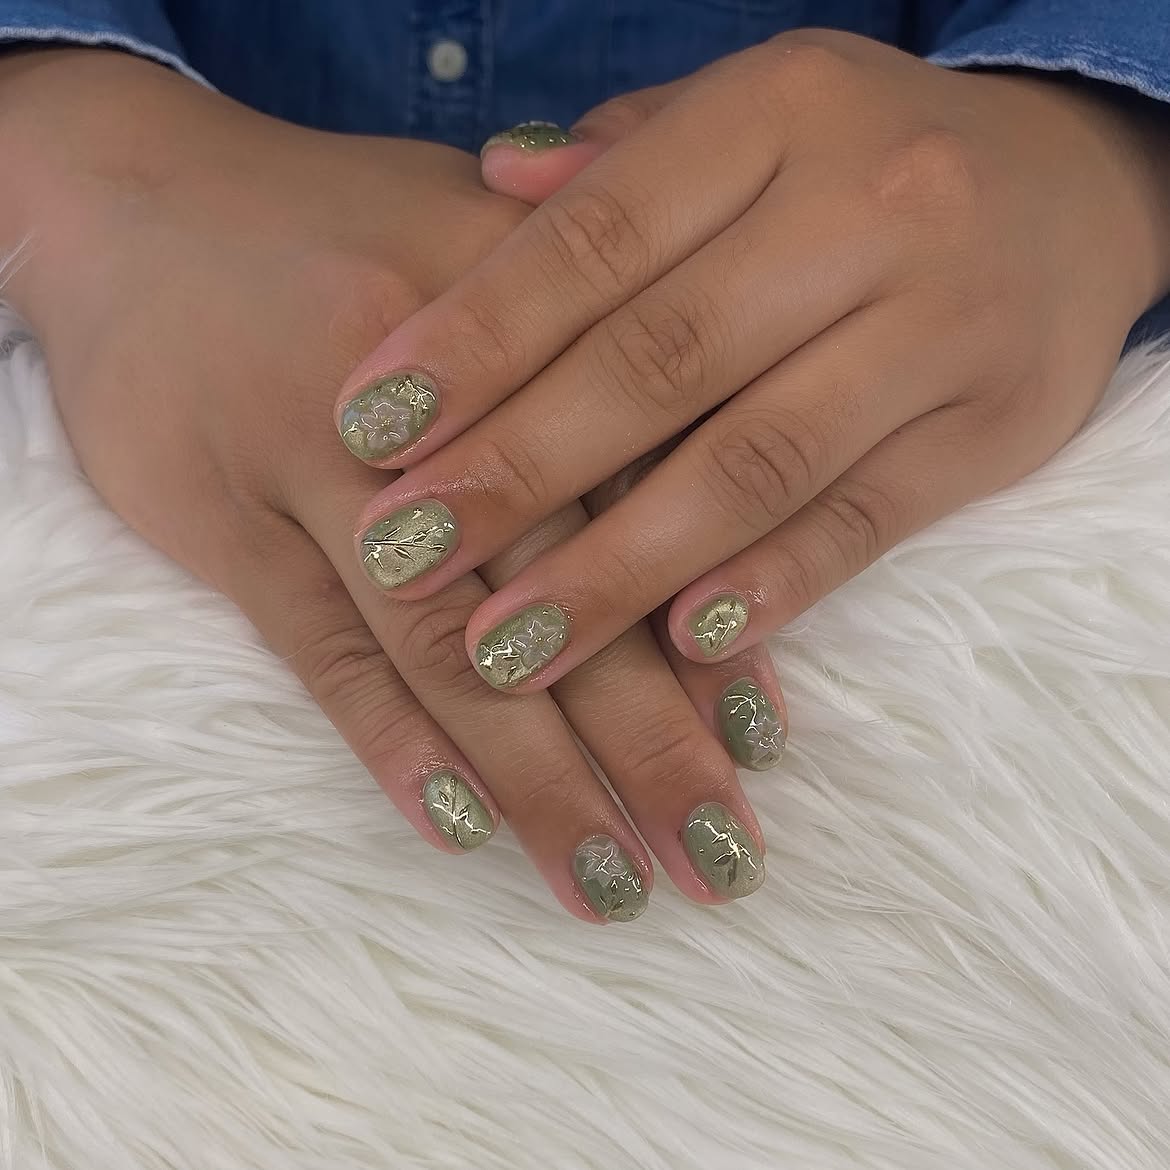
Fine gold branches give these short rounded nails a delicate botanical focus. The pale sage base looks slightly translucent, allowing cloudy green patches and metallic details to appear layered beneath the glossy surface.
What stands out here:
- Branch motifs stretch in different directions across the nails.
- Small metallic fragments fill the gaps without forming a repeated pattern.
- Soft grey green tones keep the gold from looking too bright.
- Rounded edges suit the loose, natural placement of the artwork.
Build the background with thin, uneven layers instead of one solid coat. Place the metallic pieces while the surface is still workable, then press them flat before sealing. A smooth clear finish helps the layered details look suspended inside the color rather than sitting on top.
A translucent sage base creates visible depth, while scattered gold branches bring detail without hiding the soft green layers.
15. Pair Solid Sage Nails with Clear Gold Botanical Accents
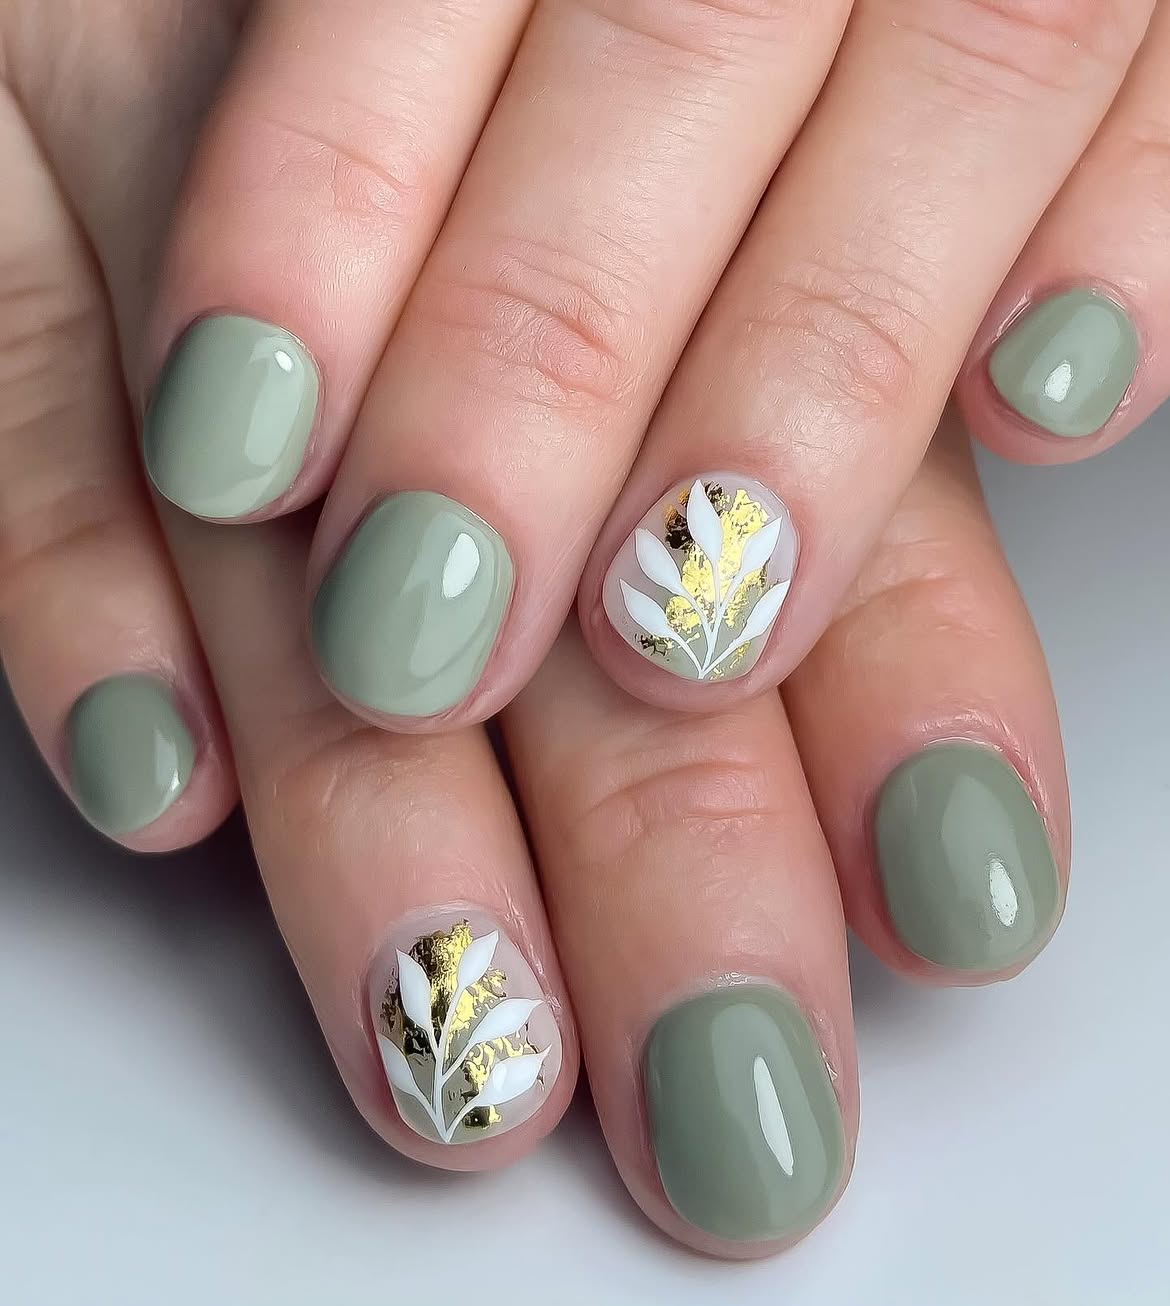
Solid sage nails create a calm base for this short rounded manicure, while one detailed accent on each hand brings contrast. The muted green covers most nails evenly, so the botanical artwork feels intentional rather than busy.
Each accent nail uses a sheer background with irregular gold sections beneath a crisp white branch. The white leaves remain easy to see because they sit over the darker metallic patches, while clear areas stop the design from feeling heavy.
Keep the botanical branch near the center of the nail and let the gold spread unevenly behind it. Use the same sage shade on every remaining nail for a clean frame. This balance works well when you want decorative nail art without placing a pattern across the whole set.
| Solid Sage Nails | Botanical Accent |
|---|---|
| Creates a calm color base | Introduces gold and white detail |
| Use across most of the manicure | Keep to one centered nail on each hand |
16. Mix Sage Green with White and Soft Leopard Spots
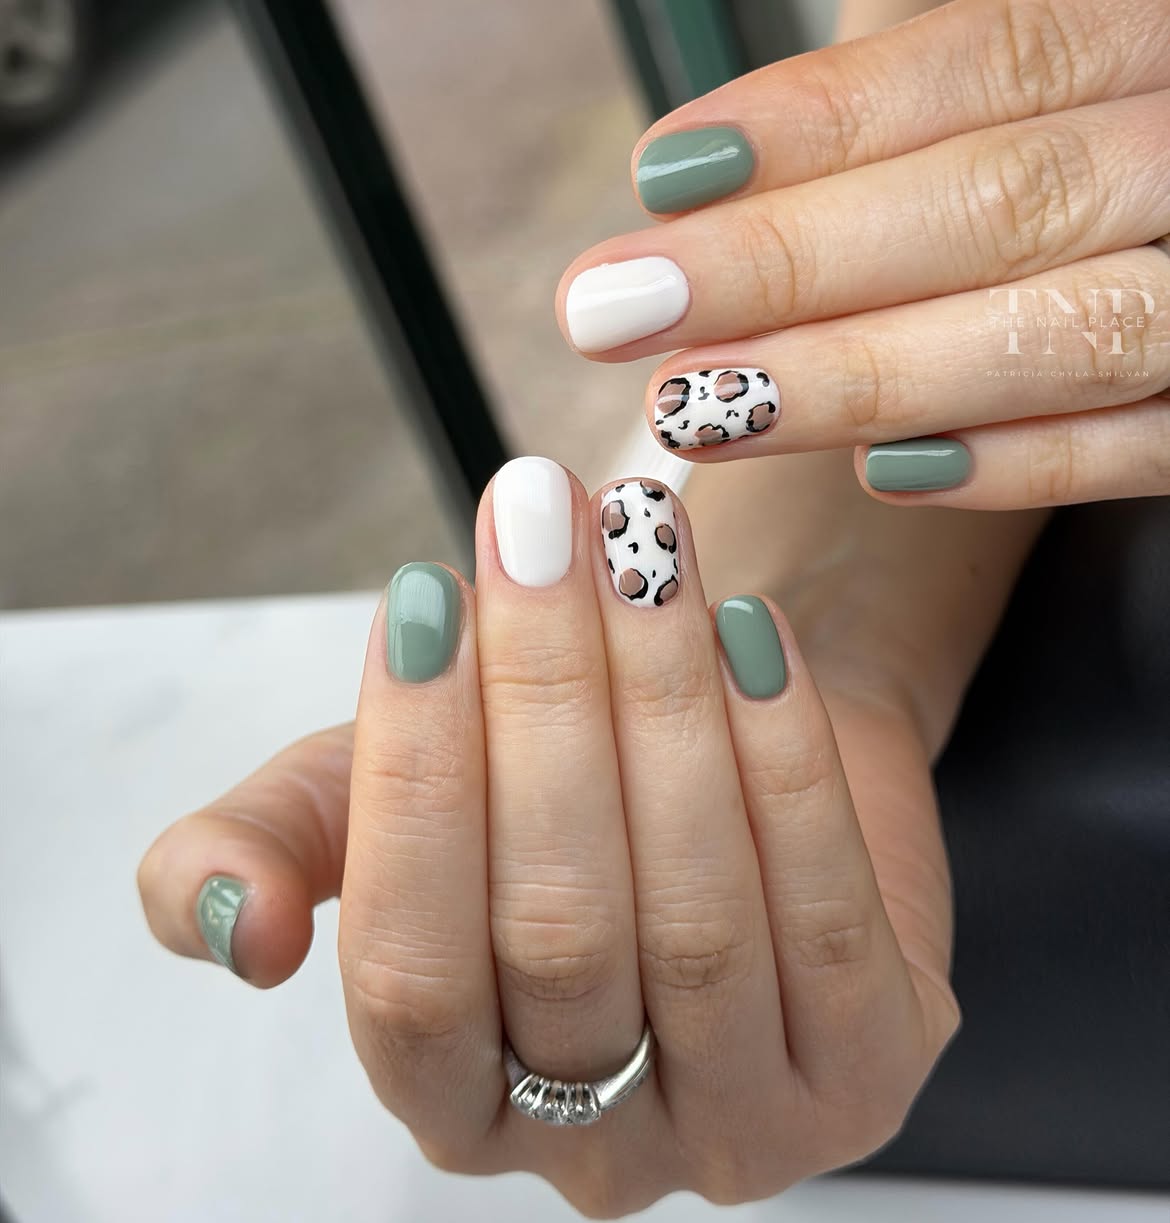
Leopard print feels calmer when it is paired with muted sage and clean white polish. The short rounded square nails keep the mixed design compact, while the limited palette prevents the animal pattern from taking over.
The balance is simple. Sage green anchors most of the set, solid white creates a bright pause, and two patterned nails bring the main detail. The leopard spots use soft taupe centers with loose black outlines, which makes them less harsh than a classic brown and black version.
Begin the accent nails with an opaque white base. Paint irregular taupe shapes with plenty of space around them, then add broken black curves along selected edges. Avoid outlining every spot completely because uneven marks make the pattern look more natural.
17. Choose Dusty Sage Green for Soft Oval Nails
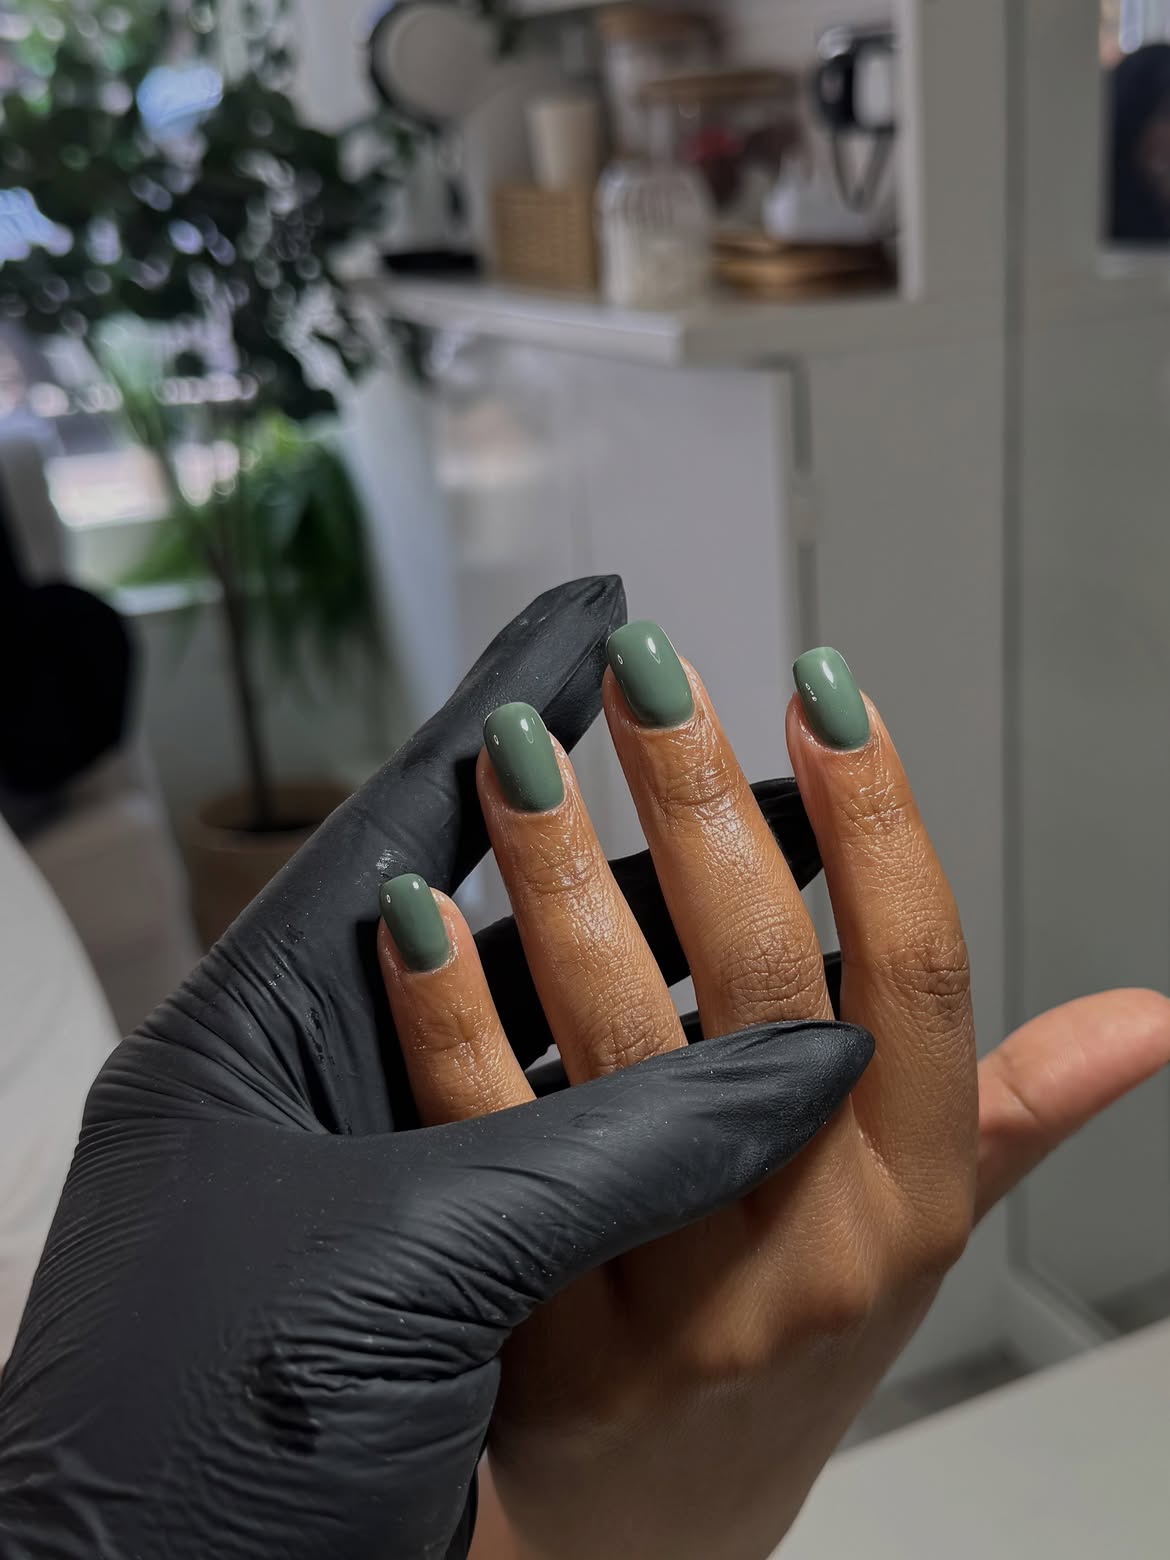
Dusty sage brings a quieter direction to short green nails. The grey undertone softens the color, while the smooth oval shape keeps the manicure clean and balanced. Against the warm skin tone shown, the muted green creates clear contrast without looking overly bright.
Why this simple manicure works:
- The grey undertone gives the sage color a calm, earthy finish.
- One uninterrupted shade makes the oval nails look longer.
- Strong gloss prevents the muted polish from appearing flat.
- Smooth cuticle lines keep the solid manicure neat.
- Matching color across every nail creates a consistent result.
Apply the polish in thin layers and check the side edges before sealing. A reflective clear finish will bring out the green tone while preserving its soft, understated character.
🌿 Shade Selection Note
Choose a sage green with a visible grey undertone when you want a softer result. A warmer or brighter green will create a noticeably bolder manicure.
18. Wear Turquoise Green on Neat Short Rounded Nails
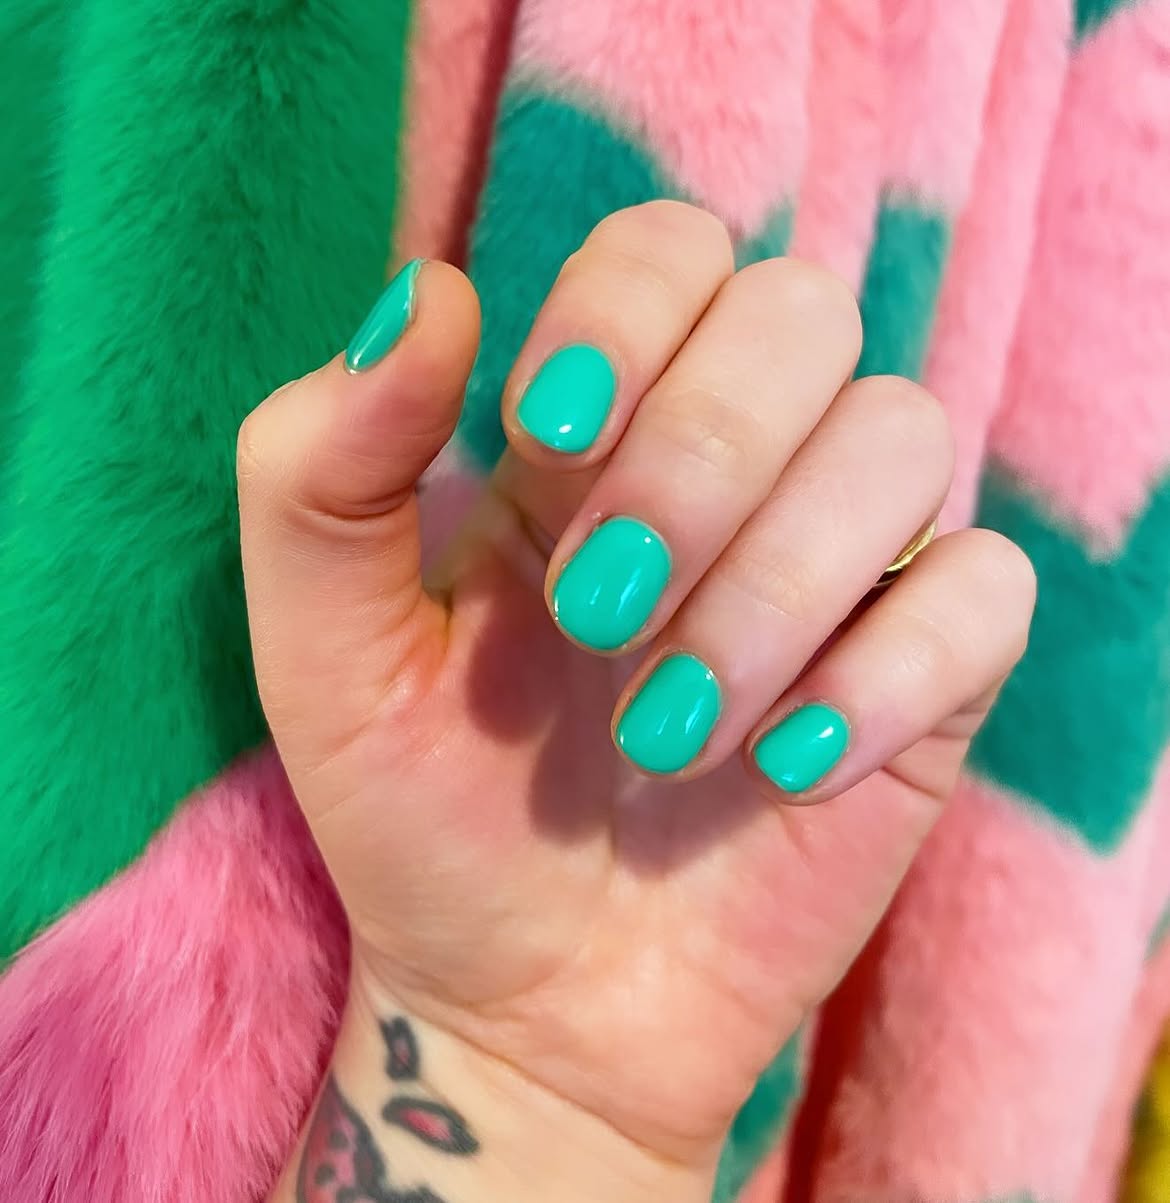
Turquoise green gives this solid manicure a cooler and brighter character than mint, sage, or olive. The short rounded shape keeps the vivid color compact, while the strong glossy finish makes the blue green tone look smooth and saturated.
Because the shade carries plenty of visual energy, added artwork is not needed. Even coverage and clean cuticle lines become the main details. The rounded corners also soften the brightness and make the single color feel balanced across every nail.
This tone works especially well beside strong pink, deeper green, and small gold details, as shown in the surrounding styling. Use thin coats to preserve the smooth surface, then finish with clear gloss to strengthen the turquoise depth.
A cool blue green that looks brighter and sharper than earthy green shades.
Strong color and high shine make short rounded nails stand out without extra decoration.
19. Layer Silver Chrome Lines over Sage Green Short Nails
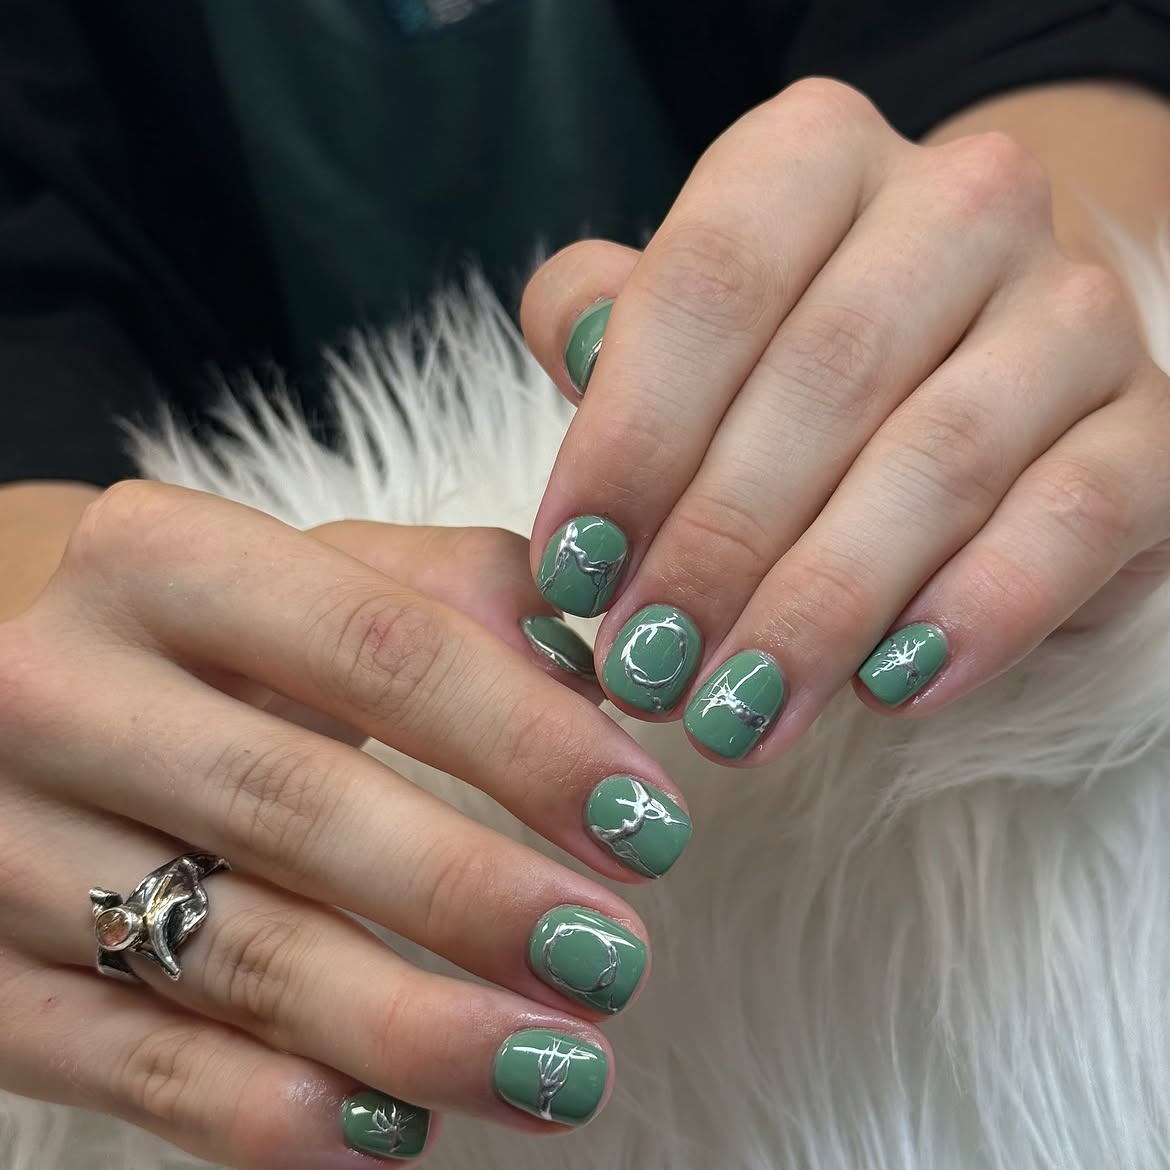
Cool silver details give this muted sage manicure a sharper, more sculptural direction. The short rounded square nails share the same green base, but each carries a different arrangement of metallic curves, rings, or fine white line art.
Some silver shapes appear slightly raised and wrap across the nail like liquid metal. Circular outlines create another focal point, while the small white star and branch motifs keep the design from relying on chrome alone. Plenty of uncovered sage space helps every detail remain visible.
Use the metallic lines on selected areas rather than framing every edge. Alternate larger silver shapes with lighter white drawings, then seal carefully around any raised sections. The cool metal and grey green base work together because both colors stay soft and subdued.
Mix bold silver curves with finer white details.
Leave open sage areas around every design.
Covering the whole nail with heavy metallic lines.
Repeating the exact same shape on every nail.
20. Keep Pale Sage Green Crisp on Short Square Nails
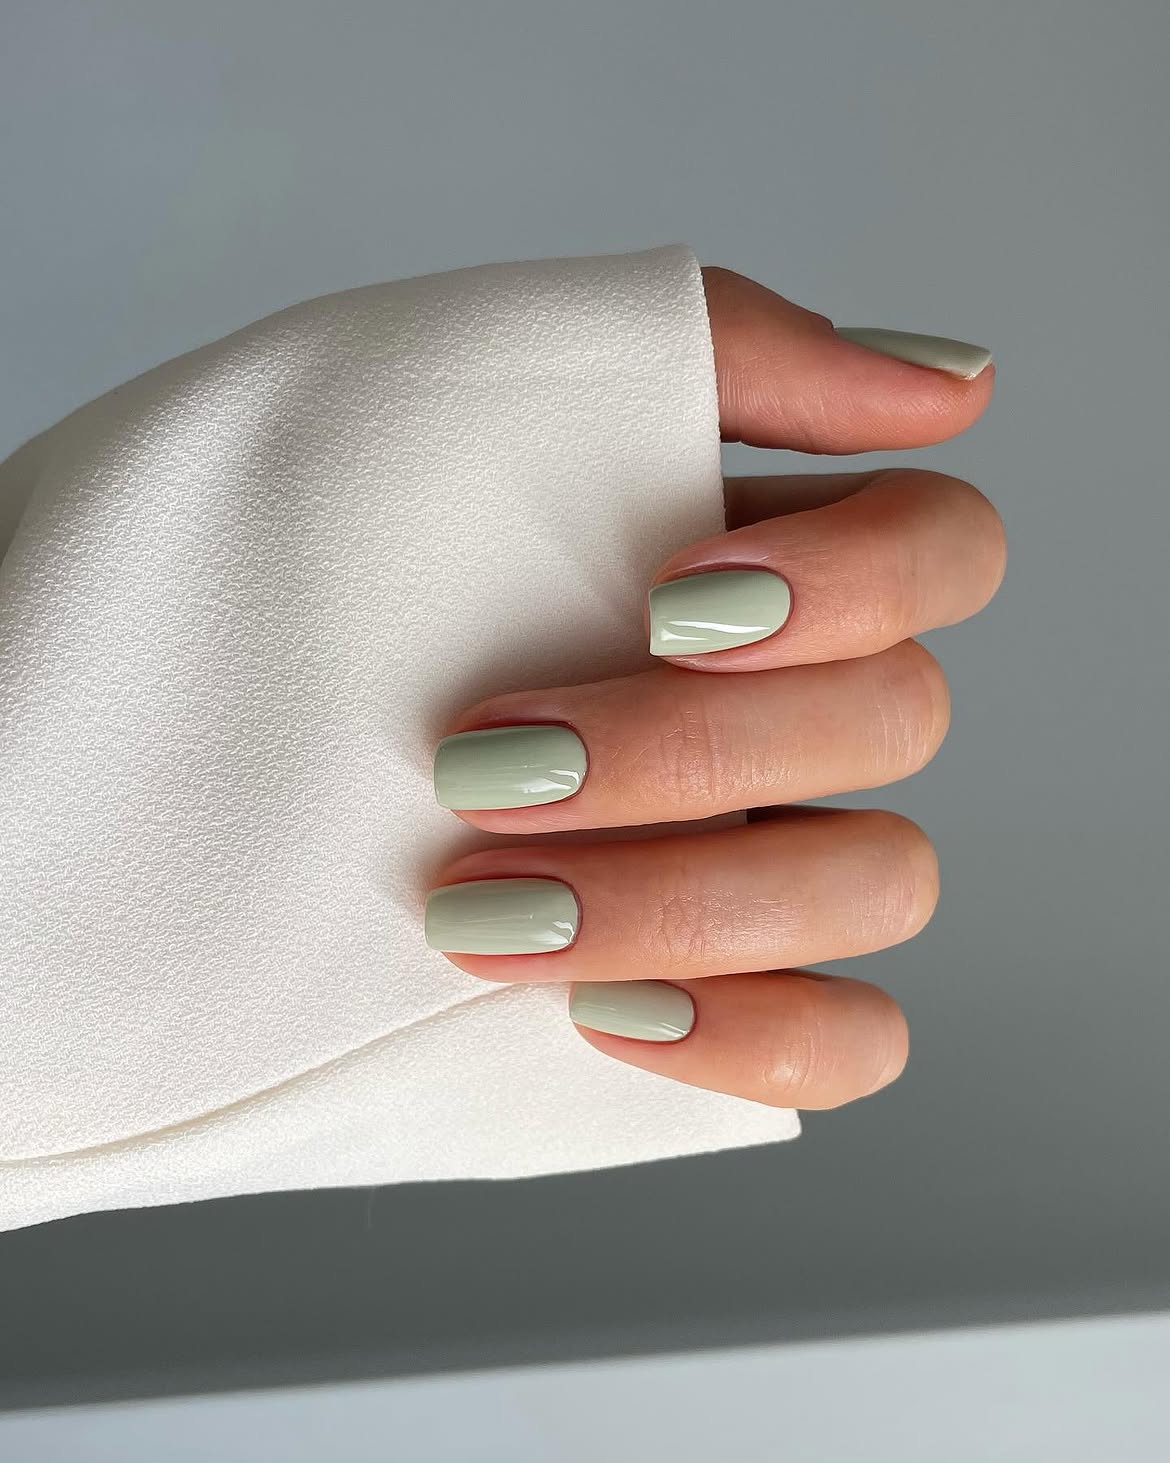
Pale sage gives this short square manicure a soft, almost neutral appearance. The green carries a cool grey undertone, which looks especially clean beside the white fabric and muted background shown in the image.
Why this quiet design stands out:
- The pale color keeps the square shape from feeling heavy.
- Straight tips give the subtle shade a clear structure.
- Softly rounded corners make the edges look less severe.
- Consistent color creates a calm and uniform finish.
- Strong gloss reveals the green undertone under direct light.
Apply thin coats so the pale pigment stays smooth rather than streaky. Check each sidewall and square edge before adding the final clear layer. Since there is no artwork, tidy shaping and even coverage become the main focus.
The cool sage shade stays soft, while the straight square tips provide enough structure to make the simple manicure look deliberate.