19 Simple Winter Nails for Beginners You Can Easily Recreate
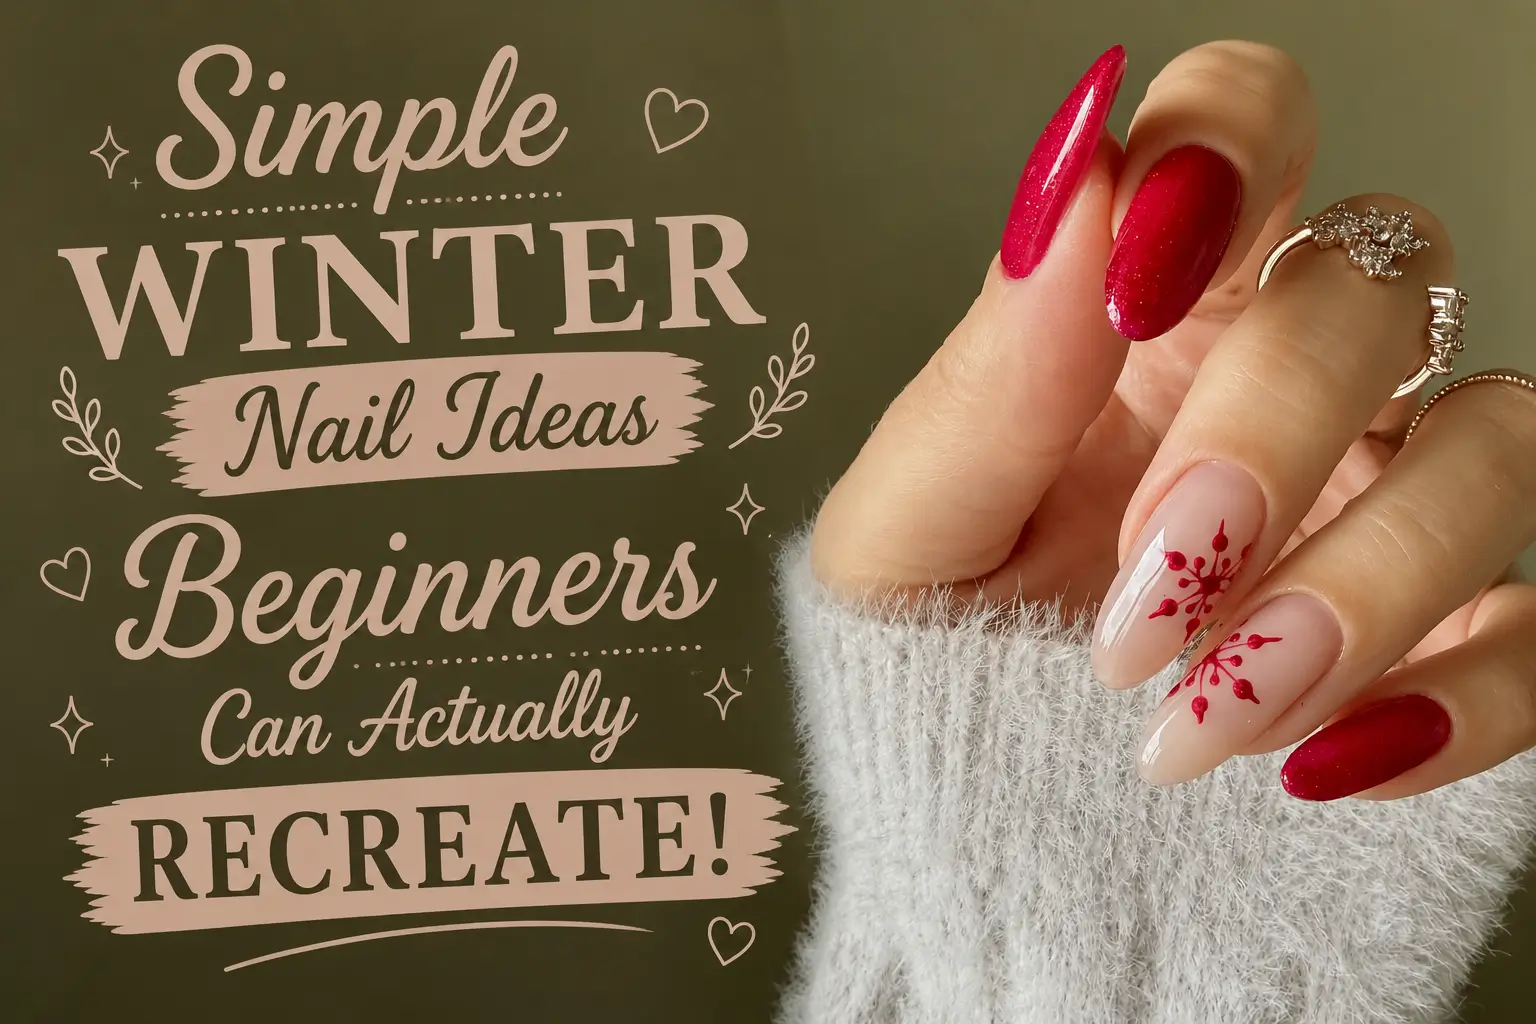
Winter nails can look detailed without demanding a steady hand or a drawer full of special tools. The 19 Simple Winter Nails for Beginners in this roundup rely on rich seasonal colors, forgiving patterns, and small accents that are easy to adjust as you work. Some ideas keep things calm with glossy forest green, chocolate brown, deep berry, or icy silver polish. Others bring in playful details through snow dots, soft swirls, tiny lights, French tips, bows, flowers, glitter, and bold white snowflakes.
There is something here for short square nails, rounded shapes, and longer almond tips. You can start with a one color manicure, practice neat dots with a toothpick, or use stickers when detailed brushwork feels difficult. Several designs also mix solid nails with one or two accents, which cuts down the time and precision needed. Pick the colors and technique that suit your skill level, then let a glossy top coat pull the whole winter look together.
19 Simple Winter Nails for Beginners
1. Smoky Frost Swirls for an Easy Winter Manicure
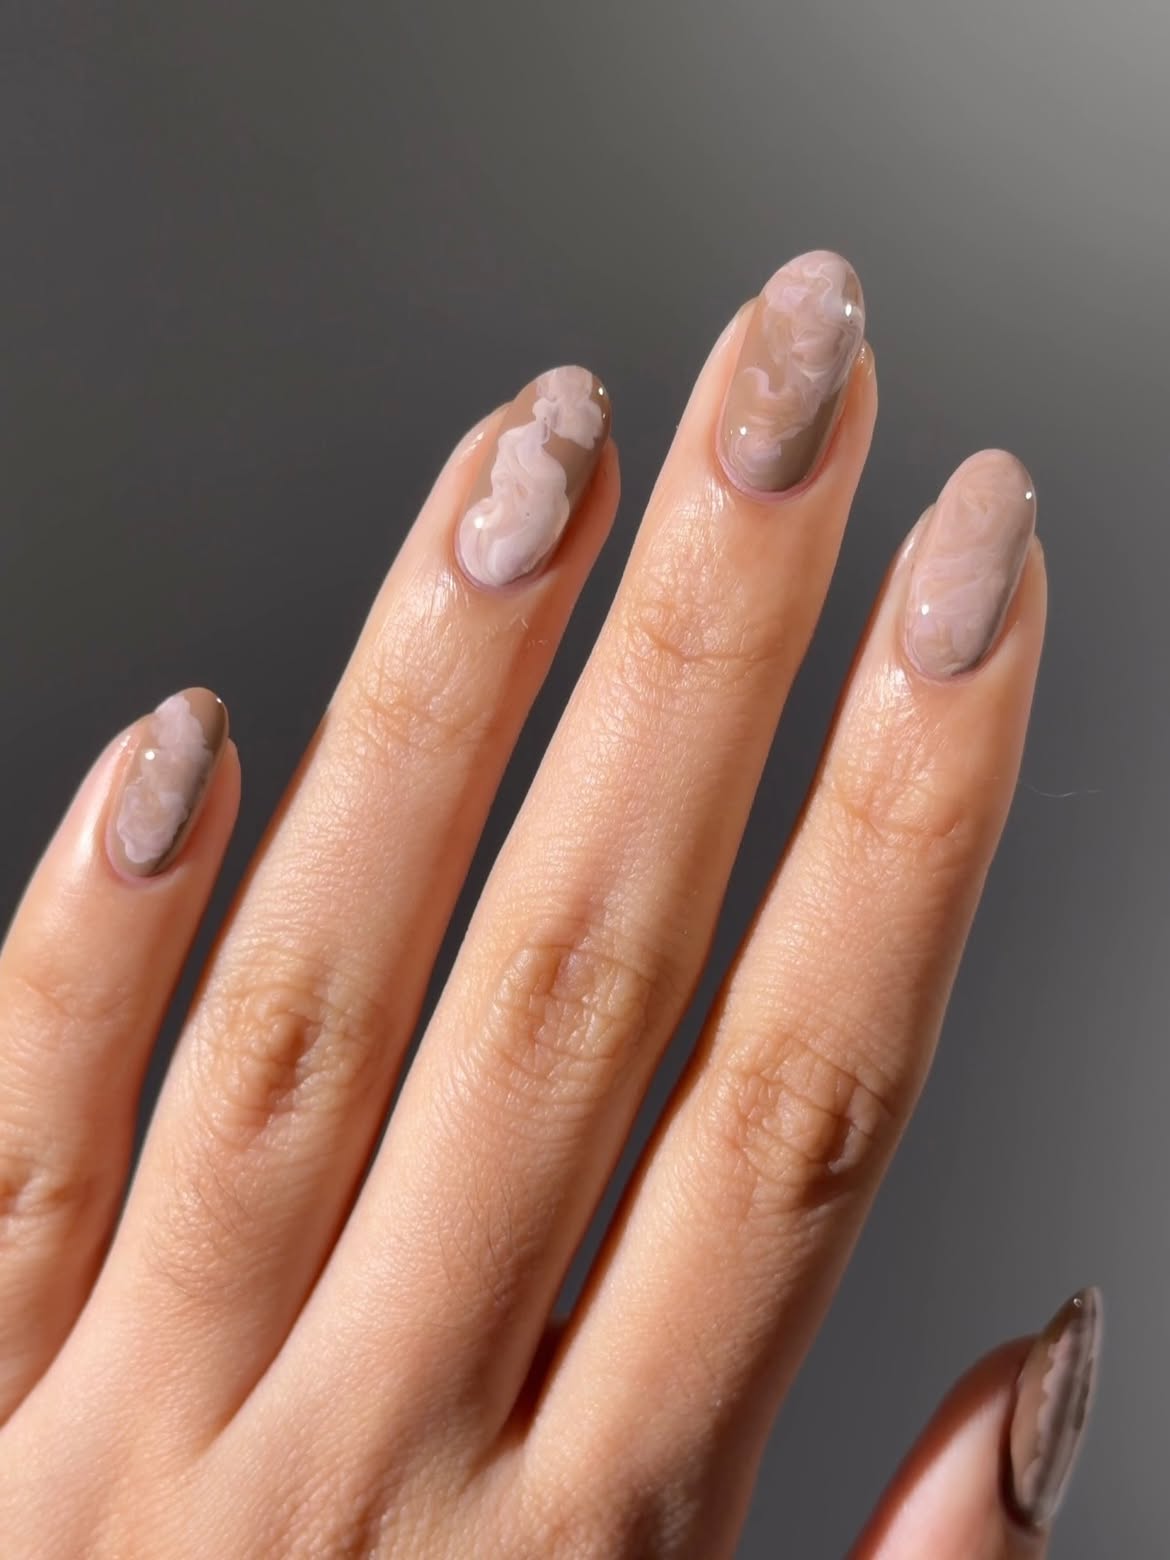
A sheer taupe base gives these nails a soft, misty look that suits the colder season. Milky white swirls move across each nail like frost on glass, while the glossy finish keeps the muted colors from looking flat.
The rounded almond shape also works well with this design because the curved lines follow the natural shape of the nail. To recreate it, keep the white details loose and uneven. Small patches and soft waves will look more natural than carefully matched lines. Each nail can have a slightly different pattern while still feeling connected to the full set.
Apply a thin coat of sheer taupe or smoky nude polish.
Add small milky white patches, then soften their edges with a fine brush.
Seal the cloudy pattern with a glossy top coat for a smooth winter finish.
2. Cocoa Brown Snow Dots for Simple Winter Nails
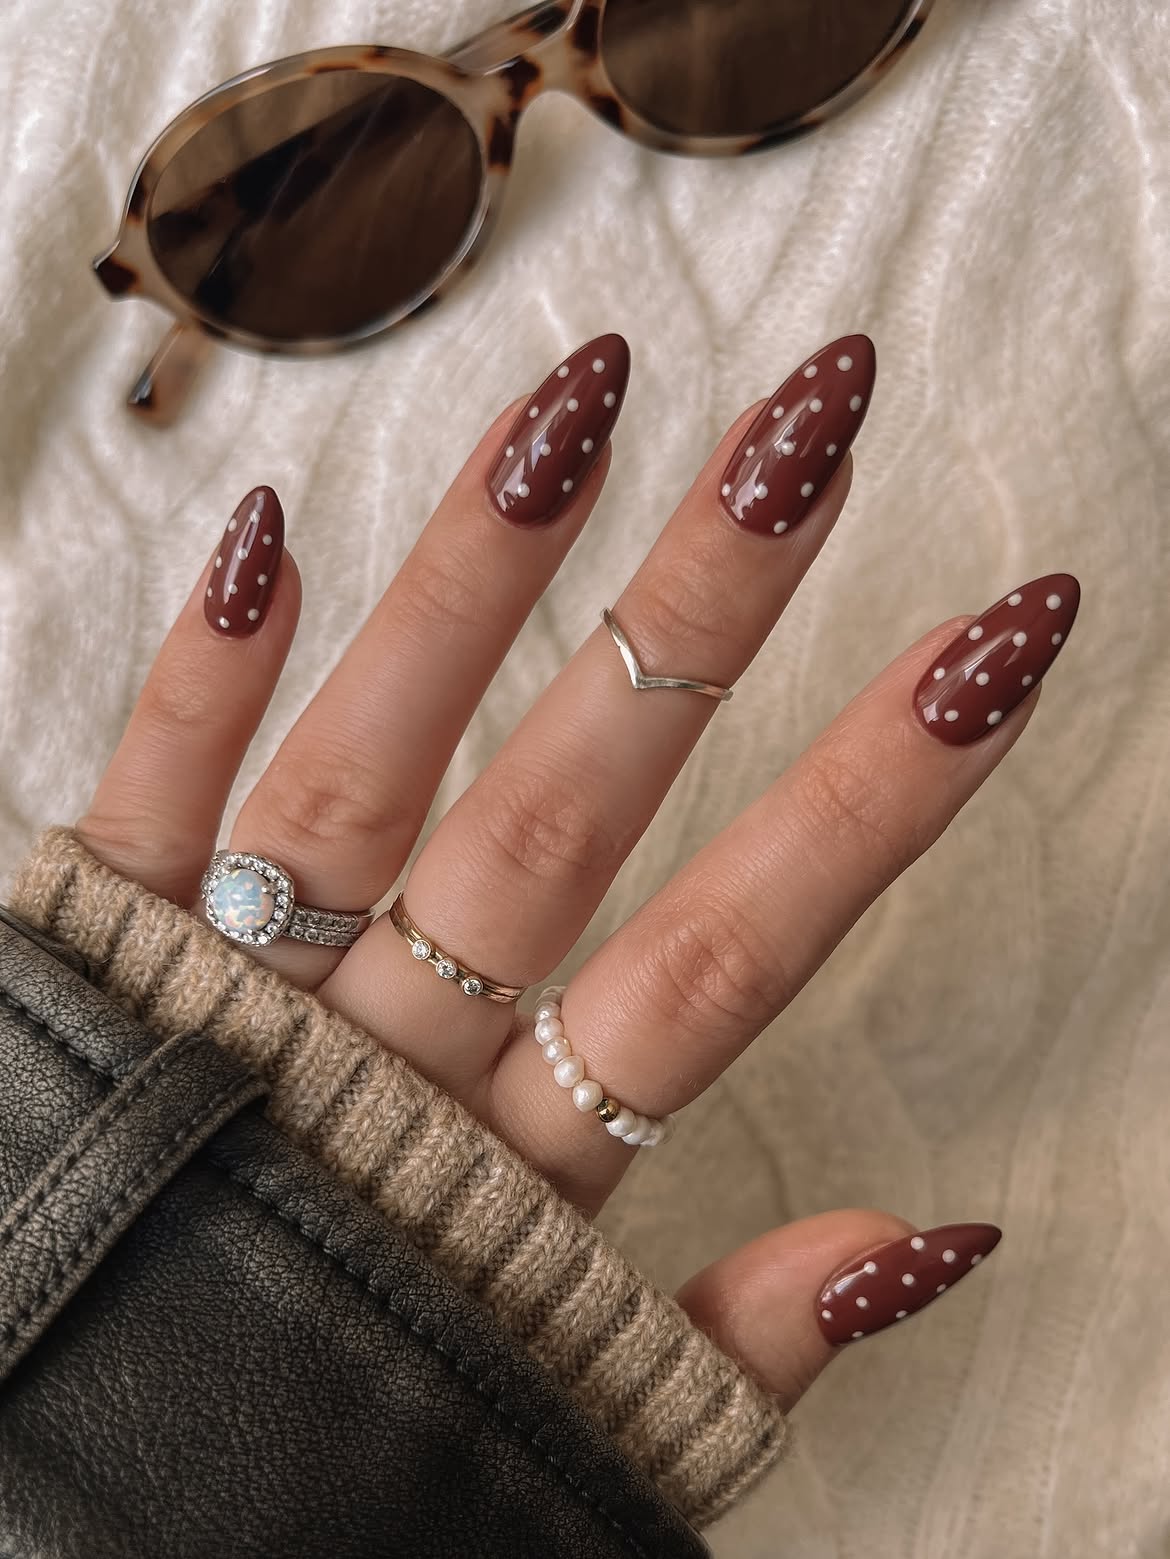
Deep cocoa brown gives this manicure a warm winter mood, while the scattered white dots resemble light snowfall. The high gloss surface makes the contrast crisp, and the long almond shape gives the simple pattern a dressed up finish.
The loose dot placement is what makes this design manageable for beginners. Some dots sit close together, while others leave more brown showing, so there is no exact pattern to follow. Use a dotting tool or the rounded end of a toothpick. Dip it lightly into white polish, touch it straight onto the nail, and vary the dot sizes by changing the amount of polish. Let every dot dry before adding the final clear coat.
3. Icy Silver Shimmer on Short Winter Nails
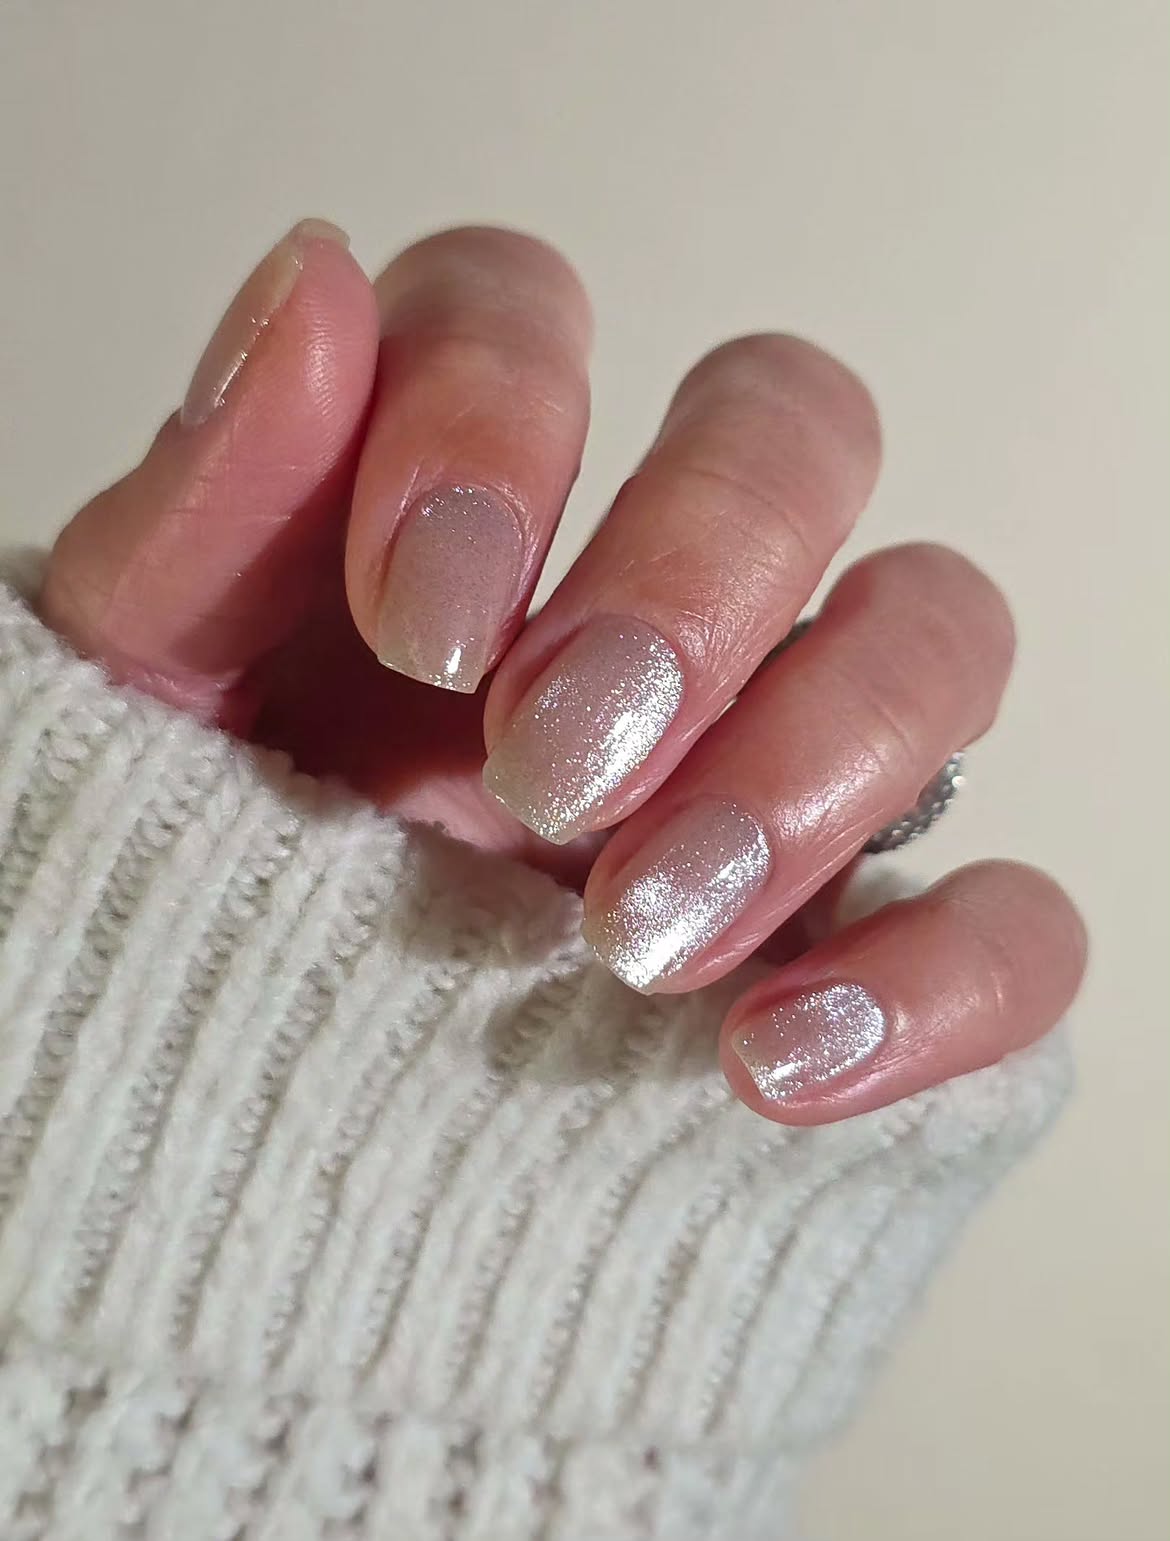
Soft silver shimmer catches the light without needing detailed nail art. The pale reflective finish looks icy and clean, while the short rounded square shape keeps the manicure practical for daily wear.
This idea is helpful for beginners because the sparkle does most of the work. Apply two thin coats instead of one heavy layer, allowing each coat to settle before adding the next. Finish with a clear glossy coat to smooth the shimmer and bring out its shine.
- Short rounded square shape for easy upkeep
- Pale silver shimmer for a frosty winter look
- Sheer base that keeps the color soft
- Fine sparkle that hides small brush marks
- Glossy finish for a smooth reflective surface
💡 Quick Tip
Use thin coats of shimmer polish. Thick layers can collect around the cuticles and make the reflective finish look uneven.
If you prefer practical styles that still feel polished, these 18 Short Winter Nails for Everyday Wear are full of easy seasonal ideas.
4. Navy Snow Dot French Tips with Matching Accent Nails
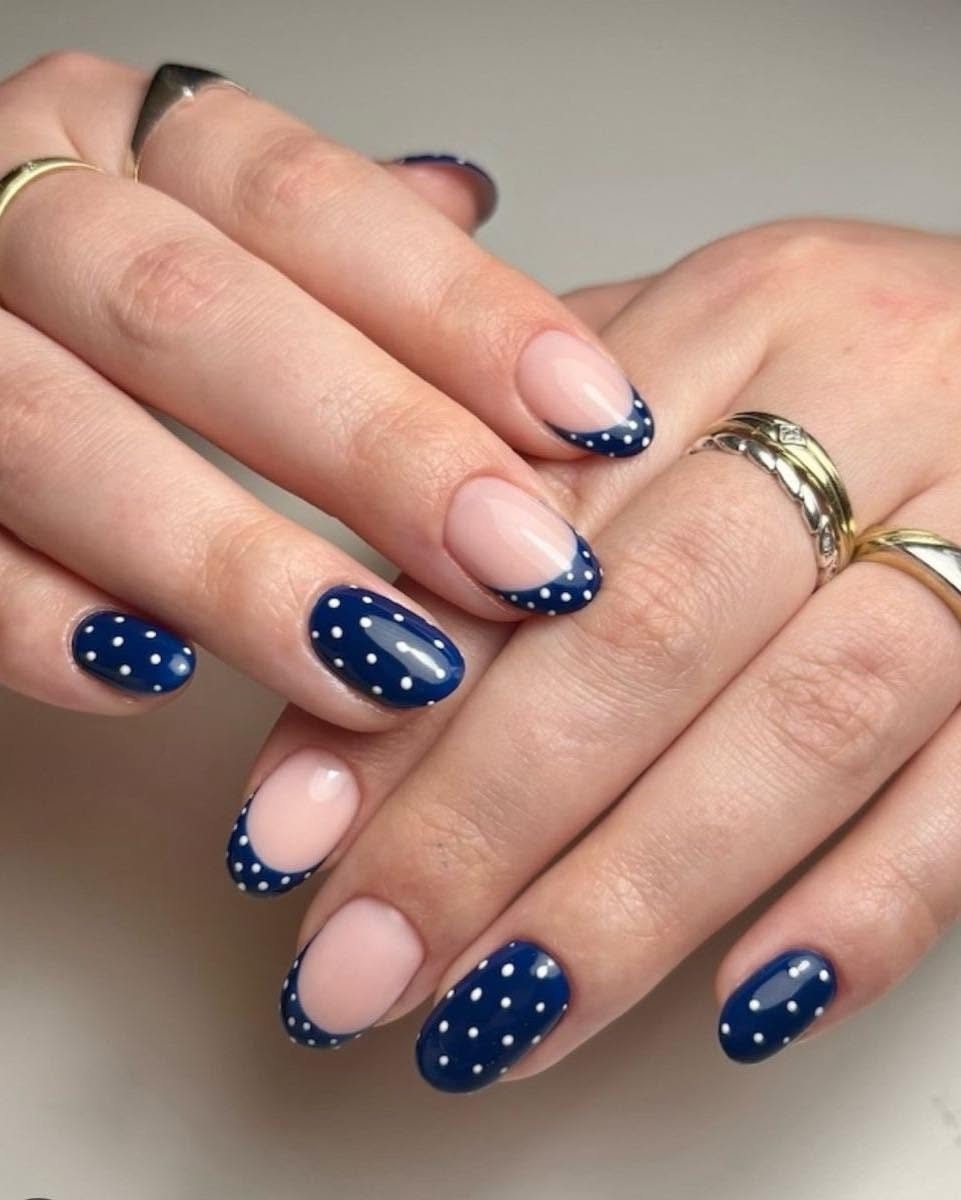
Navy and white create a crisp winter contrast, but the mix of two nail styles is what makes this manicure stand out. Some nails are painted fully in deep navy, while others use a sheer blush base with curved navy tips. Small white dots connect both styles and give the set a playful snowfall effect.
Beginners can recreate the look by completing all solid navy nails first. For the remaining nails, follow the natural tip line with a small brush rather than trying to make every curve identical. Once the navy polish dries, add white dots with a dotting tool. Keep the spacing loose so minor differences look intentional.
| Full Navy Nails | Navy French Tips |
|---|---|
| Create bold color anchors | Keep the manicure light and balanced |
| Place white dots across the full surface | Keep most dots inside the navy tip |
| Easier choice for a beginner | Use a small brush for better control |
5. Layered Red and White Chevron Tips for Winter
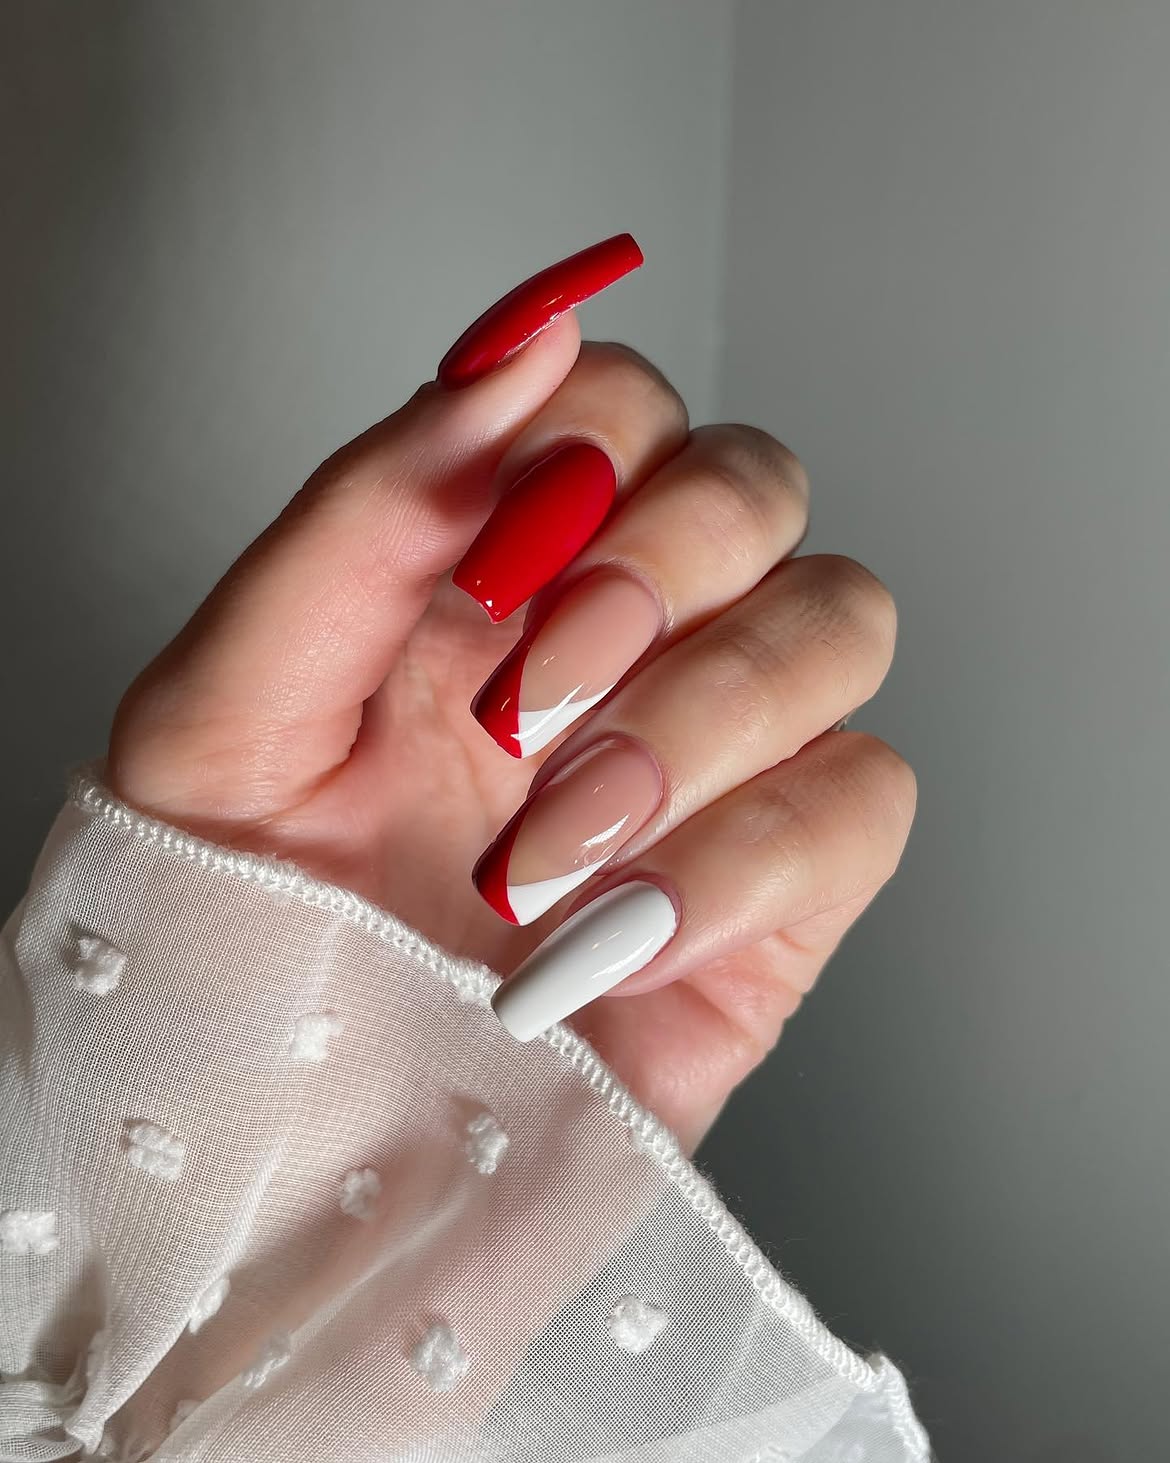
Bright red and snowy white give this manicure a strong seasonal look without covering every nail in detailed art. Two center nails feature angled red and white tips over a sheer blush base. The remaining nails use solid red or white polish, which keeps the set balanced and reduces the amount of precision work.
Beginners can form the angled tips with thin nail tape or small guide stickers. Paint the white section first, let it dry, then add the red edge. A clear glossy coat will smooth the separate color sections and help them look connected.
- Long coffin shape with straight tips
- Glossy red nails for bold winter color
- Solid white nail for clean contrast
- Sheer blush base on the detailed nails
- Angled red and white tips for a layered effect
Let the white tip dry before adding the red section.
Use thin coats to keep the angled edges neat.
Do not place nail tape over polish that still feels soft.
Avoid loading the brush with too much color near the tip.
6. Glossy Forest Green Nails with No Extra Art
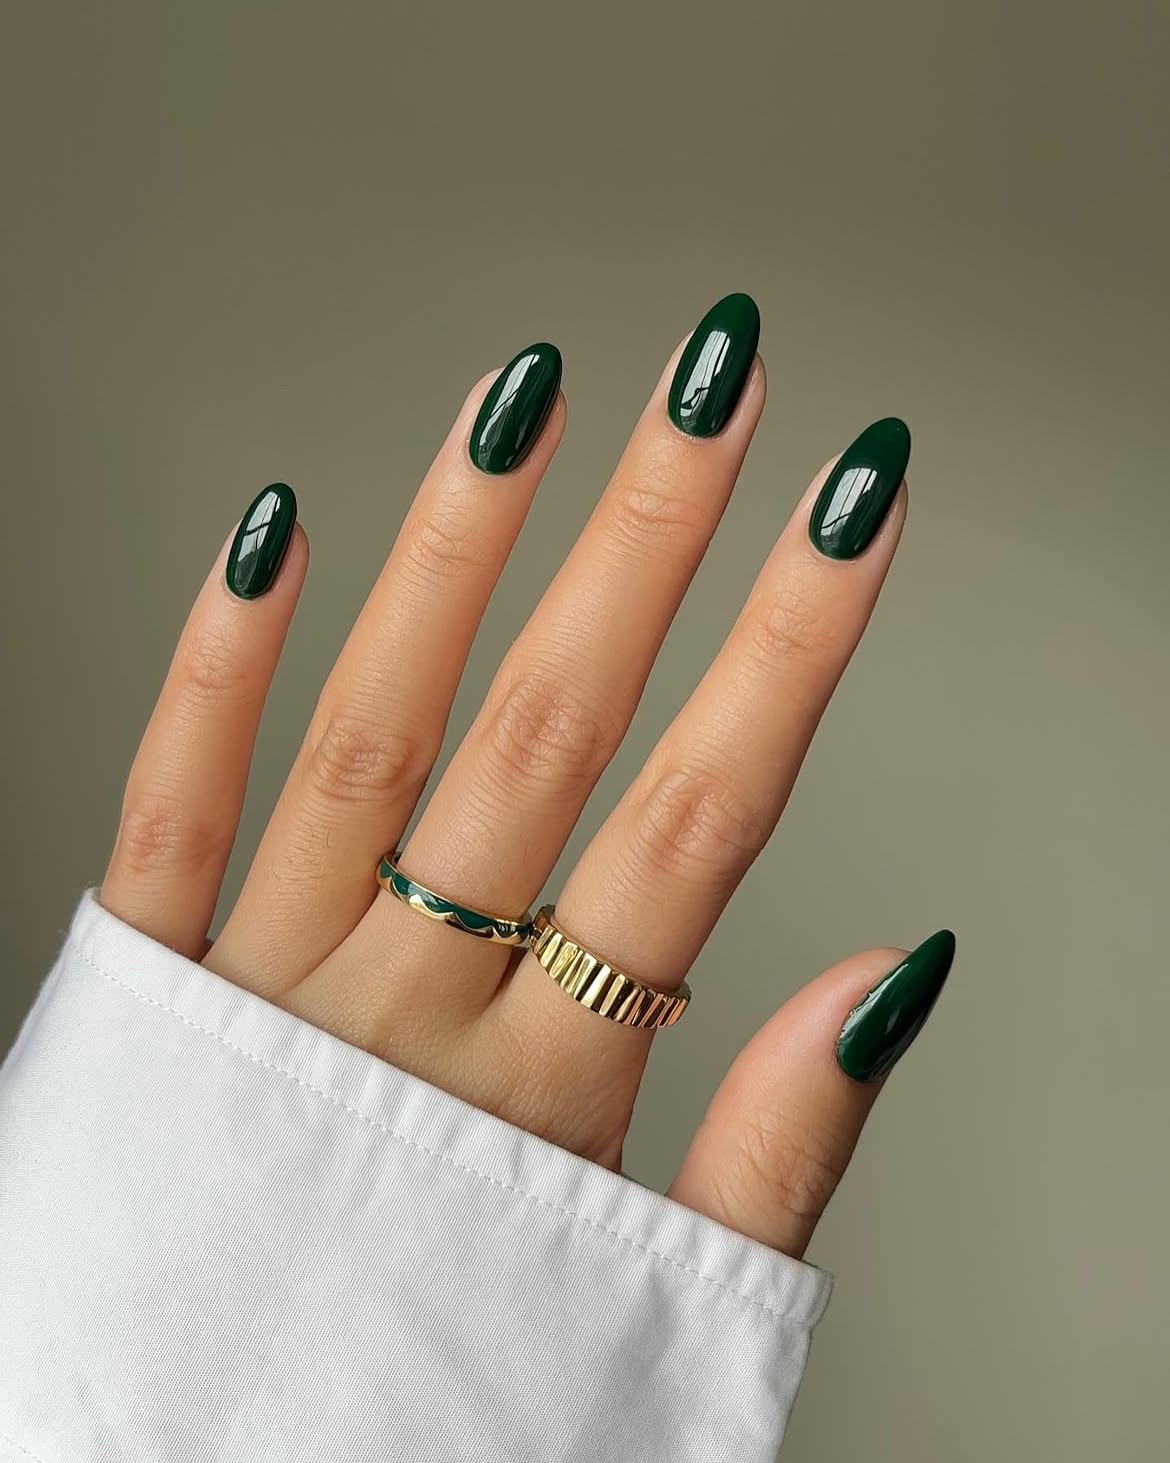
Forest green turns a plain manicure into a rich winter look without dots, lines, or extra tools. The color is deep enough to feel seasonal, while the glossy surface keeps it fresh and polished.
For a cleaner application, begin with one stroke down the center of each nail, then cover both sides with lighter strokes. Leave a narrow space around the cuticle instead of pushing the polish against the skin. Dark shades make uneven borders easy to notice, so a small cleanup brush can be more useful than a nail art tool.
The medium oval shape softens the bold color and keeps the finished manicure neat. This is one of the easiest winter nail ideas for beginners who want strong color with very little detail work.
A deep winter shade needs no detailed art when the edges are clean and the finish is glossy.
7. Berry French Tips with a Polka Dot Accent Nail
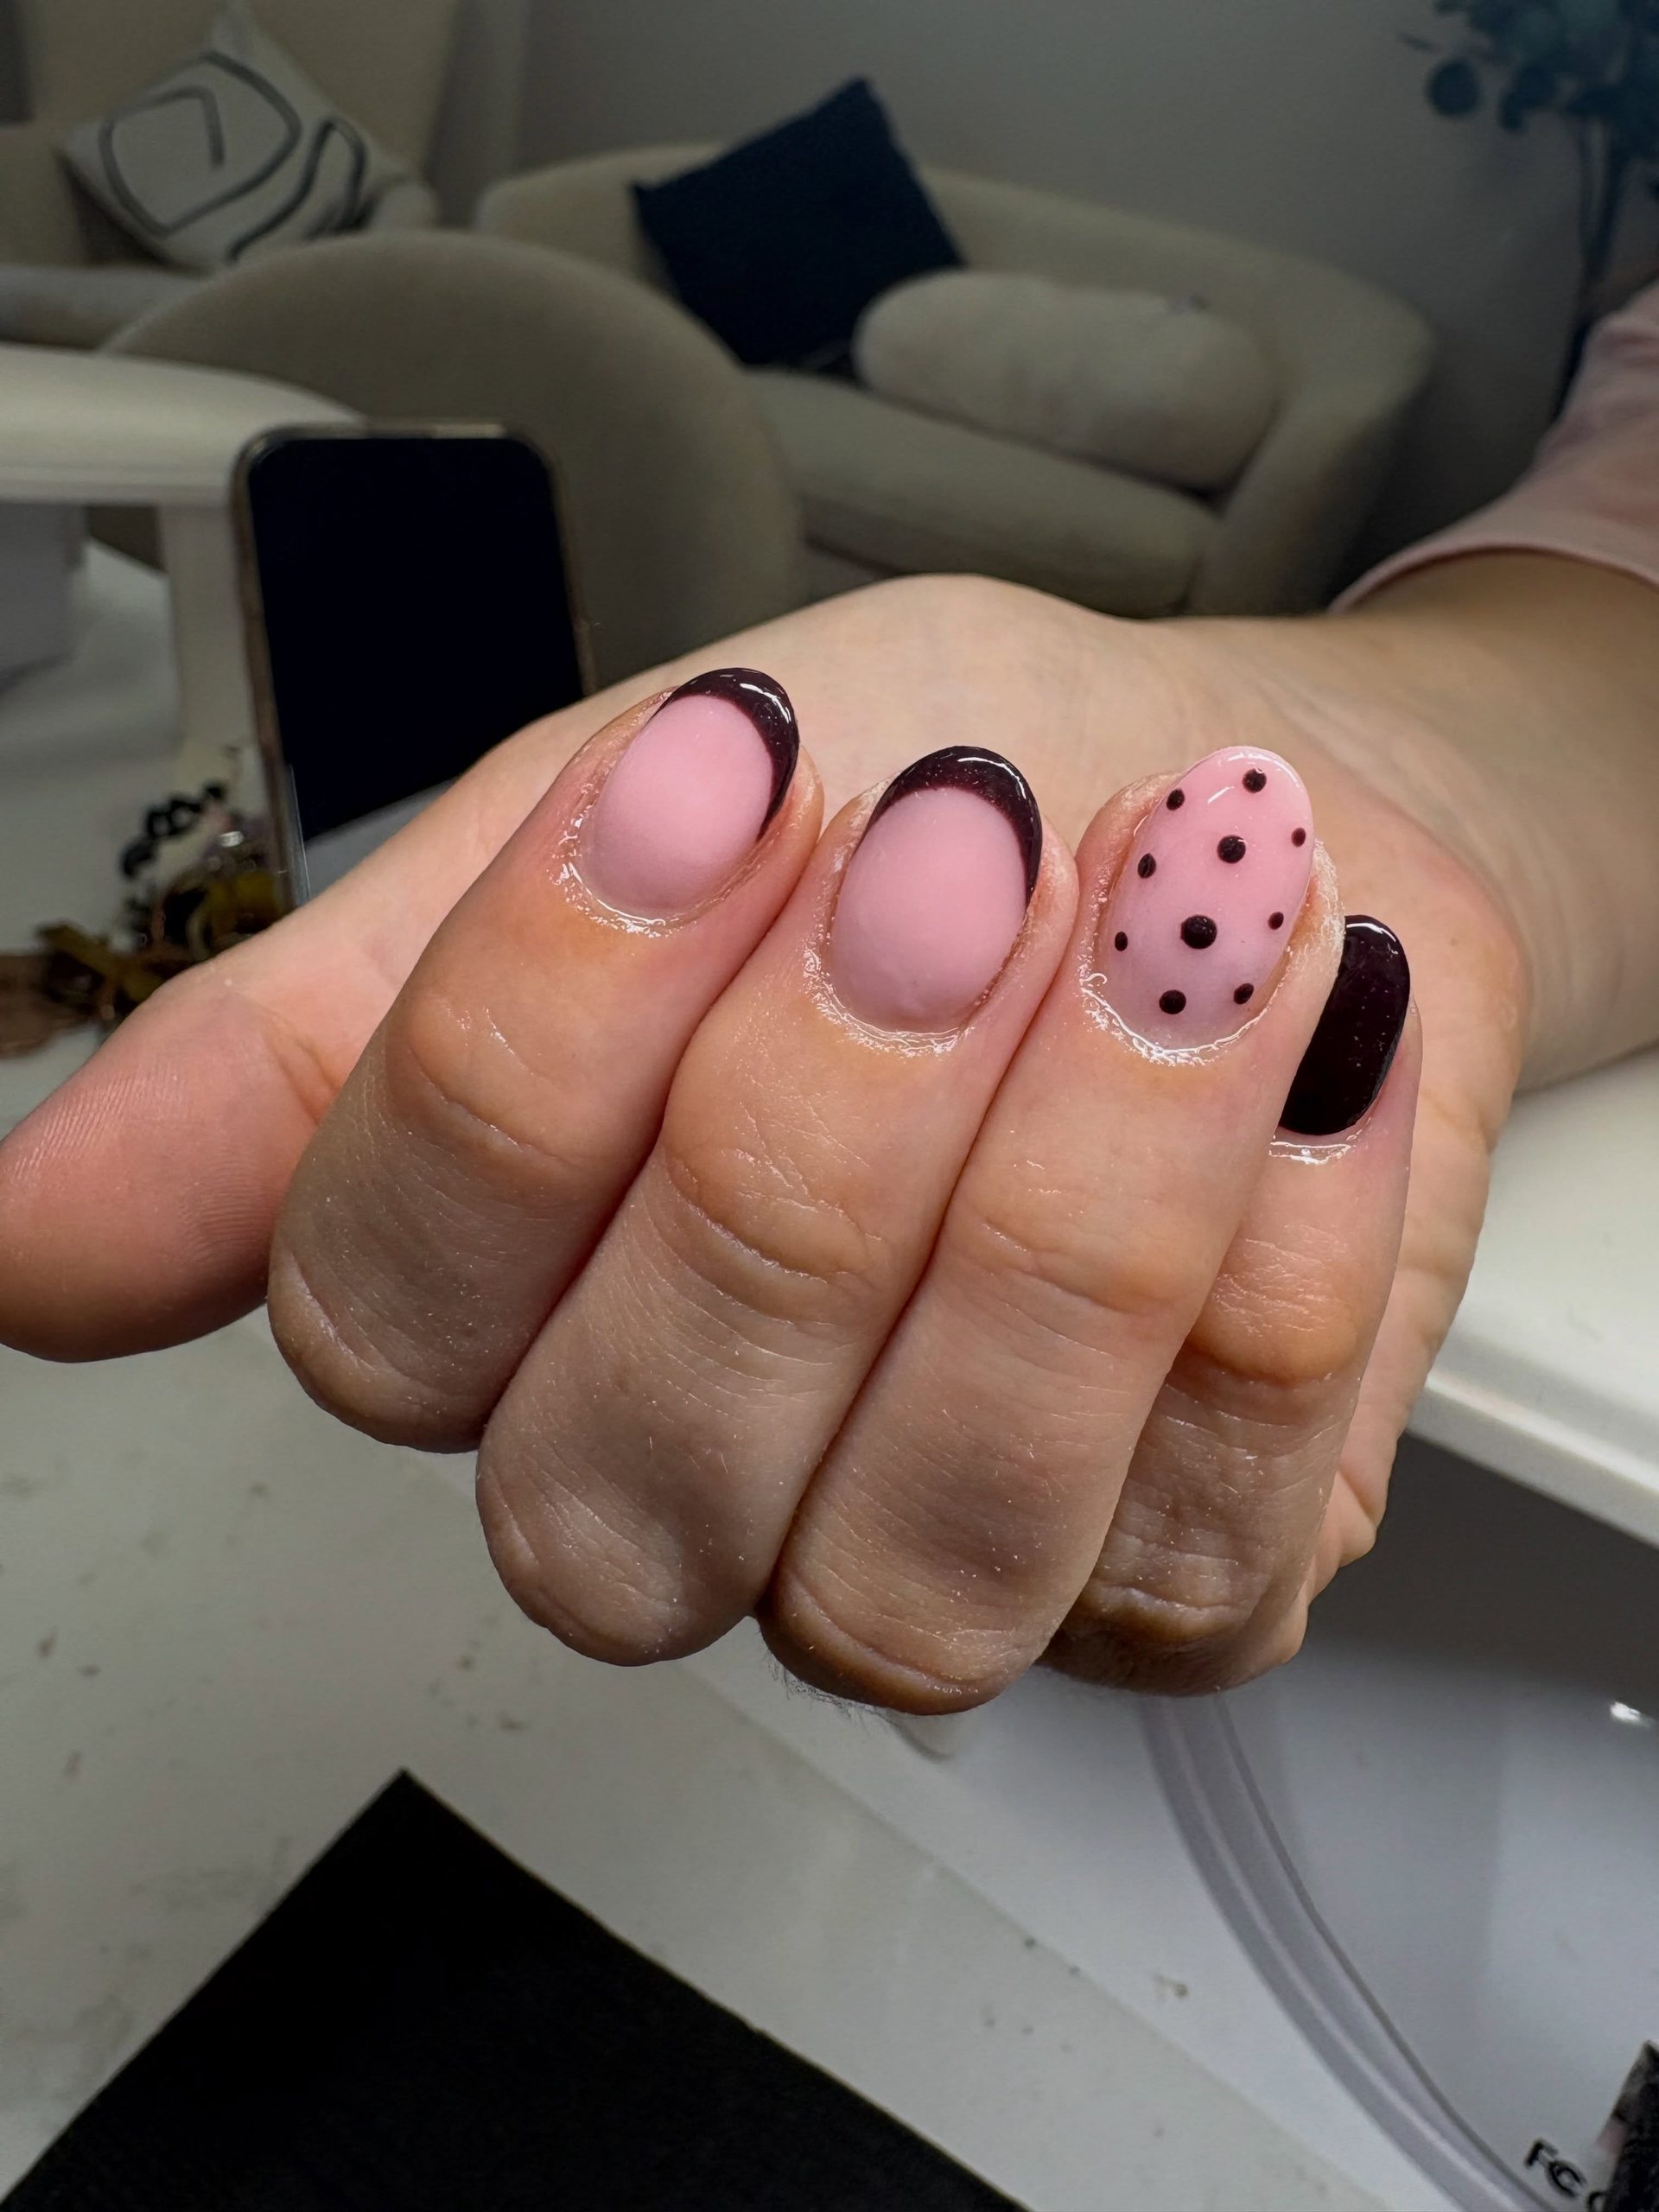
A soft pink base keeps this winter manicure light, while deep berry polish adds contrast in three simple forms. Two nails have rounded French tips, one has scattered dots, and the little finger is fully covered in the darker shade. Using one accent color across several patterns makes the full set feel connected.
- Sheer pink base for a soft background
- Deep berry tips on two nails
- Scattered dots on one accent nail
- Solid berry color on the little finger
- Short oval shape for comfortable daily wear
Paint the solid nail first, then form the curved tips with a small brush. Add the dots last with a dotting tool or rounded toothpick. Allow each section to dry before sealing everything with a glossy clear coat.
Apply a smooth soft pink base across every nail.
Mix curved tips, simple dots, and one solid nail using the same deep berry shade.
8. Blue Dotted Cuticle Arcs on Short Nude Nails
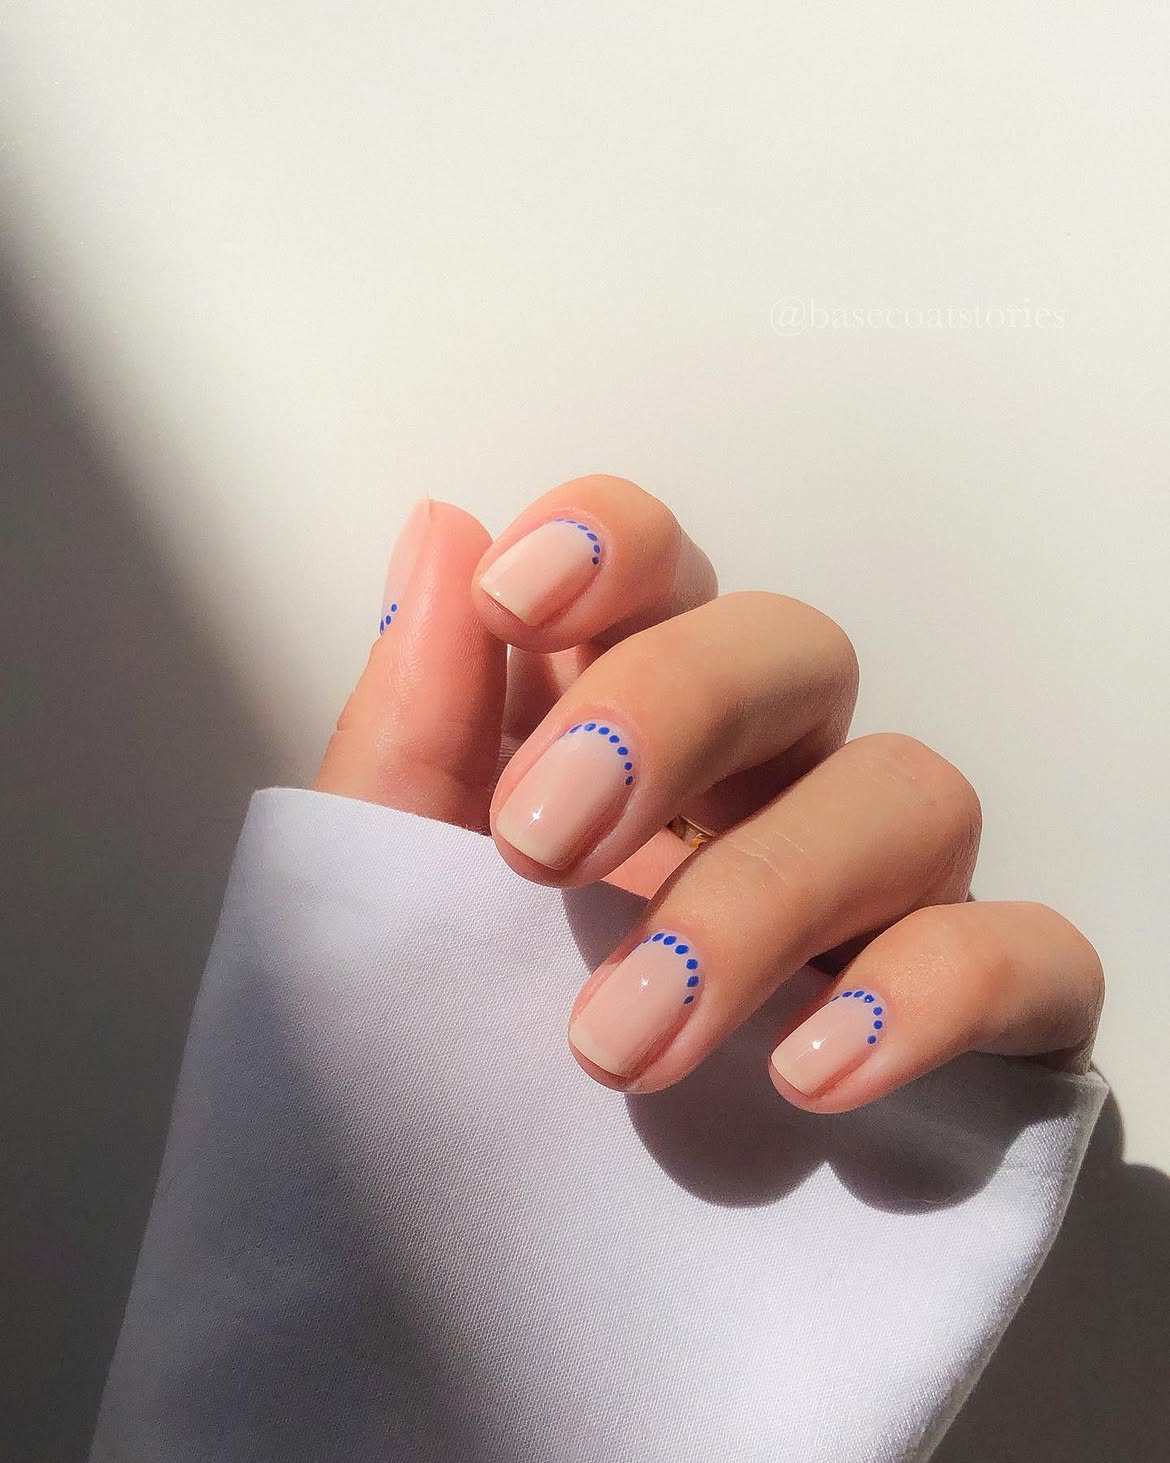
Tiny cobalt dots turn a sheer nude manicure into a clean winter design. Instead of sitting at the tips, the dots follow the curve near each cuticle, creating a reverse French border while leaving most of the nail bare. The short square shape makes the simple detail easy to notice.
Apply the pale nude base first and let it dry fully. Begin with one blue dot at the center near the cuticle, then continue outward on both sides. Working from the middle helps keep the curved line balanced. Use very little polish on a fine dotting tool or pin so the marks remain small. Wait until the dots are set before adding a clear glossy coat.
Keep the dotted curve neat
9. Berry Pink Waves with Silver Glitter Borders
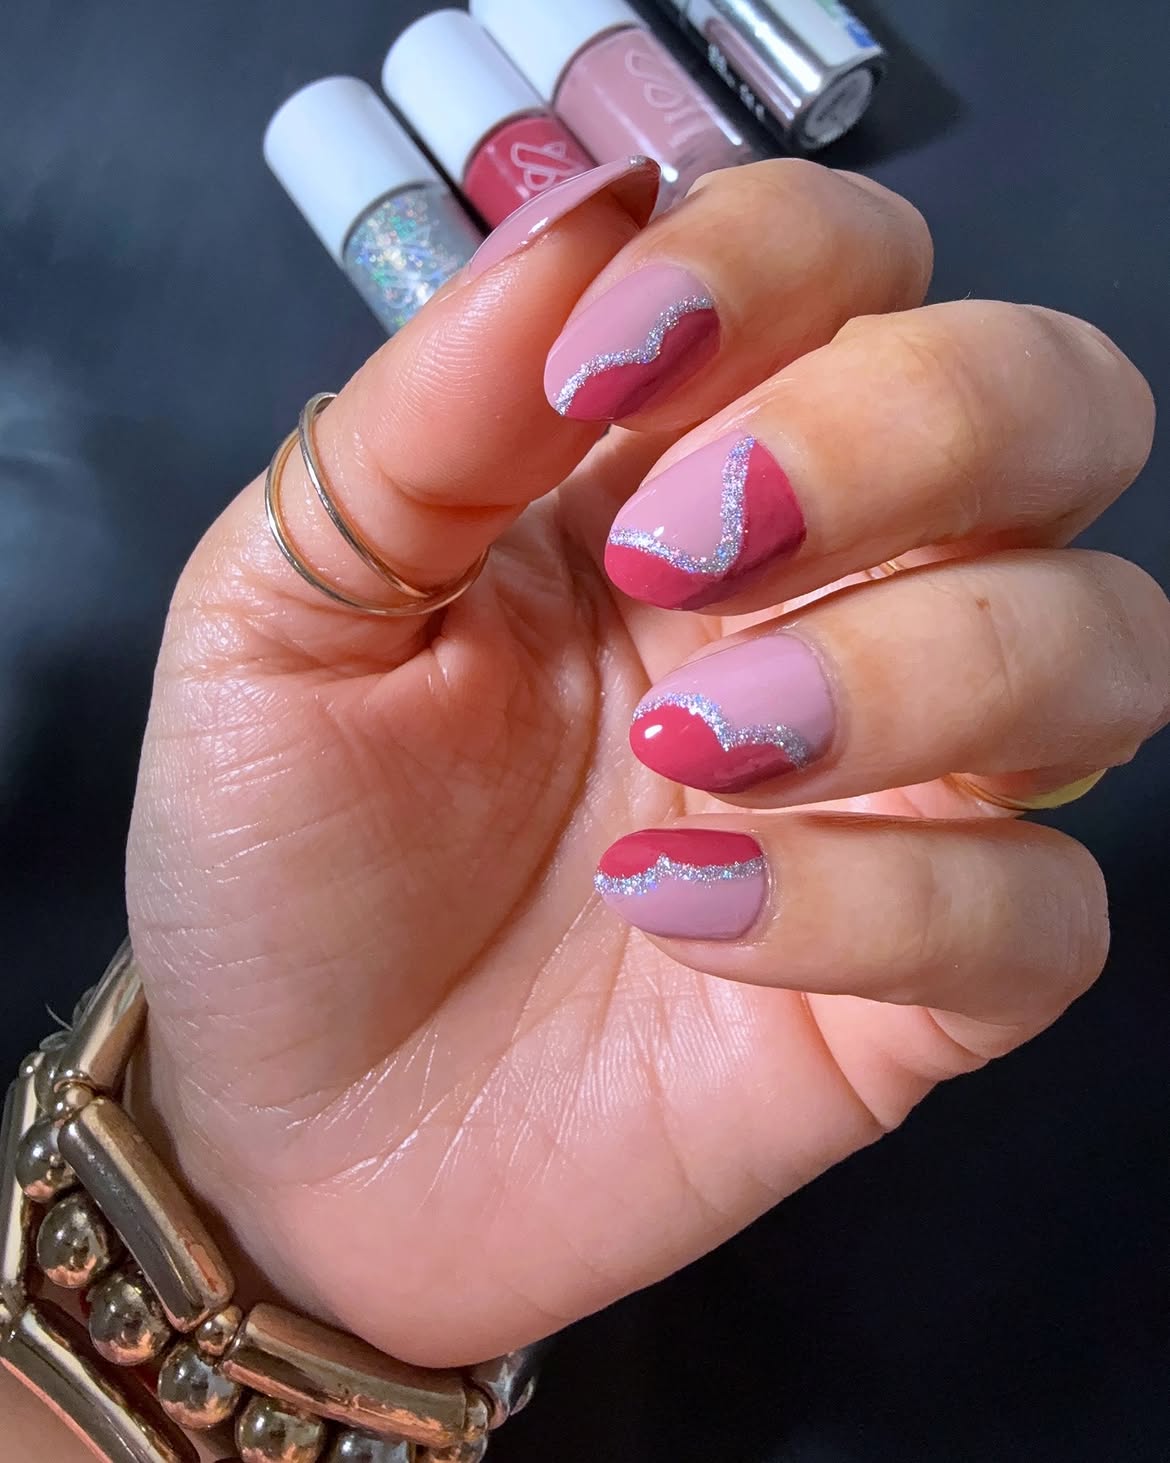
Curved berry sections move across each nail in a different direction, giving the manicure variety without requiring tiny drawings. A soft pink base keeps the brighter shade balanced, while the silver glitter follows each curve like a frosty edge.
Loose waves are easier for beginners than straight lines because small changes in shape look intentional. The narrow glitter border also helps cover any uneven meeting point between the two pink shades.
- Soft pink polish across the full nail
- Deeper berry color for the curved sections
- Silver glitter tracing each wavy border
- Different wave placement on every nail
- Short rounded shape with a glossy finish
Paint the pale base first, add the berry curves once it dries, then trace their edges with a fine glitter brush.
For a soft seasonal shift you can do yourself, these 17 Easy Late Summer Early Fall Nails at Home are perfect for simple color changes and fresh accents.
10. Chocolate Brown Scalloped Tips with a Gold Star Accent
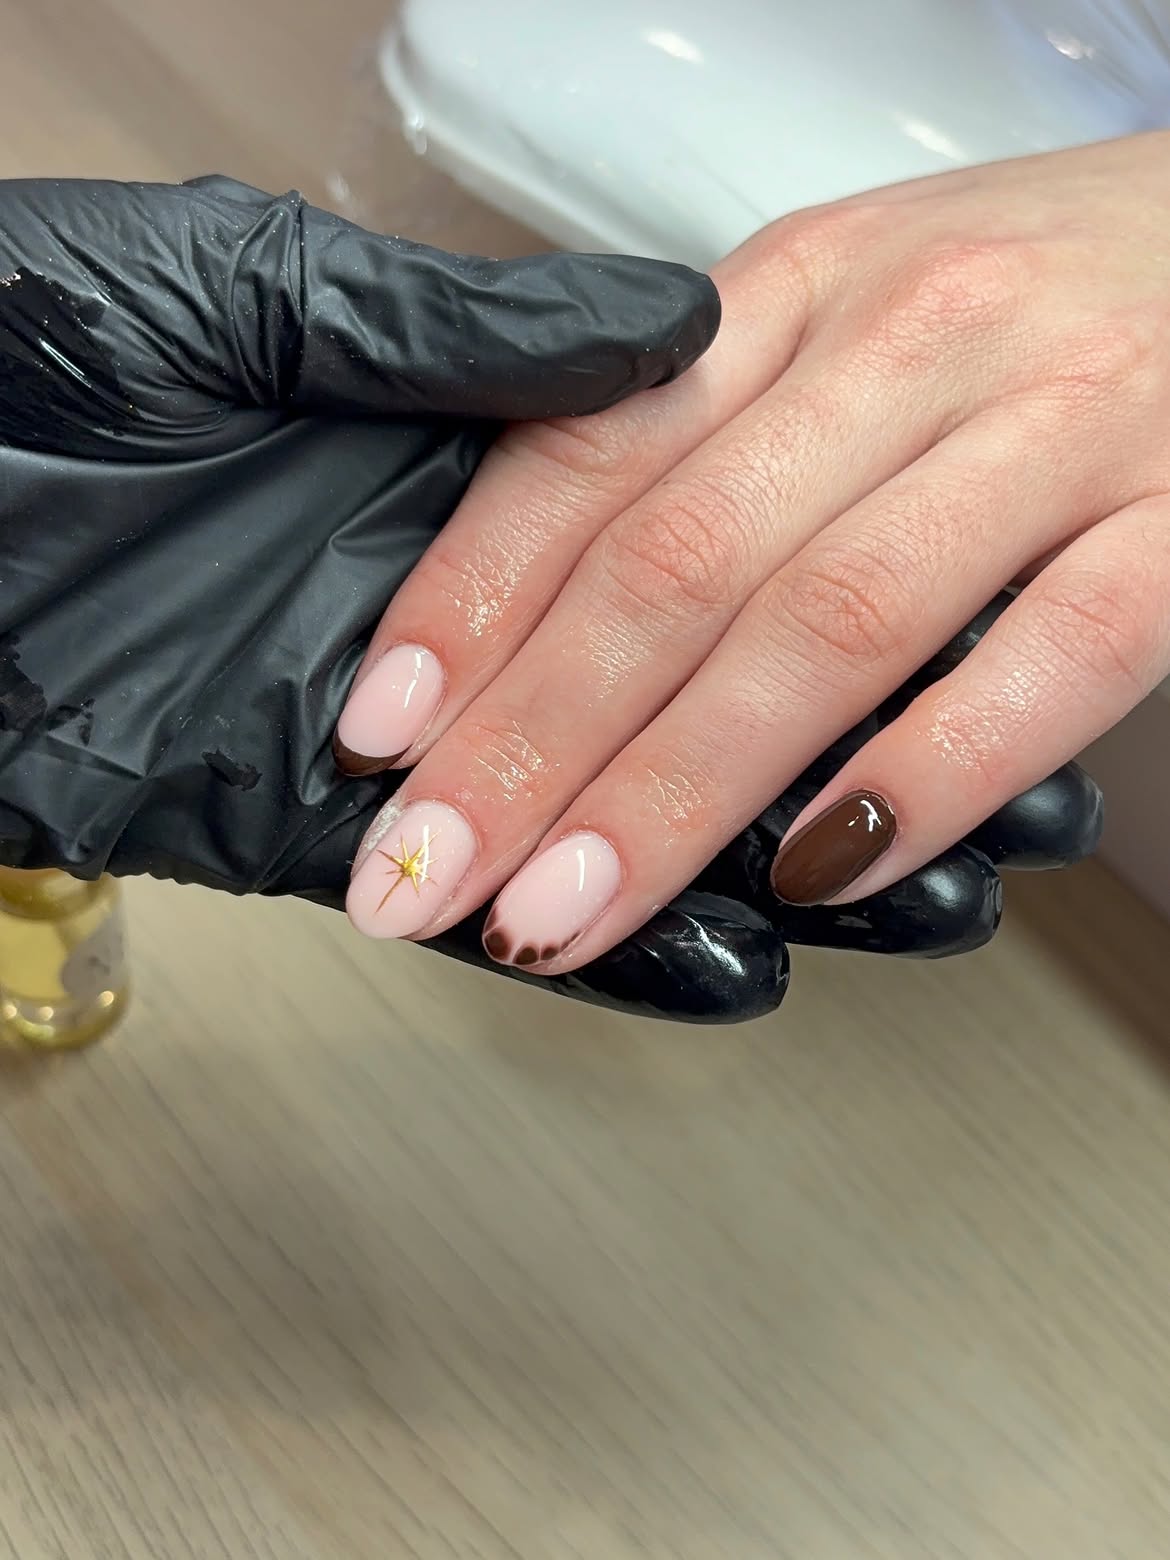
Chocolate brown gives this soft pink manicure a warm winter palette. One nail is fully covered in glossy brown, another has a slim brown tip, and one uses rounded scallops across the free edge. A small gold star on the pale pink accent nail adds a bright detail without covering the whole design in glitter.
Complete the solid brown nail first, then use a fine brush for the narrow tip. The scalloped edge can be formed with a dotting tool by placing touching brown dots along the tip and filling the space beneath them. A small gold nail sticker can recreate the star detail without requiring careful hand painting.
📌 Good To Know
For an easier scalloped tip, place a row of touching brown dots along the nail edge, then fill the remaining tip with the same color.
11. Red Glitter Snowflakes With Beginner Friendly Accent Nails
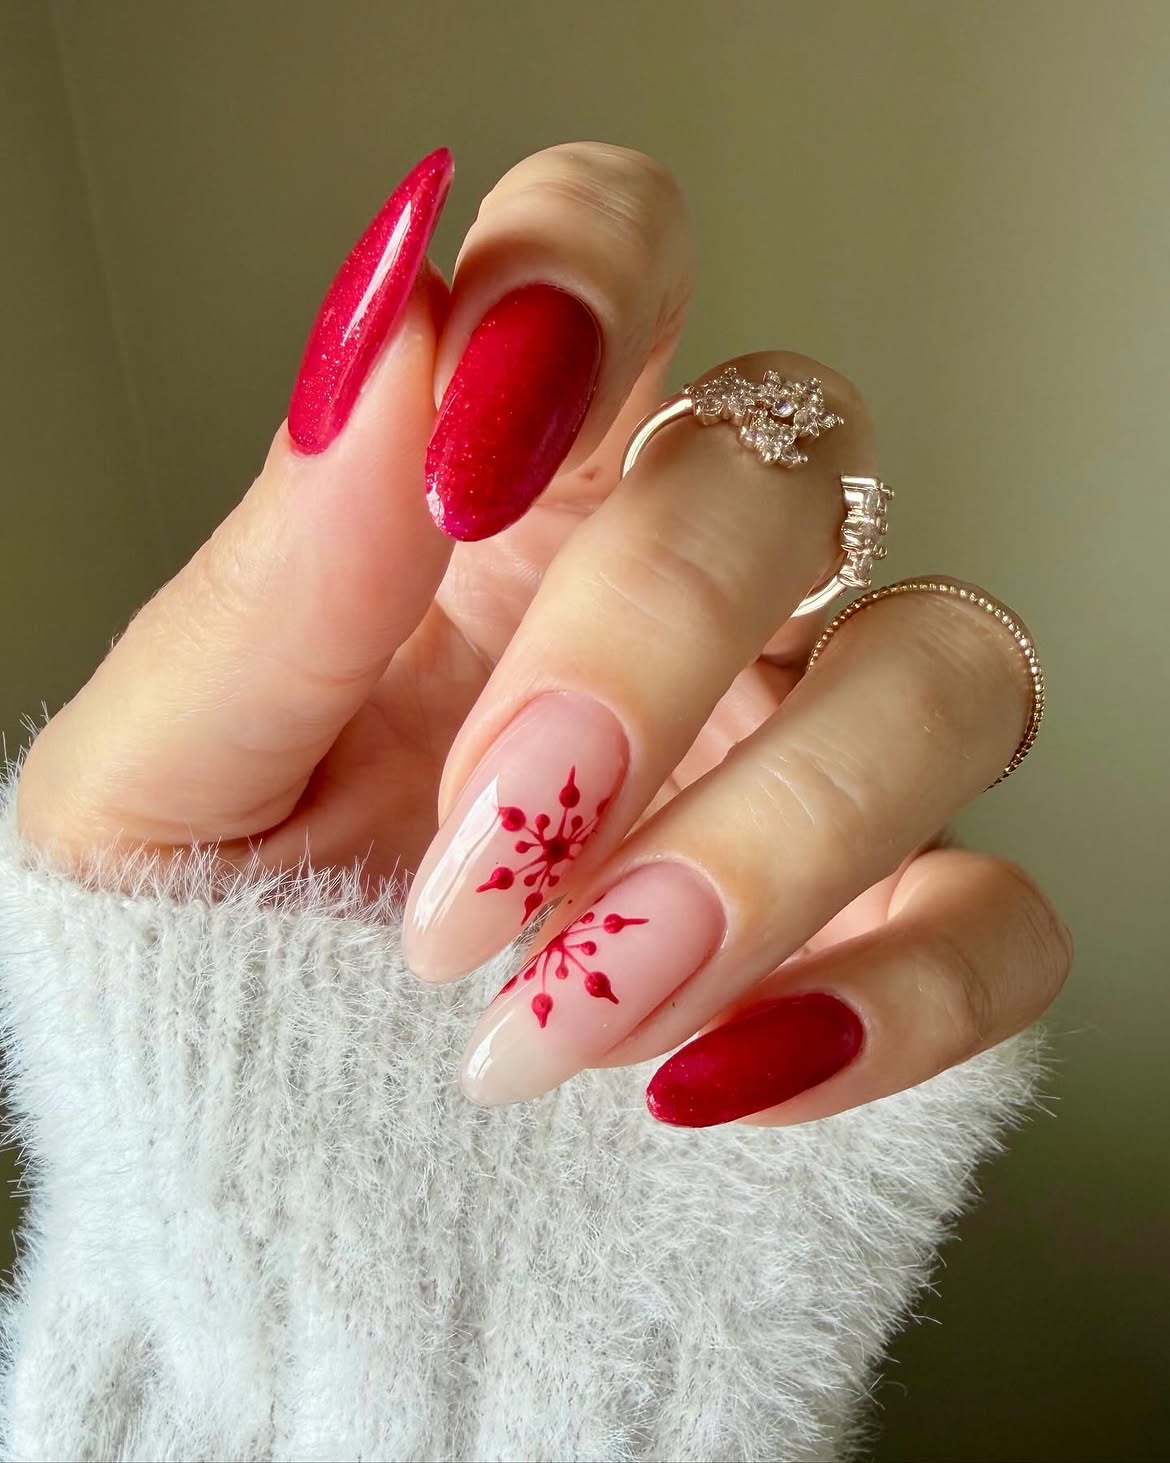
Rich red shimmer makes this manicure feel festive, while two sheer nude nails keep the design soft and balanced. The long almond shape adds drama, but the same idea also works on shorter nails.
What makes it easy to copy:
- Paint three nails with red shimmer polish.
- Keep two middle nails sheer pink or nude.
- Draw small red dots first, then connect them with thin lines.
- Add a few teardrop shapes to create simple snowflakes and winter branches.
- Seal everything with a glossy top coat.
The tiny motifs do not need to match exactly. Slight differences make the finished manicure look delicate and handmade.
12. Glossy Chocolate Brown Nails for an Easy Winter Manicure
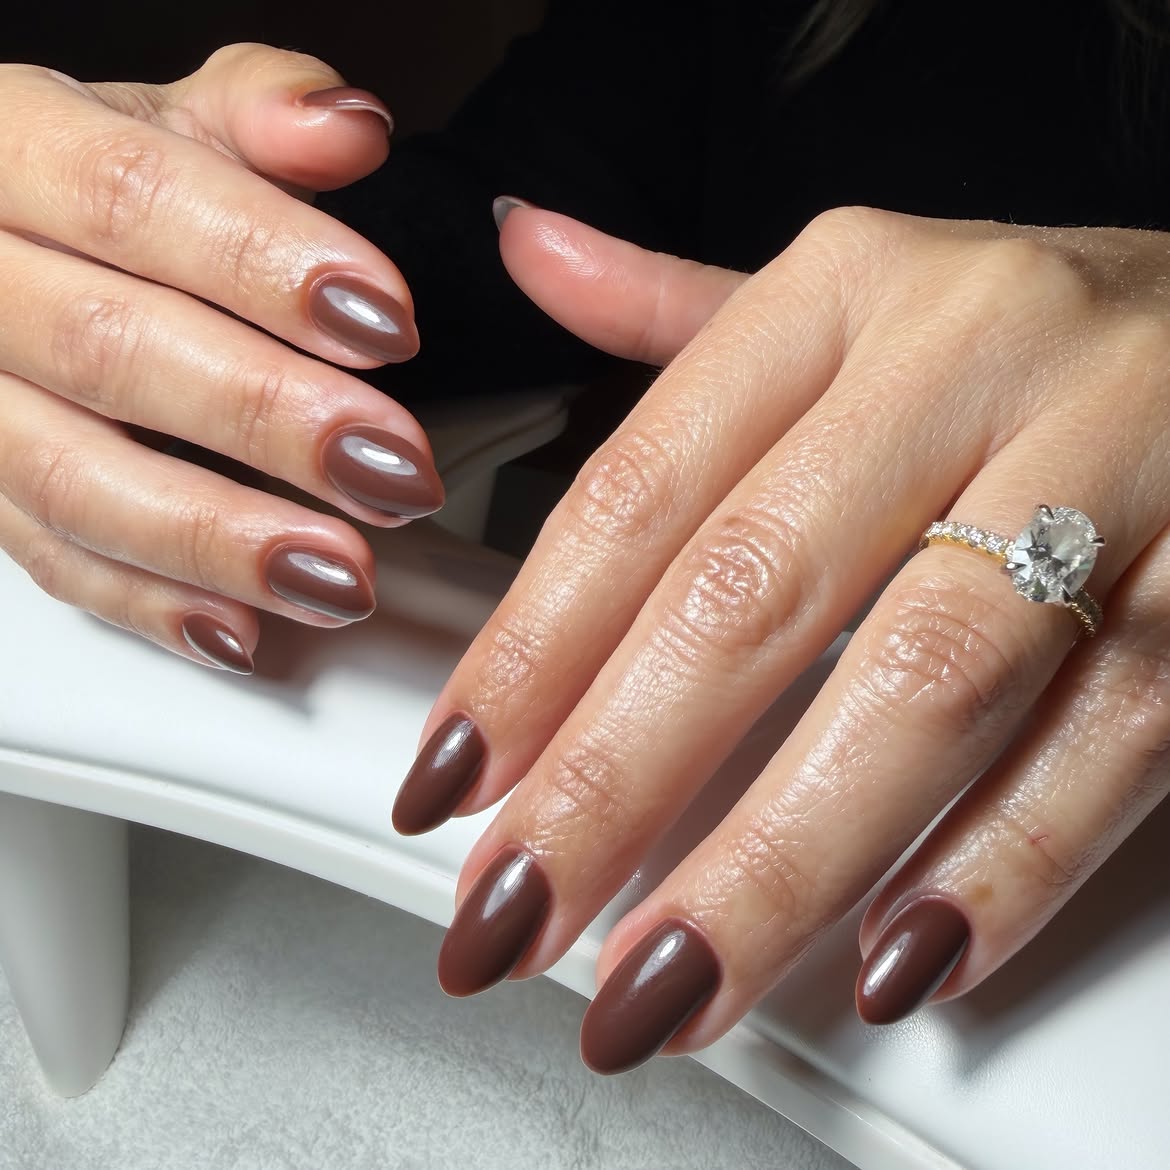
The appeal of this look comes from restraint. Every nail carries the same creamy chocolate brown shade, so there is no detailed art to copy or tools to master. The warm color feels rich against winter clothes, while the high shine keeps it fresh rather than heavy.
A softly rounded almond shape complements the simple polish. Shorter nails can use an oval shape for a similar effect. Choose a brown with a neutral or slightly warm tone, then focus on smooth coverage and clean edges around the cuticles. Careful application is what gives this single color manicure its polished finish.
Prepare the surface. Shape the nails, tidy the edges, and apply a clear base coat.
Build the color. Apply two thin coats of chocolate brown, allowing each coat to settle.
Add the shine. Finish with a glossy top coat and lightly cap each nail tip.
13. Icy Blue Glitter Nails With Bold White Snowflakes
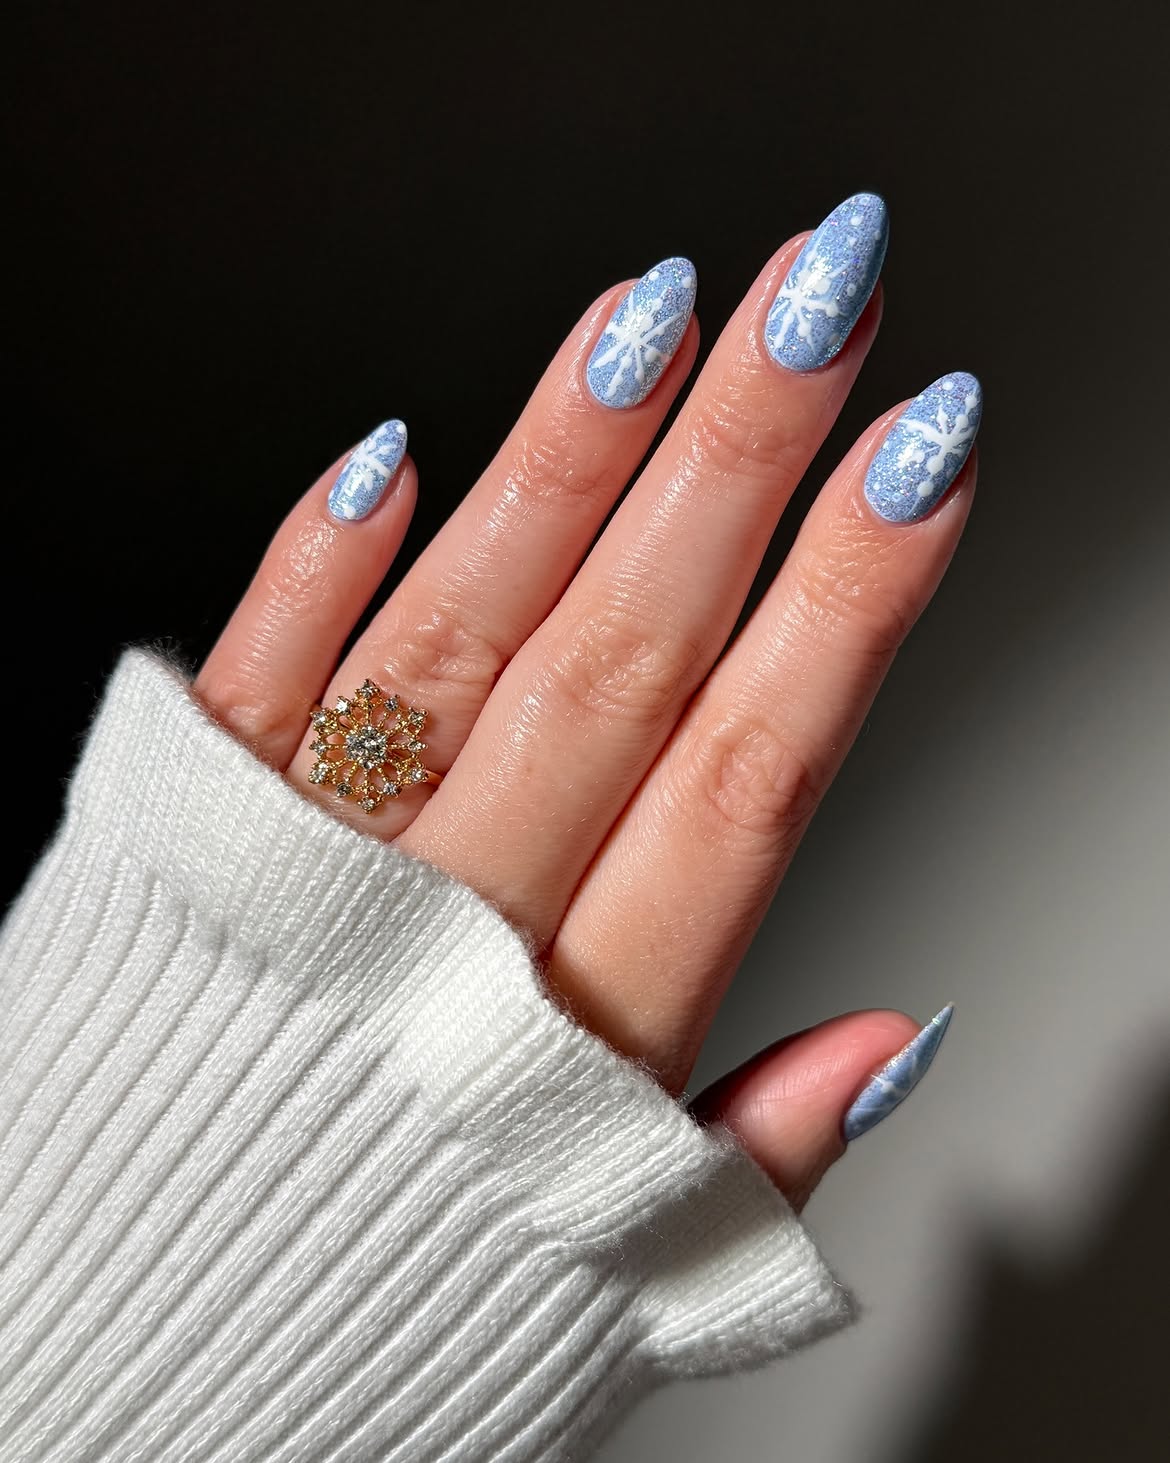
Frosted blue glitter creates the snowy background, while large white snowflakes make each nail feel playful and wintry. The repeating color scheme keeps the set coordinated even though every snowflake is placed a little differently.
Start with the background. Apply a pale blue shimmer polish across every nail. A slightly textured sparkle gives the color an icy look.
Add the snowflakes. Beginners can use white nail stickers or a stamping plate. For simple freehand art, draw three crossing lines, then add short branches near each tip.
Keep the finish smooth. Let the white details dry before adding a clear glossy coat. This helps level the raised design and protects the glitter underneath.
Let the blue polish dry before adding white details.
Vary the placement so each snowflake has room to stand out.
Do not press hard with the detail brush or the lines may spread.
Avoid adding thick top coat before the artwork has dried.
14. Forest Green Nails With One Tiny Bow Accent
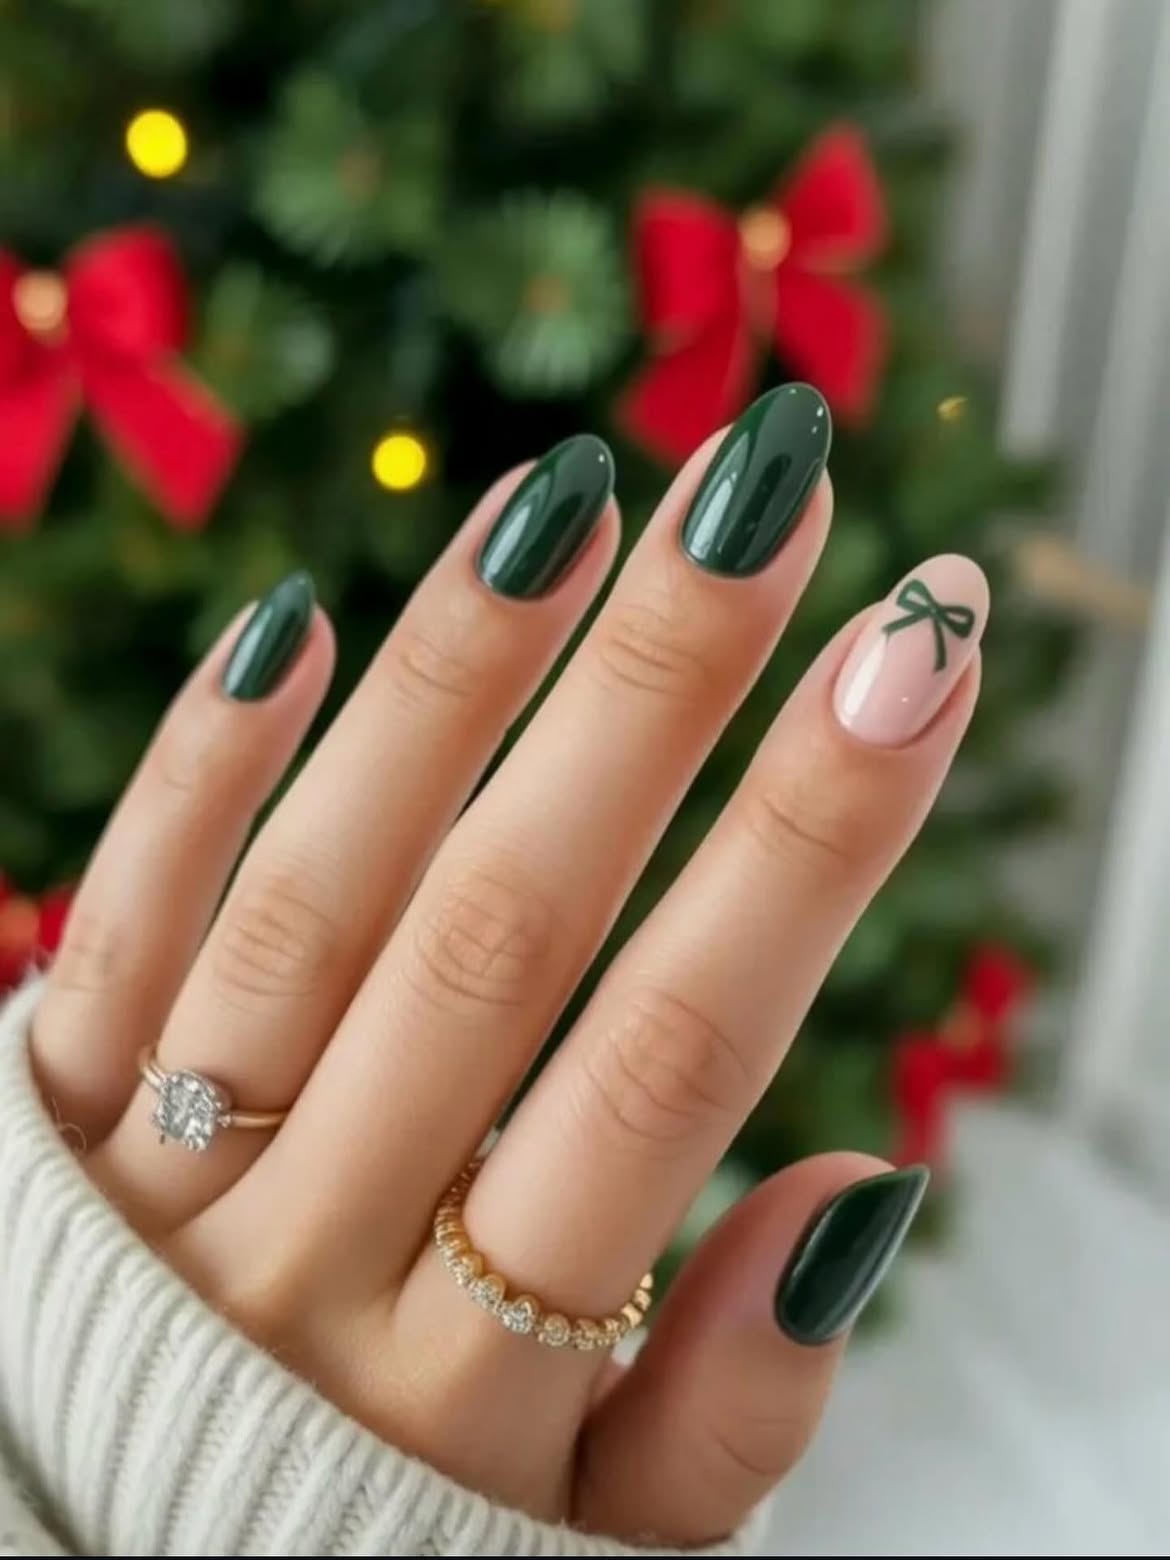
One small bow does all the decorating in this festive manicure.
Deep forest green covers four glossy almond nails. A sheer blush accent nail breaks up the dark color and gives the thin green bow room to stand out. The result feels seasonal without filling every nail with detailed art.
This is a smart option for beginners because the artwork stays on one finger. Paint two small loops near the nail tip, add a tiny center knot, then pull two narrow ribbon lines downward. A bow decal can give you the same neat result if using a detail brush feels tricky.
What You Need
15. Soft Blue Winter Nails With Simple White Flowers
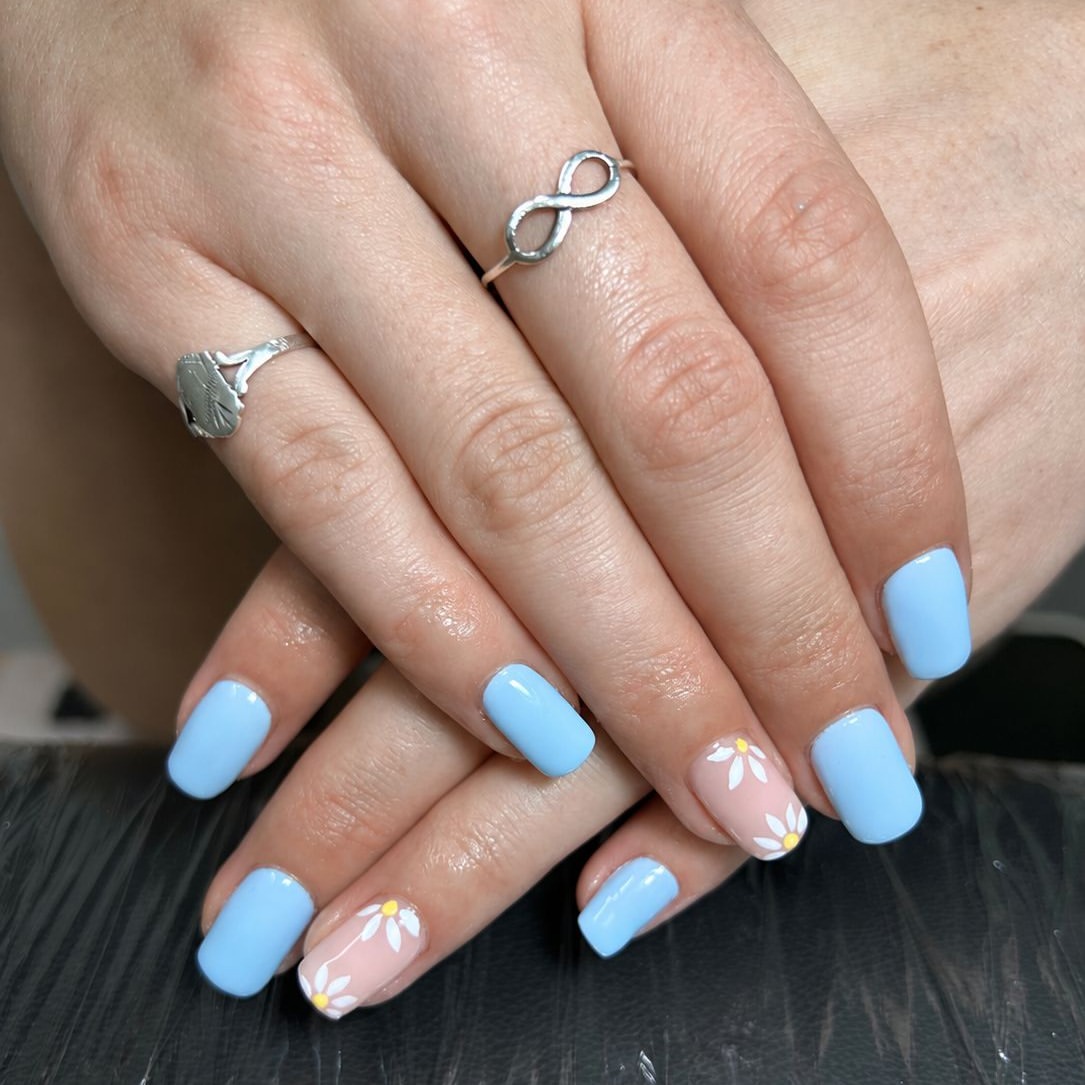
Cool blue polish gives this manicure a calm, frosty base. Two sheer pink accent nails bring in small white flowers with sunny yellow centers, creating a softer take on winter nail art.
Color balance: Use blue on most nails so the floral details feel like small surprises rather than the main event.
Easy artwork: Place one yellow dot first, then add five white petals around it. A dotting tool, toothpick, or small nail sticker can help beginners keep the shapes neat.
Shape note: The short square nails make this design practical for daily wear. Rounded or oval nails can carry the same color pattern just as well.
Let the pale blue carry most of the manicure, then use just two floral accent nails to keep the design easy, light, and balanced.
16. Tiny Christmas Light Nails on a Sheer Pink Base
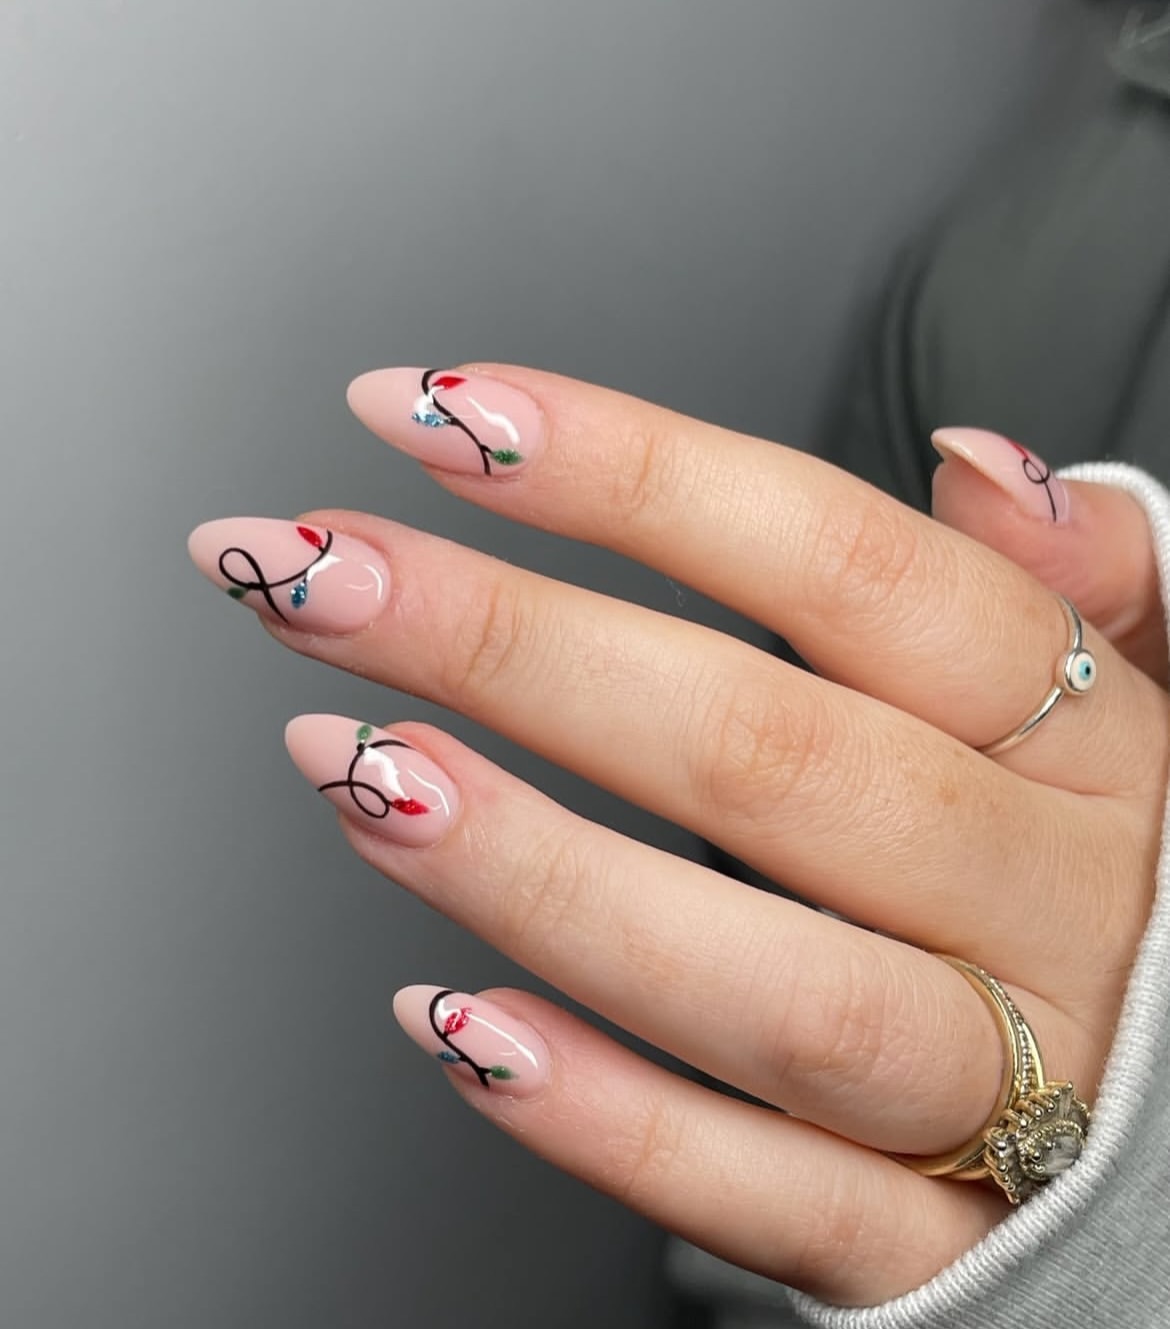
A glossy pink base keeps these colorful holiday lights light and airy. Thin black curves travel across the almond nails like loose electrical cords, while tiny red, green, and blue bulbs bring in cheerful color.
With a detail brush: Paint one simple black curve on each nail. Add small oval bulbs beside the line, then place a tiny black mark where each bulb meets the cord.
With nail decals: Apply the sheer base first, let it dry, then place light strand stickers at slightly different angles. This route gives beginners crisp shapes without needing steady brush control.
Keep the curves loose rather than identical. The changing direction makes the design look like one playful strand moving across the whole hand.
💡 Quick Tip
Leave open space around each bulb. Crowding too many colors onto one nail can hide the delicate black cord and make the artwork harder to read.
17. Milky Pink Glitter Nails With Soft Snowy Sparkle
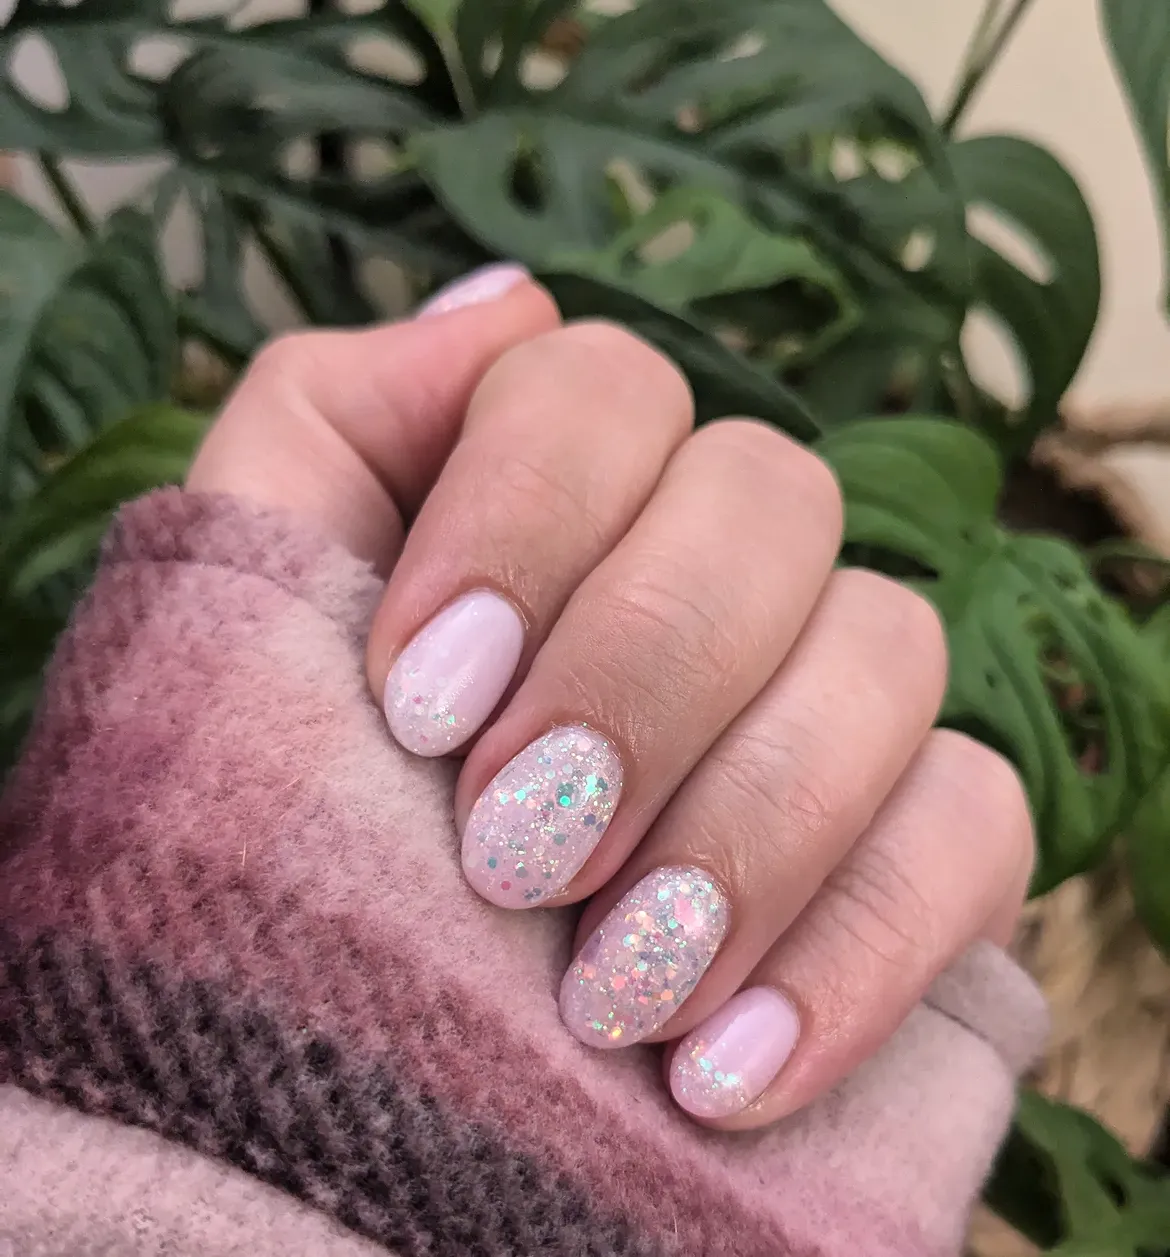
This set proves winter sparkle does not need a dark or bold base. Milky pink polish keeps the nails soft and clean, while iridescent glitter reflects hints of mint, silver, and pale peach.
The two center nails carry the heaviest sparkle. The outer nails use a lighter glitter dusting, which stops the manicure from looking crowded. Short rounded nails also make the finish practical and easy to maintain.
No drawing tools are needed. Apply the milky shade first, dab glitter polish onto the chosen areas, then move a few larger pieces into place with a toothpick. Finish with a generous clear coat so the chunky glitter feels smooth.
18. Pastel Stripes and Dots for Simple Winter Nails
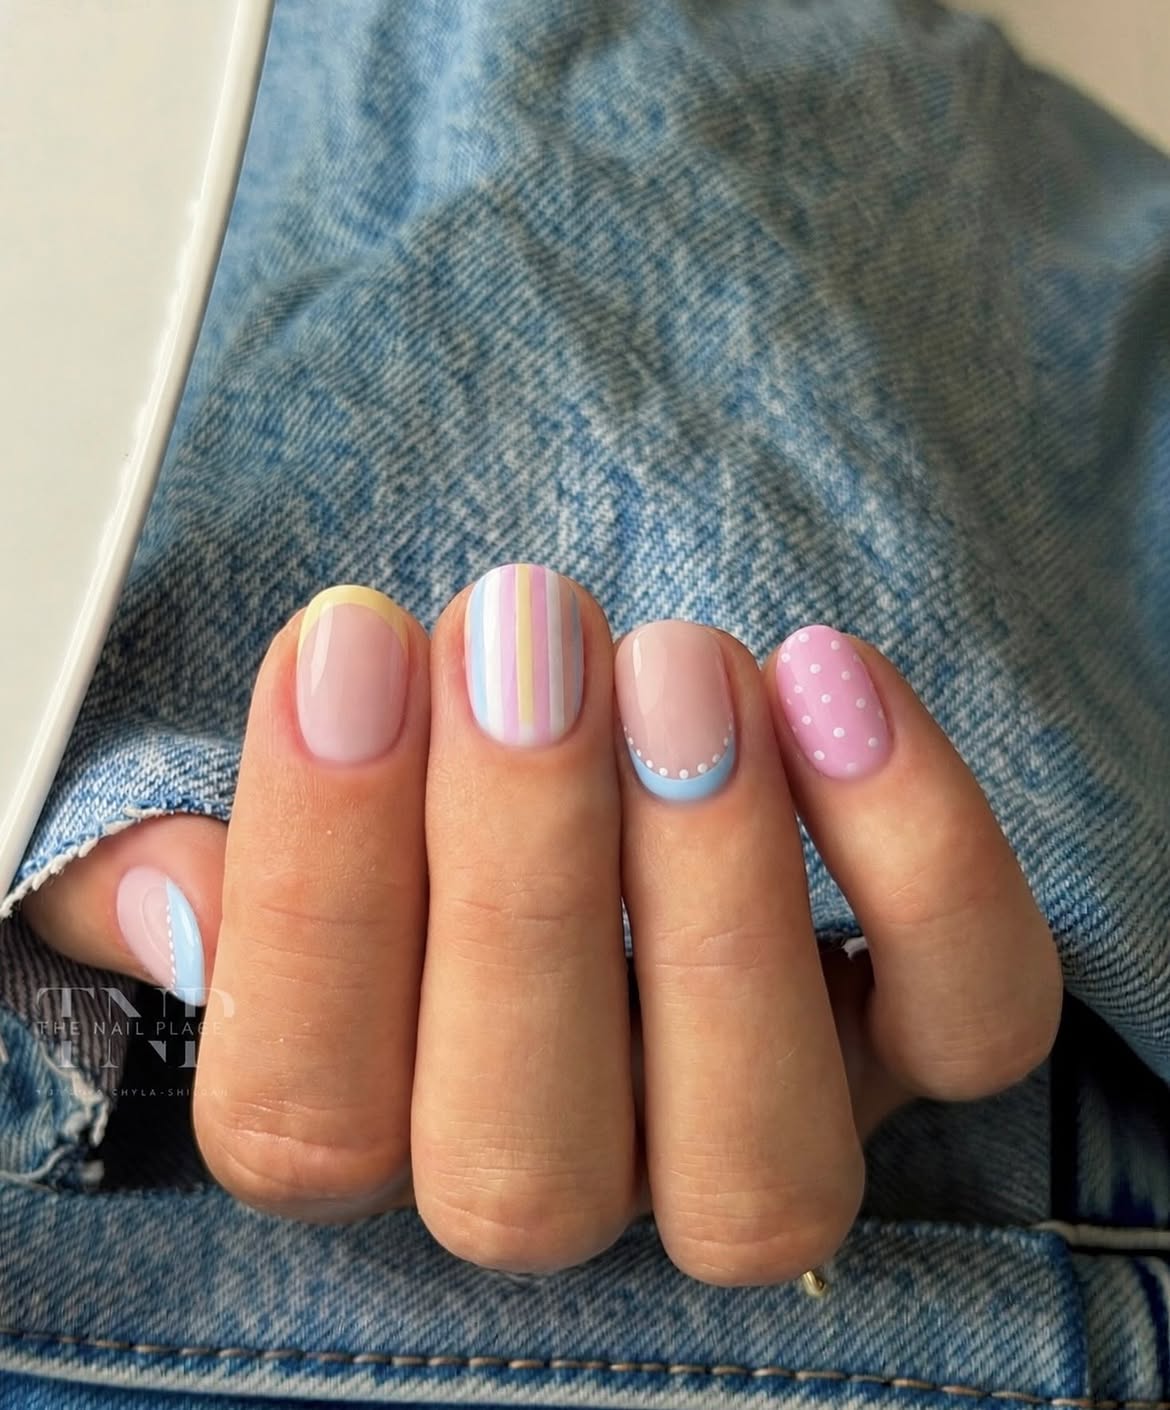
Soft pastel colors can brighten a grey winter day without relying on dark seasonal shades. Each short nail has its own pattern, including a yellow French tip, slim vertical stripes, a blue curved tip, and neat white dots.
The repeated pink, blue, yellow, and white palette keeps the mixed designs connected. Beginners can complete one pattern at a time instead of trying to match every nail. Use striping tape or a thin brush for the straight lines, then make the dots with a small nail tool or toothpick. A sheer pink base helps all four patterns feel like part of the same set.
- ▸Easy start: Add one curved pastel tip.
- ▸Neat detail: Place tiny white dots along the curve.
- ▸Bold pattern: Paint narrow vertical pastel stripes.
- ▸Playful finish: Scatter white dots over a pink nail.
19. Deep Berry Polish for Crisp Winter Color
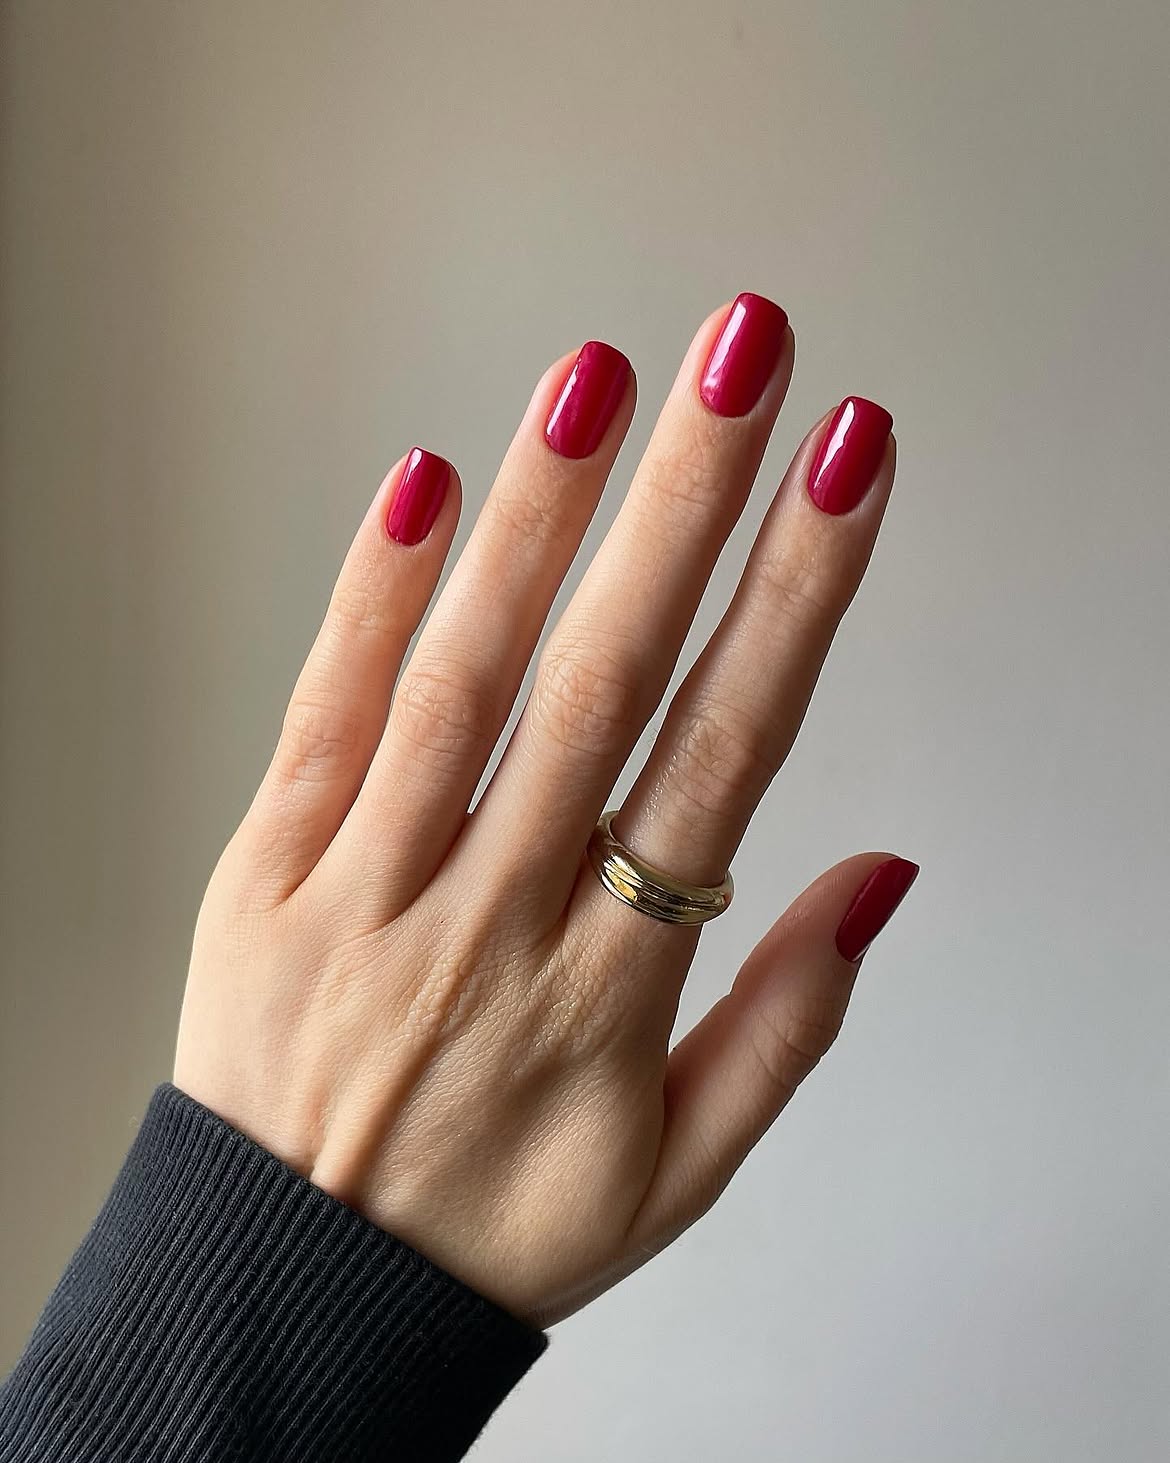
Berry polish brings all the impact here. The rich shade sits between pink and red, giving a simple manicure more depth than a pale neutral without requiring glitter or nail art.
Short square nails suit the strong color because the clean edges make the finish look sharp. Start with a clear base coat to reduce staining, then apply the berry polish in thin layers. Leave a narrow space around the cuticle rather than pushing color into the skin. A glossy top coat brings out the depth and helps the surface catch the light.
This is a useful winter choice when you want bold color with very little setup.
| One Thick Coat | Two Thin Coats |
|---|---|
| Can gather near the cuticle | Gives better control around the edges |
| May look uneven as it dries | Builds smoother, richer color |
| Takes longer to set | Helps reduce dents and smudges |