17 Elegant Winter Nails for Women Over 40 to Wear Everywhere
Winter is a lovely time to bring deeper color, soft shimmer, and clean detail to your manicure. The trick is choosing a design that feels current without becoming too busy, too harsh, or difficult to wear. These Elegant Winter Nails for Women Over 40 offer plenty of range, including rich plum and emerald shades, glossy chocolate tones, milky white fades, glitter tips, and crisp French shapes.
Some looks keep things simple with one strong color or a soft gradient. Others use fine flowers, lace patterns, pearl snowflakes, animal print, metallic outlines, or a single raised accent. You will also find options for short square nails, neat oval shapes, classic almonds, and longer pointed tips.
Use these ideas as a starting point rather than a strict set of rules. You can borrow a color, change the nail length, reduce the sparkle, or keep just one detailed feature nail. The goal is a winter manicure that suits your hands, your daily routine, and the amount of detail you enjoy wearing.
17 Elegant Winter Nails for Women Over 40 Designs 2026
1. Layer Rich Plum With Soft Mauve Details
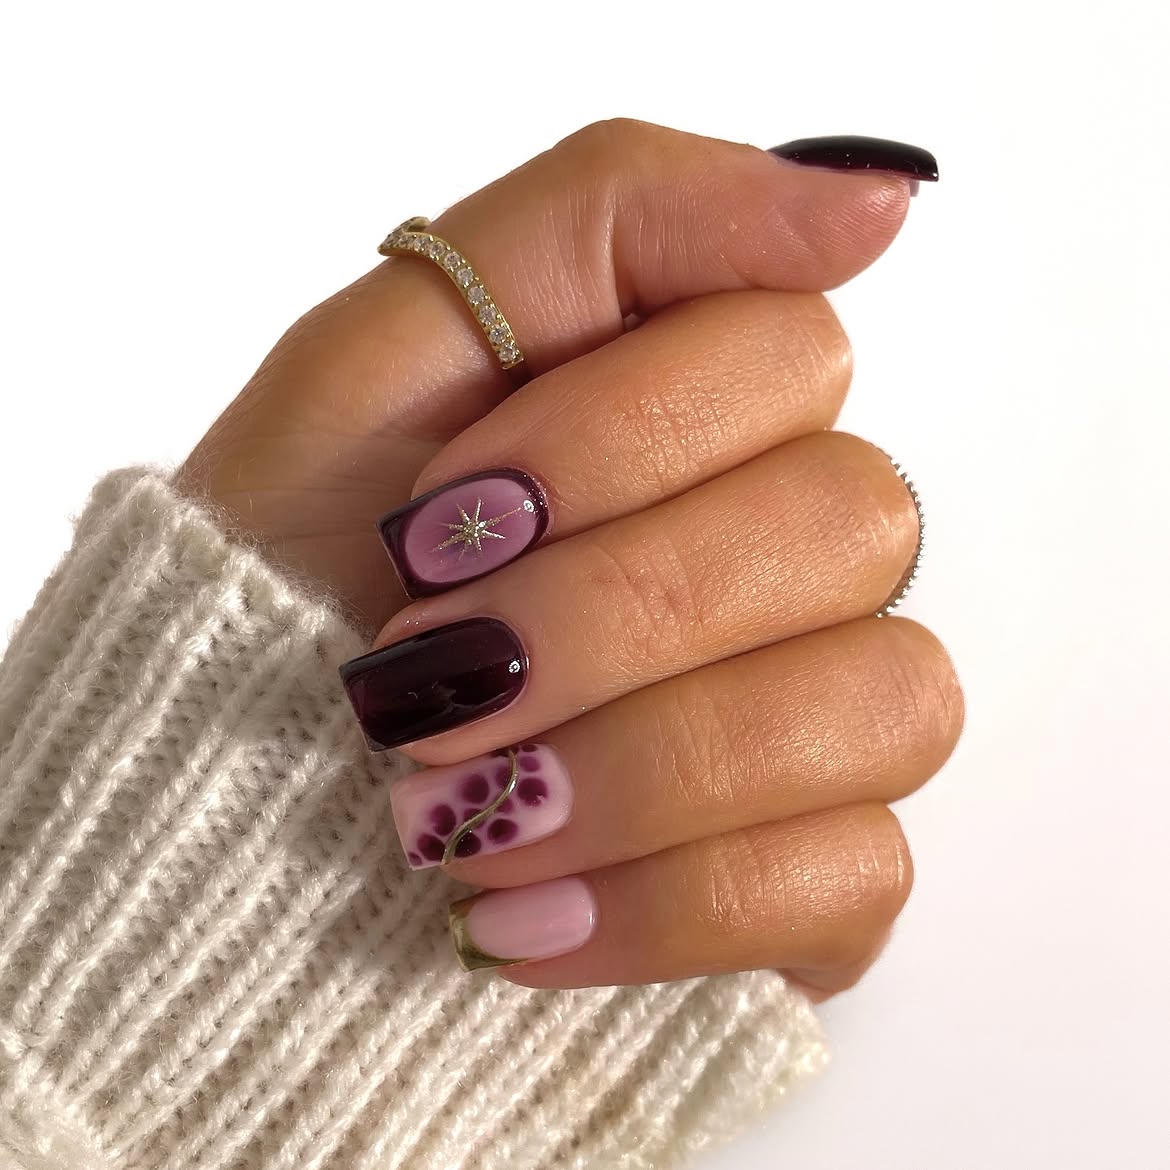
Plum feels more refined when it is used as a small color story instead of one flat shade. Glossy wine colored nails sit beside sheer mauve panels, a fine starburst, and a soft berry petal design.
What makes the manicure work:
- Solid plum nails give the set depth.
- Pale pink breaks up the darker shades.
- Thin metallic lines add light without heavy sparkle.
- Two detailed nails create interest while the others stay calm.
A softened square shape keeps the dark edges crisp and wearable. Ask for slightly rounded corners if you want the same neat finish with less sharpness.
2. Balance Cranberry Red With Fine Ribbon Art
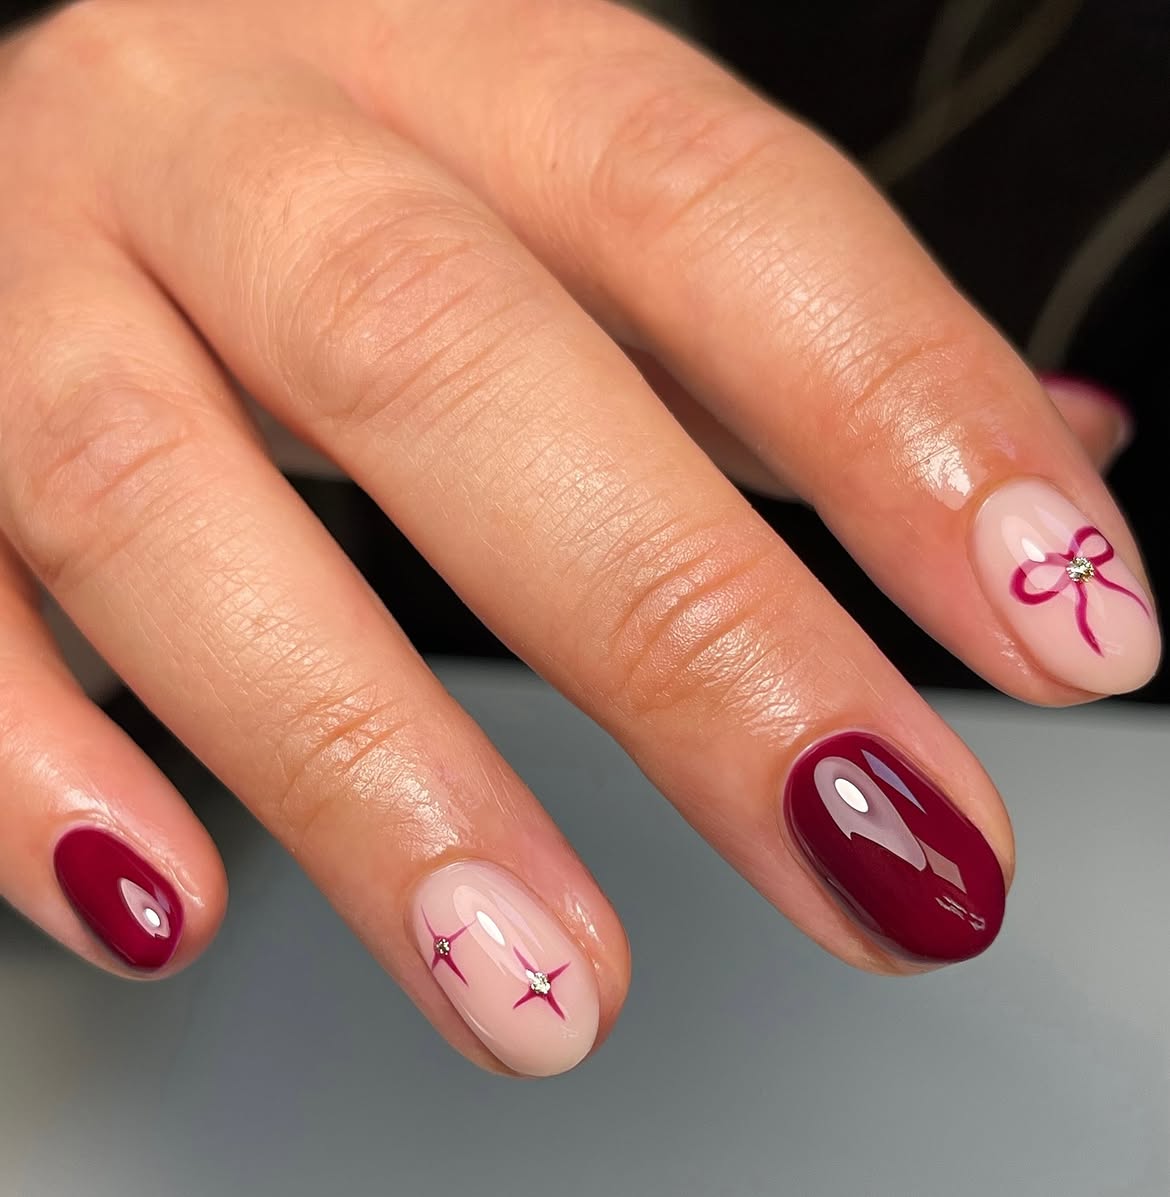
Deep cranberry supplies the winter drama, while the sheer blush nails keep the manicure light. The slim ribbon details feel playful without looking busy because each one has plenty of open space around it.
How to get the look:
- Choose a glossy cranberry shade for two or three nails.
- Use a soft blush base on the remaining nails.
- Paint the ribbons with thin lines that match the solid color.
- Place one tiny reflective accent at the center of each design.
Keep the ribbons small and slightly different rather than forcing them to match exactly. That delicate scale helps the manicure feel polished on short almond nails.
💡 Quick Tip
Match the ribbon color to the solid cranberry nails. That small repeat makes the mixed design feel connected rather than scattered.
3. Soften Zebra and Leopard Tips With Buttery Yellow
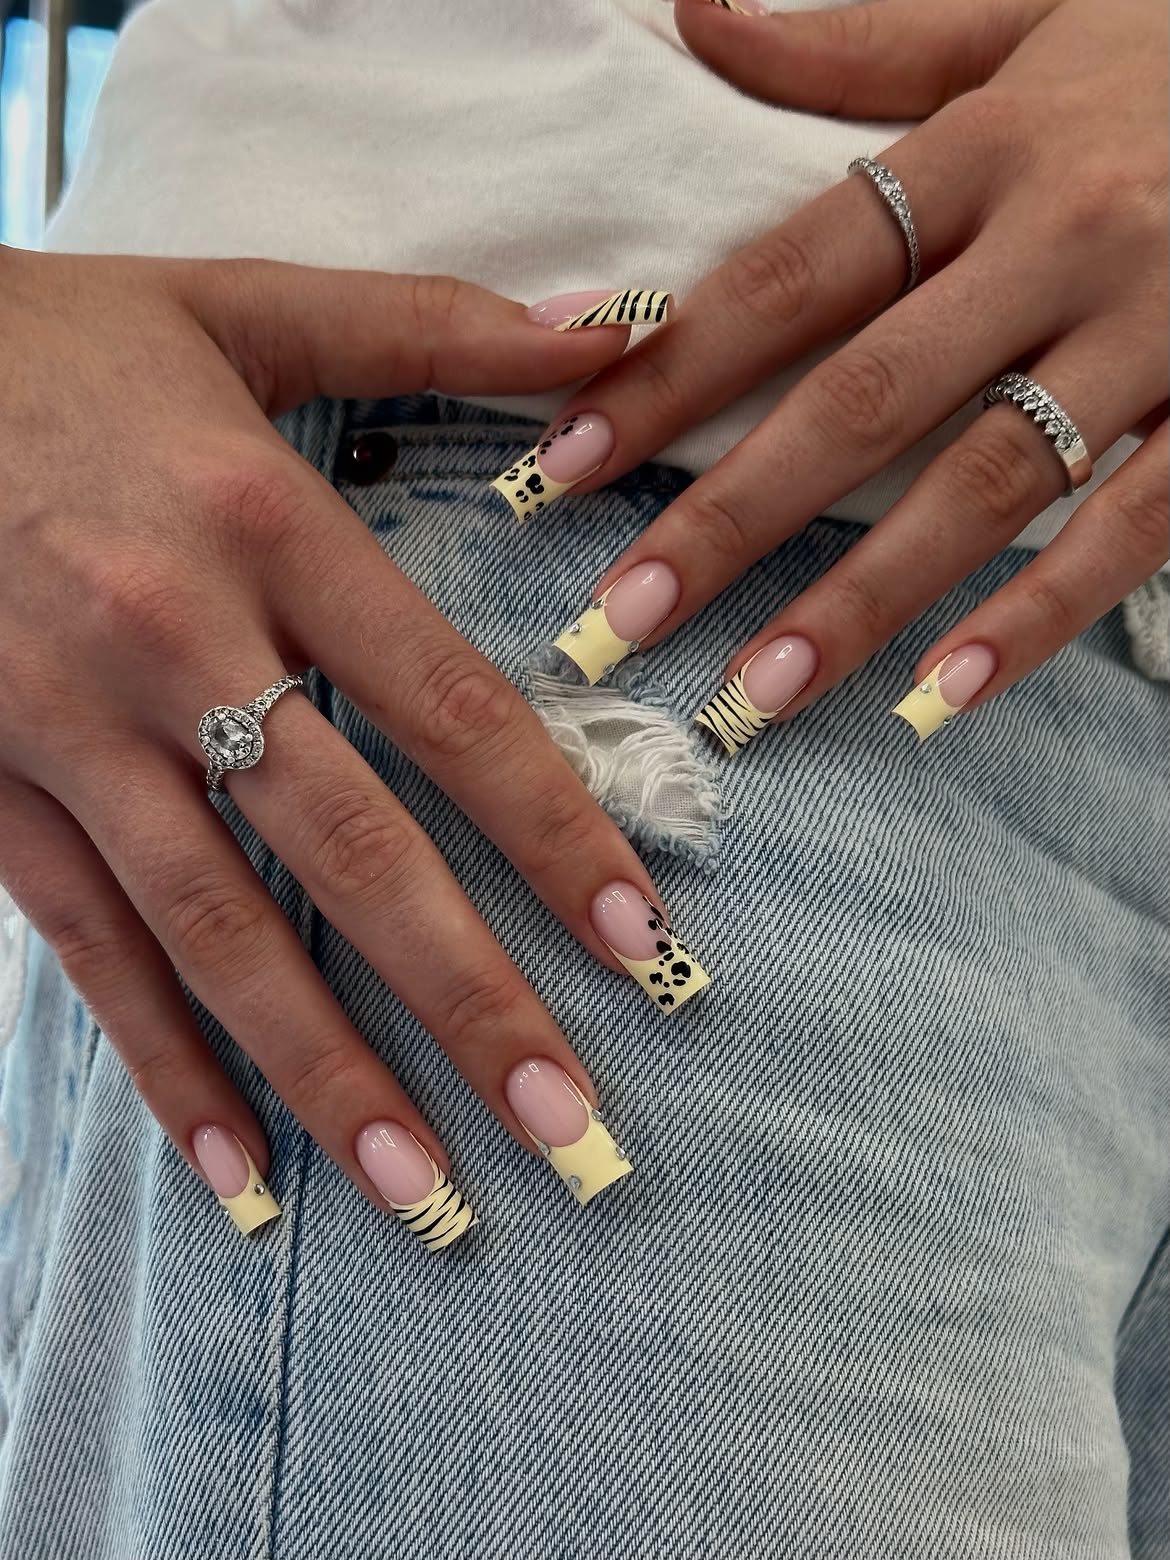
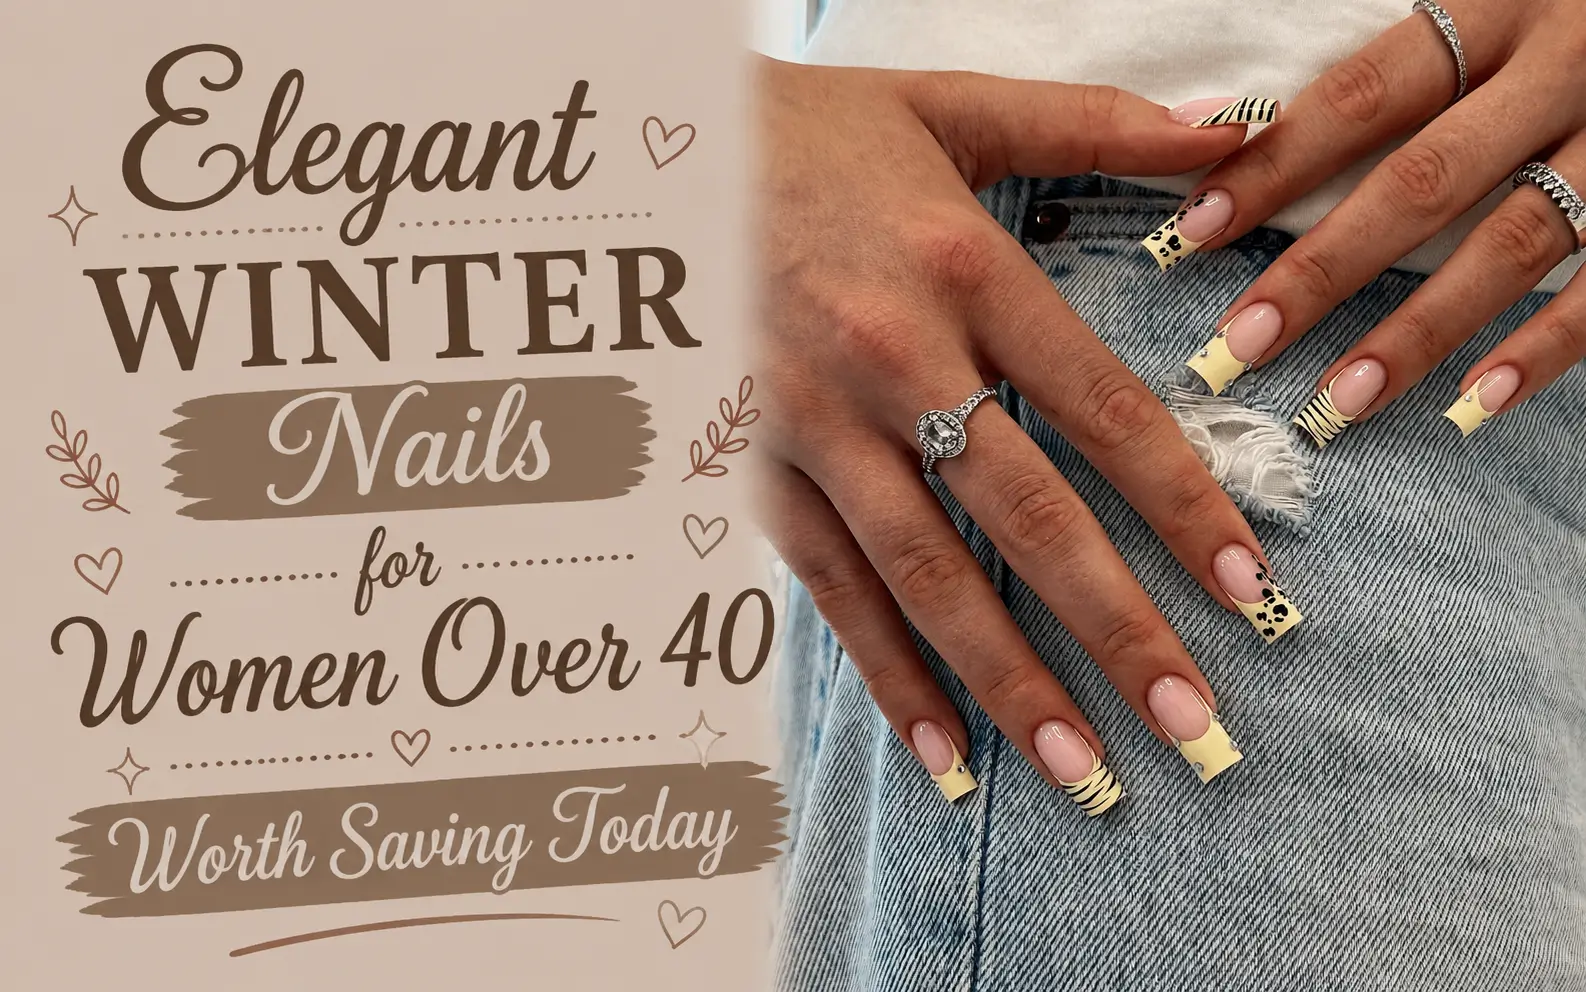
Animal print does not have to make a winter manicure feel dark or heavy. A sheer blush base keeps most of the nail quiet, while pale yellow tips carry the bold detail.
Base: The natural pink tone creates a clean break between the hand and the patterned tips.
Pattern: Alternating zebra lines and leopard spots give each nail its own look without changing the main palette.
Detail: Fine metallic curves and tiny reflective accents bring a dressier finish to the long square shape.
The shared yellow tip is what holds everything together. Keep the black markings thin and leave some open space so the print stays crisp.
Repeat the same pale yellow across every tip.
Alternate the prints instead of placing both on one nail.
Extra polish colors that compete with the animal print.
Large gems beside the already detailed tips.
For more beginner-friendly manicure inspiration, save these 20 Winter Nails You Can Do at Home before choosing your next cozy winter look.
4. Mix Emerald Gloss With Silver Frosted Accents
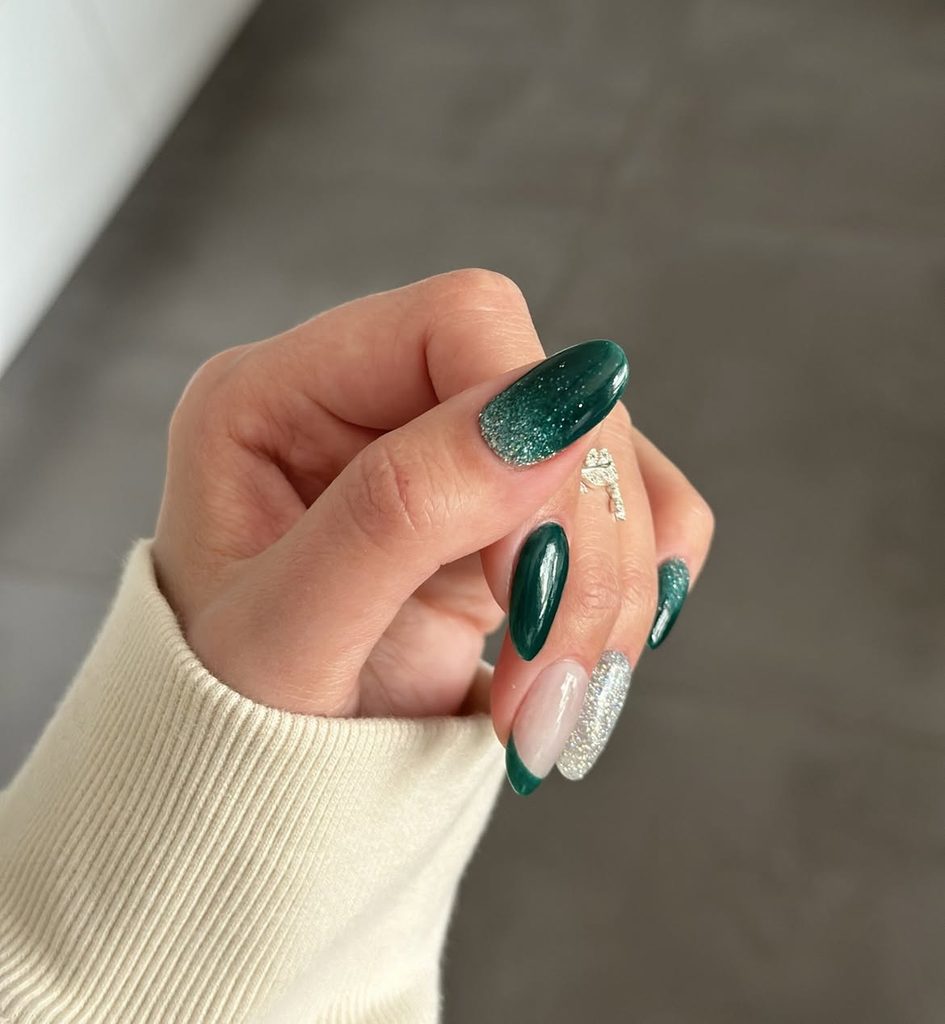
Emerald carries enough depth to look striking through winter, while silver glitter brings in a cooler point of light. The almond shape helps both finishes look smooth rather than heavy.
Across the hand, the color moves in a clear rhythm: glossy green, bright silver, sheer blush, then green again. The glitter fade on the thumb connects the solid polish to the full silver accent nail.
A green tip over the sheer nail gives the eye a quiet place to rest. If you prefer less sparkle, keep the fade and replace the full glitter nail with a thin silver tip.
One dark green finish across every nail can make the color feel dense.
Silver glitter and one sheer accent open the design while keeping emerald in charge.
5. Outline Burgundy French Tips With a Fine Blush Curve
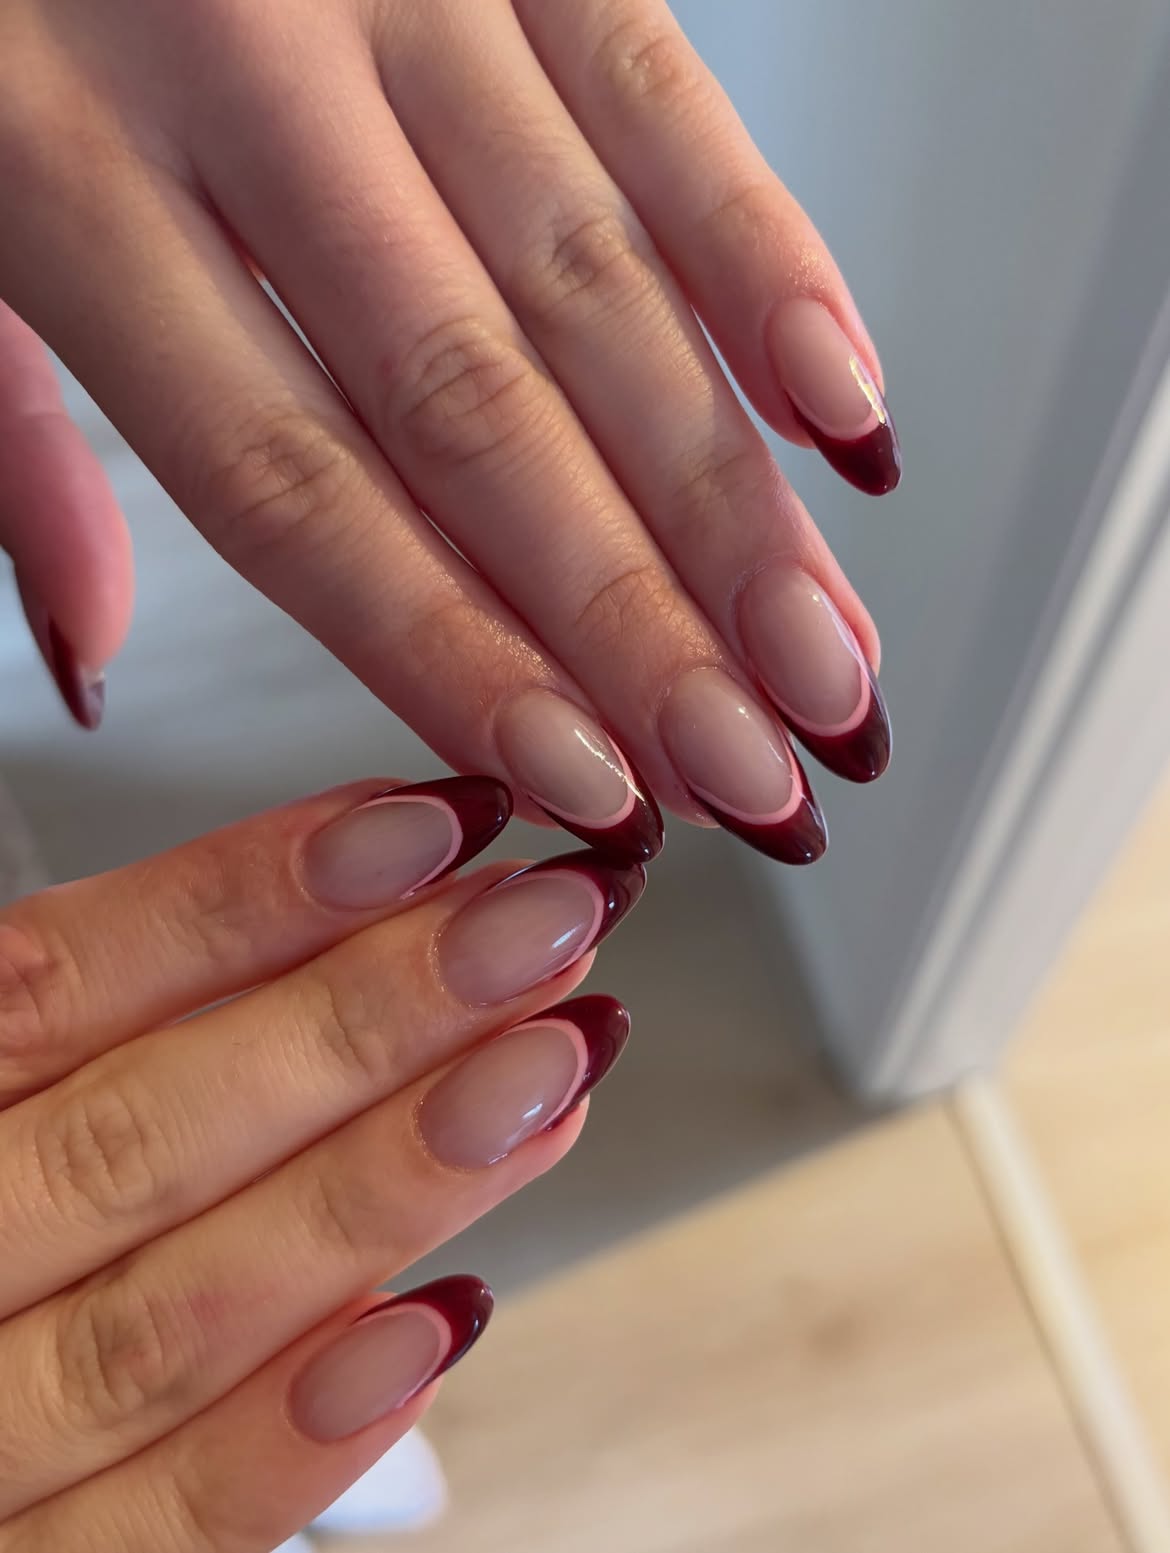
A burgundy French manicure keeps the clean structure of a classic tip but gives it a deeper winter mood. The sheer pink base stays close to the natural nail, so the wine colored edge looks crisp without making the entire manicure dark.
The formula: sheer pink base + deep burgundy tip + one slim blush outline.
Look closely at the border. The fine pink curve follows the burgundy tip and creates a soft double edge. That small detail makes the design feel more considered on the almond shape.
For shorter nails, narrow the burgundy section and keep the inner curve delicate. The balance between those two lines matters more than added length.
Keeping the blush outline much slimmer than the burgundy band adds definition without turning the tip into a busy pattern.
6. Add One Fine White Flower to a Pink French Manicure
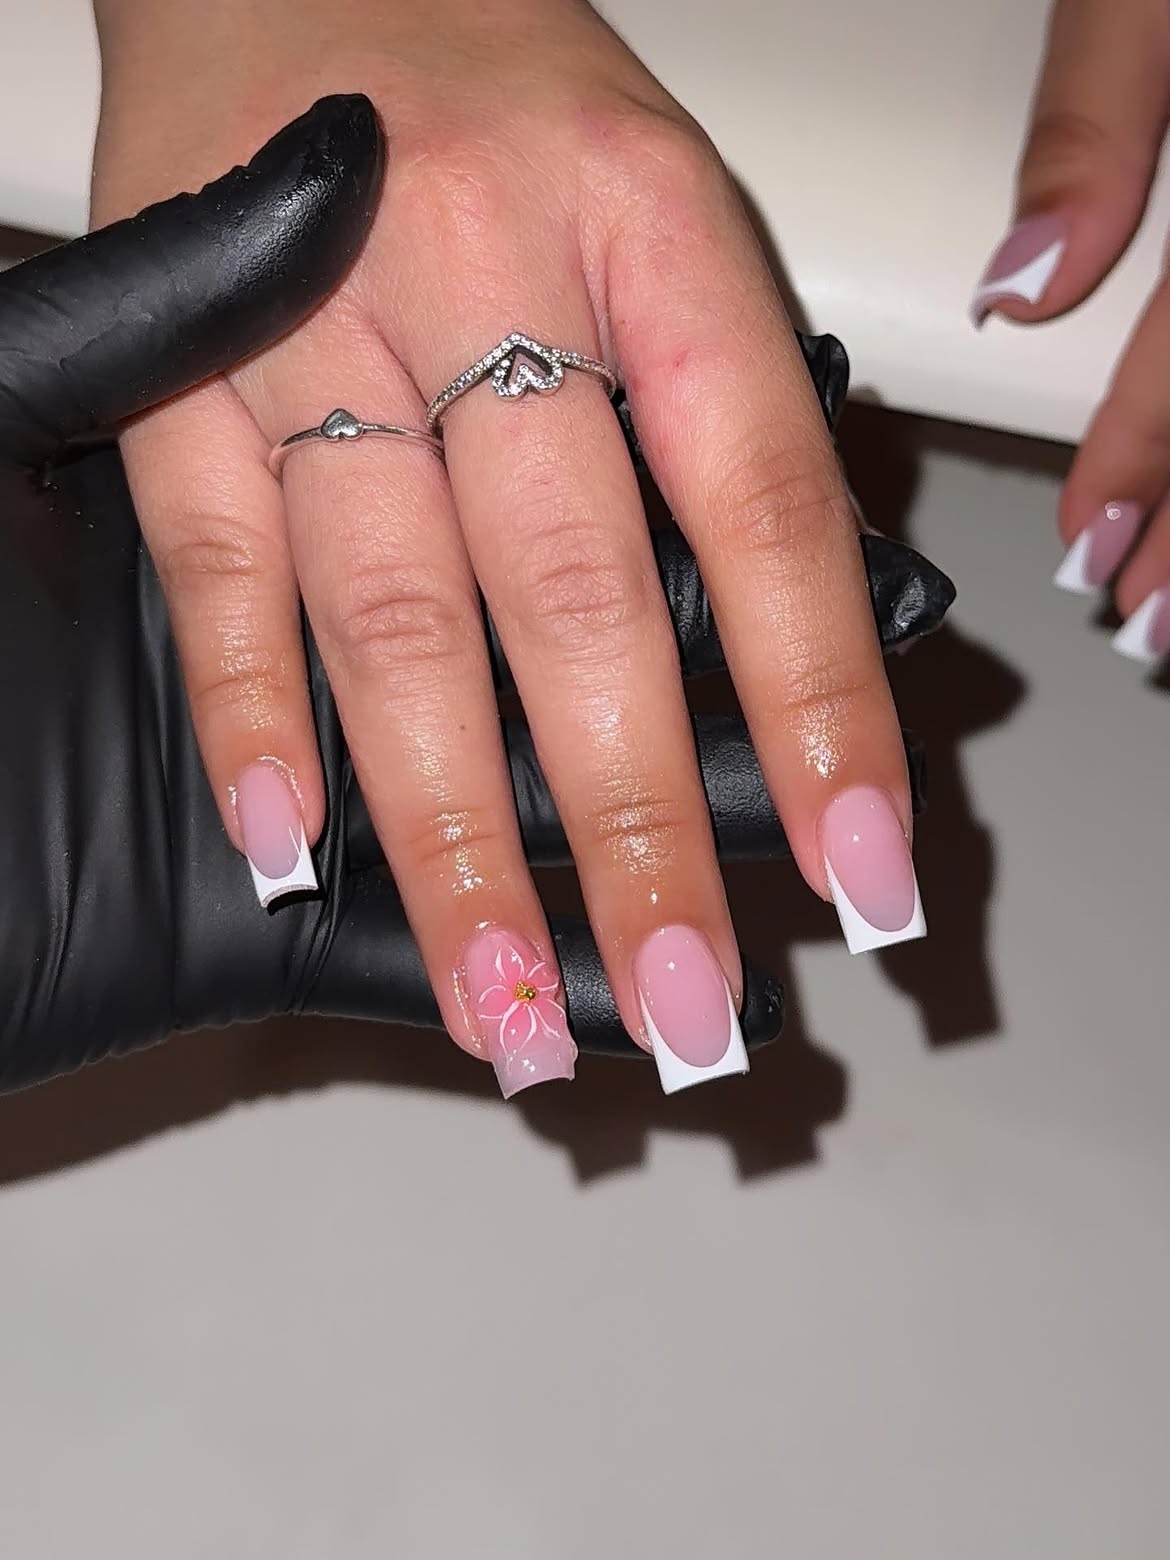
One accent nail is enough.
Most of the manicure keeps a sheer pink base with crisp white tips, giving the long square shape a clean and familiar finish. The ring finger changes the pattern with a delicate white flower and a small metallic center.
Covering every nail with flowers would shift attention away from the French design. Using one bloom keeps the set calm while still giving it a personal detail.
The thin white petals also connect naturally with the tips. Ask for open, airy lines rather than filled petals so the flower does not look heavy against the soft pink background.
Recreate this look
7. Brighten Winter Nails With a Lilac and Fuchsia Split
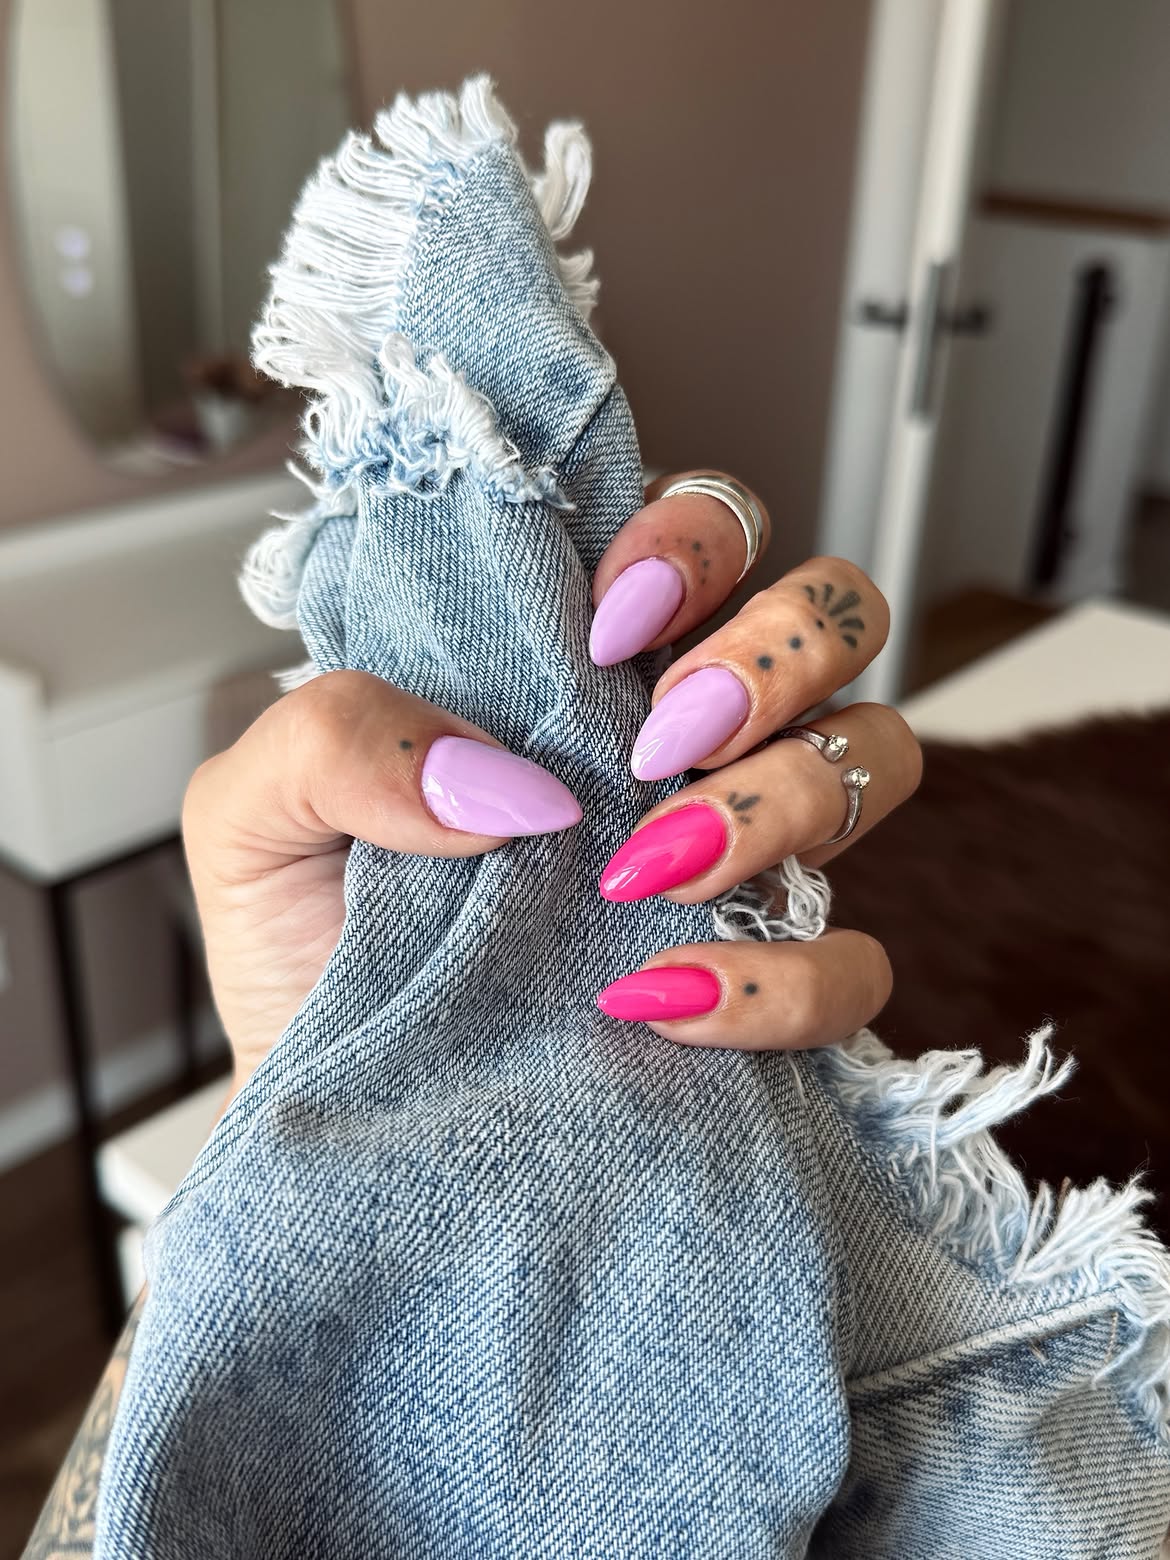
Not every elegant winter manicure needs shimmer or detailed art. Two clear colors can carry the entire design when their placement feels deliberate.
Soft lilac covers three nails and acts as the calmer shade. Vivid fuchsia appears on the final two nails, creating a clean color shift across the hand. Keeping both shades glossy and free from decoration lets that contrast stand on its own.
The almond shape adds another layer of polish. If bright pink feels too bold, replace it with a deeper berry while keeping the lilac side unchanged.
| Softer color split | Brighter color split |
|---|---|
| Use lilac on four nails. | Use lilac on three nails. |
| Keep one berry accent nail. | Place two fuchsia nails side by side. |
| Choose a muted berry tone. | Keep the hot pink vivid and glossy. |
8. Trace Sheer Pink Nails With Rose Glitter Tips
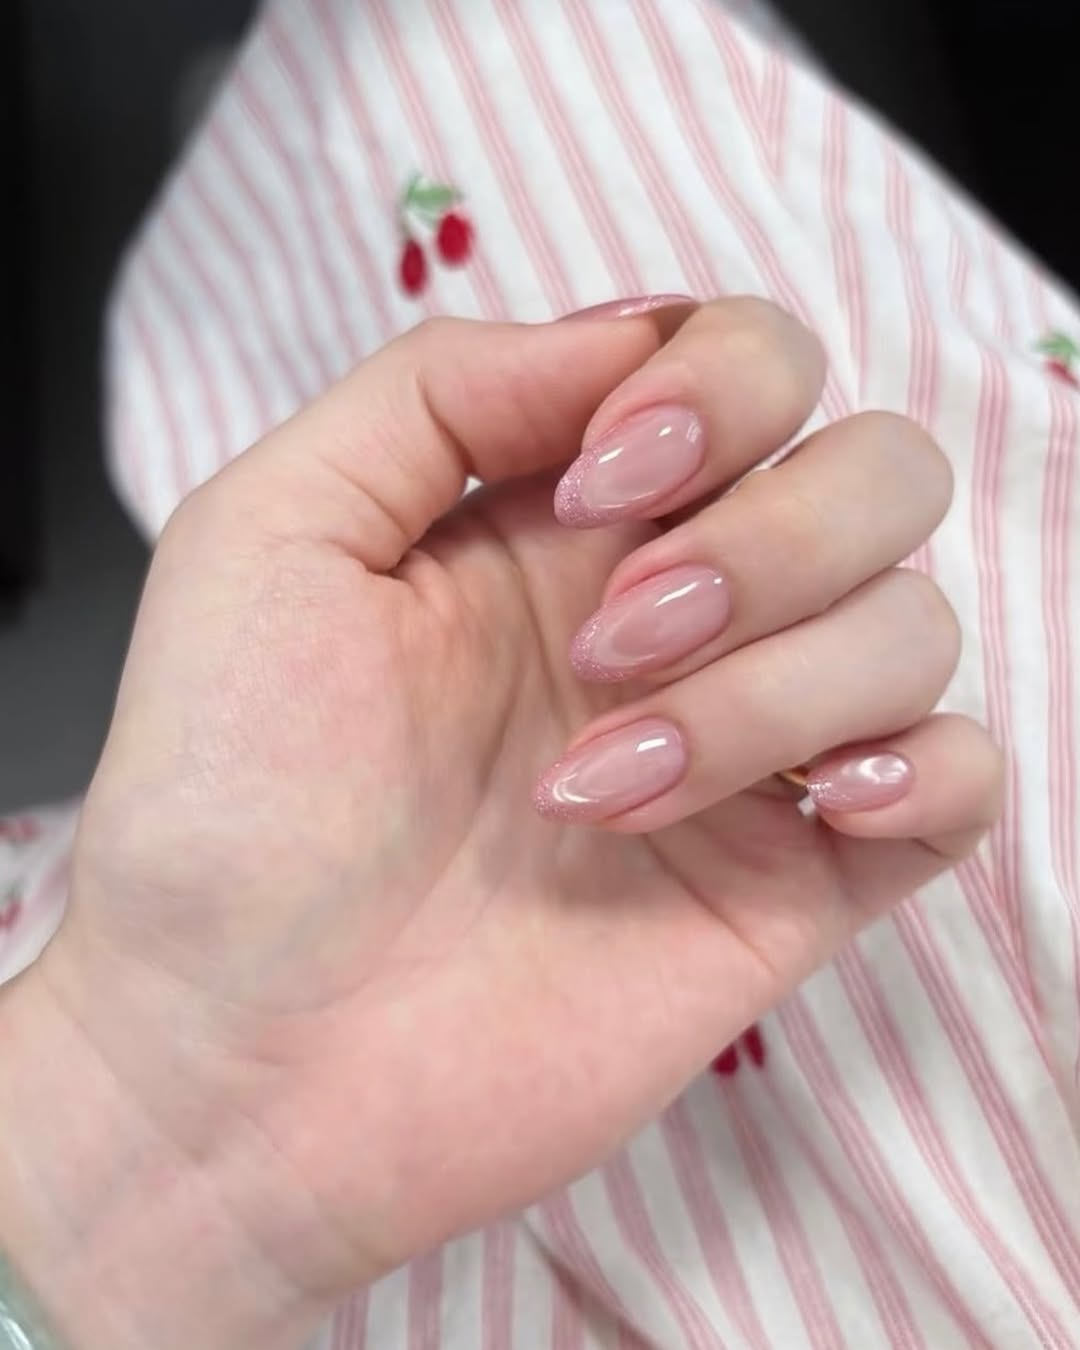
Fine glitter has more impact when it follows a clean, narrow edge. A translucent blush base lets the natural nail tone show through, while rose shimmer adds a soft winter glow around each almond tip.
The close color match is what makes the sparkle feel understated. Pink glitter blends into the base instead of creating a strong contrast, so the manicure stays light even with shine on every nail.
Keep the glitter line even along both sides and slightly fuller near the center of the tip. A fine texture will preserve the smooth outline better than larger glitter pieces.
9. Frame Blush Almond Nails With Berry Patterned Tips
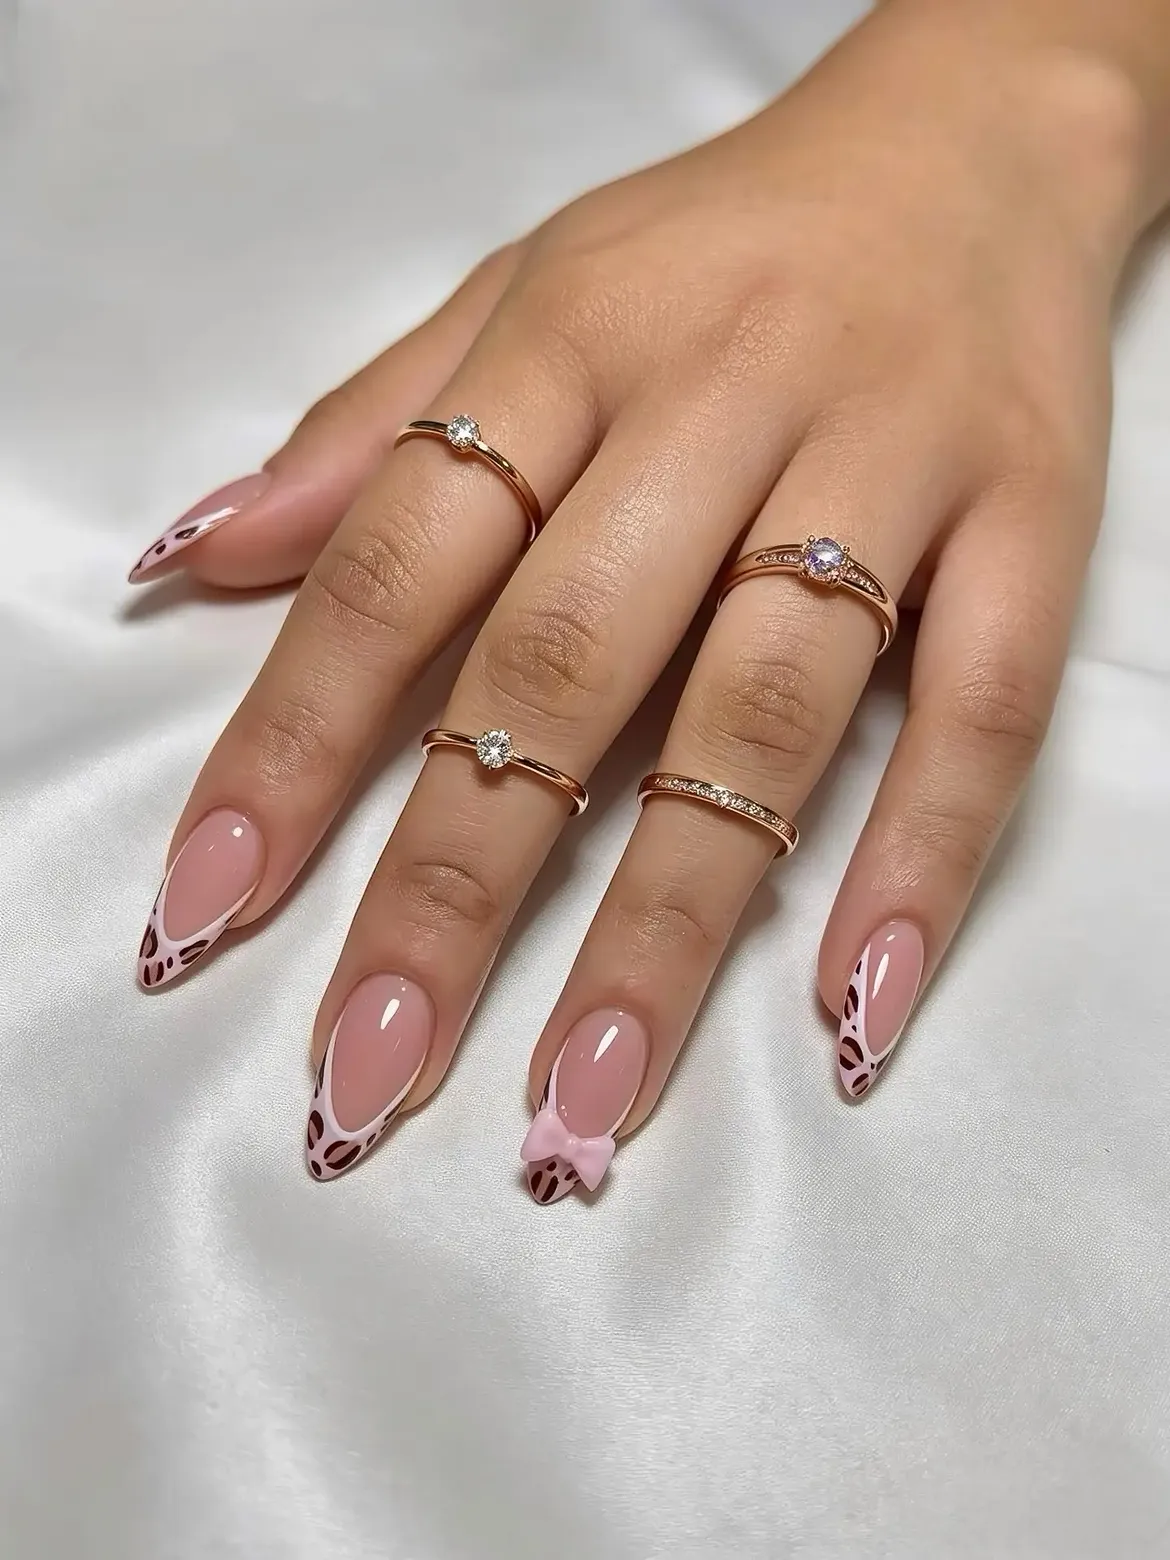
Patterned tips feel more refined when the artwork stays near the edge of the nail. Here, the center remains sheer pink while a curved blush border holds small burgundy marks.
Three details keep the design balanced:
- Fine pale lines separate the pattern from the base.
- Irregular berry shapes give each tip a slightly different finish.
- One raised pink bow creates a clear feature nail.
Keep the bow on a single finger so it does not compete with the patterned edges. The pointed almond shape also gives the tip art enough room without covering the whole nail.
Apply a glossy sheer pink base across every nail.
Trace the curved blush tips, then add loose burgundy markings inside them.
Reserve the raised bow for one feature nail and keep the others flat.
For cozy, low-maintenance ideas that work beyond special occasions, browse these 18 Short Winter Nails for Everyday Wear next.
10. Ground Bold Red Nail Art With Crisp White Tips
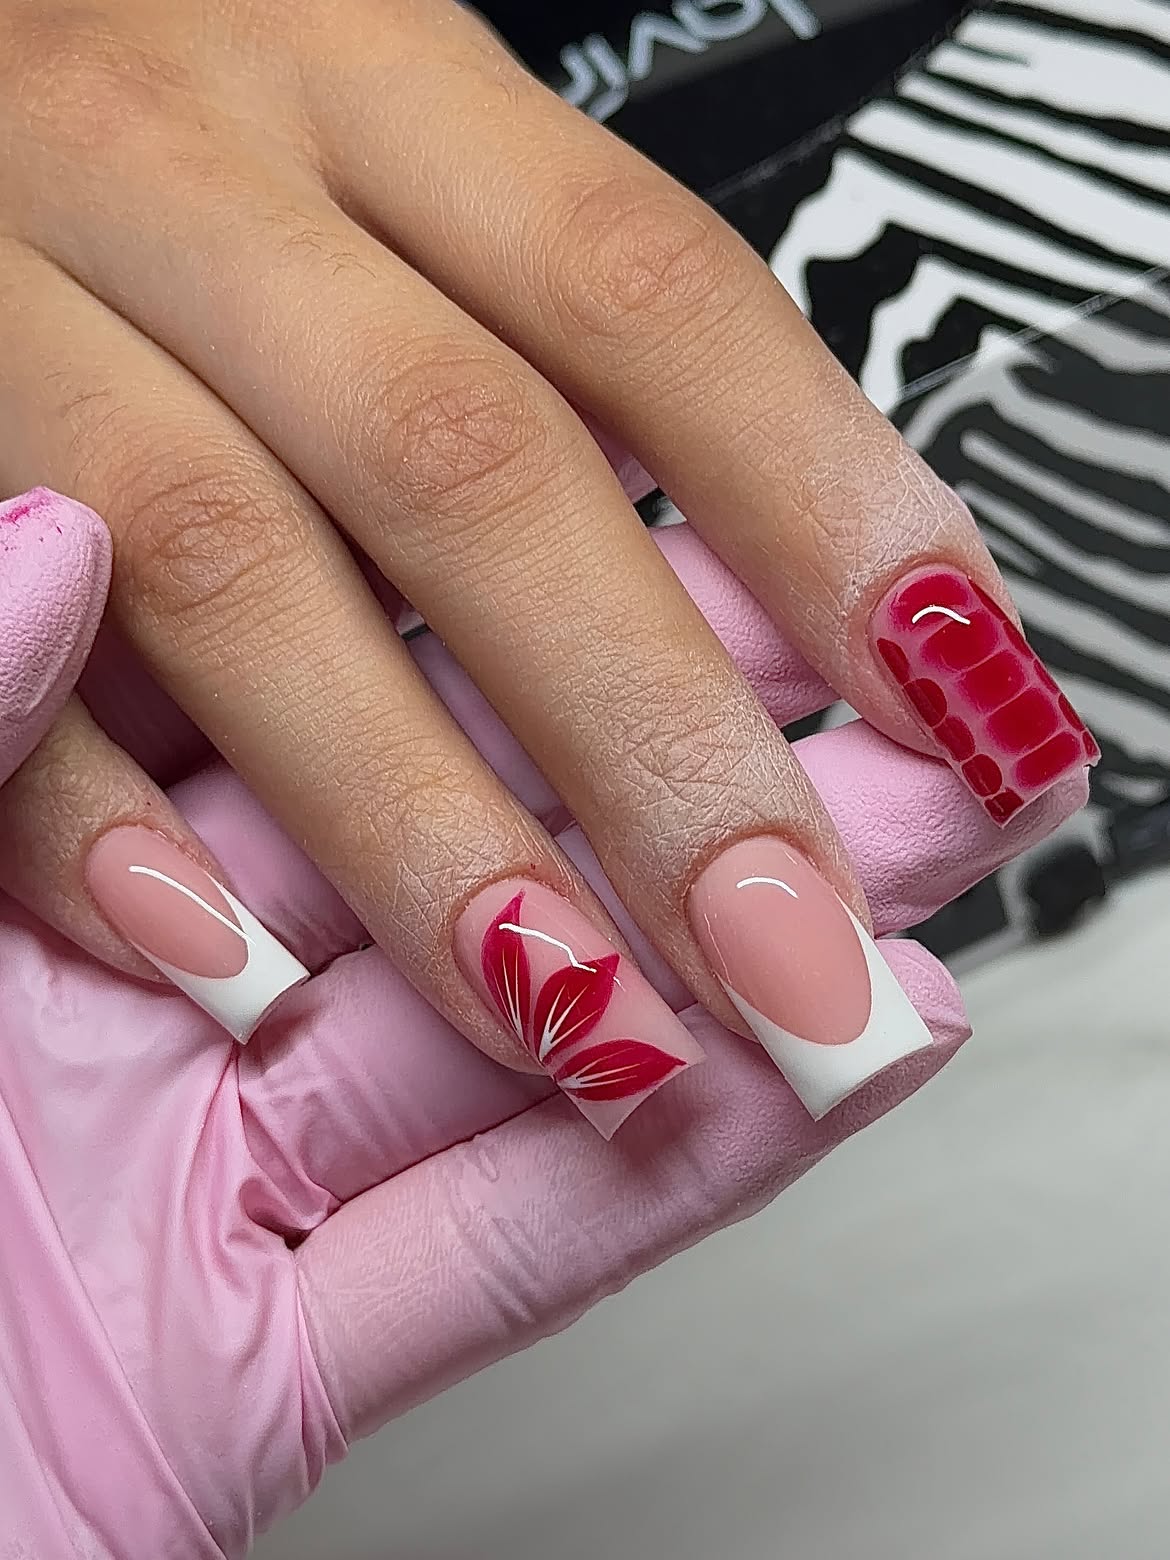
Bold nail art becomes easier to wear when simpler nails create a pause. The white French tips provide that breathing room here, keeping the long square manicure clean around two detailed red accents.
One feature nail uses deep berry petals over the sheer pink base, with fine pale lines running through each shape. Another turns the same red family into a glossy tonal block pattern.
Repeating the red across both detailed nails makes them feel connected even though the artwork is different. Keep the base color and white tips consistent so the mixed designs still read as one manicure.
- ▸ Let the white French tips act as the quiet part of the set.
- ▸ Repeat one berry shade across both feature nails.
- ▸ Pair one flowing floral design with one structured tonal pattern.
11. Warm Up Winter Nails With Chocolate Brown and Gold
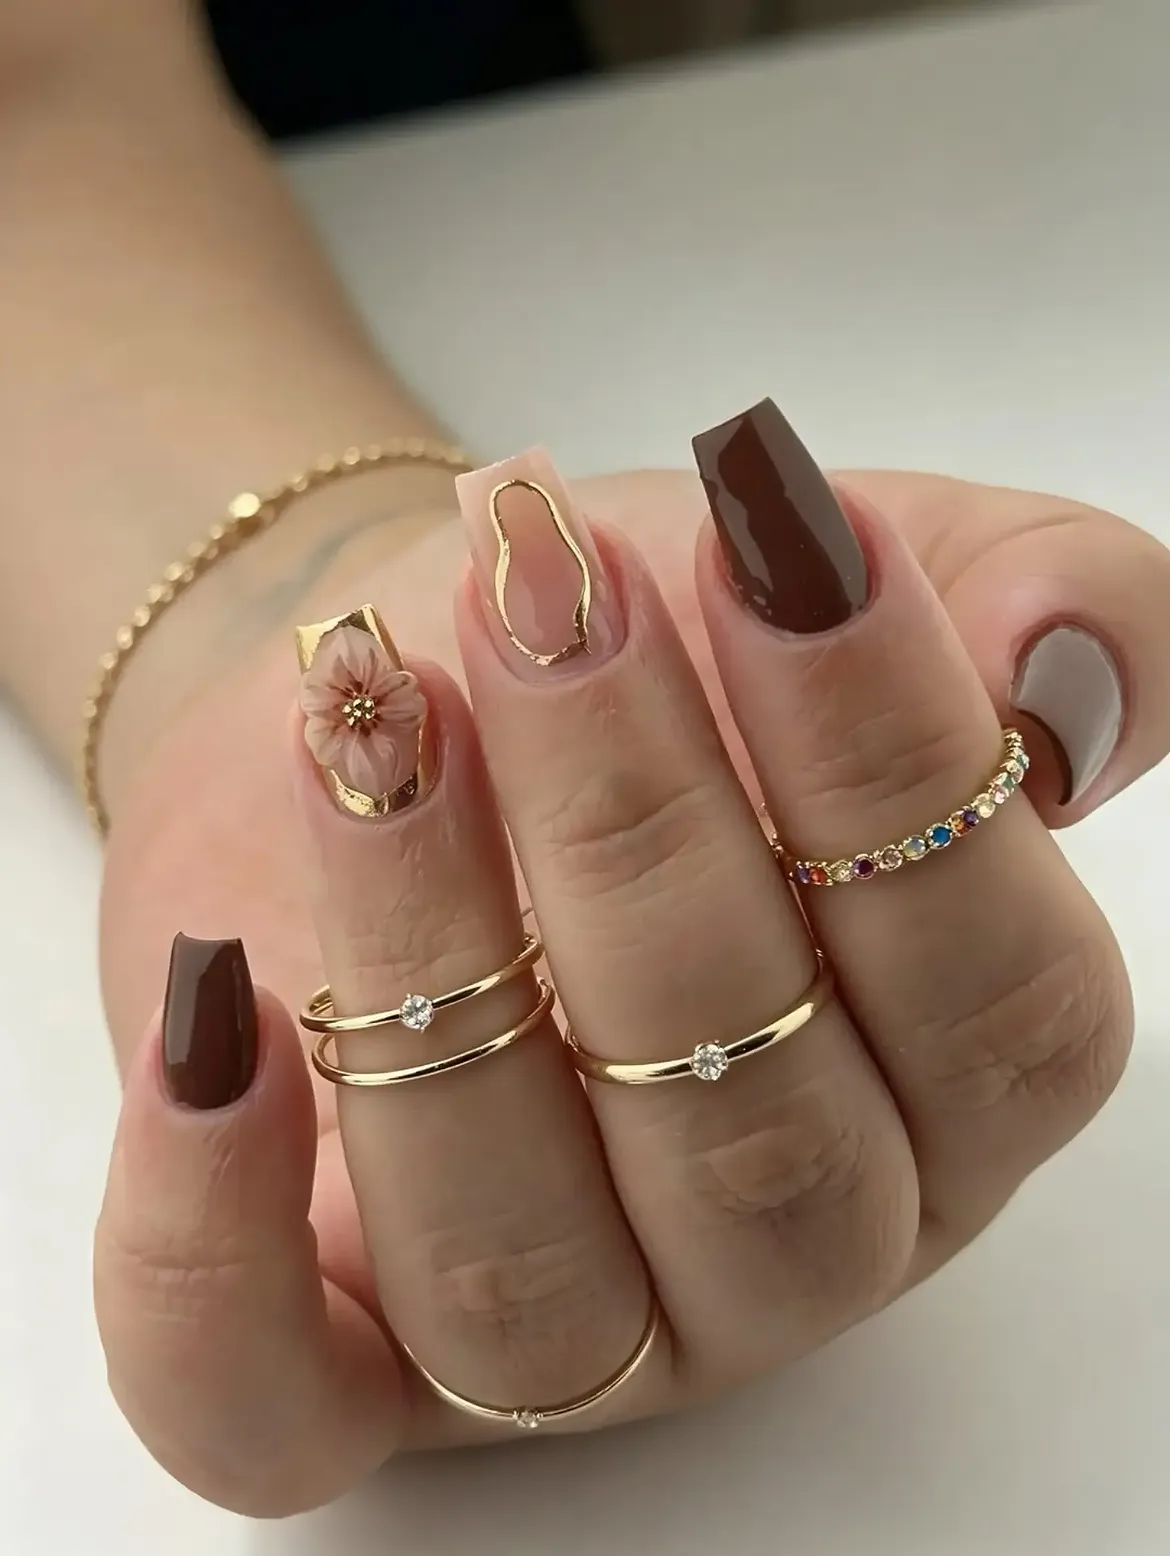
Chocolate brown gives this manicure depth, while taupe and nude keep the darker shade from covering every nail. The long square shape leaves enough room for each accent to stay clear.
What stands out here:
- Fine gold lines frame the soft neutral sections.
- One raised flower creates a central feature.
- A curved brown accent repeats the solid polish on a lighter nail.
- Plain chocolate nails give the detailed pieces room to breathe.
Since the metallic lines and flower already catch attention, keep the brown polish smooth and free from extra decoration. That contrast makes the mixed design feel deliberate.
12. Choose Glossy Tortoiseshell With One Gold Framed Accent
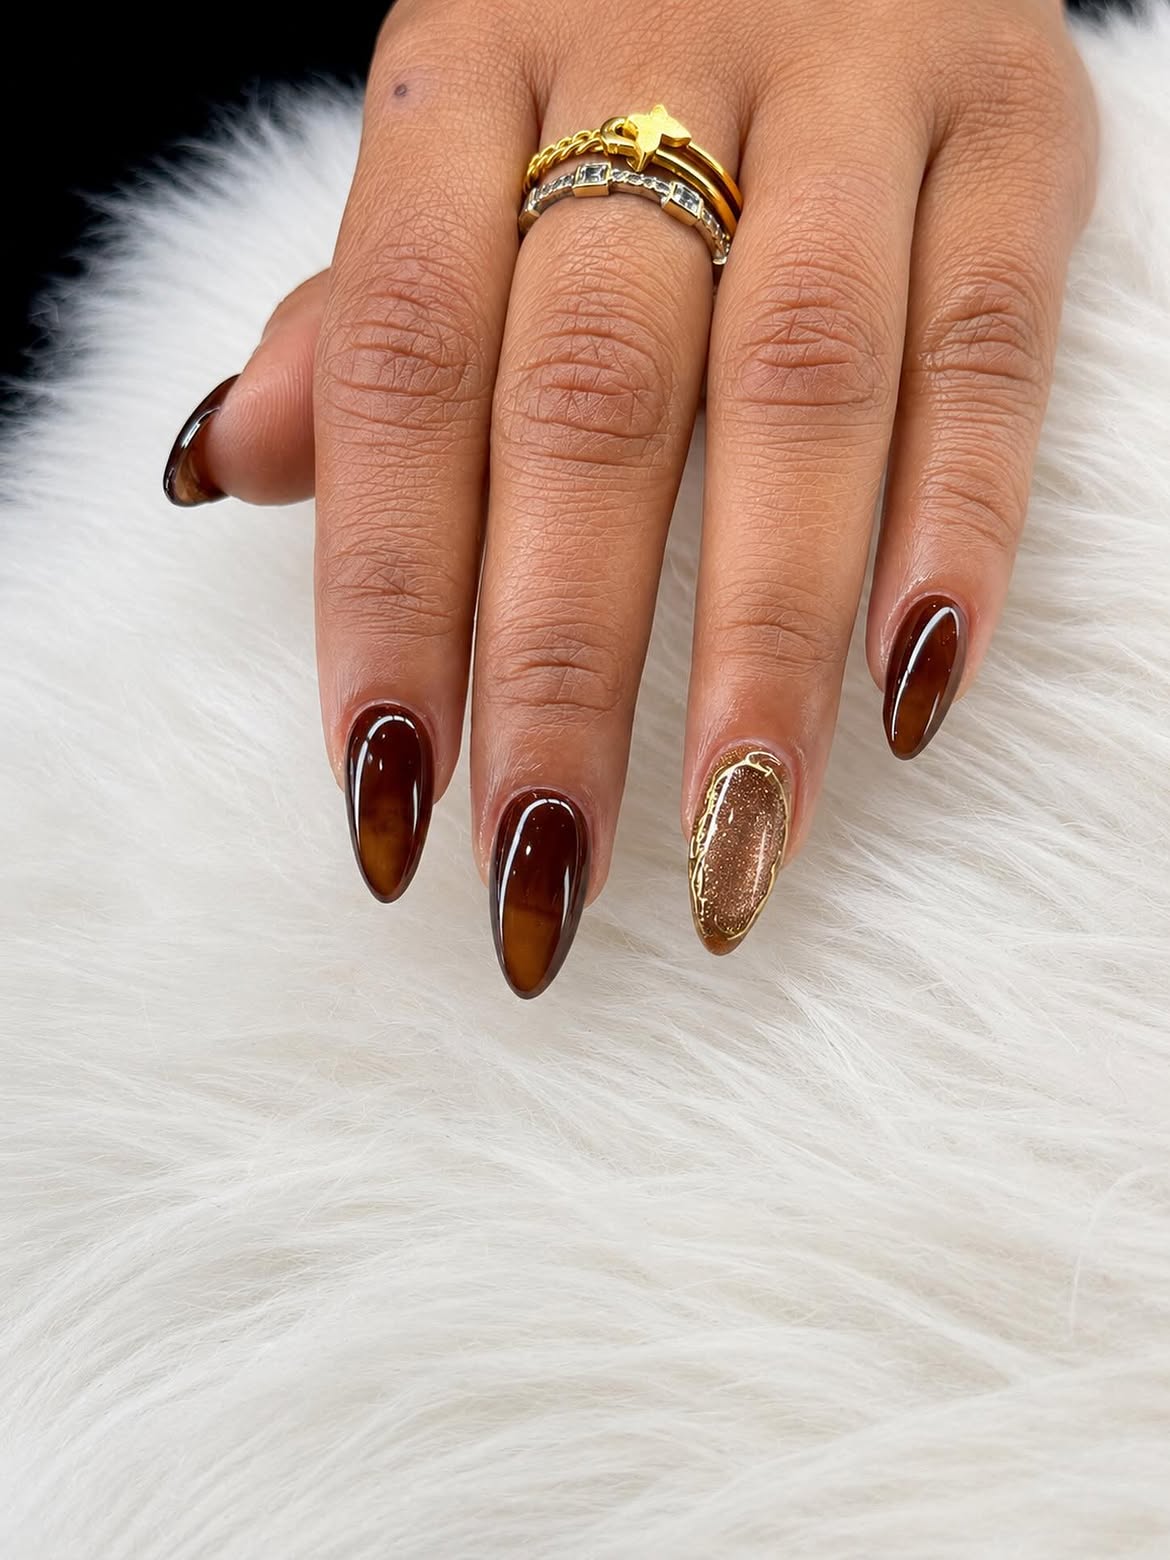
Warm amber and chocolate layers give these winter nails more depth than a flat brown polish. Lighter sections glow through the darker edges, creating the familiar tortoiseshell effect across the almond shape.
The accent nail stays within the same color family but changes the finish. Fine bronze shimmer fills the center, while an irregular gold outline frames it like a small piece of jewelry.
Limiting that metallic detail to one nail keeps the manicure balanced. The surrounding tortoiseshell nails remain smooth and glossy, so the layered brown pattern stays easy to see.
📌 Good To Know
Tortoiseshell needs visible light and dark layers. Bring a reference photo so the finished color has amber depth instead of reading as one solid brown shade.
13. Soften Winter White With a Sheer Pink Fade
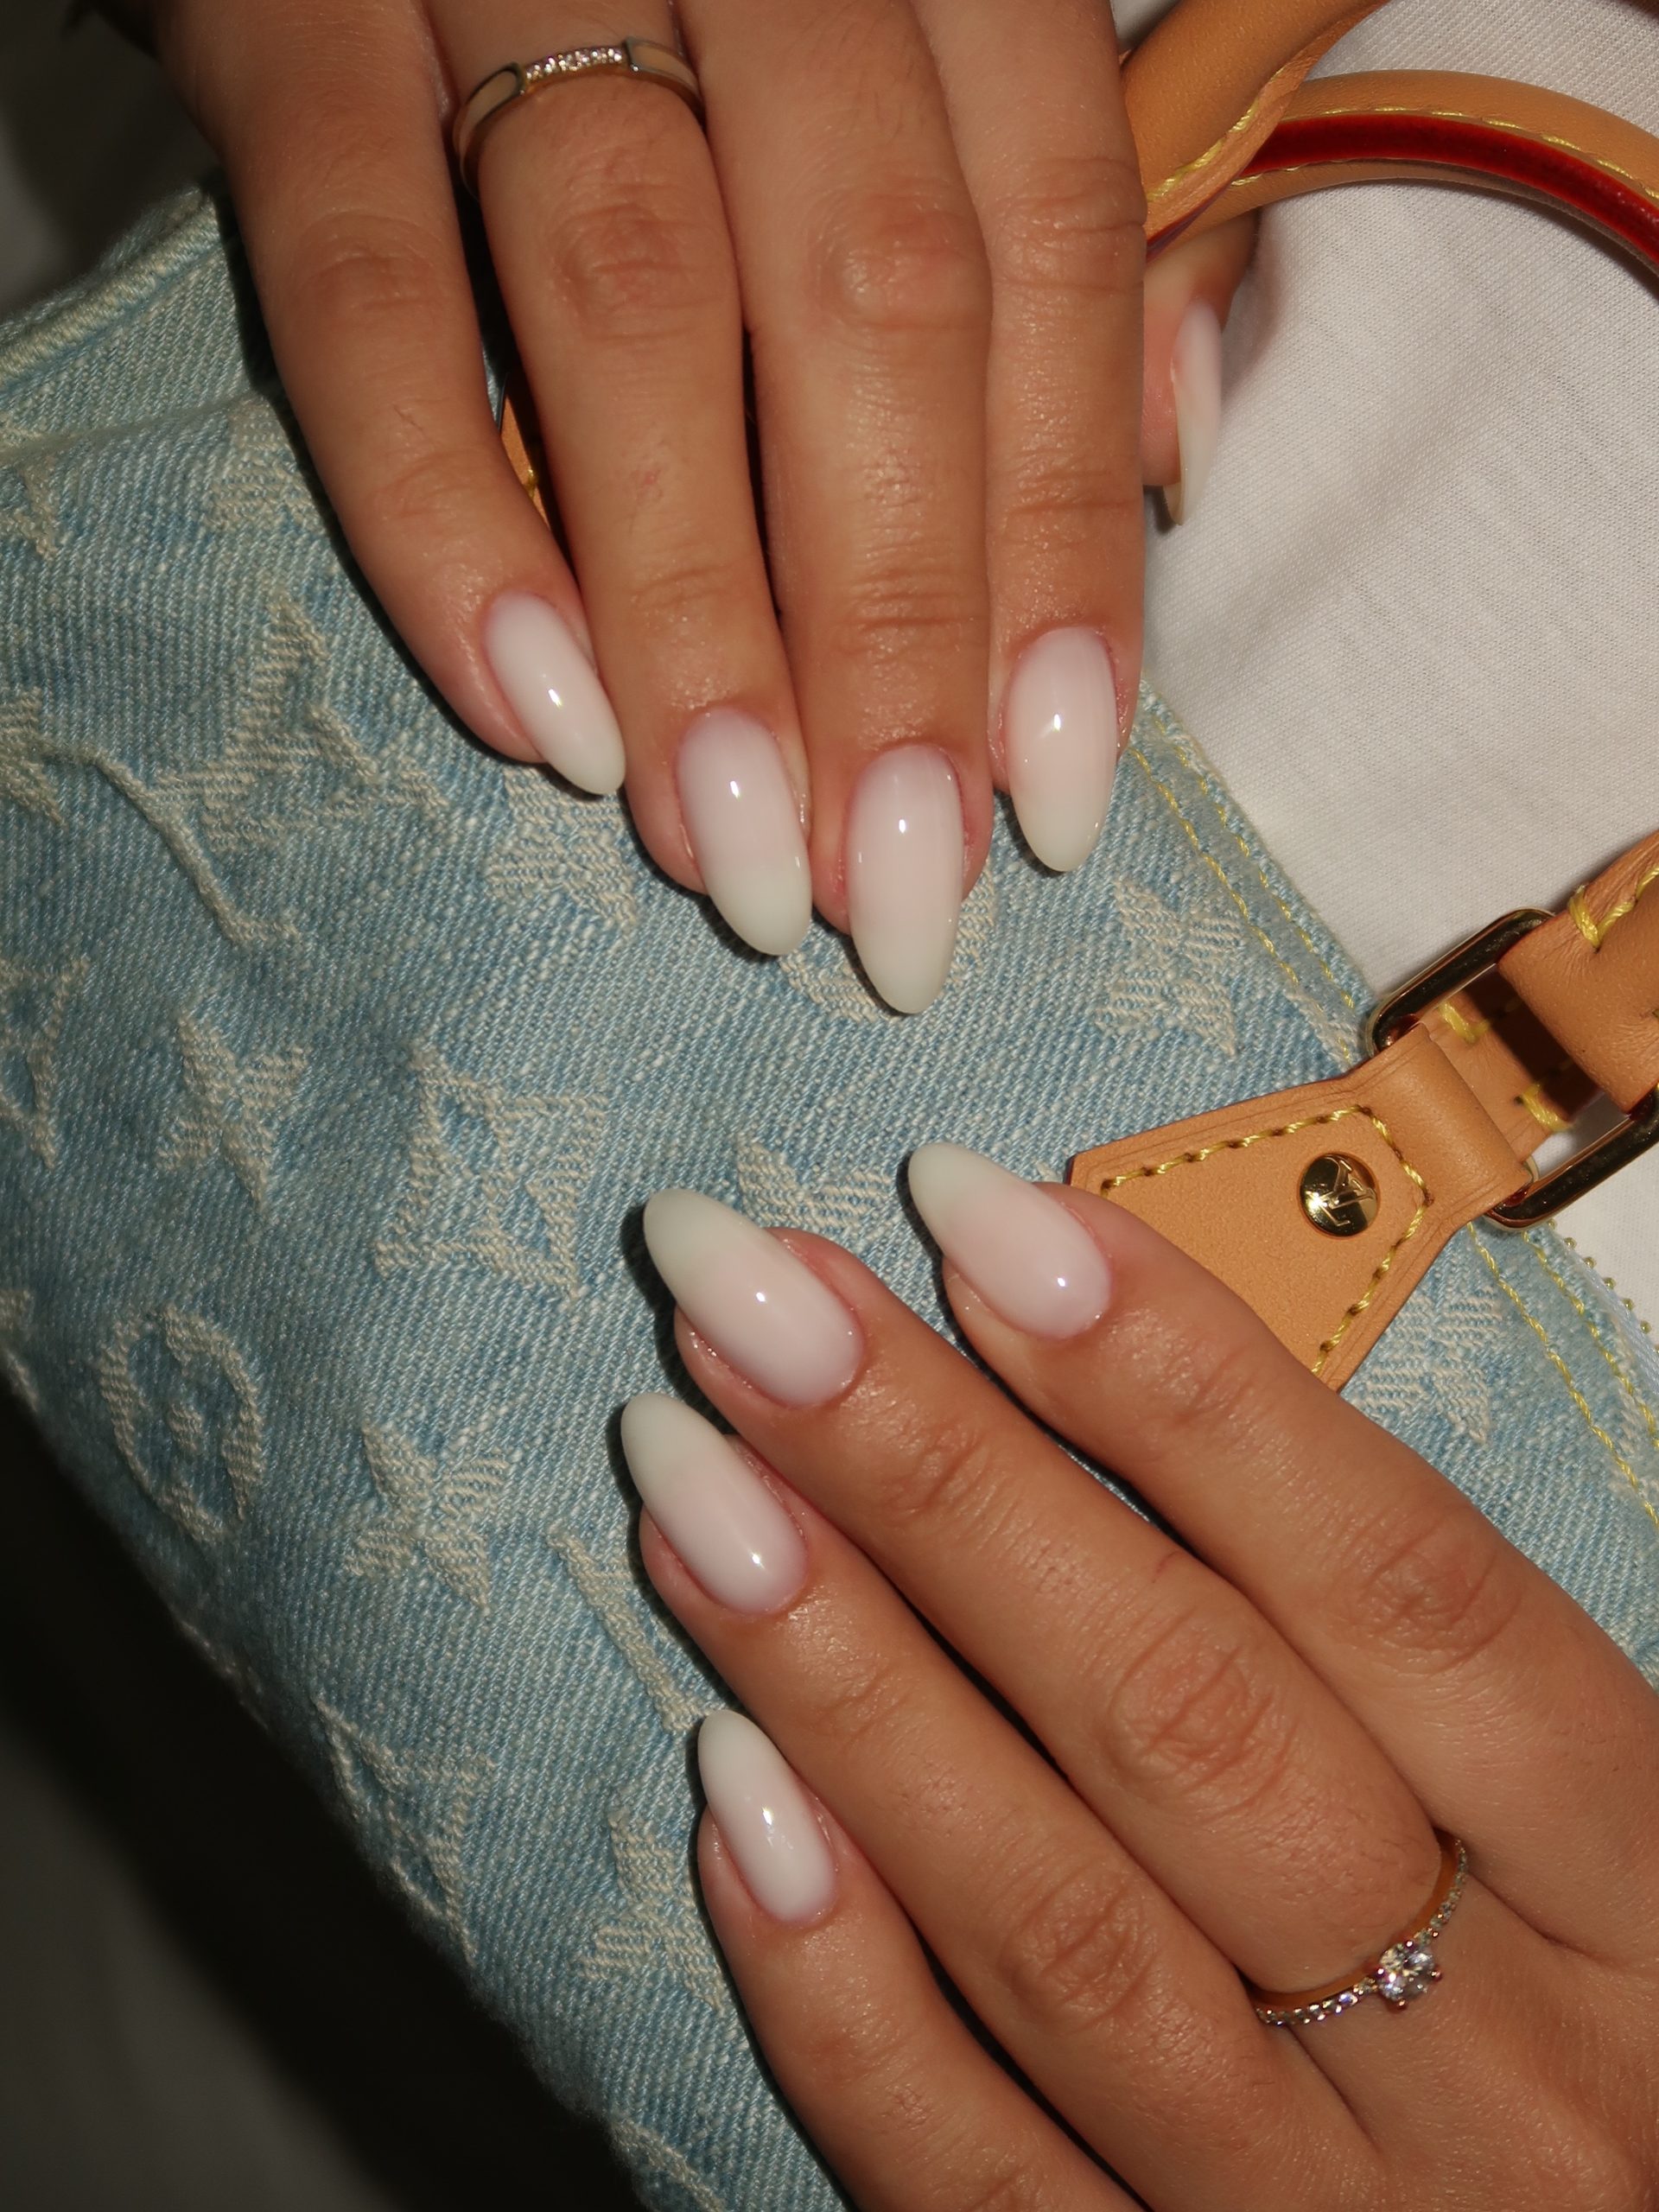
Quiet color lets the almond shape and smooth finish carry the manicure. The base begins as a translucent pink near the cuticle, then gradually becomes a milky white toward the tip.
There is no hard French line or added decoration. That gentle transition gives the nails brightness without making the white feel stark against the hand.
Ask for the pink to remain visible through the center of each nail. The white should build slowly near the tip, with both colors blended until the change is hard to pinpoint.
Solid white from base to tip can make the finish look flat and more severe.
A sheer pink base blending into milky tips creates a softer winter white.
14. Layer Fine White Lace Under Curved French Tips
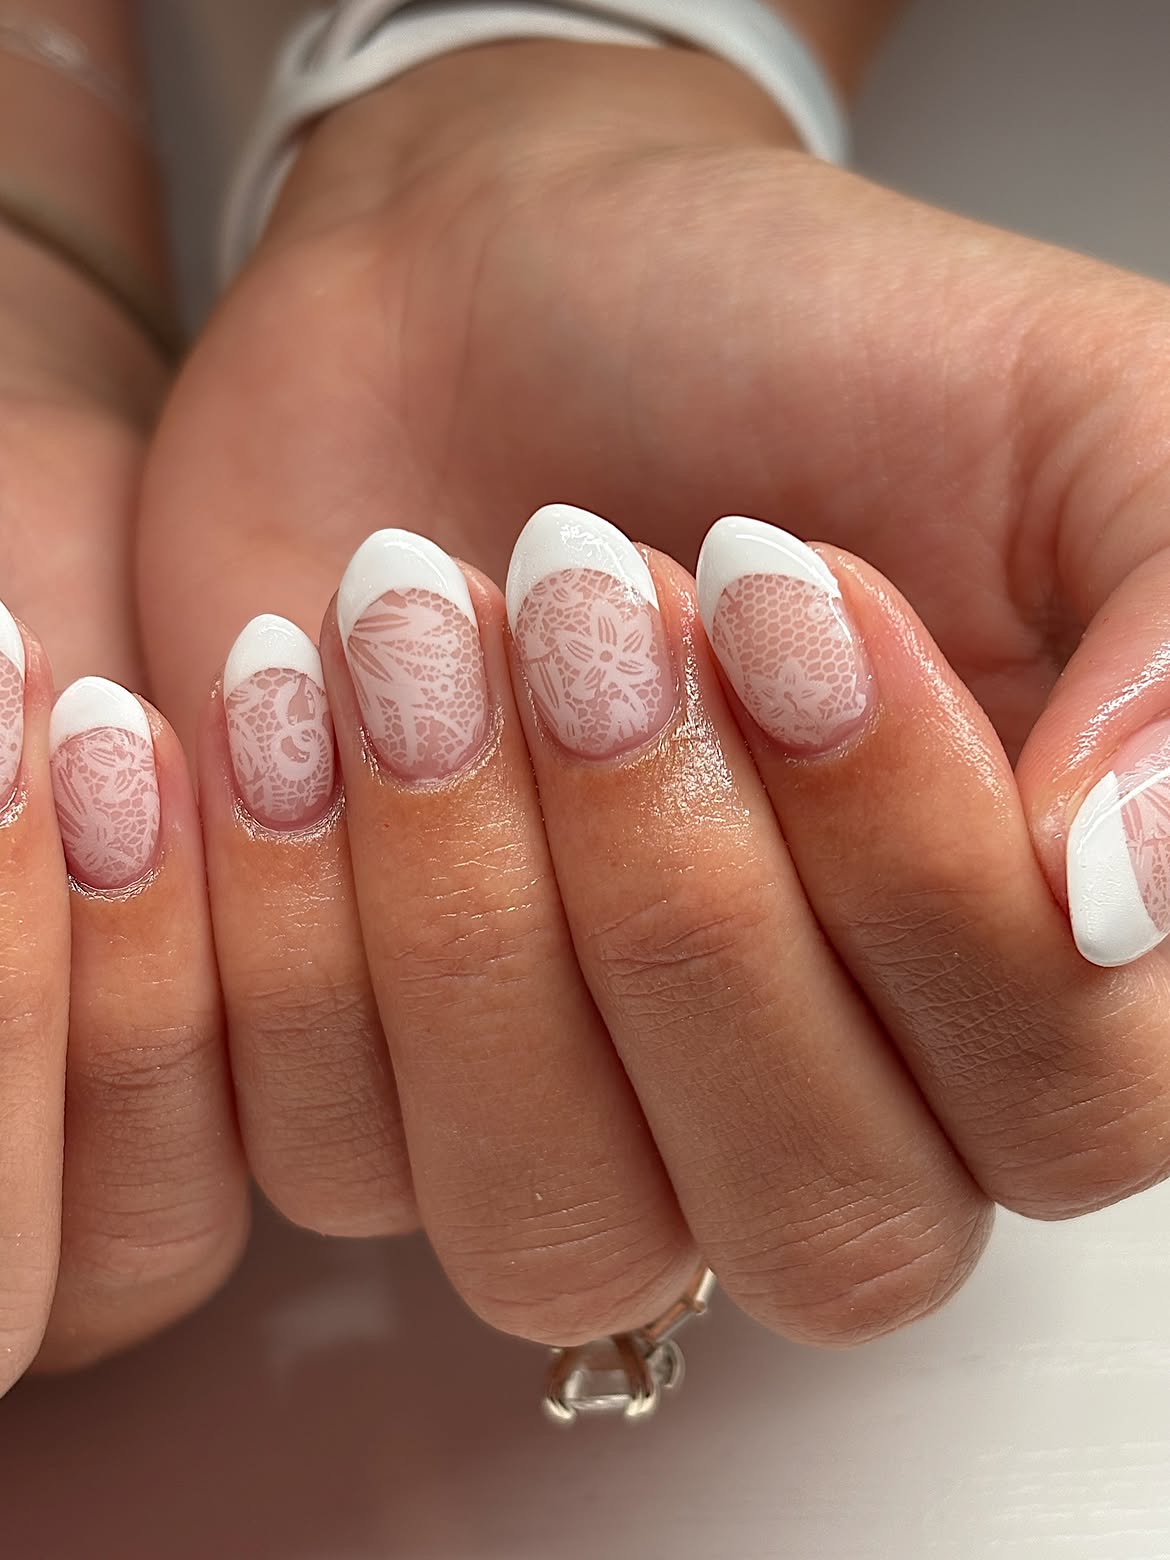
White nail art becomes easier to notice when the texture changes instead of the color. A sheer pink base reveals delicate floral and netlike details, while the curved white tips give each short square nail a crisp border.
The lace effect covers most of the surface but stays light because the lines are thin and low in contrast. Slight changes in the flower placement also keep the pattern from looking rigid.
On shorter nails, use smaller lace details and leave a little clear space near the cuticle. That open area helps the intricate design remain visible.
Use a translucent pink base so the lace remains soft.
Keep the white tip smooth and clearly defined.
A heavy base color that hides the fine pattern.
Extra gems that compete with the lace detail.
15. Pair Curved Black Tips With Mirror Silver Accents
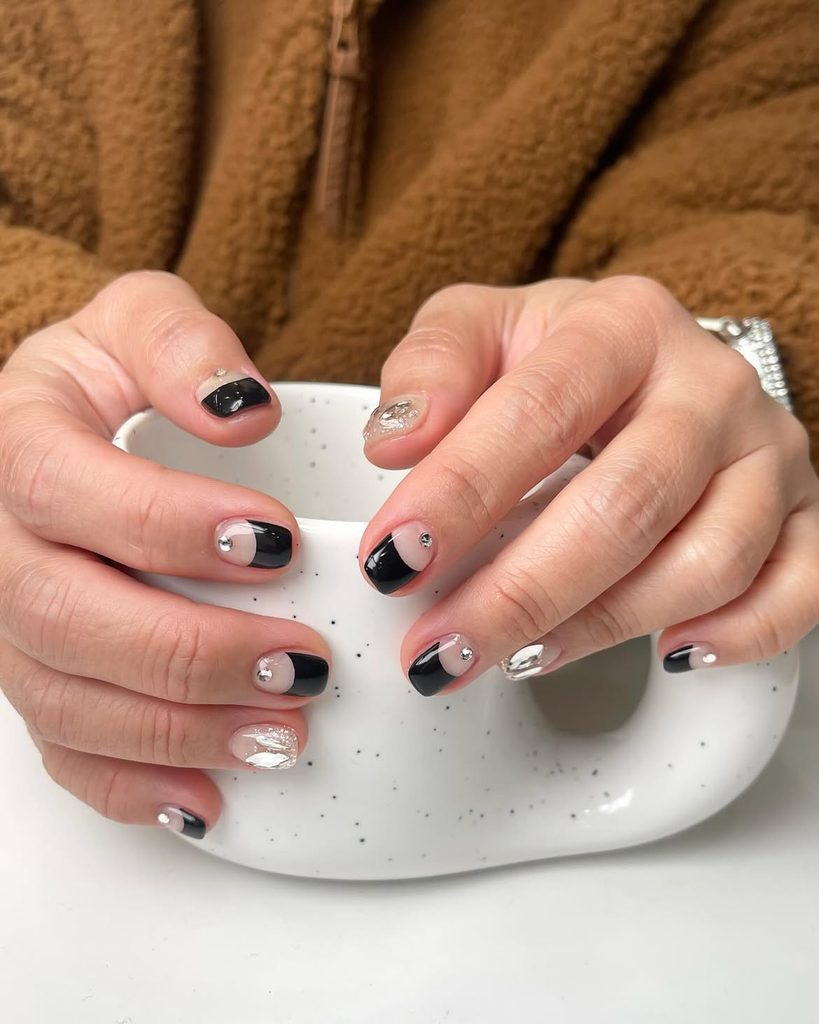
Black and silver feel sharper on short nails when bare space breaks up the darker polish. Each black nail keeps a rounded section of sheer nude near the base, then places one small reflective accent close to the curve.
The silver nails take a different approach. Their irregular mirror finish catches light from several angles, creating contrast against the smooth black sections.
Keep the shape short and softly squared so the graphic curves remain easy to see. Limiting the silver texture to a few nails also stops the manicure from becoming overly bright.
Smooth black curves give the eye structure, while the uneven silver finish adds light without needing detailed artwork.
16. Scatter Pearl Dot Snowflakes Over Milky Pink Nails
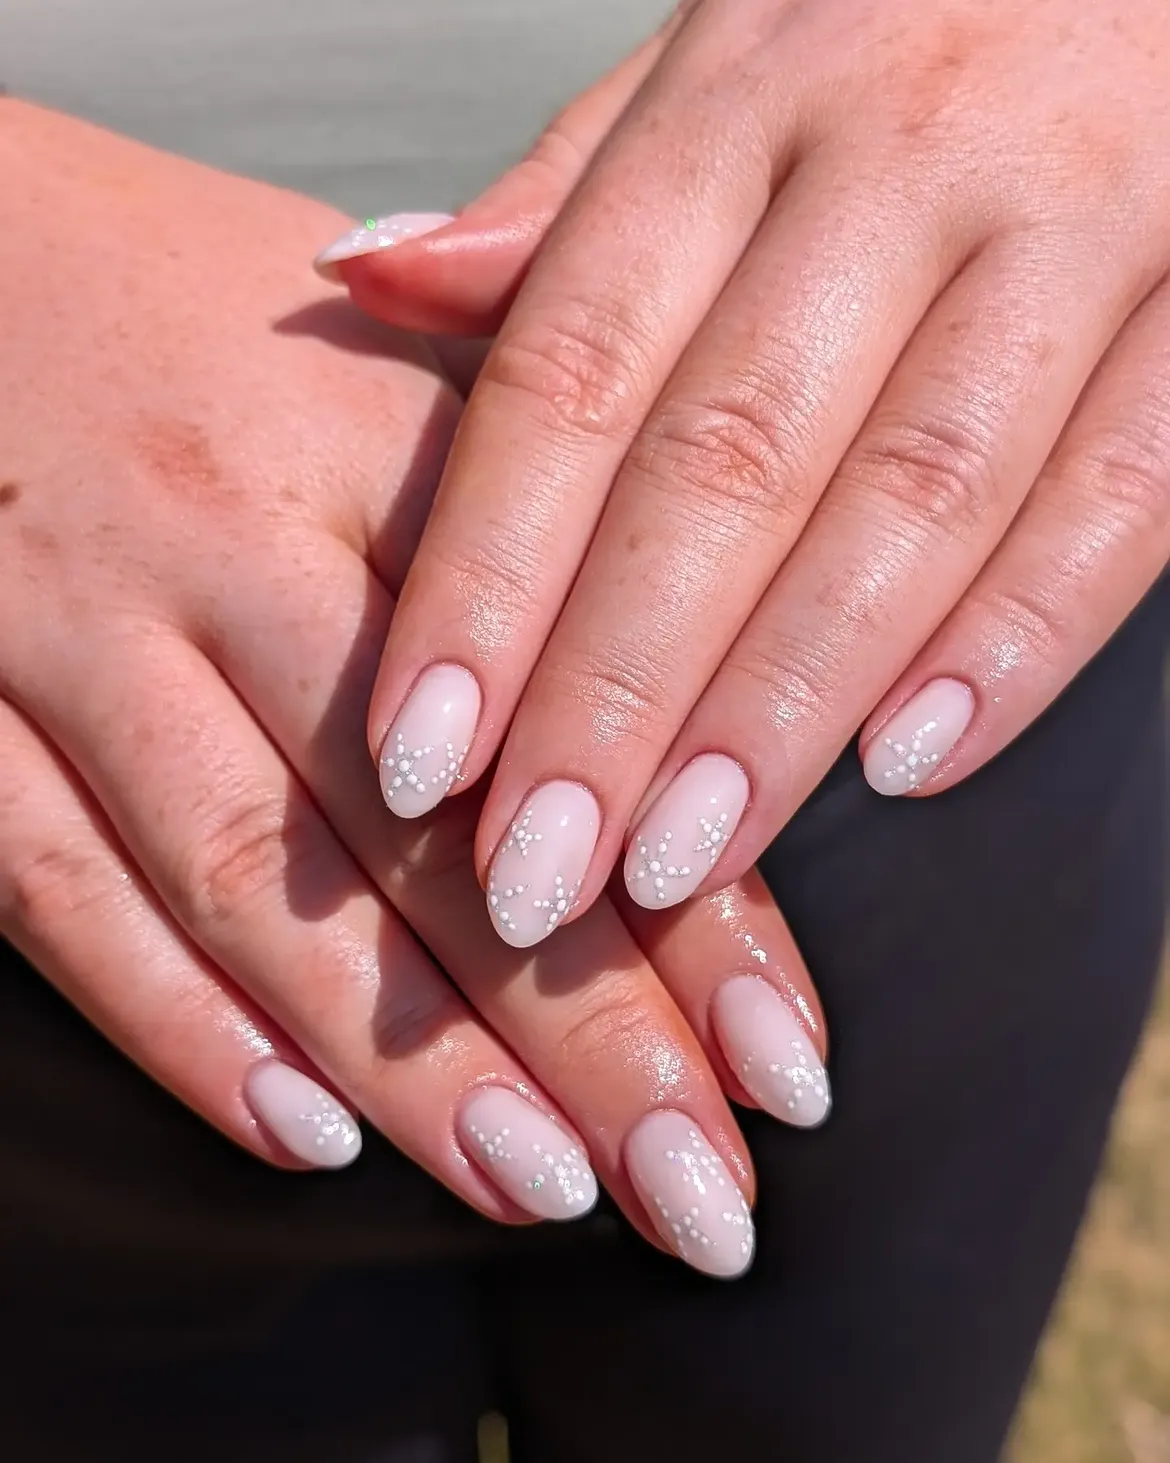
Tiny raised dots suggest snowflakes without covering the nails in heavy white shapes. The milky pink base keeps the contrast soft, while a few reflective centers catch the light.
Placement changes across the manicure. Some clusters sit near the tips, while others climb one side of the nail. Leaving open space through the center stops the pattern from feeling crowded.
Ask for several snowflake sizes rather than one repeated stamp. Keep the dots small and the branches uneven so each cluster feels delicate on the short oval shape.
Build the snowy detail
17. Repeat Polka Dots and Gold Lines Across Butterfly Nails
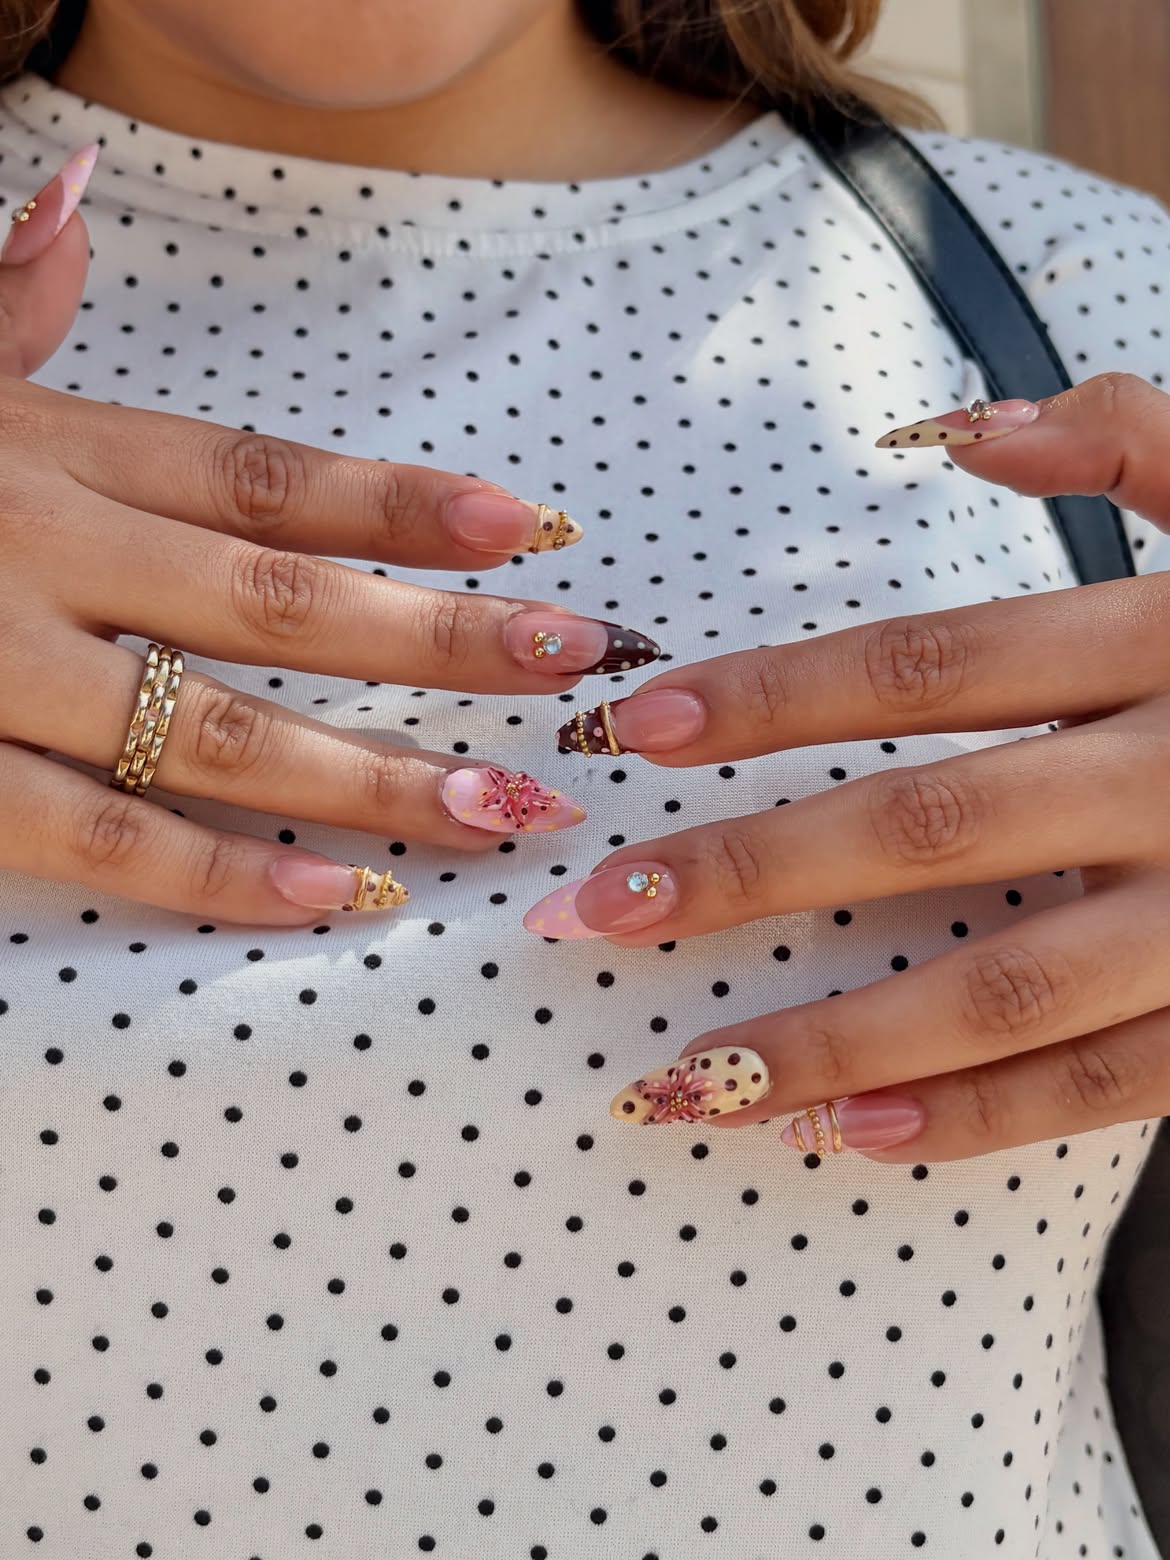
Maximalist nail art feels more connected when one small motif appears throughout the design. Chocolate dots repeat across cream and dark tips, while slim gold bands link the simpler nails to the decorated ones.
Three details build the look:
- Cream and chocolate switch roles across the pointed tips.
- Small reflective accents mark the center of several nails.
- Raised pink butterflies create the main focal points.
The sheer pink base prevents the many details from covering the entire nail. For a calmer version, keep the same dot pattern and gold lines but reduce the raised butterflies to one hand.
| Full statement | Quieter version |
|---|---|
| Use long pointed nails. | Choose a shorter almond shape. |
| Add raised butterflies to both hands. | Keep one butterfly as the main accent. |
| Mix dots, gold bands, and small gems. | Repeat the dots and use fewer reflective details. |