16 Easy Christmas Nails to Do at Home for Holiday Style
Christmas nail designs are a simple way to bring holiday details into your everyday style. From classic red and green combinations to delicate winter inspired patterns, the right manicure can add a festive touch without requiring complicated tools or salon skills. This collection of Easy Christmas Nails to Do at Home features creative ideas that range from minimal designs with tiny accents to playful nail art filled with candy cane stripes, glitter, bows, wreaths, and seasonal characters.
Whether you prefer a soft and elegant manicure or something more colorful and cheerful, these designs offer inspiration for different nail shapes, lengths, and skill levels. Many ideas use simple techniques like dots, fine lines, French tips, and accent nails, making them easier to recreate with basic nail supplies.
Explore these Christmas nail ideas and find a holiday style that matches your personality, outfit, and celebration plans. Save your favorite designs for your next festive manicure session.
16 Easy Christmas Nails to Do at Home Designs 2026
1. Easy Christmas Light Nails with Silver Glitter Tips
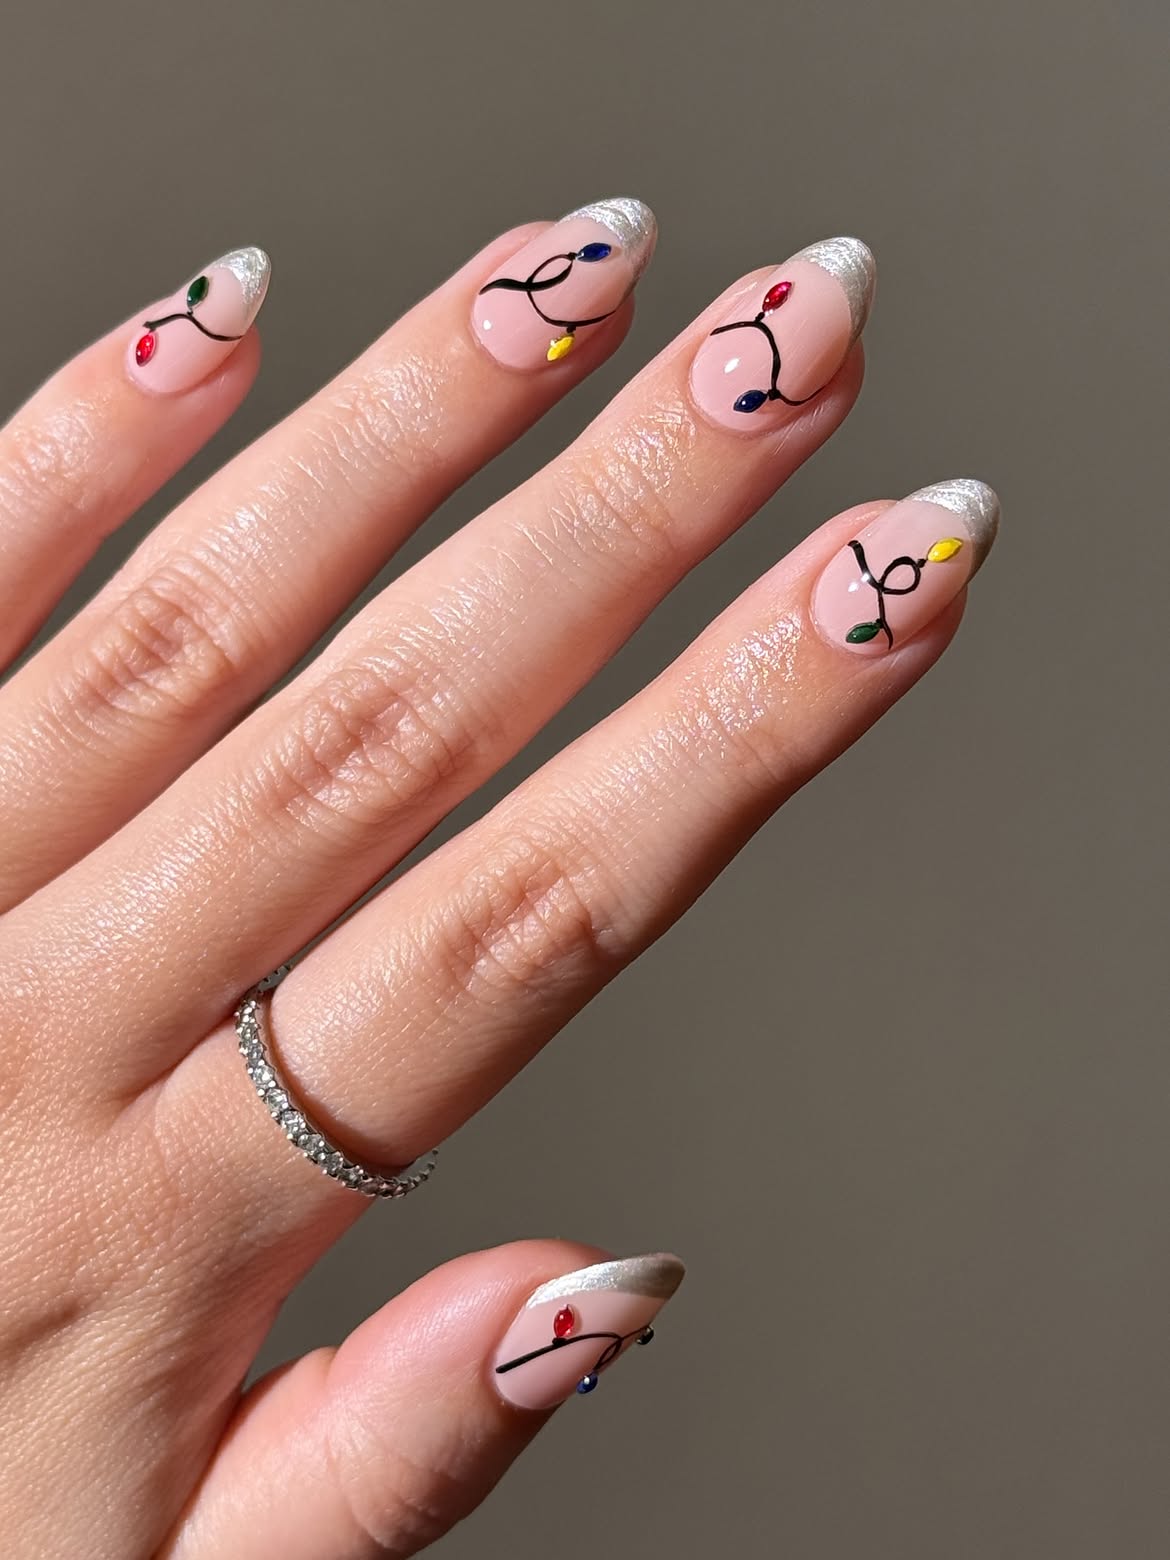
A sheer blush base keeps the design clean while the colorful bulbs bring in the Christmas detail. The silver glitter tips catch the light without competing with the tiny red, green, blue, and yellow bulbs.
What makes this design work:
- The thin black cord curves differently across each nail.
- Small bulb shapes keep the pattern neat.
- Silver tips add a frosty finish.
- The soft pink base leaves enough open space around the artwork.
Start with the blush base and paint the silver tips. Once dry, draw loose black loops using a fine nail brush. Add the colored bulbs with a dotting tool or toothpick. Finish with a glossy top coat, using a light touch so the black lines do not smear.
💡 Keep the Details Clean
Let the black cord dry before adding the colored bulbs. Float the top coat over the artwork instead of pressing the brush against it.
2. Red, Green, and White Nails with Gold Glitter Lines
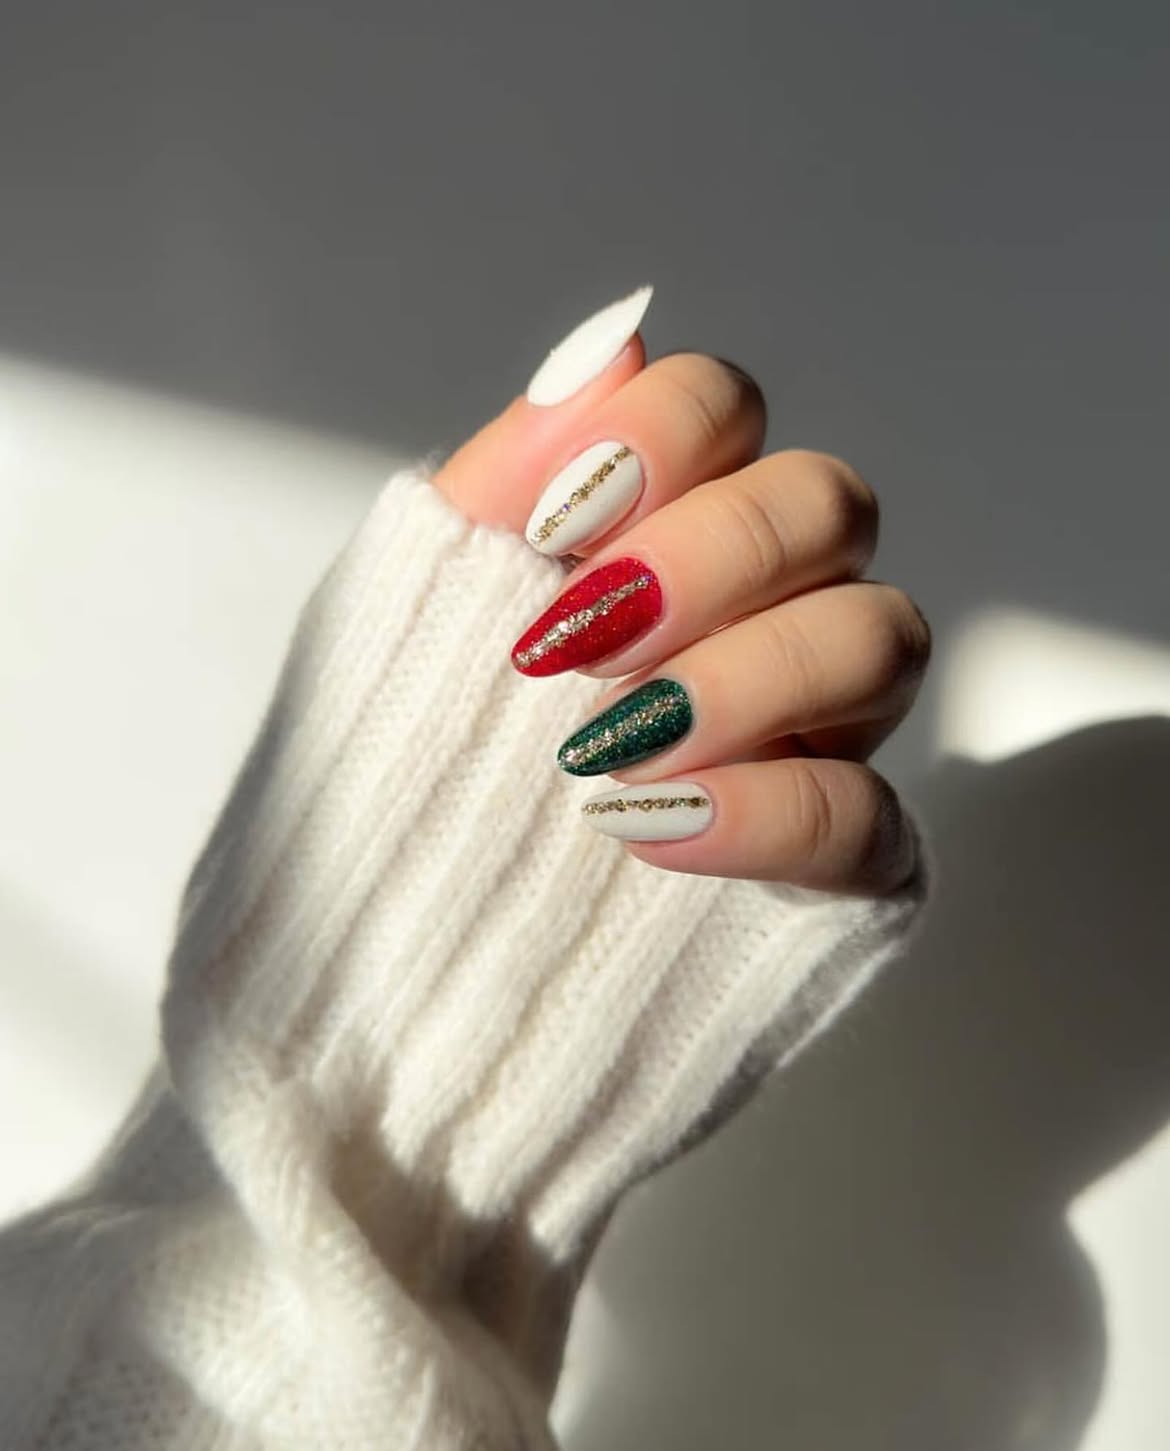
Classic Christmas colors feel more polished here because each nail carries one clean gold detail. The mix of snowy white, sparkling red, and deep green gives the set variety while the narrow glitter lines connect everything.
Create the look in three steps:
- Paint each almond nail in white, red, or green.
- Let the base colors dry fully, then place a thin gold glitter line down the center.
- Clean the edges with a small brush and finish with a glossy top coat.
A striping brush gives you more control, but a toothpick can also place the glitter in a narrow path. Keep the gold lines slim so the rich base colors remain visible.
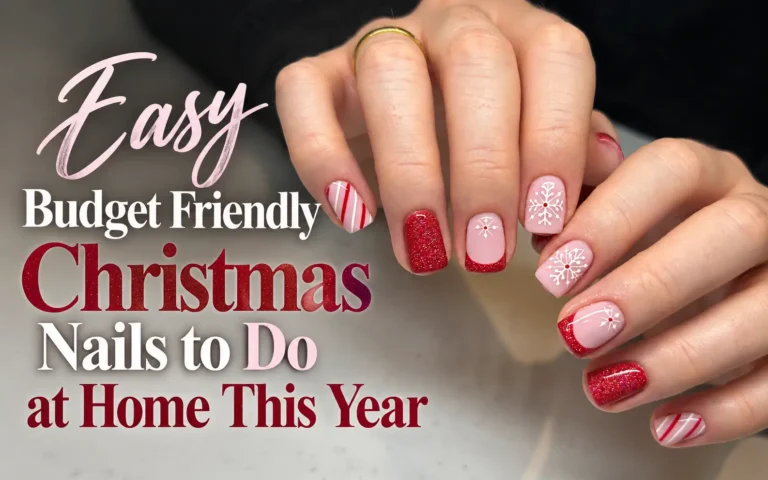
3. Candy Cane French Tips for Short Christmas Nails
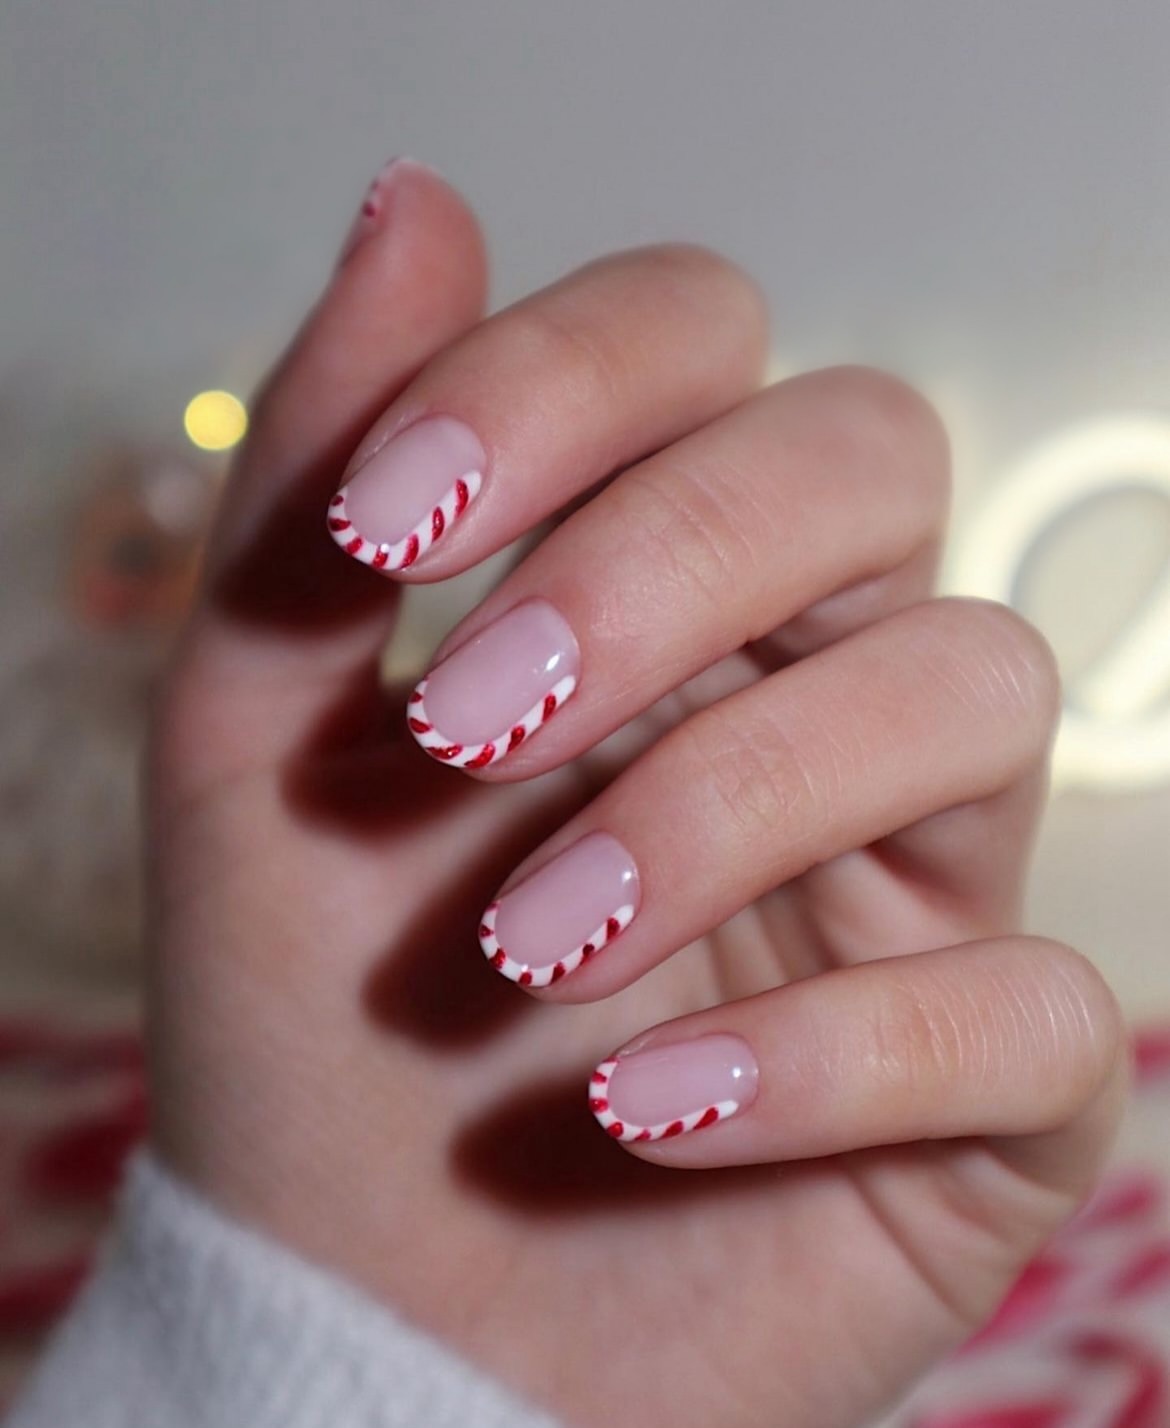
Candy cane tips give short rounded nails a clear Christmas theme without covering the soft pink base.
Base: Apply a sheer pink polish and let it dry until the surface feels smooth.
Tip: Paint a curved white French edge across each nail. Once it dries, add small diagonal red glitter stripes. Space the stripes evenly so the white sections still show.
Finish: Seal the artwork with a glossy top coat. Run a little extra top coat across the free edge to help protect the painted tips.
The narrow design suits shorter nails because all the detail stays near the edge. Small differences between the stripes are fine and can make the pattern feel hand painted.
| Fine Nail Brush | Toothpick |
|---|---|
| Better for smooth white tips | Useful for short red marks |
| Offers more control over curves | Easy to use with polish already at home |
Looking for simple holiday nail ideas you can recreate at home? These 17 Simple Christmas Nails for Beginners are great options for anyone trying Christmas nail art for the first time.
4. Red French Tips with One Candy Cane Accent Nail
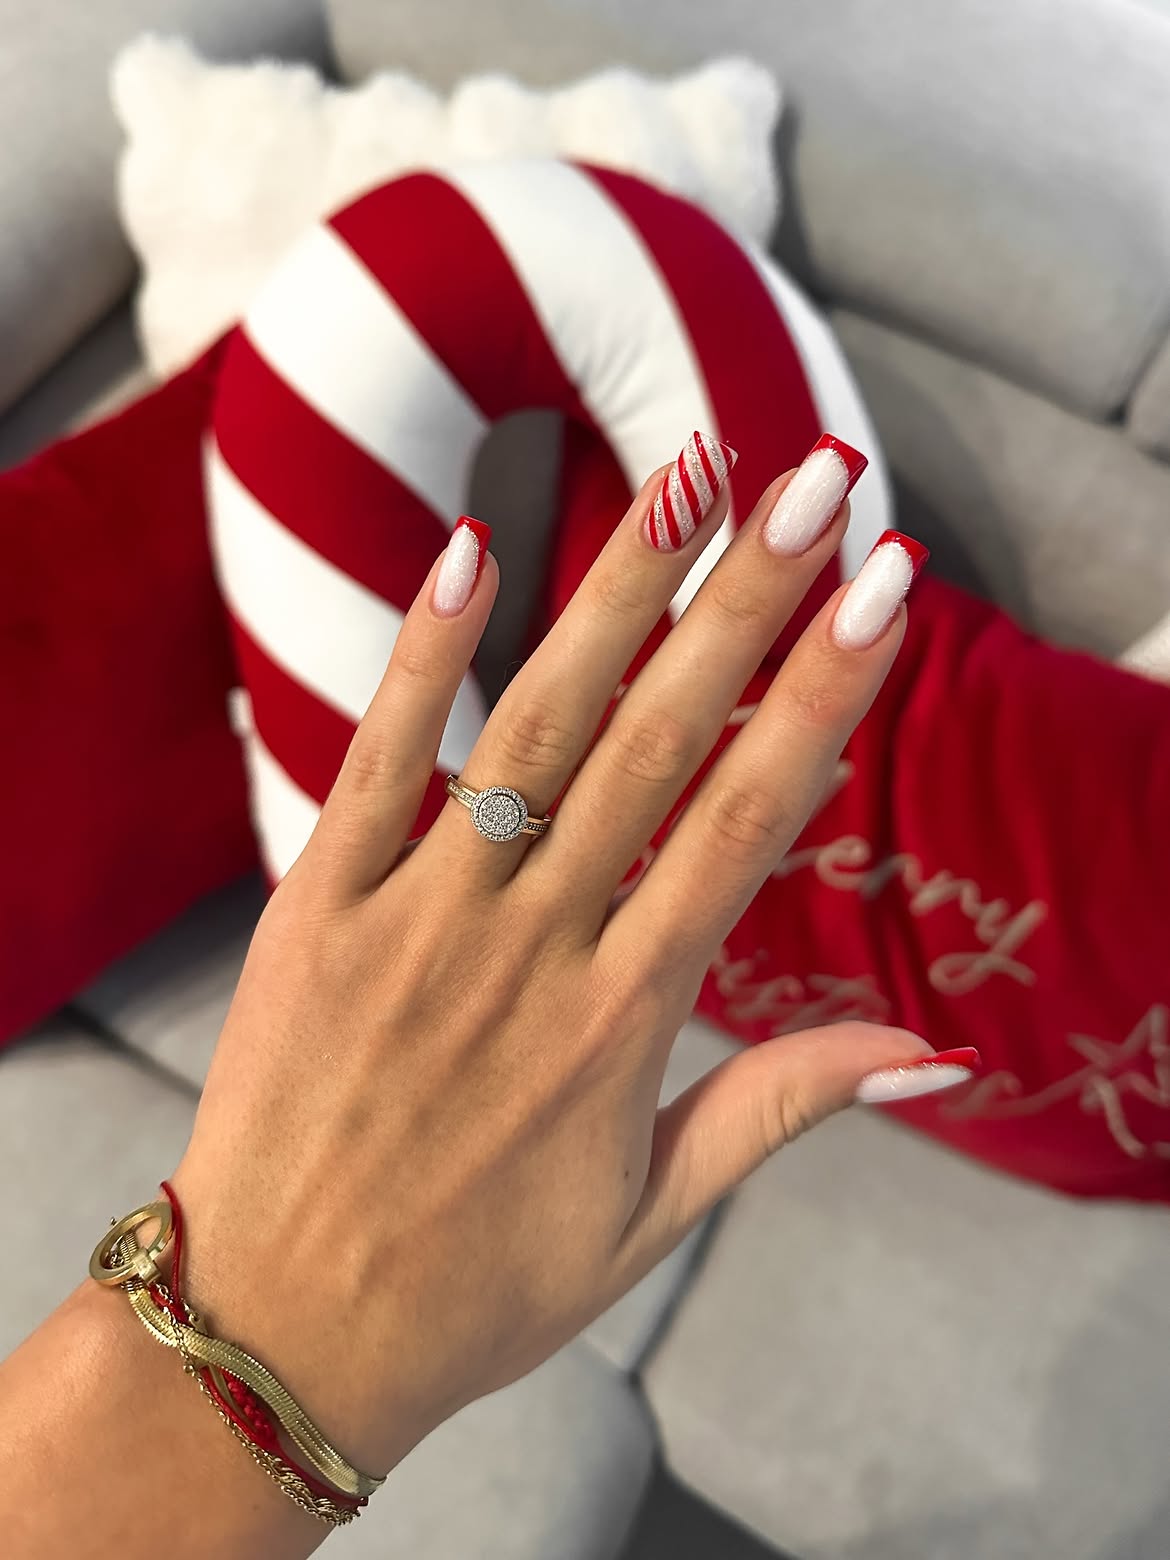
The strong red edges and shimmering white base give these long square nails a crisp holiday finish. Instead of placing stripes on every finger, the design saves the bold candy cane pattern for one accent nail.
Copy the balance:
- Use a pearly white polish across every nail.
- Add straight red tips to four nails.
- Cover one nail with diagonal red and silver glitter bands.
- Keep the stripe width similar for a tidy result.
Striping tape can help form the accent pattern at home. Place each piece diagonally, paint the open sections, and remove the tape while the polish is still slightly wet. A small cleanup brush will sharpen the red tips around the side edges.
Let the white base dry before placing tape.
Seal the stripe edges with a smooth top coat.
Do not pull the tape after the polish fully dries.
Avoid thick red tips that hide the white shimmer.
5. Red Ribbon Accent Nails with Lace French Tips
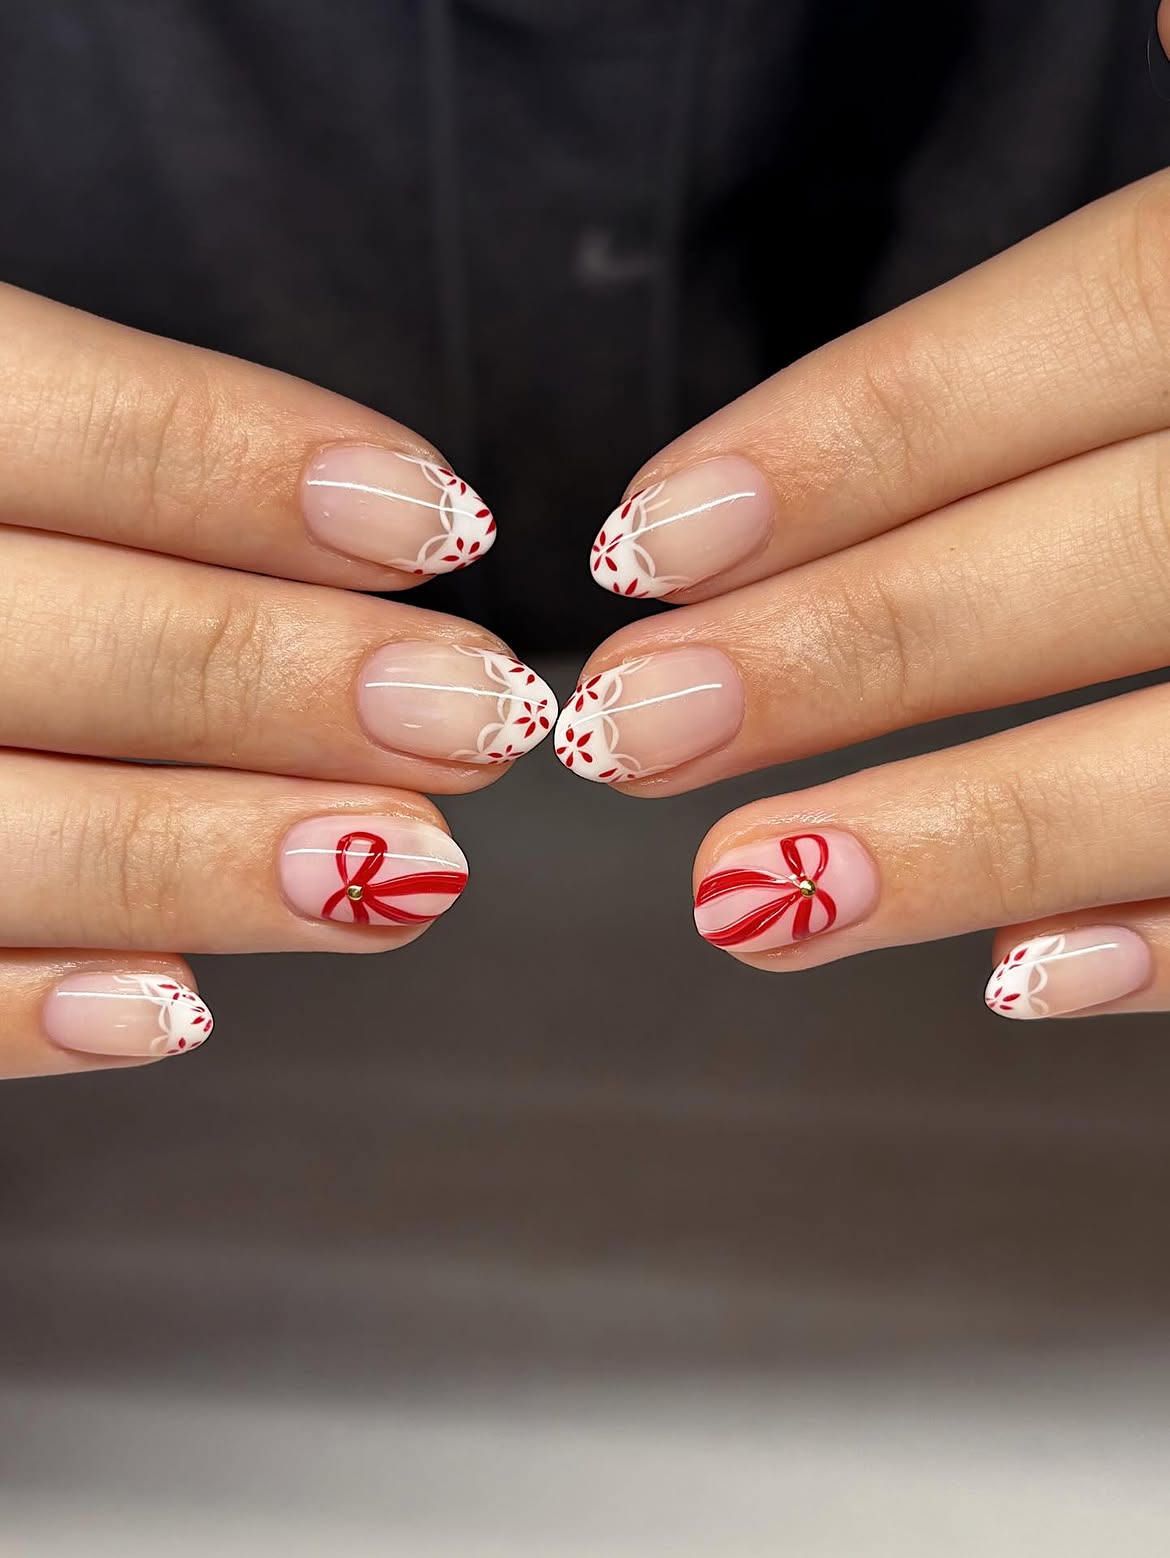
A soft pink base gives the tiny red and white details room to stand out. Most nails carry white curved tips with delicate looped lines and small red petal marks. Two accent nails replace the tip design with flowing red ribbons and a tiny gold center.
The bow is the detail that catches the eye first, so it does not need to appear on every finger. Place it on one accent nail per hand and keep the remaining artwork close to the tips. For a simpler home version, paint small white scallops along the edge instead of copying every fine loop. A thin nail brush and slow strokes will help keep the ribbon curves smooth.
Paint two red loops to form the top of the bow.
Pull two curved ribbon tails toward the nail edges.
Add one small gold dot in the center and seal the design.
6. Sparkly Red Santa Hat Nails
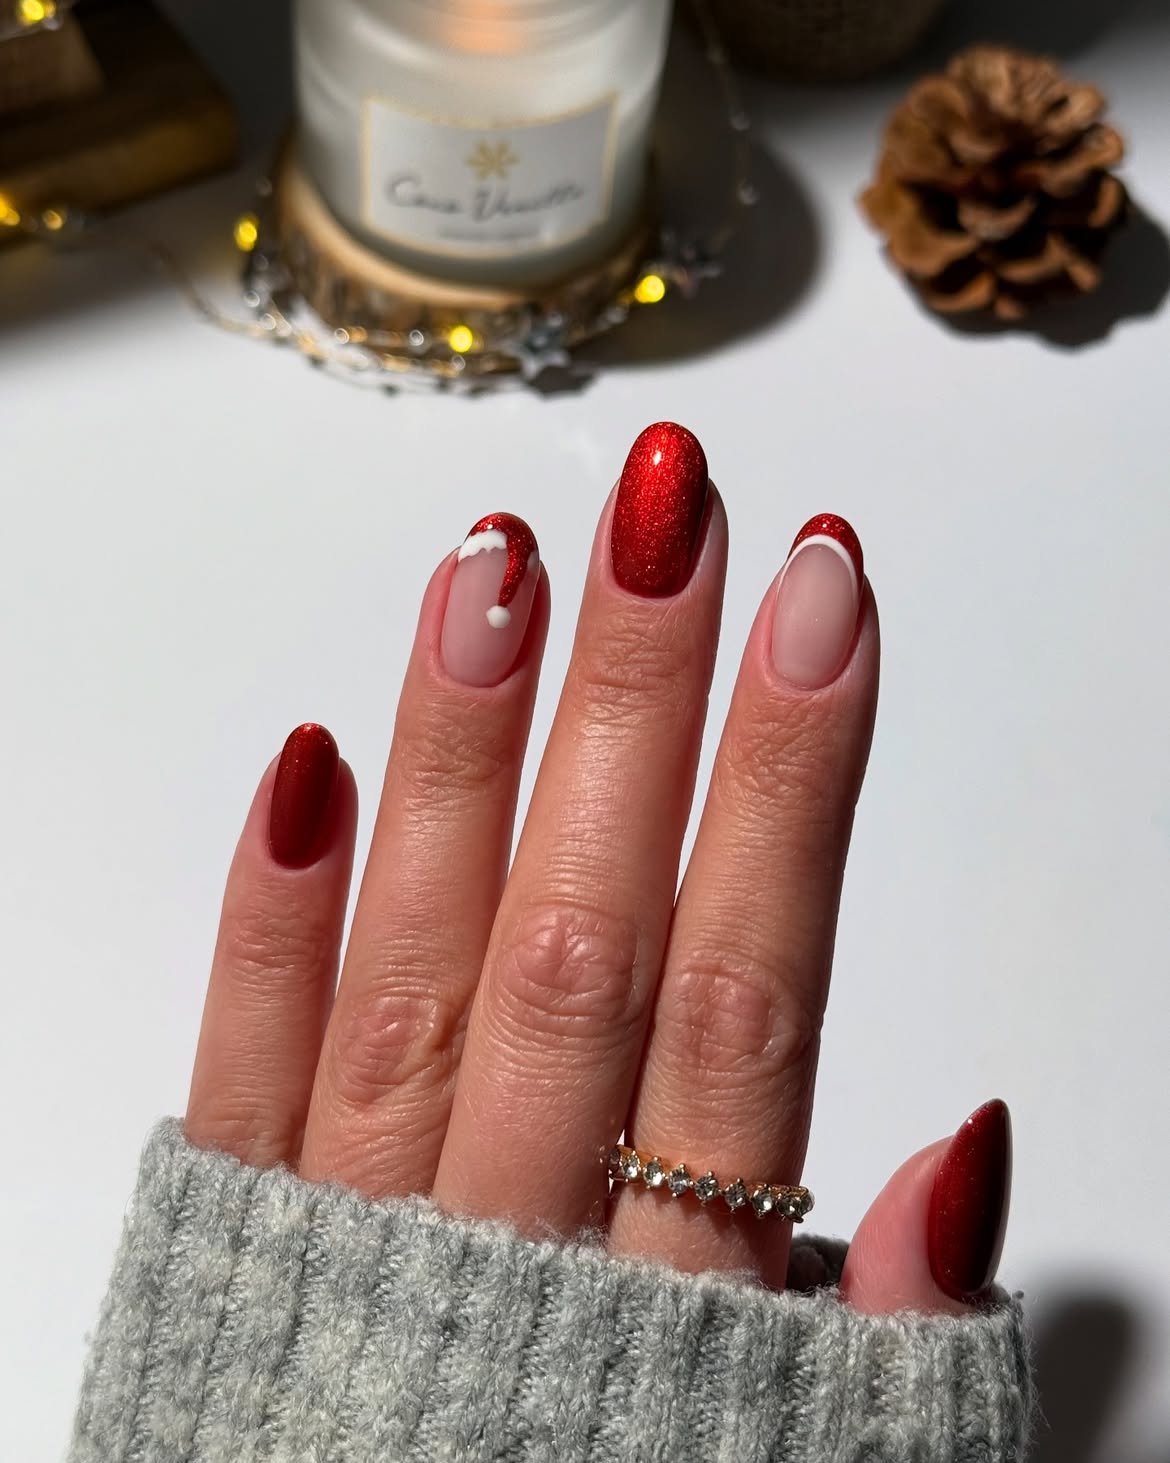
Bold red glitter makes this set festive before the Santa details are even added. The design mixes solid red nails with decorated French tips, so the hand looks varied without using many colors.
Use this simple nail map:
- Paint the thumb, middle finger, and little finger fully red.
- Turn one nude nail into a Santa hat with a curved white trim and round pompom.
- Give the remaining nude nail a red glitter tip with a slim white border.
Paint every red section first and allow it to dry. Add the white details afterward using a dotting tool or the rounded end of a hairpin. Keep the pompom small and slightly raised for a soft, snowy look.
What You Need
7. Jewel Tone Glitter French Tips with Gold Stars
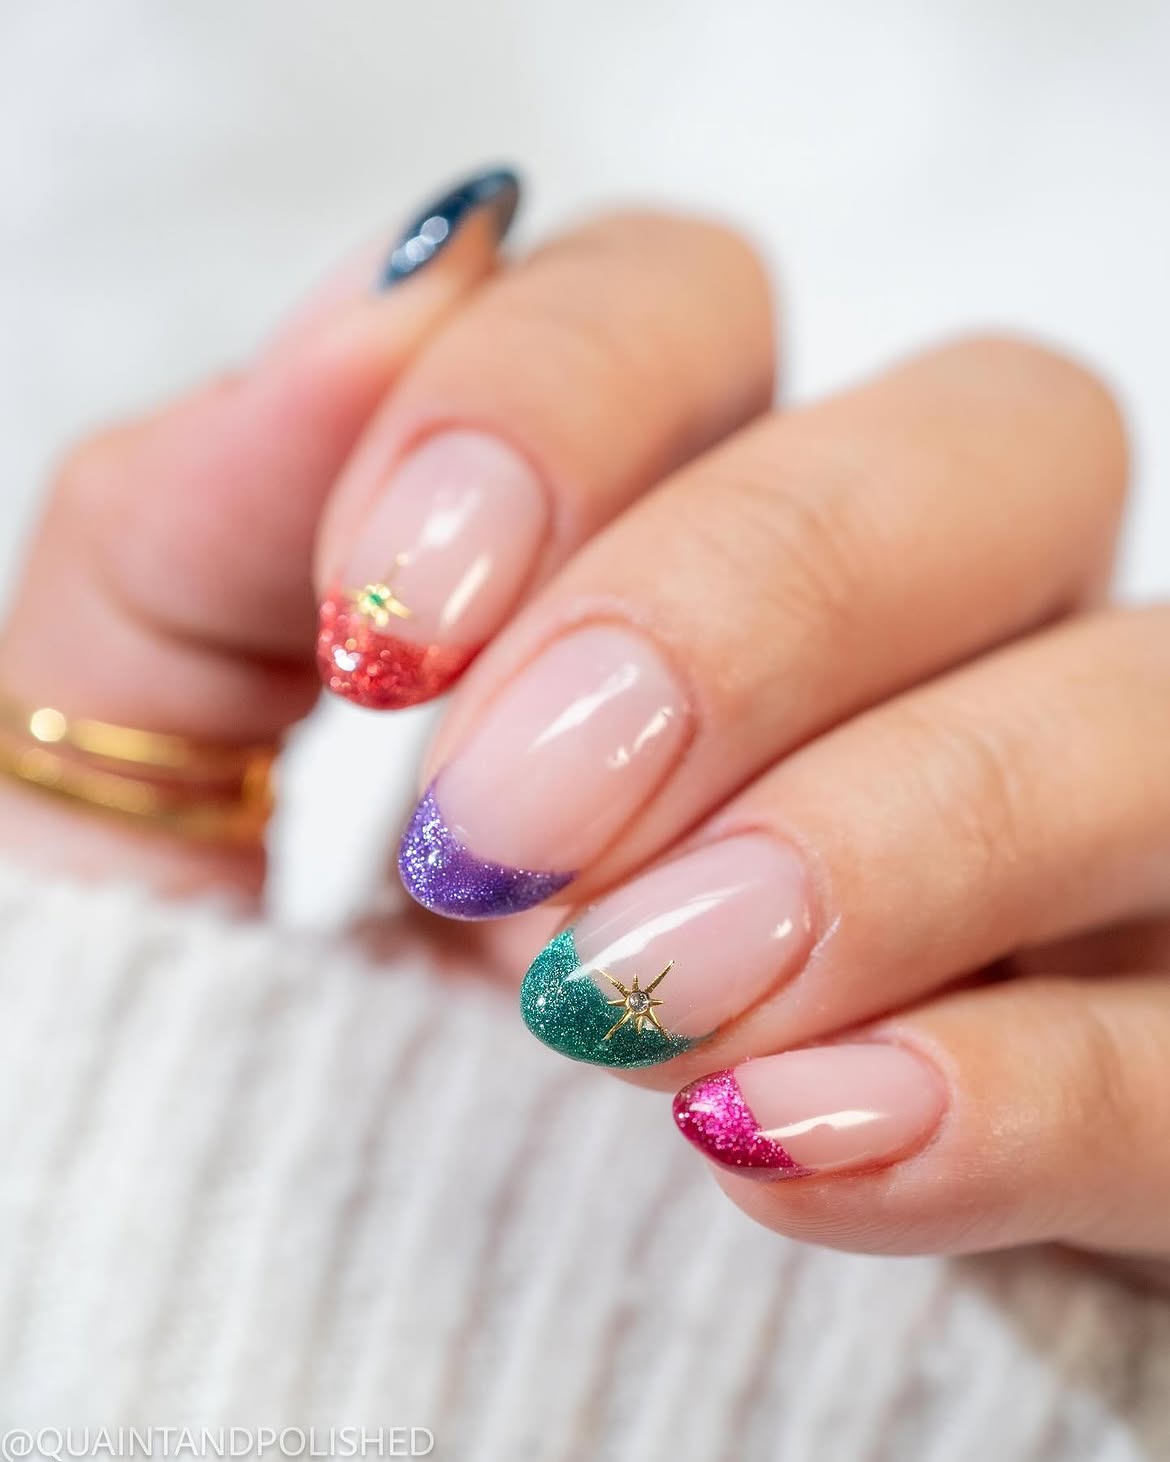
Bright jewel colors give this French manicure a playful Christmas party feel without relying only on red and green.
Palette: Each rounded nail uses a different glitter shade, including red, purple, emerald, pink, and deep blue.
Placement: The color stays along the curved tips, leaving most of the sheer pink base visible. Tiny gold star accents decorate only a few nails, which keeps the set from feeling crowded.
Technique: Apply the glitter with a small brush, then sharpen the inner curve using a flat cleanup brush. Gold star decals are an easy substitute for hand painted details. Press each decal onto dry polish and cover it with two light layers of top coat so the edges stay flat.
8. Red Confetti Dot Nails over a Milky Shimmer Base
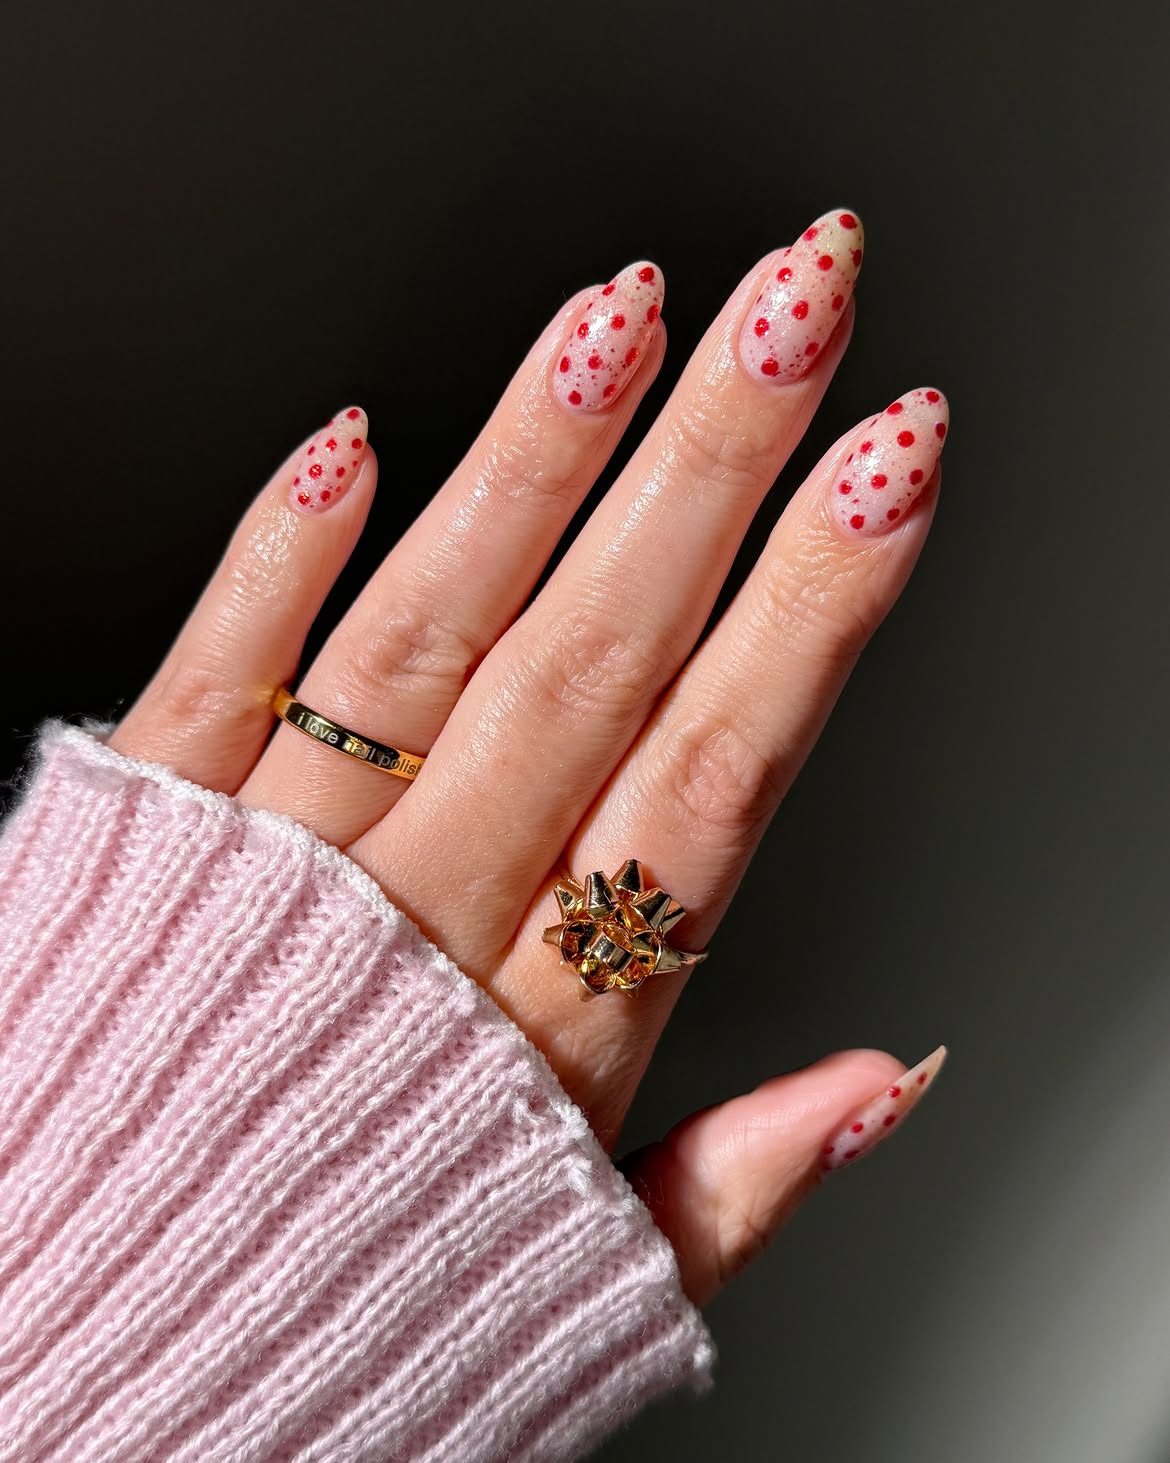
Scattered red dots turn a soft, pearly base into a cheerful Christmas manicure. The dots vary in size and spacing, so the pattern feels more like falling confetti or tiny winter berries than a strict polka dot print.
Apply one or two thin coats of milky shimmer polish and wait until the surface is dry. Dip a dotting tool, toothpick, or hairpin into red polish and place the larger dots first. Add smaller marks between them to fill open areas without crowding the nail.
Keep a little breathing room near the cuticles. This makes the almond shape look longer and prevents the pattern from becoming too busy. Finish with a smooth glossy coat to level the raised dots.
Place the larger red dots first, then use smaller dots to fill the empty spaces while keeping the pattern loose.
9. Santa Hat French Tips on Square Nails
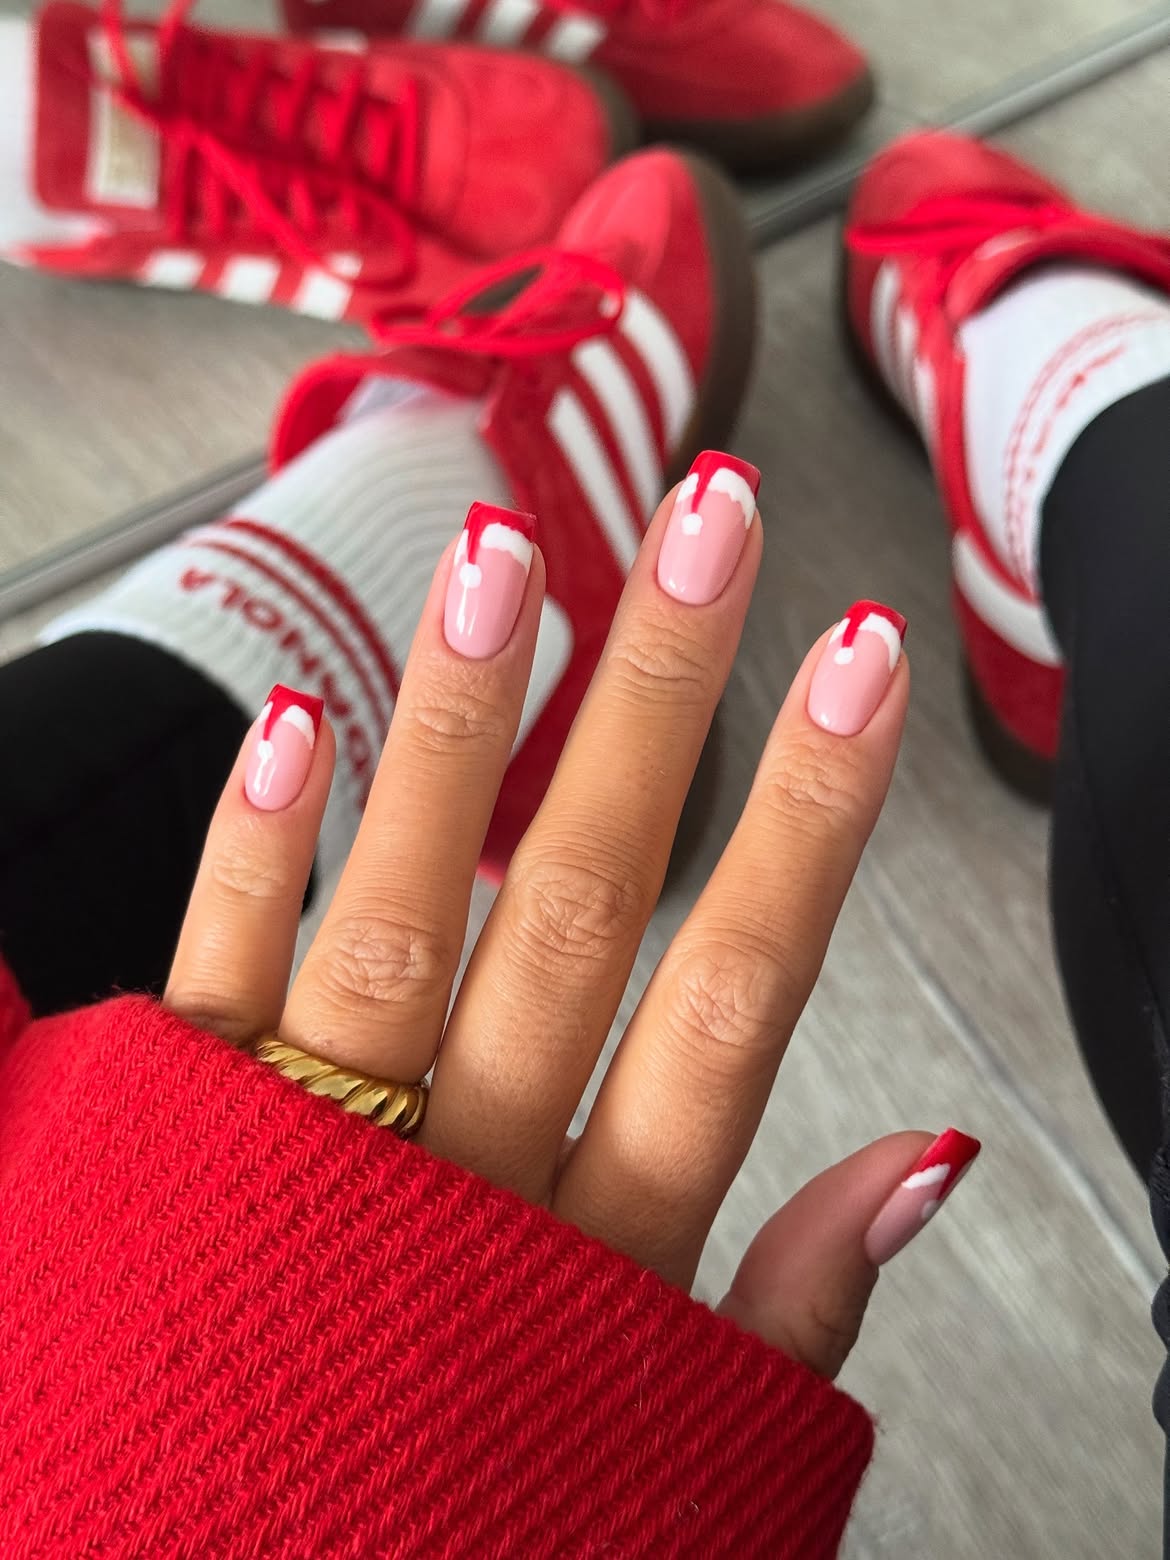
Repeating the Santa hat across every nail creates a clear theme while the sheer pink base keeps the set light.
Pattern breakdown:
- A bright red block follows the straight square tip.
- White scallops form the fluffy hat trim.
- A slim red line drops from one side of each tip.
- A small white dot finishes the hanging pompom.
Paint all the red tips first, then create the white scallops with a dotting tool. Join the dots while the polish is wet to form a soft cloud shape. Draw the red hanging line with a fine brush and place the white pompom at the end. Changing the tail position slightly on each nail helps the repeated pattern feel playful rather than rigid.
Paint a simple red French tip across the square edge.
Finish with white scallops, one red tail, and a round white pompom.
Oval nails create a beautiful canvas for seasonal nail art. Check out these 15 Christmas Nails for Oval Shaped Nails for stylish ideas that combine classic Christmas details with a flattering shape.
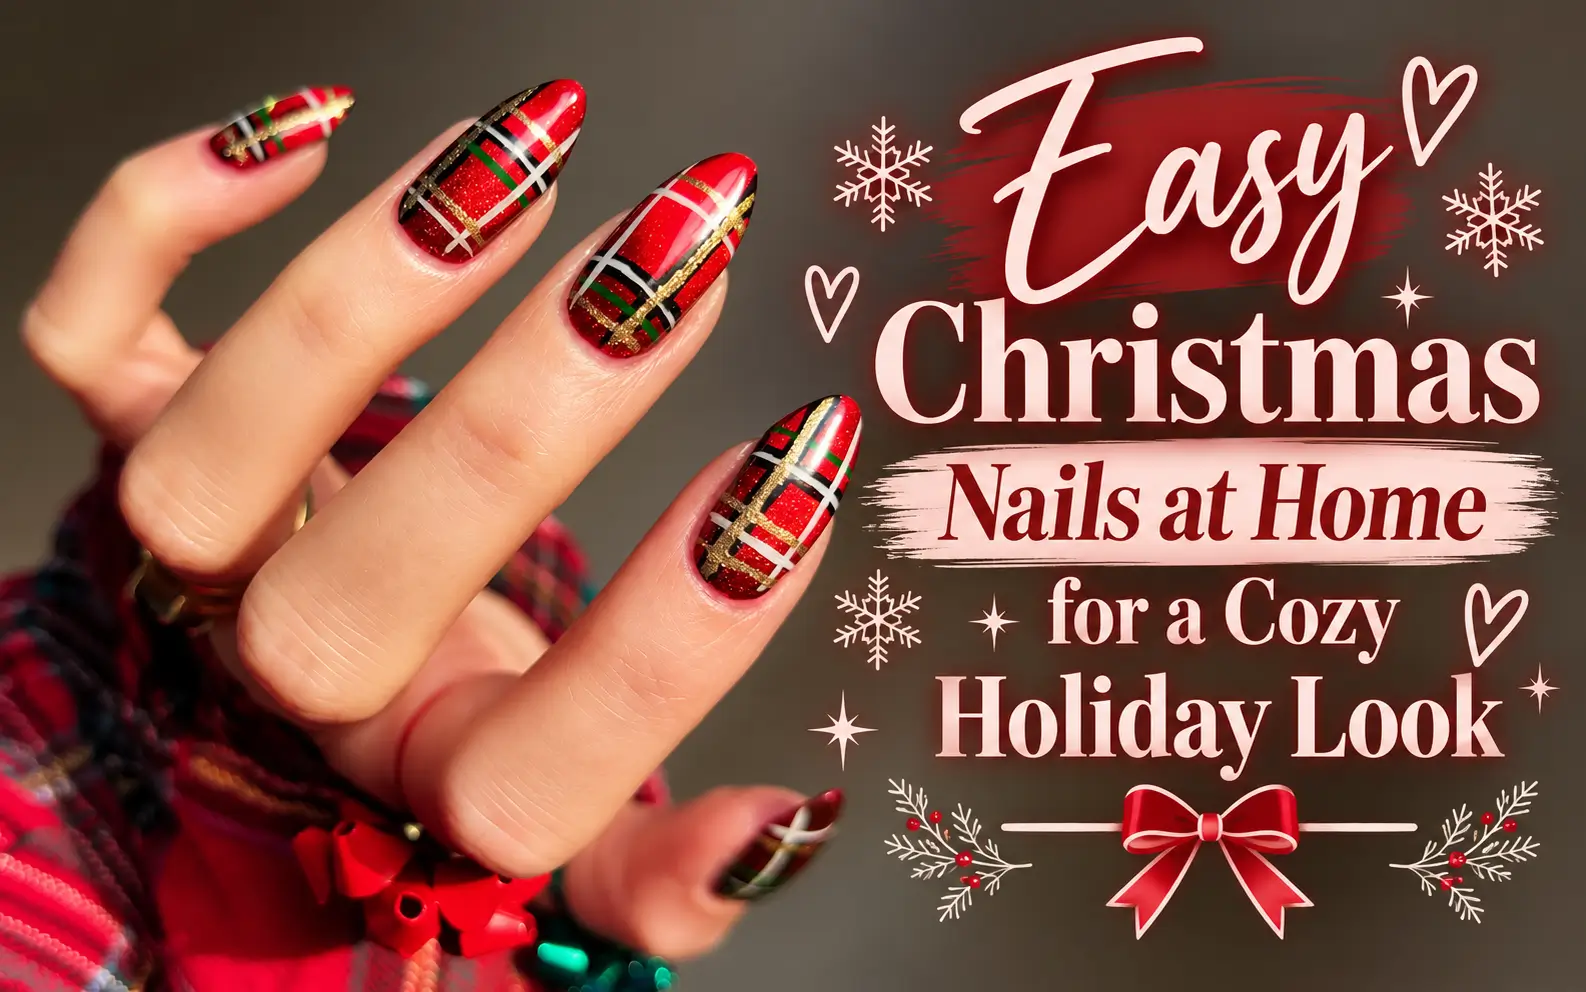
10. Red Tartan Christmas Nails with Gold Glitter Lines
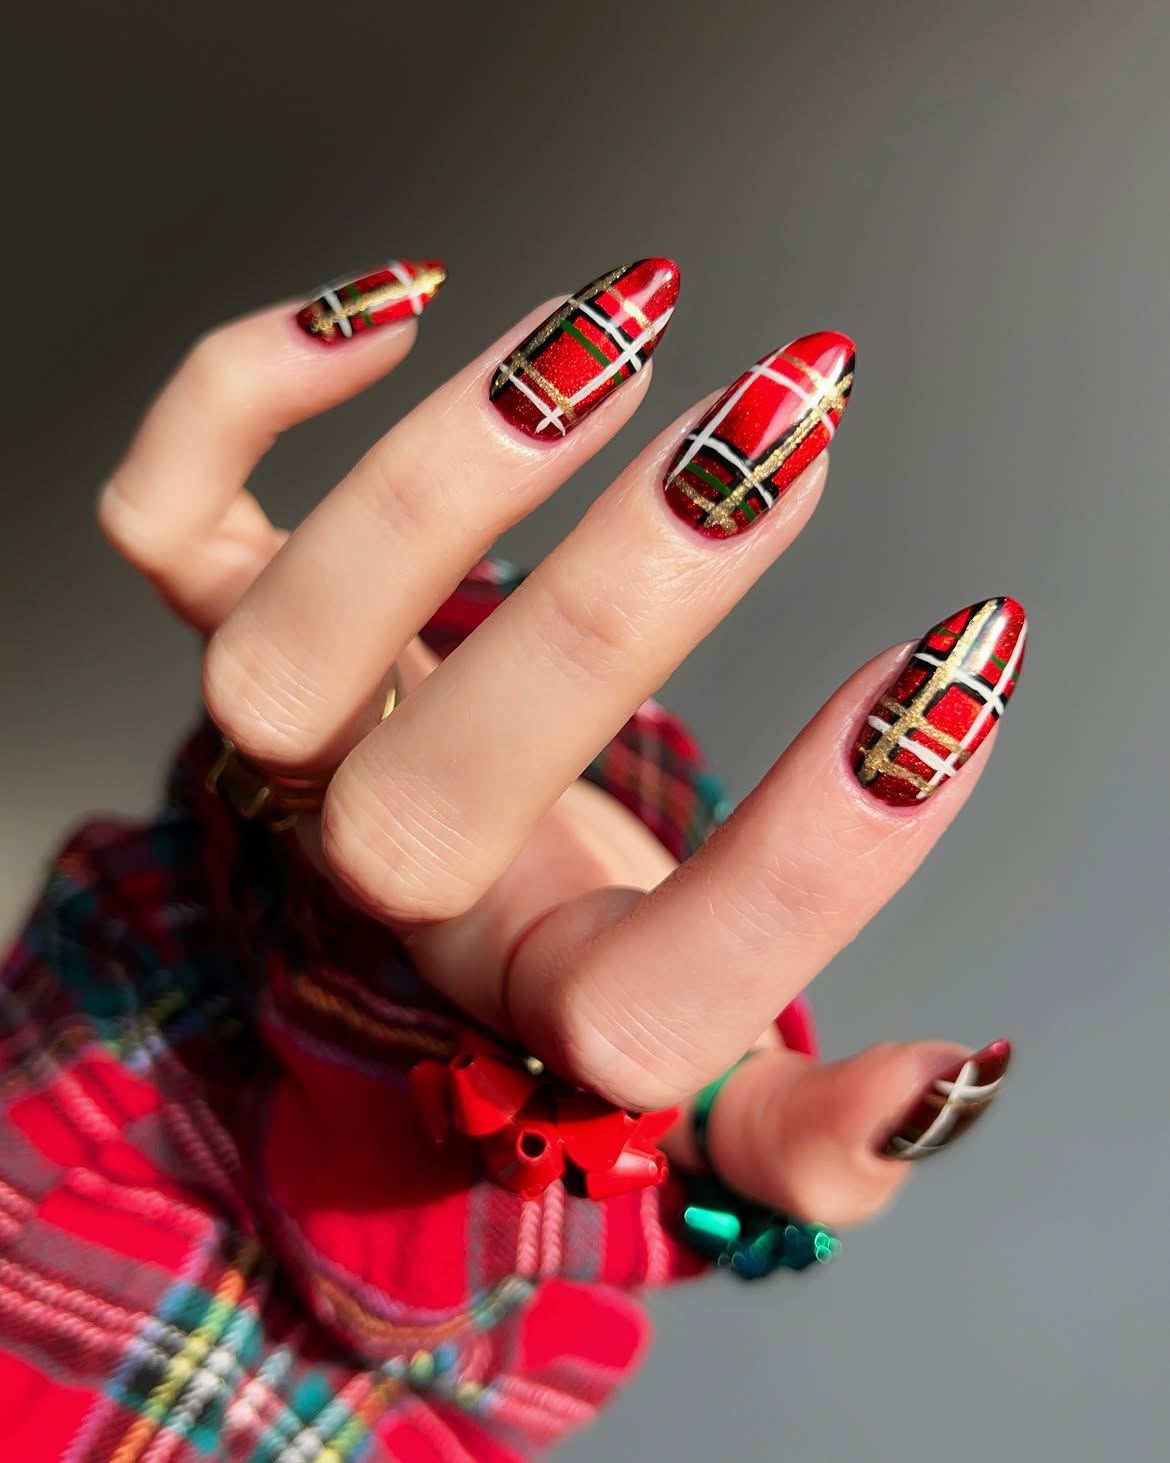
Tartan brings a richer, bolder direction to Christmas nail art. These long almond nails use a shimmering red base crossed with black, white, green, and gold lines.
Full pattern: Thick and thin bands overlap in different places across every nail. The gold glitter lines brighten the darker black and green sections.
Home shortcut: Start with the red base, then create one black line and one green line across each nail. Add slim white strokes in the opposite direction. Finish with a narrow gold glitter line where two colors meet.
A long striping brush gives smoother strokes. Striping tape can also help, but each layer should dry before the next pieces are placed. Small differences between nails suit the woven plaid effect.
Build the Tartan in Layers
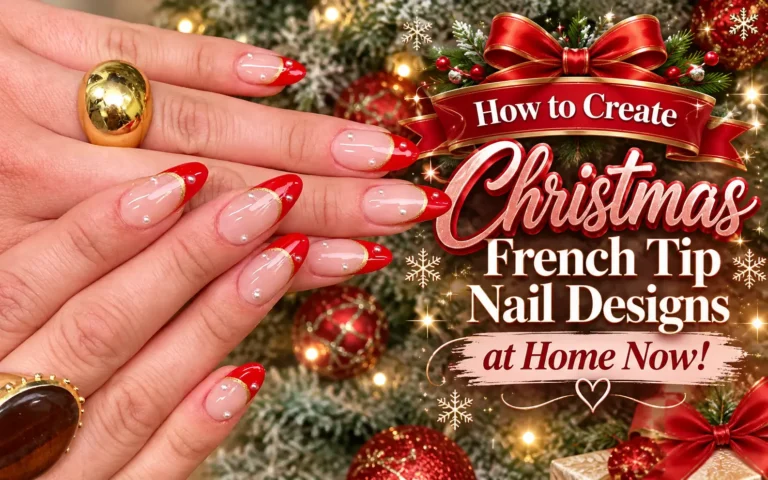
11. Deep Red French Nails with White Gift Bows
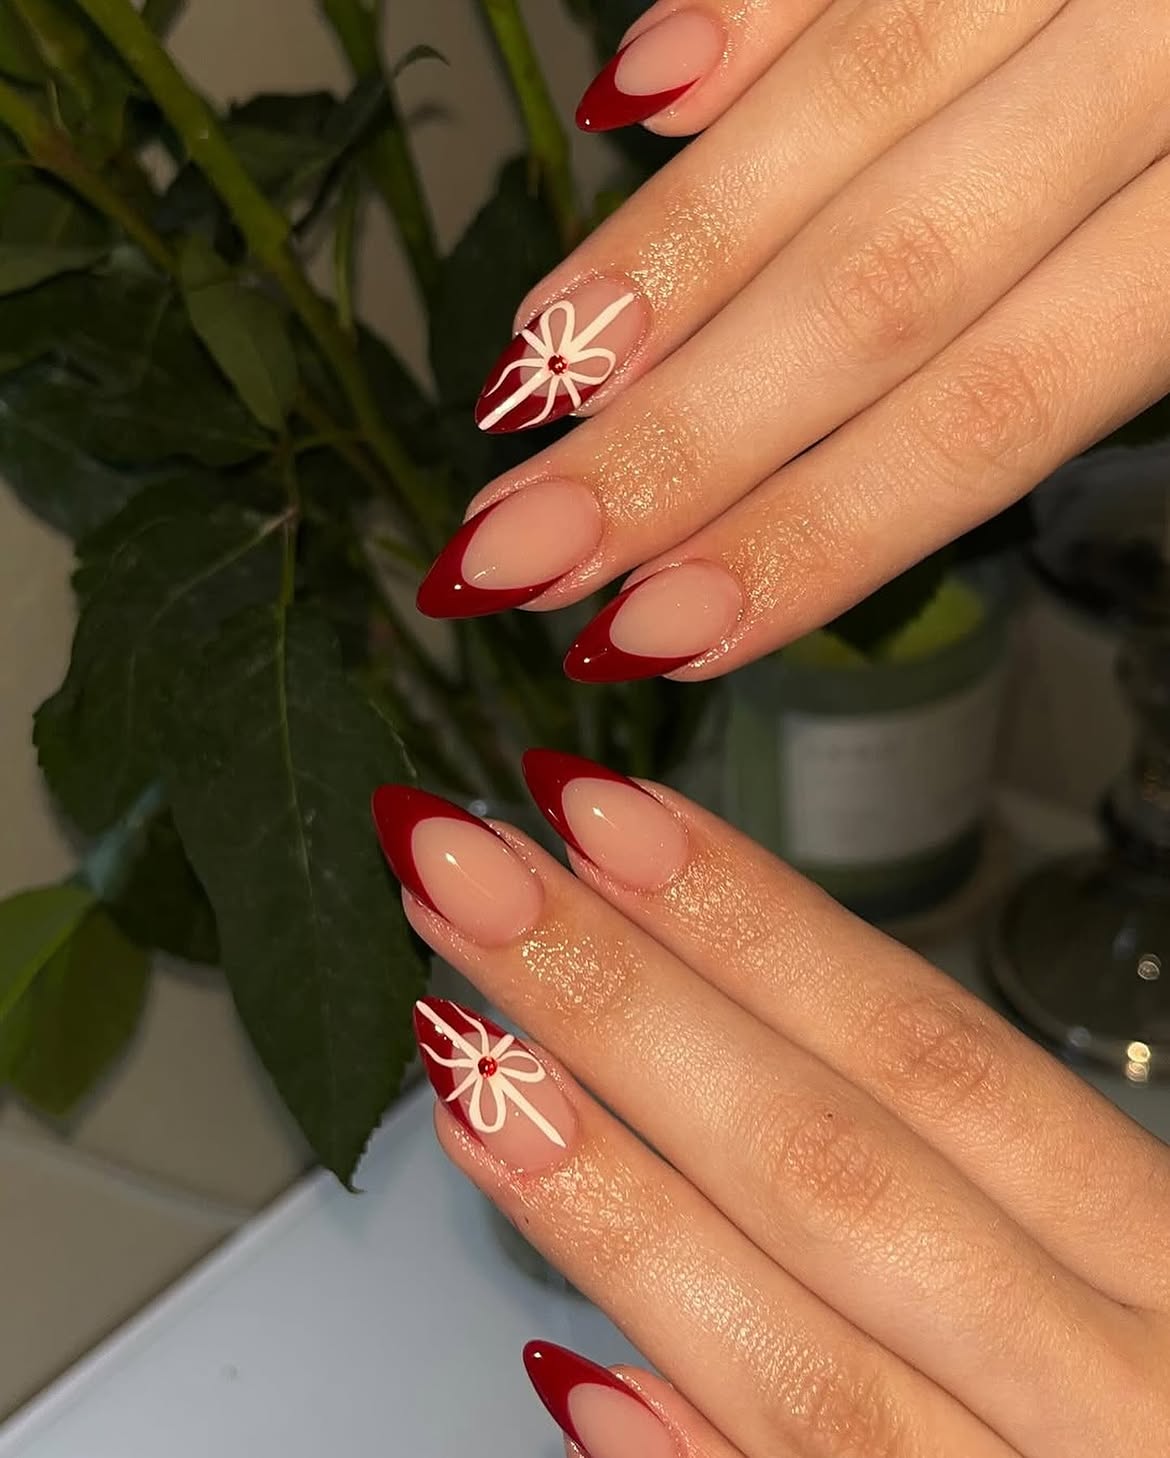
Deep red French tips create a clean base for the white ribbon accents. Most nails stay simple, while one feature nail on each hand looks wrapped like a tiny Christmas gift.
Why the layout works:
- The pointed almond shape follows the curve of the red tips.
- White ribbon lines stand out clearly against the red corner.
- The bow appears on only one nail per hand.
- A small red gem or polish dot marks the center.
Paint the red tips across every nail first. On the accent nail, extend the red color farther down one side. Use a fine brush to draw two white ribbon lines, then add the bow loops and tails. Keep the sheer center visible so the gift design does not cover the whole nail.
📌 Good to Know
A red polish dot can replace the small gem. If you add a gem, place top coat around its base to help hold it without hiding its shine.
12. Classic Red Glitter Nails with a Smooth Glossy Finish
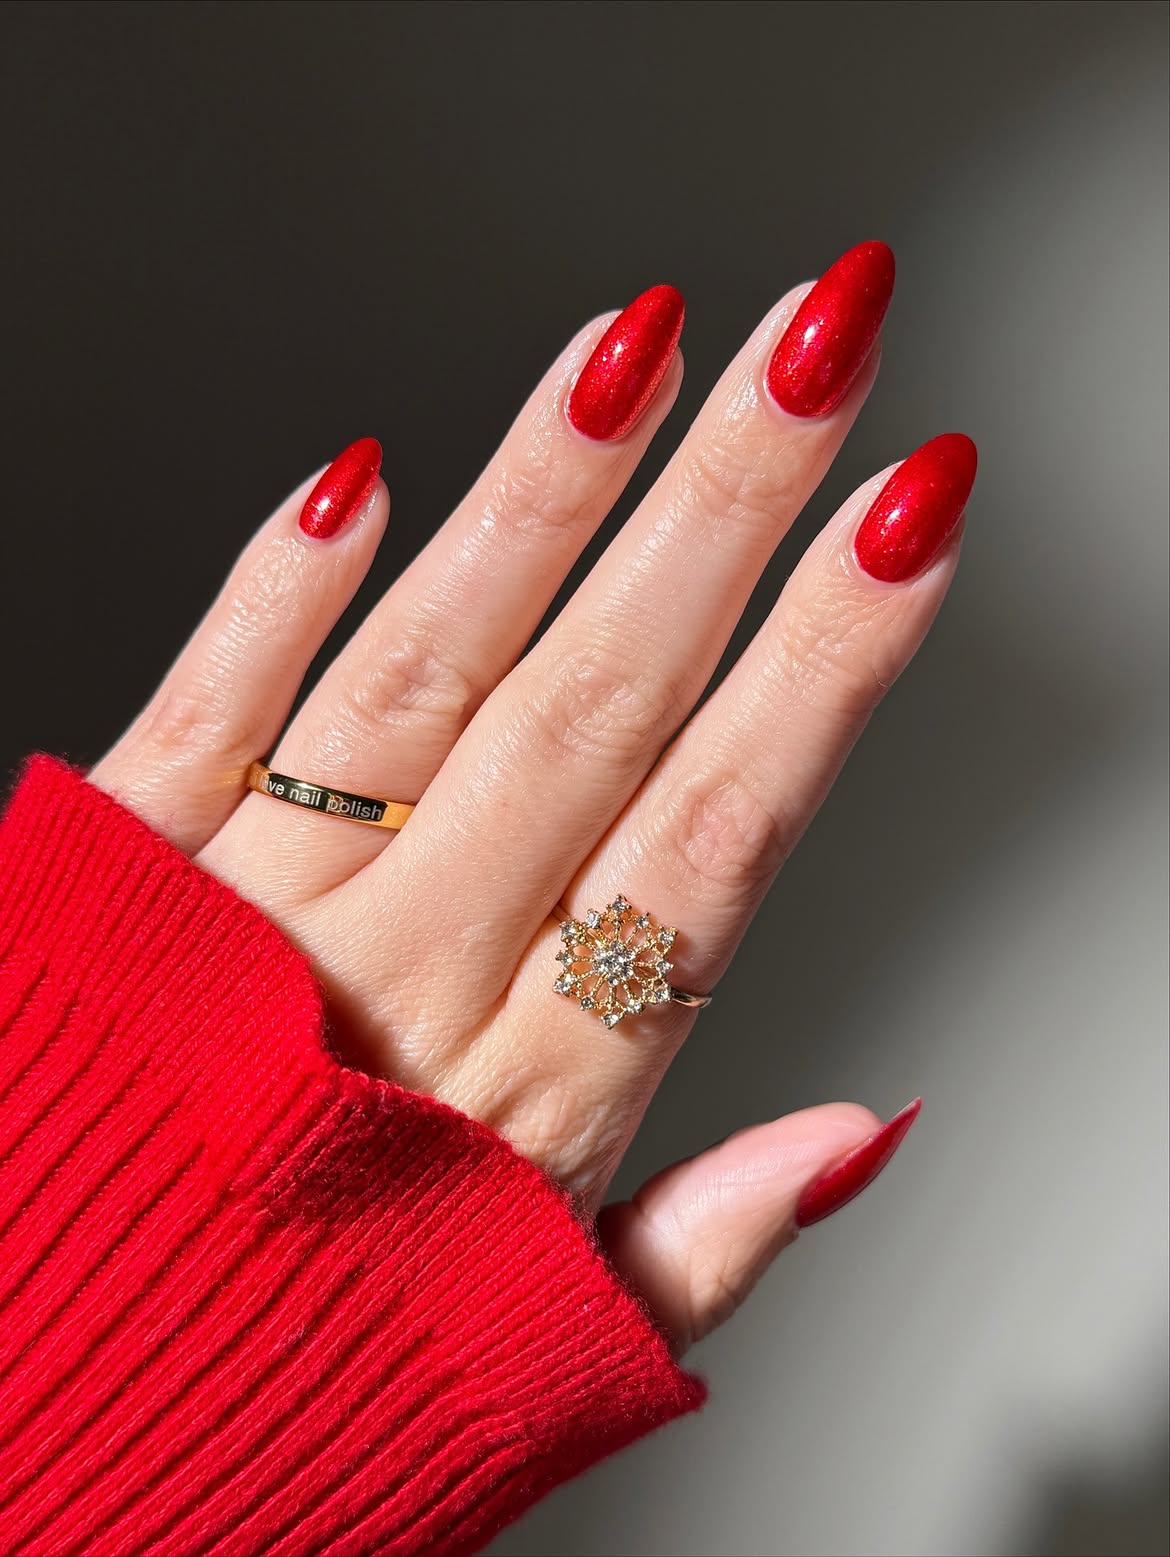
Solid red glitter is the simplest way to make an almond manicure feel ready for Christmas. The fine shimmer in this set creates an even sparkle across every nail, while the single color keeps the result clean.
Apply the red glitter polish in thin layers until the base looks fully covered. Allow each layer to dry before adding more, since thick glitter polish can stay soft underneath. Use a small cleanup brush around the cuticles for a neat outline.
A glossy top coat smooths the fine particles and makes the red shine brighter. Brush a little across the free edge as well, since glitter can wear away faster at the tips during daily tasks.
| Fine Shimmer as Shown | Chunky Glitter |
|---|---|
| Creates a smooth, even sparkle | Creates larger flashes of light |
| Usually needs less smoothing | May need extra top coat for texture |
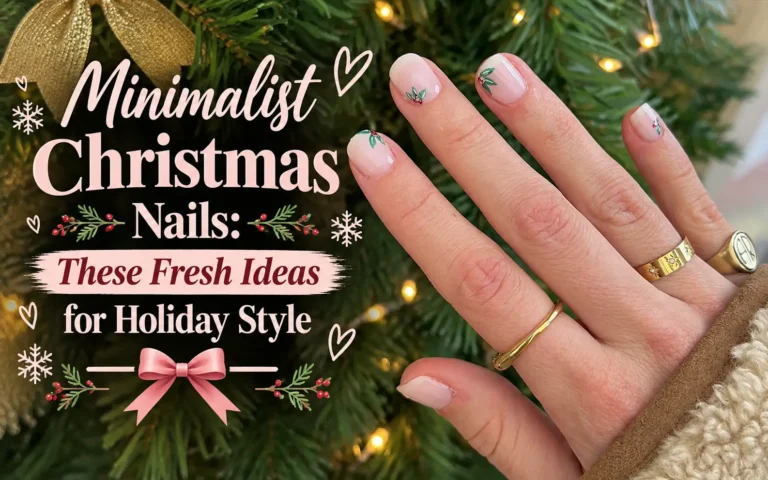
13. Minimal Christmas Wreath Accent Nails
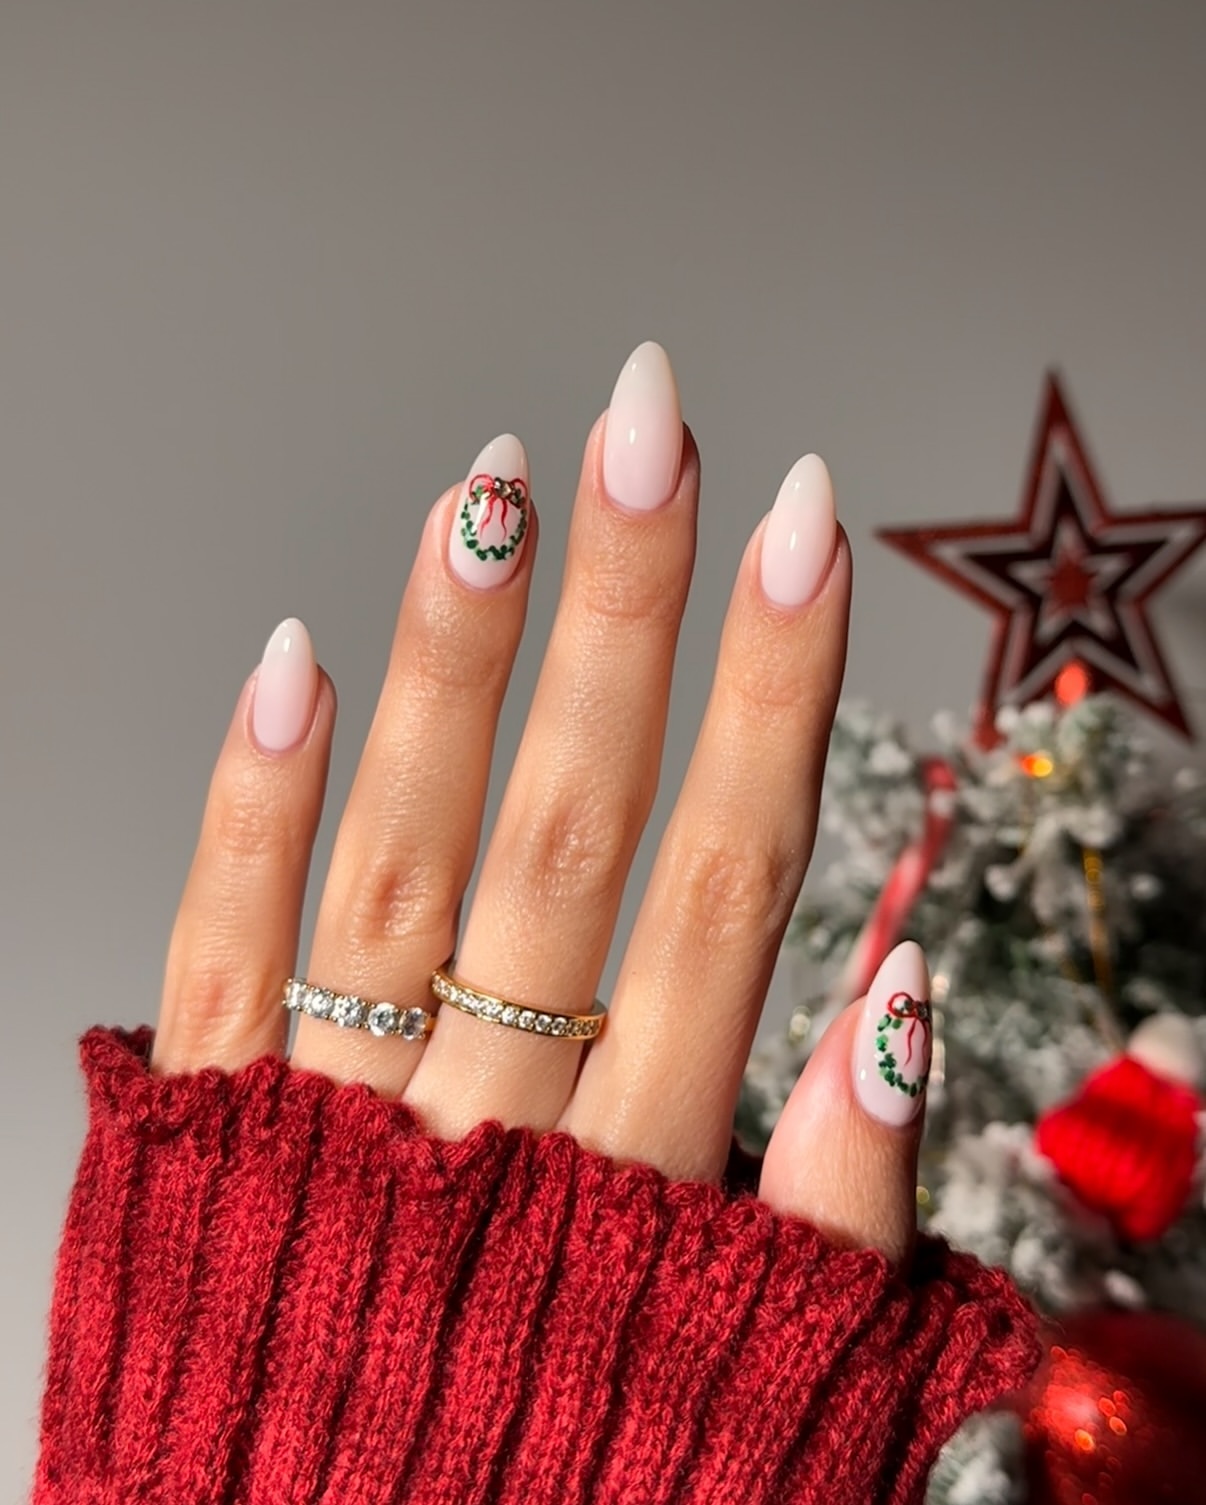
Soft milky pink polish gives this manicure a quiet winter look. Most nails remain plain, while the ring finger and thumb carry small green wreaths finished with red bows.
To recreate the wreath, mark a light circle near the center of the nail. Place tiny green dots and short leaf shapes around that guide, leaving the middle open. Paint two small red loops at the top, then add thin ribbon tails. A toothpick can handle the green dots, while a fine brush works better for the bow.
Keeping the artwork on two nails makes the tiny details easier to manage at home. It also gives the wreaths more attention without making the full manicure feel busy.
Accent Nail Placement
Plain
Wreath
Plain
Plain
Wreath
14. Red Glitter French Tips with Plaid and Winter Branch Accents
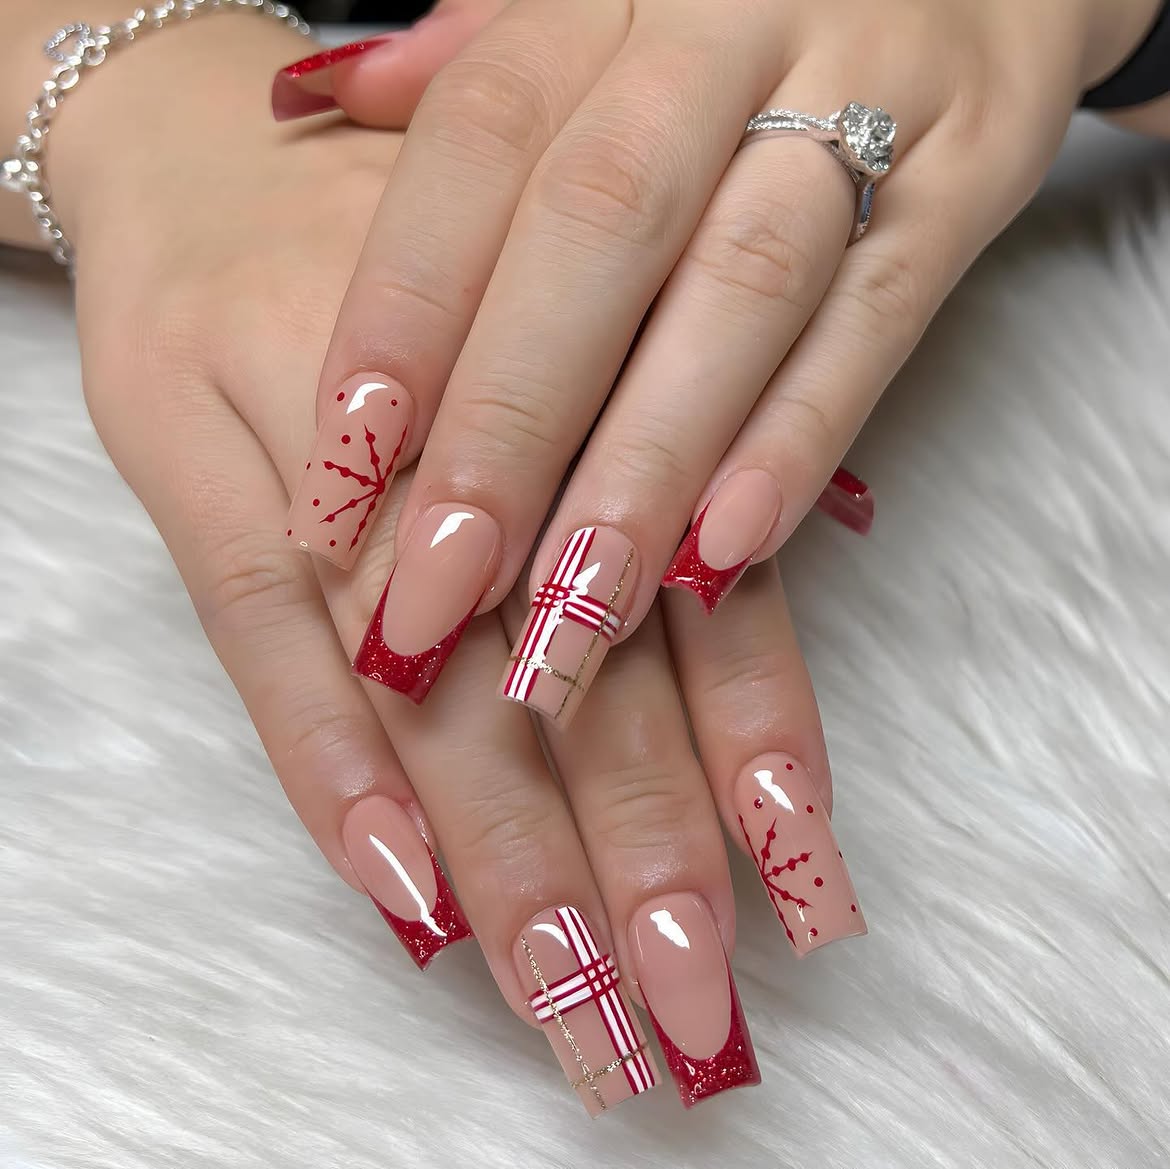
This long square set combines three Christmas patterns without losing the clean nude base.
What changes across the nails:
- Red glitter French tips cover the simpler nails.
- Red, white, and fine gold lines create the plaid accents.
- Branching red artwork and scattered dots fill the remaining feature nails.
The plain tips give the detailed artwork space to stand out. For an easier home version, choose one plaid nail and one branch nail on each hand. Paint the glitter tips first, then work on each accent separately. A long liner brush helps with the stripes, while a dotting tool can create the small red marks around the branch design. Let every color dry before crossing it with another line.
Keep the plaid lines thin and spaced apart.
Allow each stripe color to dry before crossing it.
Do not place every pattern on the same nail.
Avoid pressing the top coat brush into fresh artwork.
15. Minimal Candy Cane Border Nails with a Soft Winter Finish
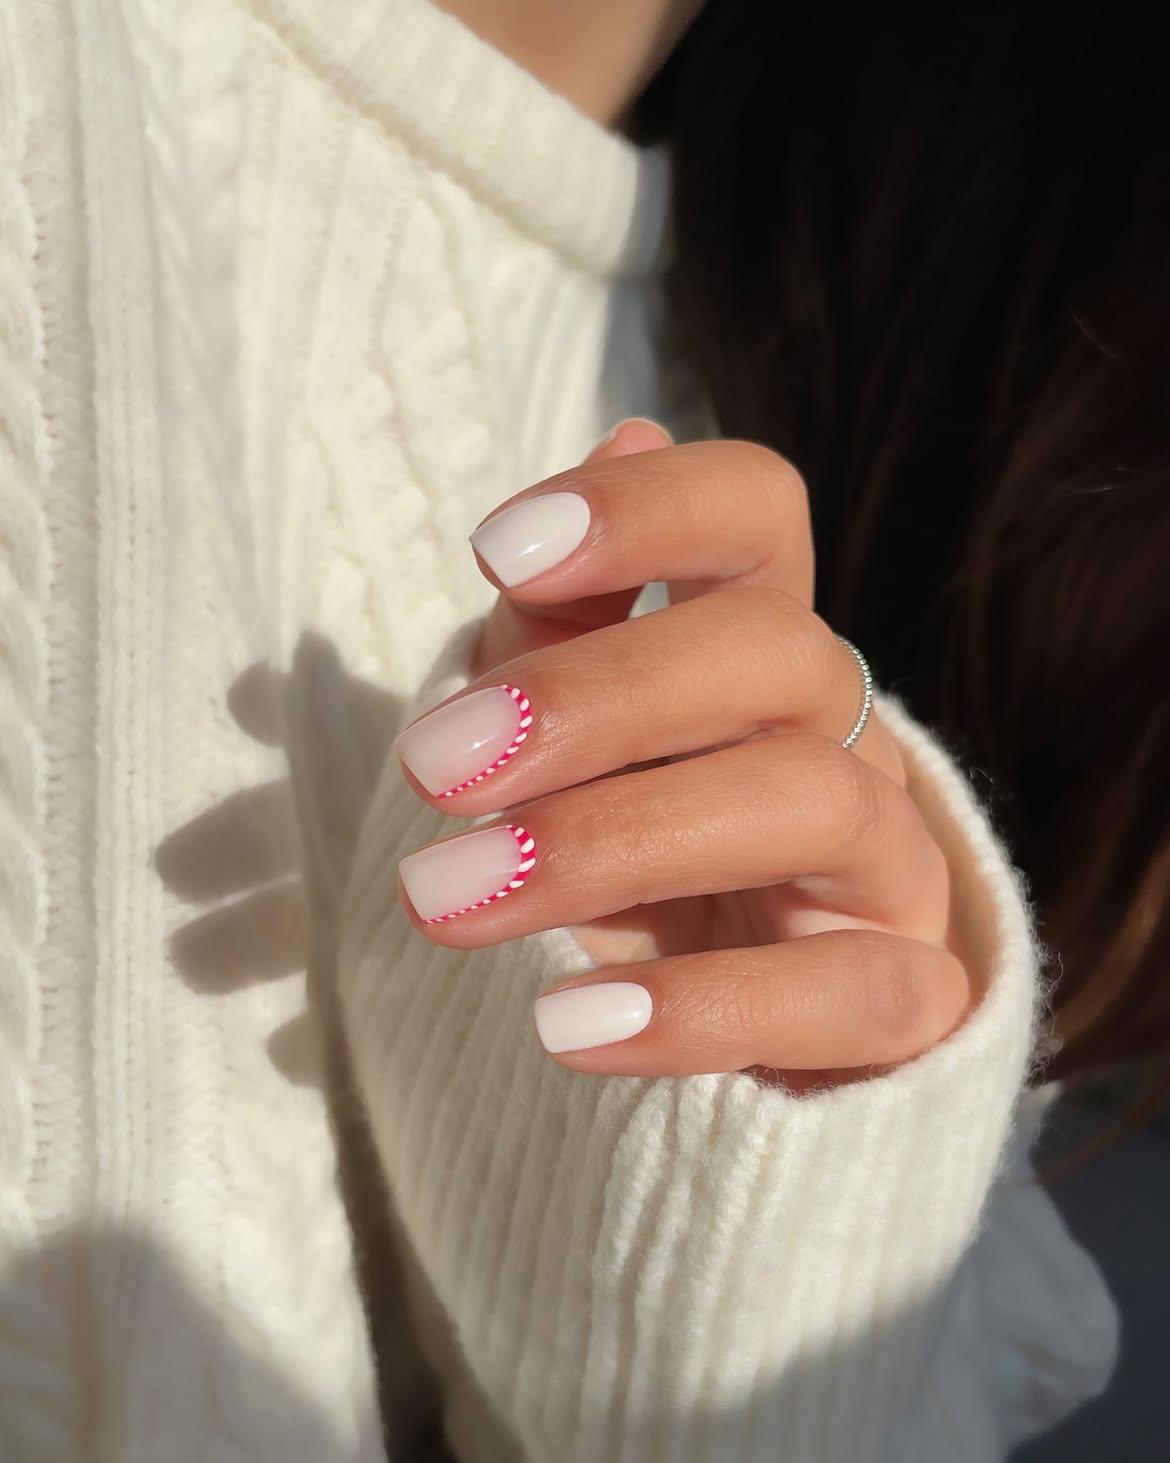
The clean white base keeps this Christmas nail design simple, while the thin red dotted border around the edges adds a festive candy cane inspired detail. The decoration stays close to the nail outline, leaving most of the surface open for a fresh and minimal look.
What makes this design stand out:
- A milky white base creates a snowy background.
- Thin red and white edge details frame the nails without looking heavy.
- The rounded shape keeps the manicure soft and wearable.
- The design uses small details instead of full nail artwork.
For a home version, apply a sheer white or milky polish first. Once dry, use a fine nail brush or dotting tool to create small red and white marks along the curved side edges. Keep the dots evenly spaced and finish with a glossy top coat to smooth the surface.
Recreate this winter look
16. Mixed Christmas Nail Art with Candy Cane Stripes and Gingerbread Details
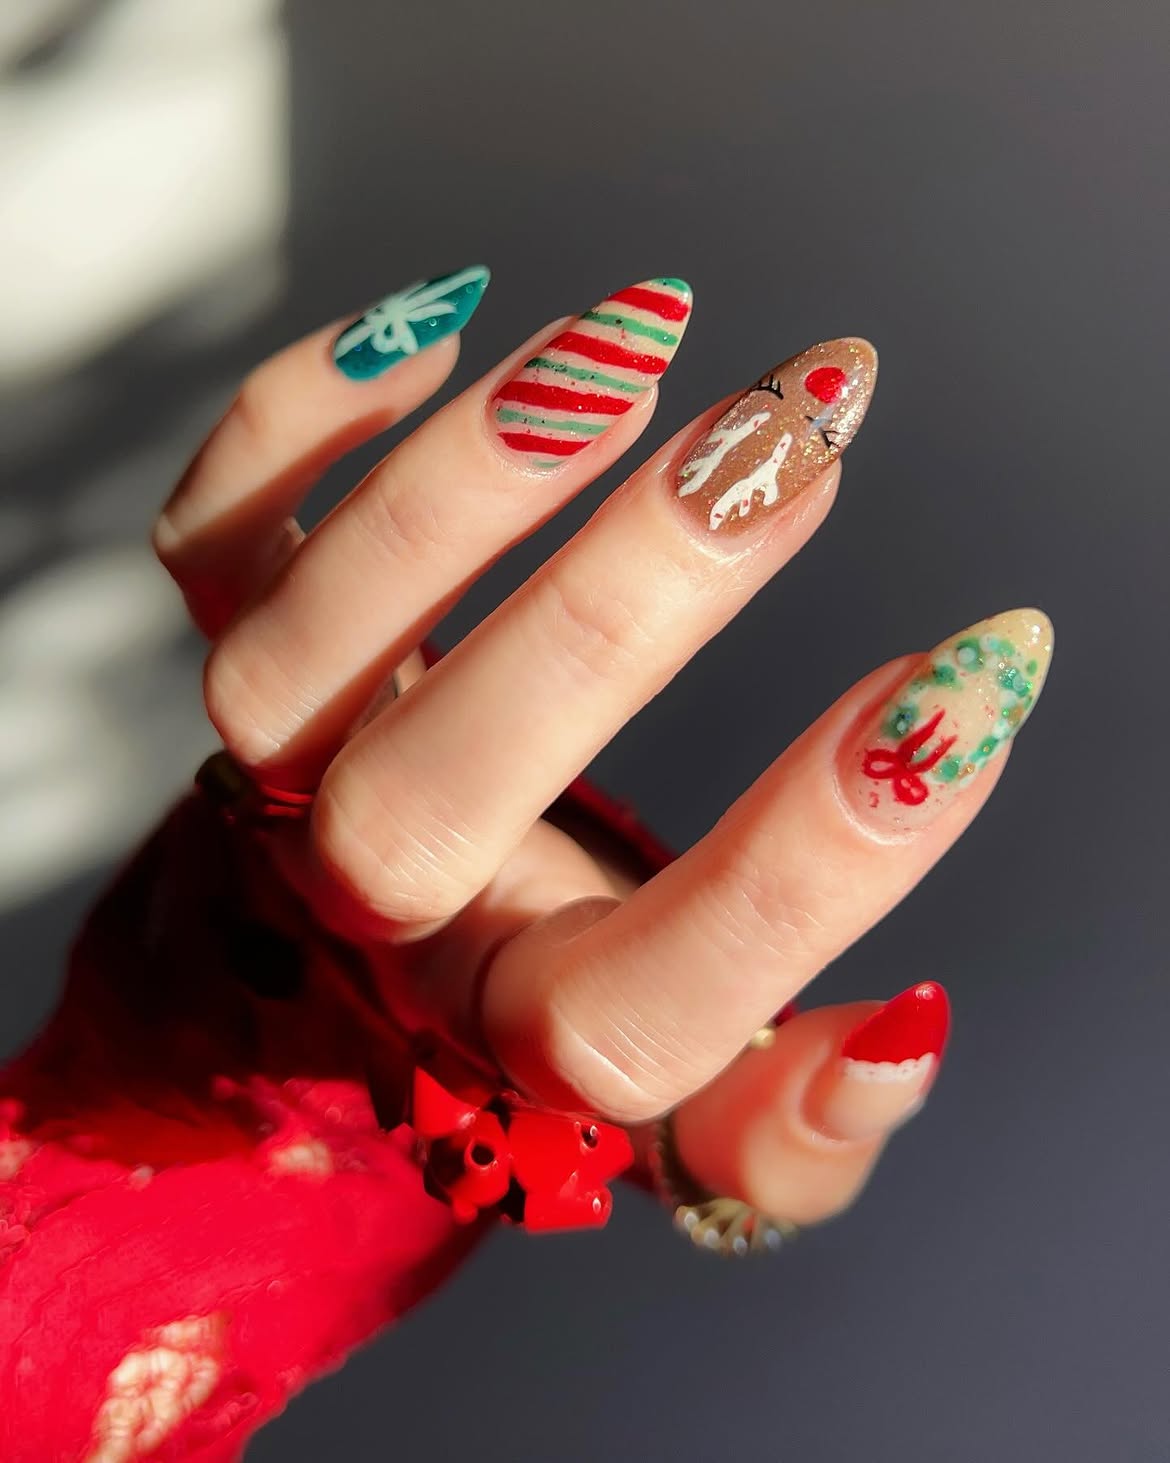
This playful Christmas manicure combines several holiday symbols while keeping each nail unique. The set mixes candy cane stripes, a tiny gingerbread inspired character, winter greenery, and a bold teal accent nail for contrast.
What makes this design interesting:
- Red and green stripes create a classic candy cane pattern.
- The gingerbread style accent nail adds a fun character detail.
- Small holiday decorations are spread across different nails instead of repeating one design.
- The mix of warm and cool colors gives the manicure a handmade Christmas feel.
For recreating this look at home, start with a neutral base on most nails. Add the striped pattern using a thin brush, keeping the lines slightly curved for a softer look. Create the character details with small dots and fine strokes, then finish with a glossy top coat to bring all the different elements together.