15 Quick Christmas Nails for Busy Women: Chic Festive Ideas!
The festive season is busy enough without spending hours choosing a manicure. These Quick Christmas Nails for Busy Women bring together stylish designs that feel seasonal, polished, and easy to recreate. From glitter French tips and glossy red details to tiny bows, holly accents, and simple Christmas decals, each look delivers plenty of charm without demanding a complicated appointment.
Use these ideas as inspiration for your next salon visit or adapt them at home with nail stickers, a fine liner brush, and your favorite festive polish. There is something here for every mood, from subtle sparkle to cheerful holiday art.
15 Quick Christmas Nails for Busy Women
1. Colorful Star Decals for Quick Christmas Nails
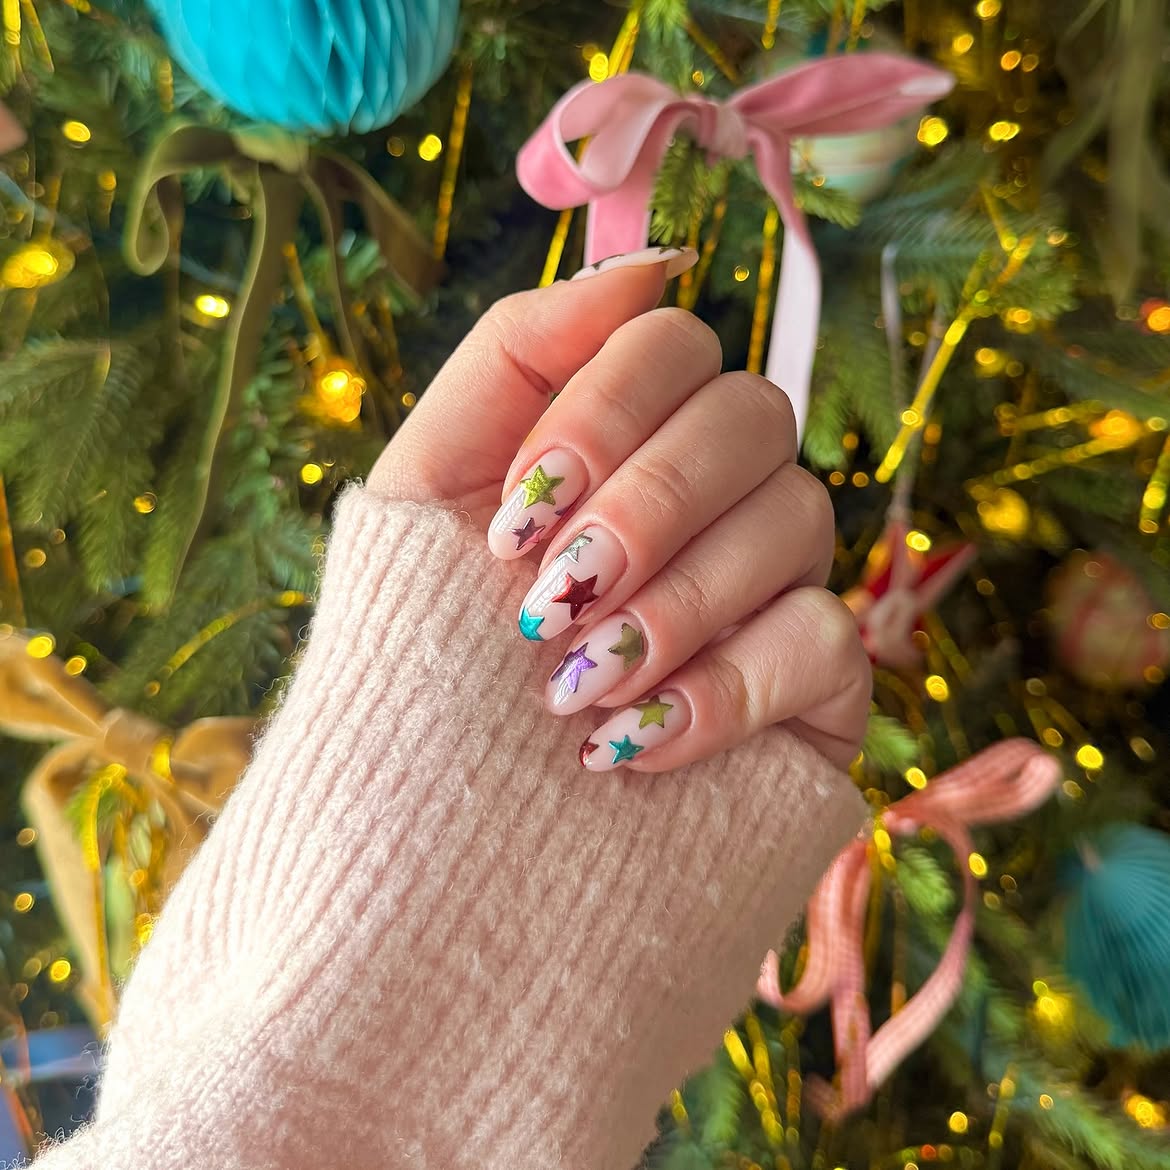
A sheer pink base gives these short rounded nails a clean look, while metallic stars and tiny moon shapes bring in the festive detail. The mix of teal, red, purple, silver, and gold feels playful beside the glowing Christmas tree.
What makes this design easy to recreate
- Apply one or two coats of sheer pink polish.
- Place small star decals in different positions on each nail.
- Mix colors instead of repeating one shade.
- Add a tiny moon shape for extra variety.
- Seal everything with a glossy top coat.
Keeping the base simple saves time and allows the colorful shapes to stand out. The varied placement also means every nail can look slightly different without needing detailed brushwork.
2. Red Glitter French Tips with Silver Details
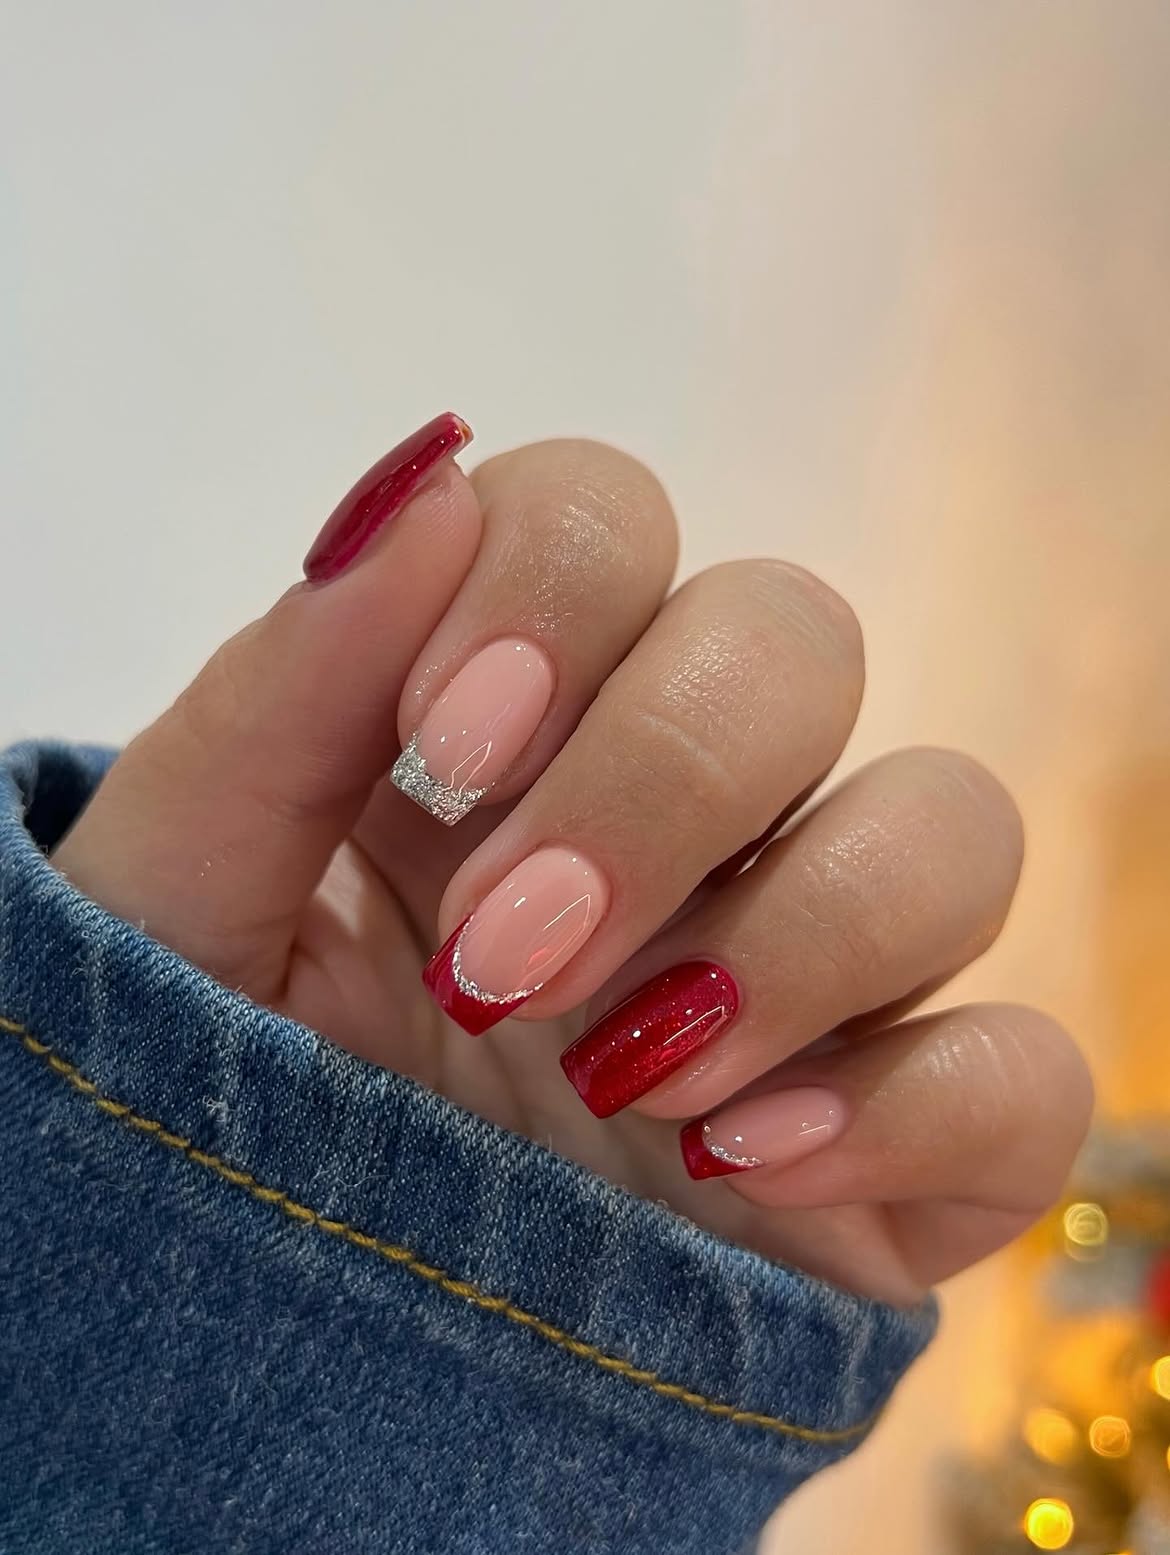
Red glitter carries the Christmas color, while the nude base keeps the manicure light and polished. Two nails are fully covered in sparkling red, while the others use red or silver tips with thin curved accents.
Keep two nails bold: Use solid red glitter on the thumb and ring finger to anchor the design.
Keep the remaining nails light: Add red French tips to a glossy nude base, then outline selected edges with silver glitter.
Change the details slightly: One silver tip, one curved silver border, and one smaller accent create variety without adding difficult artwork.
The final look feels detailed, but the repeated colors make it simple to plan and quicker to finish.
| Full Red Glitter | Nude Accent Nails |
|---|---|
| Creates the strongest festive color | Keeps the overall set balanced |
| Needs only glitter polish and top coat | Uses red tips with small silver details |
| Best used on selected nails | Adds variation without detailed drawings |
3. Mint and Forest Green Christmas Tree Nails
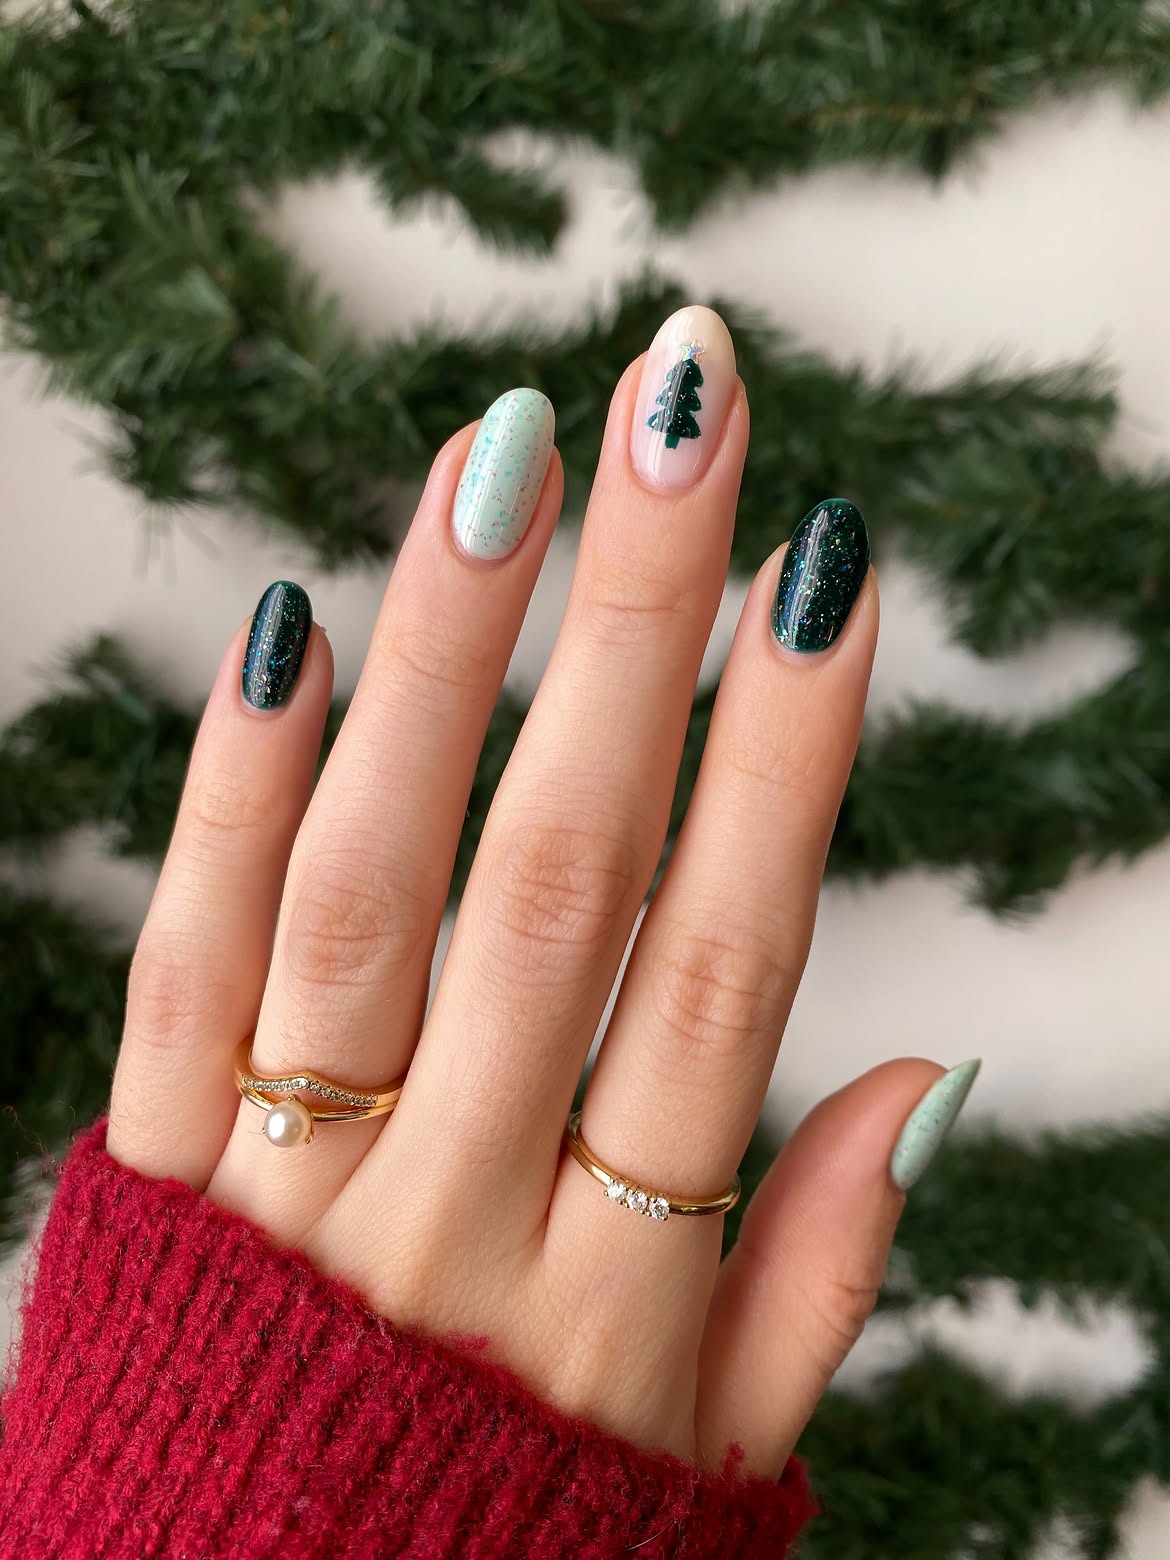
A tiny Christmas tree becomes the center of this manicure, surrounded by soft mint and deep forest green nails. The darker polish has a fine sparkle, while the pale green nails carry delicate red speckles that resemble scattered holiday confetti.
Only one nail needs detailed artwork. A nude base keeps the tree visible, and the layered green shape is finished with a small shimmering star at the top. For a faster result, use a tree decal or stamping plate instead of painting each branch.
Repeating the mint and forest shades across the other nails keeps the set coordinated. This approach gives busy women a clear festive theme without placing artwork on every finger.
Fast version of this look
For more low-effort holiday inspiration, explore these 17 Christmas Nail Designs for Beginners with cute, simple styles that still feel polished and festive.
4. Silver Glitter Tips with Tiny Christmas Characters
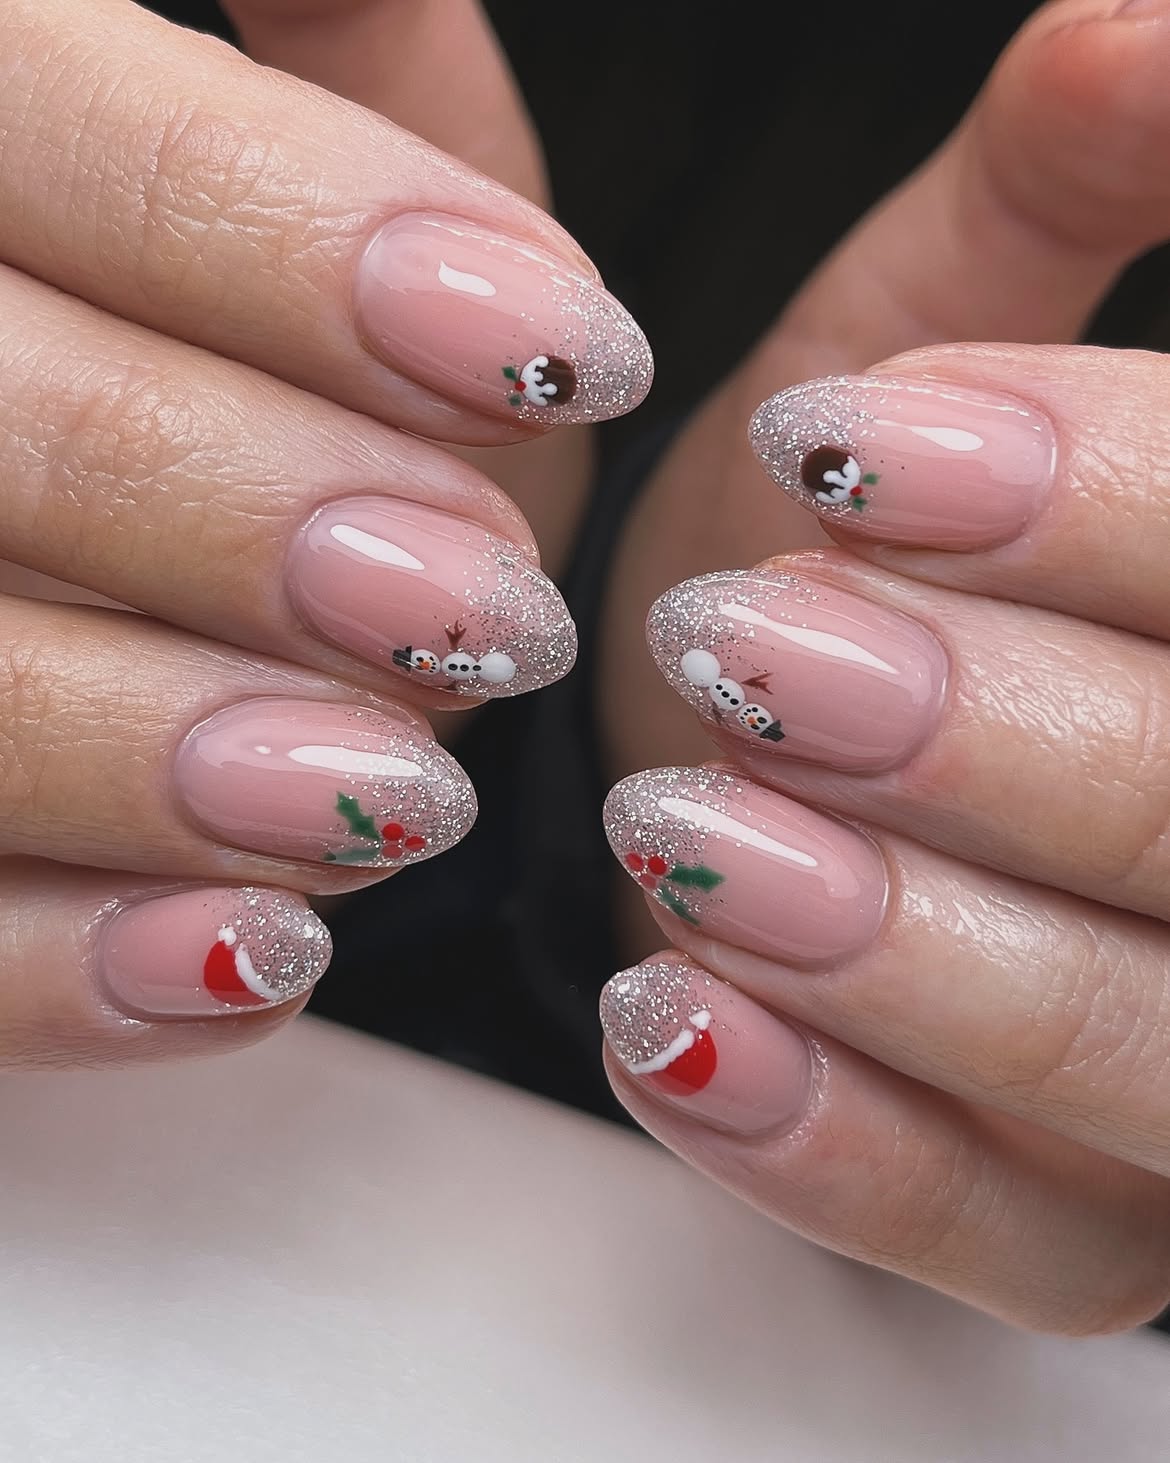
Fine silver glitter fades across the tips of these short oval nails, giving the sheer pink base a frosty finish. Tiny snowmen, holly leaves, berries, Santa hats, and other festive symbols sit near the edges without covering the whole nail.
The small scale of the artwork keeps the manicure neat, even though every finger has a different design. For a quicker version, apply miniature nail decals after the base and glitter have dried. This removes the need to paint detailed faces and shapes by hand.
Keep each symbol near the tip so the center of the nail stays open. That clear space stops the mixed designs from looking crowded.
Use tiny decals near the glitter tips.
Leave open pink space around each symbol.
Do not place several large symbols on one nail.
Avoid thick glitter that hides the small artwork.
5. Candy Cane Nails with Red Glitter Accents
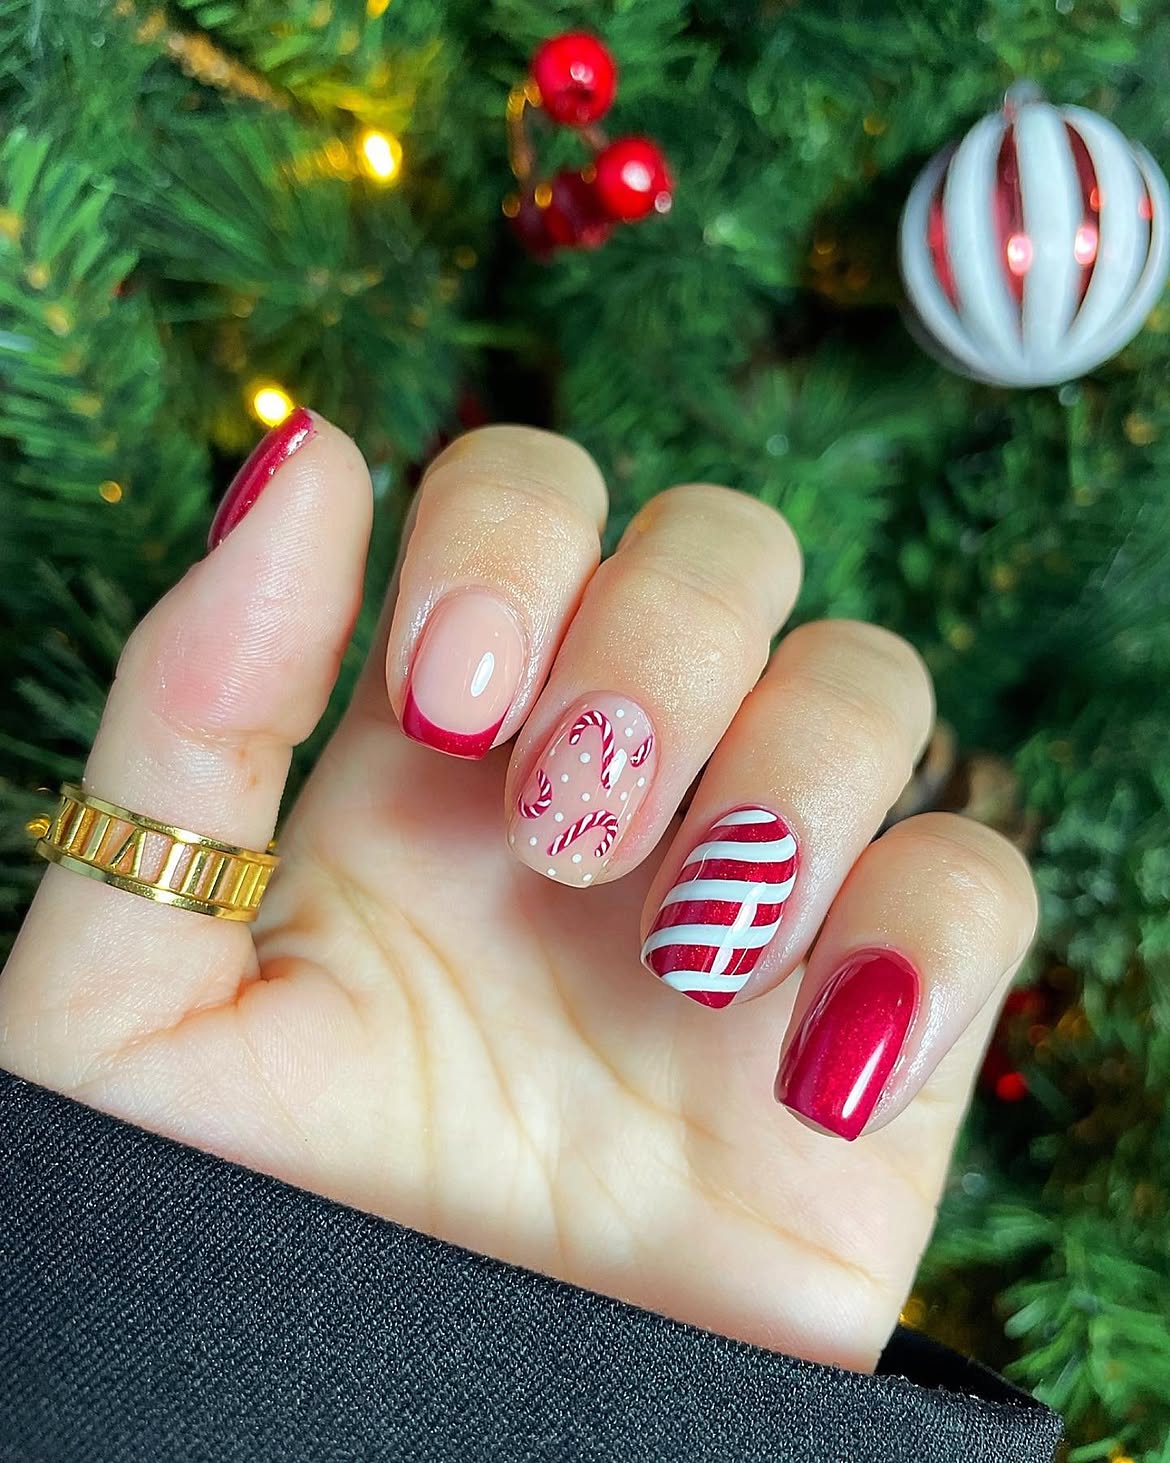
Candy cane details give this manicure a clear Christmas theme using only red, white, and soft pink. The short square shape keeps the bold patterns tidy and practical.
The quieter side: A nude nail with a slim red tip adds breathing room. Another nude nail carries small candy canes and white dots, which resemble scattered snow.
The bolder side: One nail uses a red glitter base with flowing white stripes, while the remaining nails stay solid red. This mix prevents every finger from needing detailed artwork.
For a quicker version, use small candy cane decals for the accent nail. Create the larger white lines with a fine nail brush, then seal the full set with a glossy top coat.
Use tiny candy cane decals on one nail, then repeat the red polish across the others for a faster and cleaner finish.
6. Glassy Red French Tips on a Nude Base
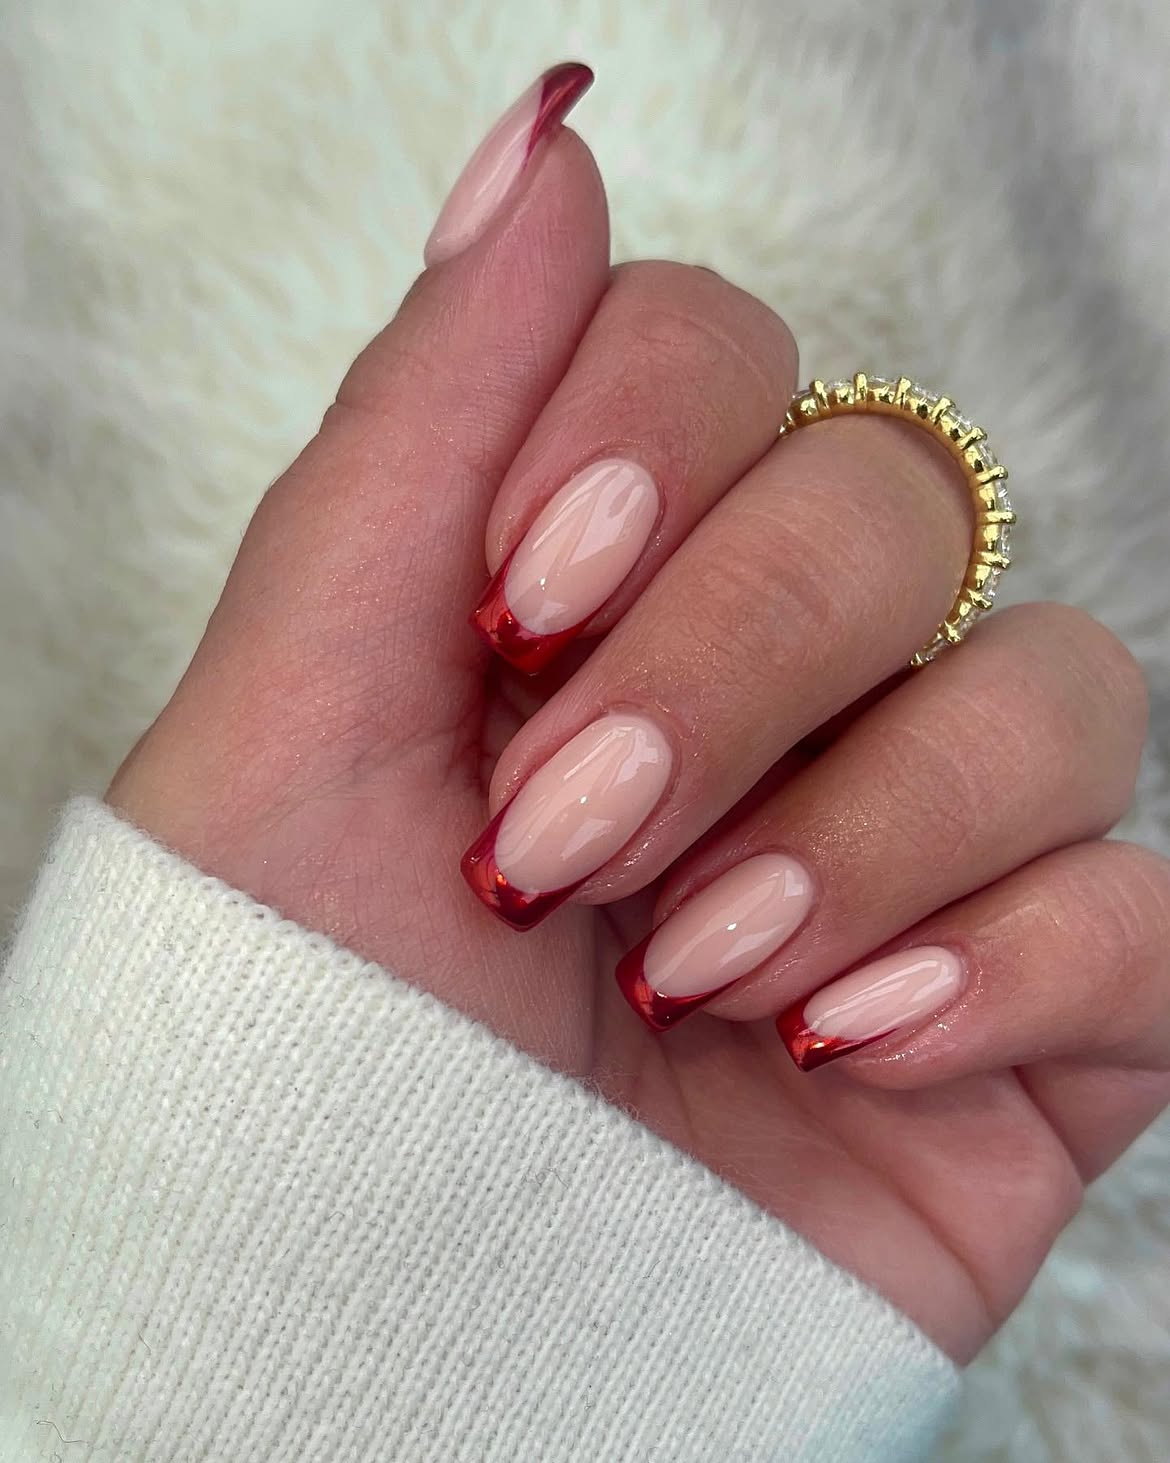
A translucent red tip gives the classic French manicure a simple Christmas update. The glossy nude base keeps the nails clean, while the deep red edge adds enough seasonal color without glitter, decals, or detailed drawings.
The matching tips create a calm, uniform finish across every nail. Since the design uses only two colors, it is easy to plan and suitable for a busy schedule. Apply the nude base first, then add the red edge with a French tip guide or a fine brush. A glossy top coat strengthens the glassy effect and smooths the line between both shades.
This understated design can also move easily from holiday events to everyday wear.
💡 Quick Tip
Choose a translucent red polish for the tips. It gives the color more depth and makes small brush marks less noticeable beneath the glossy top coat.
7. Chocolate Christmas Pudding Accent Nails
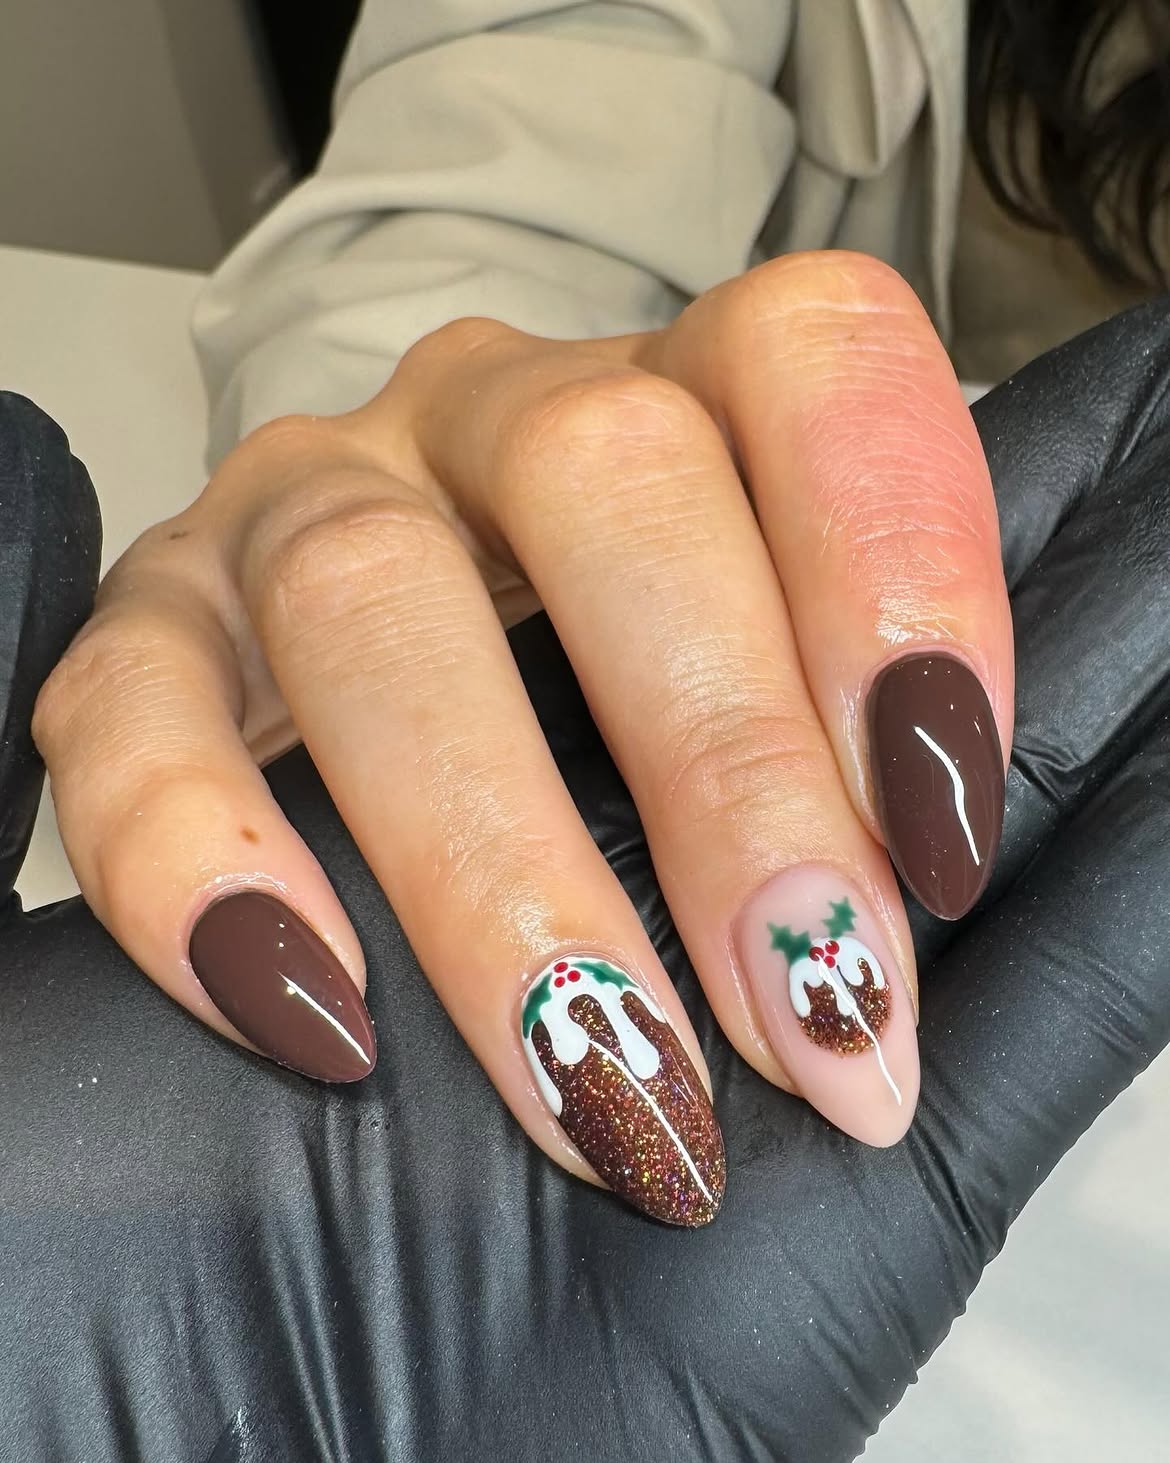
Chocolate brown polish gives this almond manicure a warm holiday look without relying on the usual bright red base. The festive detail comes from two Christmas pudding accents decorated with white icing, green holly leaves, and small red berries.
One accent nail uses a full brown glitter base, making the pudding feel rich and sparkly. The second places a smaller pudding shape over soft nude polish, which keeps the set from becoming too dark. Solid brown nails give the detailed artwork room to stand out.
For a quicker result, paint most nails brown and use one pudding decal as the accent. Add a little glitter polish to the brown section before sealing it.
Use solid chocolate polish with one small pudding decal over a nude accent nail.
Add brown glitter, white icing, green leaves, and red berries to a second accent nail.
8. Silver Half Moons with Tiny Red Dots
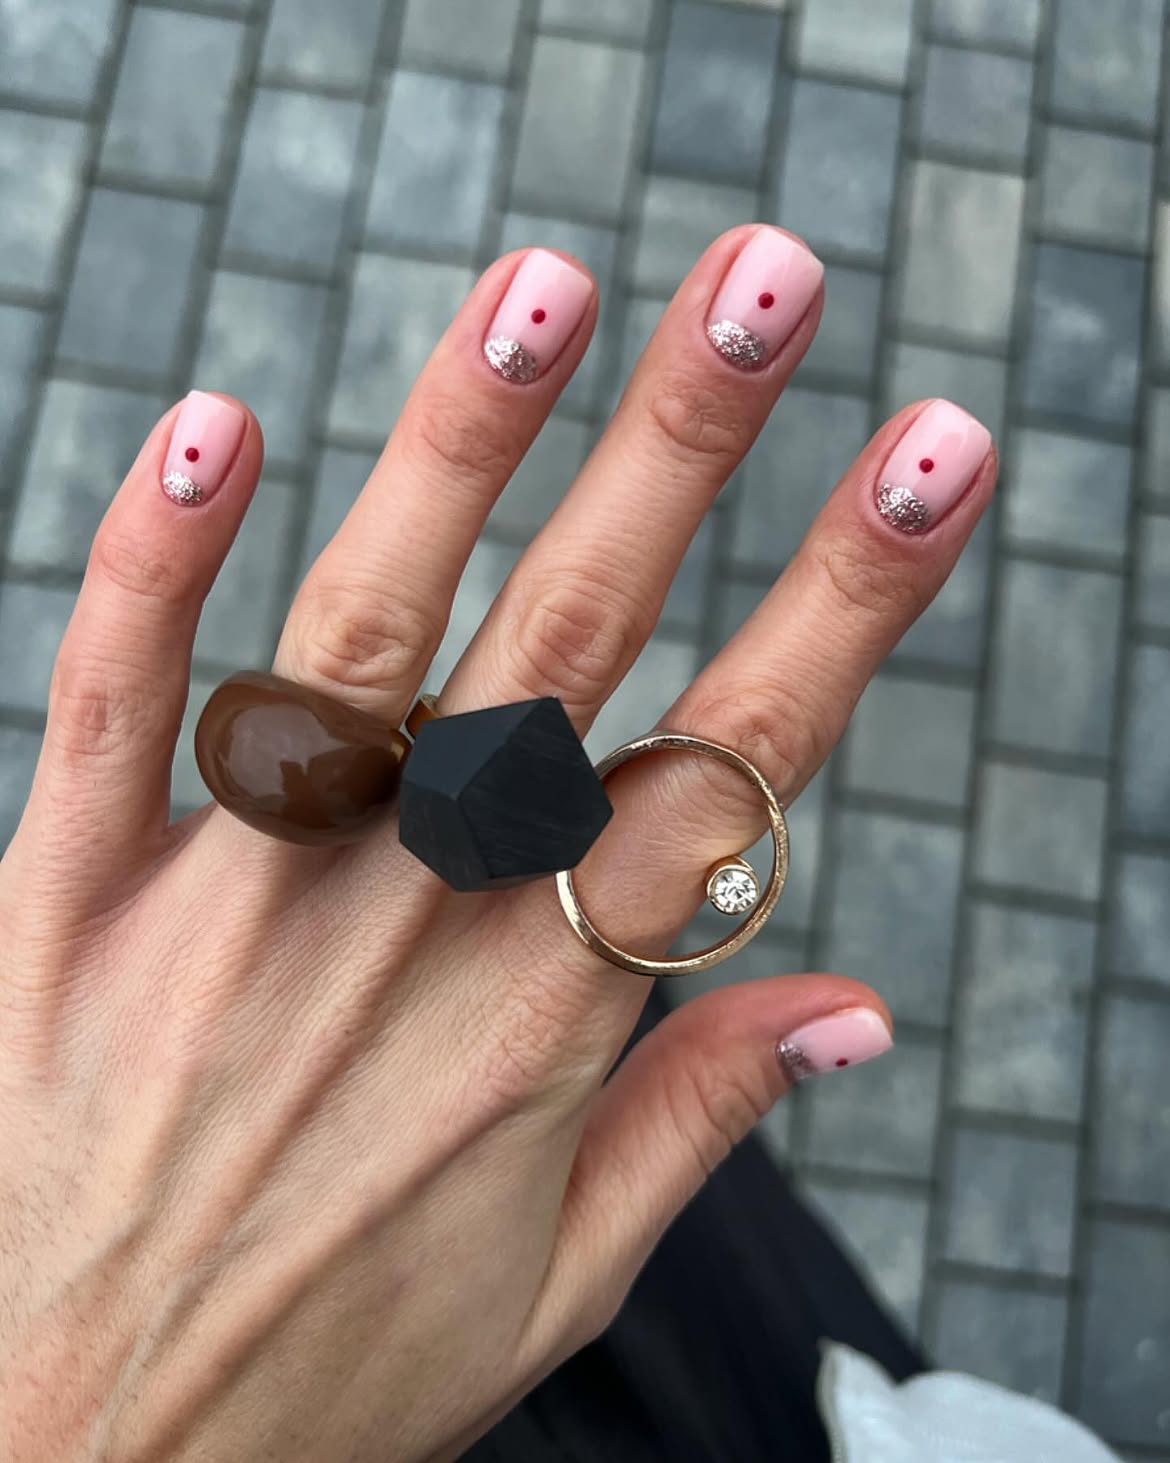
Small details make this pale pink manicure feel festive without covering the short square nails in artwork.
Base: The soft pink polish creates a clean background and keeps the look light.
Sparkle: Silver glitter forms a rounded shape near each cuticle. The placement is repeated across all five nails, so there is no need to plan different designs.
Accent: One small red dot sits above the glitter on every nail. A dotting tool, toothpick, or the end of a fine brush can create this detail quickly.
The repeated pattern is easy to follow, and the short length makes the manicure practical for work, shopping, and holiday preparation.
9. Glossy Red Nails with Simple Holly Accents
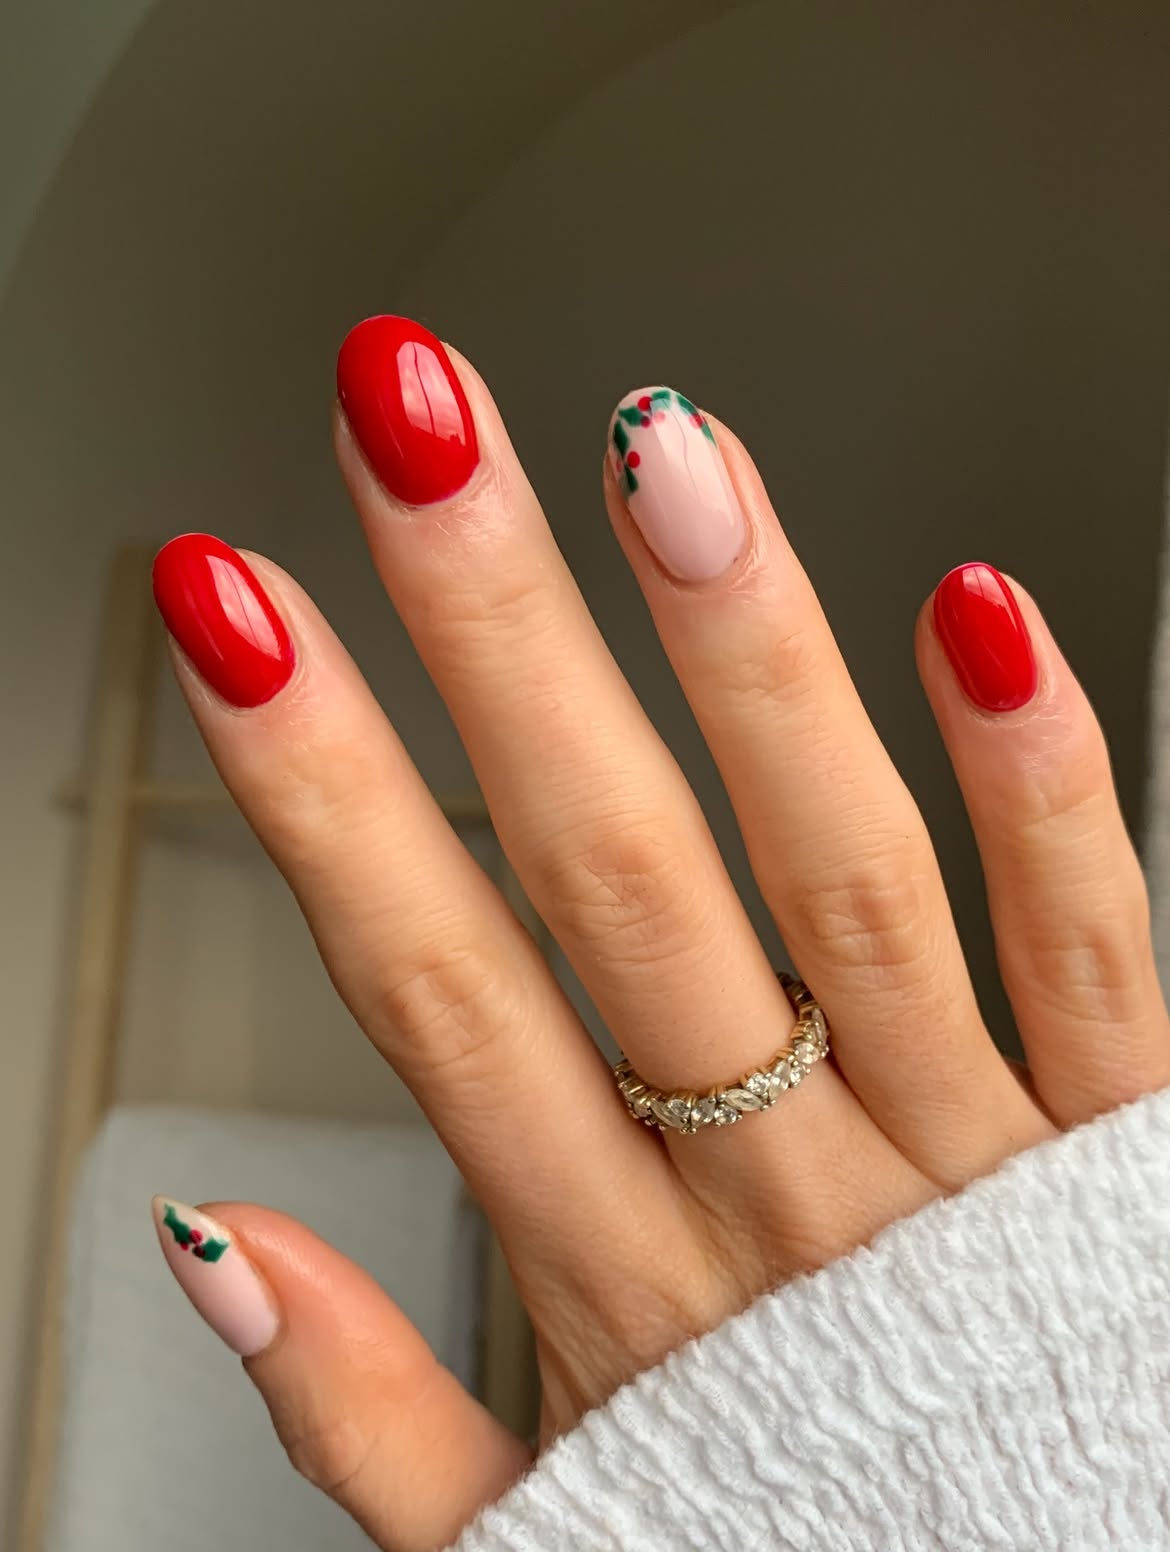
Most of the work in this manicure comes from one glossy red polish. Three oval nails are painted in the same bright shade, while two soft pink accents carry small holly leaves and red berries near the tips.
The uneven placement of the greenery gives the accents a natural look, so every leaf does not need to match. A fine brush can create the green shapes, and a dotting tool can place the berries. Nail stickers offer an even faster route.
The balance is useful for busy women because only two nails need festive detail. The remaining nails require a smooth coat of red and a glossy finish.
Paint three nails with glossy Christmas red.
Cover two accent nails with soft pink polish.
Add small green leaves and red berry dots near the tips.
If you want even easier festive ideas, these 17 Simple Christmas Nails for Beginners are full of cute looks you can recreate without advanced nail art skills.
10. One Christmas Decal per Nail on a Shimmer Base
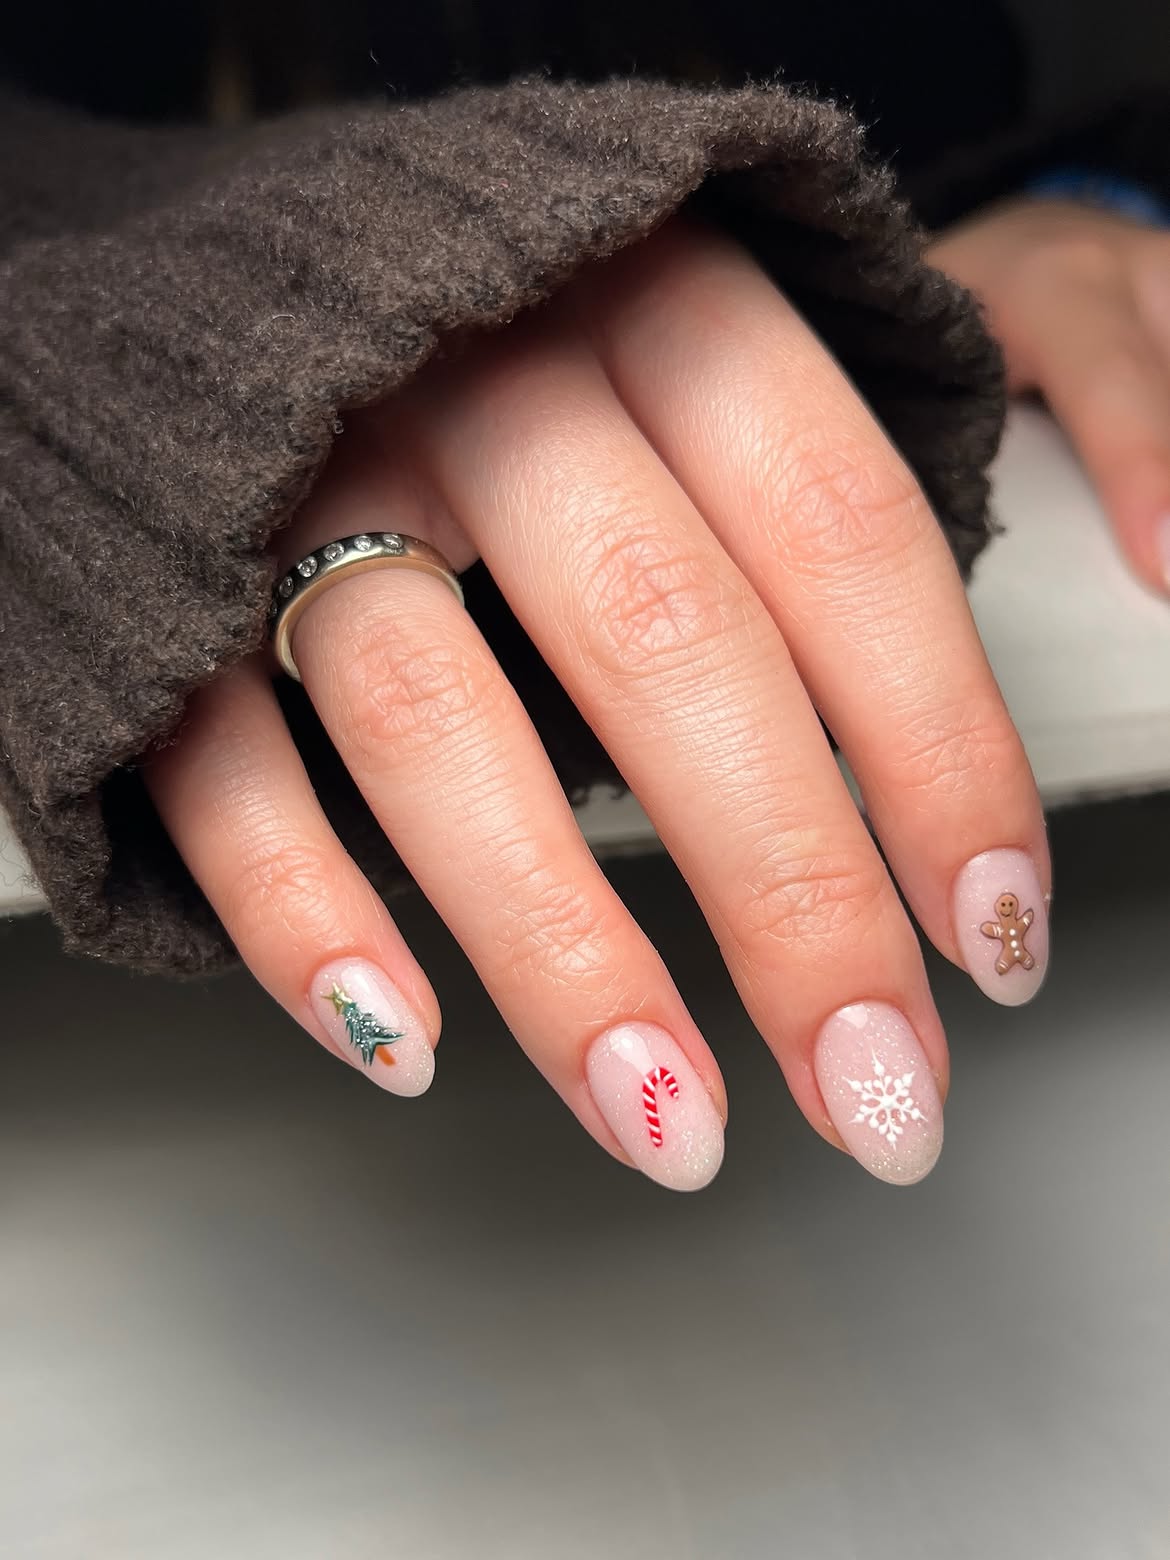
A pale shimmer base connects four different Christmas symbols without making the manicure feel busy. Each short oval nail carries one small design: a decorated tree, a striped candy cane, a white snowflake, or a smiling gingerbread figure.
The useful trick is keeping every symbol small and leaving plenty of the soft base visible. Since the background stays the same, the nail designs can change without losing balance.
Choose ready made decals to copy the look quickly. Place each one slightly away from the center for a relaxed arrangement, then press the edges flat before adding top coat. One symbol per nail is enough to create a cheerful holiday set.
11. Pink Snowflake Nails with Mixed Silver Glitter
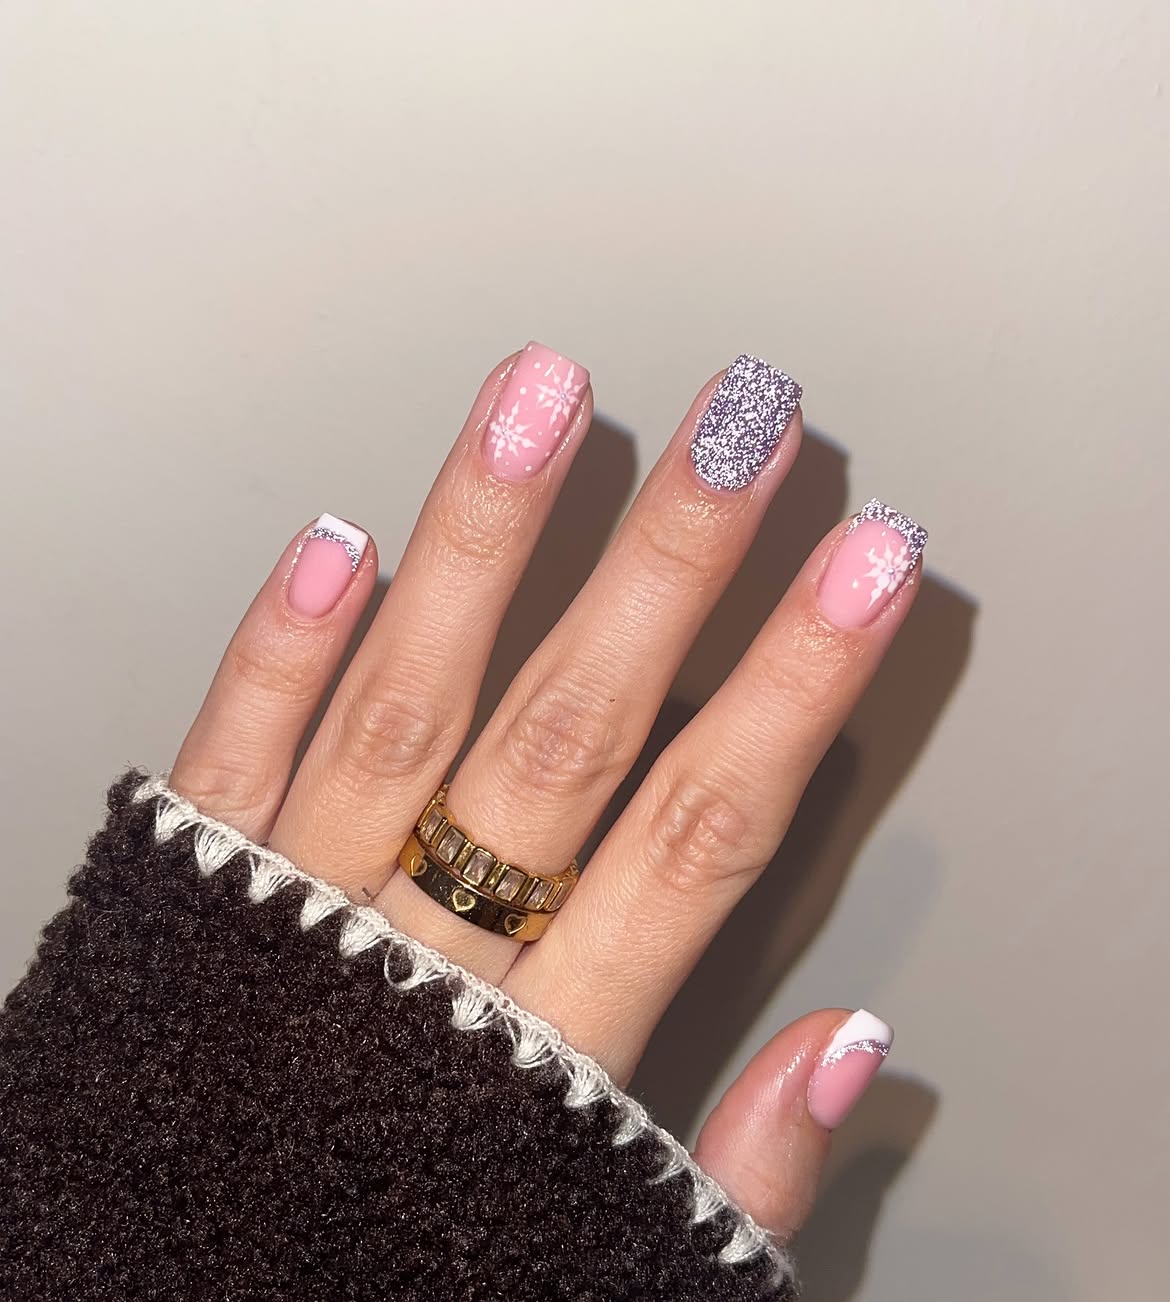
Soft pink polish gives this square manicure a gentle winter base, while silver glitter changes position from nail to nail. One finger is fully covered in sparkle, two nails carry white snowflakes, and the remaining tips use white polish with a narrow silver border.
- The design looks varied, but each technique is simple on its own.
- Use a dense glitter polish for the solid accent nail, then place snowflake stickers over the pink base.
- French tip guides can help shape the white edges.
This layout saves detailed artwork for selected nails. The full glitter accent also draws attention away from small differences in the hand painted tips.
- ▸ One full glitter nail creates the main sparkle.
- ▸ White snowflake stickers add detail without careful brushwork.
- ▸ Silver borders connect the white tips to the glitter accent.
12. Burgundy French Tips with a Glitter Bow Accent
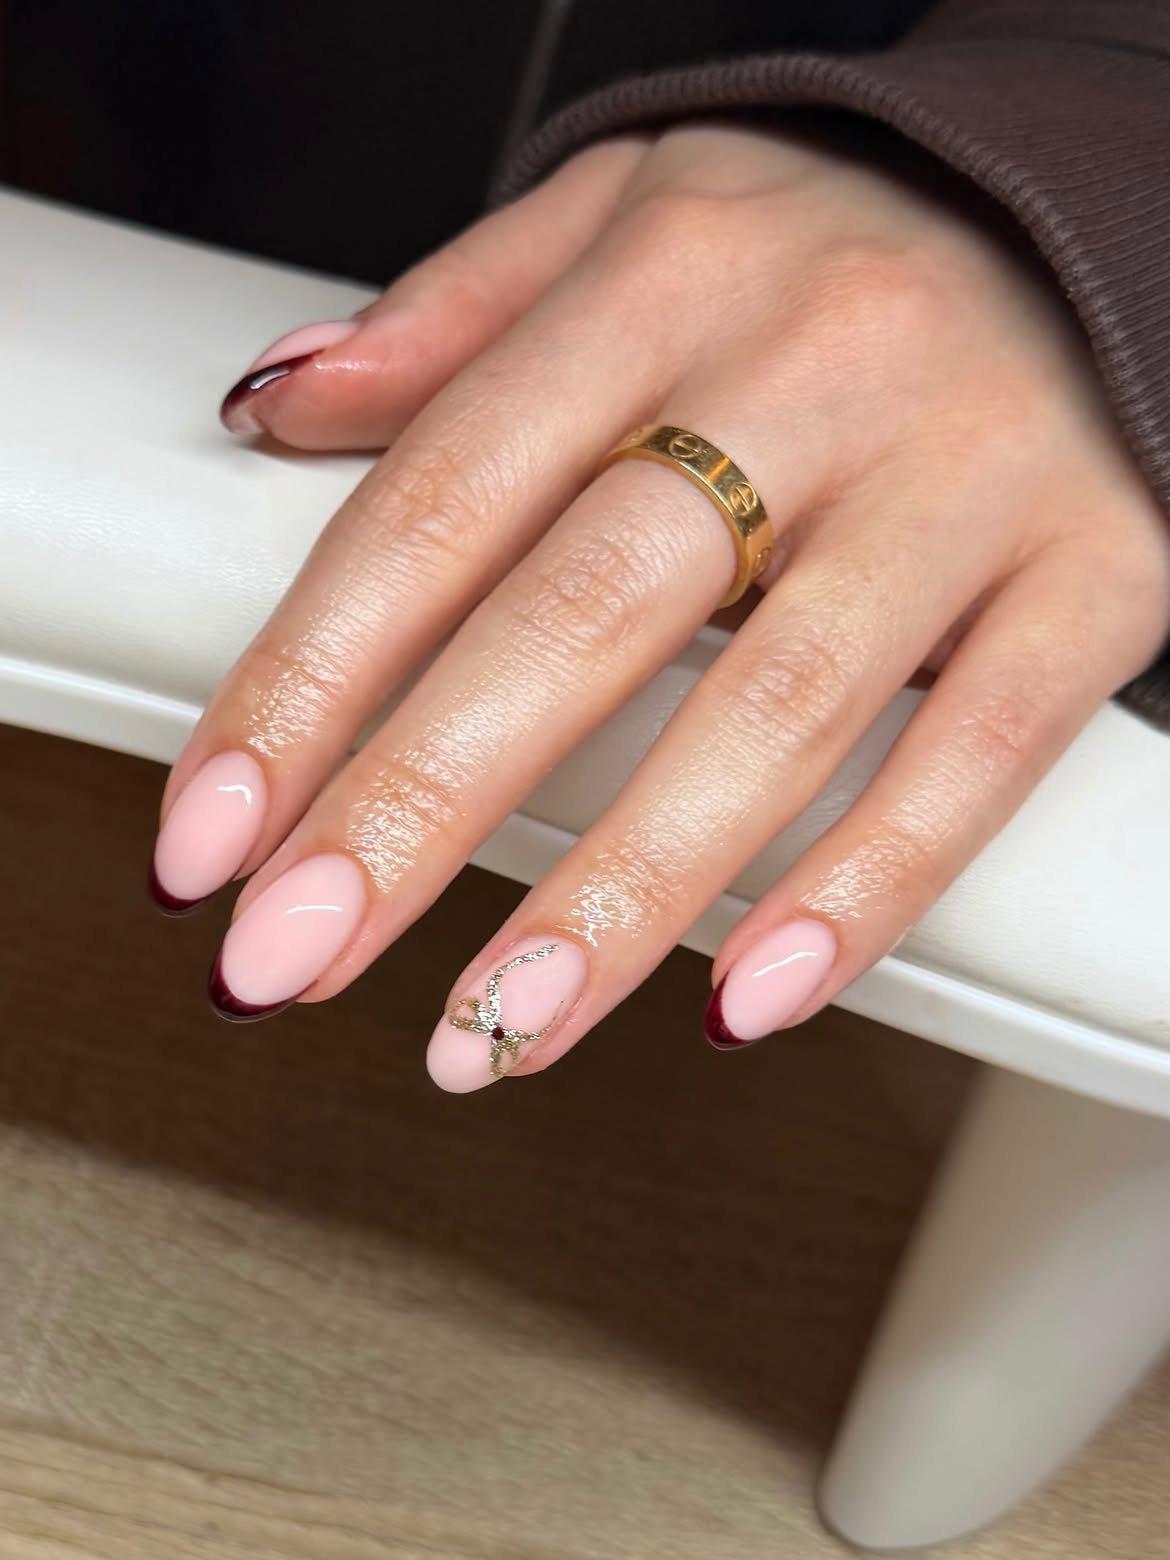
Deep burgundy tips frame this soft pink manicure with a rich Christmas color while keeping most of the nail bare.
Most nails: A narrow burgundy edge follows the almond shape. Repeating the same tip across four fingers makes the design easier to complete.
Accent nail: A slim metallic bow sits over the pink base, finished with a small burgundy detail at its center. The ribbon shape adds a gift inspired touch without filling the whole nail.
Use a bow decal or metallic nail sticker to save time on the accent. The simple base and repeated tips keep this manicure polished, wearable, and manageable during a busy holiday week.
What you need
13. Gold Glitter Tips with Christmas Garland Bows
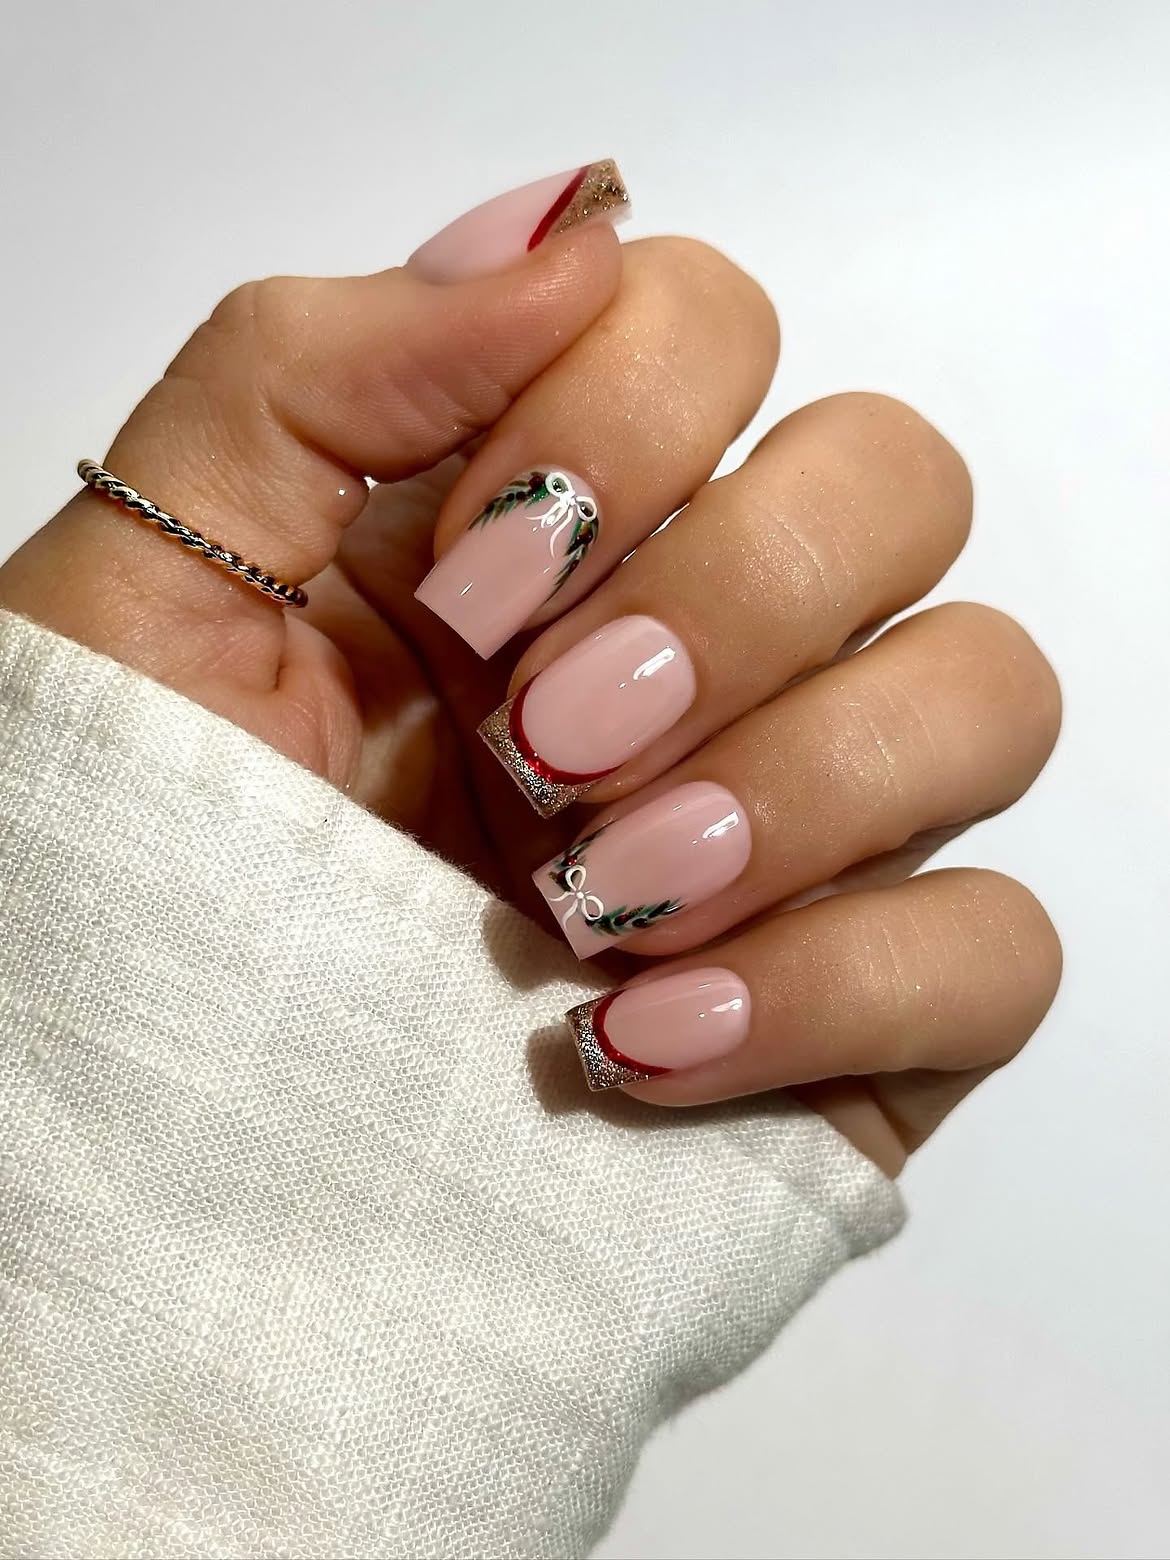
Gold glitter tips bring sparkle to this soft pink manicure, while thin red curves add a clear Christmas accent. The square shape gives the glitter a crisp edge and makes the color sections easy to separate.
Two nails replace the glitter tips with narrow green garlands arranged near the edges. Small white bows sit among the leaves, adding a gift inspired detail without hiding the pink base.
To recreate this look quickly, use striping tape to guide the glitter tips and choose garland decals for the accent nails. Keeping the same nude base across every finger helps the two patterns feel connected. The result mixes sparkle and greenery without requiring detailed art on every nail.
| Glitter Tip Nails | Garland Accent Nails |
|---|---|
| Add gold glitter at the square edge | Place greenery along one or two sides |
| Outline with a slim red curve | Finish with one small white bow |
| Use tape for cleaner edges | Use decals to reduce painting time |
14. Burgundy Glitter Nails with Bow and Starburst Accents
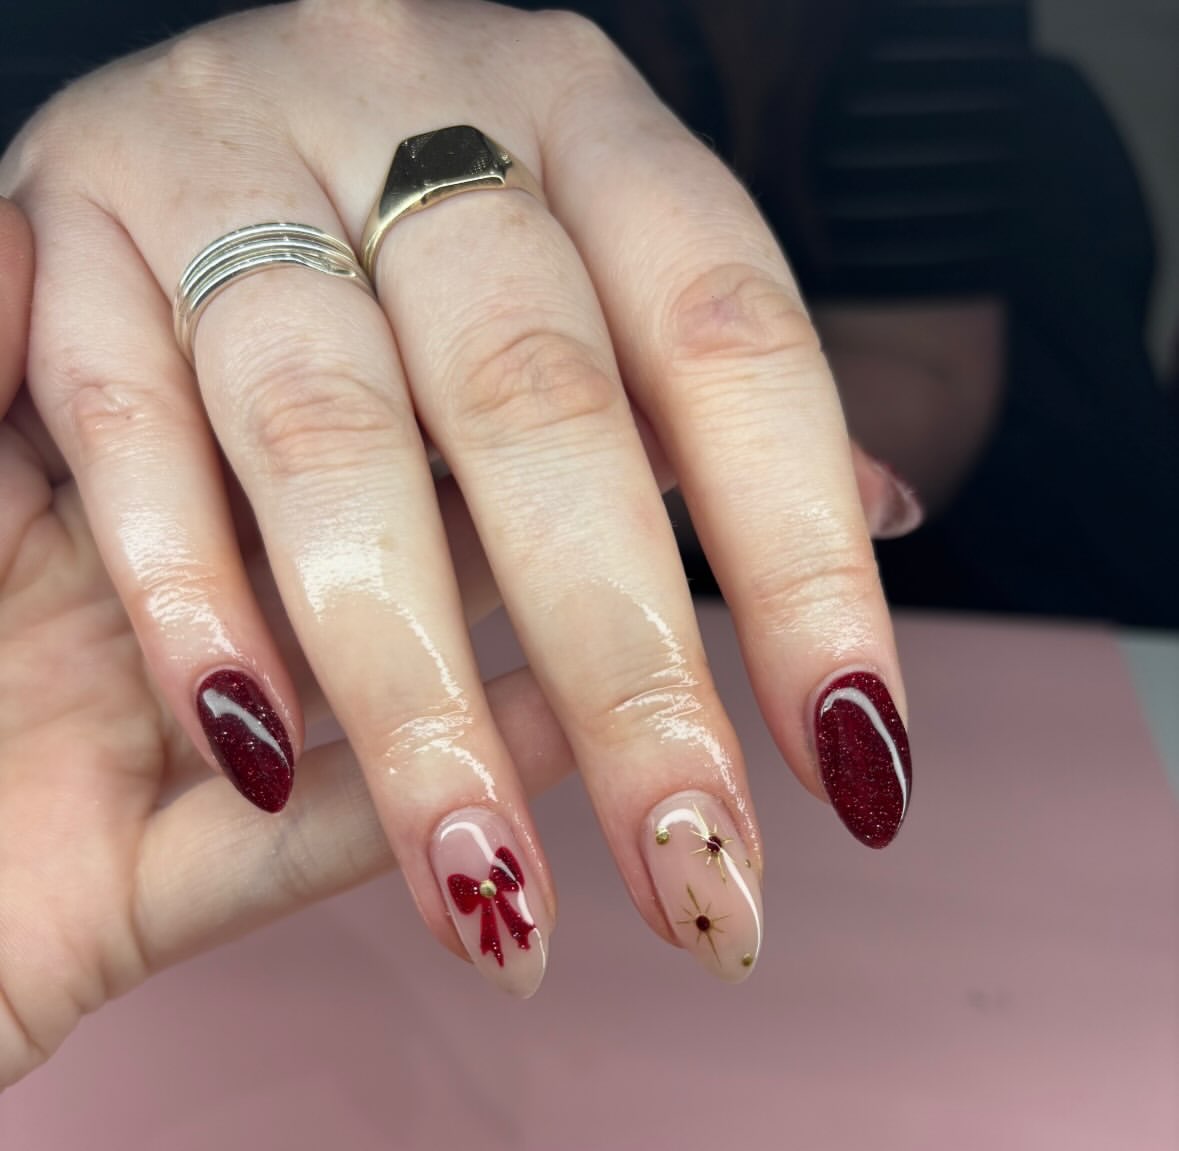
A deep burgundy shimmer gives this almond manicure its strongest color. The solid nails carry one slim white curve, which breaks up the dark polish without adding a complicated pattern.
The nude accent nails take two different directions. One features a burgundy bow with a small metallic center, while the other uses fine gold starbursts and tiny dots. Keeping both decorations over the same neutral base helps them sit comfortably beside the glitter nails.
Use small bow and star decals to reduce painting time. The white curves need only one smooth stroke with a fine brush. This keeps the manicure festive while limiting the detailed work to two fingers.
Repeat burgundy glitter on the solid nails.
Use decals for the bow and gold starbursts.
Do not add large artwork to every finger.
Avoid several glitter colors that compete with the accents.
15. Graphic Red Curves with Solid Christmas Red Nails
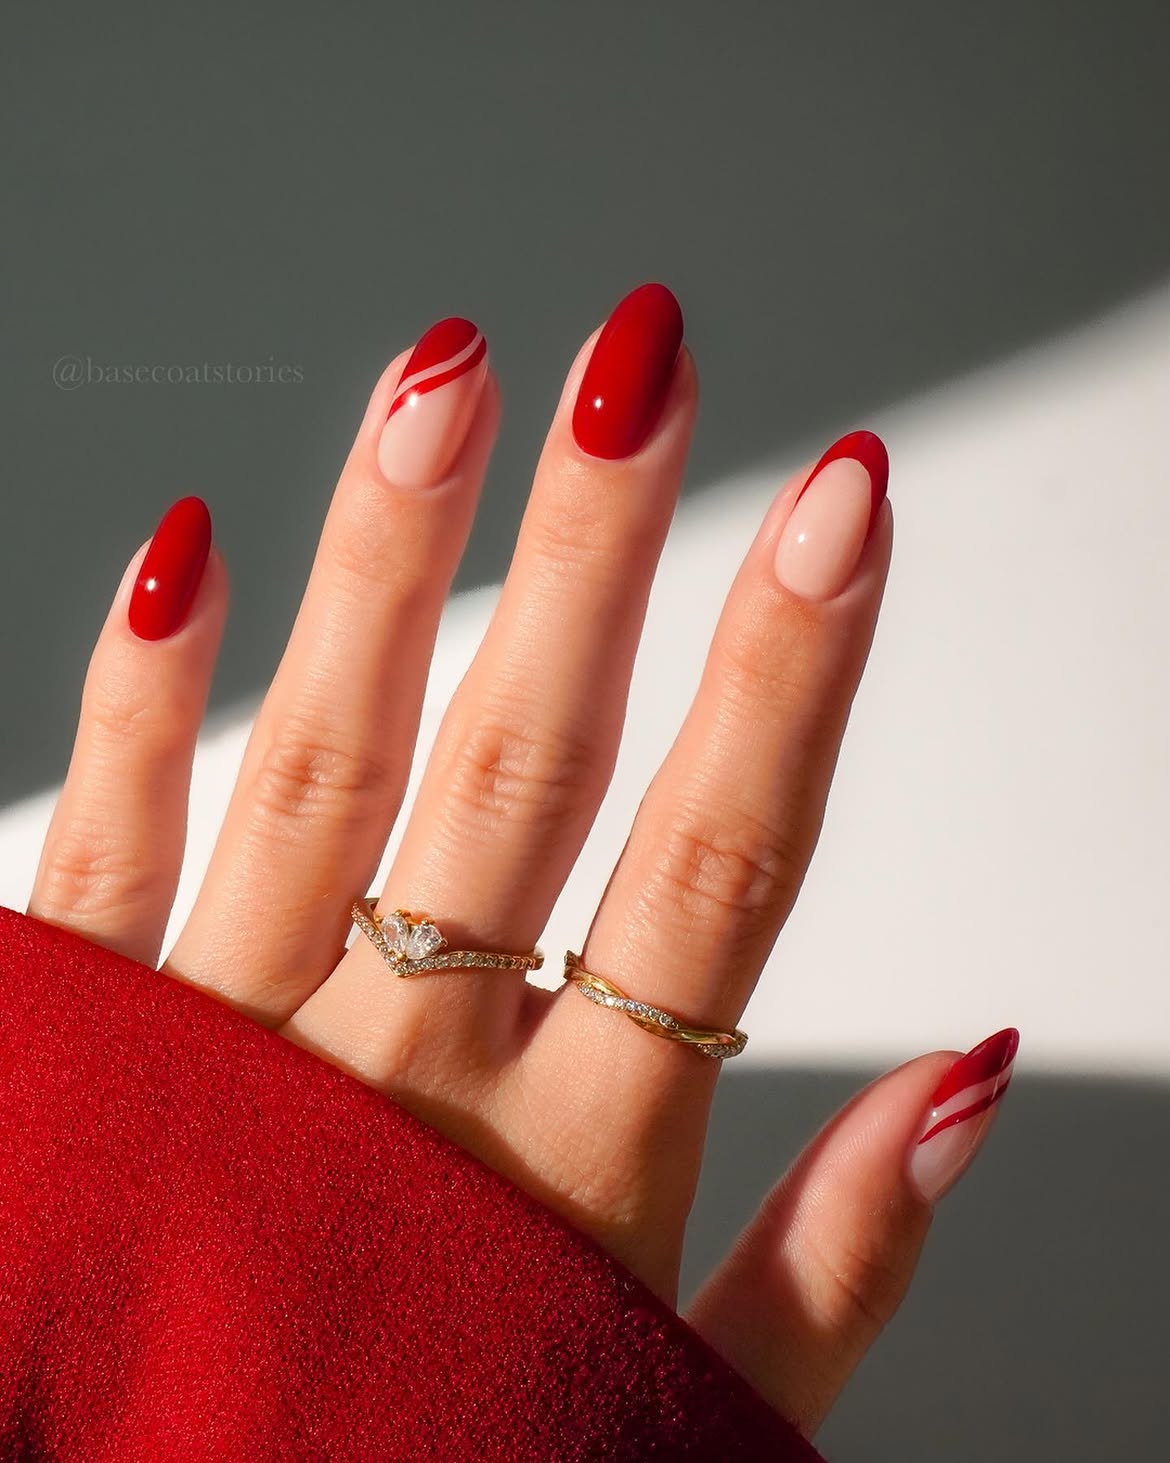
Bold red polish and open pink space create a crisp holiday manicure without glitter or small illustrations. Two almond nails are painted fully red, giving the set a strong color anchor.
The remaining nails use curved red tips over a glossy nude base. Slim pink gaps break up some of the red sections and create a striped ribbon effect. Since the curves do not need to match exactly, each accent can follow the natural shape of the nail.
Use a fine brush or flexible striping tape to form the curved sections. Paint the solid nails first, then repeat the same red shade on the tips. A glossy top coat pulls both finishes together.
Two solid red nails carry the Christmas color, so the curved accent tips can stay slim, simple, and quick to paint.