The Christmas Nails You Can Do Without a Nail Salon at Home!
Christmas nail art does not have to begin with a salon appointment. With a few polish shades, a small brush or dotting tool, and a little patience, you can create a festive manicure at home. The designs in this collection range from subtle glitter tips and tiny starbursts to bright bows, reindeer faces, wreaths, and candy stripes. Some need only a couple of colors, while others give you room to spend more time on an accent nail.
If you are looking for Christmas nails you can do without a nail salon at home, start with the details that feel manageable. A toothpick can make berry dots, nail tape can guide straight ribbons, and a decal can stand in for a detailed snowflake. You can also borrow one feature from a design instead of copying the entire set. Choose a base color you like, let each layer dry, and add a clear top coat when the details are ready. The ideas ahead offer plenty of ways to make your nails feel ready for Christmas in your own style.
15+ Christmas Nails You Can Do Without a Nail Salon
1. Soft Pink Christmas Nails With Colorful Starbursts
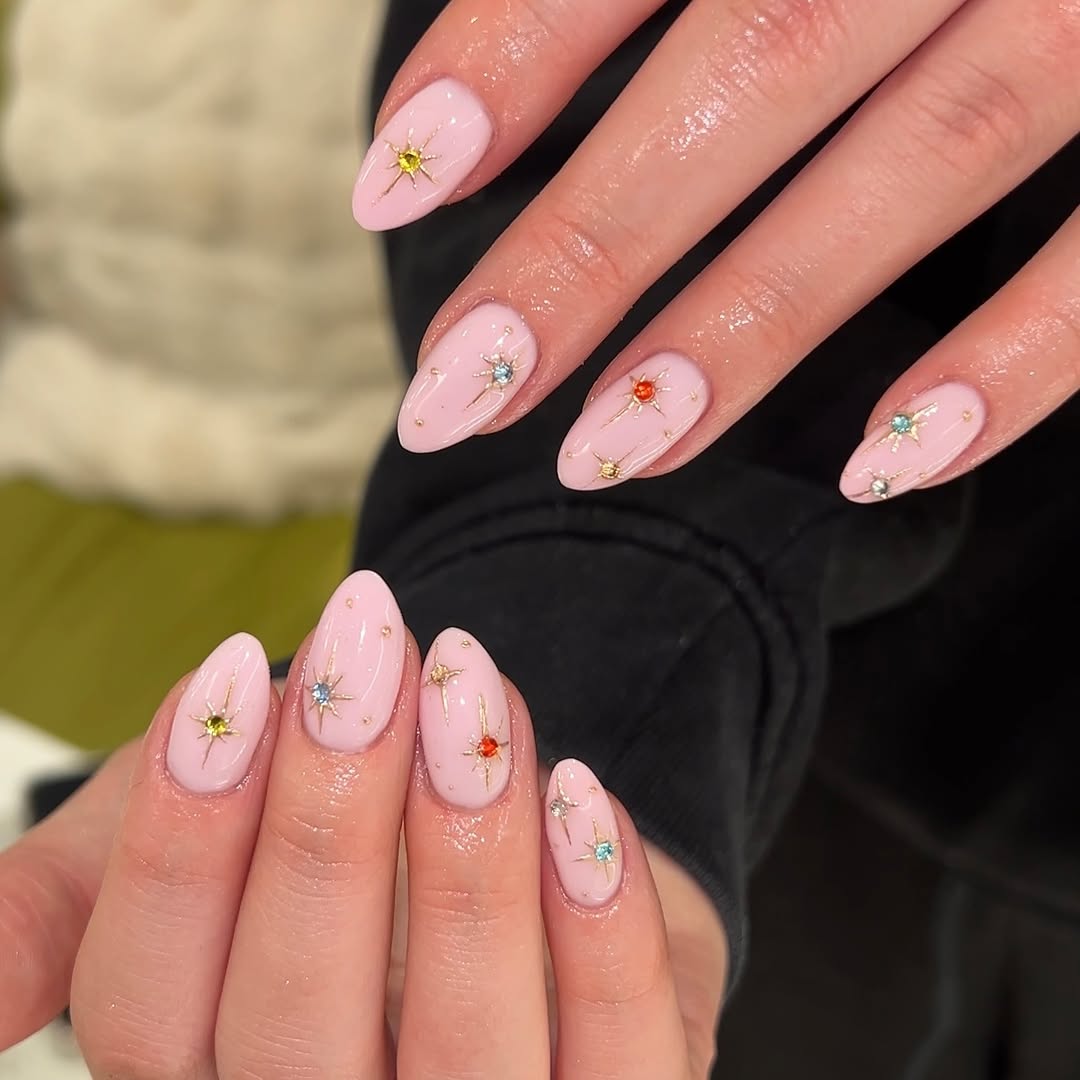
These glossy pink nails use small colored gems as the centers of fine gold stars. The red, blue, green, and yellow accents give the design a festive sparkle without covering the soft pink base.
To try the look at home:
- Paint your nails a pale pink and let them dry fully.
- Add a few thin gold starbursts with nail stickers or a fine nail art brush.
- Place one small gem at the center of each main star. Leave some open space so the details stand out.
You can keep the stars simple if drawing fine lines feels tricky. A few gold stickers and colorful gems will still capture the look. Finish with a glossy top coat, brushing carefully around any raised gems.
Leave pink space around each star so the fine gold lines stay visible.
Keep gems away from the nail edges, where they are more likely to catch on clothing.
2. Christmas Gift Bow Nails With Deep Green Tips
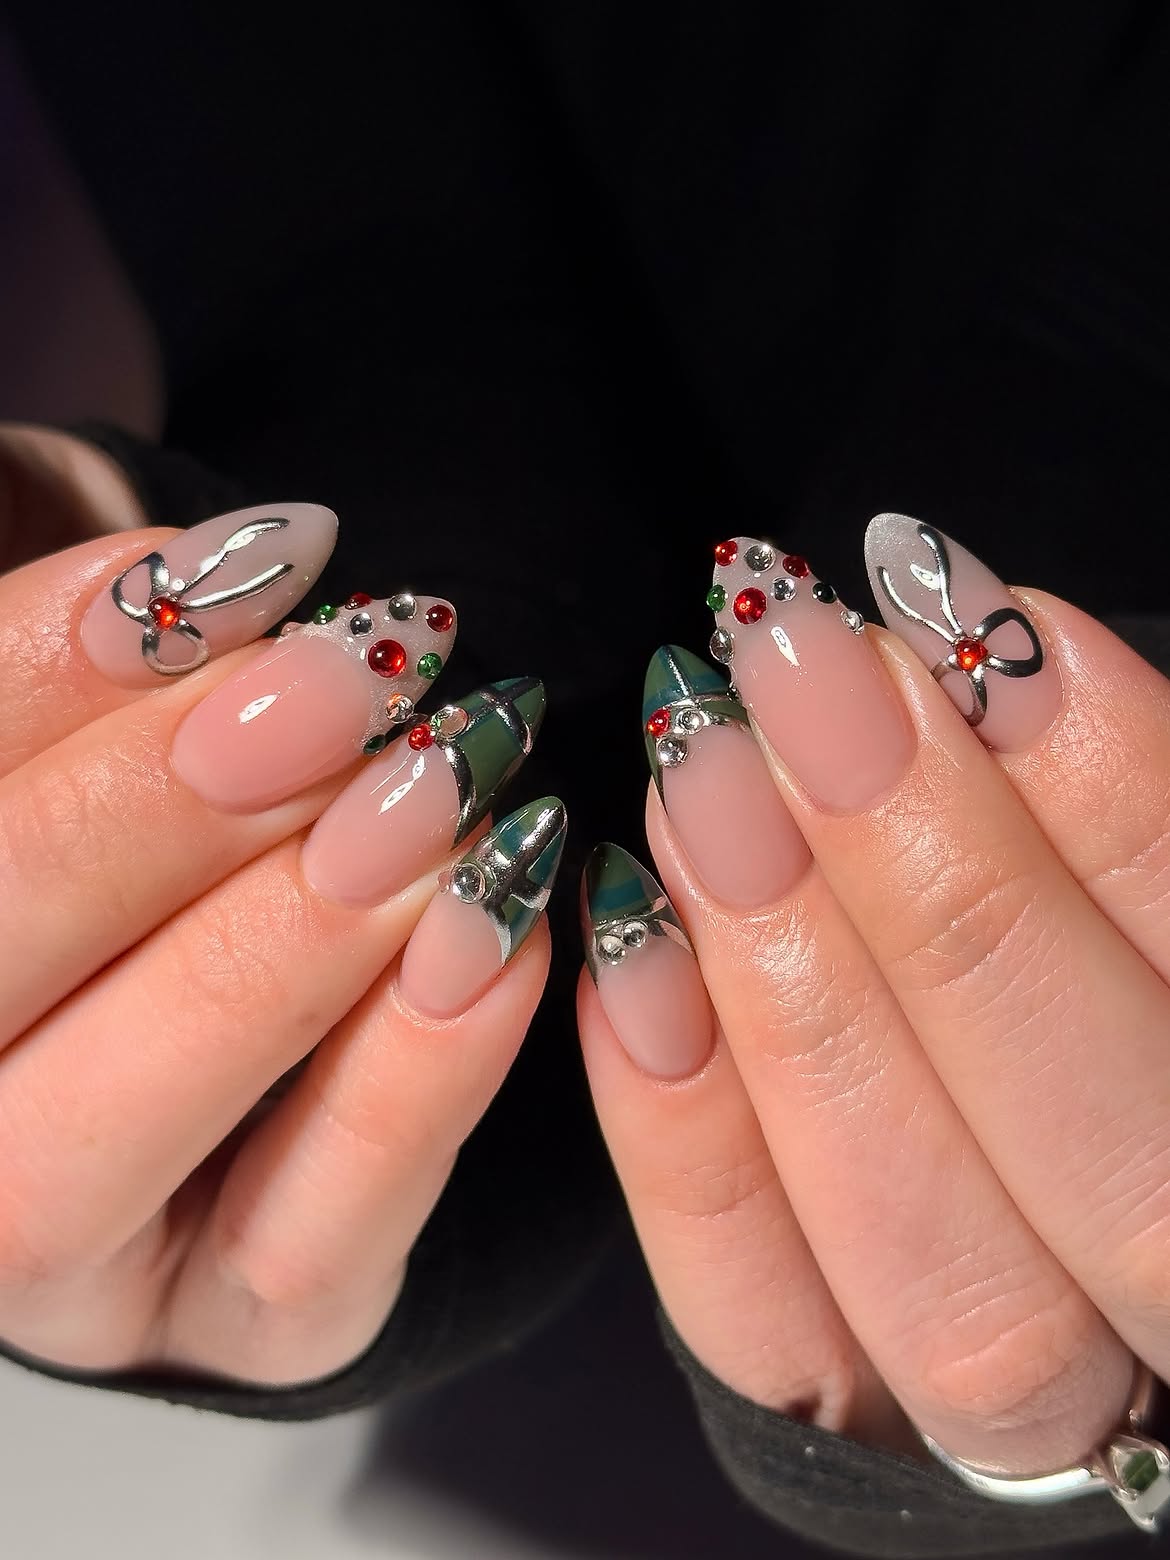
These nails look like tiny wrapped gifts. Deep green tips sit over a soft pink base, while shiny silver curves form bows on the thumbs. Red gems mark the bow centers, and scattered red, green, and silver stones add sparkle to a few other nails.
The easier home version: Make the green tips your main design and add silver bow stickers to just two nails. That keeps the gift wrap idea clear without having to draw every curve by hand. If you prefer shorter nails, use a smaller green tip and leave plenty of pink showing.
How to build the gift wrap look
Start with a soft pink base, then paint a deep green tip on several nails.
Add silver bow stickers to your accent nails and place a red gem at each center.
Add a few small stones to the remaining nails, then seal the painted areas with a glossy top coat.
3. Pink Christmas Nails With Gold Vines and Red Berries
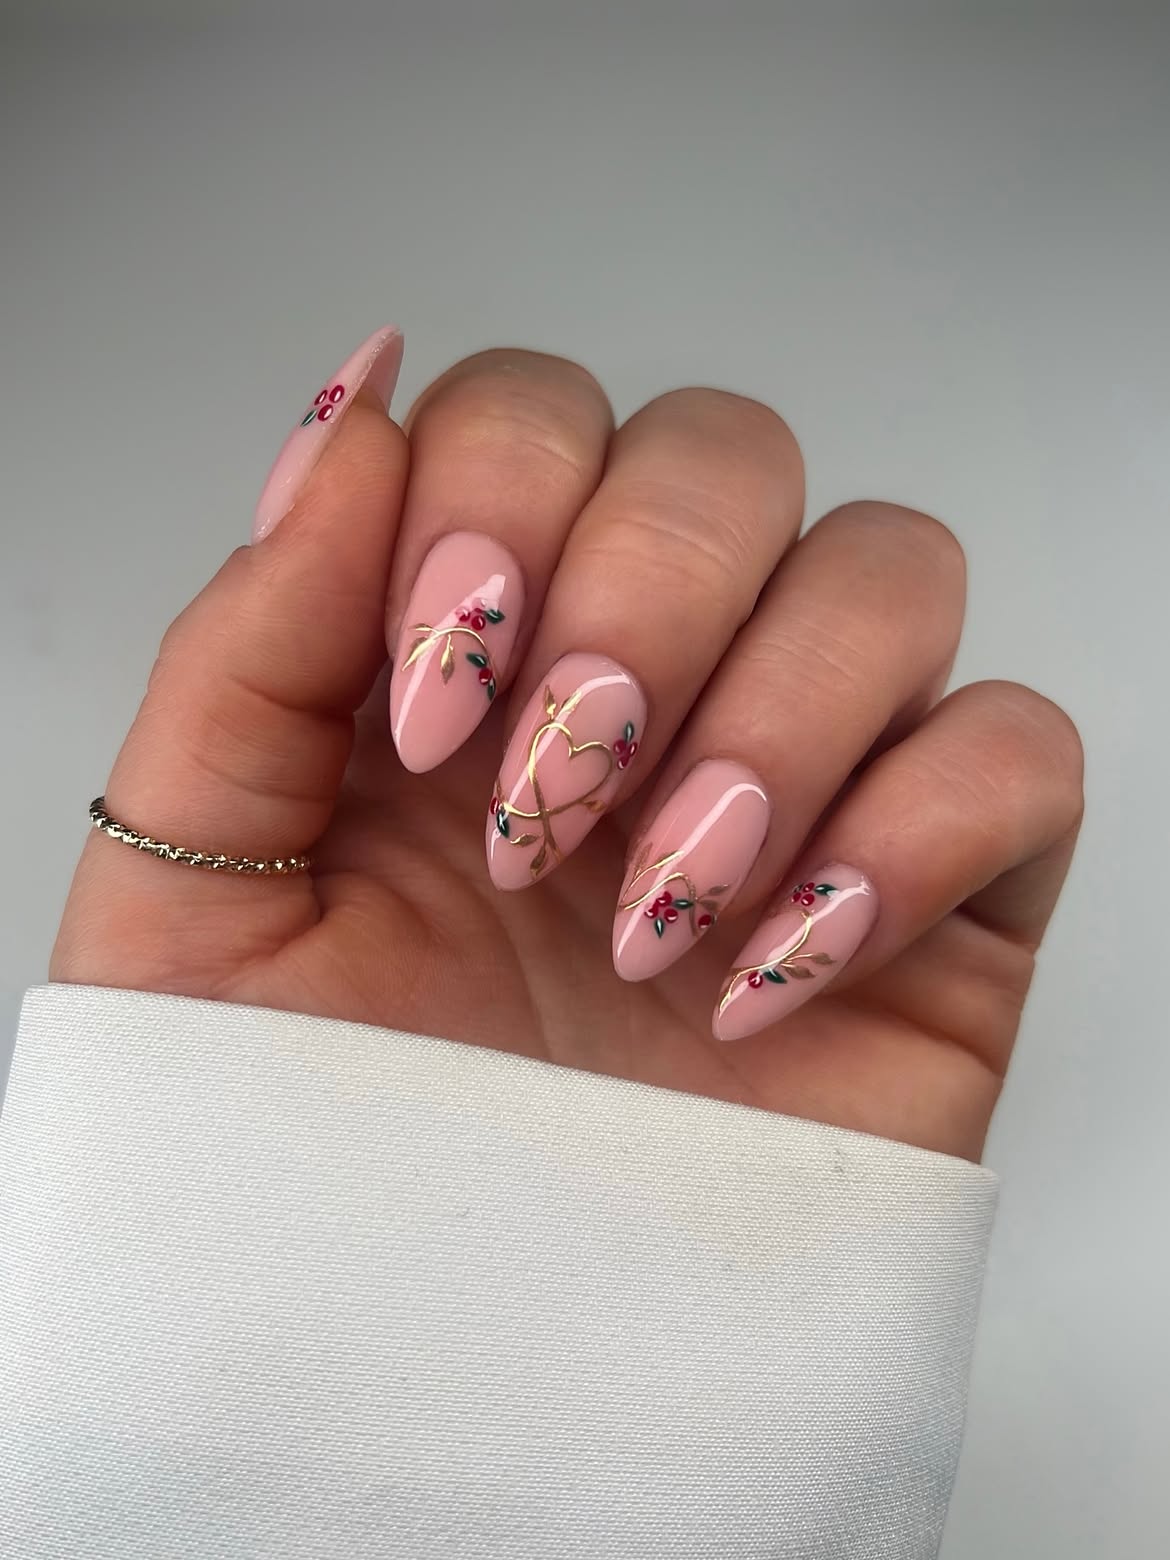
Thin gold vines curl across a soft pink base in this design. Small red berry clusters and dark green leaves follow the curves, while a few white swoops give the nails a bright finishing detail. There is plenty of pink space between the branches, so each little detail is easy to see.
What makes the pattern work: The vines take a different path on each nail. One loops near the center, while others sweep toward the tips. You can copy that loose arrangement without making every nail match.
For a home version, draw the gold curves first with a fine brush. Add the berries with a dotting tool, then paint the leaves once the red has dried. Small leaf decals can help with the trickiest detail.
Gather your nail art kit
Looking for more simple holiday nail inspiration? Explore these 16 budget friendly Christmas nails you can recreate at home with easy designs and affordable ideas.
4. Forest Green Christmas Nails With One Wreath Accent
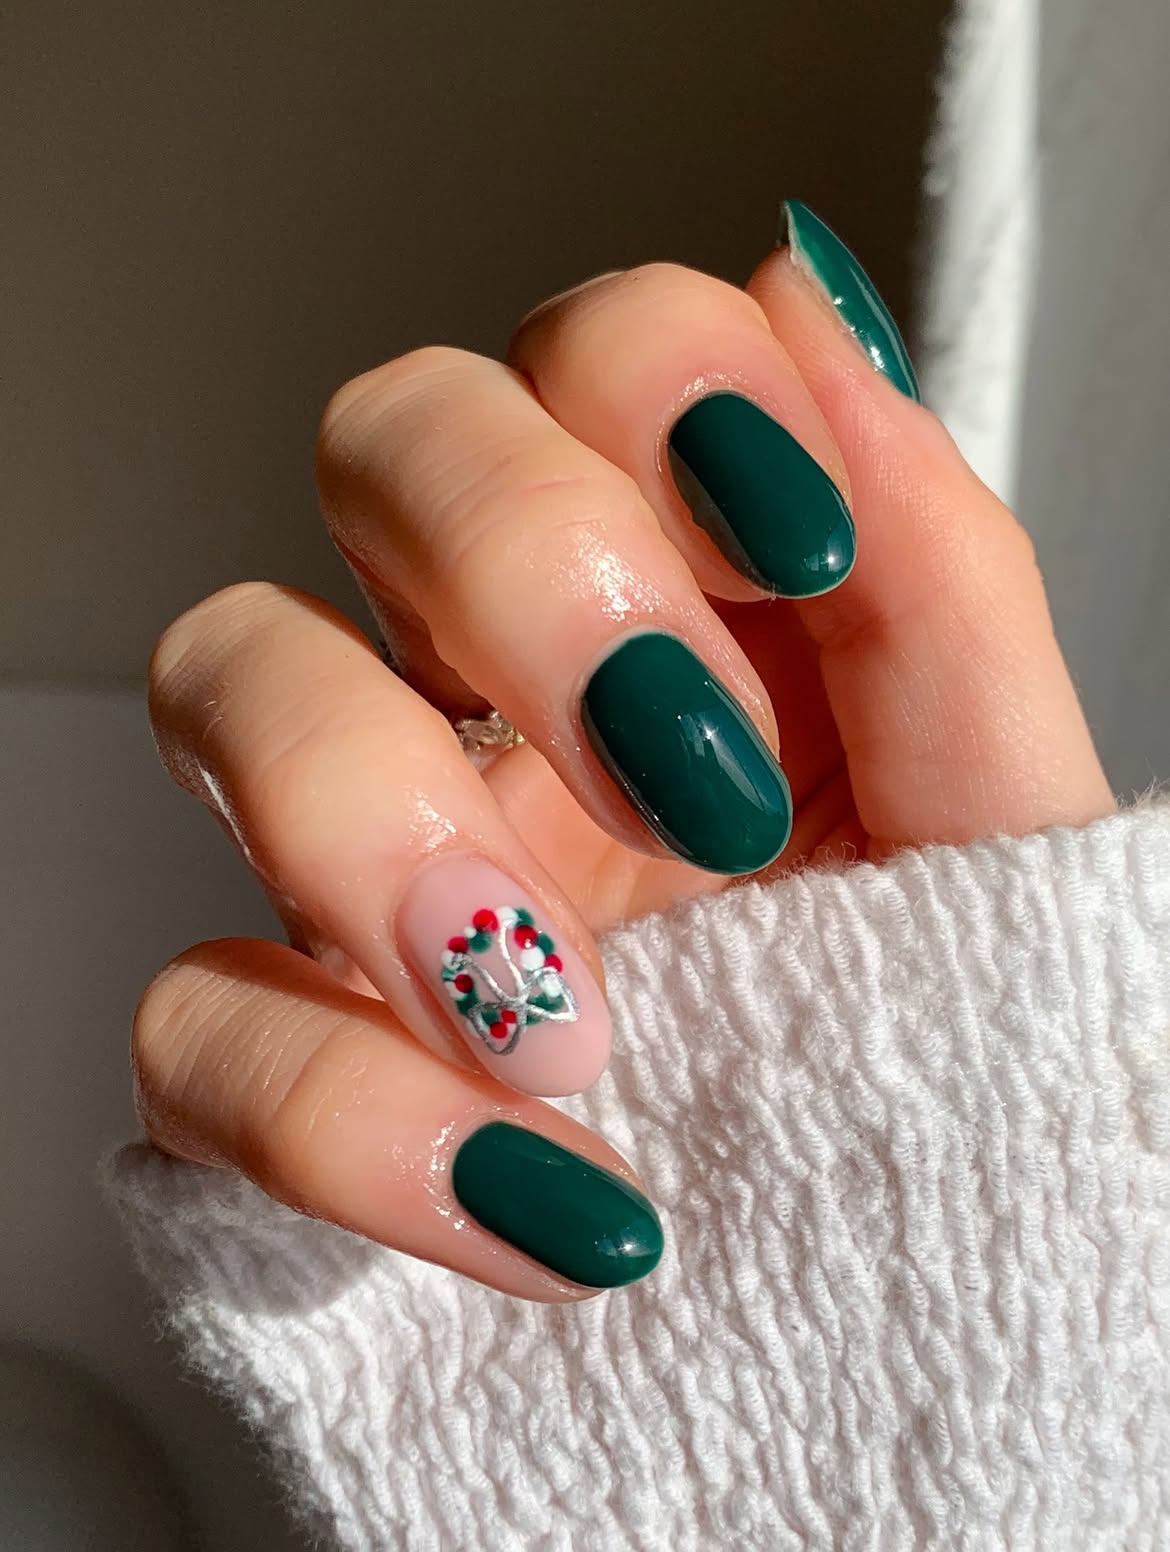
Glossy forest green covers most of these nails. One soft pink nail carries the Christmas detail: a small wreath of red and green dots with a silver bow near the bottom. The plain green nails make the wreath stand out, so there is no need to paint a pattern on every finger.
For a home version, start with the solid green nails. On the pink accent nail, use a dotting tool to form a loose circle of green and red spots. Add a small silver bow sticker once the dots are dry. Keep the wreath within the middle of the nail so the bow has room beneath it. The same arrangement can work on shorter nails with a smaller circle.
Place dots at the top, bottom, and sides first. Fill the gaps with smaller dots to make the wreath look round without drawing a circle.
5. Red Ribbon Christmas Nails Over White Tips
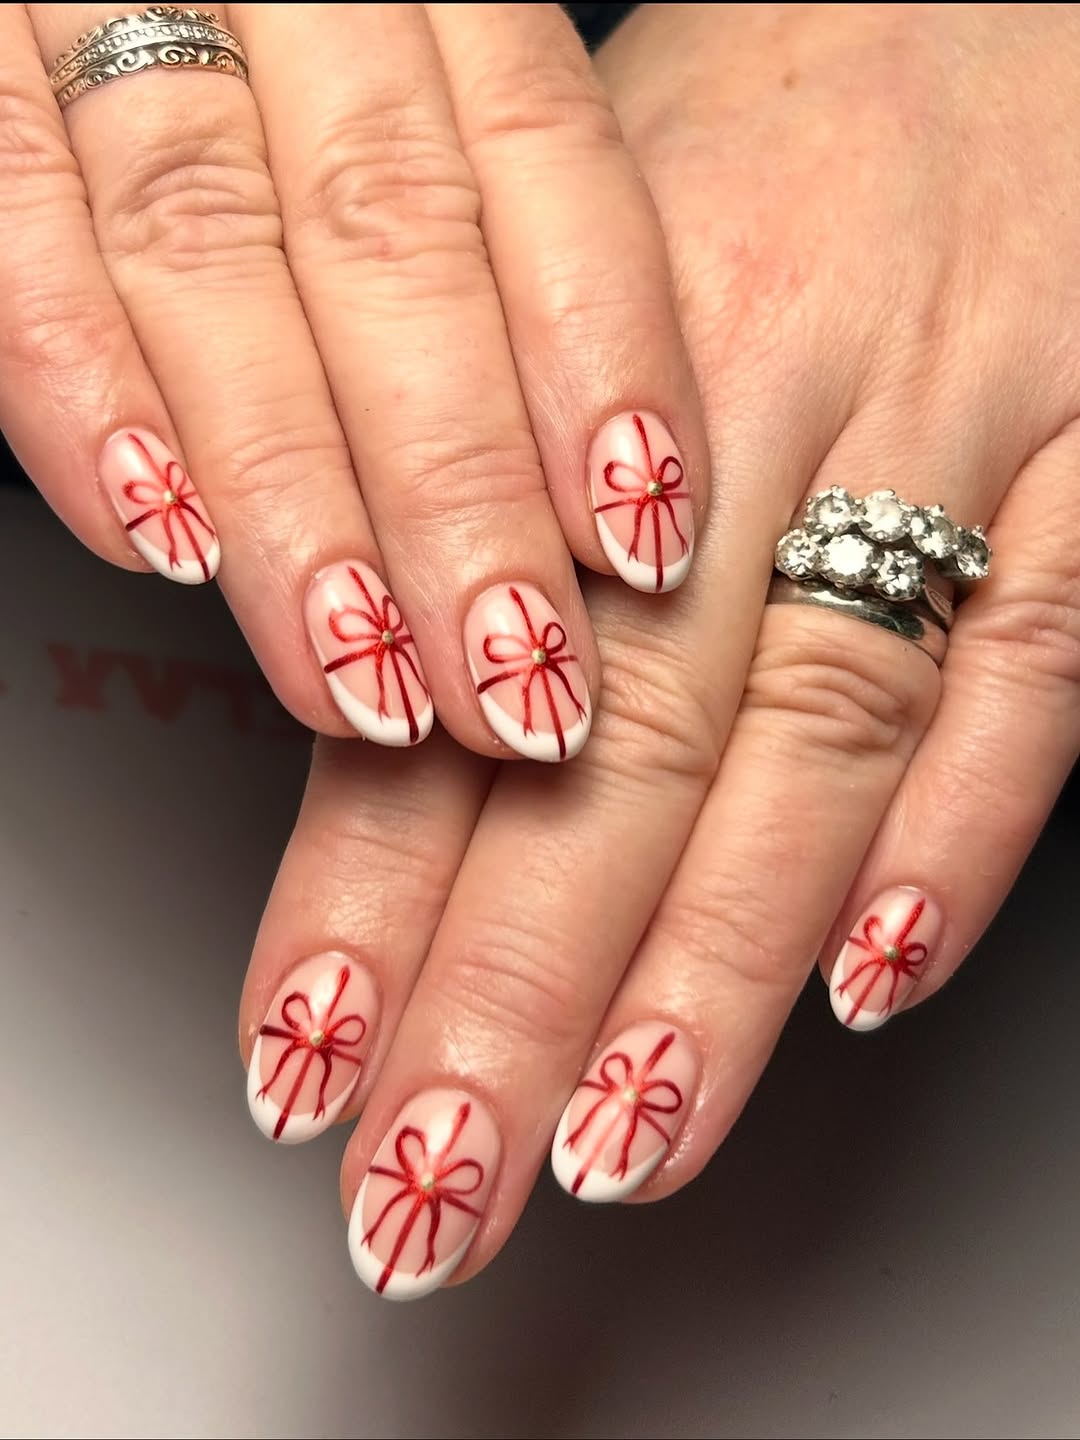
These short oval nails resemble little gifts tied with red ribbon. A sheer pink base leaves the nail looking soft, while curved white tips give the red lines a clean edge. Each nail repeats the same bow: two loops, long ribbon ends, and a tiny gold accent at the knot.
To paint the pattern at home:
- Paint the white tips and let them dry.
- Draw thin red lines across the nail, then add the loops and trailing ends.
- Place a small gold dot at the center of each bow.
Keep the red lines narrow so the pink base still shows. If painting loops on every nail feels fiddly, bow decals can give you the same repeated pattern.
| Paint the bows | Use bow decals |
|---|---|
| You can adjust each loop to fit the nail. | The loops stay neat across the whole set. |
| Let the red polish dry before sealing it. | Press down the edges before adding top coat. |
6. Mix and Match Christmas Nails With Candy Stripes and Snowflakes
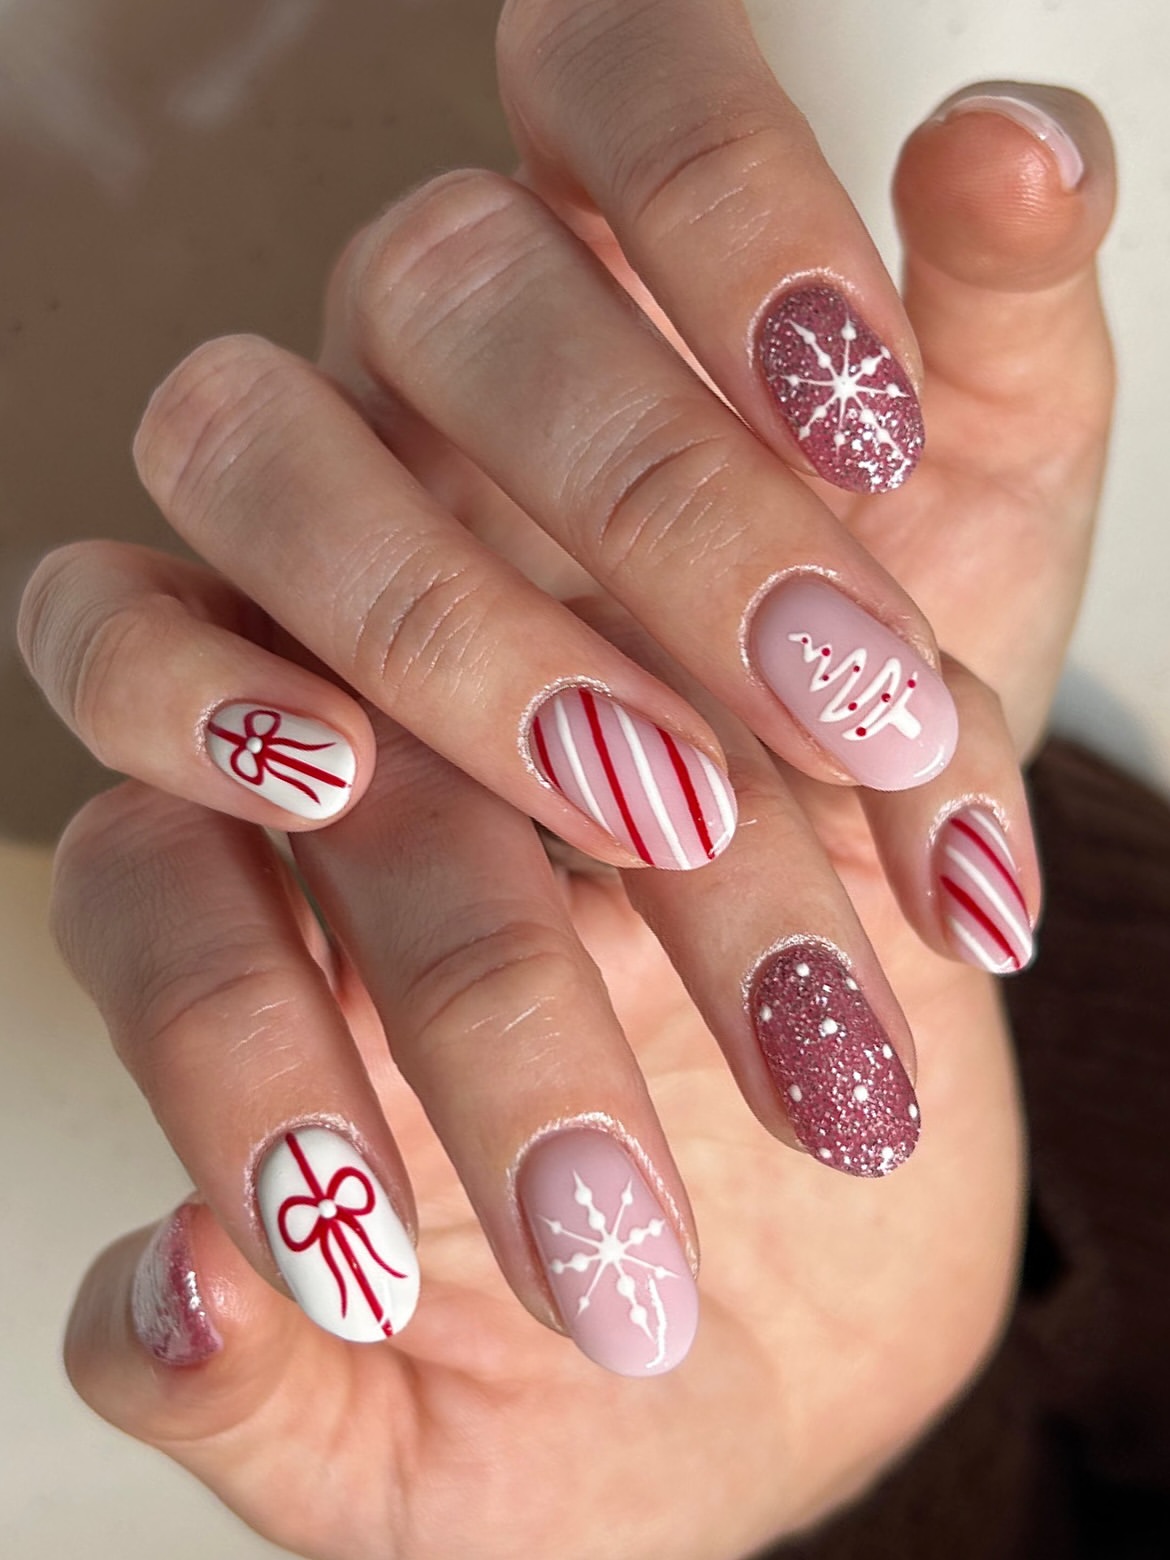
Rosy glitter, candy stripes, red bows, snowflakes, and a small Christmas tree all appear in this set. Each nail has its own design, but the pink, red, and white colors make them feel like they belong together. The glitter nails add sparkle beside the crisp stripes and finer drawings.
A simple way to plan it: Choose your glitter nails first, then give the remaining nails pale pink or white bases. Add red stripes to a couple of nails and save the tree, bows, or snowflakes for accents. You can use decals for the fine shapes if you want to spend more time on the color and placement. Let every layer dry before sealing the set.
7. Storybook Christmas Nails With a Santa Hat Cat
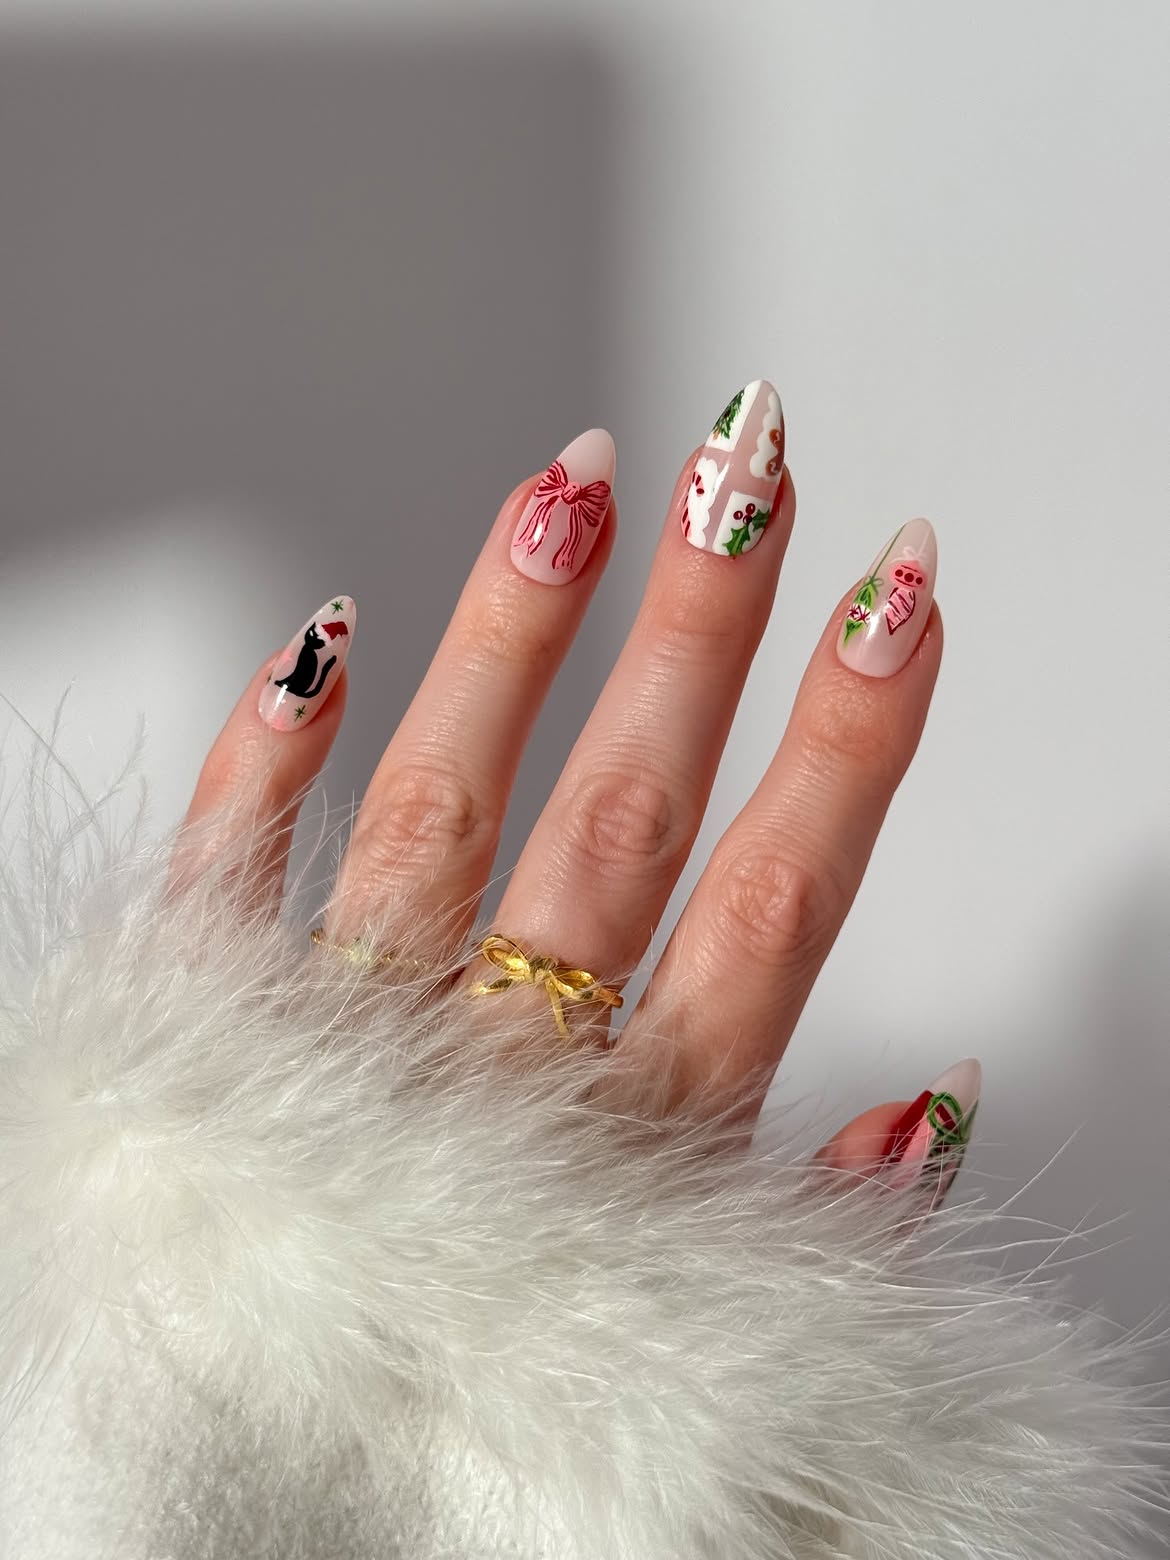
A tiny black cat in a red Santa hat gives this set its playful character. The other pale pink nails carry a fine red bow, white festive shapes, small green leaves, and little red accents. Each nail tells a different part of the holiday story, while the open pink background keeps the drawings clear.
To try it at home, choose the cat as your main accent. A small nail decal can handle that detailed silhouette. Add a red bow to another nail with a fine brush, then use simple leaves and dots on the rest. You can leave more pink space than the photo shows if you are working on shorter nails.
💡 Plan the tiny details
Place your largest motif first. Check how much pink space remains, then add the little leaves, dots, or stars around it.
8. Bright Red French Christmas Nails With One Glitter Bow
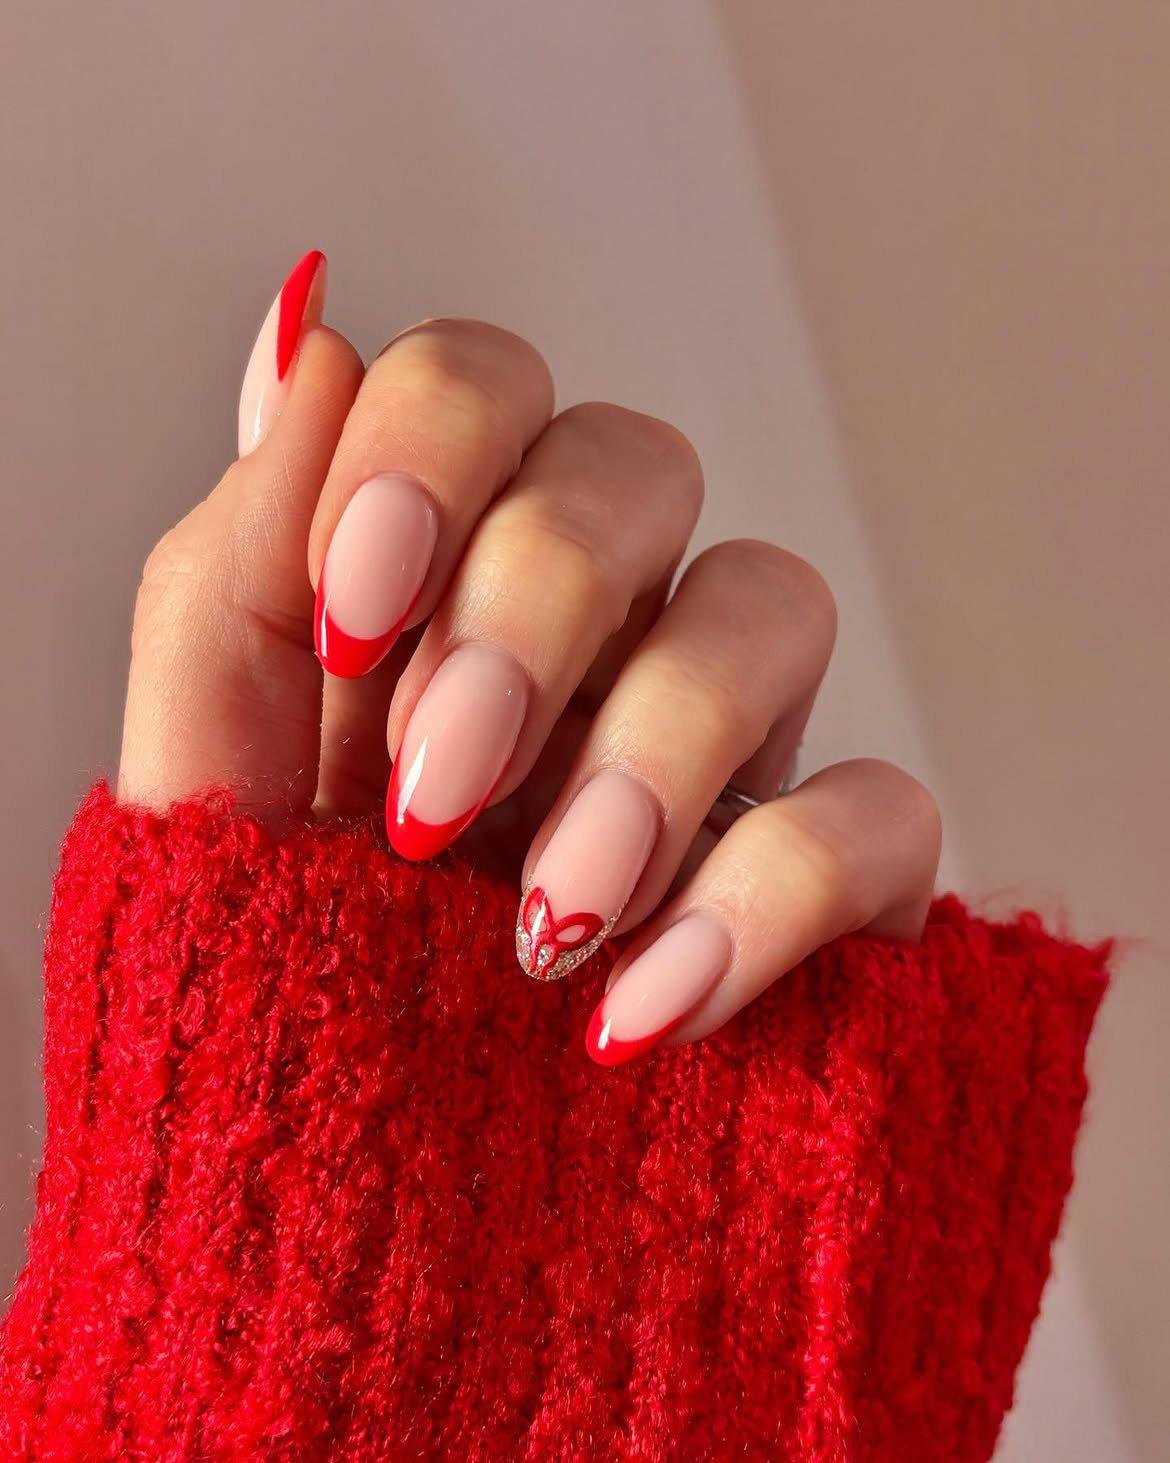
Bright red curved tips bring the Christmas color to a soft pink base. Most of each nail stays pink, which gives the vivid red a clean outline. One nail has a silver glitter tip and a small red bow, making it the clear accent in this simple set.
For a home manicure, paint the pink base first and choose which finger will carry the bow. Aim for a similar curve and width on each red tip. A bow decal can handle the smallest detail if you would rather focus on neat polish. Add the glitter and bow after the base has dried.
Use curved nail guides for a smooth edge. Lift each guide carefully while the red polish is still wet.
Dab glitter onto one tip in thin layers. Let it dry before placing the red bow near the edge.
9. Color Swap Christmas Nails With Red and White Bows
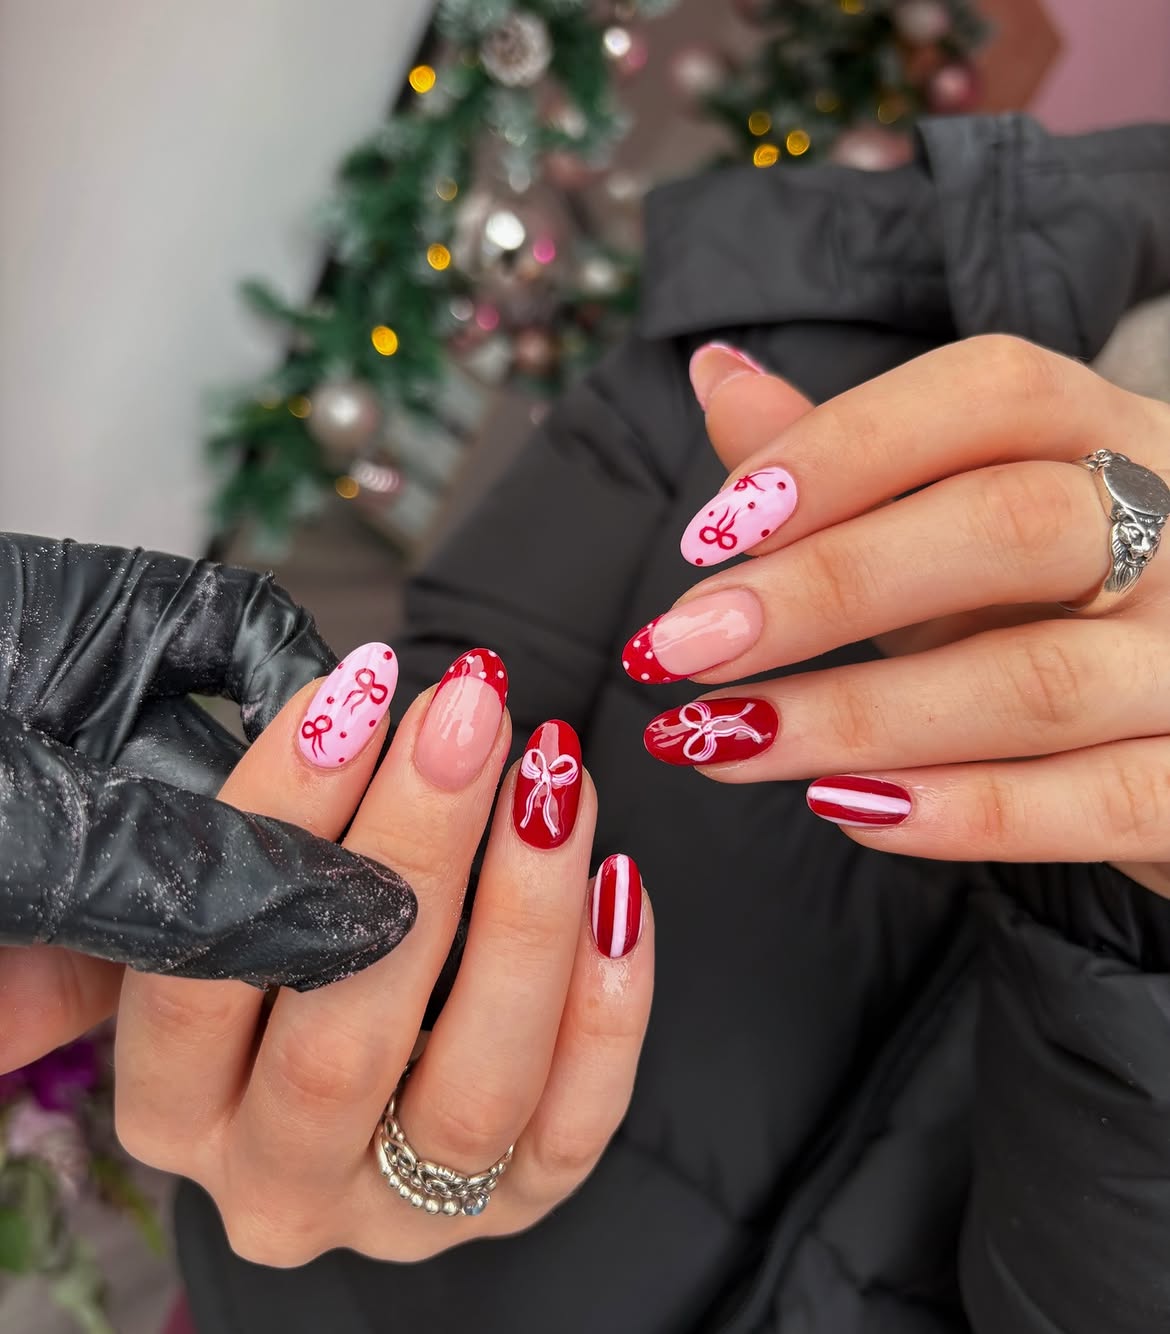
The clever detail here is the color swap. Small red bows sit on pale pink nails, while thin white bows stand out on glossy red nails. White dots line a red French tip, and a straight white stripe gives another nail a simpler pattern. The mix feels varied, but the red, pink, and white colors hold it together.
Plan the colors before painting: Put the small red motifs on the lighter nails and save the white line work for the solid red ones. Begin with a stripe or dotted tip, then try the bows once your hand feels steady. Bow decals can help with the loops if you want to paint the other details yourself.
Planning your festive look for a celebration? These 17 Christmas nails for a holiday party feature elegant colors, sparkling details, and designs that pair beautifully with your seasonal outfits.
10. Pastel Ribbon Christmas Nails With Tiny Gold Stars
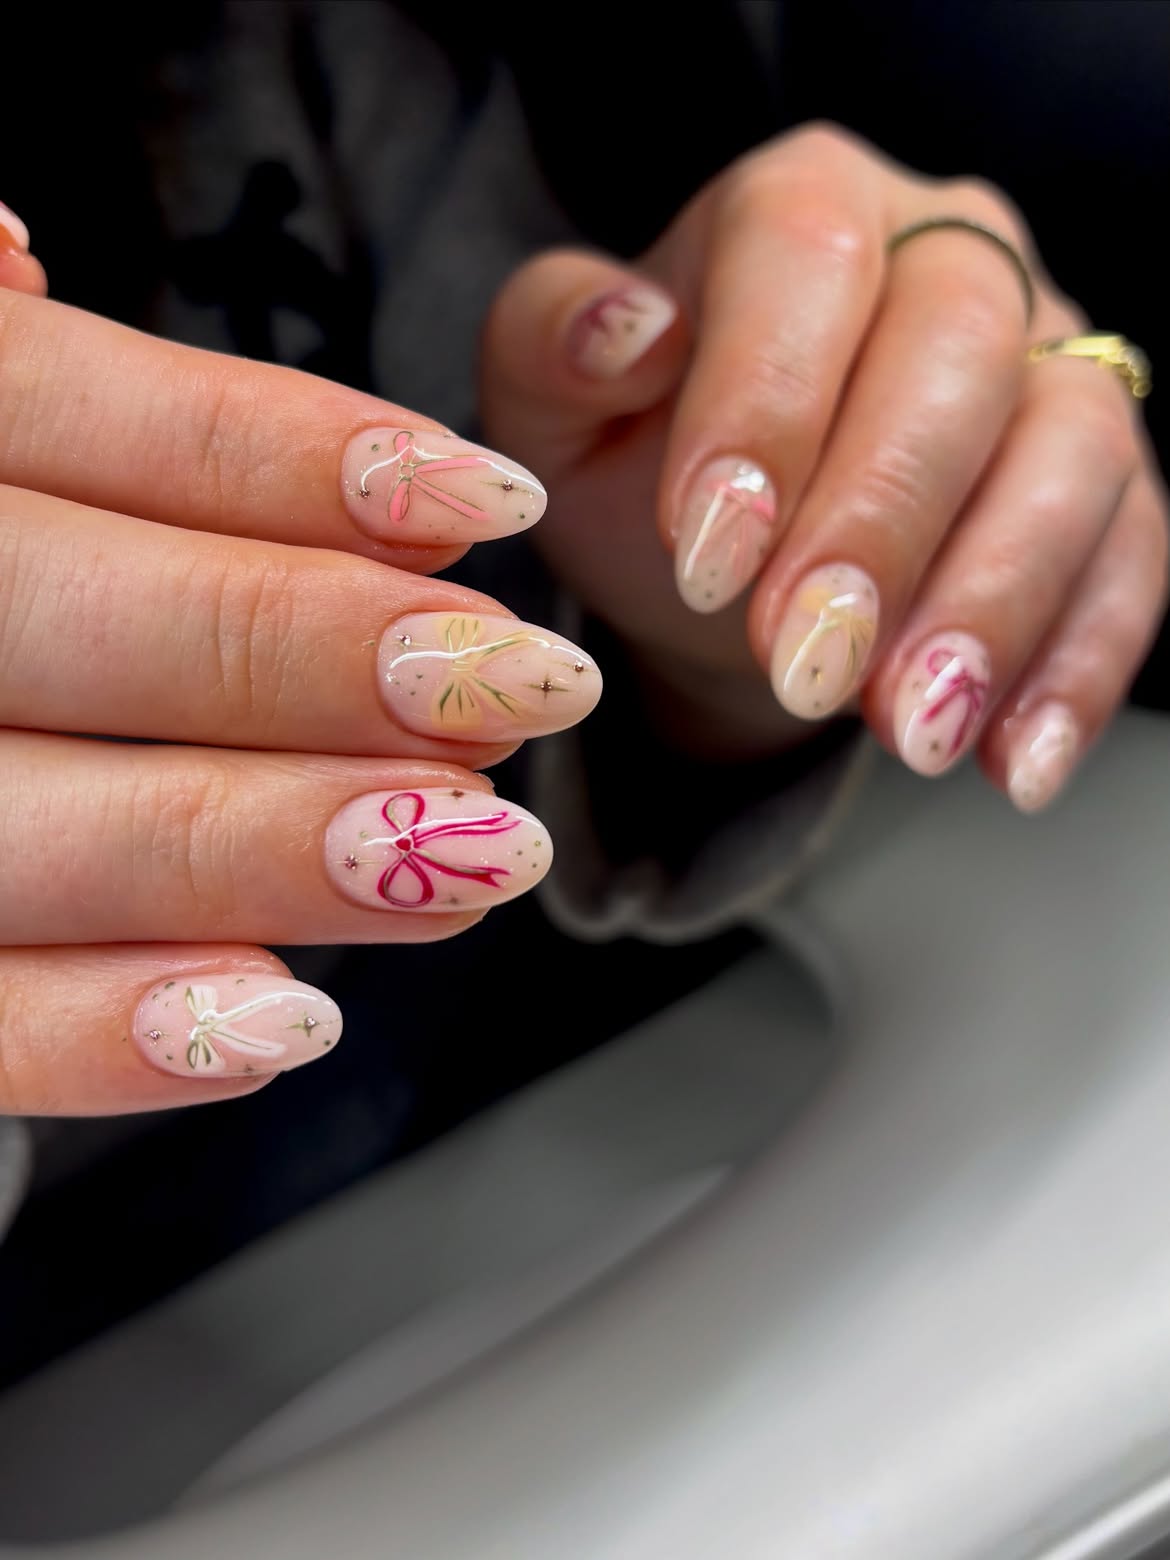
A milky blush base gives these thin ribbon bows room to show. Soft pink, pale yellow, and light green lines make the bows, while white curves and tiny gold accents fill some of the open space. The colors give this Christmas design a gentle look.
To try it at home, choose one pale color for each bow. Paint a small knot first, add two loops, then pull the ribbon ends toward the tip. A fine nail art brush helps keep the lines narrow. Let the bows dry before adding a few gold dots or small star stickers, then finish with top coat.
Place the bow slightly away from the nail edge.
Add gold accents in the open areas around it.
Use only a little polish on the detail brush.
Let each color dry before crossing it with a white line.
11. Silver Glitter French Christmas Nails With a Fine Ribbon Bow
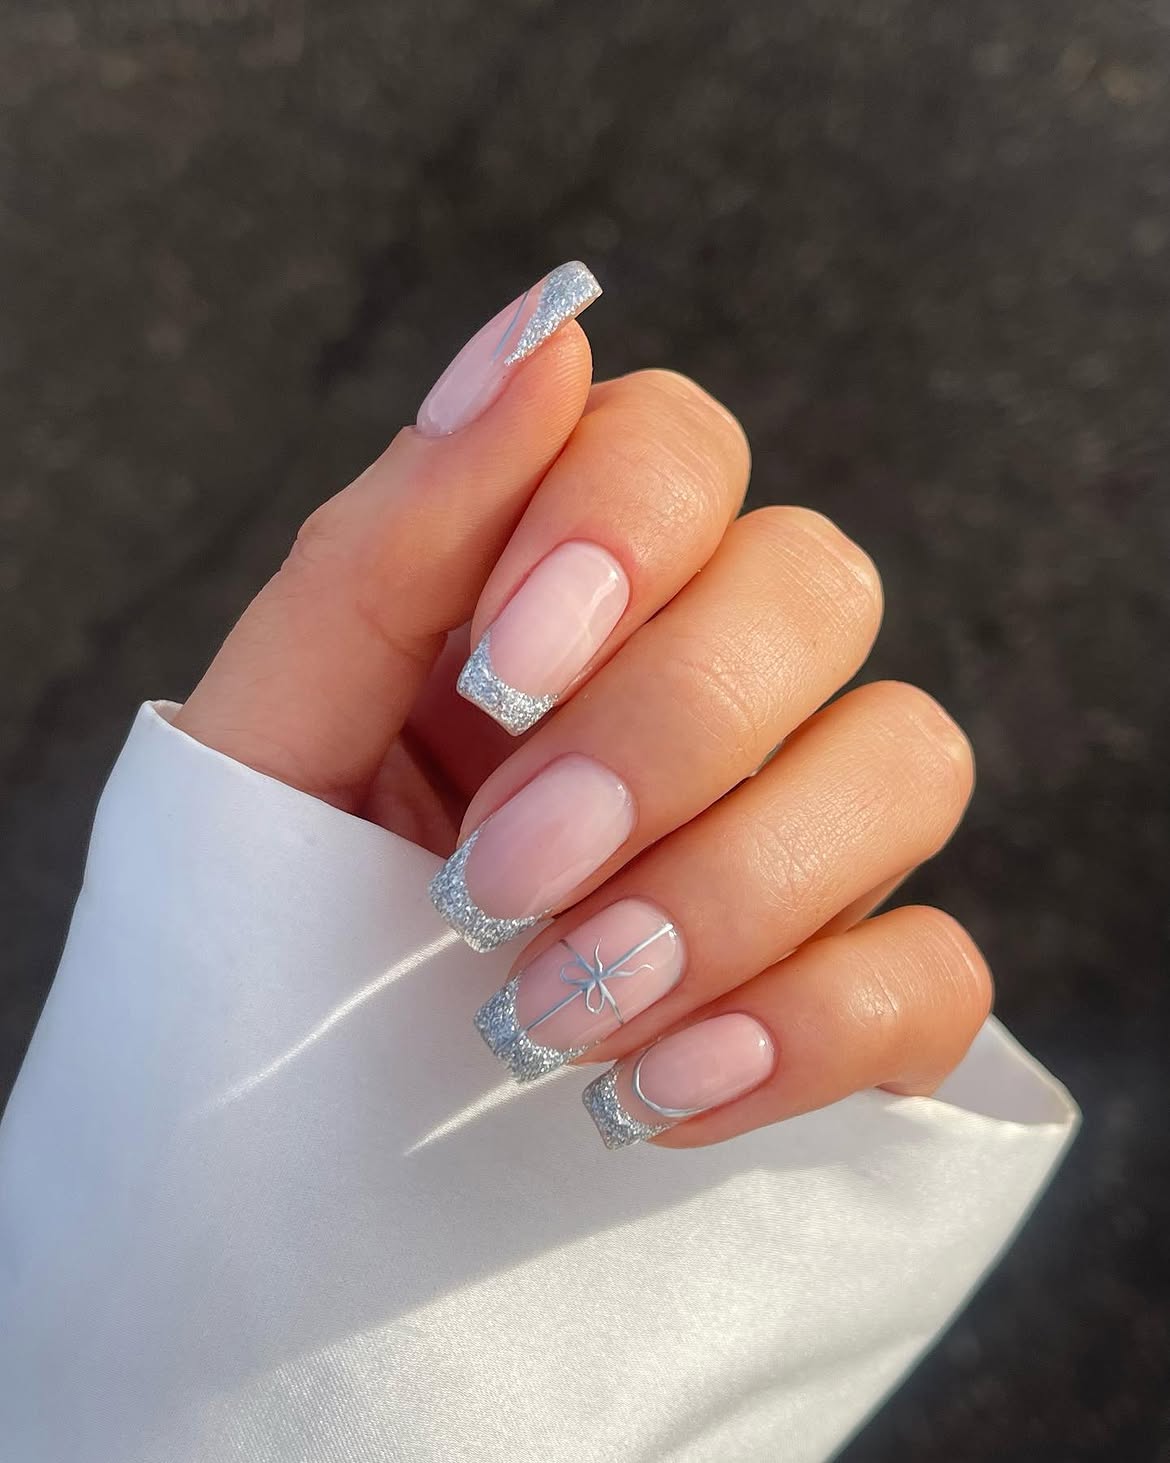
Silver glitter edges the soft pink nails in this set. The square tips give the sparkle a clear shape, while a thin silver bow and a few ribbon lines add a gift inspired detail. The design gets its shine from the tips, so the pink centers stay easy to see.
For a home version, concentrate on getting the glitter tips even before adding any line art. Choose one nail for a small silver bow sticker or draw it with metallic nail polish and a fine brush. The ribbon can be a loose curve; it does not need to match the other nails. On shorter nails, use a narrower glitter tip to leave room for the pink base.
A simple order for crisp silver tips
Let the pink base dry fully before placing tip guides.
Dab silver glitter onto the tips in thin layers so the edge stays defined.
Remove the guides carefully, then add the bow after the glitter has dried.
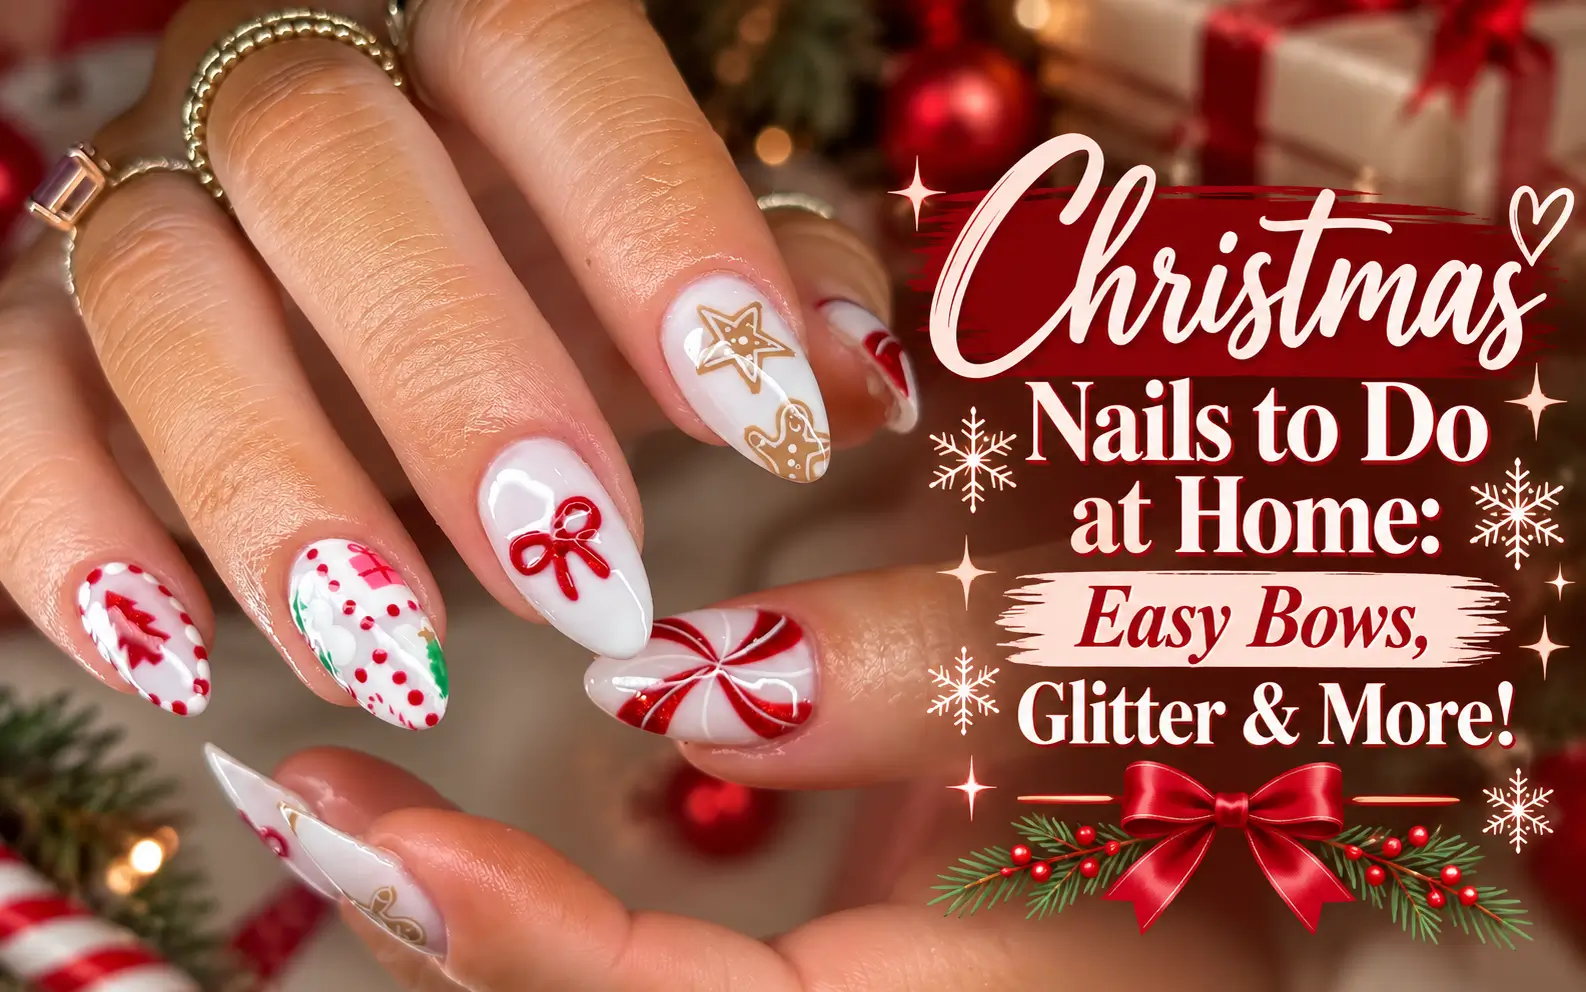
12. Gingerbread and Peppermint Christmas Nails on White
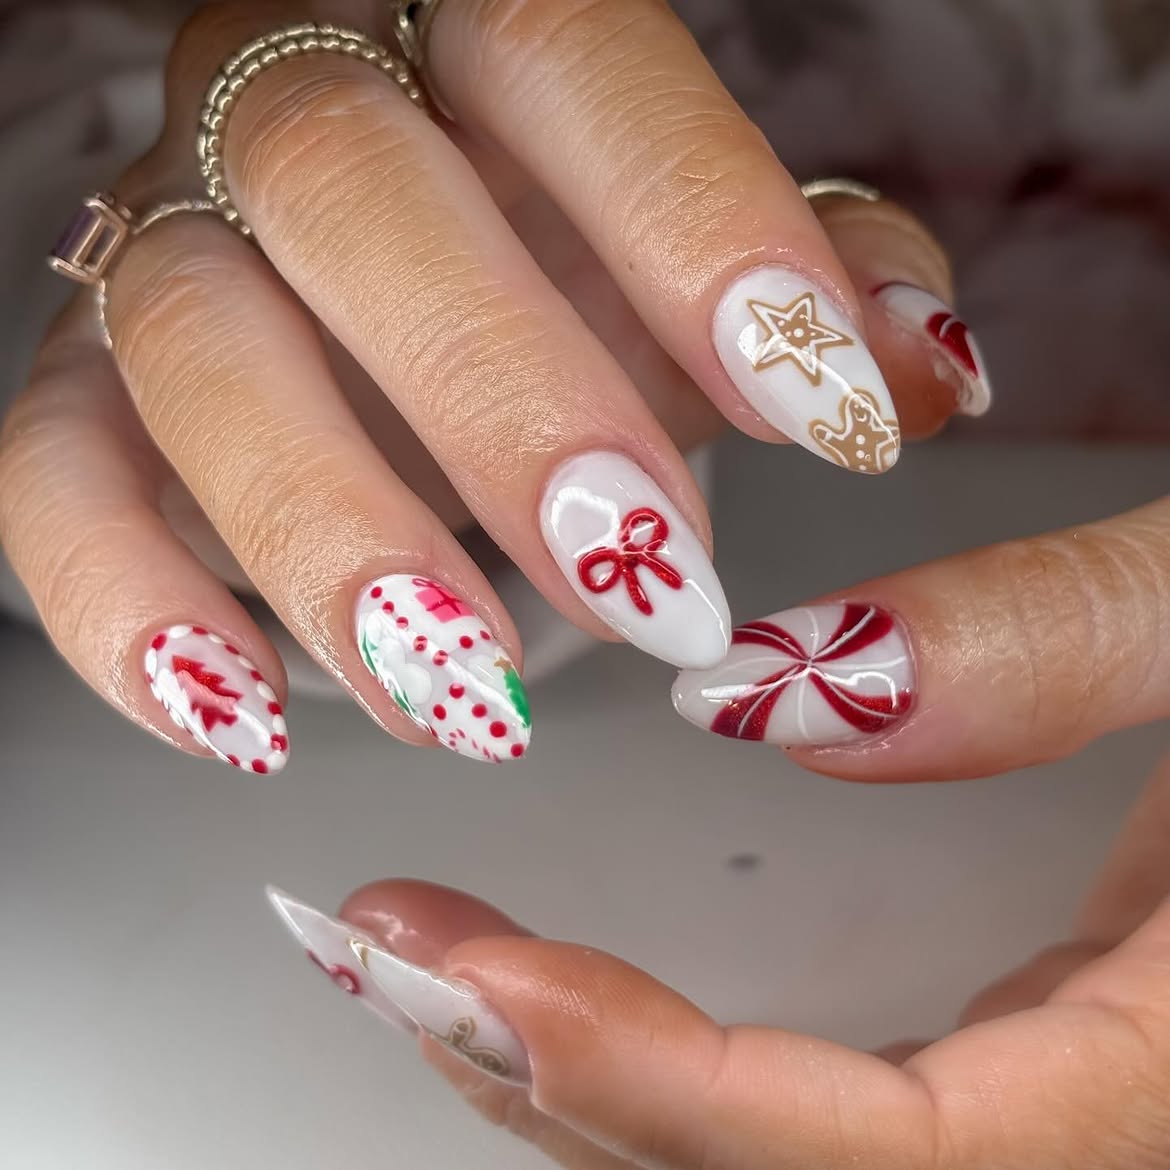
White nails carry a whole tray of Christmas details here. One shows tan outlines of a star and gingerbread figure, another has a red bow, and a thumb has a red and white peppermint swirl. Small red dots and green accents fill the spaces around them. The white base keeps each little drawing clear.
To copy the set at home, begin with white polish on every nail. Choose your favorite two motifs for the detailed fingers, then use dots or small color accents on the rest. Work on one design at a time and let each color dry before adding the next. The nails can still feel playful without painting a full scene on every finger.
| Holiday detail | At home method |
|---|---|
| ⭐ Gingerbread outlines | Use a fine tan nail art pen or a small cookie decal. |
| 🍬 Peppermint swirl | Draw curved red strokes from a center point, leaving white gaps. |
| 🎀 Red bow | Place a bow sticker on dry polish, then seal its edges. |
13. Red Nose Reindeer Christmas Nails With Burgundy Accents
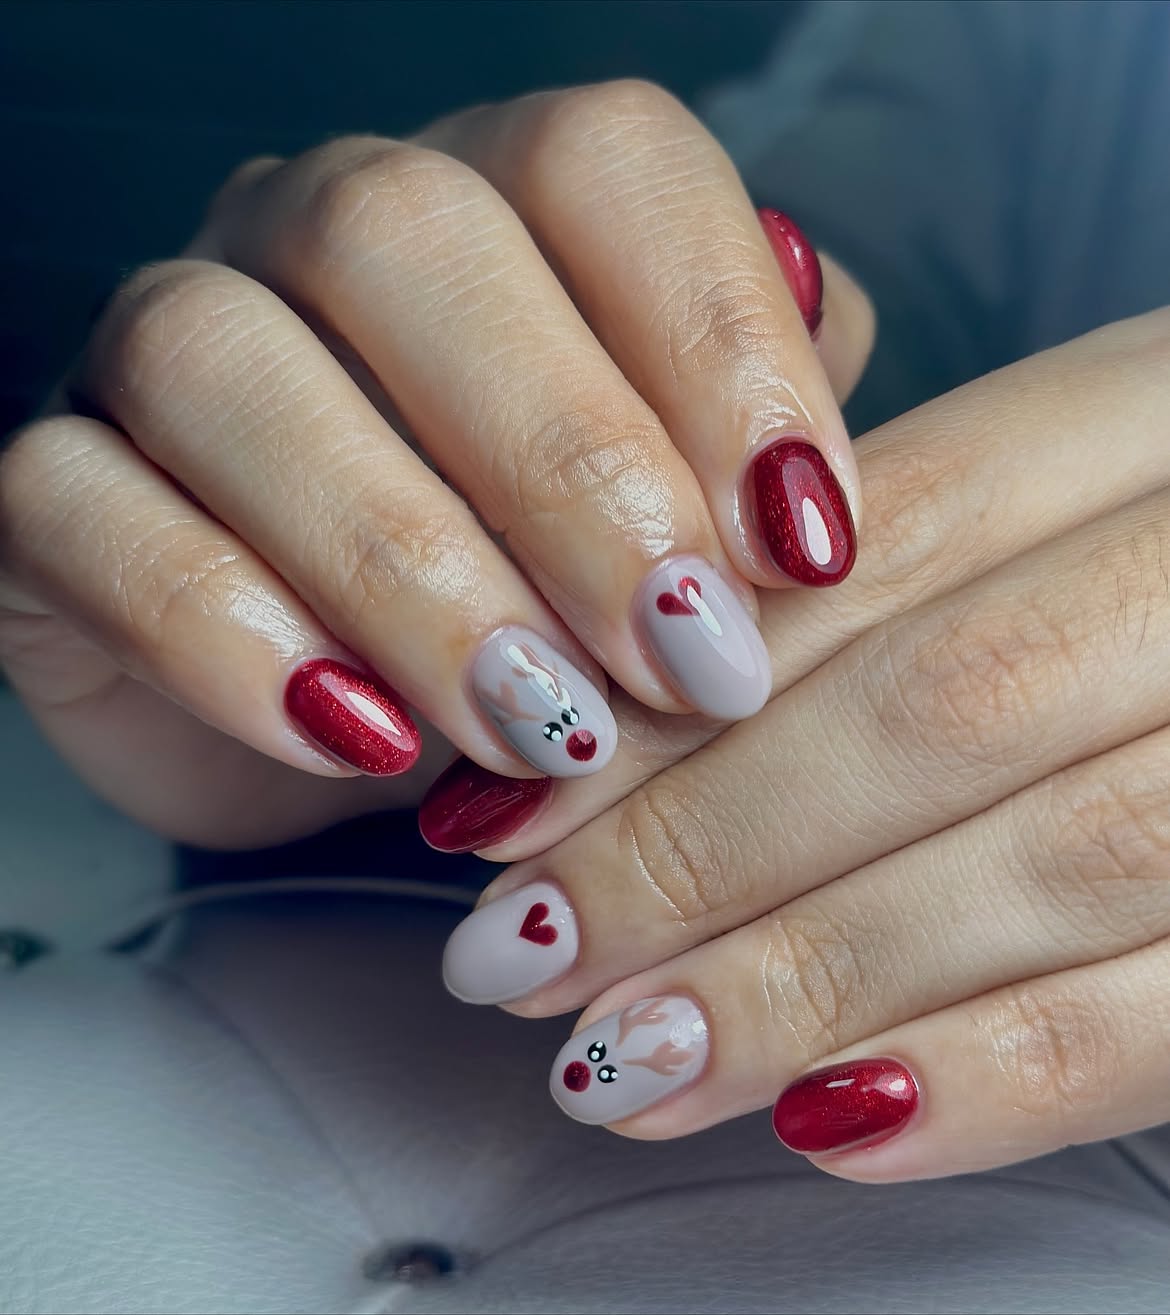
The reindeer faces bring the charm to this manicure. On pale grey nails, light brown antlers frame small dark eyes and round red noses. Glossy, shimmery burgundy nails add rich color, while tiny red hearts appear on other pale nails.
The layout: The reindeer sit on accent nails, with solid burgundy nails between the little faces.
For a home version, paint the burgundy nails first. On the pale base, dot the nose and eyes, then draw loose antlers with a fine brush. The two faces can have slightly different antlers and still look like a pair. Add a small red heart to another pale nail to bring the colors together.
14. Rose Glitter Tips with Tiny Starbursts
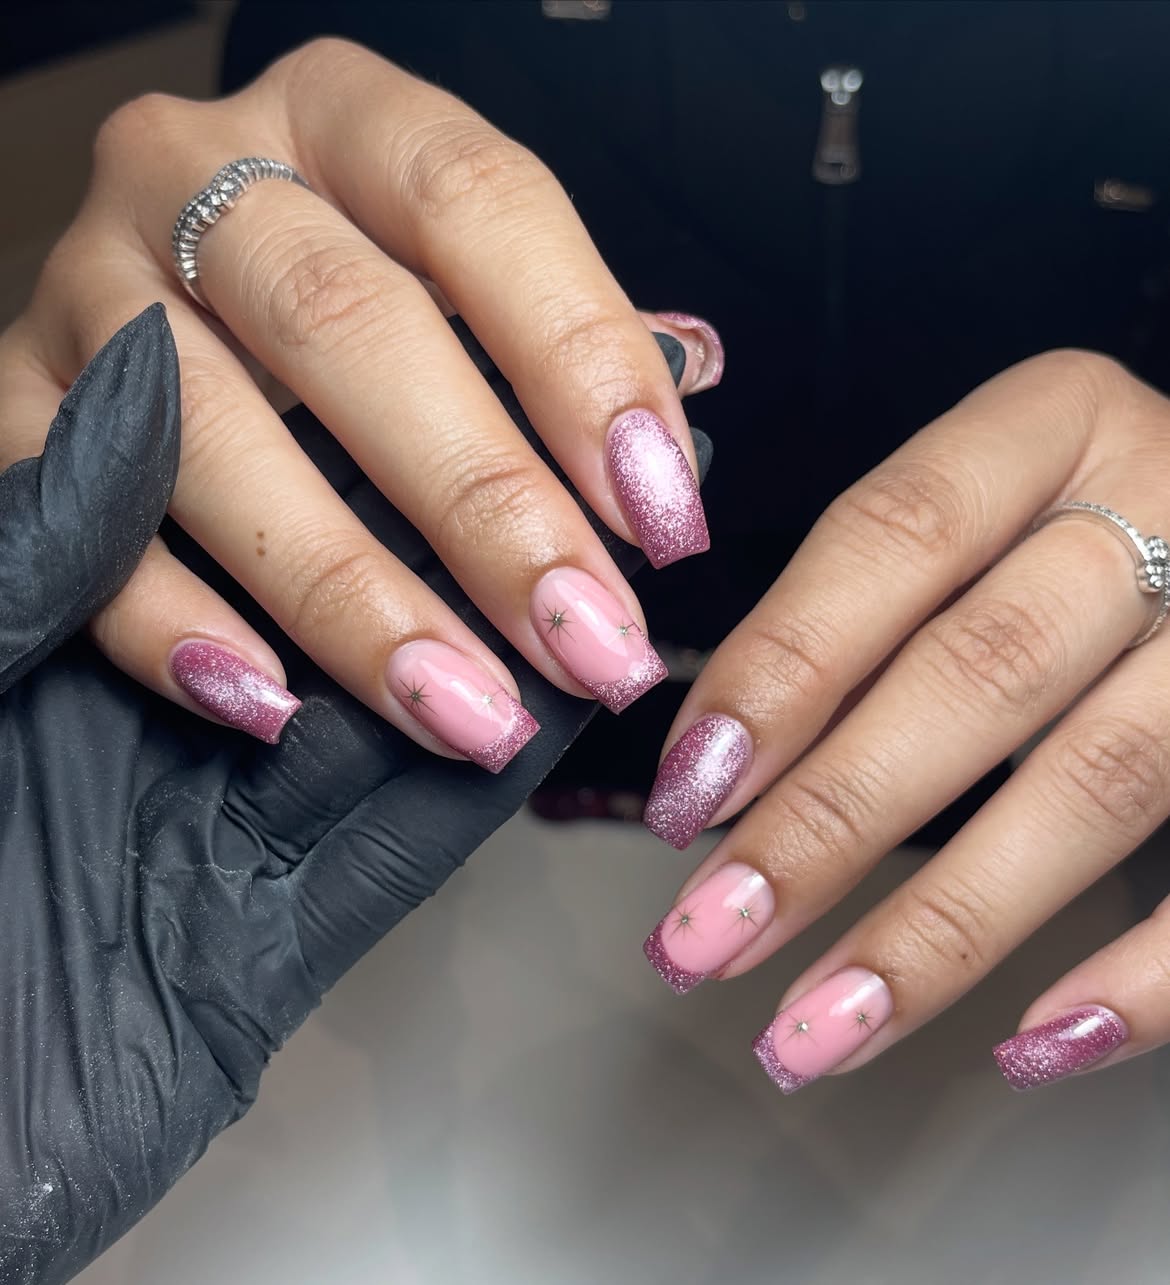
Fine rose glitter gives this manicure its holiday shimmer without covering every nail. On each hand, two glossy pink nails with glitter tips sit between two nails coated entirely in glitter. The little starbursts add detail while leaving plenty of the pink base visible.
To try it at home, paint the solid glitter nails first. Once the pink nails are dry, brush glitter across their square tips. Use a fine brush to draw a few short lines radiating from each star’s center, then add a tiny reflective stud if you have one. Keep the stars spaced apart so each one stands out.
15. Gift Wrapped Nails with Christmas Confetti
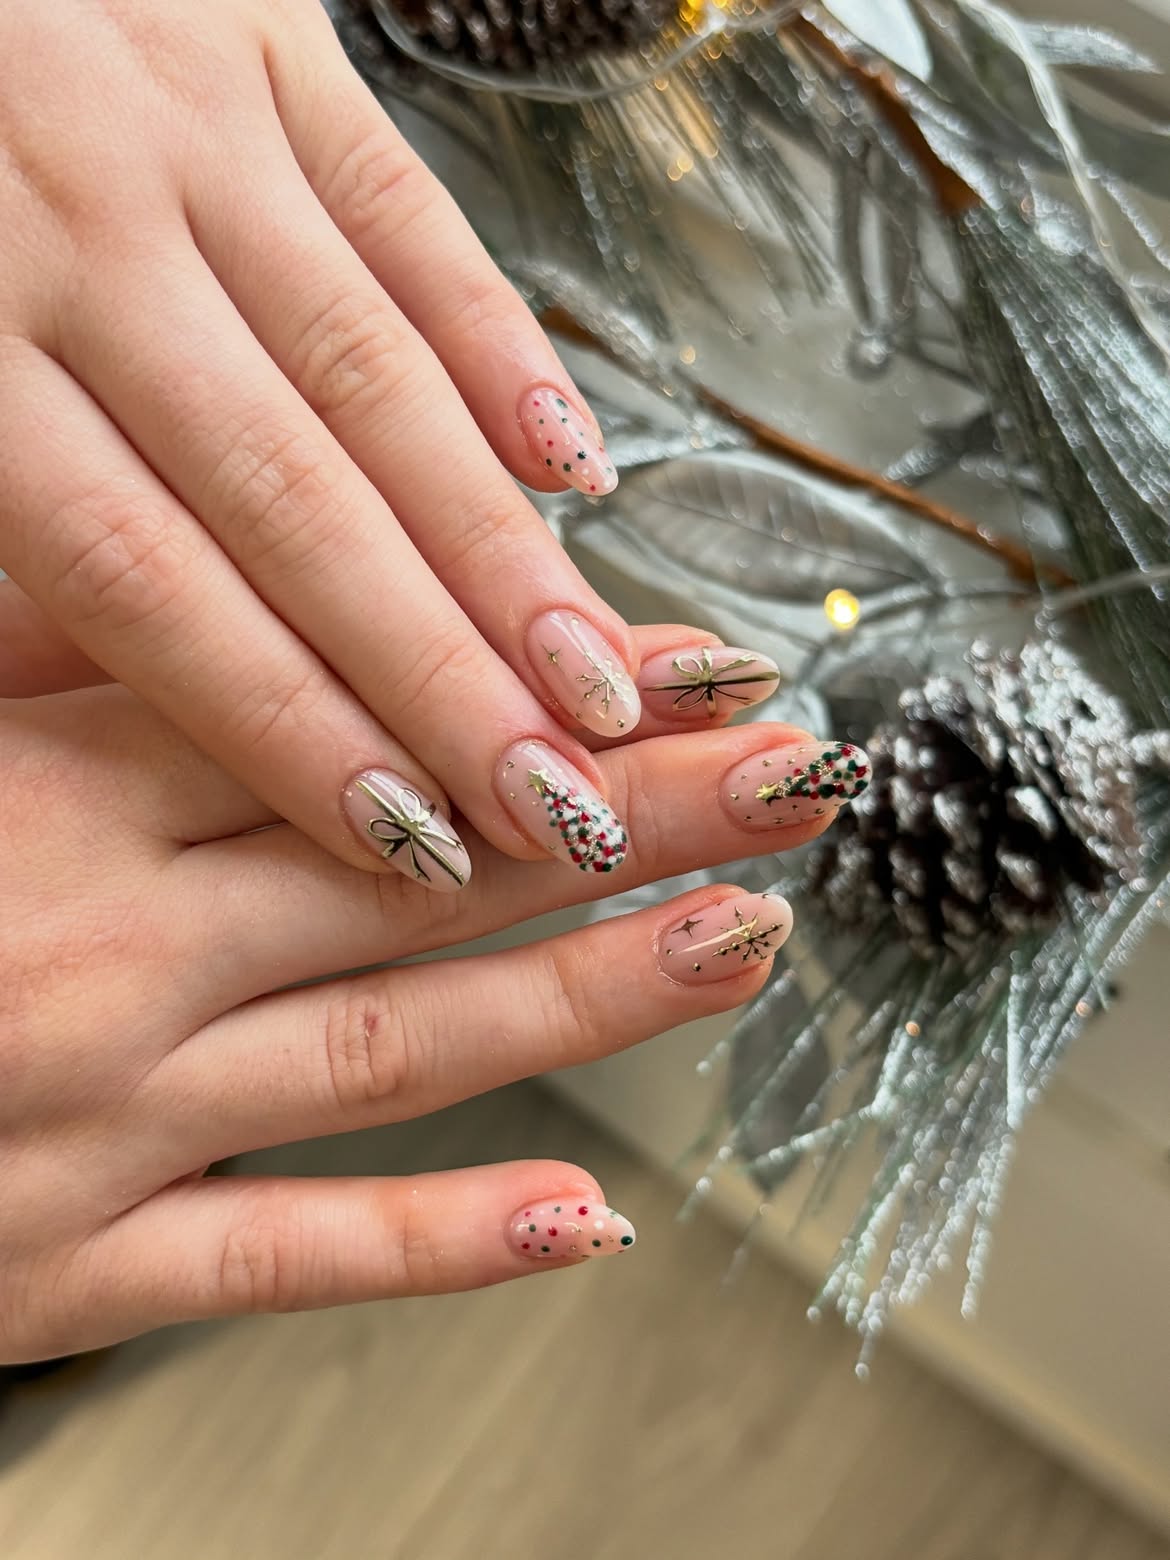
These sheer blush nails look like tiny wrapped presents. Fine gold ribbons and bows take the spotlight, while red and green dots gather near the tips of a few nails. Scattered gold stars tie the different designs together without making every nail look the same.
Start with a sheer pink base. For the gift nails, draw two thin gold lines that cross, then add small bow loops at the meeting point. A fine brush works for the lines, while a ribbon nail sticker can make this part easier. Use the tip of a toothpick to place the red and green dots. Leave some open space around the bows and stars so their shapes stay clear.
16. Silver Snowflakes and Soft Candy Stripes
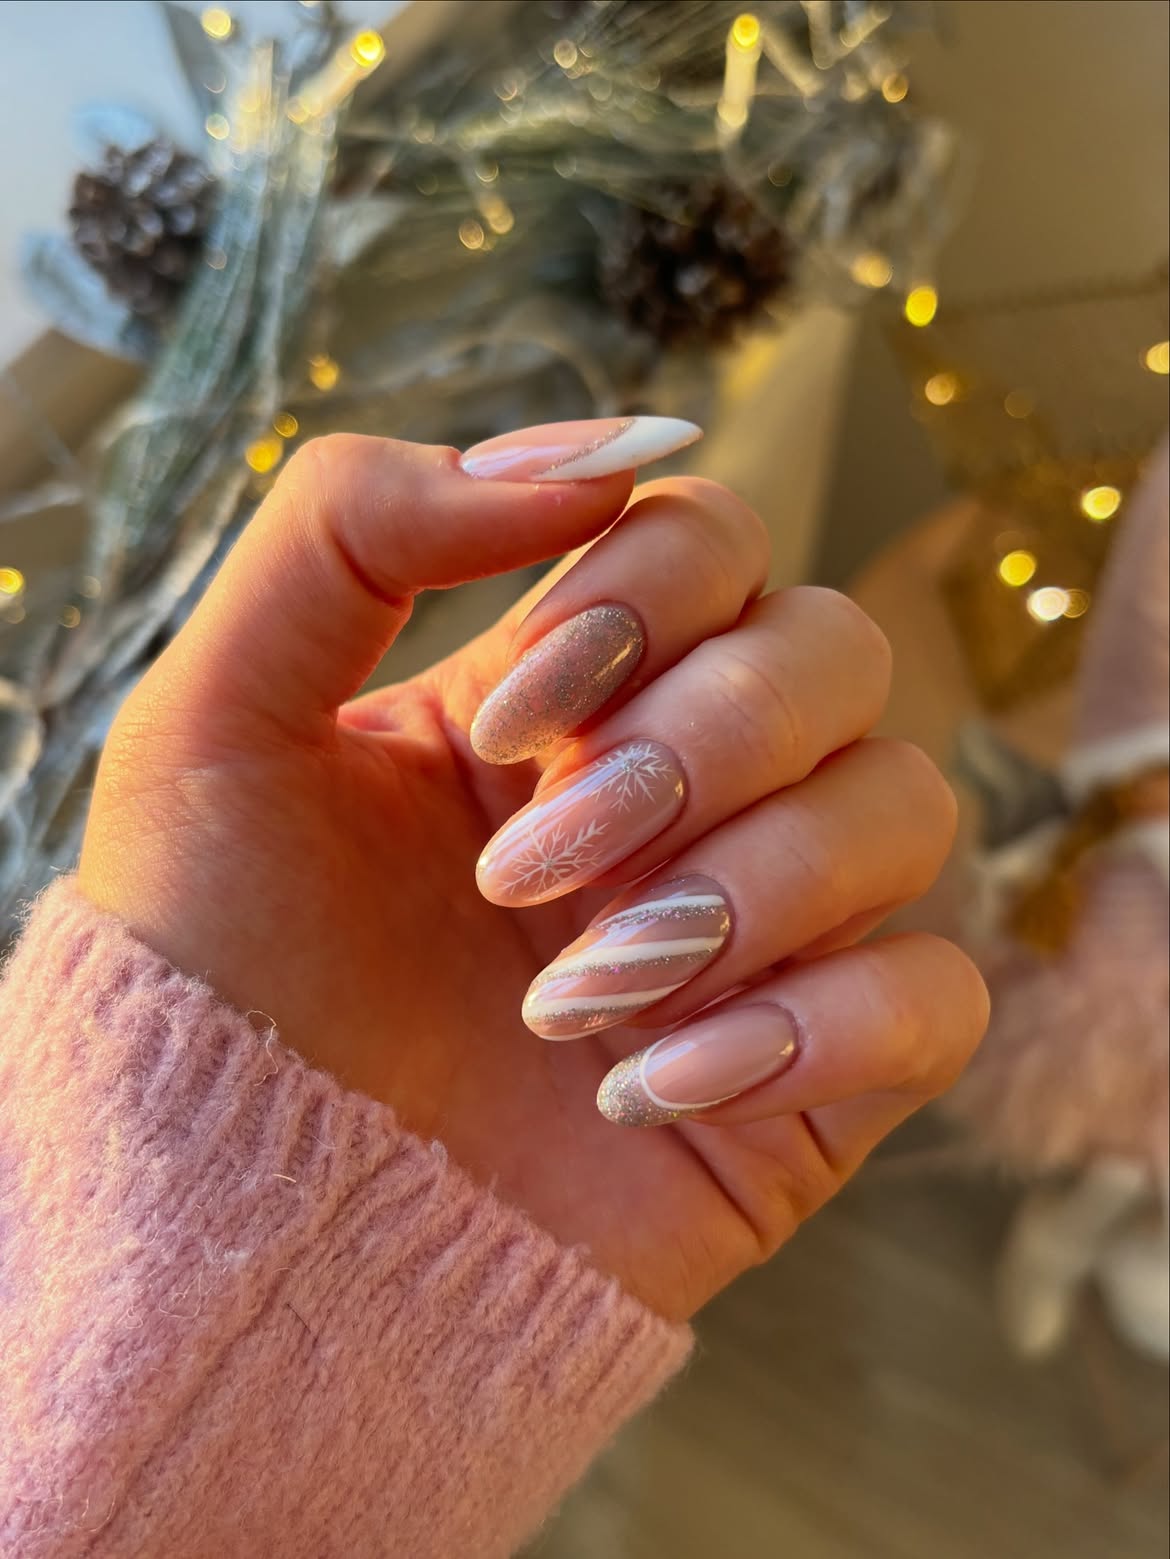
This set mixes several winter details on a sheer pink base. One nail is covered in fine silver glitter, another carries delicate white snowflakes, and diagonal white and silver stripes give the ring finger a candy cane feel. Curved white and glitter tips finish the look without repeating the same design on every nail.
Paint the pink base across your nails first, then choose one for the full glitter accent. Thin nail tape can guide the diagonal stripes; lift it while the polish is still wet for cleaner edges. If the snowflake lines feel too intricate to paint, small nail decals can create a similar effect. Add a clear top coat after every detail has dried.
- □ Check that the pink base is dry before adding tape.
- □ Remove stripe guides while the white polish is wet.
- □ Let the snowflakes and glitter details set before sealing.