19 Viral Square September Nails: Fresh Autumn Designs For You
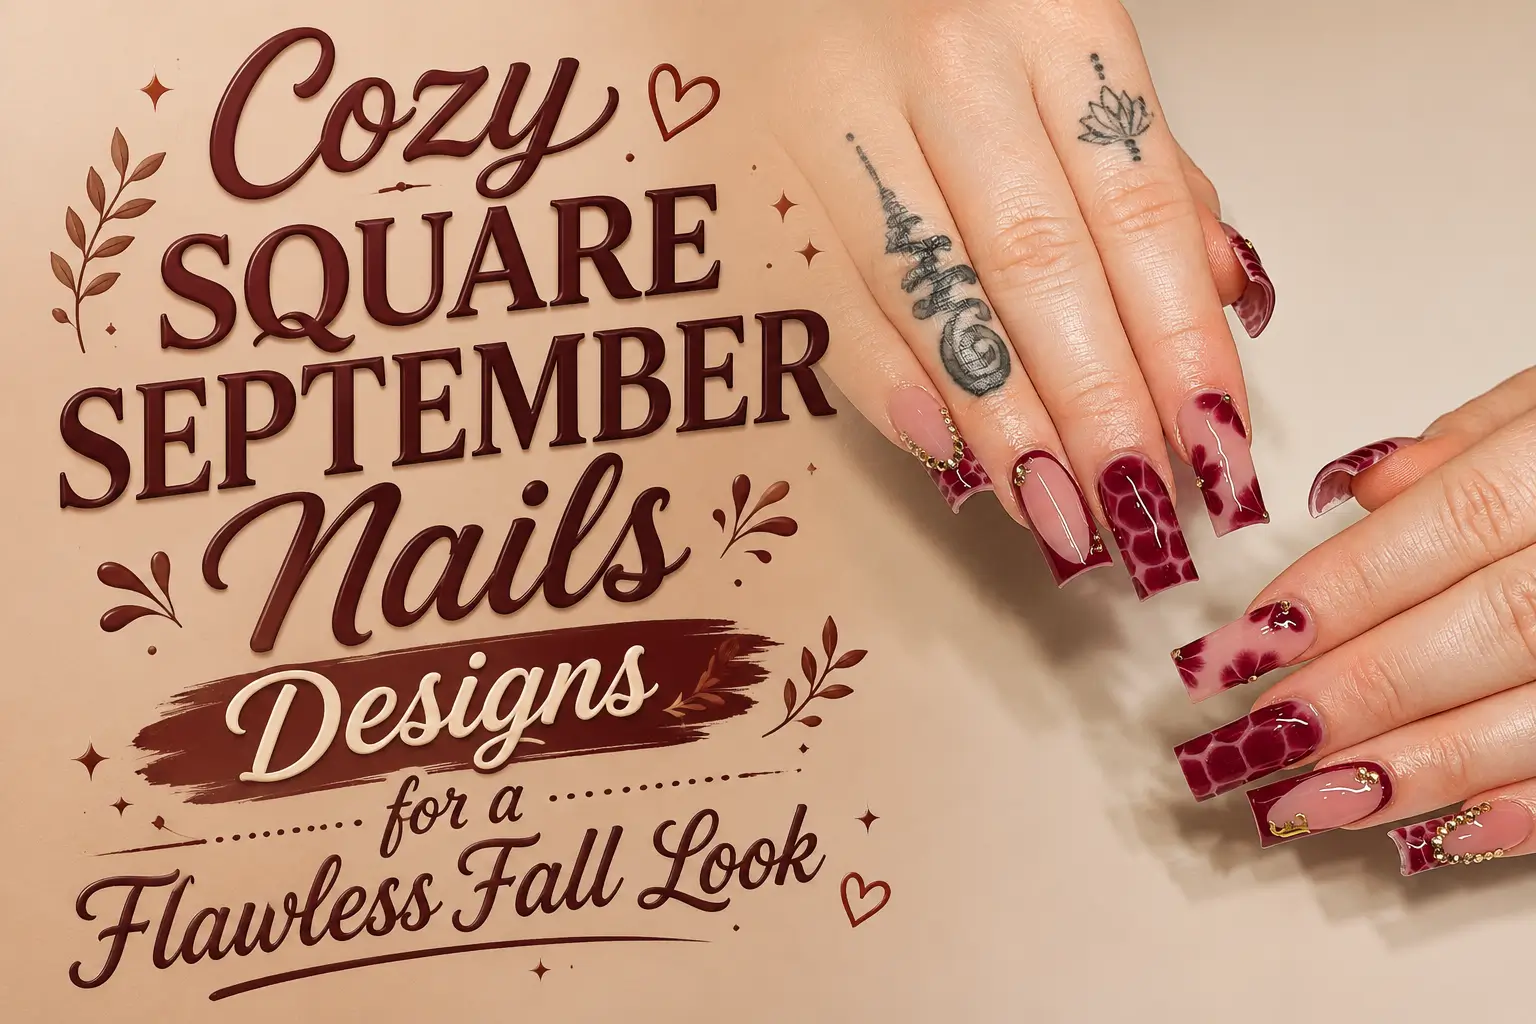
September sits between bright summer color and deeper autumn shades, which can make choosing a manicure surprisingly tricky. You may still want playful flowers and fresh color, but richer brown, burgundy, plum, and black shades are beginning to feel right again.
These Square September Nails bring both moods together through clean shapes, glossy finishes, and thoughtful details. The collection includes quiet milky nude polish, dark oxblood color, crisp French tips, animal prints, polka dots, flowing line art, and bright sculpted flowers. Some ideas keep the design simple with one strong shade, while others use raised petals, fruit inspired details, tiny insects, and metallic accents.
Long square tips provide room for detailed artwork, while shorter shapes show how much impact a neat edge and carefully placed color can create. Use these ideas to find a design that suits your preferred length, comfort level, and September plans.
19 Adorable Square September Nails Trends 2026
1. Mix Chocolate Polka Dots With a Soft Nude Base
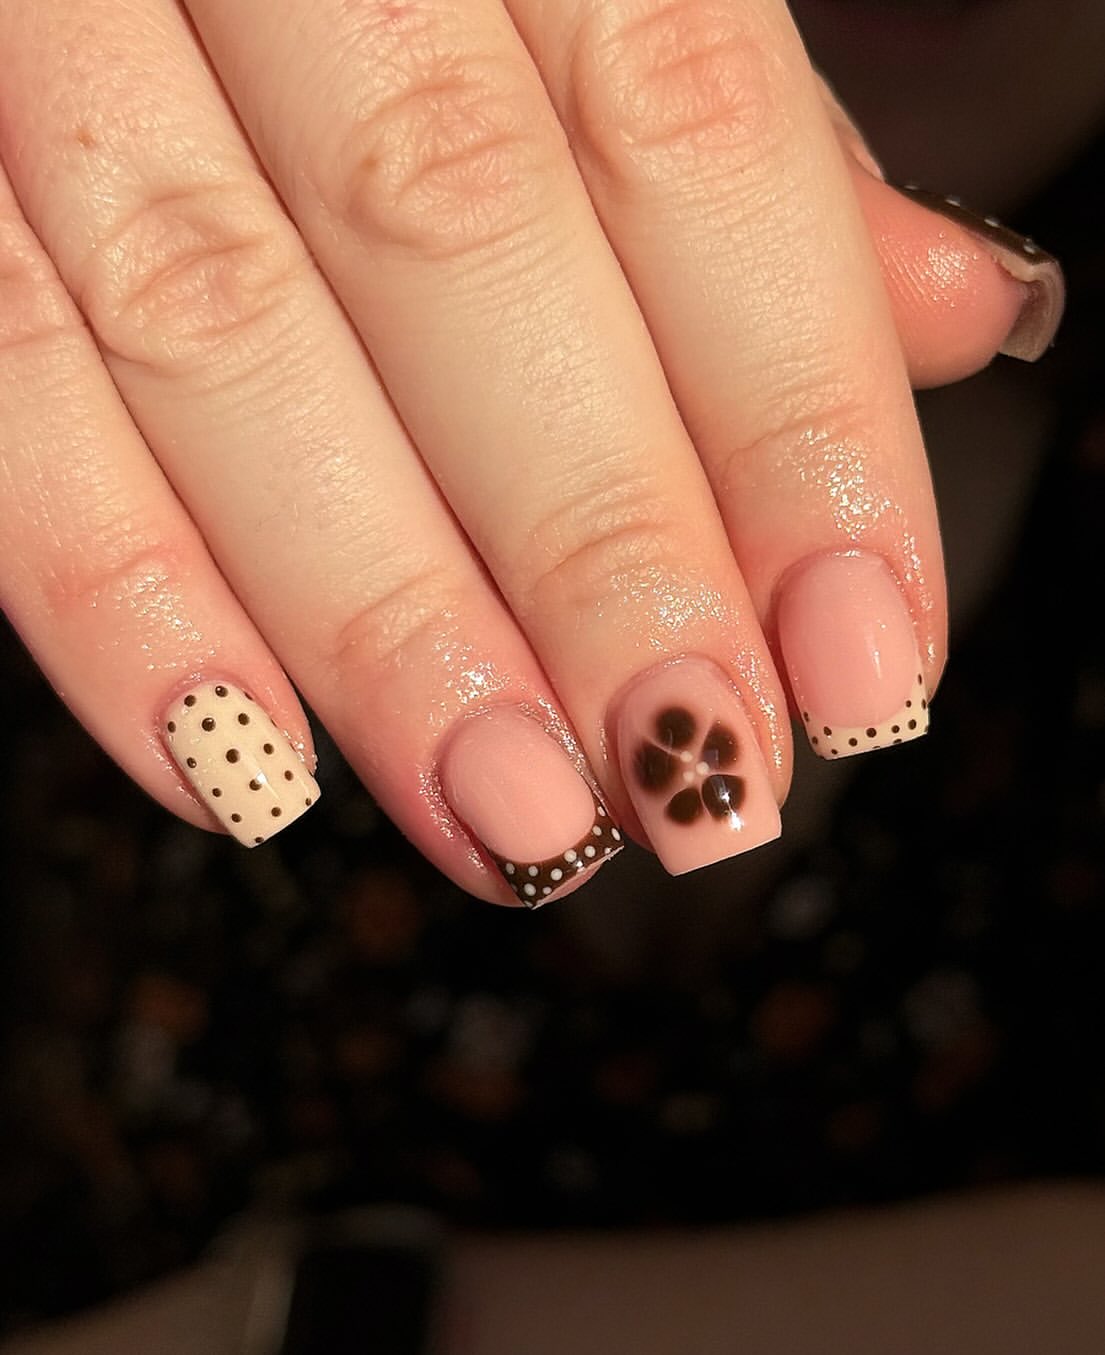
Warm nude polish gives this square manicure a clean base, while chocolate brown and creamy beige details bring in a cozy September feel.
What stands out
The dotted cream accent nail adds a playful retro note. A slim brown tip with tiny cream dots keeps the next nail more delicate. The large four petal flower becomes the main feature without making the full set feel crowded.
How to balance the design
Keep most nails glossy and neutral. Use the darker brown on only a few details, then repeat the cream shade across the dots and accent nail. Crisp square edges help every pattern look neat and intentional.
2. Give Square September Nails a Clean Leopard Accent
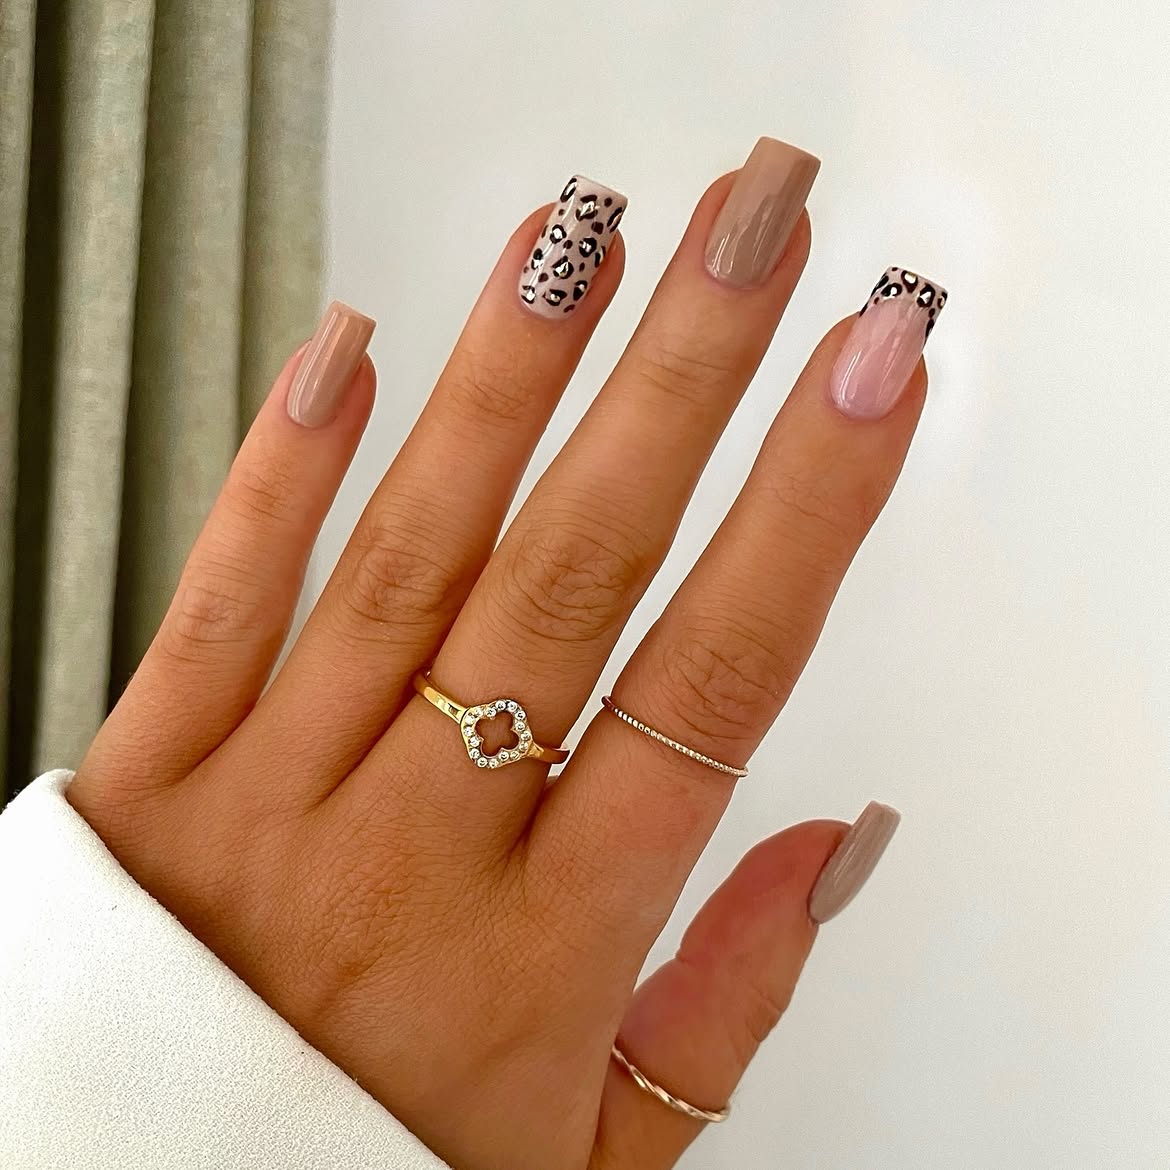
Leopard print feels more polished here because it appears in two different amounts. One nail carries the full pattern, while another keeps it only along the square tip. The remaining nails stay glossy and neutral, giving the print room to stand out.
Start with a sheer blush or muted taupe base. Paint the irregular spots with dark brown, then add small black outlines without closing every shape. A few tiny dots between the larger marks make the pattern feel natural.
Keep the square edges straight and use the animal print on no more than two nails. This balance keeps the manicure bold, neat, and easy to wear through September.
Pair one full leopard nail with one patterned tip.
Leave the other nails glossy and neutral.
Do not make every leopard spot the same size.
Avoid covering every nail with the busy pattern.
3. Keep Long Square September Nails Crisp With White Tips
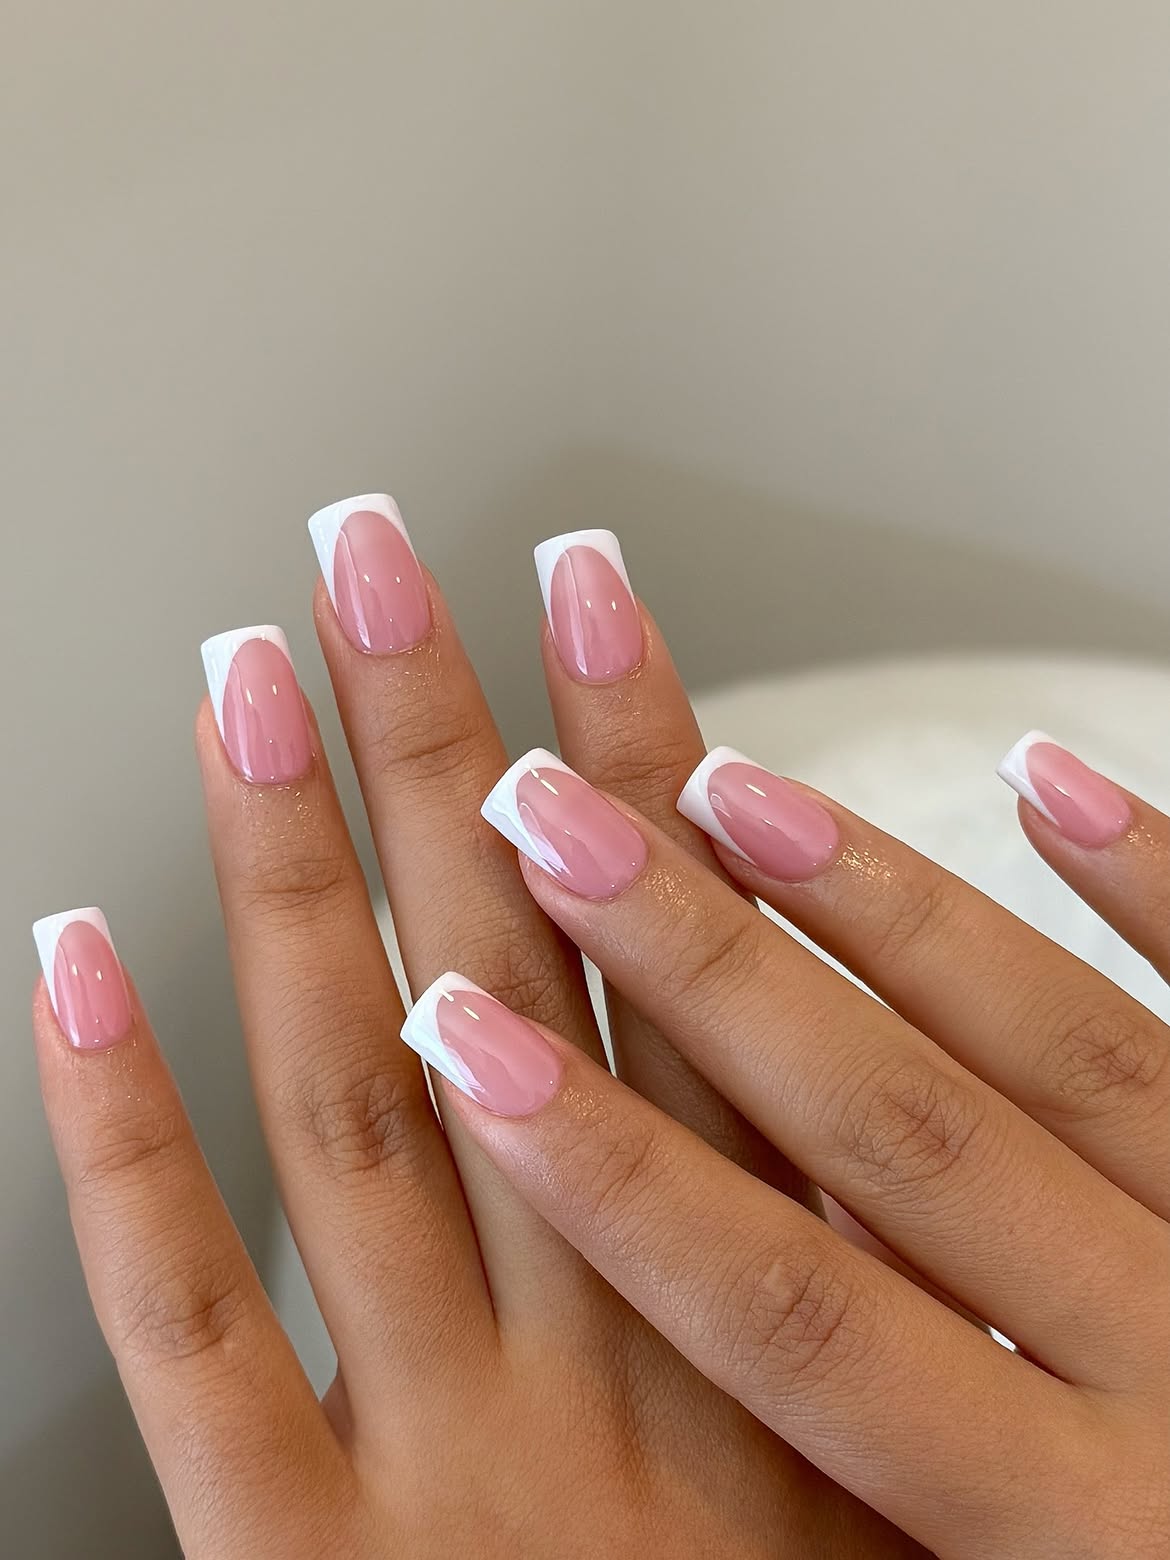
A sheer rosy base, bright white tips, and straight square edges create a fresh look that feels clean without extra decoration.
Base
The translucent pink lets the natural warmth of the nails show through. Several thin layers can build the glossy finish while keeping the color soft.
Tips
The white sections are wide enough to suit the longer length. Their gently curved lower lines soften the sharp square corners.
Shape
Even sidewalls and matching tip depth make the manicure look balanced across both hands. This design works especially well when every nail is filed to a similar length and finished with a smooth, reflective top coat.
💡 Small Detail That Matters
Map the white edge on every nail before filling it in. Matching the depth of each tip gives the full set a cleaner and more balanced finish.
For more September manicure inspiration, explore these 20 Almond September Nails filled with cozy colors, clean details, and fresh fall nail ideas.
4. Frame Blush Pink With Deep Chocolate Curves
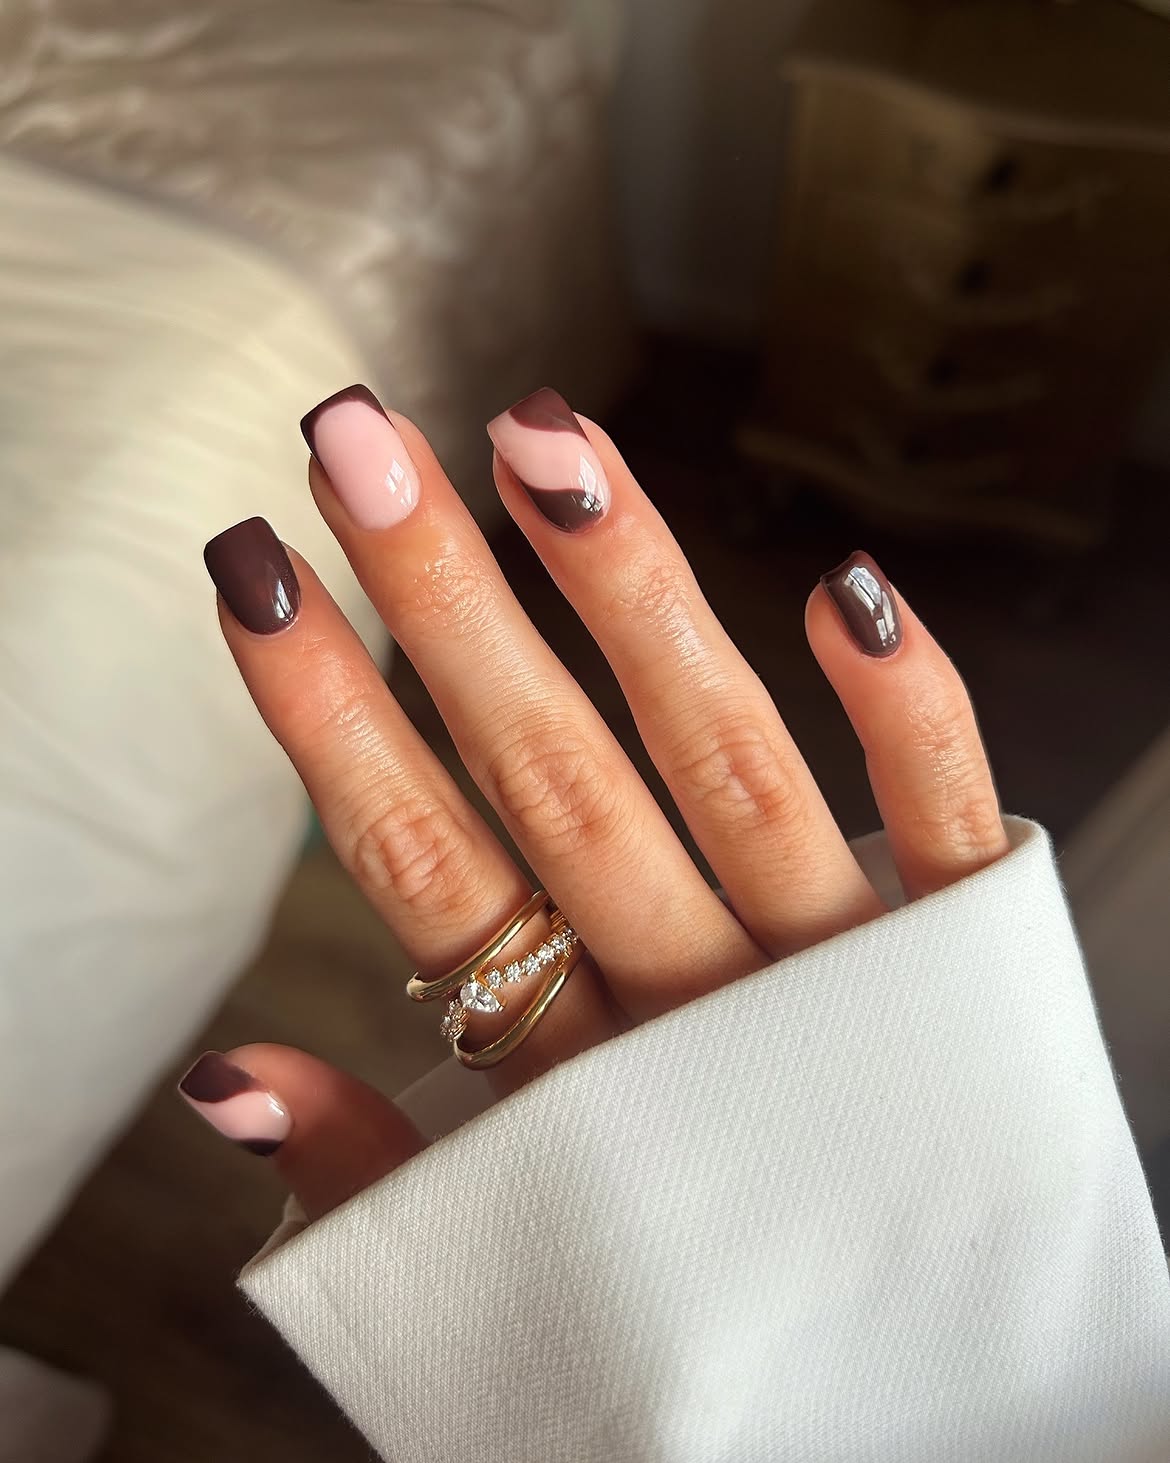
Deep chocolate polish gives this shorter square manicure a rich September mood, while glossy blush sections keep it from feeling too dark.
- The strongest detail is the curved color blocking.
- Some nails are covered fully in brown, but the accent nails use soft pink through the center with chocolate placed near the tip or cuticle.
- Changing the direction of each curve gives the set movement without adding glitter, gems, or detailed art.
For a similar result, apply the pink base first and let it settle. Sketch each brown curve with a fine brush, then fill the outer section carefully. A glossy top coat helps both colors look smooth and connected. Keep the shapes broad so the design remains clear on shorter square nails.
5. Layer Berry Crocodile Print With Tiny Metallic Details
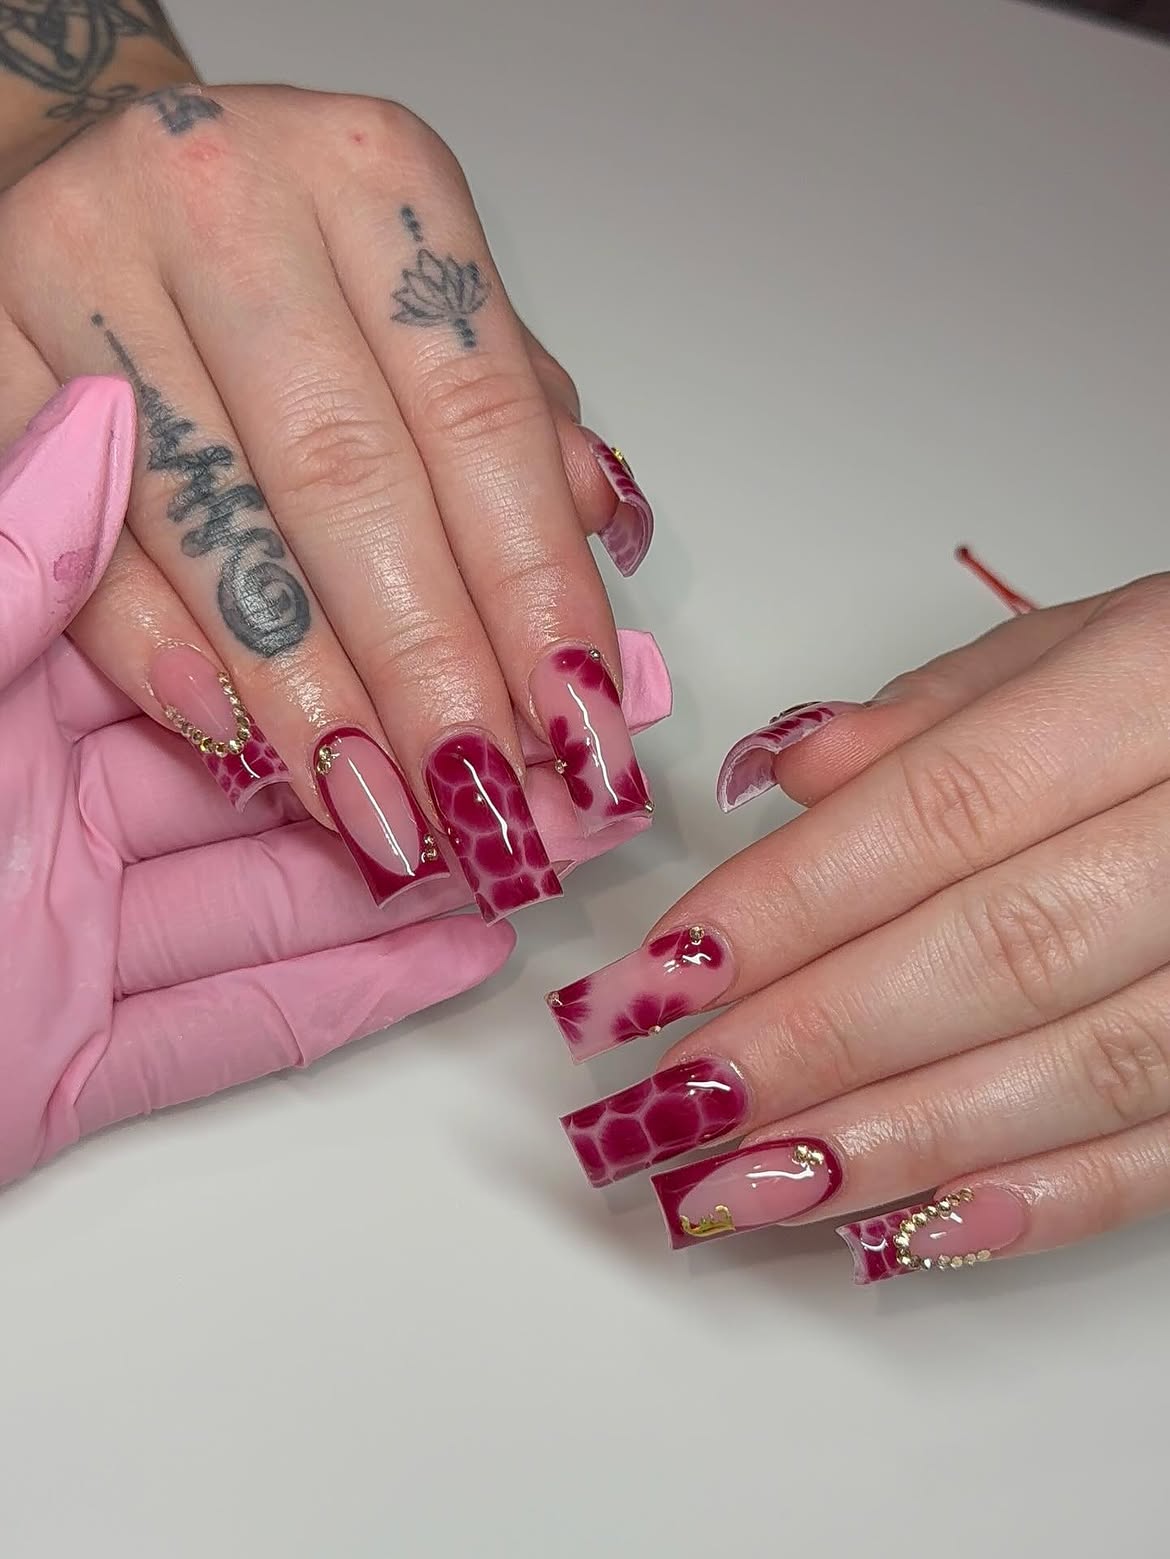
Berry polish does most of the visual work in this detailed square manicure. Some nails carry a full crocodile style pattern, while others use deep curved borders around a clear pink center. Soft blurred shapes bring another layer of movement without hiding the base.
The small metallic accents are placed along corners, curves, and cuticle lines. This helps guide the eye across the set instead of making every nail compete for attention.
Build the larger berry patterns first. Leave open pink areas on several nails, then add the smaller studs and curved decorations after the color is finished. Keeping the accents close to the painted borders makes the design feel connected. A glossy top coat brings the patterns and raised details together.
6. Scatter Pink Petals and Tiny Gold Stars Over Milky White
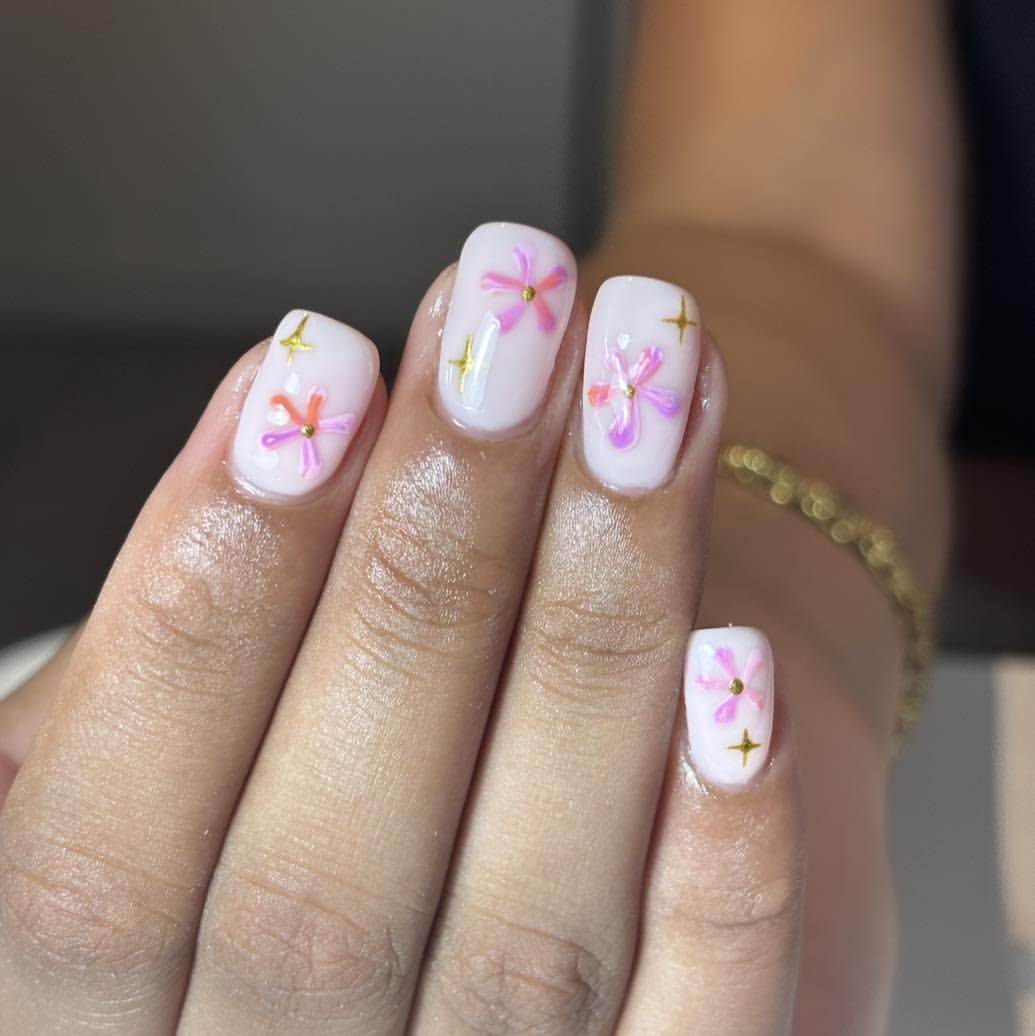
A milky white base gives these short square nails a bright, soft background for playful flower art.
- Each flower uses loose pink and coral strokes instead of sharply matched petals.
- That slight variation makes the design feel hand painted and relaxed.
- Small gold colored centers connect the flowers with the scattered star shapes, bringing a little shine without covering the clean base.
The placement changes from nail to nail. Some flowers sit near the tip, while others appear closer to the side or cuticle. Leaving plenty of white space around every detail keeps the manicure light and easy to read. This is a cheerful choice for the warmer days at the start of September.
Recreate this design
7. Choose a Milky Nude for a Quiet September Manicure
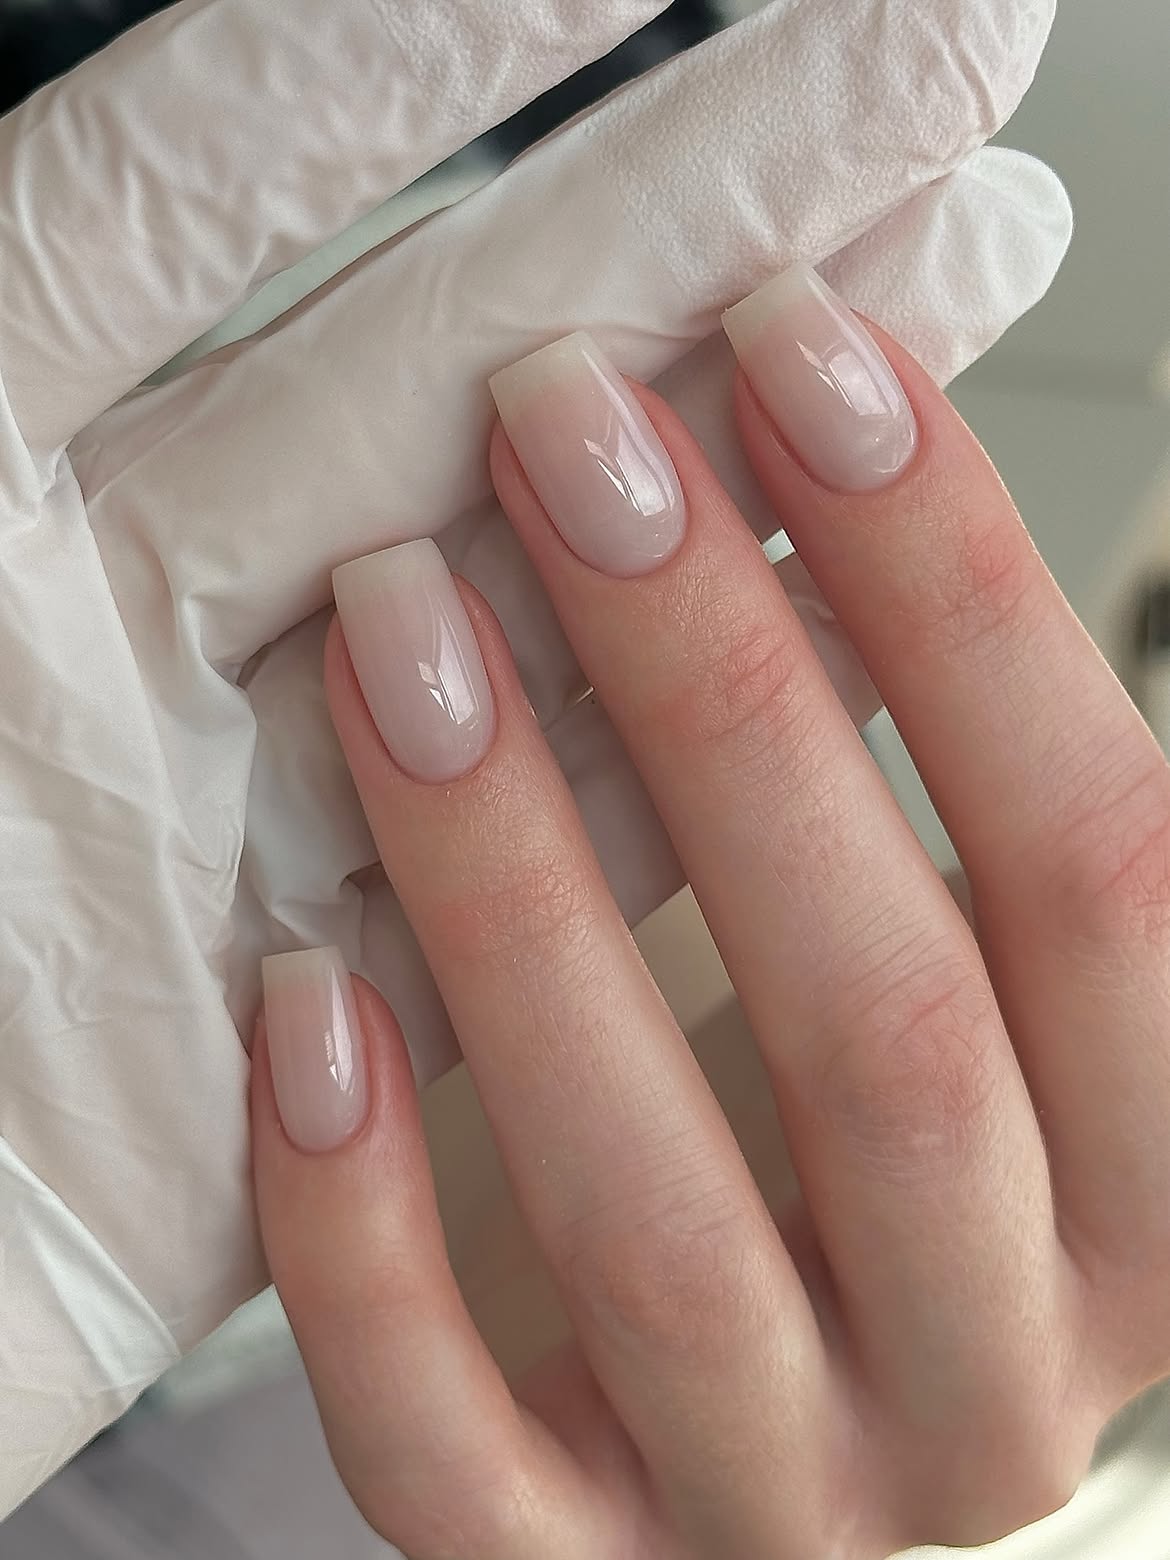
After the patterned and floral ideas, this simple nude set offers a calm reset. The soft pink beige shade keeps the nails looking natural, while the medium square length gives them a clear, structured finish.
There is no decoration to hide uneven color or filing, so the small details matter. Straight sidewalls, level tips, and a smooth surface help every nail look consistent. The translucent color also softens the line between the natural nail and the extension.
Build the shade with thin layers instead of applying one heavy coat. Finish with a glossy top layer to create the clean reflection seen across the nails. The result feels polished, understated, and easy to pair with early autumn colors.
| Sheer nude | Opaque nude |
|---|---|
| Shows a little natural warmth | Creates a more solid block of color |
| Feels light and glossy | Feels bold and uniform |
| Suits this soft natural finish | Works for stronger color coverage |
8. Mix Butter Yellow Tips With Dots and Pink Flowers
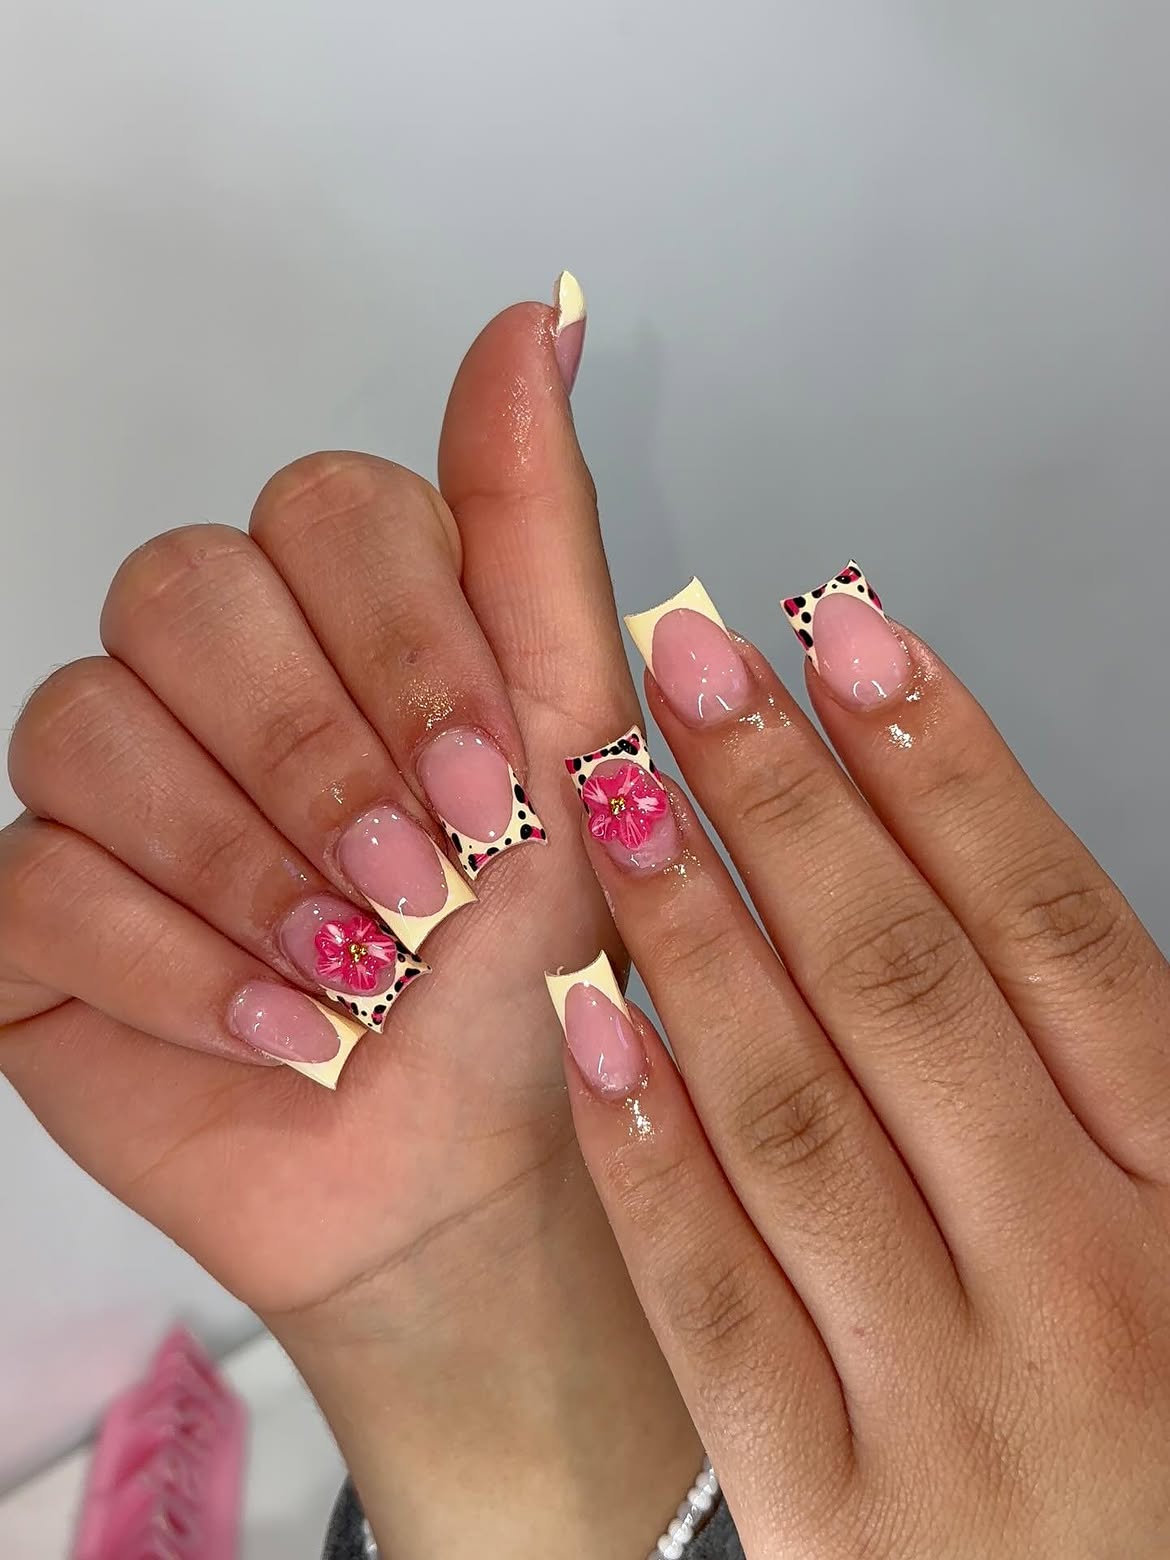
Three lively details share this long square manicure: pale yellow tips, black dots, and bright pink flowers. The glossy nude base gives each element a clear background, so the set feels playful without losing its shape.
- The yellow appears on every nail, sometimes as a full tip and sometimes as a curved corner frame.
- Black dots are limited to selected edges, adding contrast without spreading across the whole design.
- Raised pink flowers become the main accents, with small gold colored centers that connect them to the warm yellow polish.
The trick is repetition. Carrying the same yellow, pink, and black shades across both hands makes the changing patterns feel intentional. Keep the flower details on only a few nails so their texture remains noticeable.
Repeating the butter yellow on every nail gives the dots and raised flowers one clear visual connection.
9. Turn Square Nails Into a Bright September Garden
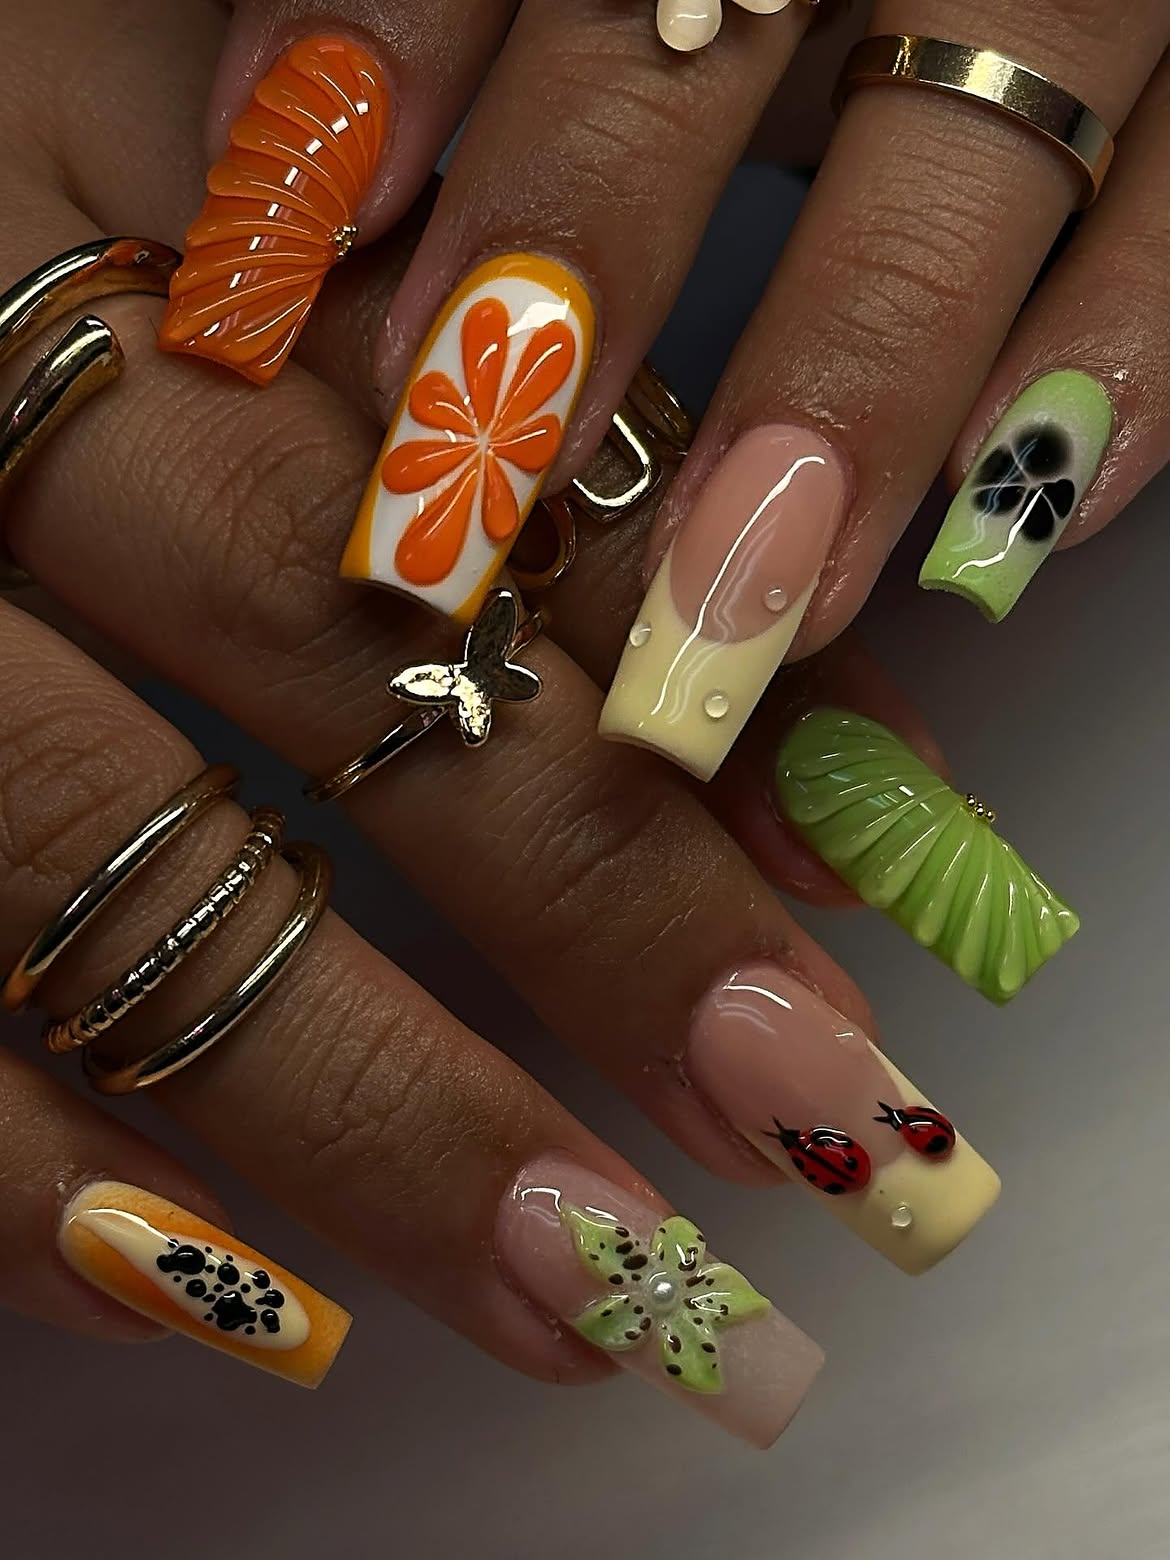
This detailed set uses every nail as a different part of one tiny garden. Orange, lime green, soft yellow, and nude create a lively palette, while repeated fruit, flower, and insect details connect both hands.
Raised fan shapes bring strong texture to the orange and green accent nails. Other nails feature bold petals, seed patterns, tiny ladybugs, soft color sections, and clear droplets that resemble morning dew. Small gold colored beads appear only in a few places, giving the brighter art a subtle point of shine.
Because every nail is different, the shared colors do the organizing. Repeating orange and green across the set keeps the many details from looking random. The long square shape also gives each miniature scene enough room to remain clear.
Choose three main colors that can repeat across every design.
Paint the flat flowers, fruit details, and color sections first.
Add raised textures, tiny insects, and clear droplets after the base art is set.
Keep the raised pieces separate so every small detail stays visible.
If you want a softer and more playful seasonal look, these 17 Cute September Nails are filled with sweet colors, tidy shapes, and charming fall details.
10. Add Lime Green Swirls to a Glossy Peach Base
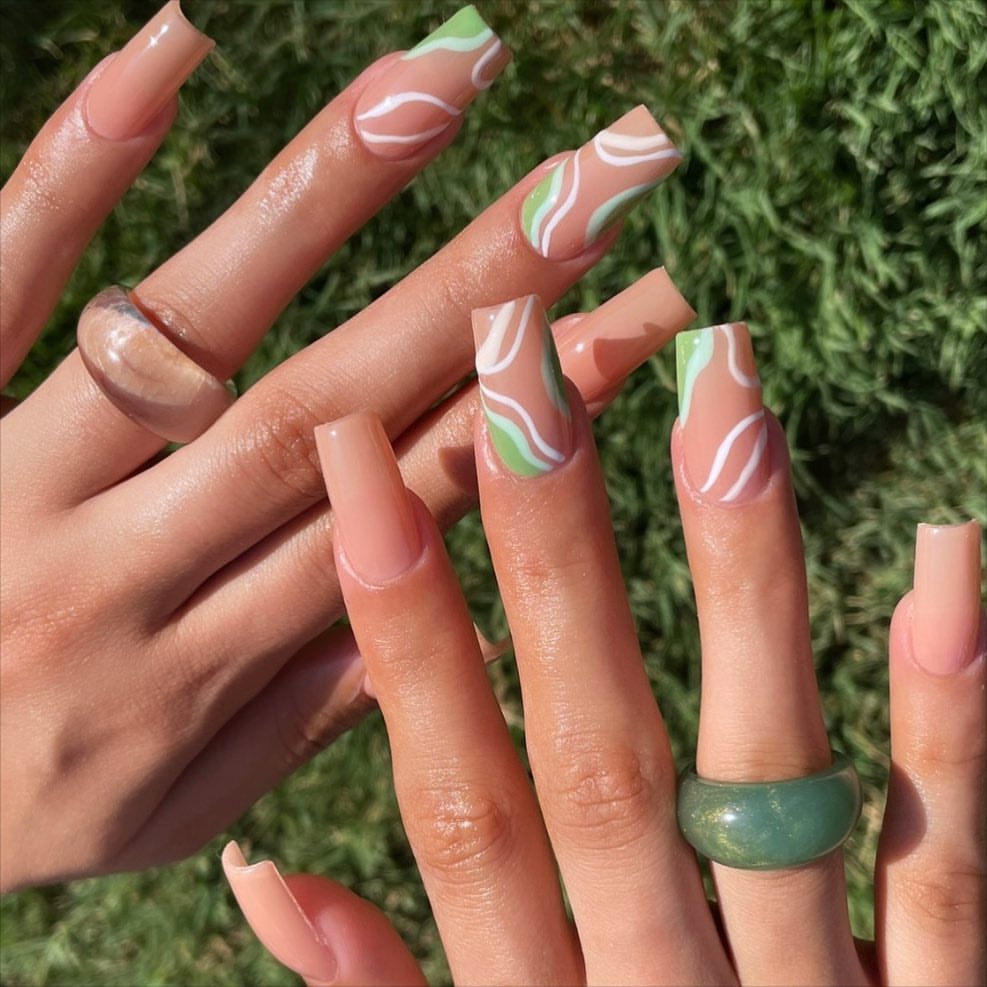
Glossy peach polish keeps this long square manicure warm and wearable, while lime green sections bring a fresh burst of color. Thin white curves move across the accent nails, separating the peach and green areas without making the pattern feel crowded.
Several nails stay completely peach. This gives the flowing artwork more space to stand out and keeps both hands visually balanced. The bright outdoor light also shows how smooth and reflective the finish is.
Quick design notes
- Color story: Soft peach creates warmth, while lime green adds contrast.
- Pattern placement: Curved blocks appear on selected nails instead of covering the whole set.
- Line work: Thin white waves connect the colors and create gentle movement.
- Finish: A glossy top layer makes the peach, green, and white details look clean and unified.
Color and pattern formula
11. Pair Neon Square Tips With Soft Sculpted Flowers
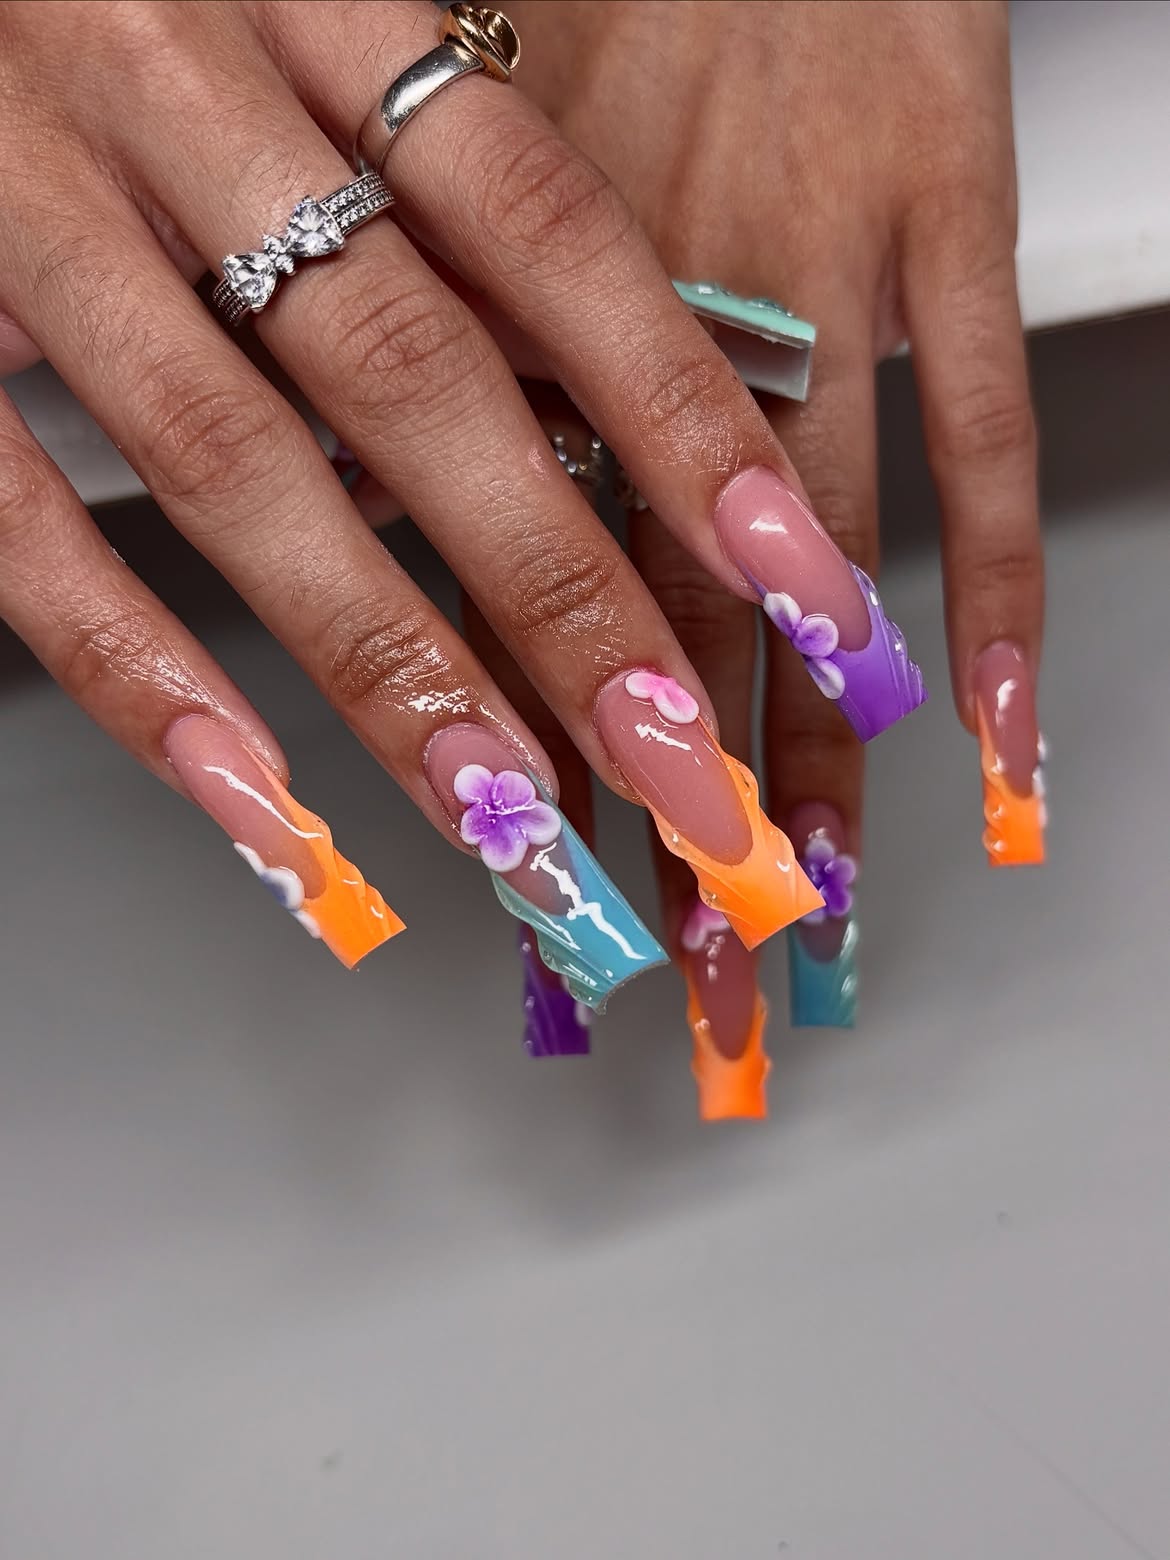
Neon orange, turquoise, and purple tips bring bold color to this long square manicure. Instead of spreading those shades across the full nail, the design keeps a large section of glossy nude visible through the center.
Soft sculpted flowers sit near the edges of selected nails. Their white, pink, and purple petals soften the strong tip colors while adding noticeable texture. Small clear droplets continue the raised effect without competing with the flowers.
The changing tip colors make every nail feel different, but the repeated nude base holds the set together. Keeping most flowers close to the side or cuticle also preserves the open center. This balance lets the bright color, sharp square shape, and floral details remain easy to see.
12. Break Up White French Tips With One Coral Flower
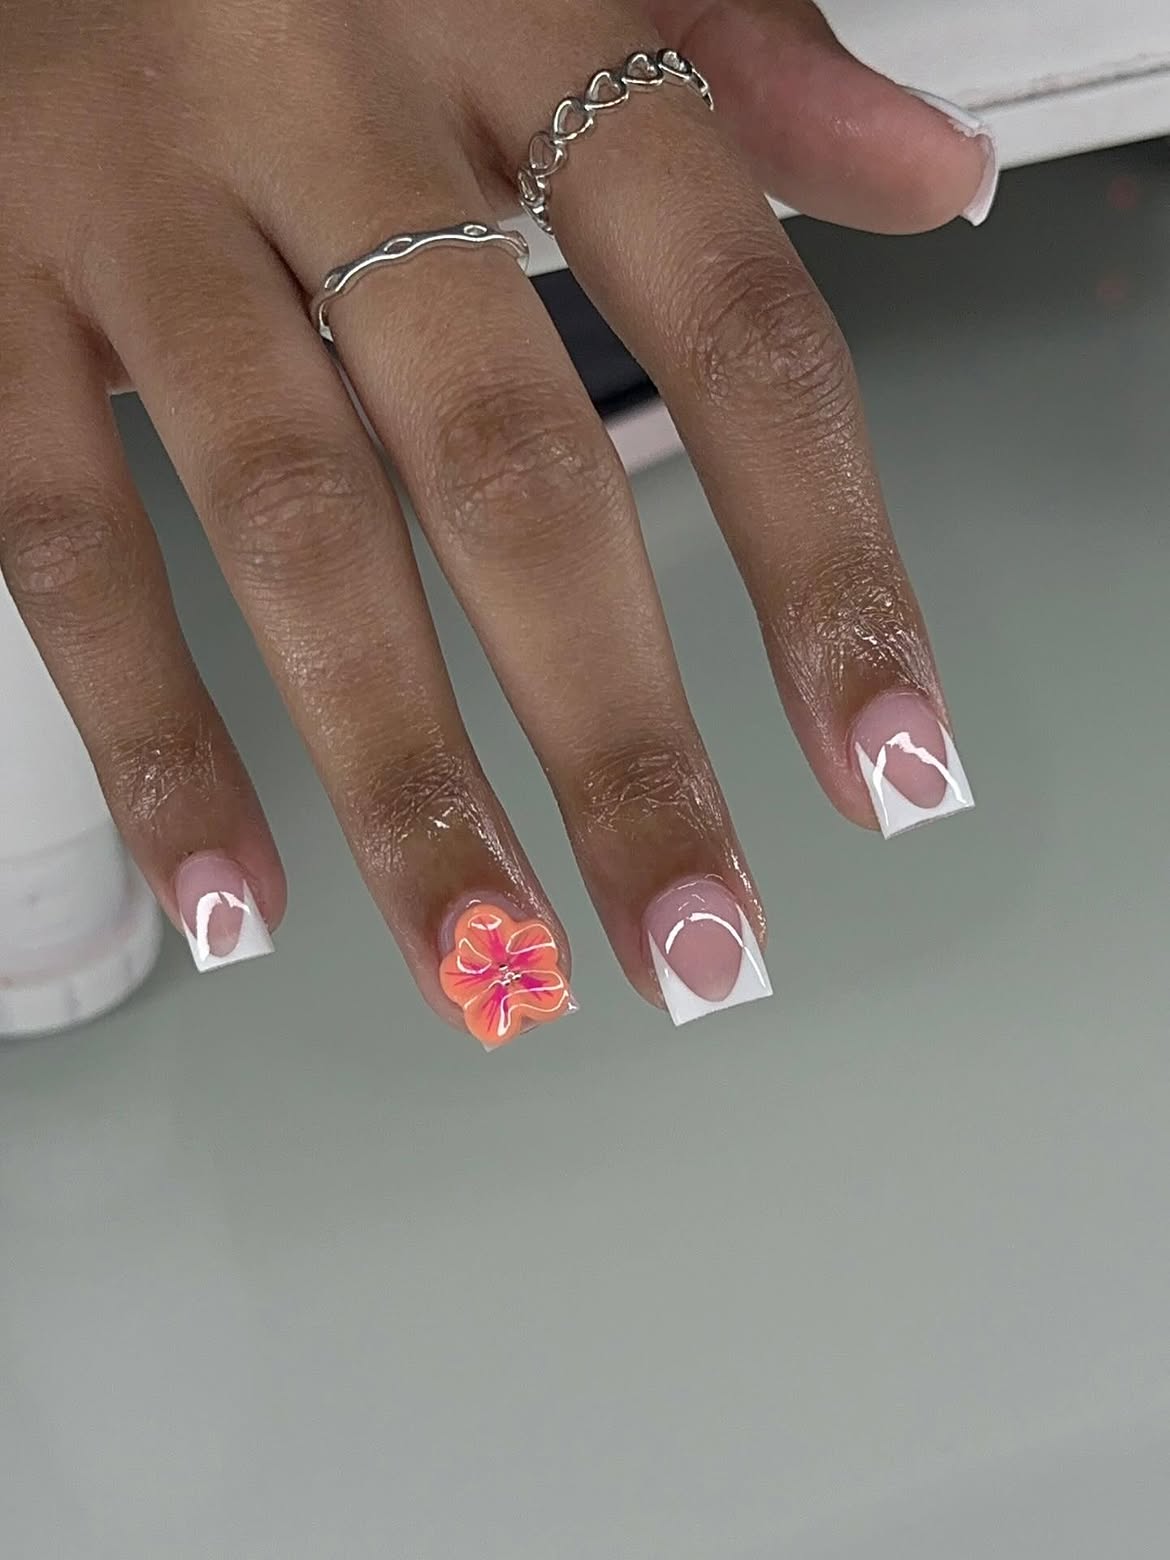
A single coral flower changes the mood of this short square French manicure. The remaining nails use a glossy pink base with white tips, but curved inner lines make the edges feel softer and more playful than a standard French design.
The accent flower fills most of one nail, using coral and pink petals with fine pale lines. A small reflective center adds a controlled point of shine. Keeping the floral art on only one finger allows it to stand out clearly.
Quick Design Notes
- Base: Glossy soft pink keeps the manicure clean and natural.
- Tips: White curved lines create open loops around the square edges.
- Accent: One large coral flower provides the main color.
- Balance: Repeating white details connects the flower to the French tips.
💡 Accent Nail Tip
Place the largest flower on one central finger, then keep the surrounding nails simple. This gives the bright coral detail a clear focal point without losing the clean French finish.
13. Stretch Pink Florals Across Extra Long White Tips
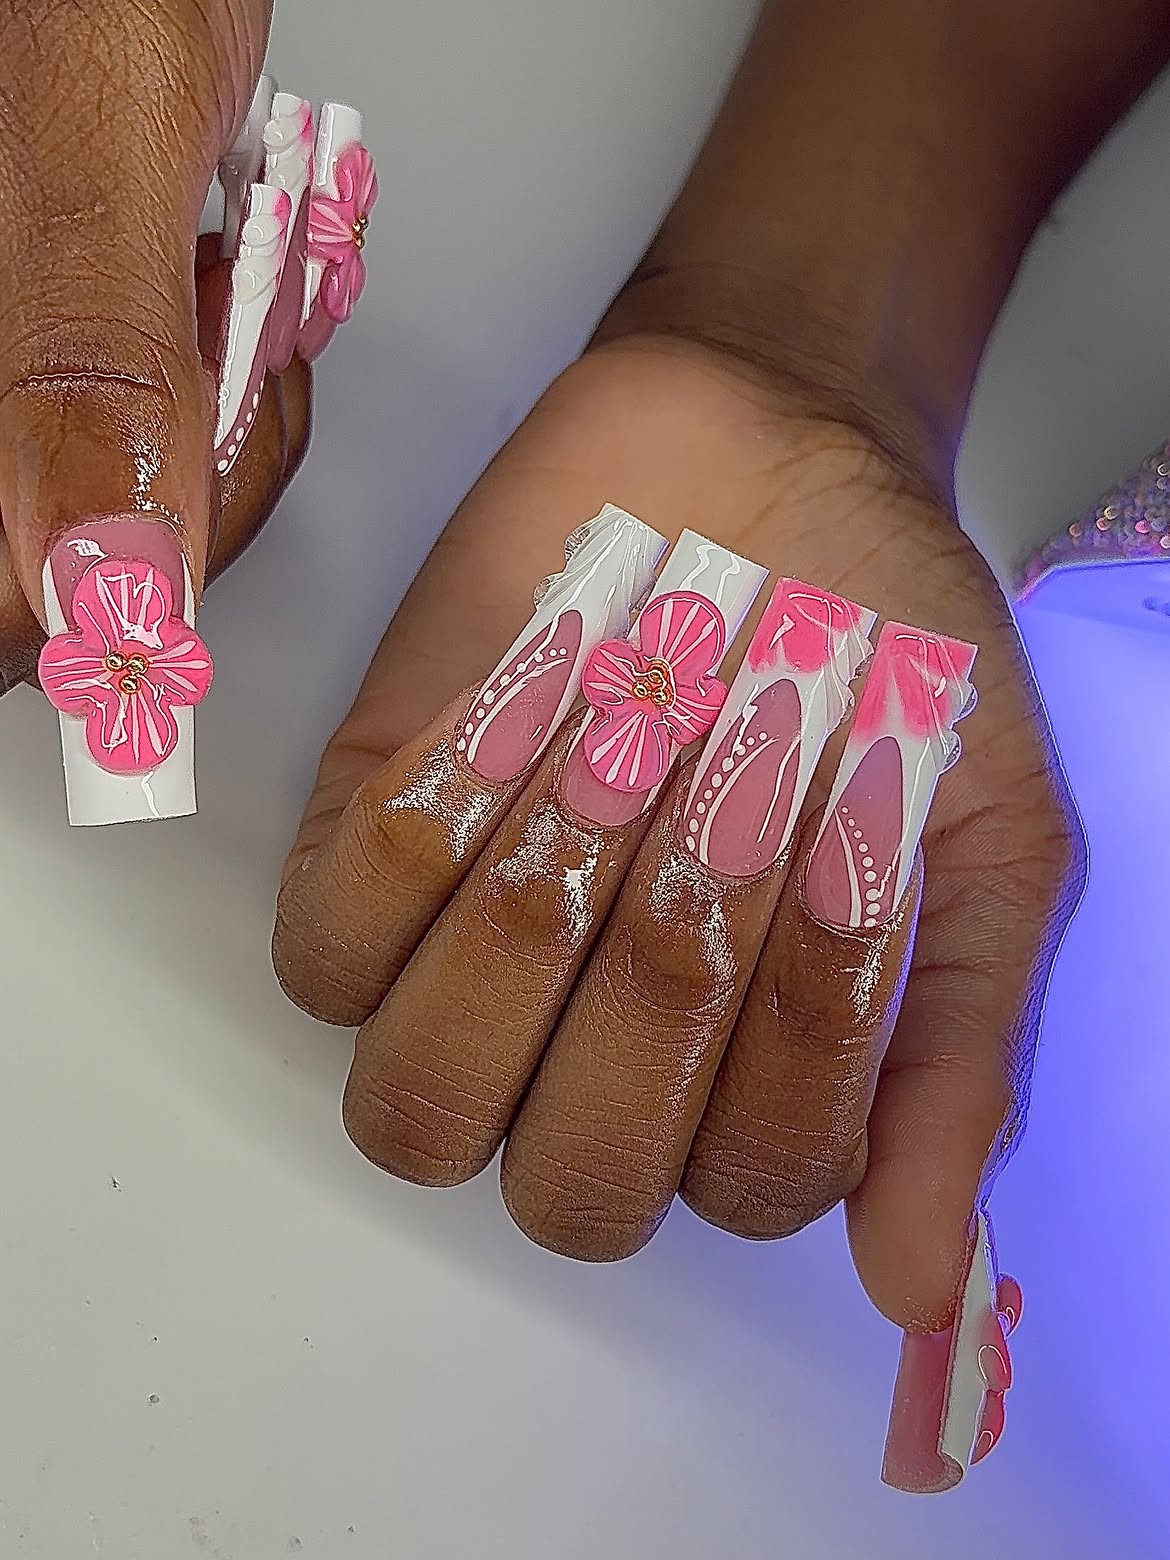
Extra long white tips act like a wide canvas for the layered pink details in this manicure. Some nails feature soft rose shading near the edge, while others use fine white curves and dots around an open nude center.
Large raised flowers create the main focal points. Their pink petals are outlined with pale lines, and small gold colored centers add controlled shine. Placing the flowers on selected nails keeps their size from overwhelming the full set.
The white tips connect every design, even when the internal patterns change. Repeating the same pink shading, curved line work, and dot details also helps both hands feel coordinated. Leave clear areas around the raised flowers so their shape remains distinct against the long square structure.
Repeat white and pink across every nail.
Keep open nude sections around the raised art.
Avoid placing a large flower on every nail.
Do not crowd the curved lines with too many dots.
14. Trace Long Square Tips With Layered White Ribbons
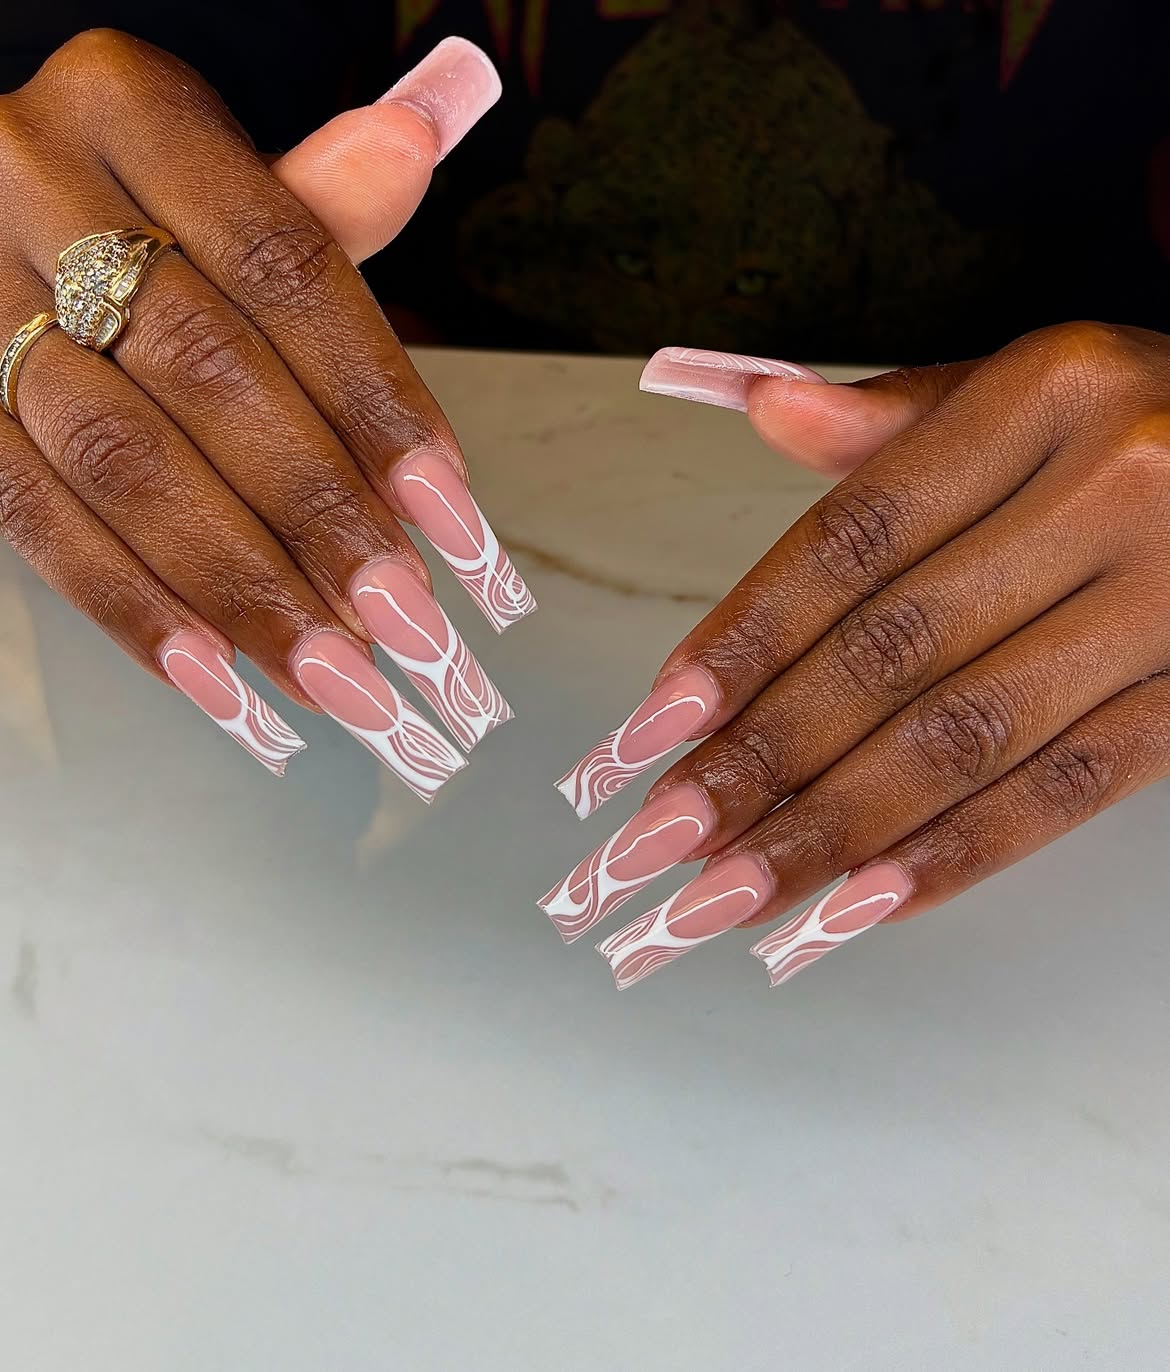
Fine white lines turn this glossy pink manicure into a flowing graphic design. Each nail keeps a wide nude center, while the curves gather near the long square tips and travel lightly along the sides.
The lines are similar across the set but not exactly matched. Some cross in narrow loops, while others spread into wider waves. This small change from nail to nail gives the design movement without introducing another color or raised decoration.
The cleanest approach is to outline the pink center first, then build extra curves near the edge. Keep the lines thin and leave small spaces between them so the layered pattern remains clear. Straight square tips provide a strong frame for the softer ribbon shapes.
Apply a smooth pink base and keep the square edges straight.
Draw one white outline around the open center of each nail.
Add narrow loops and waves near the tips, changing their direction slightly.
Seal the thin line work with a glossy finish.
15. Add Tiny Multicolor Flowers to a Classic Square French Set
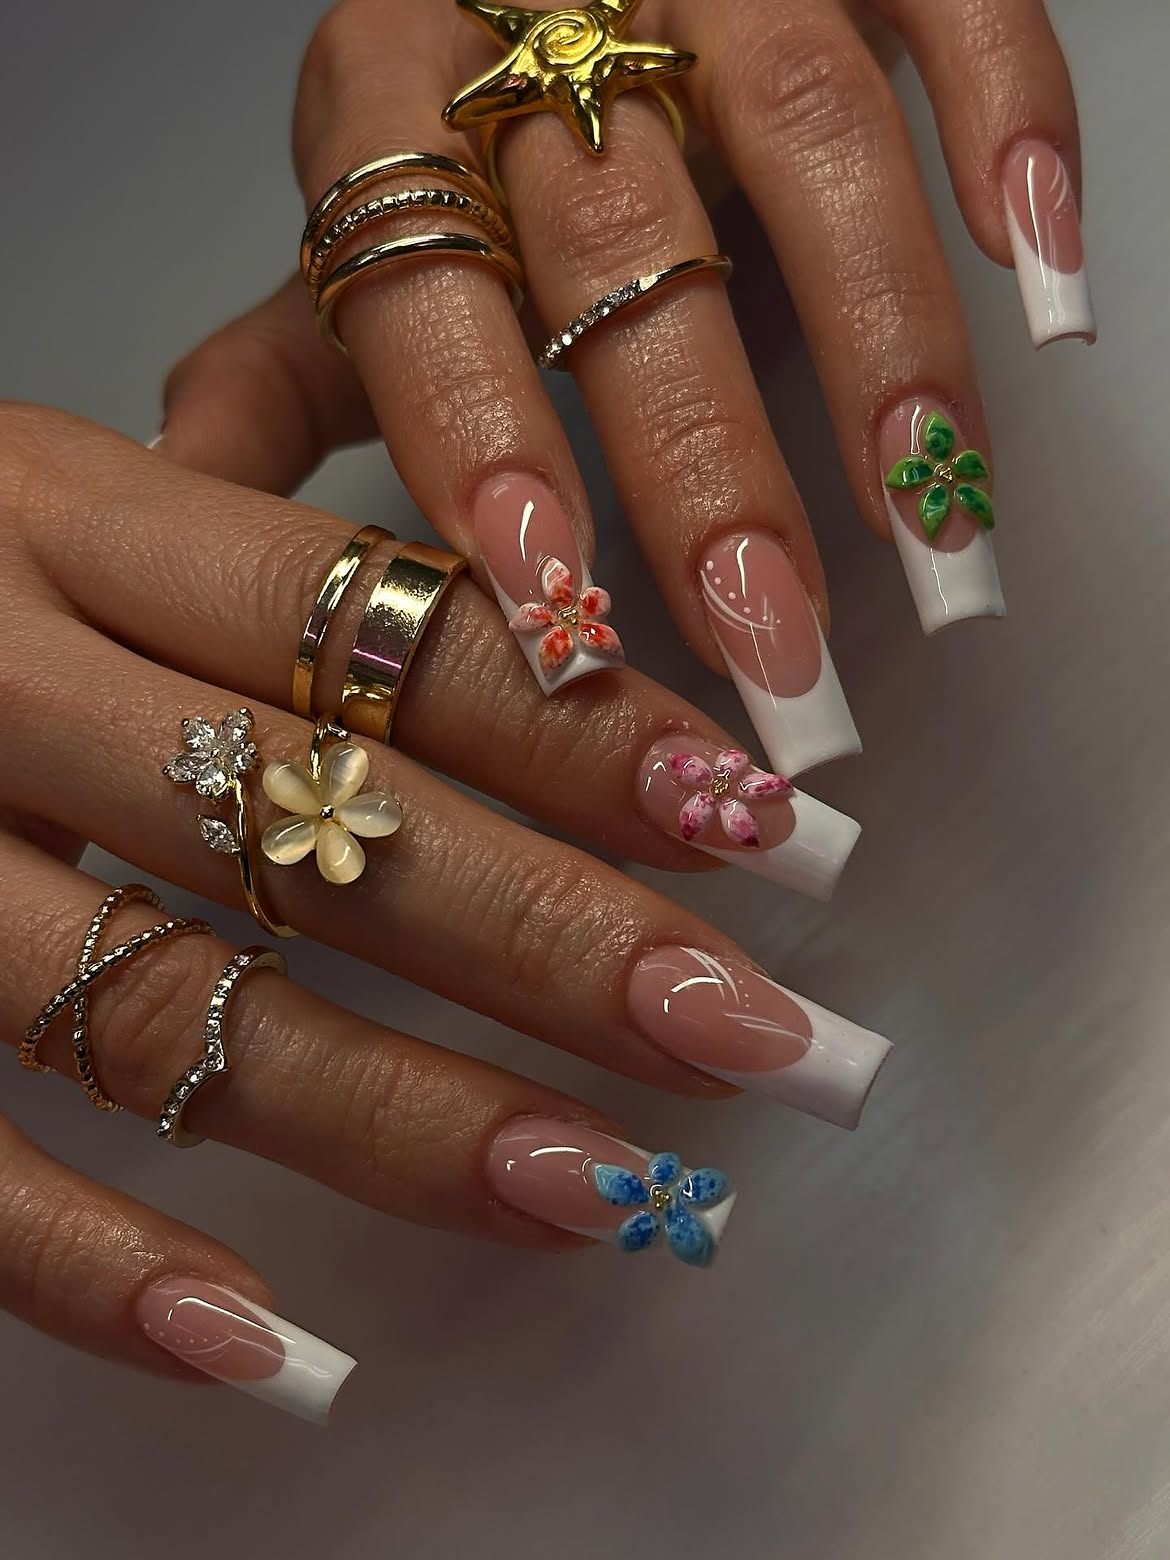
A classic white French base gives these colorful raised flowers a clean place to stand out. The long square tips stay consistent across both hands, while each floral accent introduces a different shade of blue, pink, coral, or green.
Most flowers sit close to the white edge or along one side of the nail. This placement keeps the glossy nude center open and makes the raised petals easier to see. Small gold colored centers connect the different flower colors with the warm jewelry in the image.
One nail also includes a delicate curve of white dots, adding detail without introducing another large decoration. Keeping several nails plain helps the manicure feel balanced and lets each tiny flower become its own focal point.
Glossy nude centers and clean white square tips create a simple foundation.
Small colorful flowers bring texture while the white tips keep every nail connected.
16. Trade White Tips for Deep Burgundy on Short Square Nails
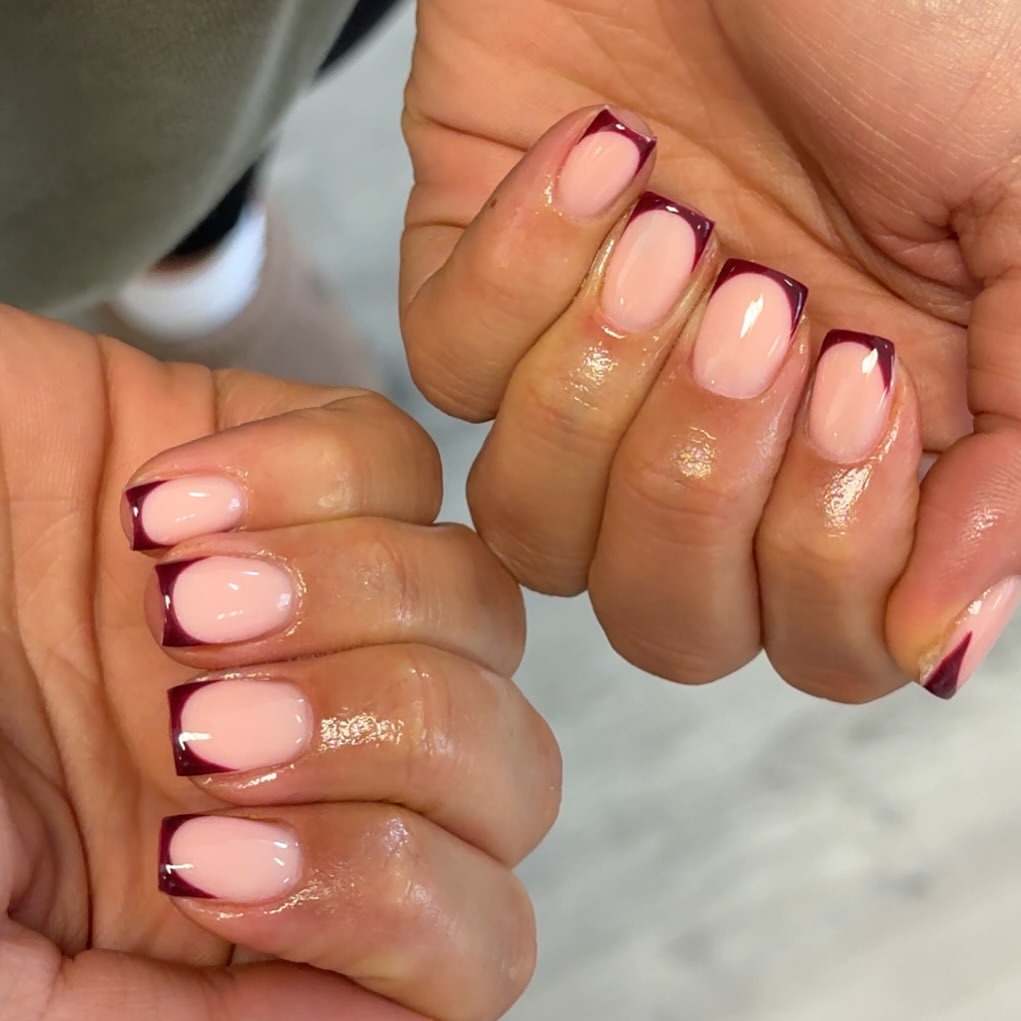
Deep burgundy gives this simple French manicure a richer early autumn finish. The pale blush base keeps the nails bright, while the narrow dark tips draw attention to their short square edges.
The color placement is clean and consistent across both hands. Each burgundy section follows the width of the nail without extending too far into the pink center. This balance allows the darker shade to feel noticeable without making the nails look shorter.
File the tips evenly before adding color, then map the burgundy line across every nail. A thin detail brush can help sharpen the corners and keep the depth consistent. Finish with a glossy layer to strengthen the contrast between the soft base and dark edge.
The slim burgundy edge adds seasonal depth while the open blush center keeps short square nails looking clean and balanced.
17. Mix Black and Cream Polka Dots With Petal Tips
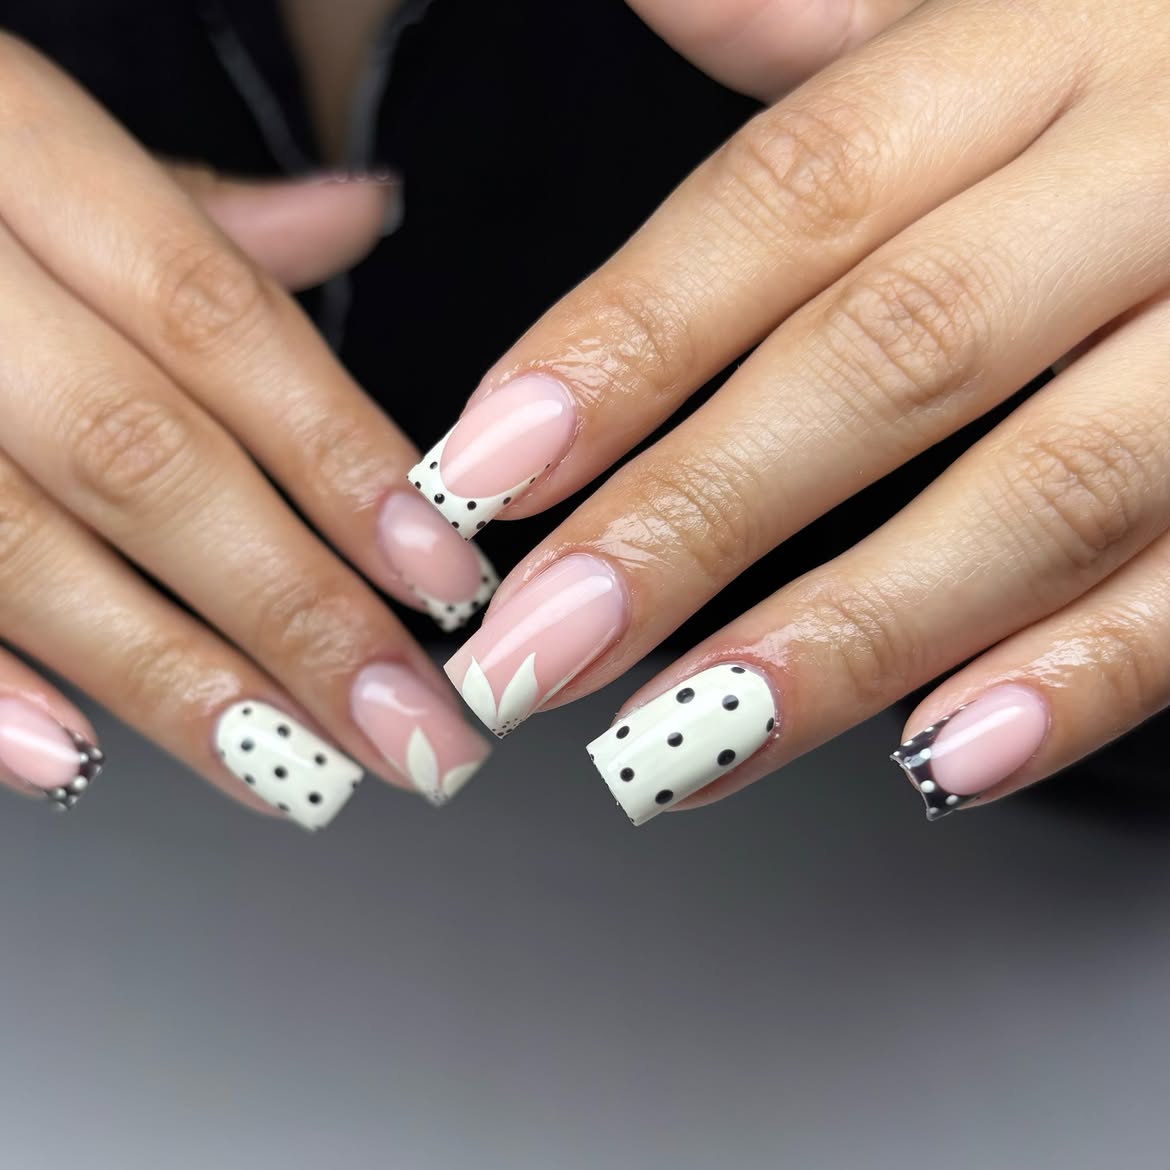
This square manicure uses polka dots in several ways without repeating the exact same nail. Some cream sections carry small black dots, while the black tips reverse the contrast with bright white spots.
- Two full cream accent nails create larger blocks of pattern.
- The remaining nails keep a glossy blush base, giving the dotted tips and pale petal shapes enough open space.
- Those pointed petals also break up the round dots and add a sharper detail near the square edges.
Keep the dot size fairly consistent across the manicure, even when the background color changes. Placing the busier patterns on selected nails helps the black, cream, and pink palette stay clean rather than crowded.
| Cream details | Black details |
|---|---|
| Softens the square tips | Creates a stronger edge |
| Carries black dots and petal shapes | Carries bright white dots |
| Feels light against the pink base | Adds contrast in small amounts |
18. Cover Short Square Nails in Glossy Oxblood
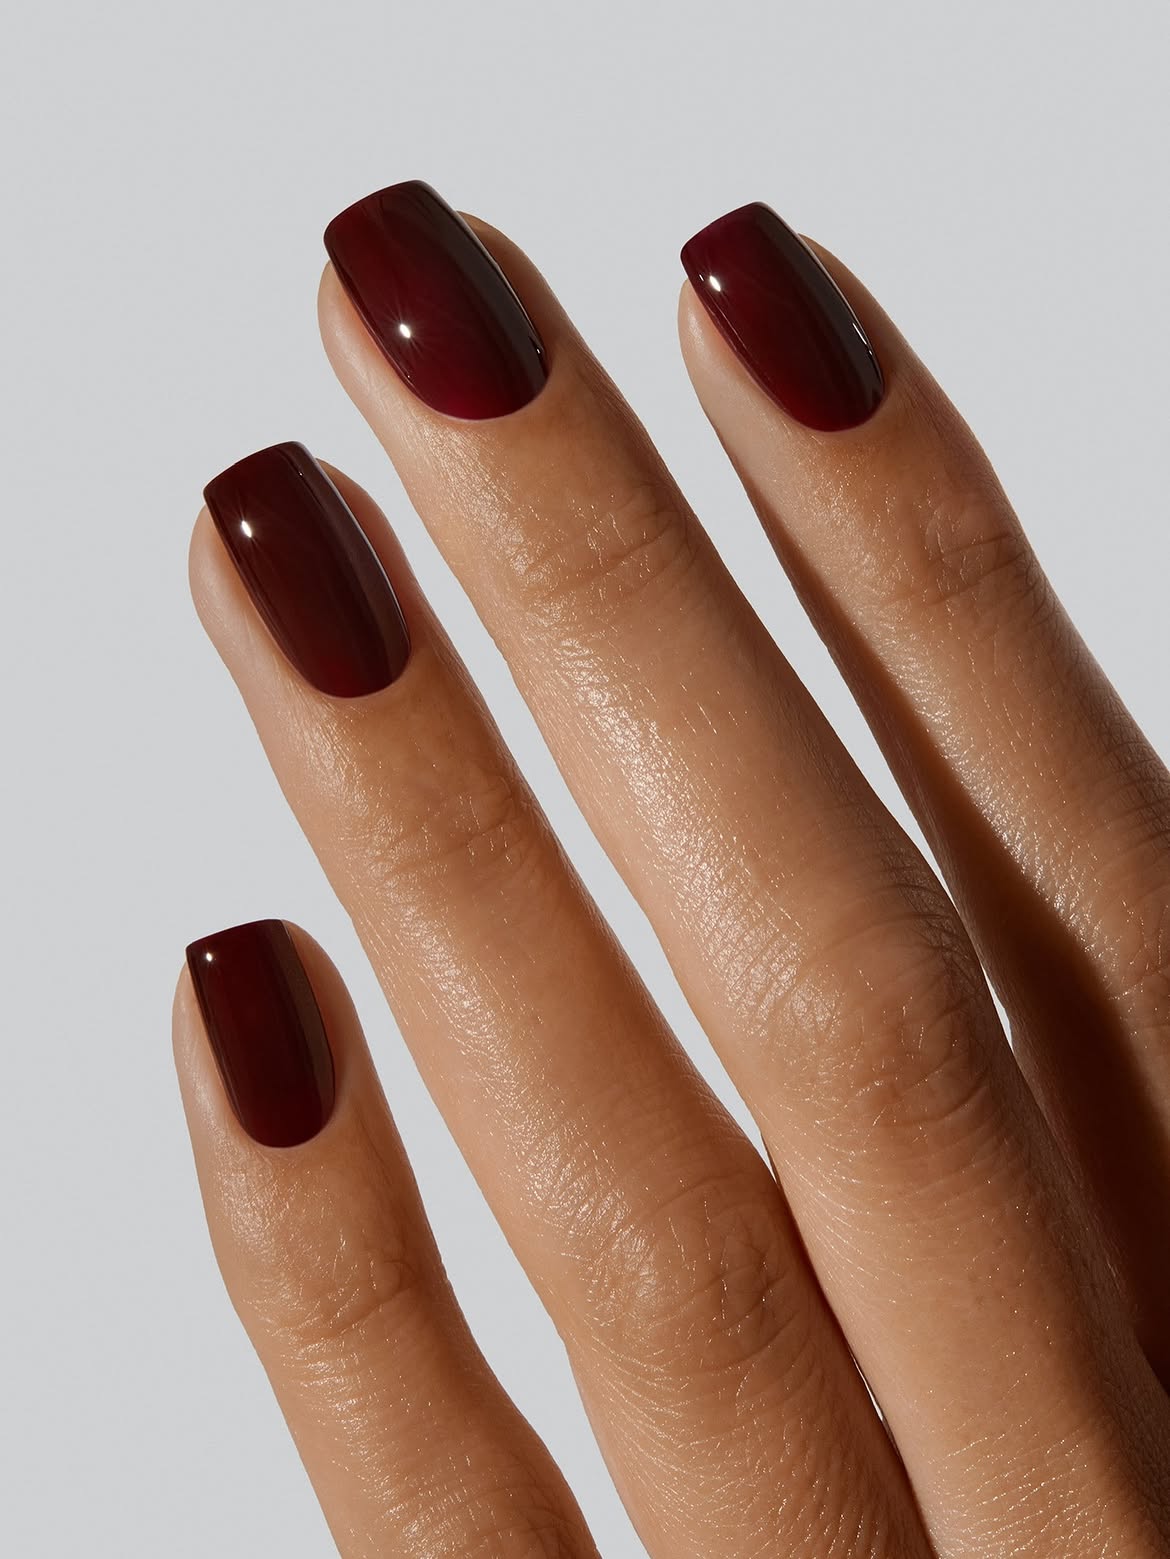
A single oxblood shade gives these short square nails a strong September look without patterns or decoration. The deep red brown color appears nearly black near the edges, while direct light reveals a warmer burgundy center.
The simple design puts all the attention on shape, coverage, and shine. Straight sides and softly refined corners keep the nails structured without looking harsh. A smooth reflective finish also prevents the dark color from appearing flat.
Apply the shade in thin, controlled layers so the color remains even from the cuticle to the tip. Clean edges matter more with a dark polish because small mistakes are easier to notice. Seal the ends carefully to help the crisp square shape stay polished.
📌 Good To Know
Deep oxblood polish shows every edge clearly. Leave a clean line around the cuticle and use thin layers to keep the surface smooth and glossy.
19. Shape Black French Tips Into Sharp Inward Peaks
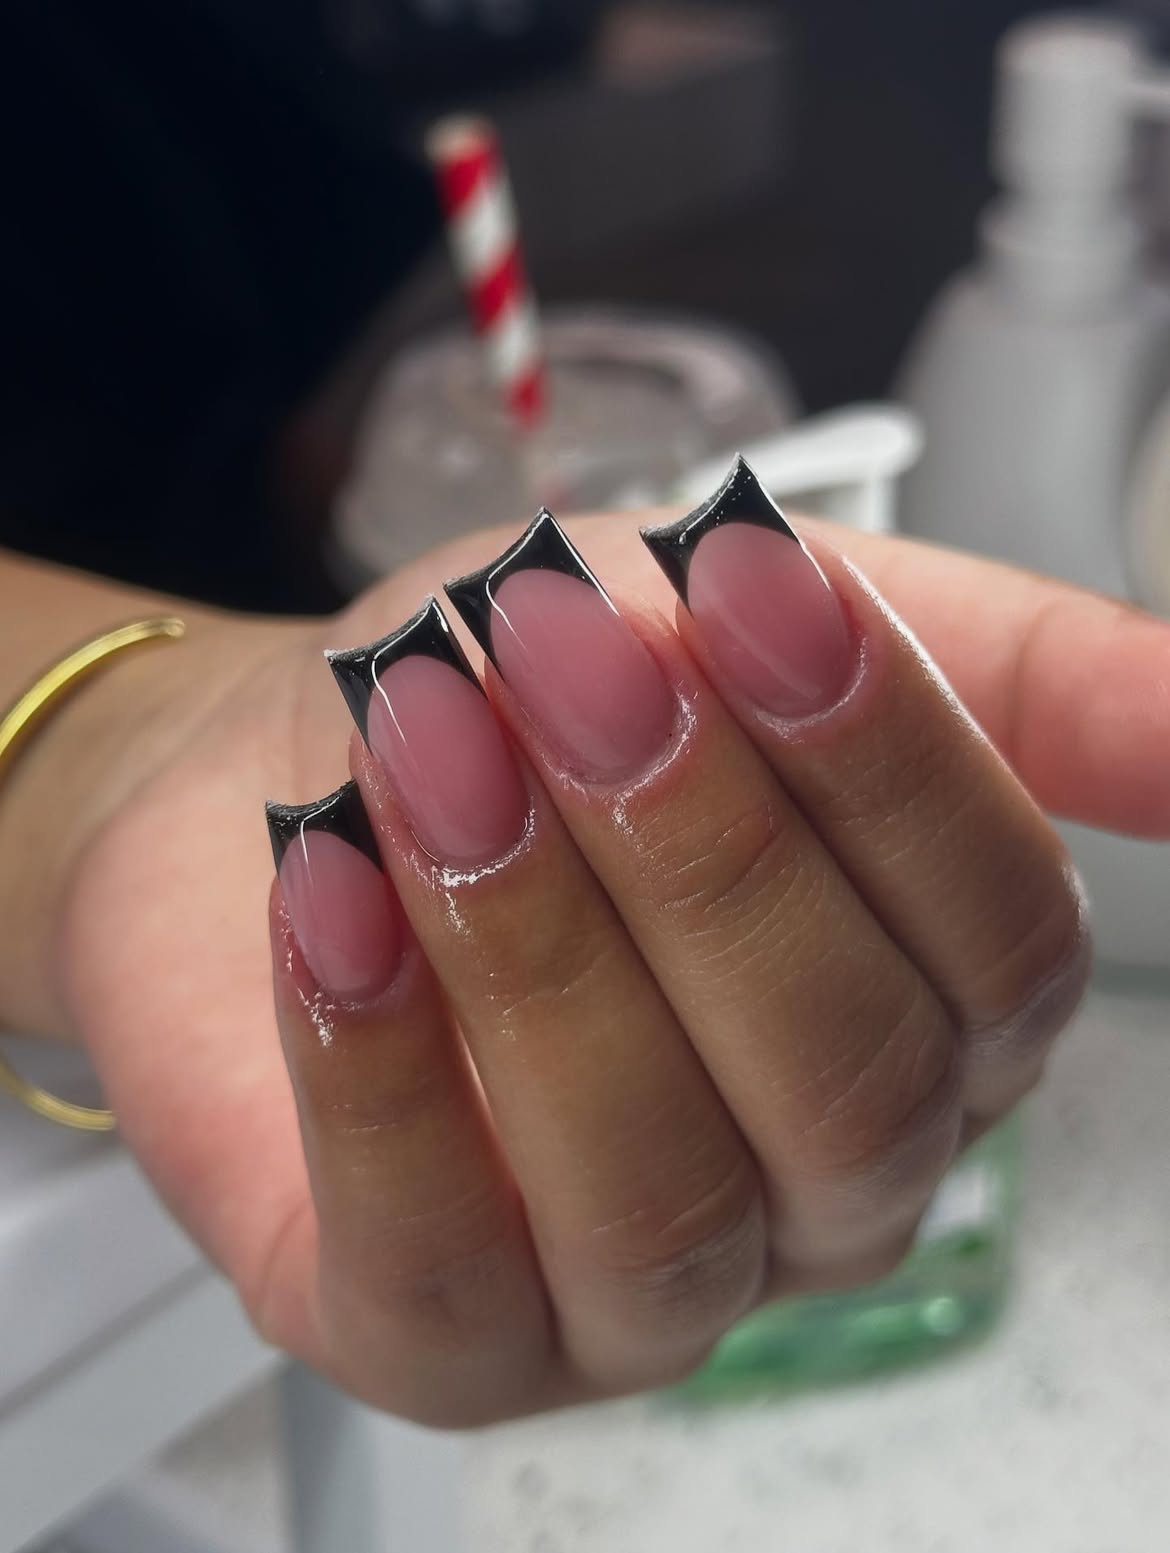
Glossy black tips give this medium square manicure a bold graphic edge. Instead of following a soft French curve, the color dips inward at the center and rises into pointed corners along both sides.
The rosy nude base keeps the darker sections from taking over the full nail. A fine pale outline follows the inner edge of the black polish, making the unusual shape easier to see. Although the painted tips look sharp, the actual nail edges remain straight and square.
Map the center dip first, then match the height of both outer points before filling in the black sections. Consistent spacing across every nail is what makes this dramatic design look clean.
Keep the geometry clean