18 Simple Green Nails Ideas 2026 for Fresh, Stylish Manicure

Green nails can feel soft and calming one day, then bold and playful the next. The difference often comes down to the shade, finish, and amount of color used. A thin mint French tip creates a quiet look, while glossy emerald or metallic olive brings much stronger impact.
These 18 Simple Green Nails show how much variety one color can offer. You will find fresh sage bases, tiny daisies, sheer blush nails, curved tips, white stripes, gold glitter, and rich green shades with glassy shine. Some ideas use one polish across every nail, while others mix floral accents and small metallic details for extra interest.
There are options for short square nails, soft oval shapes, and longer almond tips. Many of the designs can also be simplified by keeping the artwork on one or two accent nails. Browse the ideas below and choose the color, shape, and detail level that fits your style.
18 Trending Simple Green Nails Designs
1. Simple Green Nails with Cheerful Daisy Details
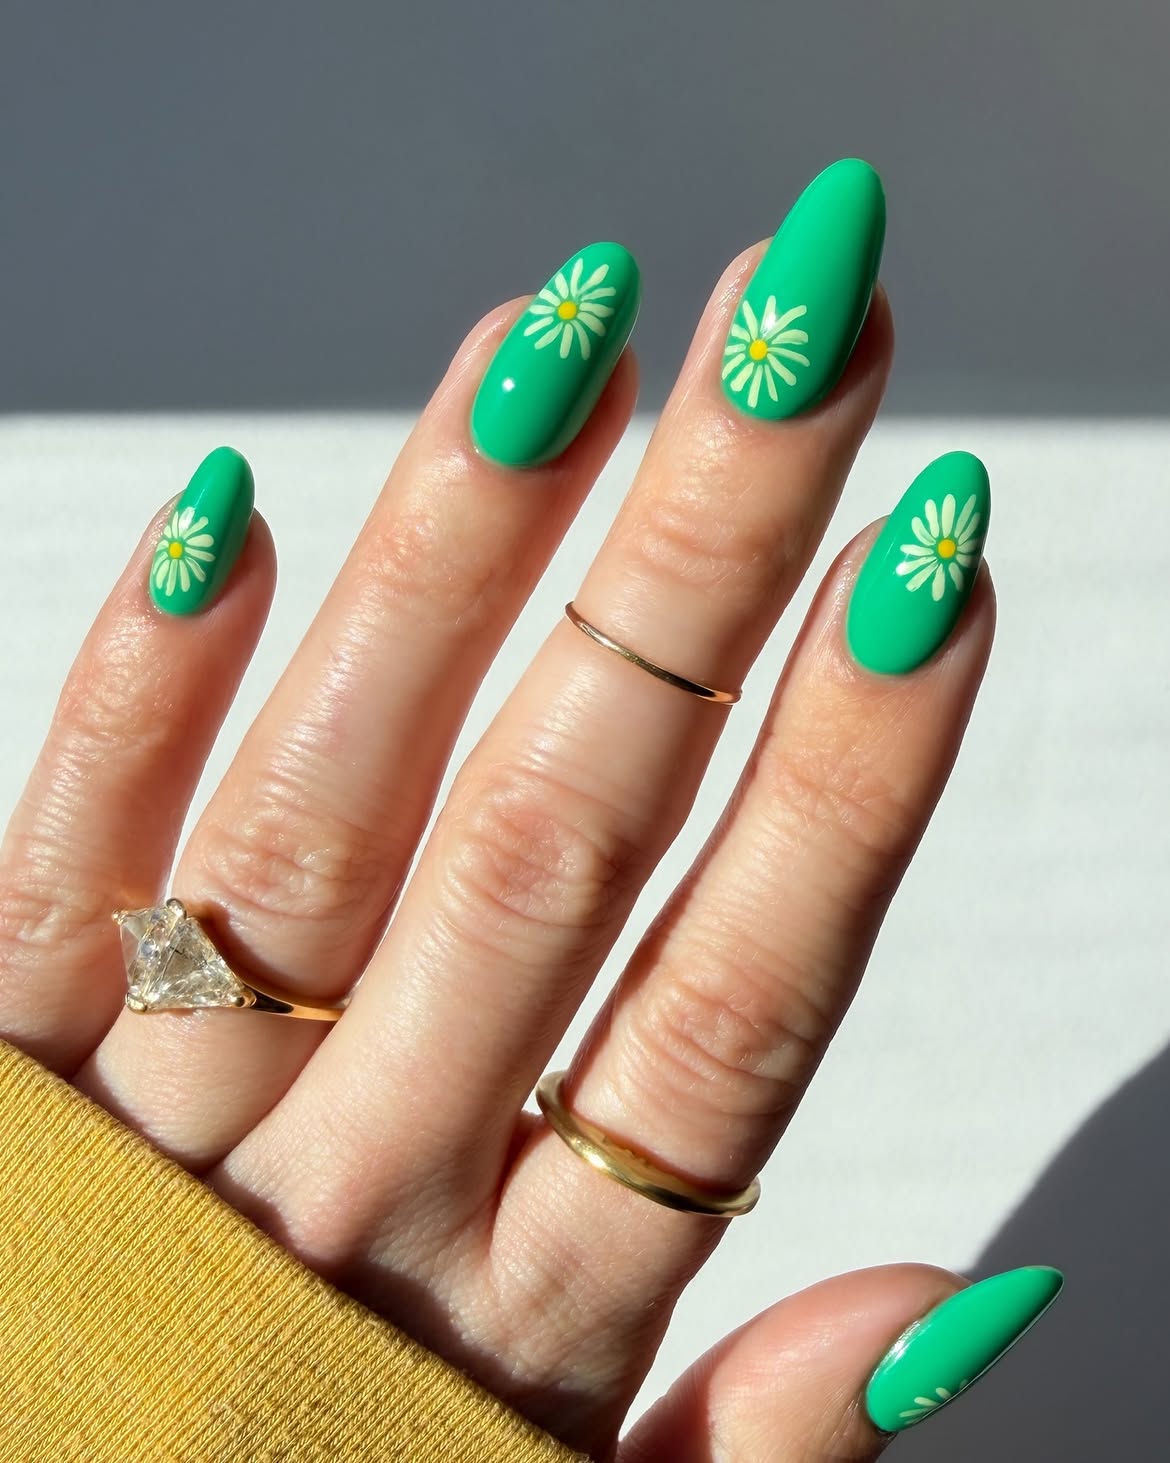
Fresh green polish gives this manicure bright, playful energy, while creamy white daisies keep the design light and easy to copy. The long oval shape leaves plenty of room for each flower, but smaller daisies would also suit short nails.
What makes it work
• Strong contrast: The pale petals stand out clearly against the vivid green base.
• Warm centers: Tiny yellow dots brighten the flowers and look lovely beside gold jewelry.
• Relaxed placement: Each daisy sits at a slightly different height, so the pattern feels natural instead of overly matched.
Apply the green base first, then form the petals with a small nail brush or dotting tool. Add one yellow dot to each center and finish with a glossy clear coat.
2. Sage Green Nails with Soft Side Swept Tips
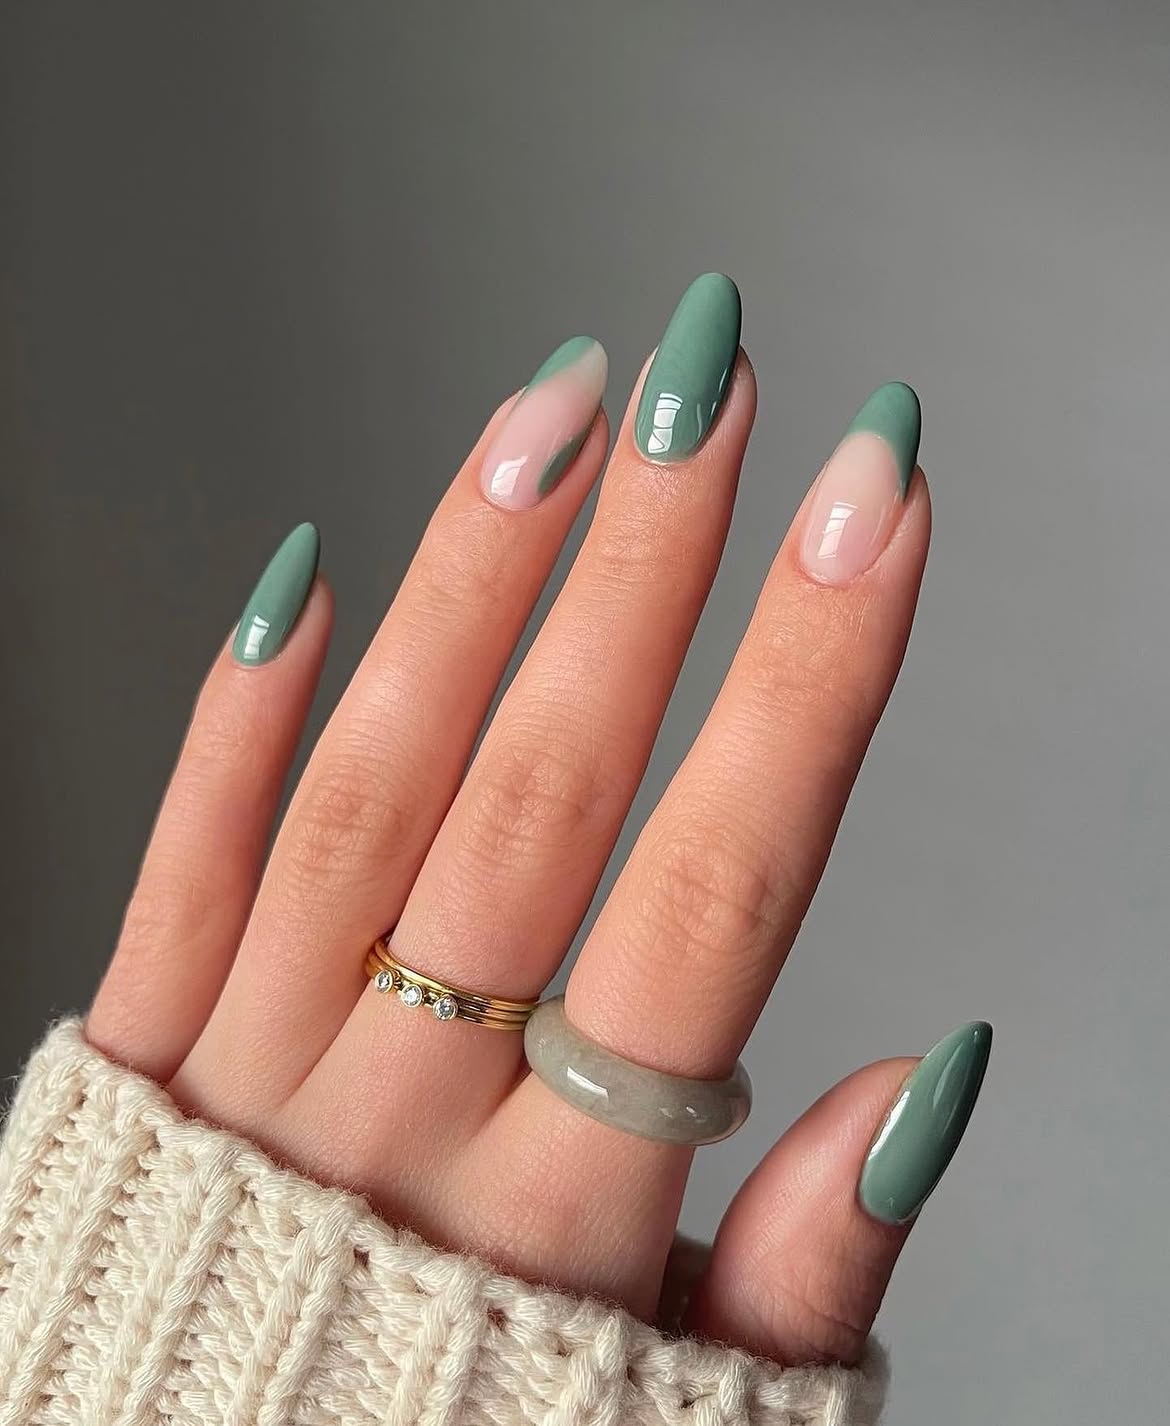
Soft sage and sheer blush create a calm manicure that still has enough detail to catch the eye. Most nails carry the muted green from base to tip, while two accent nails leave part of the natural pink base visible.
The curved green sections are placed along opposite sides, giving the design gentle movement without making it look busy. Open space also keeps the long almond shape from feeling too heavy. A glassy finish brings out the smooth curves and gives the quiet sage color a clean, fresh look.
Paint three nails sage green and cover the two accent nails with a sheer blush shade.
Use a slim brush to sweep a soft green curve across one side of each accent nail.
Seal every nail with a glossy clear coat to smooth the edges and deepen the sage tone.
3. Pale Olive French Tips on Soft Square Nails
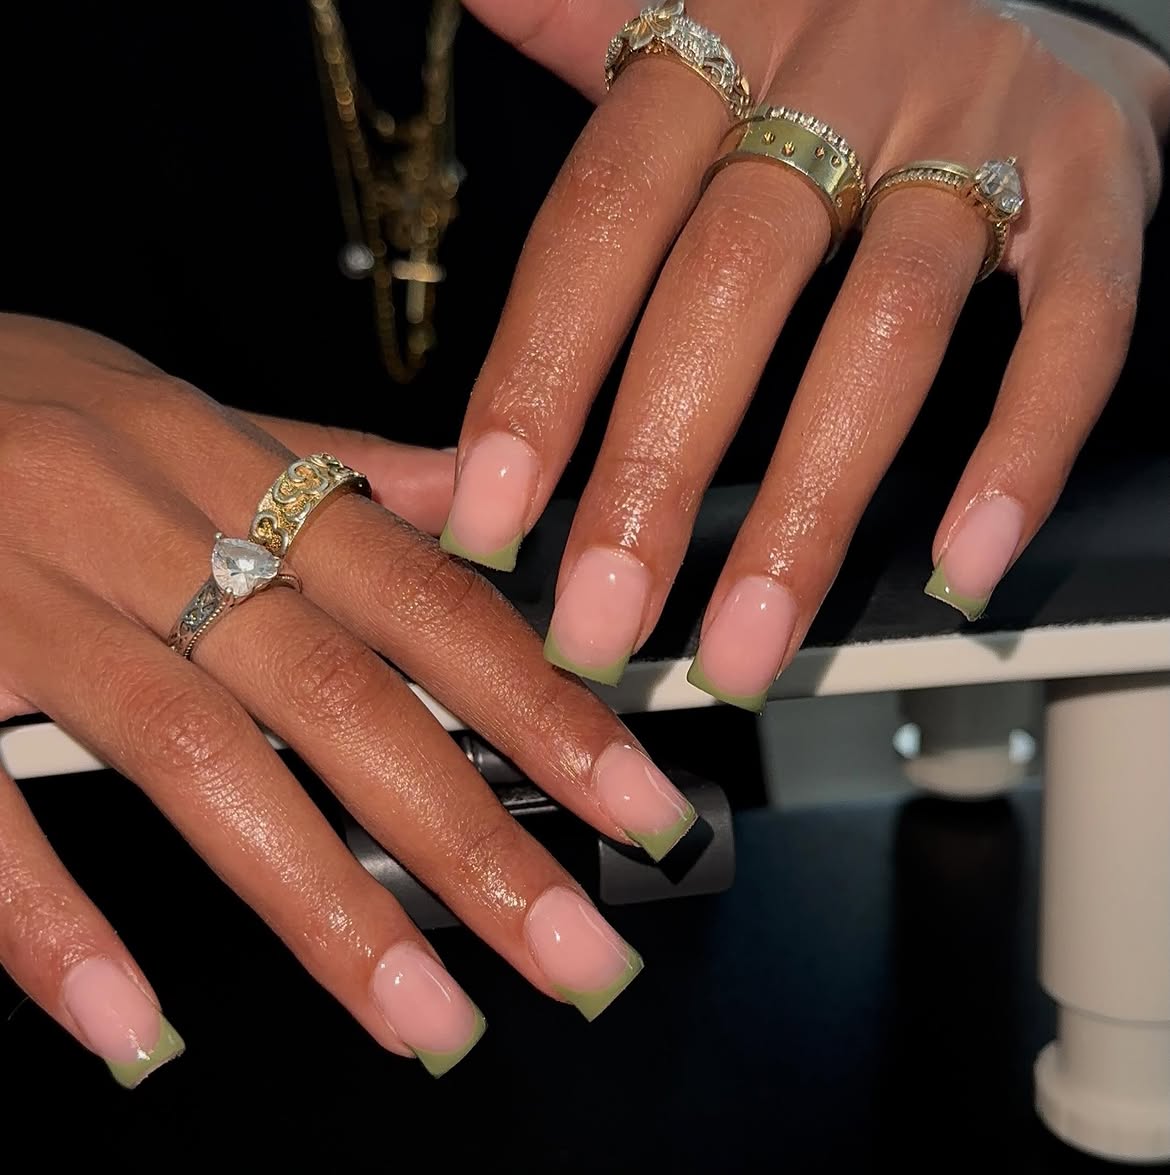
A pale olive edge gives the classic French manicure a softer, earthier finish. Each nail has a glossy blush base with a clean strip of green across the tip, creating a neat look that feels fresh without extra decoration.
The base: Sheer pink keeps the nails looking natural and bright.
The tip: Muted olive brings gentle color without overpowering the hands.
The shape: Straight square edges make the green line clear and even.
The slim color placement also leaves plenty of open space, so longer nails still feel light. Keep the corners slightly softened for a shape that looks crisp but remains easy to wear.
💡 Neat Tip Guide
Place one small green mark at the center and one at each side of the nail. Connect the marks to keep every French tip close to the same depth.
If you love earthy color combos, these 16 Brown and Green Nails bring together warm neutral tones and fresh green details for a stylish manicure that feels calm, trendy, and easy to wear.
4. Shimmery Green Nails with Playful Black Dots
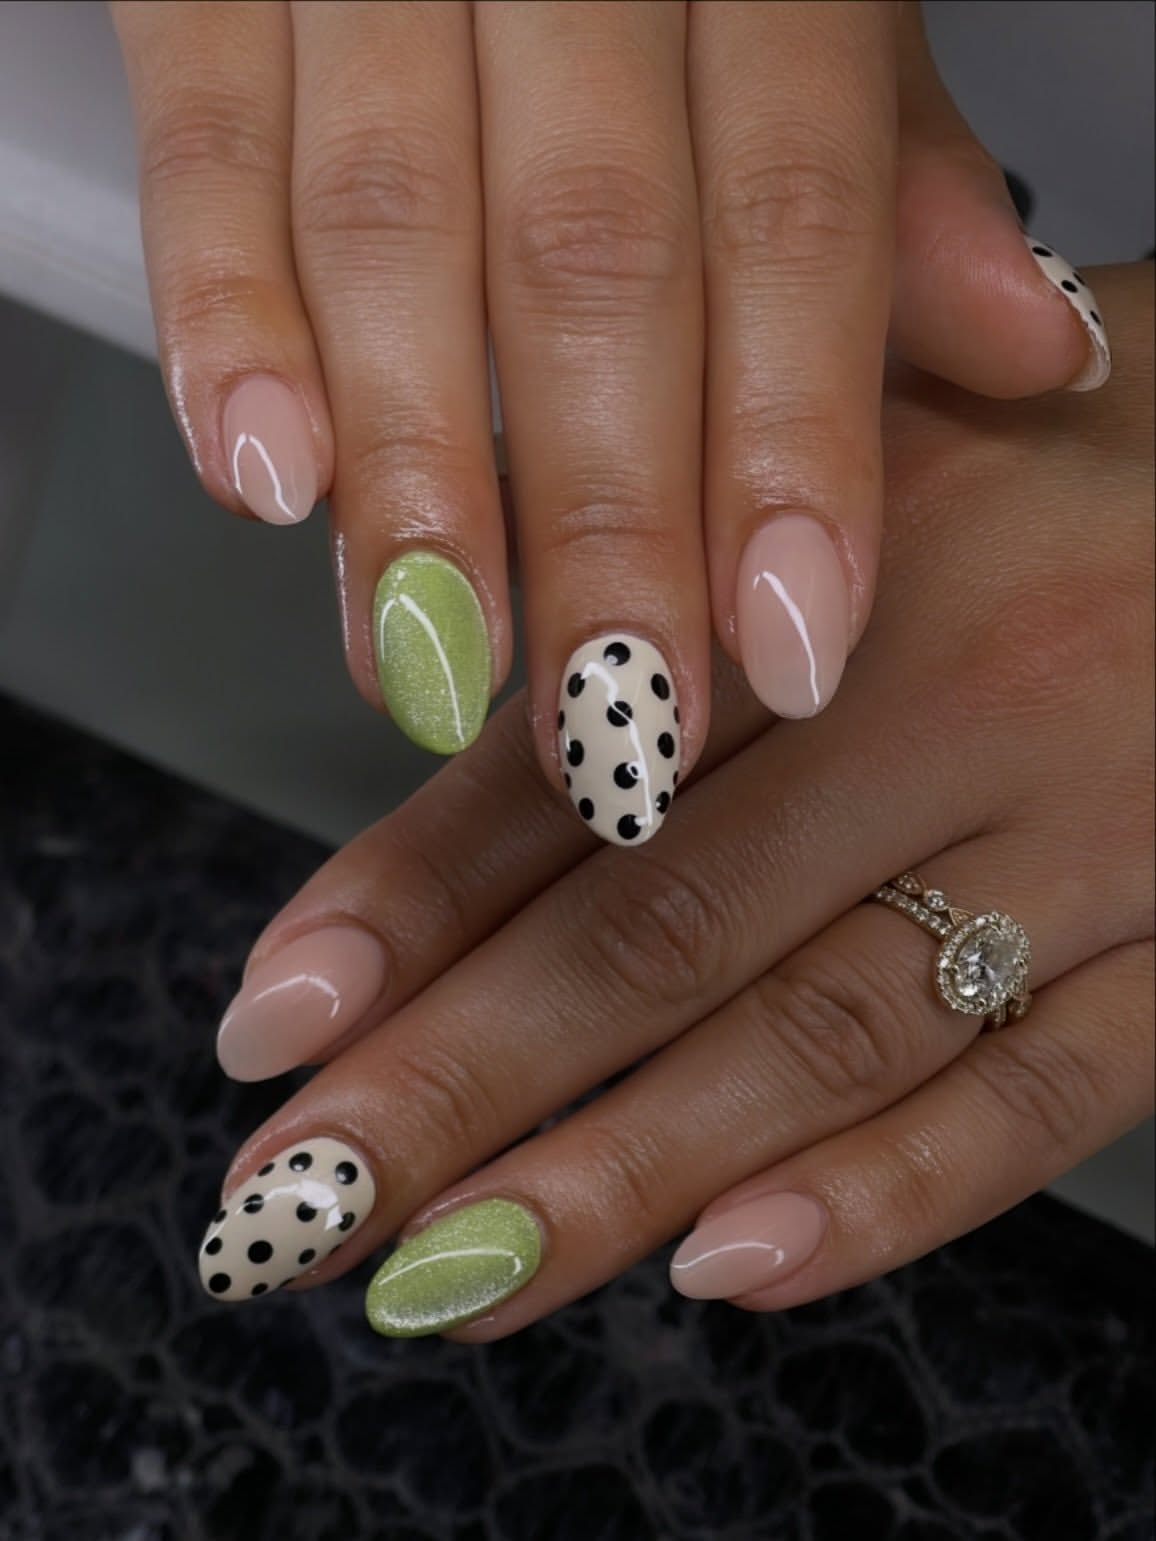
Tiny black dots give this green manicure a fun graphic twist. Two nails carry a pale green shimmer, while creamy accent nails are covered with scattered black spots. Soft blush nails between them keep the full set from looking crowded.
- The green polish brings a gentle glow, and the black dots add strong contrast without covering the light base.
- Keeping both designs on separate nails lets each detail stand out.
- The rounded almond shape softens the bold pattern and ties everything together.
Use a dotting tool for clean circles. Change the dot sizes slightly and leave visible space between them so the pattern stays crisp.
| Green Shimmer | Black Dots |
|---|---|
| Brings soft color and glow | Creates bold graphic contrast |
| Looks smooth with thin polish layers | Looks cleaner with open spacing |
| Adds the gentle side of the design | Adds the playful side of the design |
5. Pearly Pale Sage Nails for a Clean Minimal Look
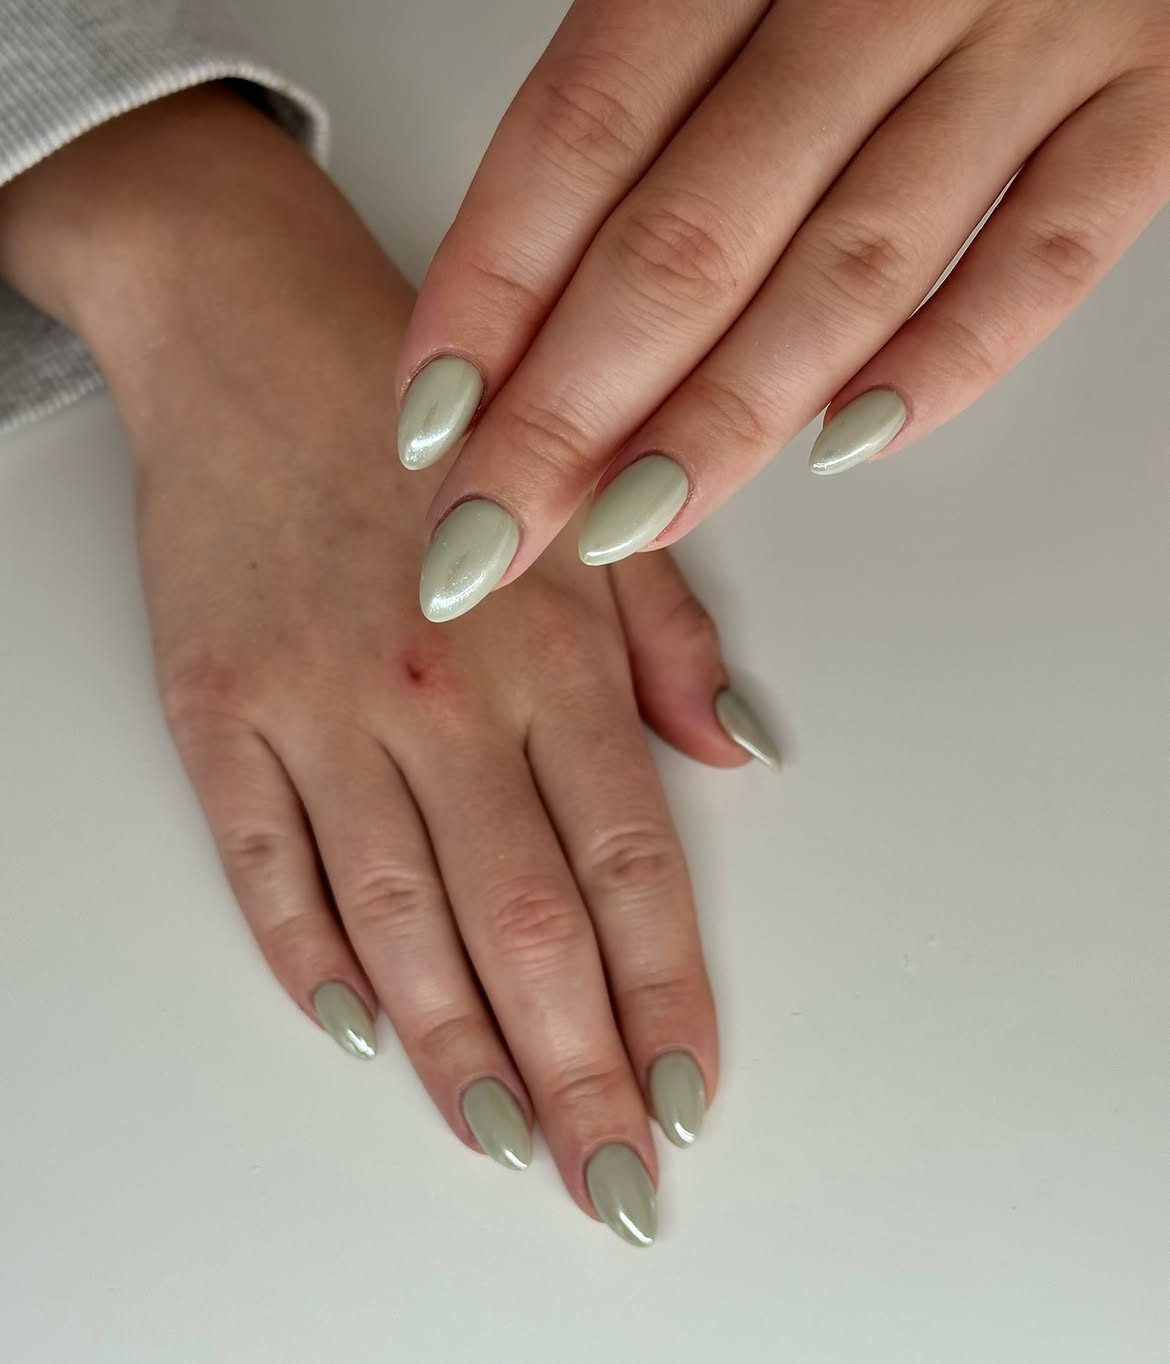
Quiet color can still feel special. This manicure uses one pale sage shade across every nail, with a soft reflective sheen that appears most clearly near the curved tips.
The look comes together through three simple choices:
- One gentle green tone keeps the set calm and consistent.
- Rounded almond tips give the hands a smooth, lengthened appearance.
- A glossy pearly finish catches the light without adding patterns or raised details.
Thin polish layers will help this light shade stay even and smooth. Allow each layer to settle before applying the next, then add a clear top coat to bring out the subtle glow.
Pale sage looks especially fresh beside cream clothing, cool grey, silver jewelry, and soft blue denim.
6. Sage Green French Tips Framed by Daisies
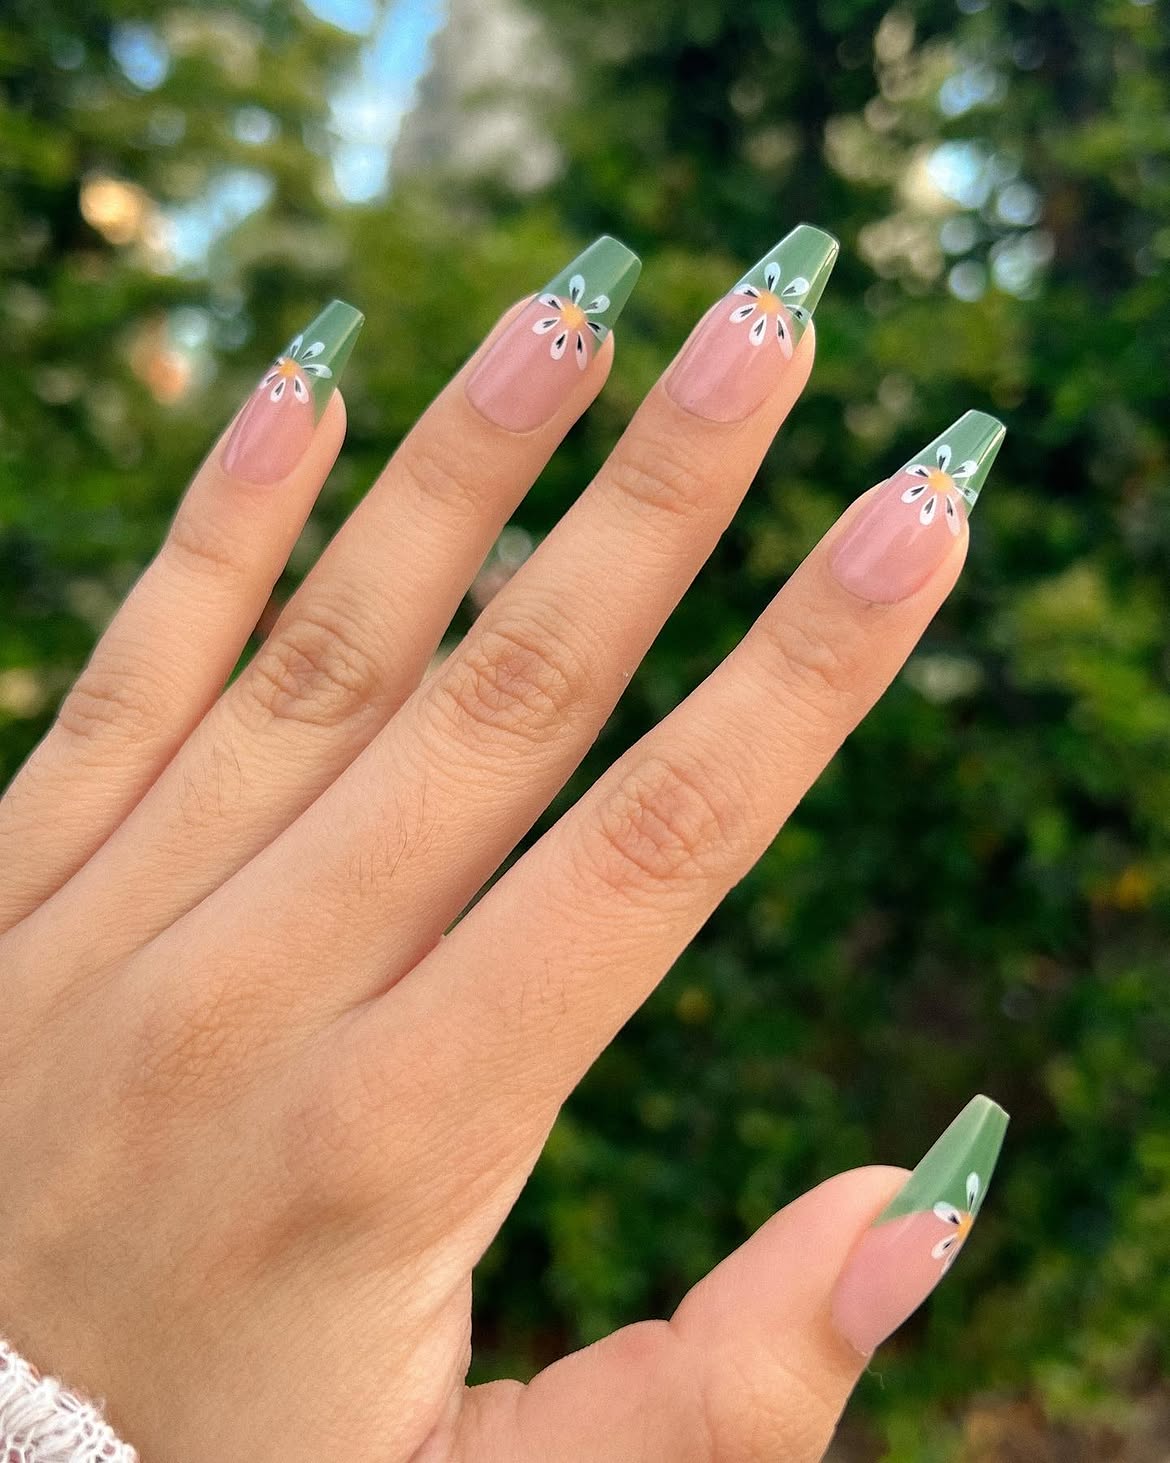
Flower placement is the clever part of this manicure. Each long square nail has a sheer pink base and a muted green tip, with one daisy resting directly across the color border.
The white petals spread into both sections, making the change from pink to green feel softer. Small dark marks inside the petals add definition, while warm yellow centers bring a sunny note to the cool sage. Repeating the flower at the same point on every nail creates a consistent pattern without filling the entire surface.
Keep the pink area clear and glossy so the detailed tips remain the main focus.
Recreate this design
7. Mint Green Swirl Nails with Fine Gold Outlines
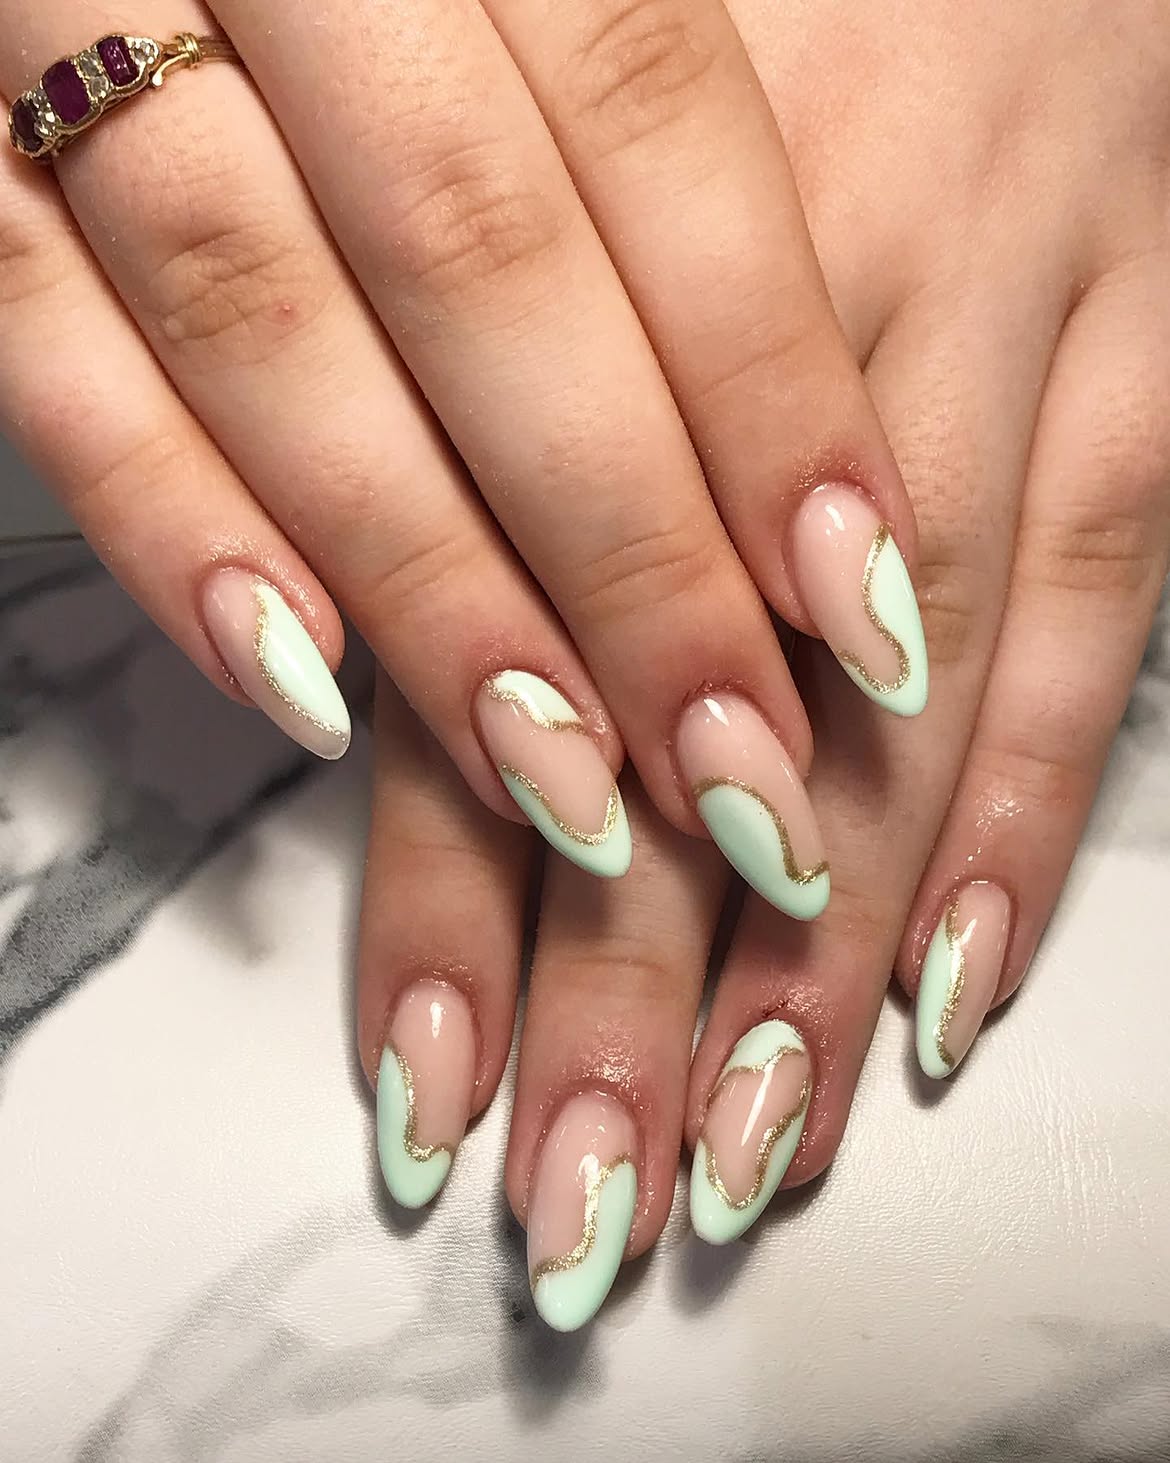
Gold tracing turns a simple mint manicure into a more detailed design without hiding the natural nail. Soft green sections curve across the sheer blush base, creating a different flowing shape on each almond nail.
The thin gold lines are important because they separate the two pale colors and make every curve easier to see. Since the swirls do not match exactly, the manicure feels relaxed while the repeated palette keeps it connected.
Sketch each curve with a fine brush before filling the outer area with mint. Once the color is dry, trace the border with gold shimmer and seal everything under a glossy clear coat.
8. Rich Emerald Green Nails with a Glassy Finish
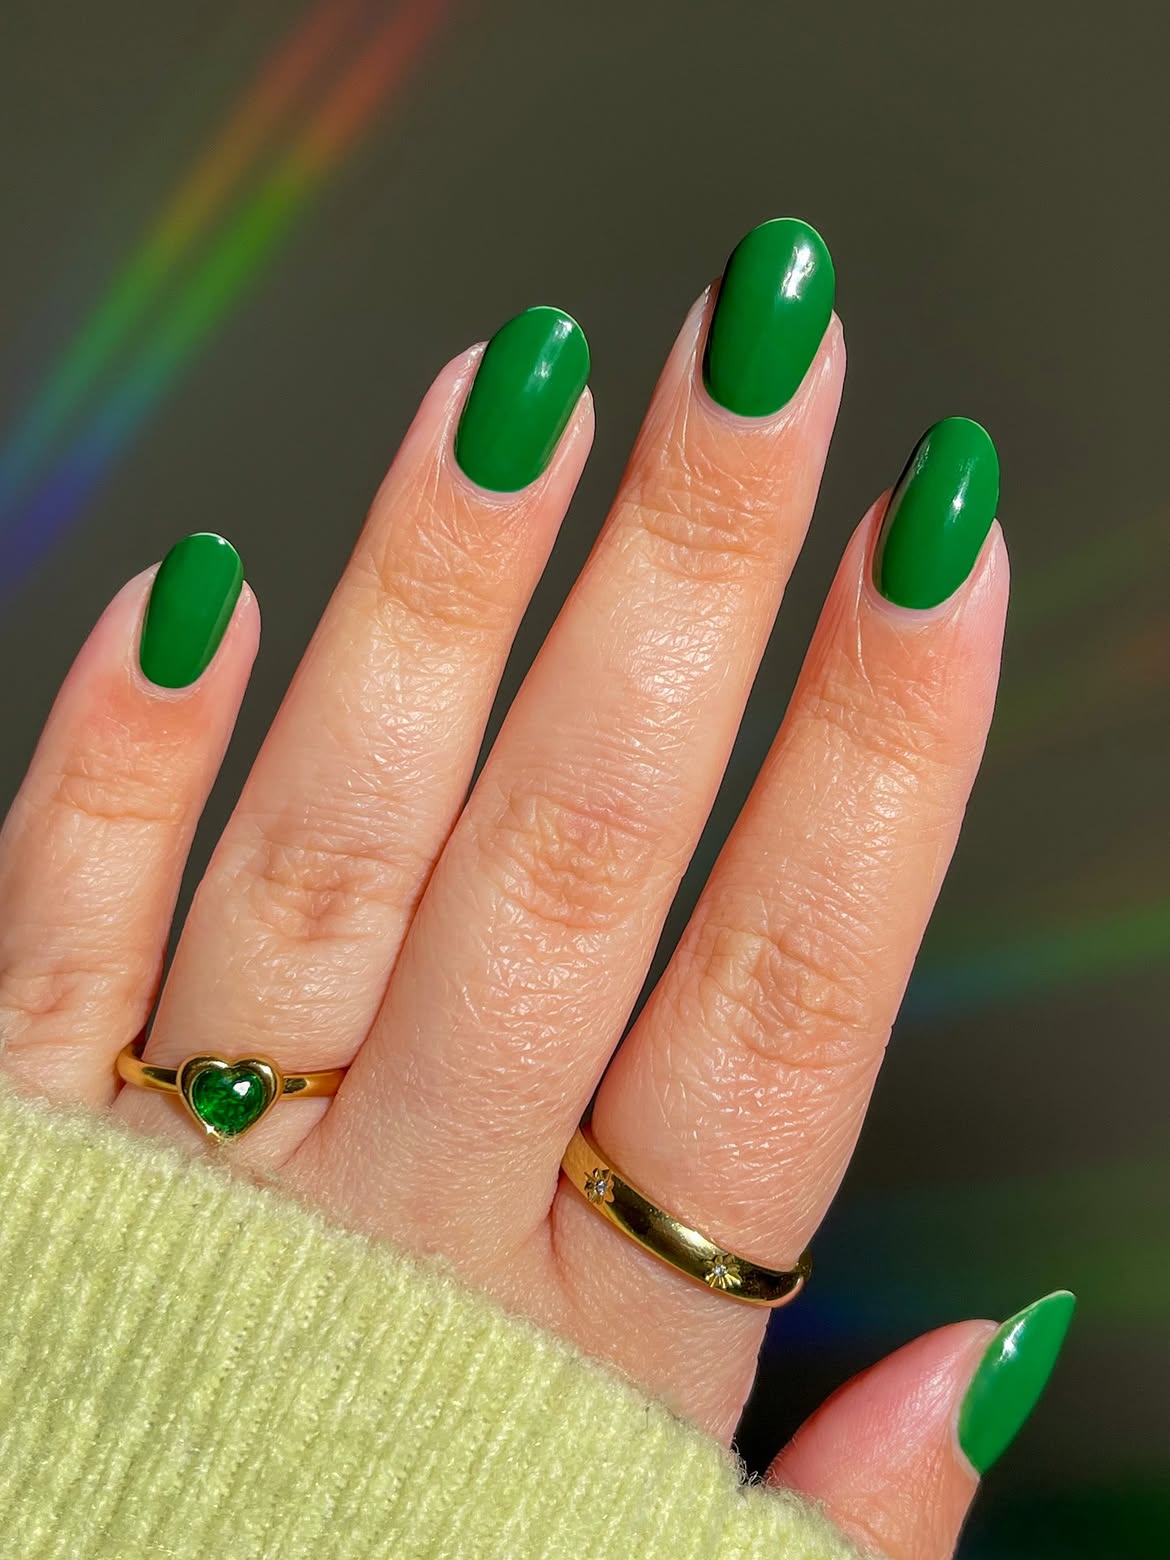
No pattern is needed when the color has this much depth. A rich emerald shade covers every nail, creating a bold one color manicure with a smooth, glossy surface.
- The rounded shape keeps the strong green from feeling too sharp, while the medium length makes the color easy to notice.
- Clean edges around the cuticles are especially important here because there are no accent details to distract from uneven lines.
- Gold rings bring warmth beside the cool green, and the matching gemstone creates a thoughtful color connection.
This look depends on three things: even coverage, tidy edges, and plenty of shine.
- ▸Apply thin green layers to reduce streaks and thick edges.
- ▸Leave a narrow clean space around the cuticle for a tidy outline.
- ▸Seal the tips with a glossy clear coat to help protect the color.
9. Mint Green Nails with White and Gold Accent Art
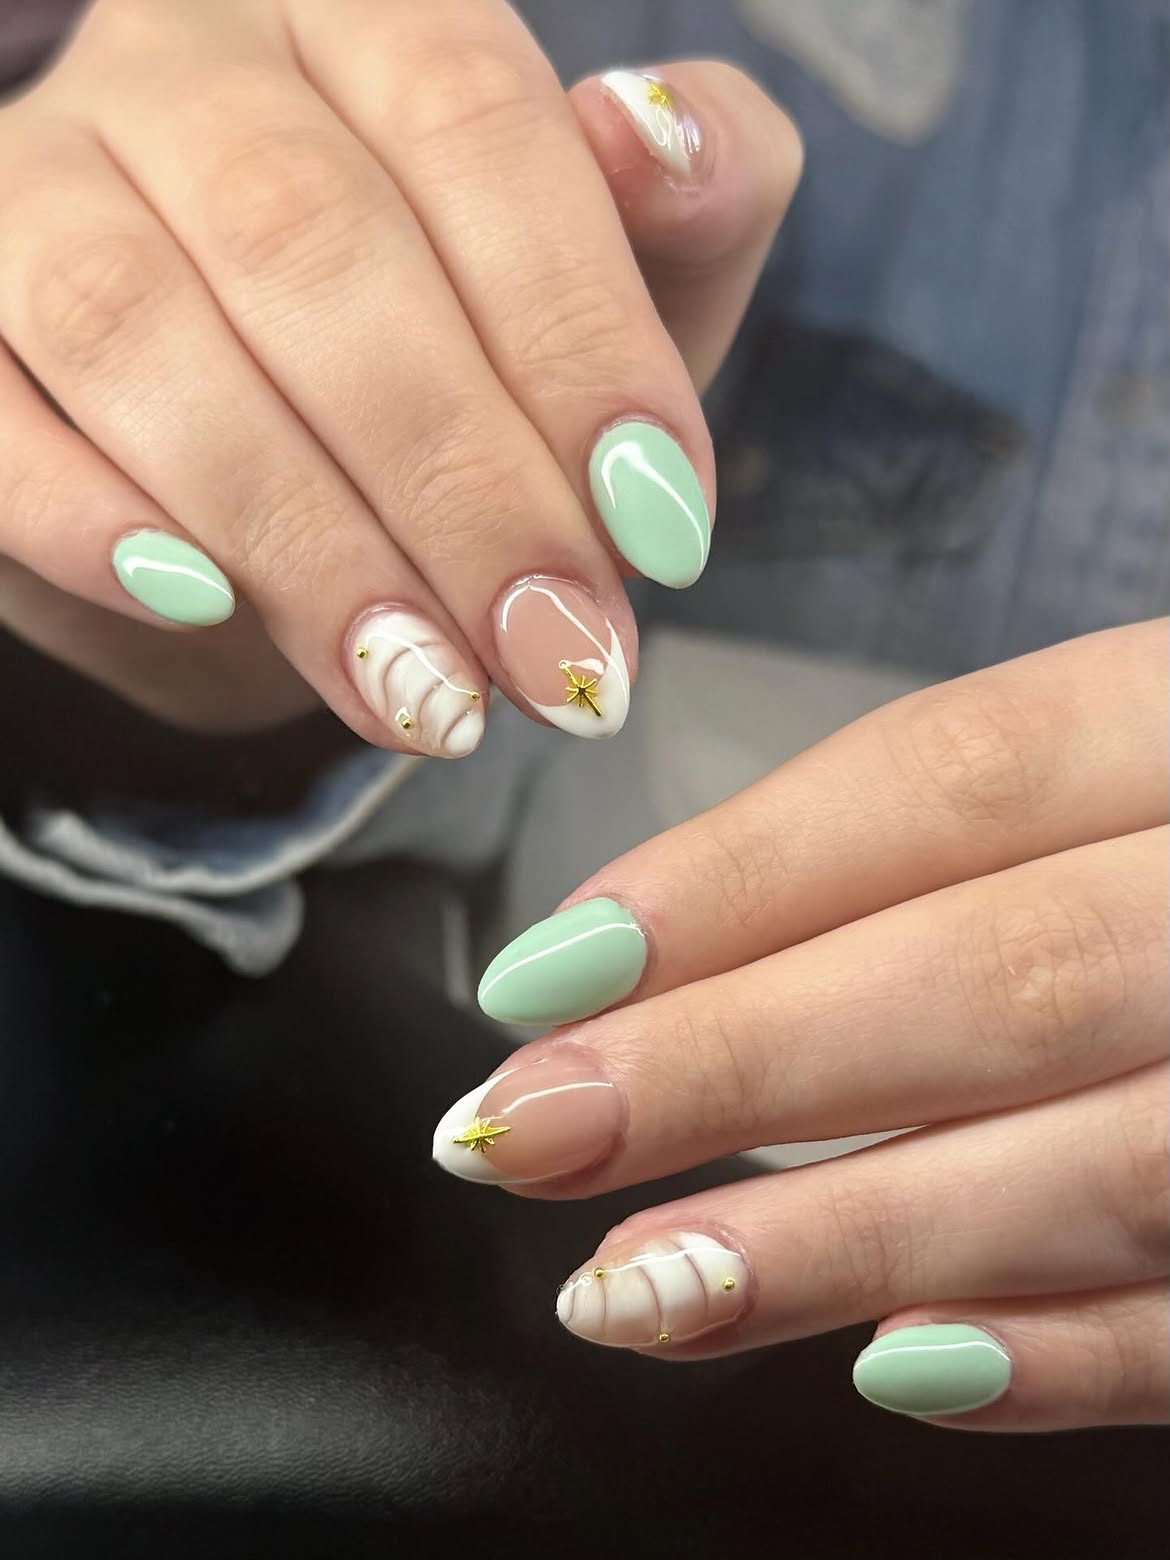
Mint acts as the quiet anchor in this mixed manicure. Several nails stay solid green, while the others bring in sheer blush, curved white tips, soft marble lines, tiny gold studs, and delicate star details.
- Spreading the decorative pieces across different nails keeps the set interesting without placing every idea in one spot.
- The repeated mint, white, and gold palette also helps the varied patterns feel connected.
- Rounded almond tips soften the straight lines and raised metal accents.
For a simpler version, keep one detailed nail on each hand and paint the remaining nails mint. Repeating the same gold finish will make the whole set look more consistent.
Repeat mint, white, and gold across the full set.
Leave a few nails solid to create visual breathing room.
Avoid mixing several metallic colors in one small design.
Do not crowd every nail with studs, lines, and raised pieces.
If you prefer neat, low-maintenance manicures, these 20 Short Green Nails offer fresh ideas with mint shades, sage tones, glossy finishes, and simple details that still feel stylish.
10. Short Mint Green Nails with Slim White Stripes
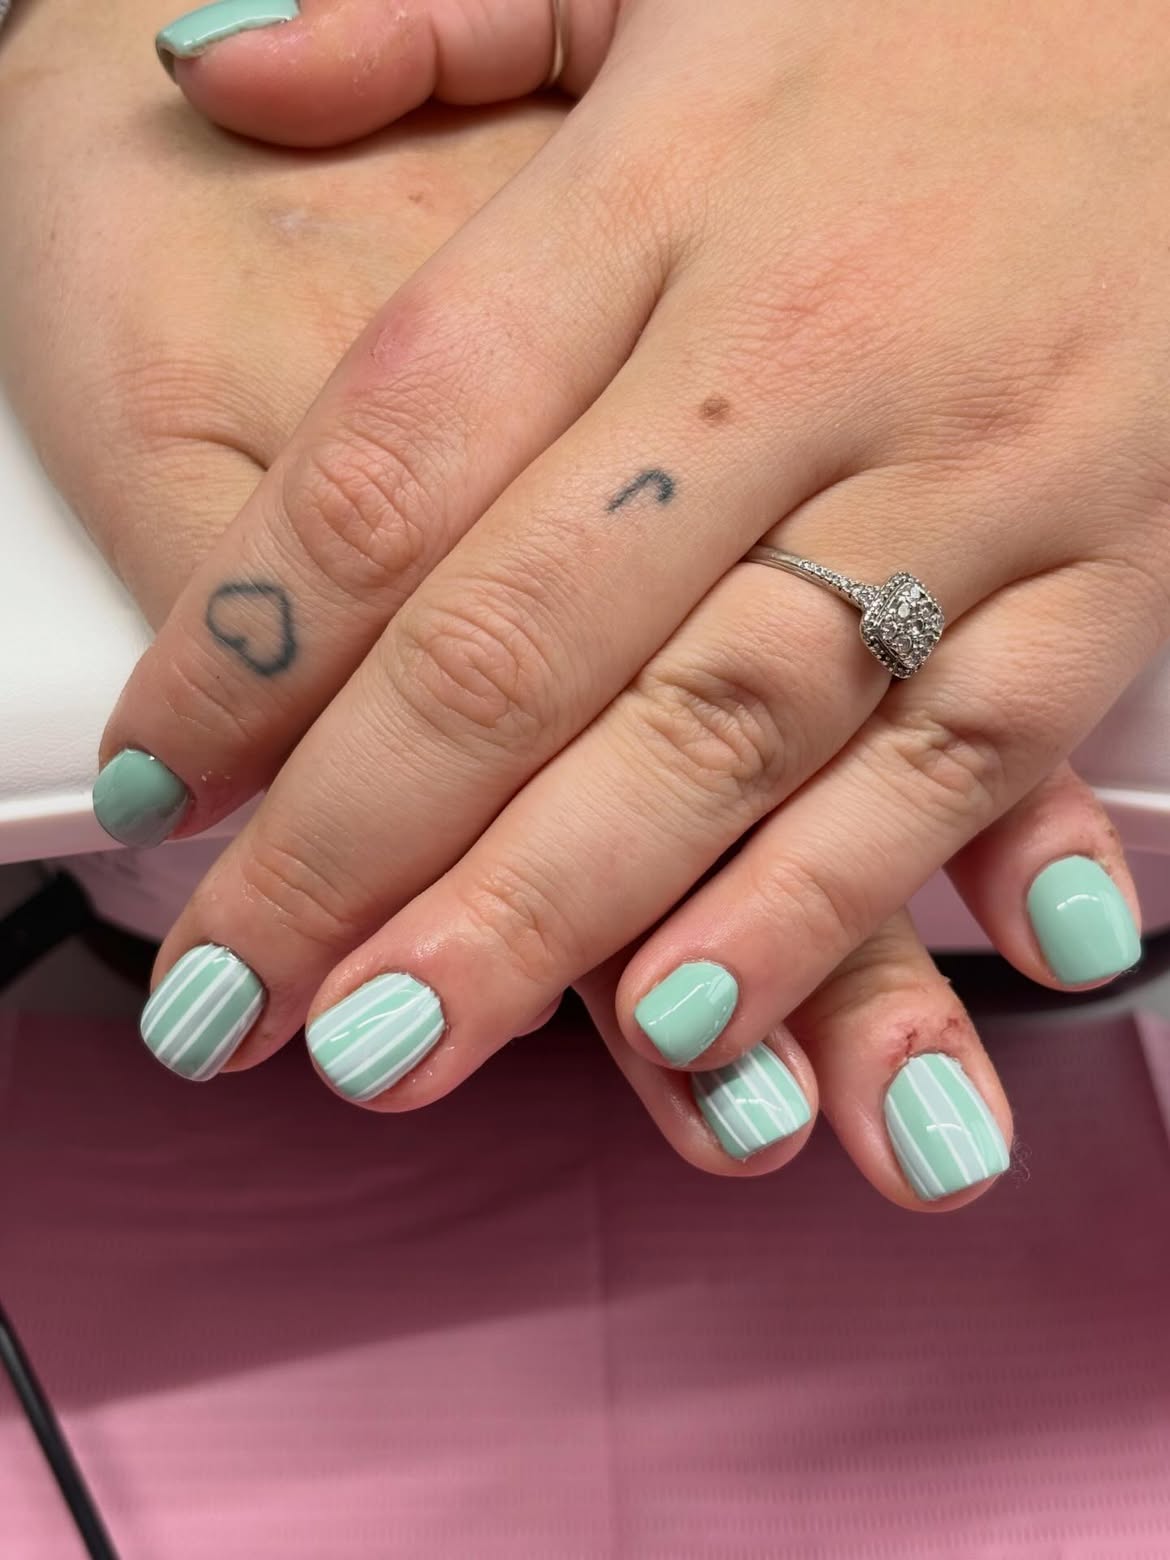
Slim white lines give short mint nails more structure while keeping the design clean and cheerful.
Build the look in a simple order:
- Cover every nail with an even layer of soft mint green.
- Choose a few accent nails and draw narrow white lines from the base toward the tip.
- Keep the spacing similar, then finish the whole set with a glossy clear coat.
The vertical direction makes the short square nails appear longer, while the solid green nails give the pattern room to stand out. A striping brush can create fine lines, but thin nail tape may help when a straighter result is preferred.
Solid mint nails bring calm color and keep the manicure from looking crowded.
White vertical stripes add contrast and help the square nails look more lengthened.
11. Forest Green Glitter Tips with Curved Placement
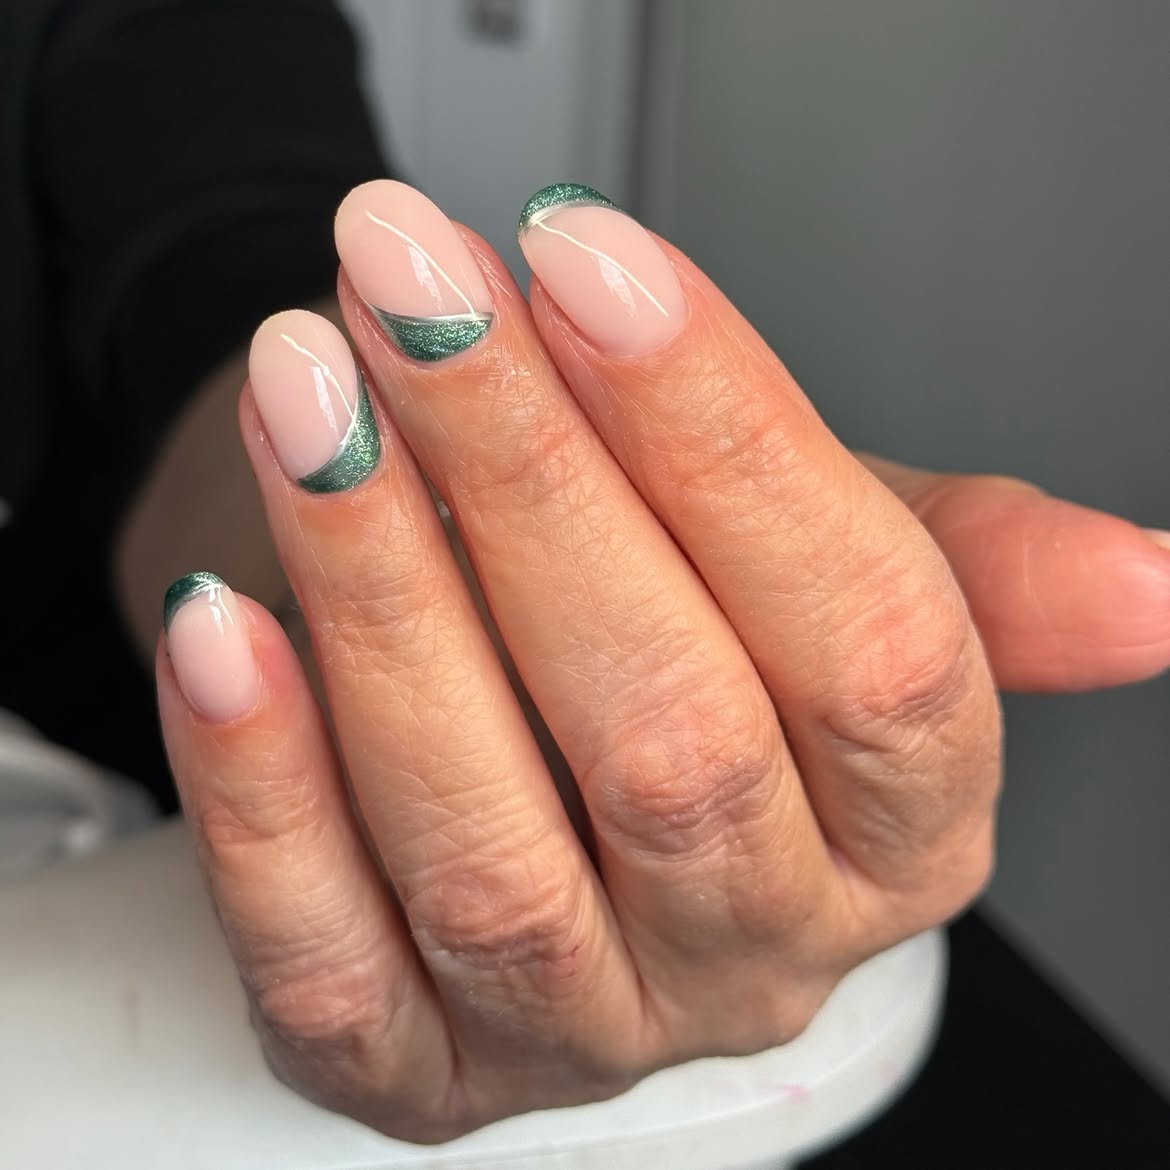
Deep green glitter moves around the nail instead of staying on every tip. The sheer blush base remains the same, but the sparkling color appears as a classic edge, a sweeping side curve, or a low rounded section.
That shifting placement gives each nail its own shape while the matching forest green keeps the manicure connected. The medium rounded length softens the strong curves and allows the shimmer to catch light from several angles.
Mark each curved border with a fine brush before filling the green area. Keeping the outlines smooth matters more than making every section identical. A clear top coat will level the glitter and strengthen the shine.
Three ways to place the green
12. Short Mint Green Nails with Corner Daisy Accents
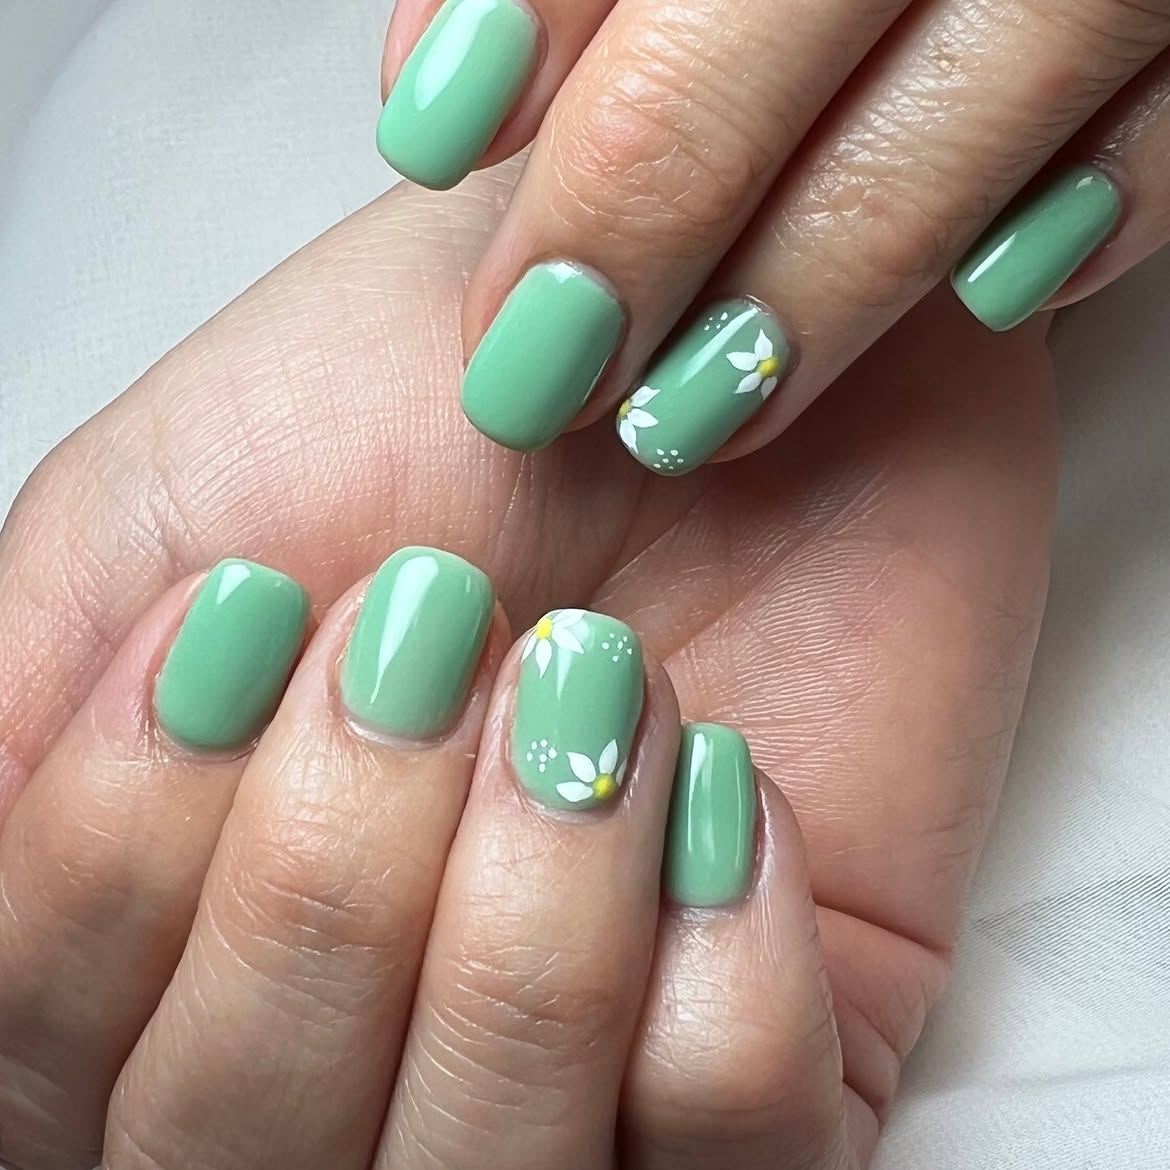
Short nails leave plenty of room for floral art when the pattern stays close to the corners. Most of this manicure uses one glossy mint shade, while a single accent nail on each hand carries small white daisies with sunny yellow centers.
Tiny white dot clusters fill a little of the open space without competing with the flowers. The floral pieces also enter from different edges, so the two accent nails feel related rather than copied. A softly squared shape keeps the set practical and gives the mint color a clean outline.
Paint the larger petals first, then add the smaller dots after the flowers have settled. This helps the delicate details remain clear.
13. Mint Garden Nails with Layered Floral Accents
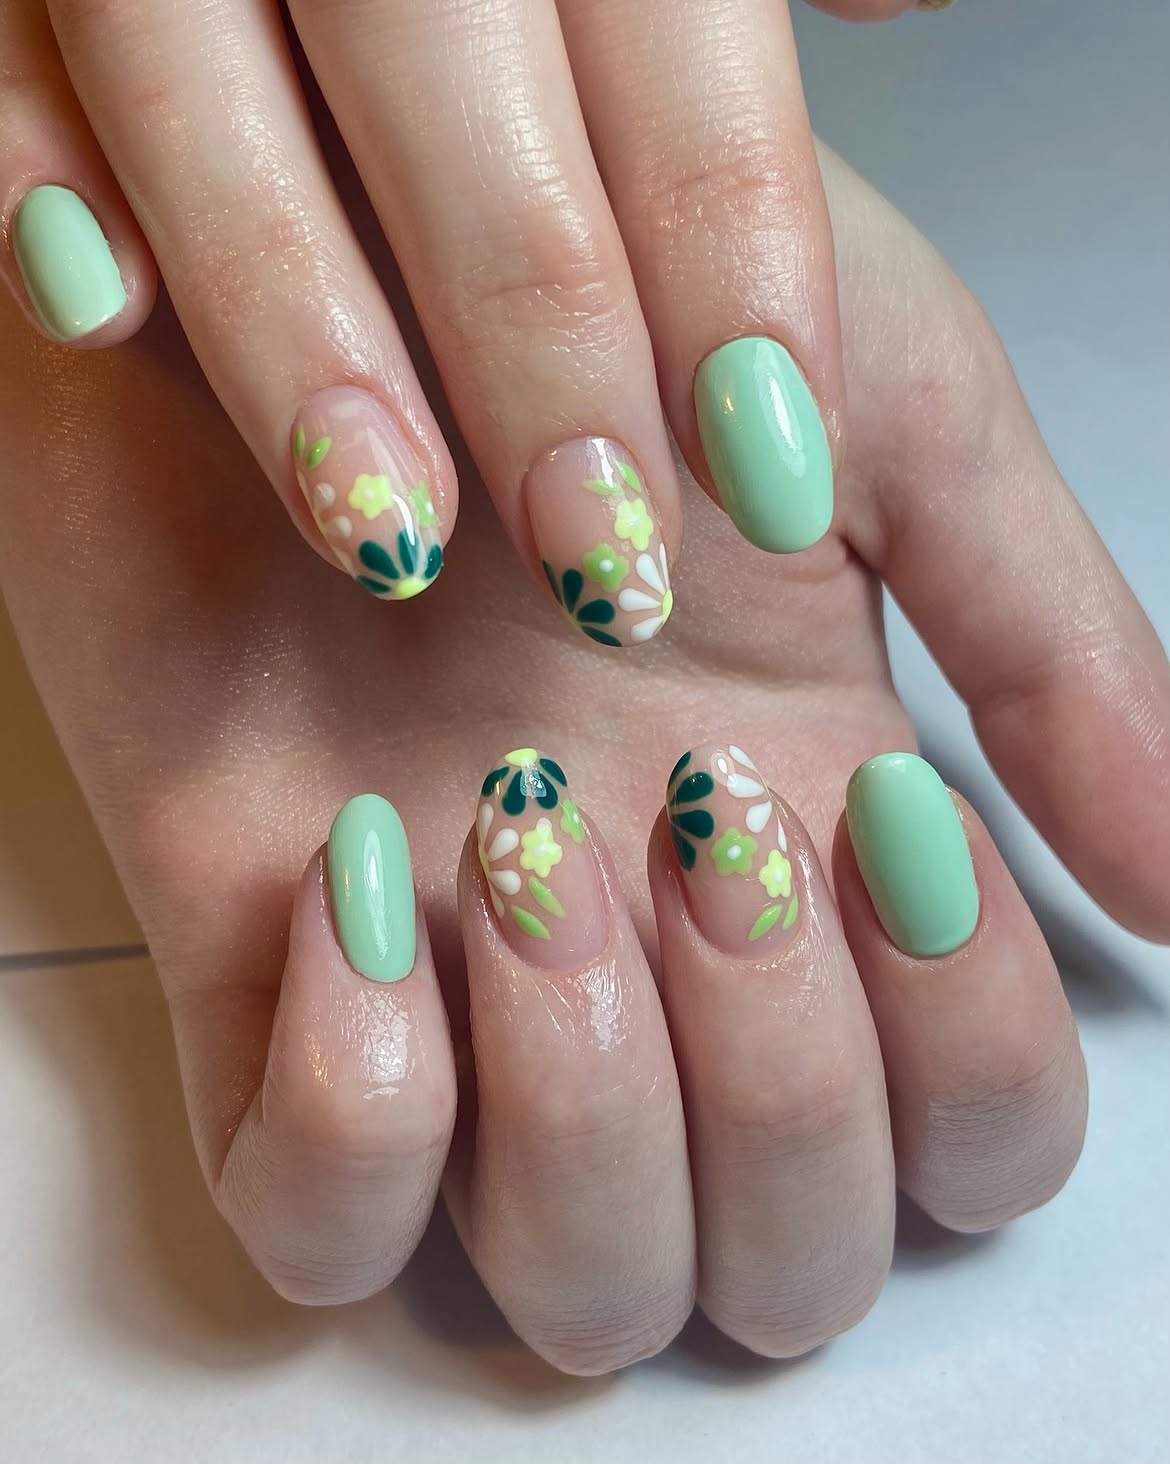
These accent nails feel like a tiny garden growing inward from the edges. Solid mint nails frame the design, while the sheer blush nails carry white petals, lime flowers, deep green shapes, and small leafy details.
Anchor: Dark green petals and leaves give the pattern depth.
Fill: Small white and lime flowers brighten the spaces between them.
Rest: Clear areas in the center stop the layered artwork from feeling crowded.
The oval shape follows the soft curves of the flowers and keeps the manicure gentle. Painting only a few detailed nails also allows the plain mint color to remain an important part of the full set.
FLORAL LAYER ORDER
14. Scattered Daisy Nails on a Soft Mint Base
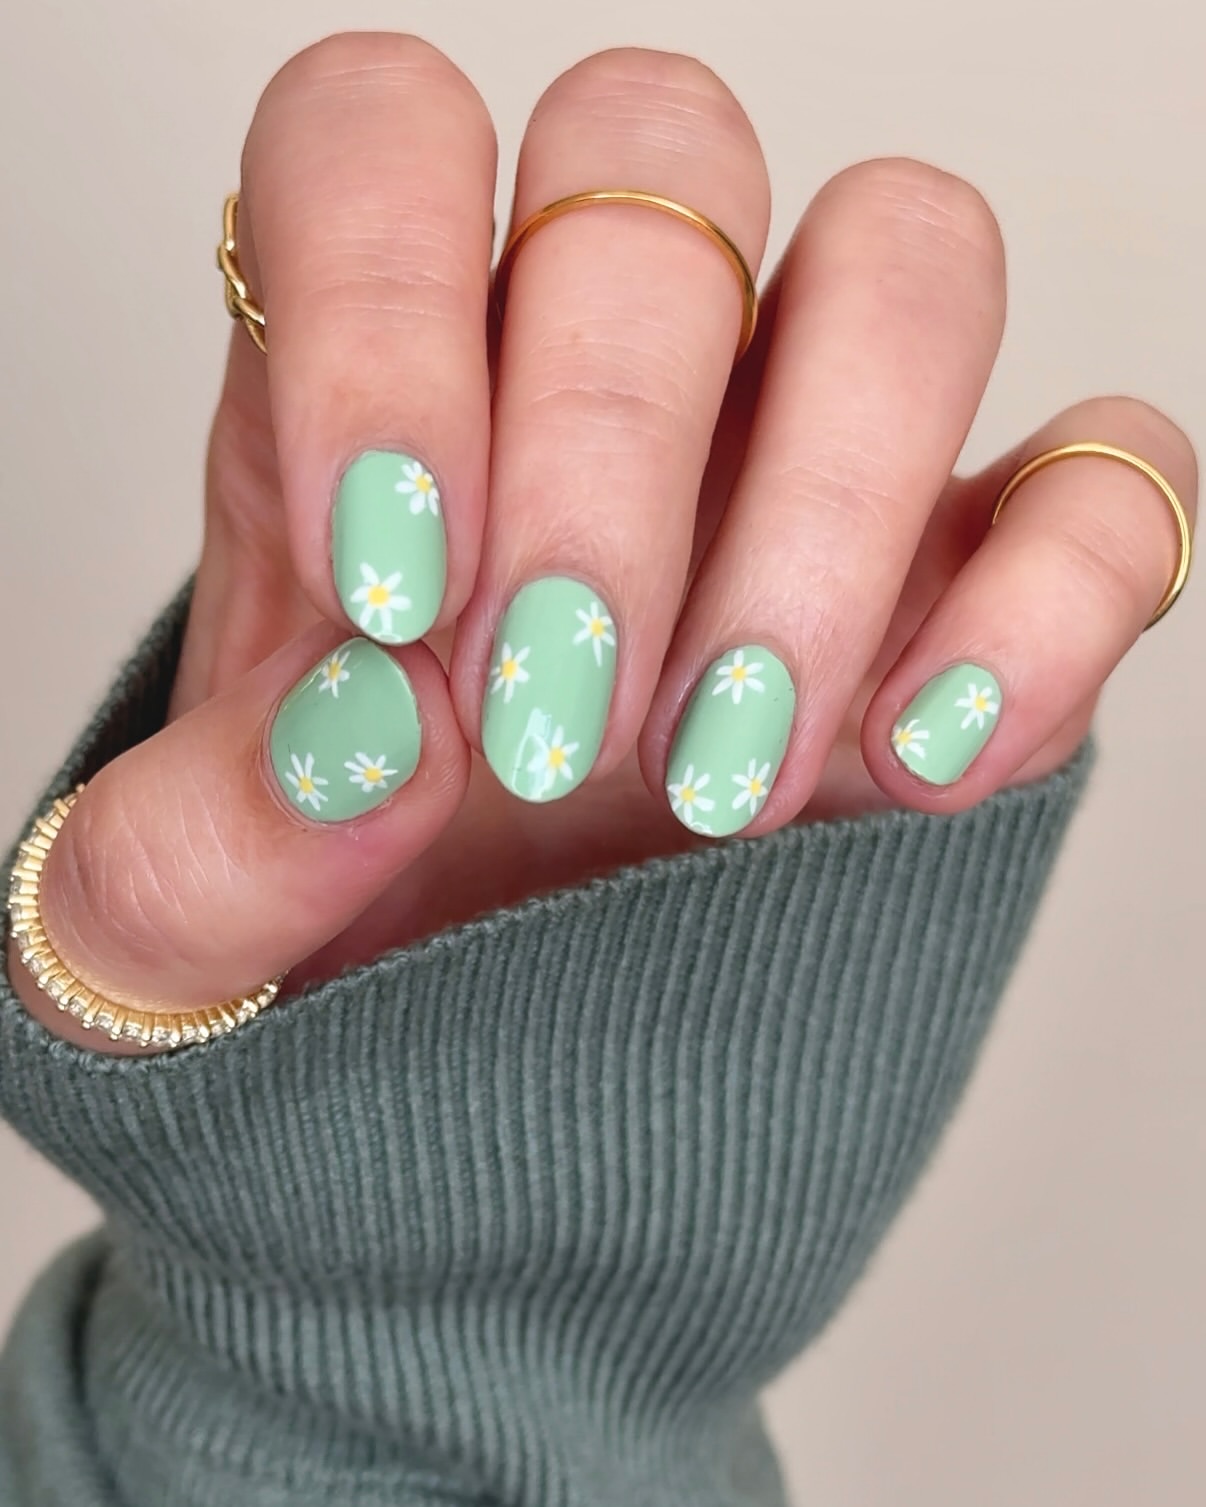
Scattering flowers across every nail gives this soft mint manicure a light, hand painted feel. Some daisies appear in full, while others are cropped by the side or tip, making the pattern look less arranged.
Keep the flowers feeling natural:
• Change the number of daisies from one nail to the next.
• Mix centered blooms with flowers that enter from the edges.
• Leave enough mint visible around each shape.
The small yellow centers add warmth and connect the white petals with the gold jewelry. Short rounded nails suit the tiny scale of the artwork and keep this floral set easy to wear.
| Full Daisies | Edge Daisies |
|---|---|
| Show the complete flower shape | Make the pattern feel less formal |
| Fit well in open nail areas | Fit neatly near sides and tips |
| Create clear focal points | Suggest flowers continuing beyond the nail |
15. Metallic Olive Green Nails with a Warm Autumn Glow
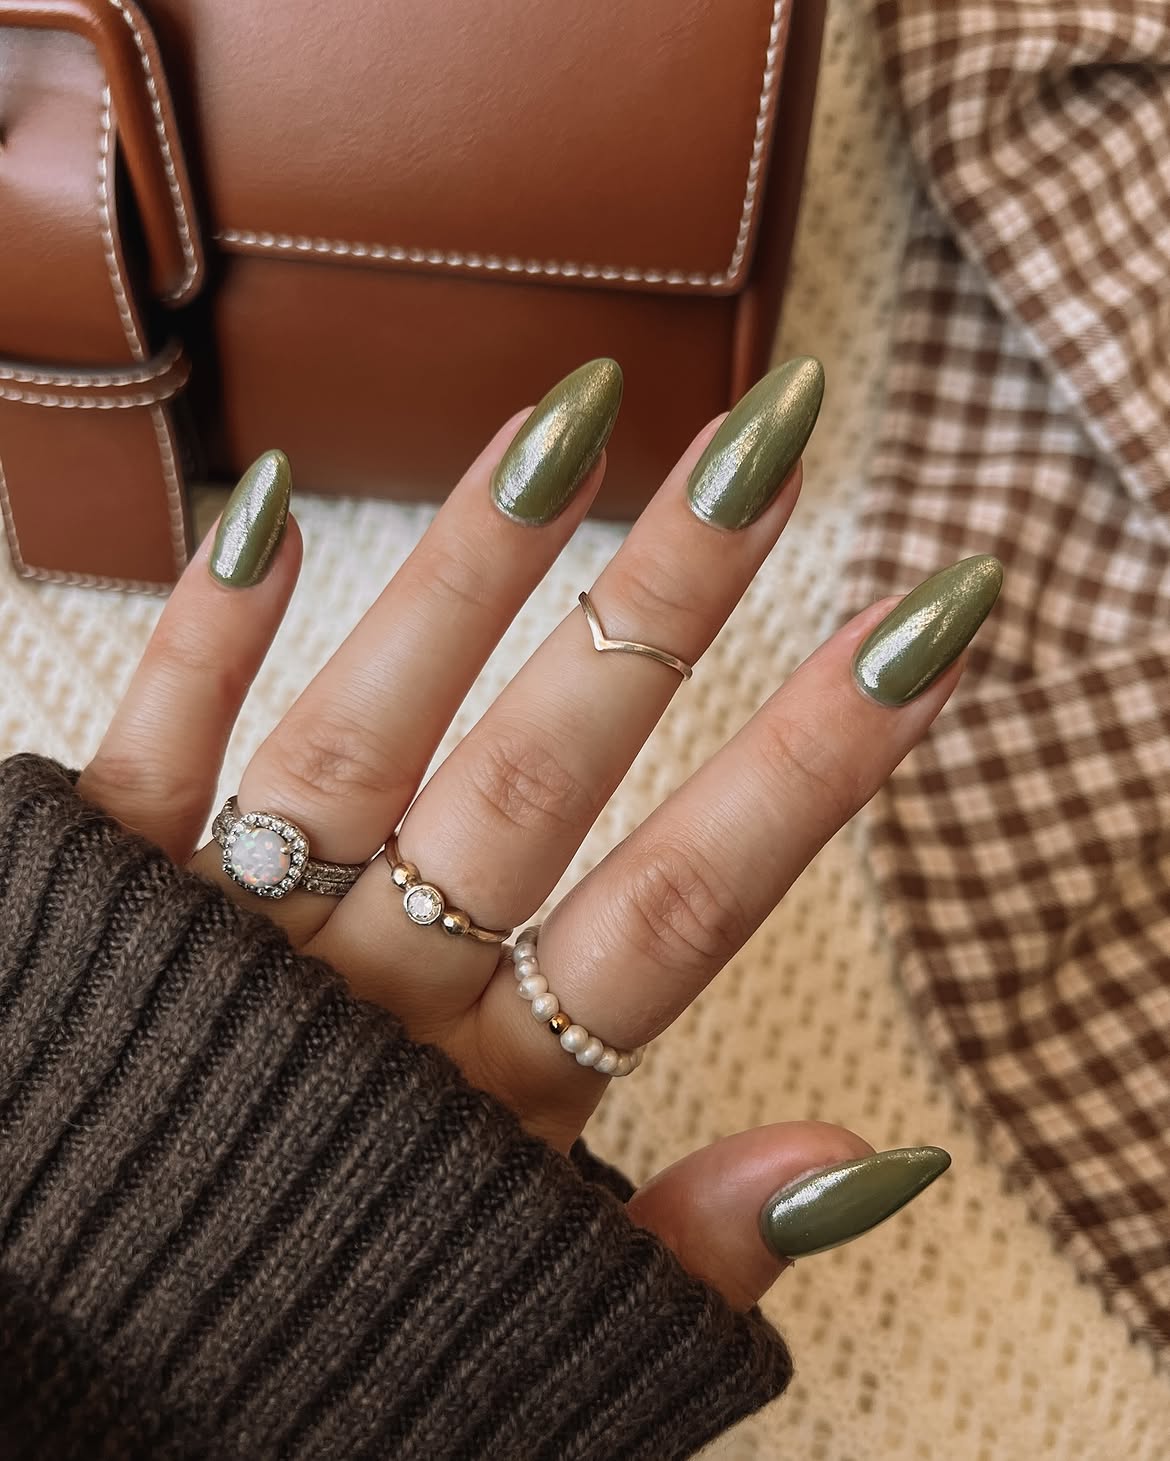
Olive green takes on a richer mood when it is finished with a fine metallic sheen. The same color covers every nail, but the reflective surface shifts between earthy green and muted gold as the light moves.
Long almond tips create a broad center highlight that makes the nails look smooth and lengthened. Since there are no patterns or accent pieces, the changing shine becomes the main detail. The warm olive tone also sits naturally beside brown fabric, tan accessories, and mixed metal jewelry.
Apply thin, even layers over a smooth base. Reflective polish can show ridges easily, so careful preparation helps the finish look cleaner.
WEAR OLIVE GREEN WITH
16. Dark Green Wave Tips with Gold Glitter Borders
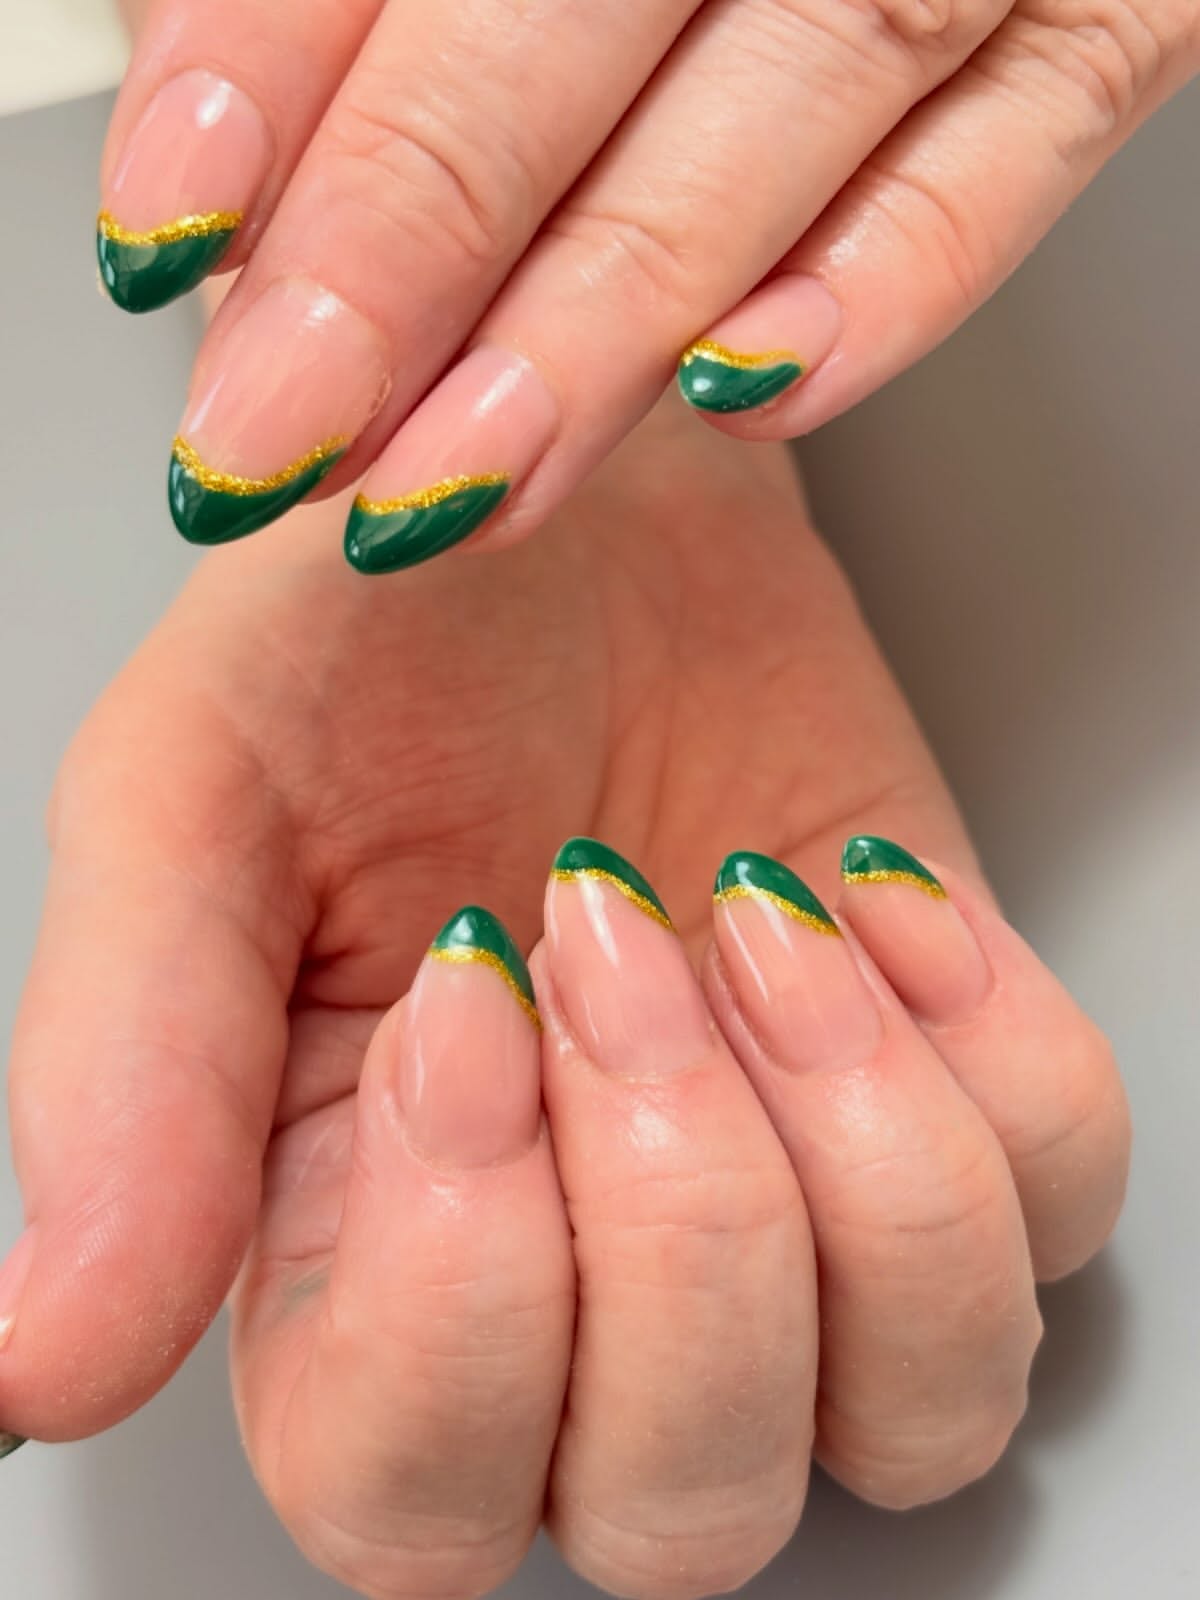
A slim gold line makes these forest green tips look sharper and more defined. The deep color sweeps diagonally across each sheer pink nail, creating soft waves instead of matching French curves.
Shape: Each green section rises from a different side, giving the manicure gentle movement.
Contrast: The natural blush base keeps the dark tips from feeling heavy.
Finish: Gold glitter follows every curve and adds warmth between the two colors.
Keep the green edges smooth before adding the gold. The metallic border should remain narrow enough to frame the wave without hiding its shape. Finish with a glossy clear coat to seal the layered lines.
⚠️ Keep the Gold Fine
A thick glitter band can cover the green curve. Use a fine brush with a small amount of polish, then trace the border in one slow motion.
17. Neon Green Micro French Nails with a Milky Base
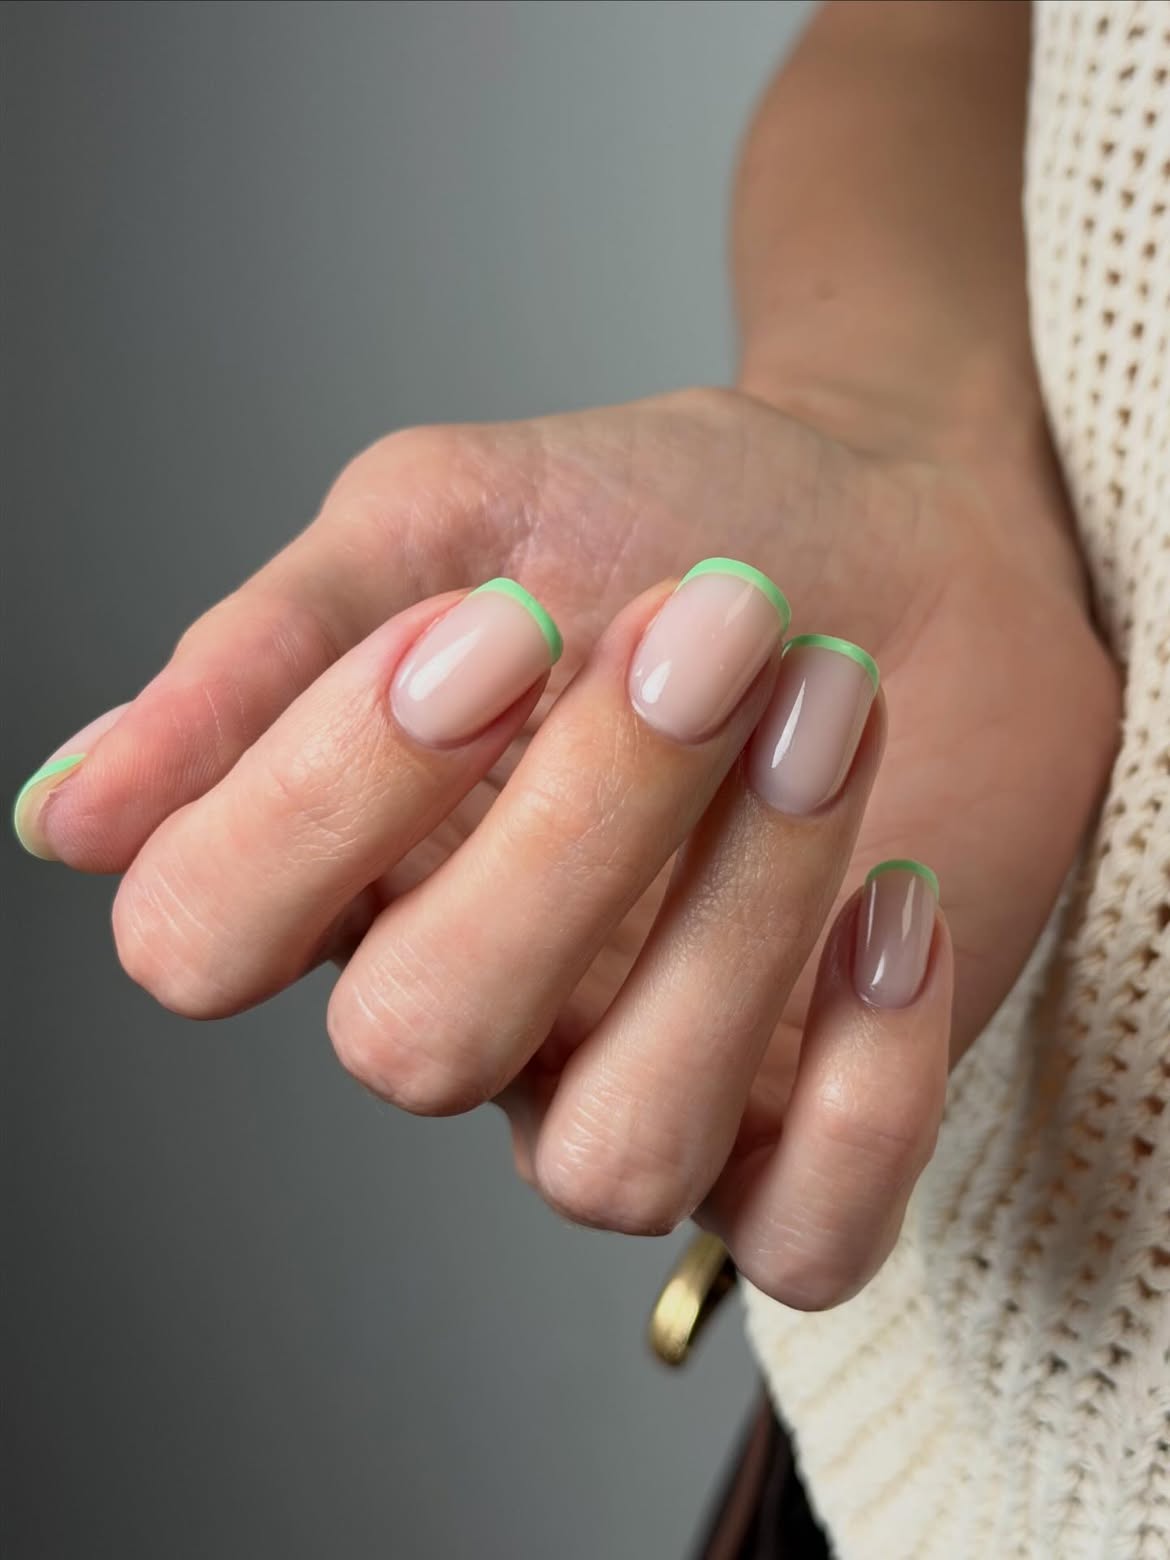
Most of this manicure stays soft and natural, allowing the slim neon green edge to make a clear statement.
Why the design stays clean:
- The milky blush base creates a smooth and healthy looking finish.
- A very narrow green line adds bright color without covering the nail.
- Rounded square tips keep the fine border neat and gently curved.
Use an opaque green polish so the thin edge remains visible. Begin at the center of each tip, then guide the brush toward both sides with a small amount of color. The line does not need to be thick, but its width should remain consistent across the set.
A bright green shade feels easy to wear when it covers only the slim outer edge and leaves the rest of the nail soft and sheer.
18. Sage Daisy Nails with White Tips and Gold Glitter
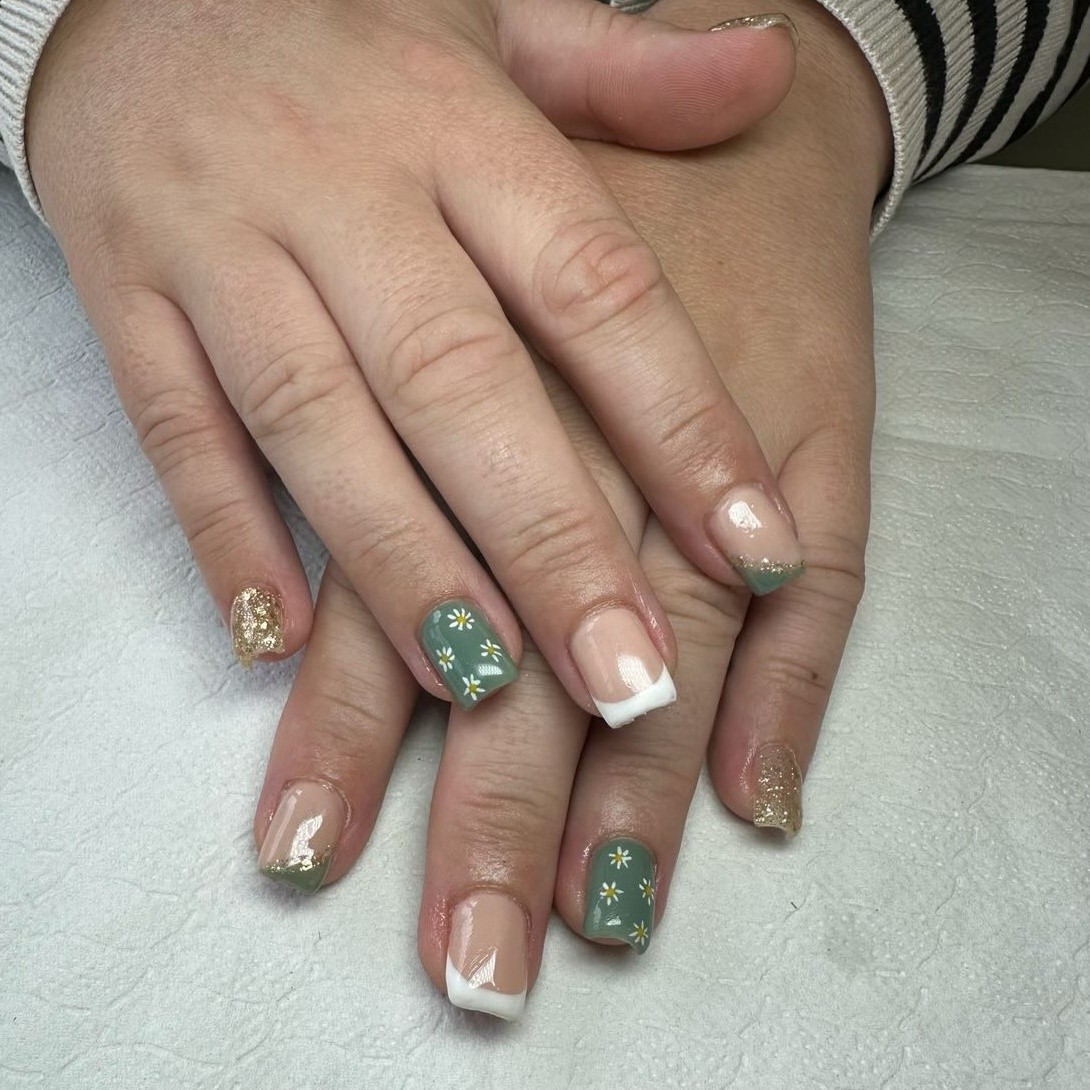
This manicure mixes four finishes without losing its calm green color story. Sage accent nails carry tiny white daisies with yellow centers, while other nails feature crisp white French tips, full gold glitter, or curved green edges traced with sparkle.
The short square shape gives every design a clear outline. Repeating sage, white, blush, and gold across both hands also keeps the mixed patterns connected. The floral nails bring softness, the white tips add clean structure, and the glitter nails create a brighter focal point.
Use the same sheer blush base and gold tone throughout the set. Those repeated details will help the varied nail art feel planned.
BUILD THE MIXED MANICURE