17 Viral Spring Green Nails Ideas for a Fresh Manicure
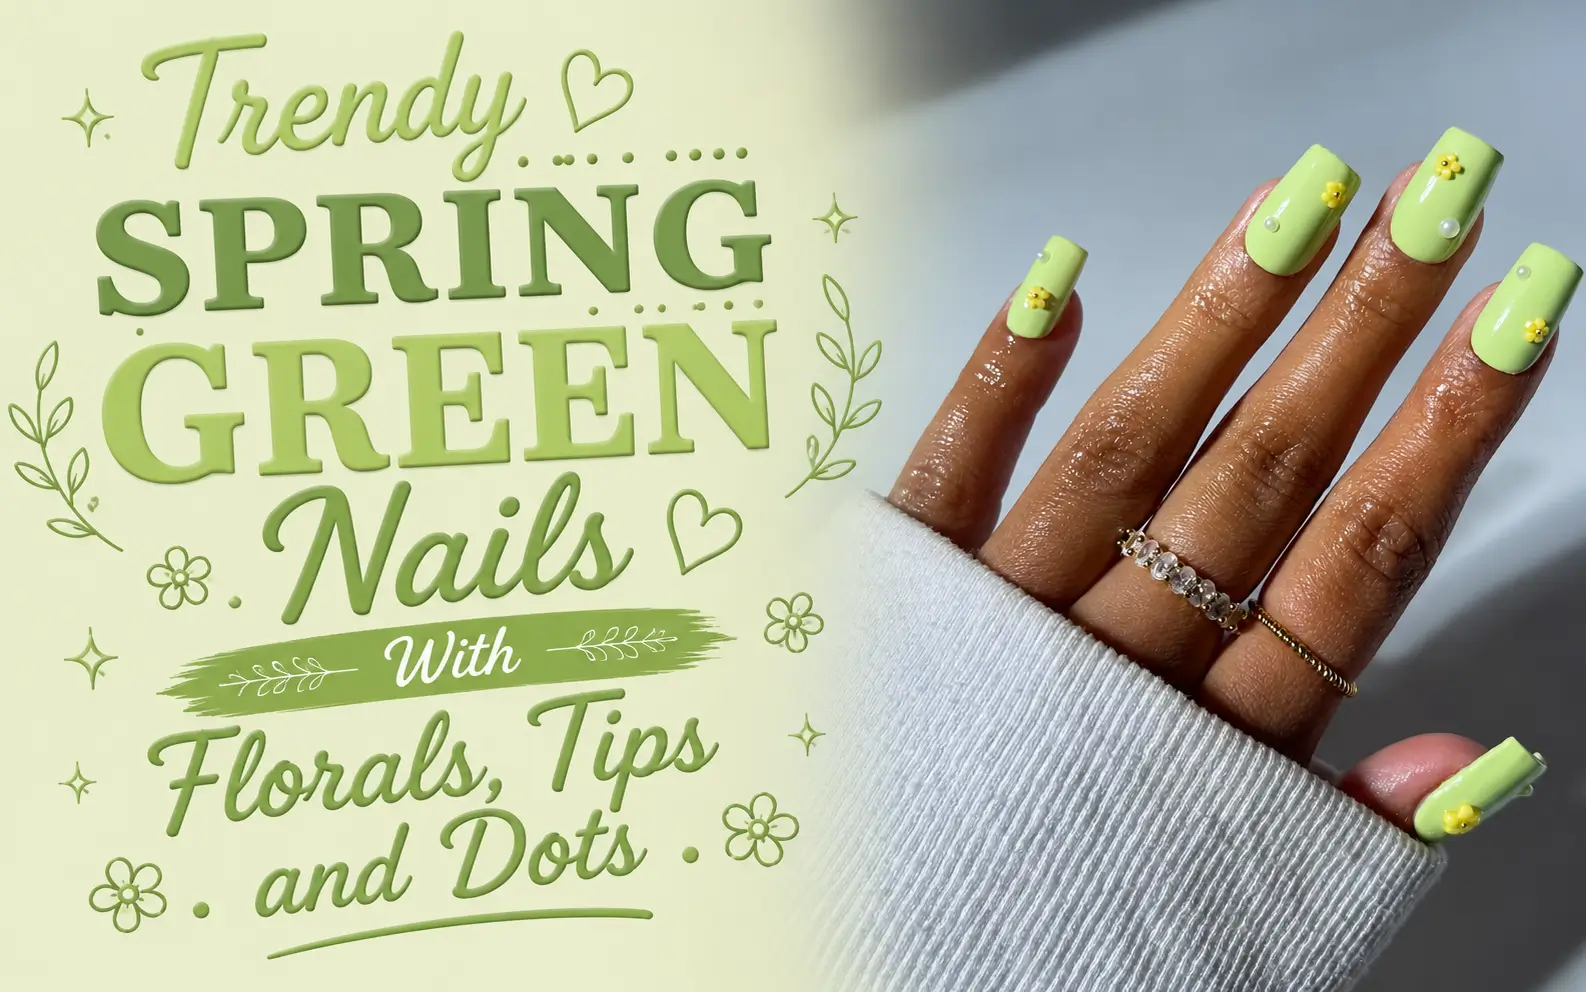
Green nail ideas can feel fresh without relying on one shade or one predictable pattern. This collection of 17 Spring Green Nails ideas shows just how much variety fits inside a green palette. Soft mint French tips keep some looks light and clean, while olive polish, chartreuse color, and deep emerald tips bring stronger contrast. Across the roundup, sheer pink bases give the brighter shades room to breathe.
The details make each manicure distinct. You will find tiny daisies, leafy sprigs, clover accents, fine stripes, scattered dots, pearls, crystals, raised flowers, and slim lines of gold glitter. Some designs use one decorated nail as the focus. Others mix several patterns but repeat the same colors so the full set still feels connected.
There are options for short rounded nails, neat square shapes, long almonds, and pointed stiletto tips. Use it to compare color placement, flower size, tip depth, and the amount of open space you prefer. Save the ideas that match your style, then adjust the shape or detail level to suit your own manicure.
17 Spring Green Nails Designs 2026
1. Mix Solid Mint Accent Nails With Green French Tips
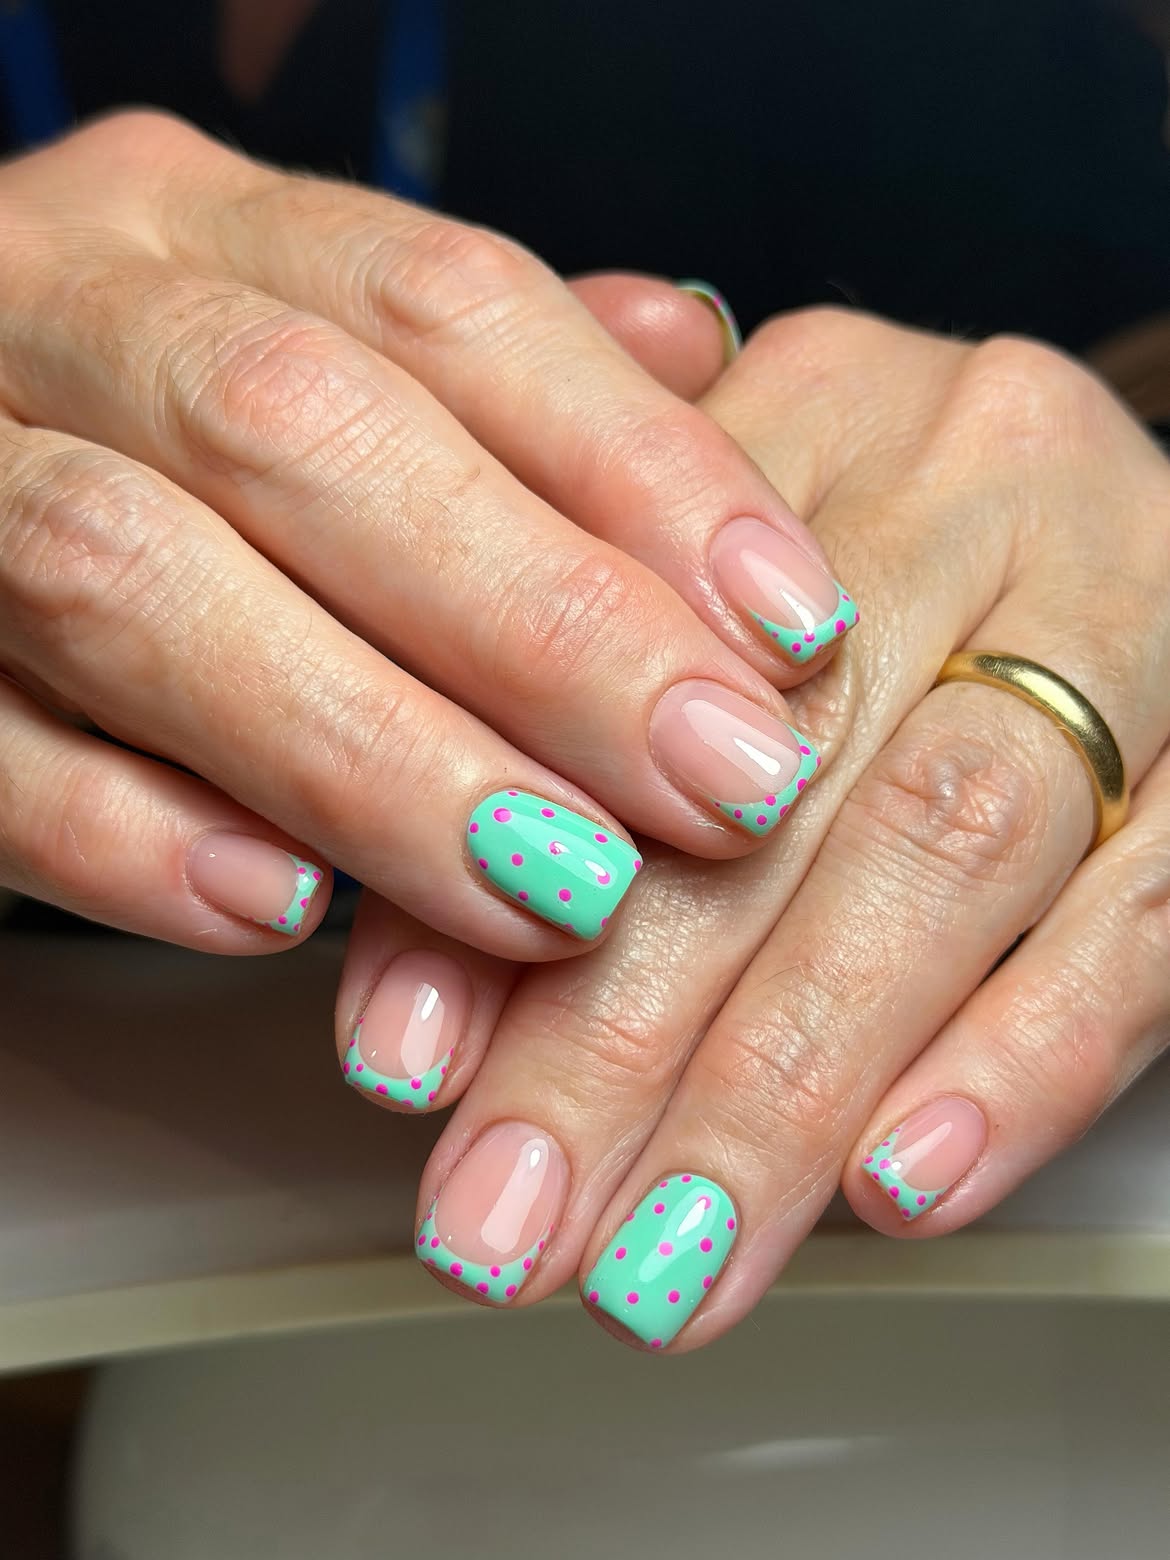
Instead of covering every nail with the same amount of color, this manicure alternates between sheer French tips and fully painted mint accents. That change in coverage gives the design a lively rhythm, even though the same green and pink palette appears across the entire set.
Placement strategy:
- Apply a translucent nude shade to the French tip nails.
- Paint selected accent nails completely mint green.
- Add small pink dots around the green tips and across the solid nails.
Keep the accent nails separated rather than placing them directly beside each other. This spreads the stronger green color across both hands and helps the lighter French tips remain visible. A glossy top coat brings the two treatments together and keeps the dotted pattern crisp.
| Sheer Tip Nails | Solid Mint Accents |
|---|---|
| Keep the nude base visible | Use full green coverage |
| Place pink dots along the tips | Scatter pink dots across the nail |
| Creates a lighter visual break | Adds stronger color and contrast |
2. Combine Olive Green Dots, Stripes, and Curved Tips
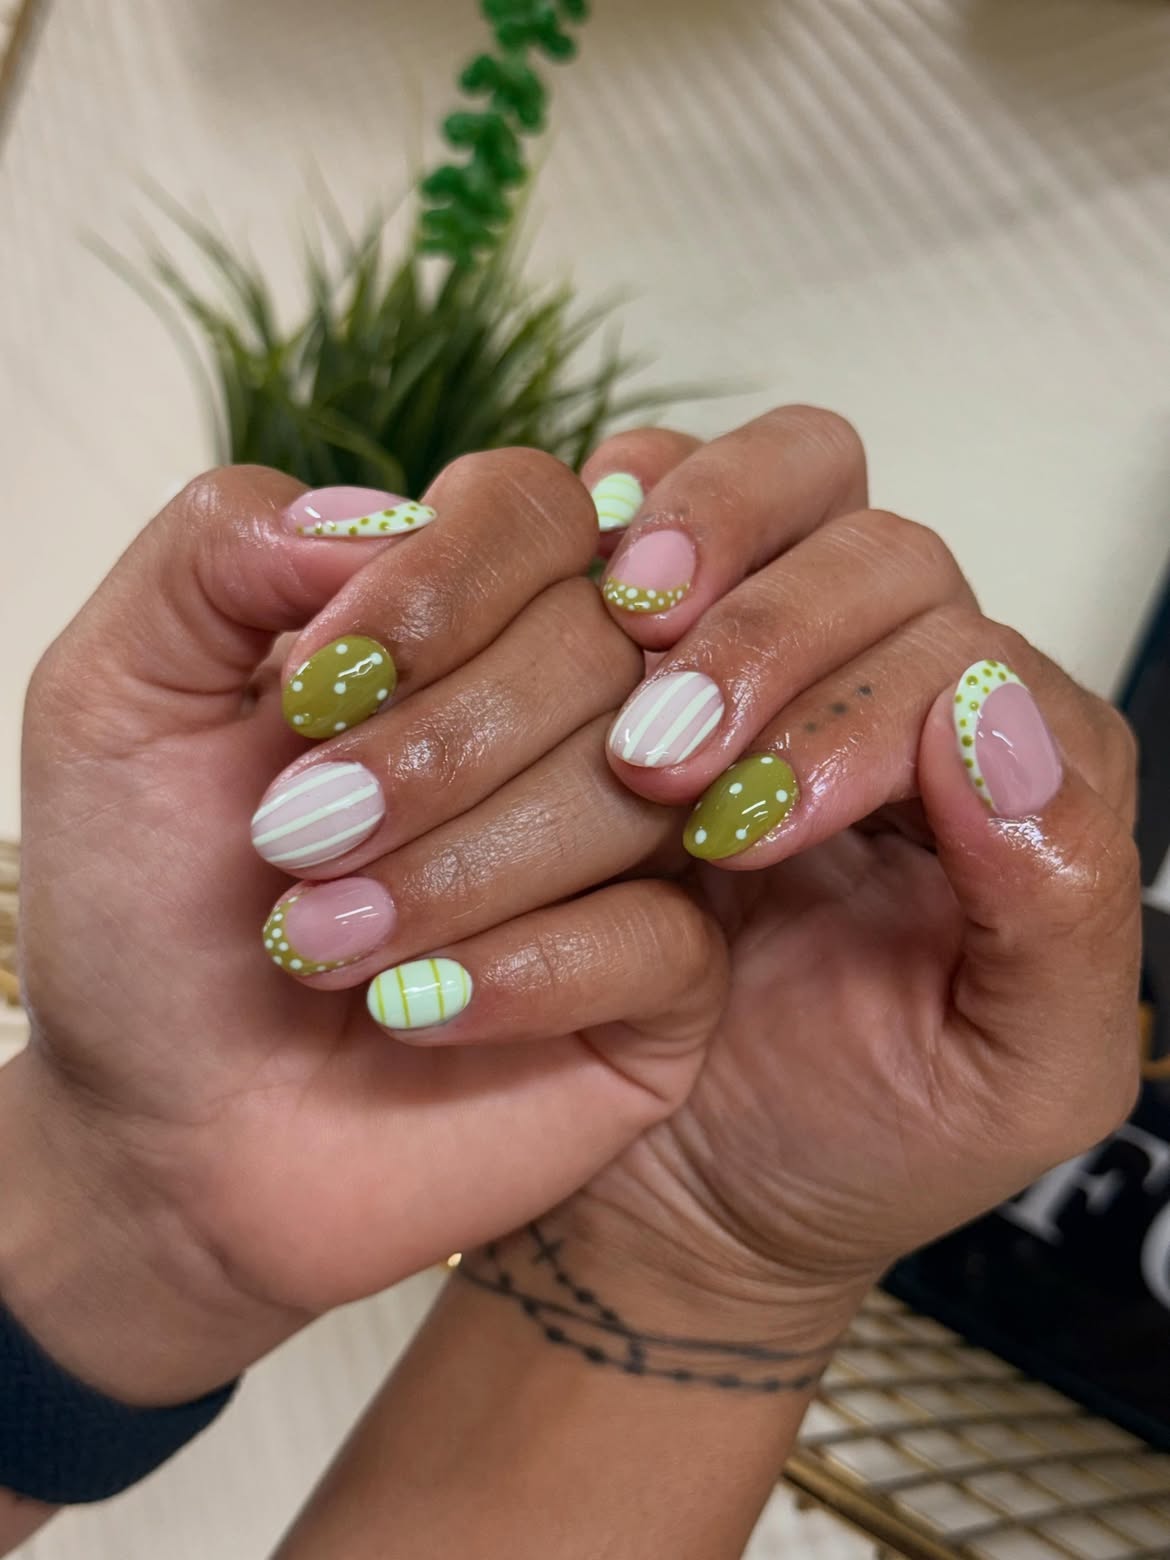
Olive green gives this spring manicure a warmer, earthier character. The set avoids repetition by rotating several patterns across a glossy pink, pale green, and olive palette.
Solid nails: Olive coverage creates strong color breaks, with scattered white dots keeping the surface playful.
Striped nails: Thin lines cross pale pink or light green bases. The narrow spacing stops the stripes from overpowering the other designs.
Curved tips: Green sections sweep across the edges of sheer pink nails, with small dots tracing the border.
Keep the line thickness and dot size similar across every nail. That shared scale connects the different patterns, even when their placement changes. The mixed designs feel coordinated because the same three colors return throughout the set.
3. Cover Chartreuse Green Nails With Scattered Pink Crystals
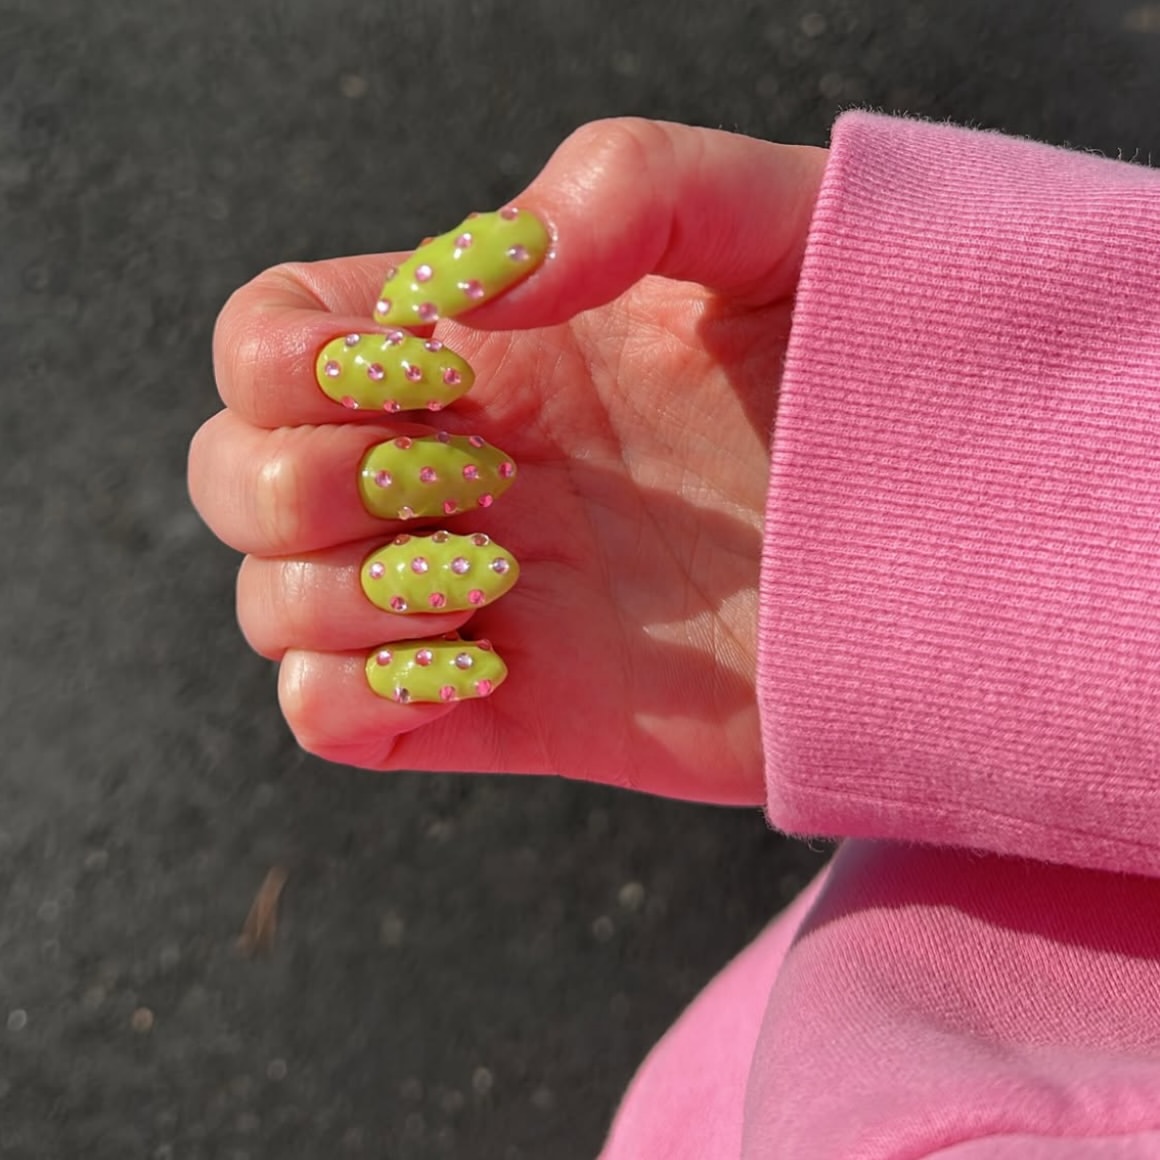
Bright chartreuse turns this manicure into one strong color statement. Instead of adding several painted patterns, the design uses small pink crystals scattered across every nail. The raised pieces catch the sunlight and give the glossy green surface extra dimension.
Why the contrast works
The sharp green base feels energetic, while the pink accents add a sweeter color without softening the overall look. Their uneven placement makes the pattern feel playful rather than overly arranged.
Leave different amounts of space between the crystals so they do not form accidental rows. Keeping a little clear space near the edges also helps the oval nail shape remain visible. The matching pink sleeve strengthens the color pairing, showing how well this green works with bright rosy shades.
💎 Crystal Placement Tip
Place the pink crystals at varied distances and angles. Leave a narrow open area around the nail edges so the chartreuse base and rounded shape can still be seen clearly.
If you want a bolder color mix after these spring green ideas, check out these 17 Orange and Green Nails for fresh contrast and playful seasonal inspiration.
4. Scatter Tiny White Daisies Across Soft Mint Nails
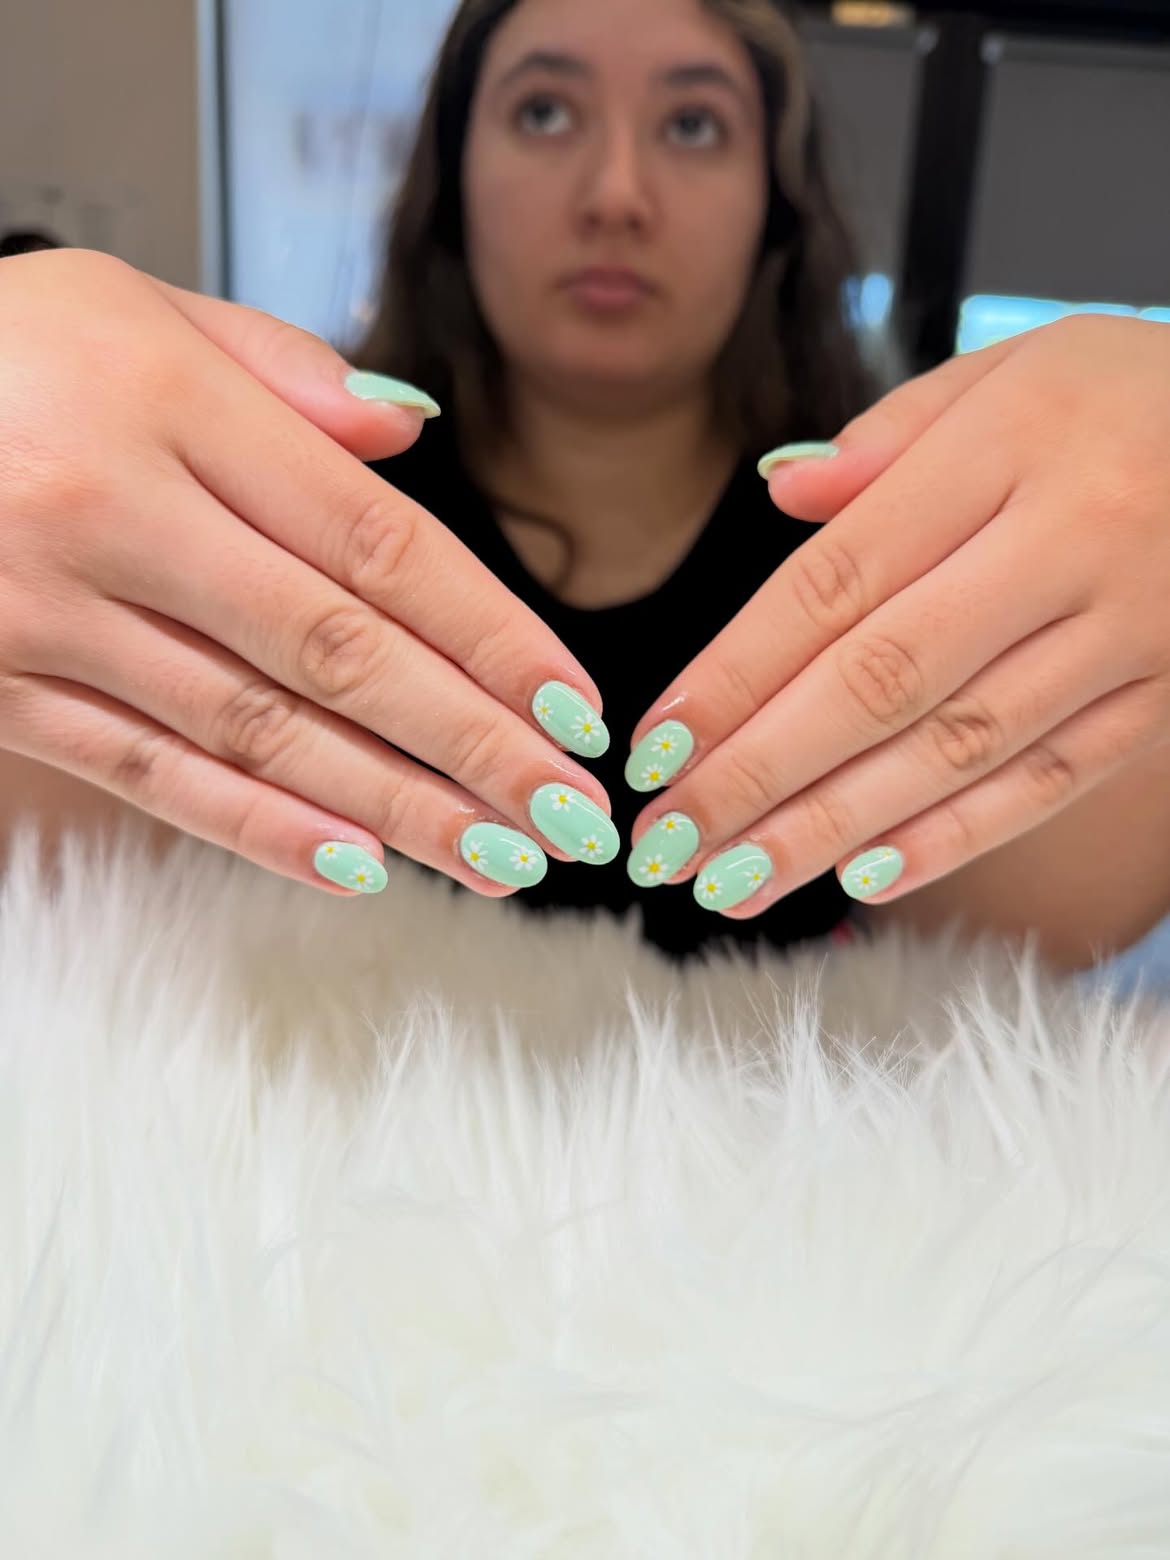
Tiny white daisies give this pale mint manicure a clear spring theme without hiding the green base. Each oval nail carries a slightly different flower arrangement. Some have one small bloom near the edge, while others use two or three across the surface.
The open mint areas are just as important as the flowers. They keep the manicure light and stop the repeated motif from feeling crowded. Varying the position of each daisy also makes the set look more natural than a strict matching pattern.
Use small yellow centers and fine white petals so the flowers stay delicate. A smooth glossy finish sharpens the painted details and brings out the calm, milky quality of the mint color.
🌼 Recreate the daisy pattern
5. Pair White French Tips With Iridescent Green Accents
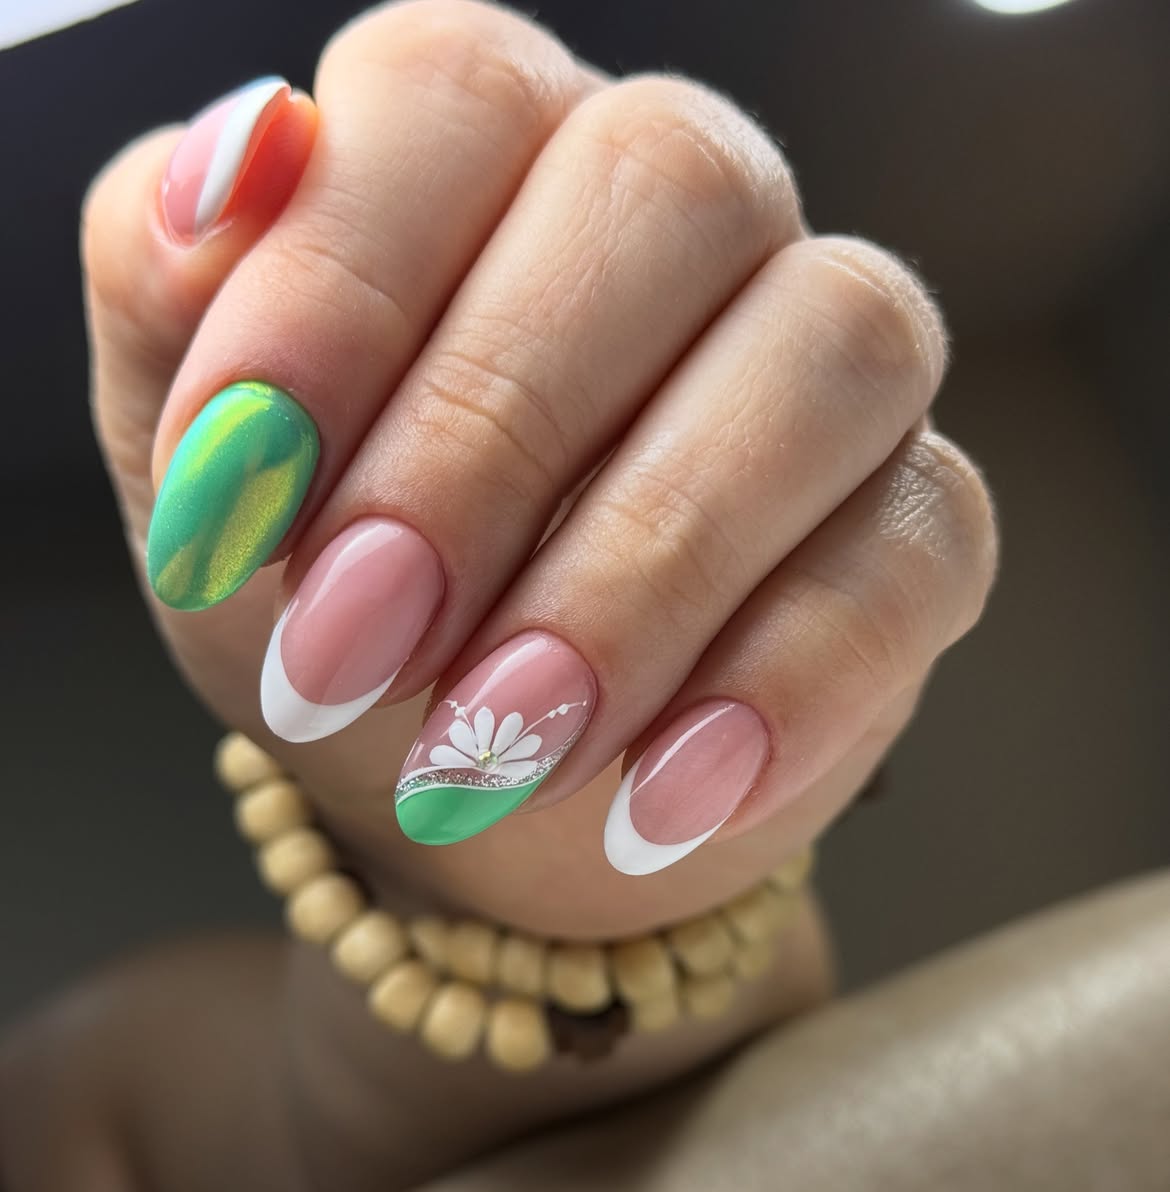
Classic white French tips do most of the quiet work in this manicure. Their clean curves and sheer pink base create a simple foundation, allowing the green accent nails to carry more detail.
- One nail is covered in luminous green with a yellow shimmer that changes in the light.
- Another uses a curved green tip, a narrow silver glitter line, and a white flower with a small reflective center.
- Using two different accent treatments keeps the set interesting without spreading decoration across every nail.
Limit the detailed artwork to one or two nails. The plain French tips provide valuable breathing room, while the green shimmer connects the floral feature nail to the stronger solid accent.
Use a sheer pink base with smooth white French tips across most nails.
Add one shimmering green nail and one curved floral tip with a fine glitter border.
6. Keep Glossy Sage Nails Simple With One Daisy Accent
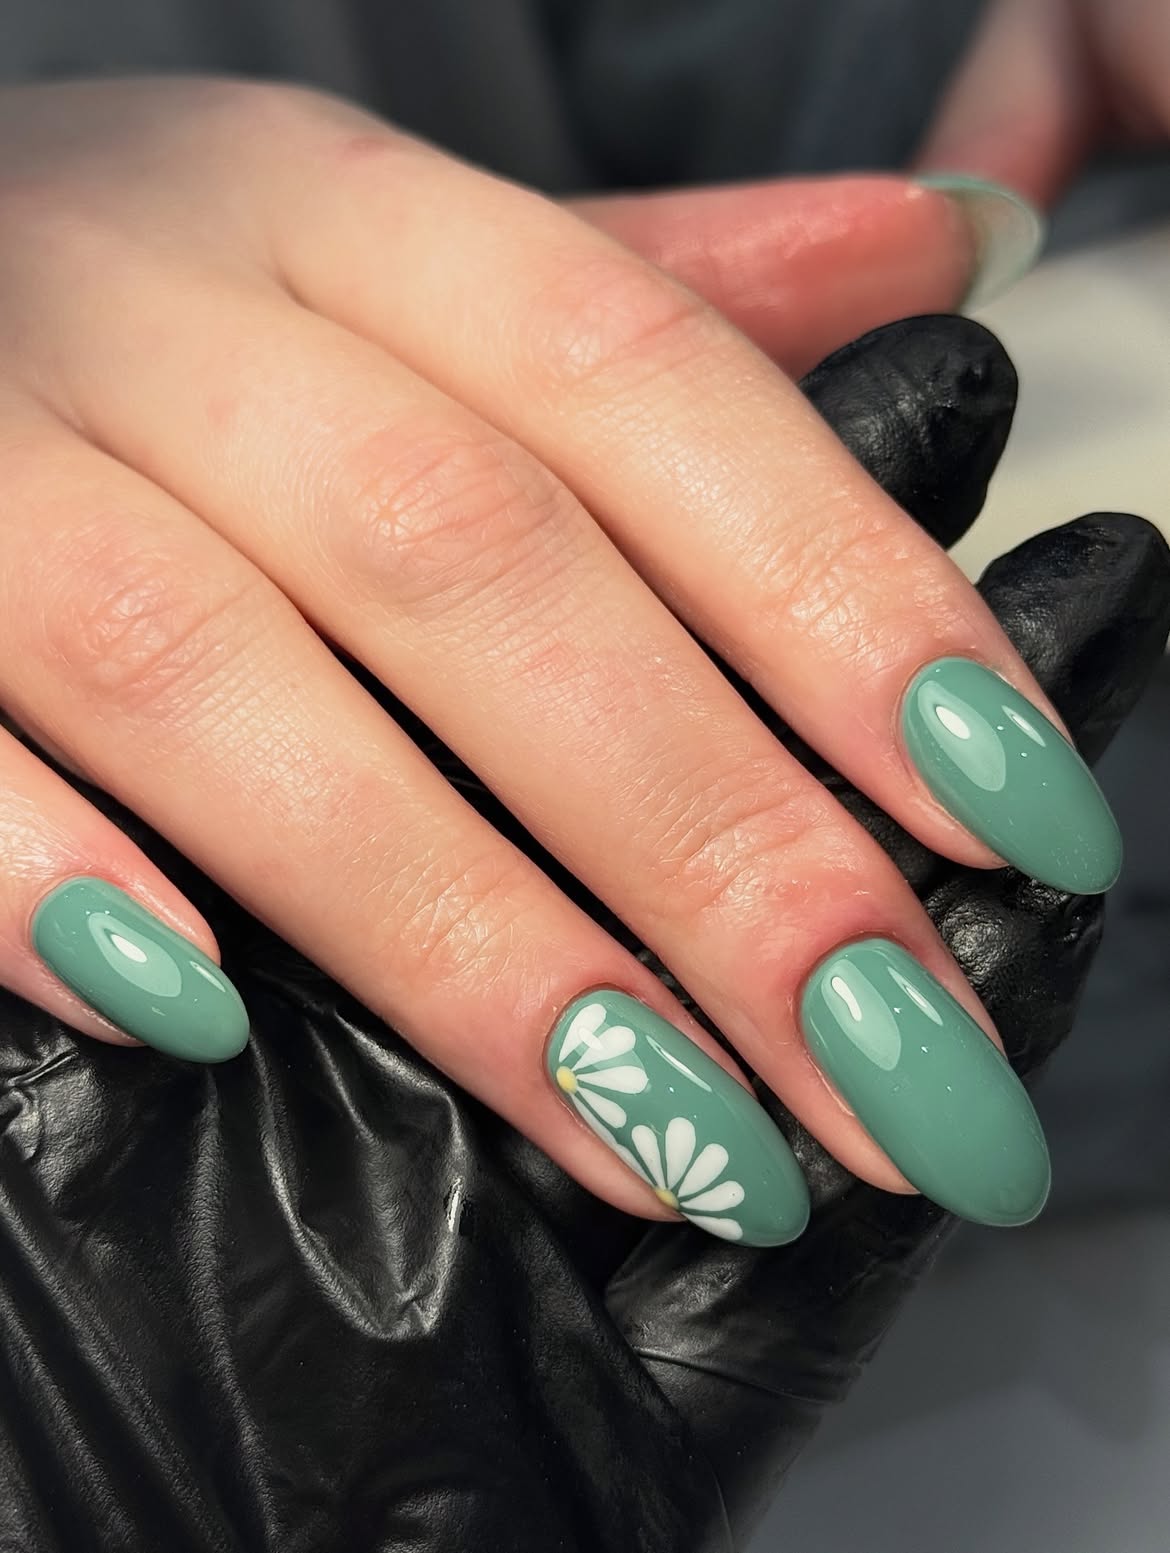
A muted sage base makes this manicure calm and polished, even on long almond nails. Four nails stay completely solid, while one feature nail carries white daisy petals reaching inward from the edges.
The restraint is the point. By limiting the flowers to a single nail, the glossy green color remains the main feature. The partial blooms also feel lighter than placing one large flower directly in the center. Their curved petals follow the almond shape and leave enough sage visible between the details.
Choose the accent nail before painting so the flower placement feels deliberate. Keep the remaining nails free of extra art, and use the same high shine finish across the set to connect the plain and decorated surfaces.
Cover every nail with the same muted sage shade.
Paint partial white daisies along the edges of one accent nail.
Finish the full set with an even glossy top coat.
7. Layer Sage Daisies, Leafy Sprigs, and Tonal Plaid
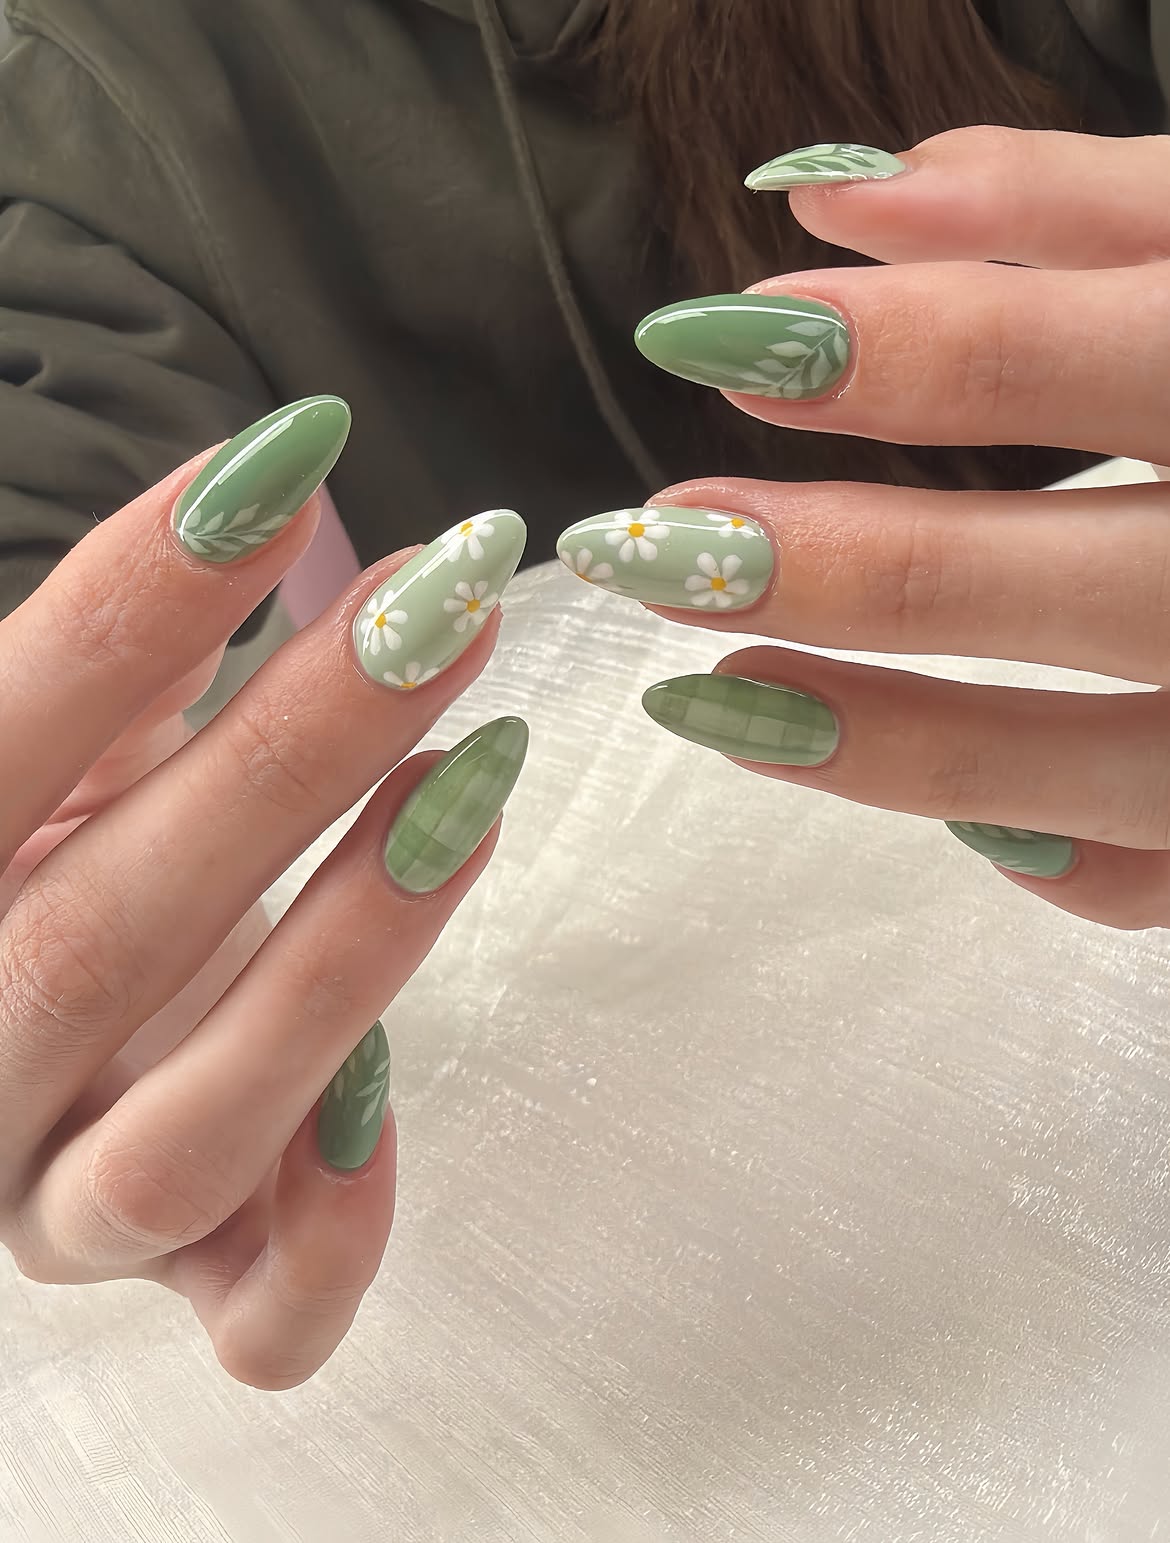
This manicure treats sage green as a small palette rather than a single shade. Deeper green nails carry pale leafy sprigs, lighter nails feature white daisies with yellow centers, and other nails use a soft tonal plaid pattern.
The mix works because every design stays within the same muted color family. White appears in both the flowers and botanical lines, while the yellow centers add only a small warm detail. Even the plaid remains subtle, allowing the floral nails to attract more attention.
Change the pattern from nail to nail, but repeat the green tones across both hands. The long almond shape gives each design enough room to be visible without forcing the artwork toward the edges.
Use several shades from the same sage family.
Repeat white in the flowers and leafy details.
Let one pattern remain quieter than the others.
Do not introduce unrelated bright colors.
Do not cover every nail with dense artwork.
Do not make the tonal plaid too dark or sharp.
8. Combine Sage Polka Dots With Raised Floral Accents
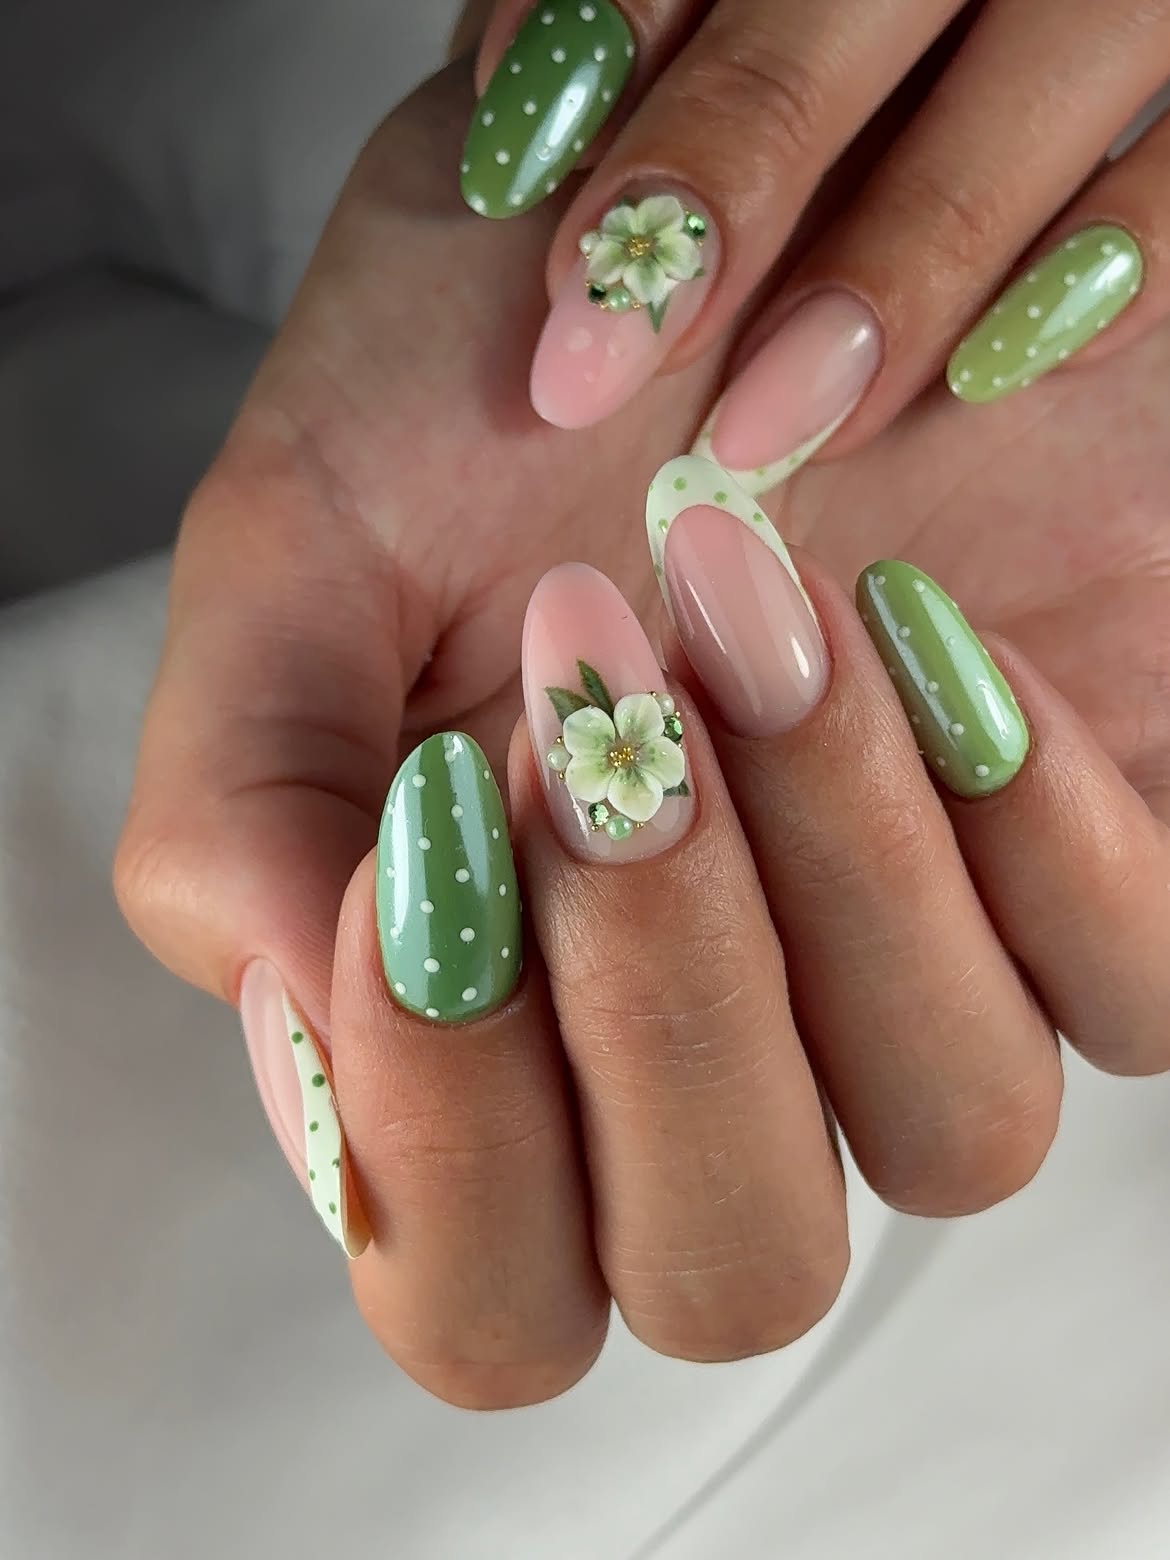
Soft sage and sheer pink share the manicure evenly, giving the detailed flowers enough room to stand out. The long almond shape supports several treatments without making the set feel cramped.
- Solid green nails use small white dots spaced across the glossy surface.
- Sheer pink nails carry curved ivory tips decorated with tiny green dots.
- Floral accents feature raised pale flowers, green leaves, and small reflective details near the petals.
The repeated colors keep these different ideas connected. White moves from the polka dots to the French tips and flowers, while green appears in the solid nails, dotted borders, and leaves. Keep the raised decoration on selected nails so it remains the main feature rather than competing with another flower on every finger.
Green and white repeat across the dotted, French, and floral nails, giving three different treatments one clear visual connection.
9. Edge Long Almond Nails With Bright Green Floral Tips
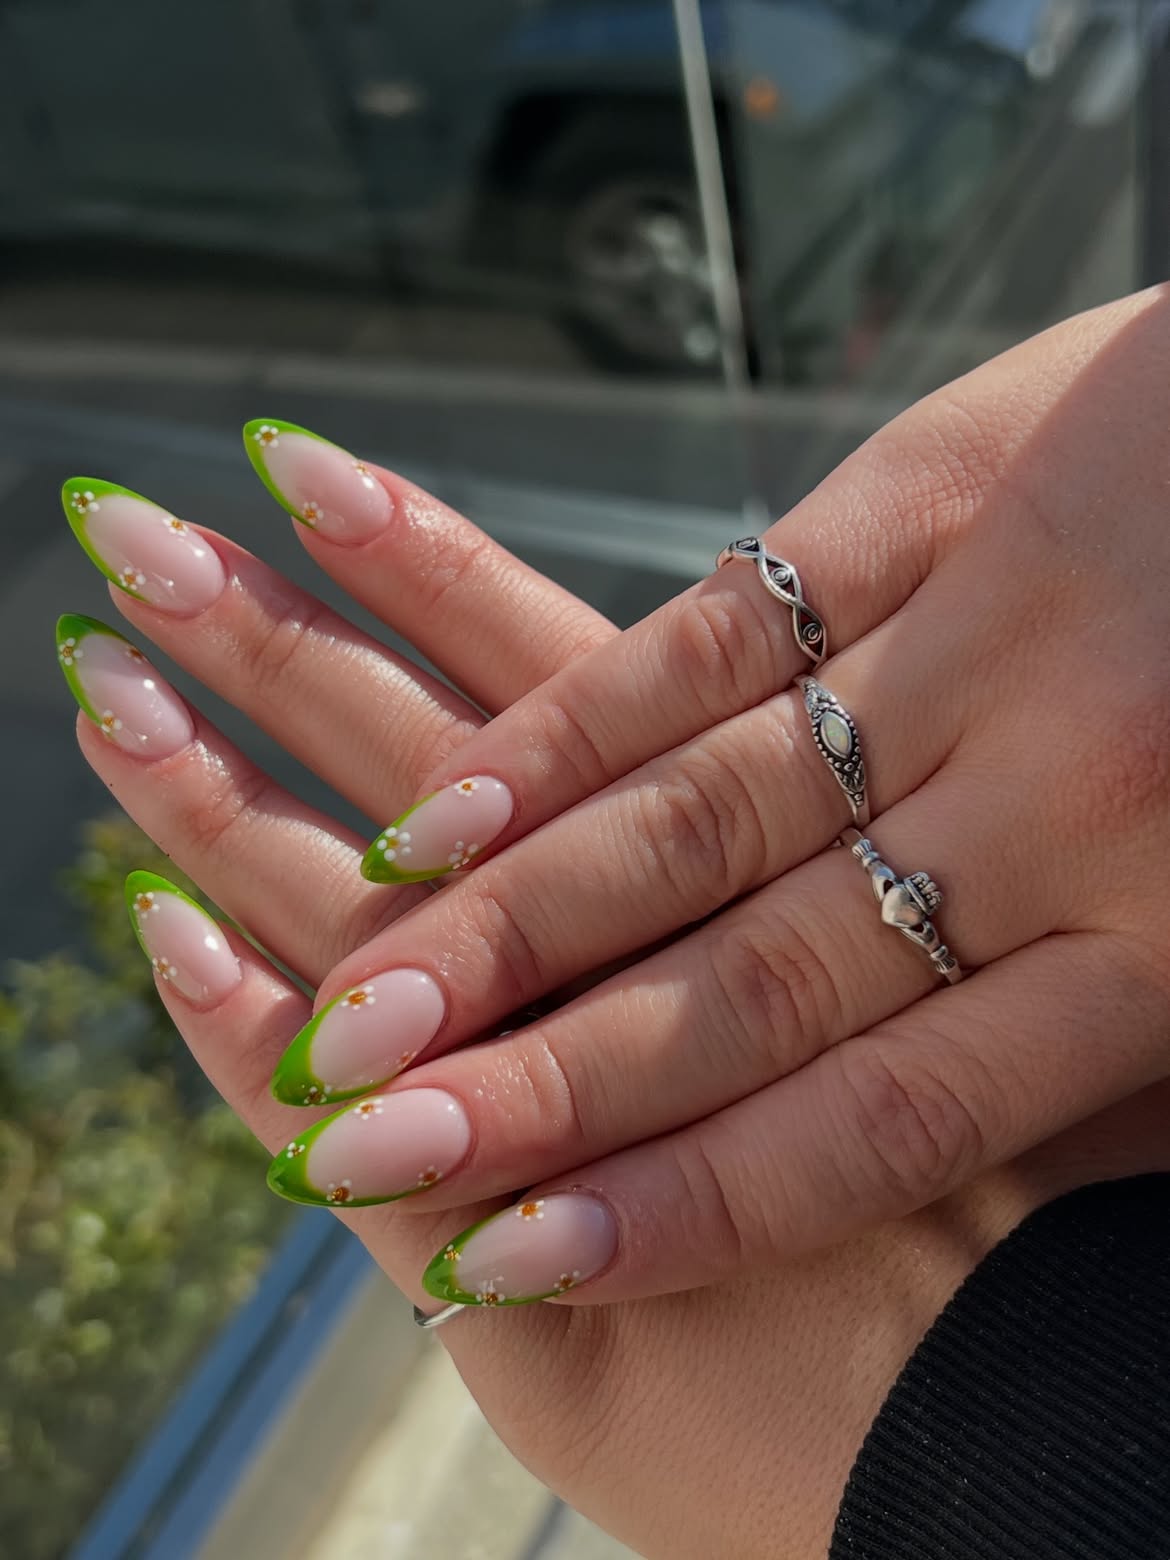
Bright leaf green tips give this manicure a sharper spring look than a traditional white French design. The color follows the pointed almond shape, creating a clean frame around the soft nude base.
- Tiny white flowers with warm yellow centers appear near the sides and lower edges of the green sections.
- Their off center placement makes them feel as though they are growing along the border rather than sitting on top of it.
- Small gold details add a quiet glint without changing the fresh green and white palette.
Keep the nude area wide and the green outline controlled. On longer nails, too much tip color can make the design look heavy. A narrow border preserves the elegant shape and leaves space around the delicate flowers.
For softer and more playful manicure ideas, these 17 Cute Green Nails are full of sweet shades, simple details, and save-worthy designs.
10. Add Raised Pink Flowers to Mint Square French Tips
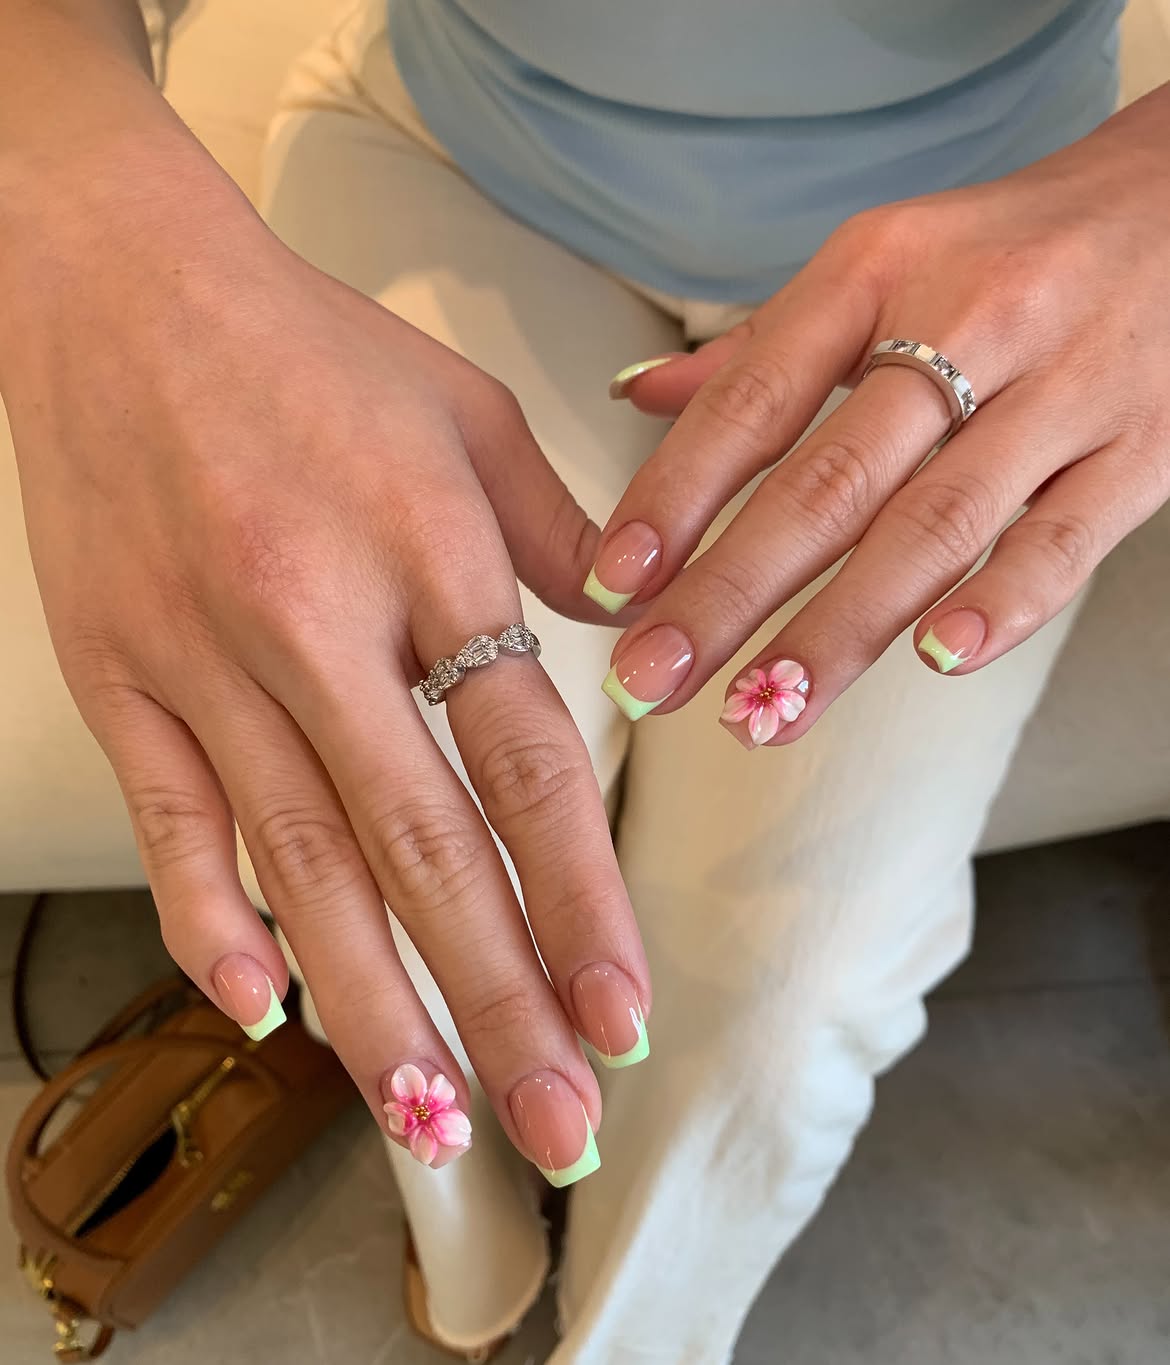
Square tips give this manicure a crisp, modern base. The pale mint color runs straight across each edge, while the translucent nude polish keeps the overall look light.
A simple design formula:
- Use a glossy nude shade that allows the natural nail tone to show through.
- Paint mint tips with a consistent depth across both hands.
- Place one large pink flower on the same accent finger of each hand.
The raised petals and small gold center give the floral nails more texture than the plain French tips. Since the flowers already carry strong color and dimension, the remaining nails need no dots, glitter, or extra lines. Repeating one flower on each hand creates symmetry and makes the accents feel planned.
📌 Keep the flower contained
Position the raised petals within the sides of the square nail. This keeps the floral detail prominent without hiding the clean mint tip or widening the nail visually.
11. Decorate Lime Square Nails With Tiny Yellow Flowers and Pearls
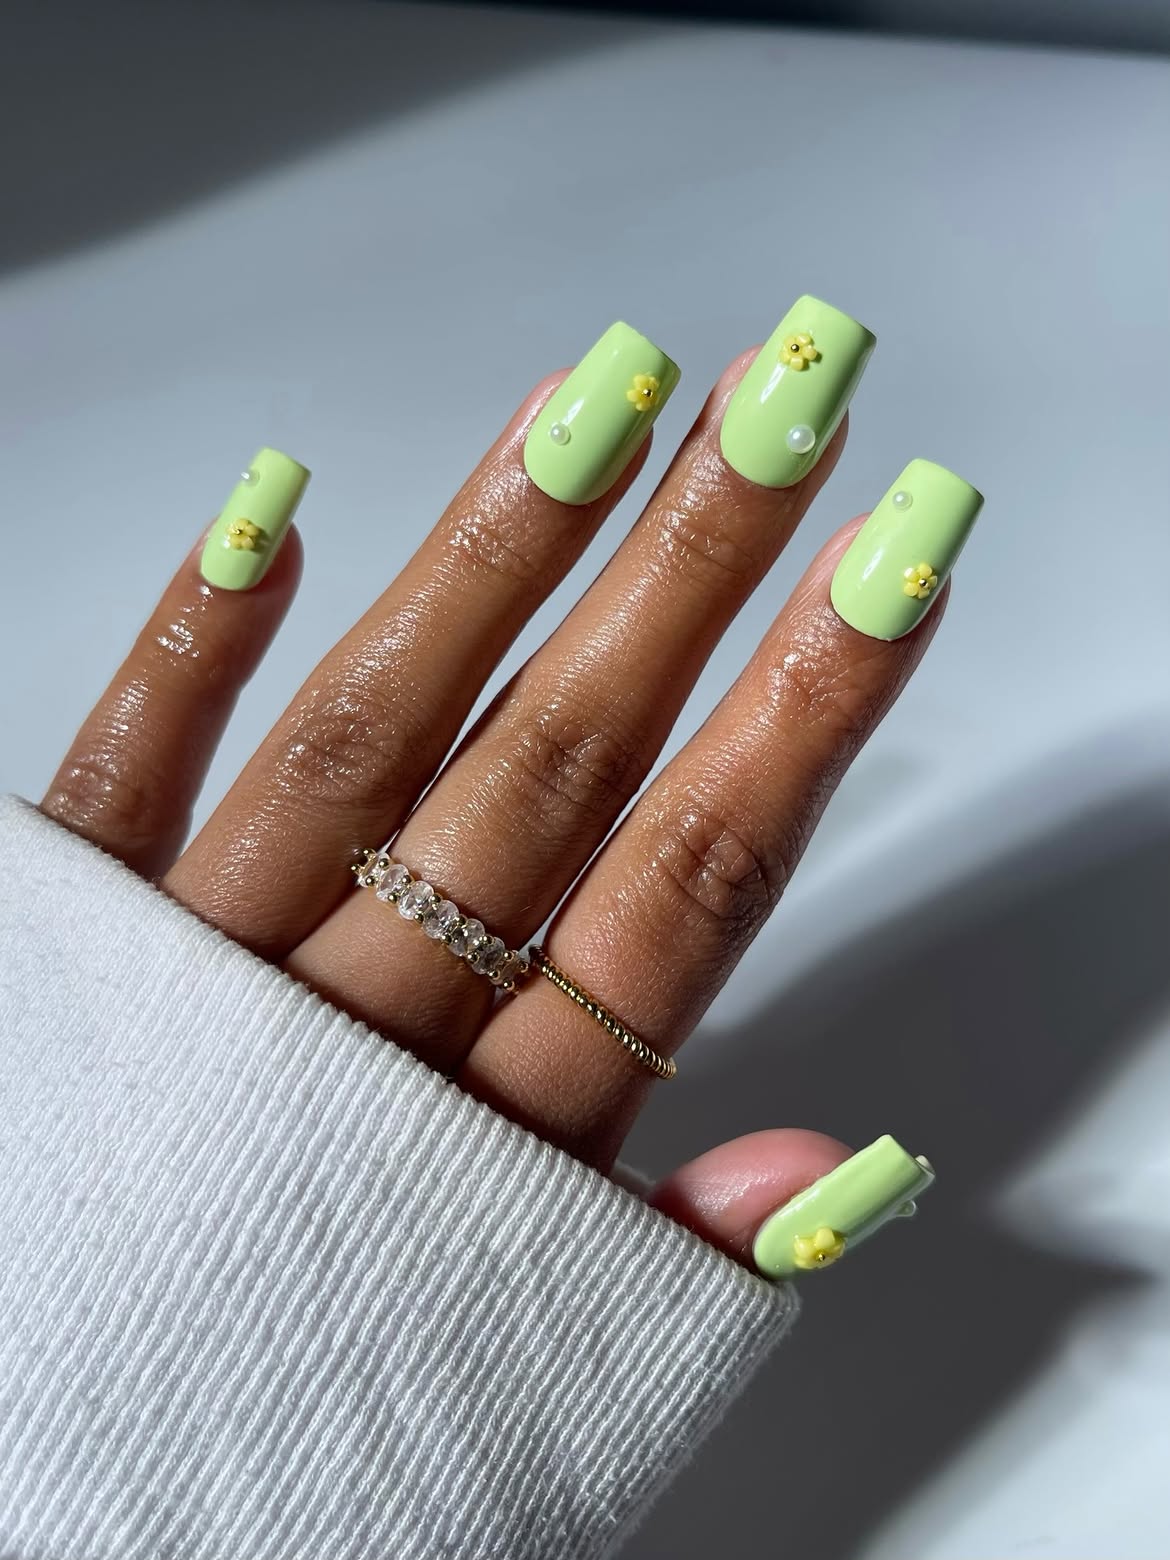
Pale lime polish covers every long square nail, creating a bright base that feels clean and cheerful. The solid color is strong enough to stand alone, so the decoration stays small and widely spaced.
- Tiny raised yellow flowers appear at different points on each nail, often paired with a single white pearl.
- This loose placement gives the manicure a handmade character without turning the surface into a dense pattern.
- The yellow details sit close to the green base in tone, while the pearls add a softer contrast.
Keep the decorations away from the free edge and leave plenty of open lime color around them. The glossy finish then becomes part of the design, reflecting light across the uninterrupted areas.
12. Alternate Muted Sage Nails With Sheer Daisy Accents
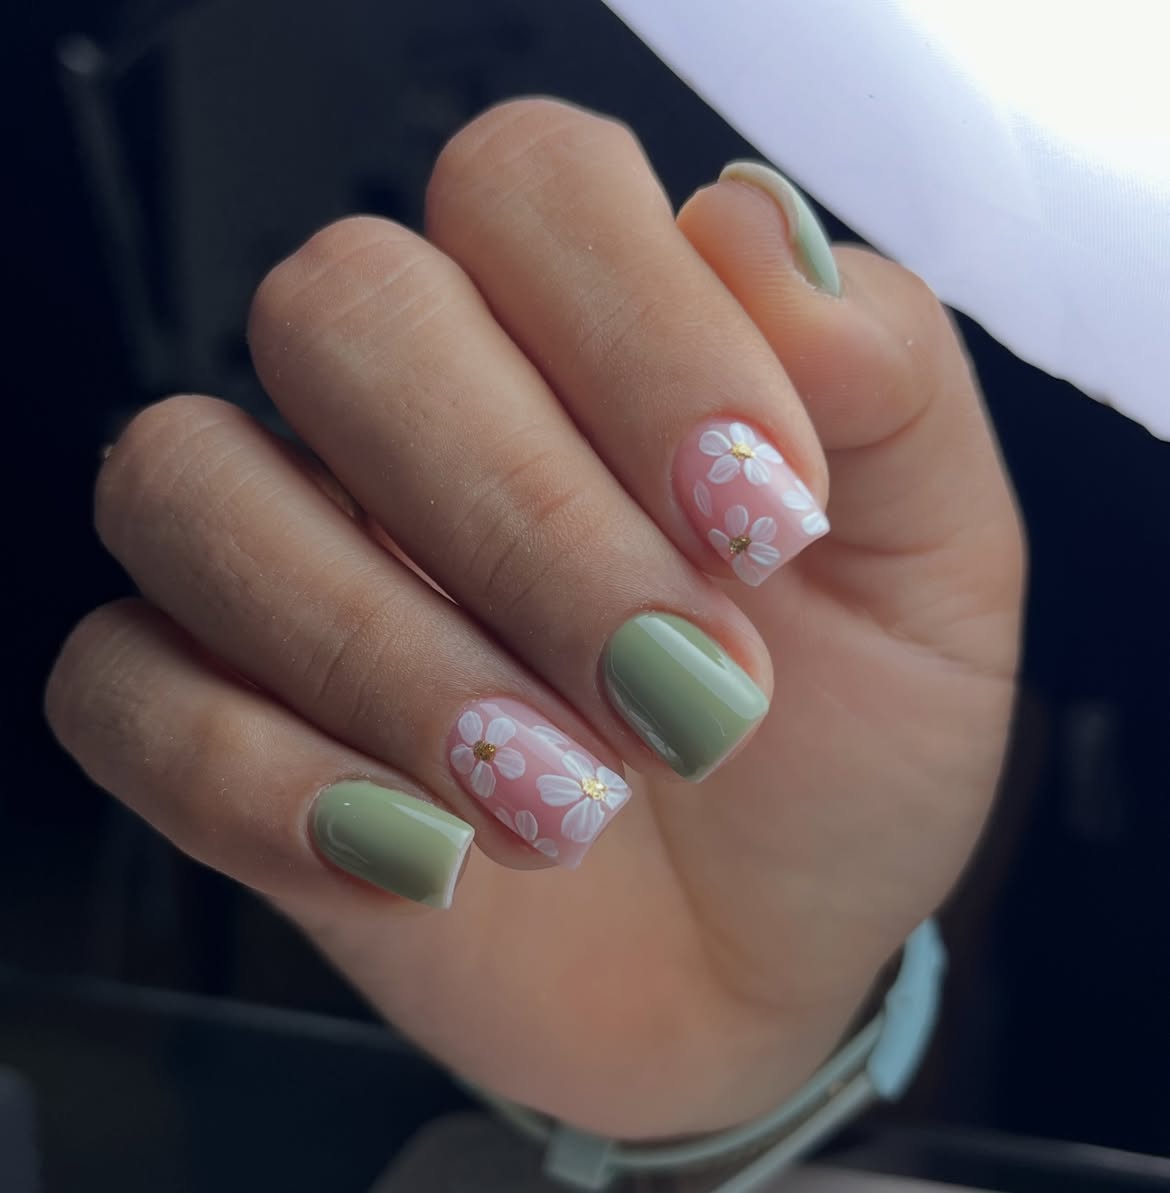
Muted sage and translucent pink create a softer take on spring green nails. The solid green nails act as calm anchors, while the flower covered nails bring in lightness and fine detail.
Balance the set this way:
Solid nails: Use an even sage shade with a smooth glossy finish and no added artwork.
Floral nails: Keep the pink base sheer, then scatter white daisies with small gold centers. Let a few petals extend beyond the visible edges so the pattern feels continuous.
Separate the flower nails with solid green rather than grouping them together. This spreads the white details across the hand and prevents one area from appearing busier than the rest.
| Solid Sage Nails | Sheer Floral Nails |
|---|---|
| Provide visual rest | Carry the main artwork |
| Use complete color coverage | Keep the pink base translucent |
| Leave free of extra decoration | Add white petals and small gold centers |
13. Fade Olive Green Tips Into a Sheer Nude Base
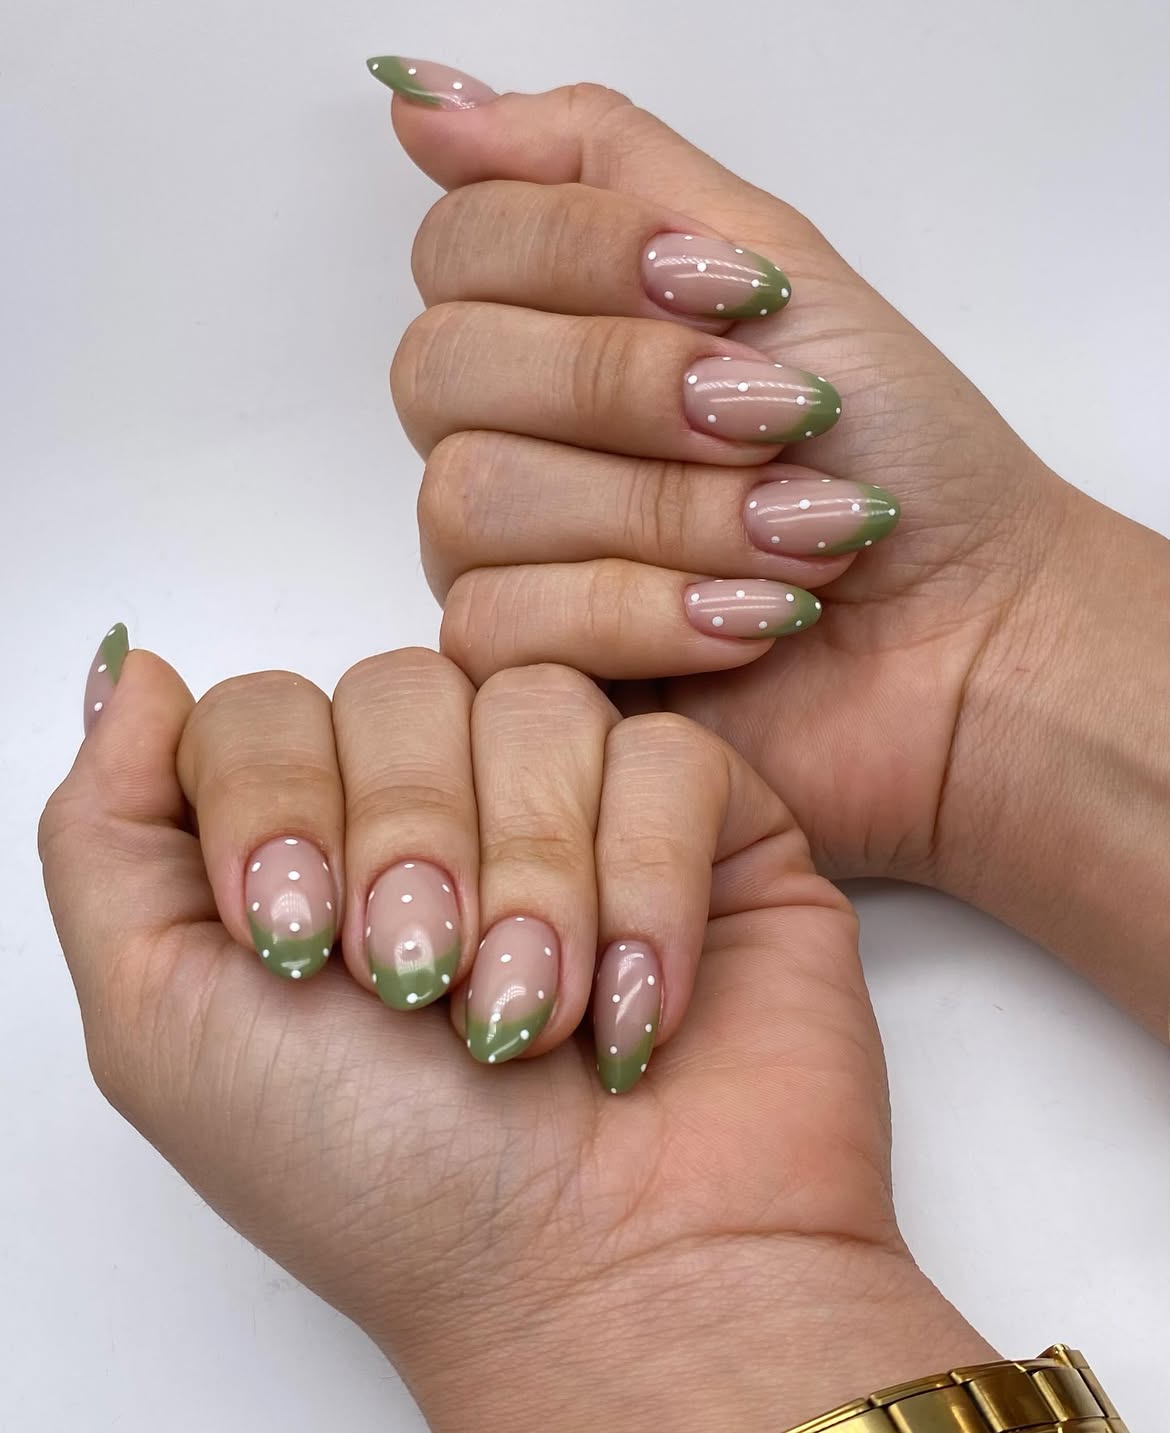
Olive green replaces the sharp edge of a standard French manicure with a soft, hazy fade. The color begins lightly around the middle of each nail and becomes stronger toward the rounded tips.
White dots cross both the nude and green areas, which makes the transition look even less defined. Their loose spacing adds movement without covering the glossy base. Since every nail follows the same fade, small changes in dot placement give the set enough variety.
Apply the translucent pink first, then build the olive color gradually at the free edge. Keep the section near the cuticle clear. Add the dots only after the blend looks smooth so their placement does not distract from the gradient.
Color placement map
14. Frame Sheer Daisy Nails With Long Sage Stiletto Accents
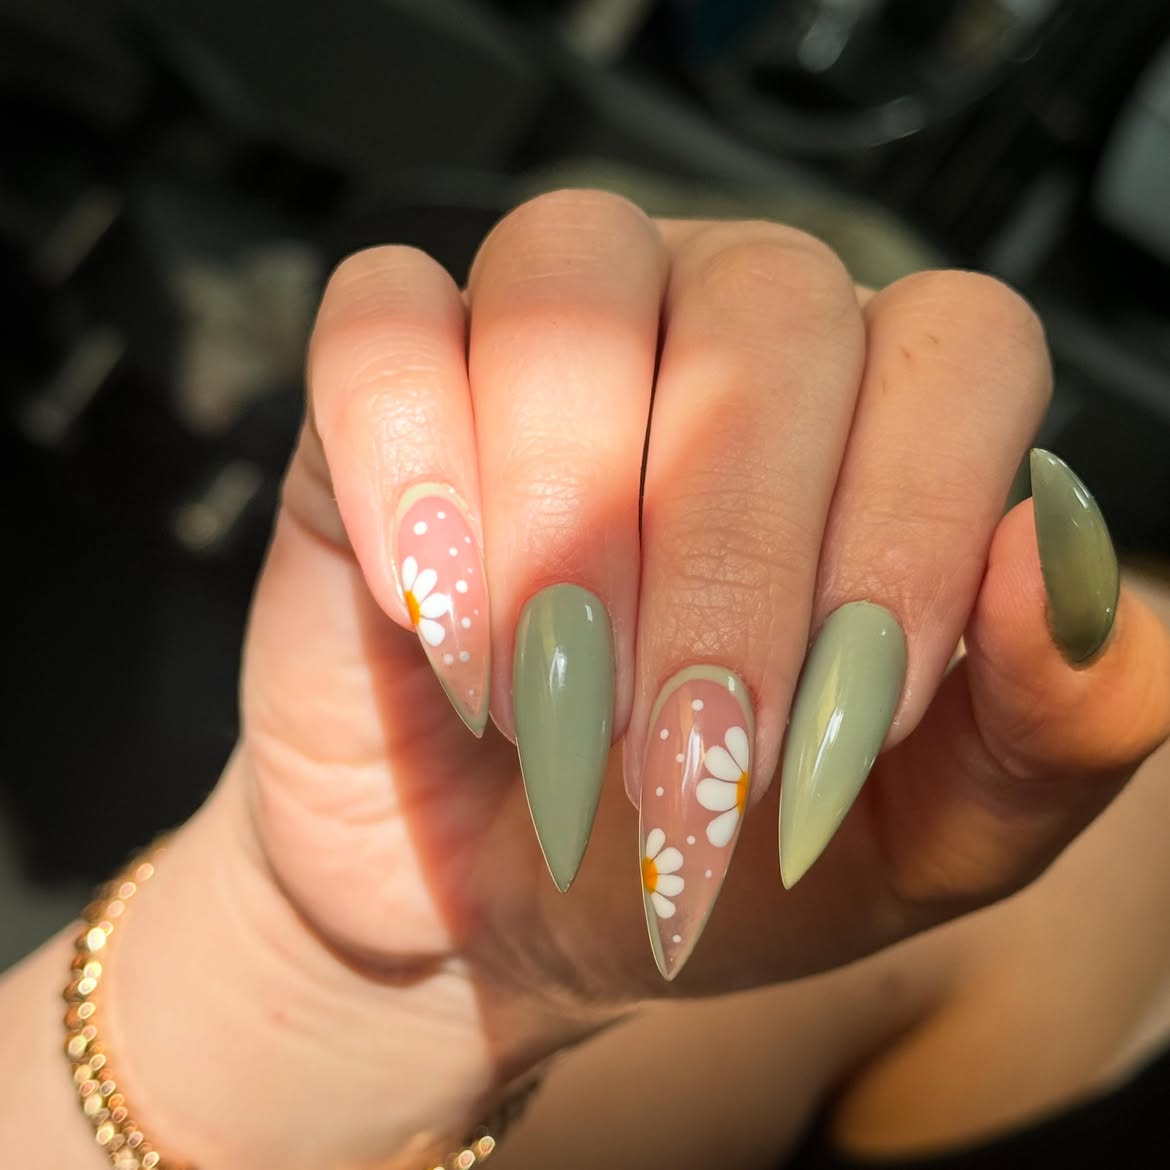
This set relies on shape before decoration. Three pointed nails use uninterrupted sage green, creating a strong silhouette that makes the softer floral accents easier to notice.
The two sheer pink nails carry large white daisies with warm yellow centers. Some flowers are cropped by the nail edges, while small white dots fill the open areas between them. A fine green border near the tip connects these detailed nails to the solid sage color.
Keep the floral base translucent so the artwork does not compete with the dramatic length. The plain green nails should remain free of added dots or glitter. Their smooth surfaces give the set structure and stop the flower pattern from becoming too busy.
🌼 Build the five nail layout
15. Mix Olive Polka Dots With Pink and Lime Stripes
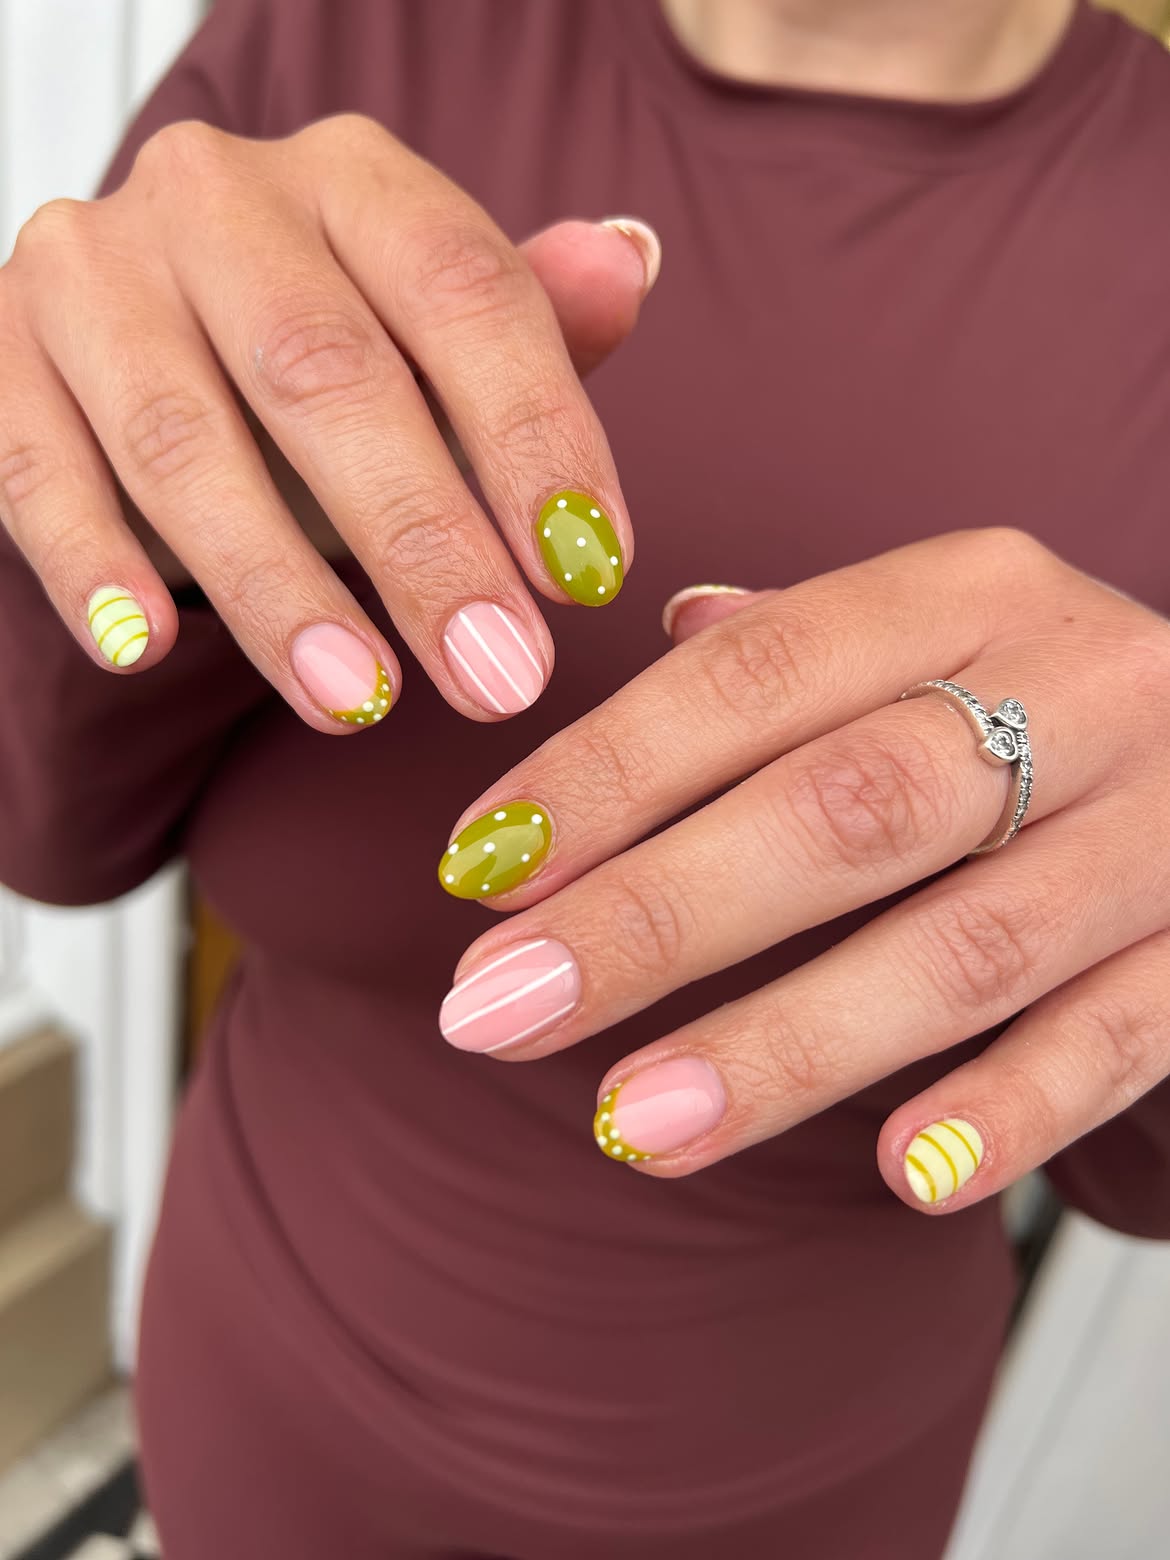
Short rounded nails can carry several patterns when the colors and line thickness stay consistent. This set rotates four treatments across olive, blush pink, pale lime, and white.
Pattern map:
- Glossy olive nails with scattered white dots
- Pink nails with fine vertical white stripes
- Pale lime nails crossed by curved yellow green lines
- Nude nails with olive tips and dotted white borders
Repeating each treatment across both hands makes the manicure feel balanced rather than random. The patterns are also kept simple enough to remain visible on the shorter nail length. Use narrow lines, small dots, and shallow French tips so every design has space to breathe. A glossy finish then connects the different colors and surfaces.
Repeat the same colors across both hands.
Use fine stripes and small round dots.
Leave visible space between each mark.
Extra colors that break the shared palette.
Large dots that crowd the shorter nails.
Heavy tips that hide the nude base.
16. Add Tiny Clover Accents to Emerald Green French Tips
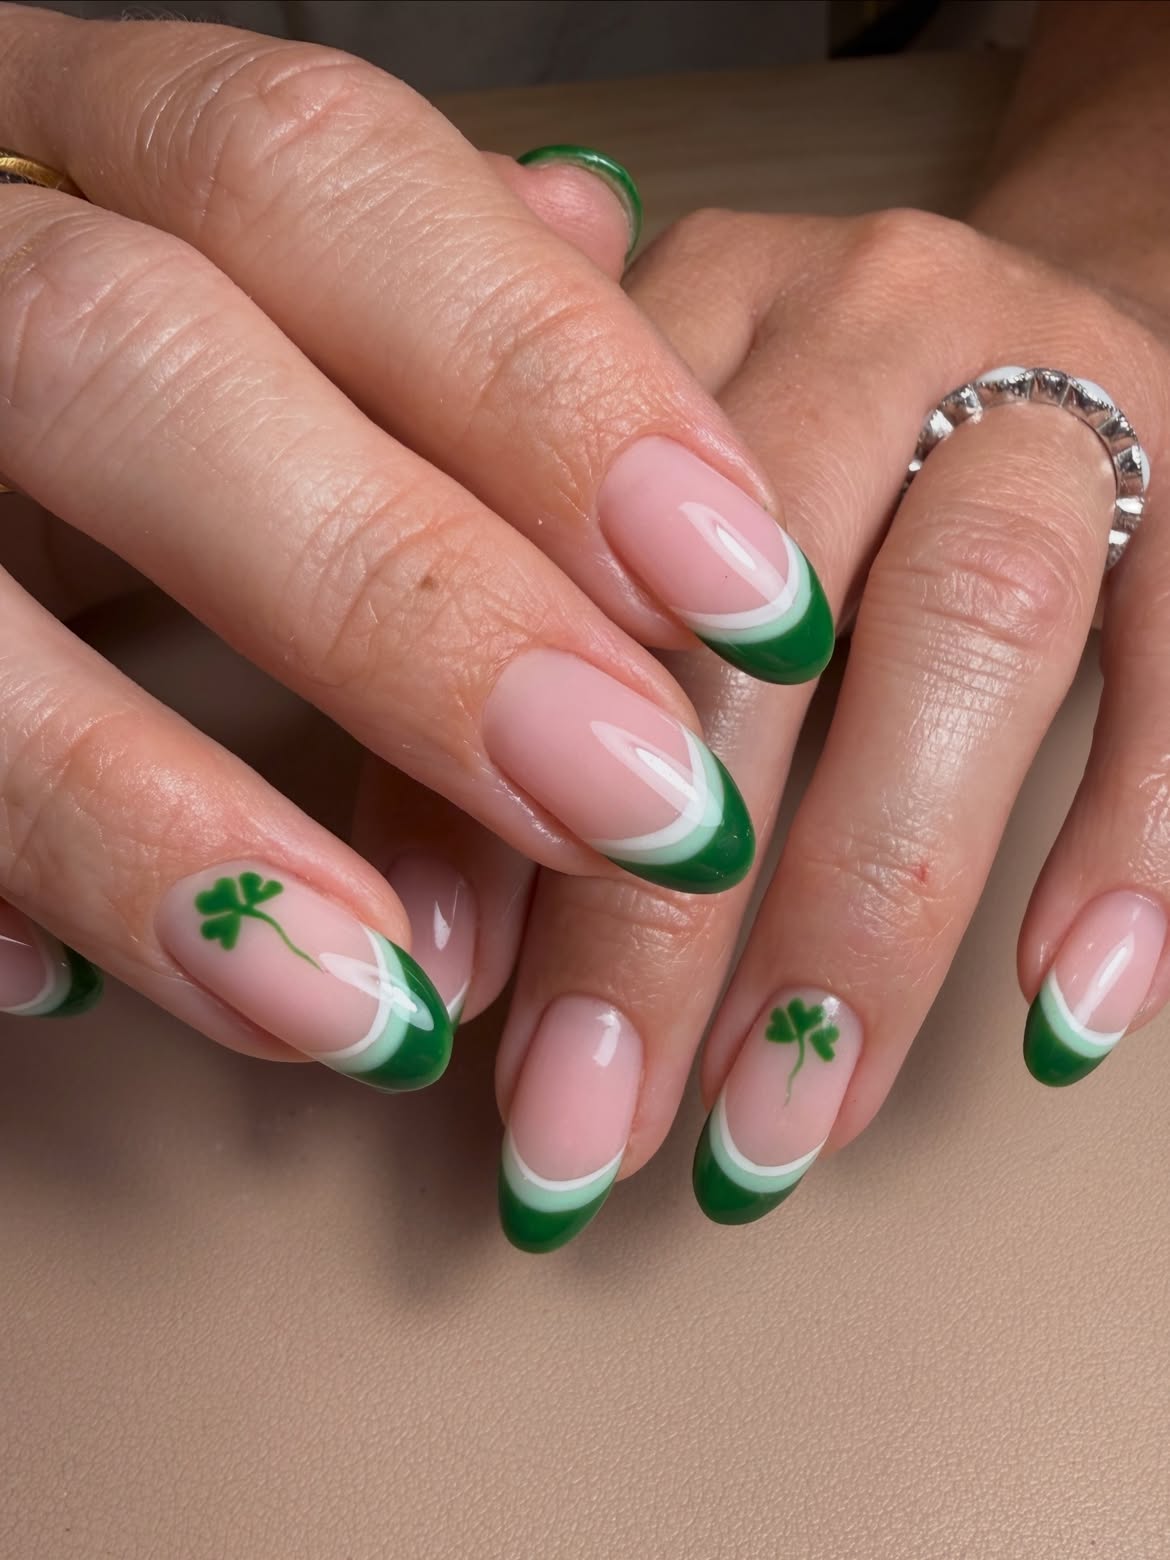
Deep emerald tips bring a richer green tone into this spring manicure. A slim white curve separates the dark color from the glossy pink base, making the layered French design look crisp instead of heavy.
Small green clovers appear on selected accent nails. Their fine stems and rounded leaves sit within the open nude area, where the motif can be seen clearly. Limiting the clovers to one nail on each hand keeps them meaningful and stops the theme from becoming repetitive.
Match the depth of the green tips before adding the white border. The white line should remain narrow and smooth across every nail. Place each clover above the tip with enough clear pink space around it to preserve the clean almond shape.
A fine white curve separates the emerald tip from the pink base, keeping the dark green edge clean and visually light.
17. Trace Mint French Tips With Fine Gold Glitter
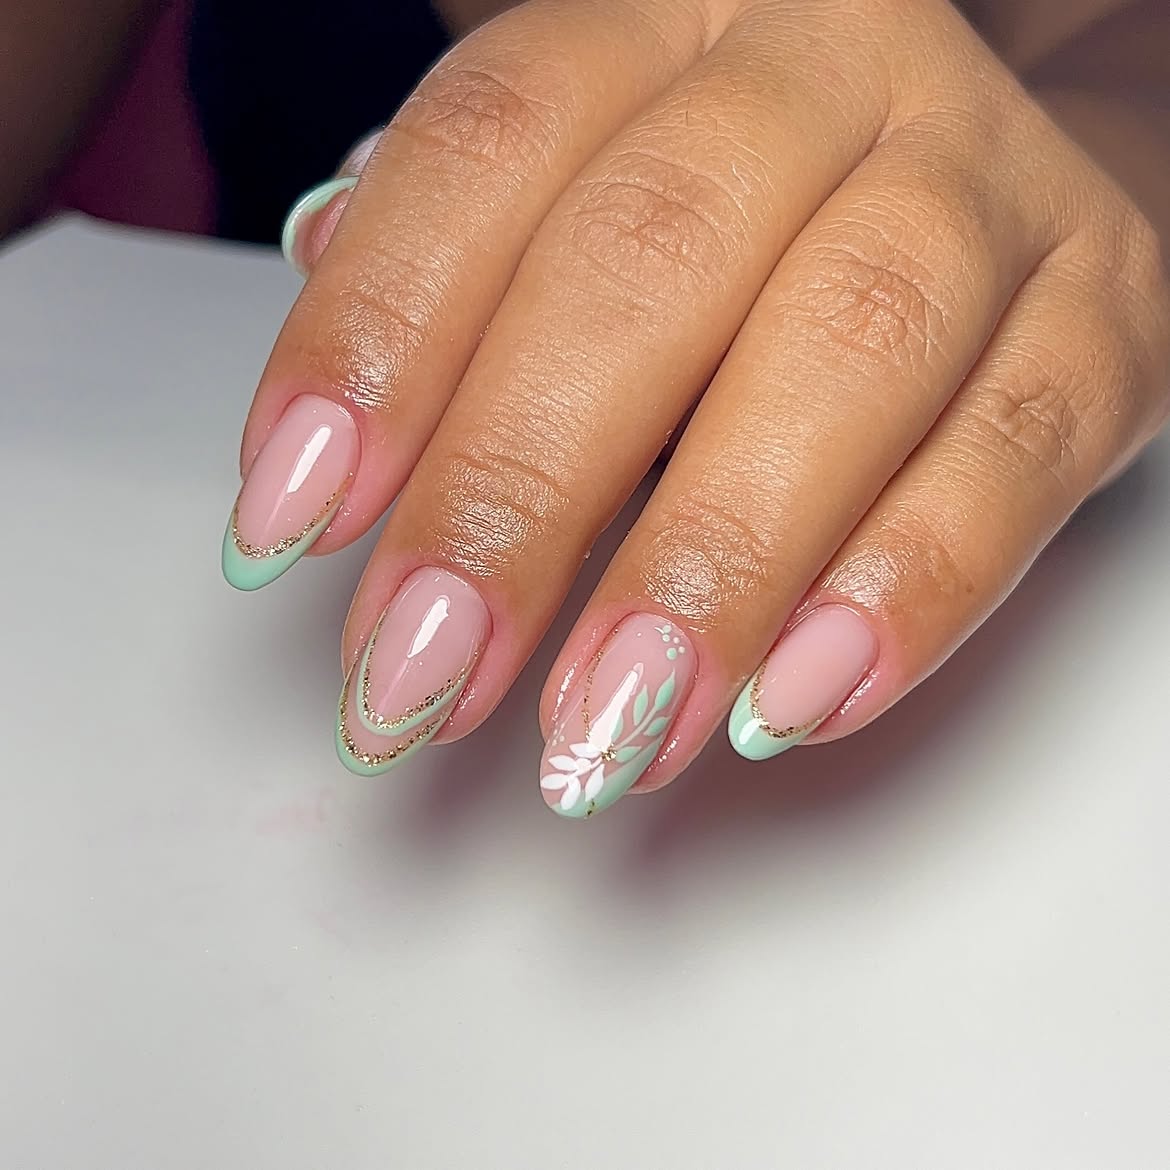
Mint French tips already feel light and fresh, but a narrow gold glitter line gives this manicure a more defined finish. The sheer pink base keeps the metallic detail from becoming too strong.
Build the design in three layers:
- Apply a glossy translucent pink across every almond nail.
- Paint soft mint tips, changing the curve slightly on selected nails.
- Trace the inner edge with fine gold glitter and reserve one nail for floral art.
The accent nail carries a white flower near the tip, mint leaves, and a few small white dots. Keeping this artwork close to the green edge connects it to the French design. The remaining nails use only mint and gold, giving the floral feature enough space to stand out.
Pair a glossy sheer pink base with softly curved mint French tips.
Add a fine gold border, then place white floral art on one selected nail.